Interior Wood Finishing - Cloverdale Paint
Interior Wood Finishing - Cloverdale Paint
Interior Wood Finishing - Cloverdale Paint

You also want an ePaper? Increase the reach of your titles
YUMPU automatically turns print PDFs into web optimized ePapers that Google loves.
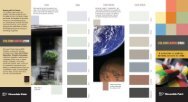
Volume 5<br />
DO IT YOURSELF SERIES<br />
INTERIOR WOOD<br />
FINISHING<br />
A STEP-BY-STEP GUIDE<br />
UNLOCK YOUR CREATIVITY
DO IT YOURSELF SERIES<br />
STEP-BY-STEP GUIDES<br />
Volume 1 . . . . . . . . . . . . . . . . . . . . . .<br />
Exterior <strong>Paint</strong>ing<br />
Volume 2 . . . . . . . . . . . . . . . . . . . . . .<br />
<strong>Interior</strong> <strong>Paint</strong>ing<br />
Volume 3 . . . . . . . . . . . . . . . . . . . . . . . .<br />
Brush & Roller<br />
Volume 4 . . . . . . . . . . . . . . . . . . . .<br />
Decorative Finishes<br />
Volume 5 . . . . . . . . . . . . . . . .<br />
<strong>Interior</strong> <strong>Wood</strong> <strong>Finishing</strong><br />
Volume 6 . . . . . . . . . .<br />
Solving Exterior <strong>Paint</strong> Problems<br />
Volume 7 . . . . . . . . . . . . . . . . . . . . . . . .<br />
Wallcoverings<br />
UNLOCK YOUR CREATIVITY<br />
For all of your home decorating and improvement needs,<br />
our trained and knowledgeable staff can help with your questions.
Checklist for<br />
wood finishing<br />
Volume 5<br />
INTERIOR WOOD<br />
FINISHING<br />
A STEP-BY-STEP GUIDE<br />
Planning & Buying<br />
Use this checklist as a<br />
planning and buying<br />
guide:<br />
• rubber gloves<br />
• safety glasses<br />
• paint & varnish<br />
remover<br />
• putty knife &<br />
scraper<br />
• steel wool<br />
• stiff bristle brush<br />
• clean cloths<br />
• paint thinner<br />
• tack cloth<br />
• bleach if required<br />
• sandpaper and/or<br />
an electric sander<br />
• brushes<br />
• stain or oil<br />
• paste wood filler<br />
• varnish<br />
• plastic drop sheet<br />
Enjoy the fun and satisfaction of finishing wood<br />
beautifully!<br />
Whether you want to finish a new wood surface or<br />
refinish an old piece of furniture, you’ll want to<br />
explore ways to help you make finishing fun, fast<br />
and easy. <strong>Interior</strong> wood finishing can be done for<br />
furniture, floors, railings, trim, paneling or any<br />
bare wood surface.<br />
This guide along with a little patience, a few simple<br />
tools, the right materials and a little sweat will help<br />
you create beautiful, long lasting results.<br />
Let’s Get Started<br />
Remove all hardware and ornamentation from the<br />
work. Disassemble what you can, such as removing<br />
shelves or drawers. Read all product labels<br />
thoroughly. Protect the work area with drop sheets<br />
and masking tape if necessary.<br />
UNLOCK YOUR CREATIVITY<br />
For more information about our products, visit us on the web at<br />
www.cloverdalepaint.com
Volume 5<br />
INTERIOR WOOD<br />
FINISHING<br />
A STEP-BY-STEP GUIDE<br />
Tips:<br />
If you’re stripping a<br />
chair or table legs, place<br />
a pail or pie pan under<br />
each leg and recycle<br />
remover that runs<br />
down.<br />
For difficult to remove<br />
finishes in dents or<br />
gouges, place a damp<br />
cloth over the dent and<br />
apply a medium hot<br />
iron. The steam and<br />
heat will cause the<br />
wood fibres to swell,<br />
both making the old<br />
finish easy to remove<br />
and help to restore the<br />
dent to the flush level<br />
of the surface.<br />
Allow the wood to dry<br />
before sanding.<br />
Work in a well<br />
ventilated area and<br />
away from sparks and<br />
open flames.<br />
Safety Comes First!<br />
Make sure you wear protective clothing including<br />
gloves, safety glasses, a dust mask and earplugs for<br />
power sanding. Work in a well ventilated area and<br />
away from sparks and open flames.<br />
Strip Off Old Finishes<br />
If necessary, remove all of the old finish by stripping<br />
it yourself, or have a commercial stripper do it.<br />
Here’s how to do it yourself:<br />
1. Read all label directions before starting. Then,<br />
using an old paint brush, spread a good quality<br />
grade of paint and varnish remover liberally on<br />
one section of the work at a time. Stroke in one<br />
direction only.<br />
2. Allow the remover to soak until the finish has been<br />
softened right down to the wood. Check directions<br />
for time (usually 5-15 minutes).<br />
3. Scrape off the softened finish with a putty knife.<br />
Use coarse twine or an old toothbrush for grooved<br />
areas. Wipe-off tools frequently on newspaper.<br />
Several soaks and scrapes may be needed to<br />
remove all layers.<br />
4. If you are working on open grained wood such as<br />
oak, take a remover soaked pad of steel wool and<br />
rub the wood with considerable<br />
pressure with the grain to remove<br />
the old finish from the pores.<br />
Note: Remove grease, wax or oil<br />
with a rag and mineral spirits.<br />
UNLOCK YOUR CREATIVITY<br />
For all of your home decorating and improvement needs,<br />
our trained and knowledgeable staff can help with your questions.
Volume 5<br />
INTERIOR WOOD<br />
FINISHING<br />
A STEP-BY-STEP GUIDE<br />
Tips:<br />
Use cut sandpaper or<br />
emery paper to sand<br />
curved or irregular<br />
surfaces. An ordinary<br />
can opener is also a<br />
handy scraping tool.<br />
An additional tip is to<br />
use steel wool twisted<br />
into a string.<br />
If you use a sander, it<br />
must be a belt type as<br />
circular sanders will<br />
go against the grain<br />
and may leave swirl<br />
marks.<br />
To test for rough spots,<br />
put a sock or nylon on<br />
your hand and rub<br />
along the surface. Sand<br />
any spots where you hit<br />
a snag.<br />
After sanding is<br />
complete, thoroughly<br />
remove all dust with a<br />
clean cloth then with<br />
a tack cloth.<br />
5. When the finish is removed, wipe the wood clean<br />
with dry cloths. A final wipe with mineral spirits is<br />
recommended to ensure that excess residue is<br />
removed.<br />
6. Allow the wood to dry before sanding.<br />
Repair Damaged <strong>Wood</strong><br />
Use wood filler products to<br />
fill cracks, chips and dents.<br />
Repair loose boards and parts.<br />
Sand and Clean Surfaces<br />
All stripped and unfinished<br />
wood must be sanded smooth<br />
before applying finish.<br />
1. Sand with progressively<br />
finer grits of paper starting<br />
with grade 100 and working<br />
up to grade 150 or 220.<br />
Always run with the grain<br />
to avoid scratching.<br />
2. Use a sanding block on<br />
flat surfaces to prevent<br />
unevenness and rounded edges.<br />
3. If you use a sander, it must be a belt type as circular<br />
sanders will go against the grain and may leave<br />
swirl marks.<br />
4. After sanding is complete, thoroughly remove all<br />
dust with a clean cloth then with a tack cloth.<br />
UNLOCK YOUR CREATIVITY<br />
For more information about our products, visit us on the web at<br />
www.cloverdalepaint.com
Volume 5<br />
INTERIOR WOOD<br />
FINISHING<br />
A STEP-BY-STEP GUIDE<br />
Tips:<br />
Before starting a<br />
project-test the oil<br />
or stain on a small<br />
hidden area to see the<br />
finished color.<br />
Stain or Oil one section<br />
at a time<br />
Although a little more<br />
time consuming to<br />
apply, natural oil<br />
gives the wood a<br />
beautiful mellow<br />
lustre. It can be<br />
applied to raw wood<br />
that is sanded and<br />
clean.<br />
Bleaching<br />
Bleaching is only necessary when you wish to lighten<br />
the wood’s natural color or when you need to<br />
remove stubborn stains. Follow the manufacturer’s<br />
directions carefully and avoid splashing surrounding<br />
areas.<br />
1. Apply wood bleach with a brush or sponge.<br />
2. Rinse or neutralize.<br />
3. Allow surface to dry overnight.<br />
4. Fine sand to remove raised<br />
grain then remove all dust.<br />
Color with Stains or Oils<br />
Choose your Finish Products Accordingly…<br />
Use stain or oil to color the wood, to emphasize its<br />
grain, to make it look like another type of wood, to<br />
tint patched areas and to create uniform color in a<br />
piece. Only apply to bare, smoothly sanded, clean<br />
and dry wood.<br />
Protection Level Finish Application Look<br />
Minimal<br />
Stain<br />
Stain, Oils &<br />
Furniture Rich, Warm, Natural<br />
Medium<br />
High<br />
Low Gloss Topcoat<br />
Stain &<br />
High Gloss Topcoat<br />
Furniture and Trim<br />
Floors, Railings & Trim<br />
Rich, Low Sheen<br />
Shiny & Hard<br />
UNLOCK YOUR CREATIVITY<br />
For all of your home decorating and improvement needs,<br />
our trained and knowledgeable staff can help with your questions.
Volume 5<br />
INTERIOR WOOD<br />
FINISHING<br />
A STEP-BY-STEP GUIDE<br />
Tips:<br />
For good results, warm<br />
the oil up by standing<br />
the can in a larger<br />
container of hot water.<br />
Old blue jeans make<br />
terrific buffing rags.<br />
For soft or porous<br />
woods, a first coat of<br />
stain sealer will give a<br />
more uniform finish.<br />
Use lighter stains for<br />
soft woods and darker<br />
stains for hardwoods.<br />
Transparent or<br />
colored oil or wiping<br />
stains help to hide<br />
grain defects and<br />
problems.<br />
Tung or Lemon Oil (hand rub application)<br />
Although a little more time consuming to apply,<br />
natural oil gives the wood a beautiful mellow lustre.<br />
It can be applied to raw wood that is sanded and<br />
clean.<br />
1. Apply thinned oil liberally<br />
over the surface with a thick,<br />
lint-free cloth.<br />
2. Use a piece of cheesecloth<br />
or other tight weave cloth and<br />
buff the surface until there is<br />
no more apparent oil.<br />
3. Let dry overnight and repeat up to three<br />
applications. The more you apply, the more<br />
attractive and durable the finish.<br />
Note: Use extreme care when using tung oil. There is<br />
a very high potential for spontaneous combustion on<br />
rags that are not disposed of properly.<br />
Oil & Wiping Stains<br />
Apply to a clean surface with a rag<br />
or brush, let soak for the directed<br />
time and wipe it off with a<br />
clean rag.<br />
Let dry before applying additional<br />
or protective coats. Apply a clear<br />
protective coat if the project is<br />
exposed to direct sunlight or<br />
heavy wear.<br />
UNLOCK YOUR CREATIVITY<br />
For more information about our products, visit us on the web at<br />
www.cloverdalepaint.com
Volume 5<br />
INTERIOR WOOD<br />
FINISHING<br />
A STEP-BY-STEP GUIDE<br />
Tips:<br />
Applying wax is<br />
another method of<br />
protecting a surface,<br />
however, it is difficult to<br />
apply and remove, and<br />
takes a long time to<br />
penetrate the wood.<br />
Today’s advanced<br />
coatings will provide<br />
similar or superior<br />
results with less<br />
hassle.<br />
<strong>Paint</strong>ing <strong>Wood</strong><br />
<strong>Wood</strong> is generally<br />
finished with clear<br />
coatings to enhance<br />
the grain. <strong>Paint</strong>ing<br />
wood with a colored<br />
solid enamel is an<br />
alternative and<br />
depends on the results<br />
that you want to<br />
achieve with your<br />
decorating project.<br />
Always prime new<br />
wood. Our in-store<br />
professionals would be<br />
pleased to help you<br />
choose the right<br />
products for your<br />
application.<br />
Finish with Protective Clearcoats<br />
A gloss, protective clearcoat will be required if the<br />
surface is exposed to direct sunlight or heavy wear.<br />
1. Make sure that the work area<br />
is completely dust-free<br />
(otherwise dust will settle<br />
in the finish).<br />
2. Use a tack cloth to<br />
remove dust traces.<br />
3. Apply with the best quality natural bristle brush<br />
that you can afford.<br />
4. Allow coat to dry completely, lightly sand with very<br />
fine sandpaper or steel wool. Dust well<br />
and repeat.<br />
5. Let the final coat cure (check can label) before<br />
placing any heavy objects on the surface.<br />
Some new products combine a coloring stain and<br />
a finish polyurethane in one product. These may be<br />
somewhat opaque and hide some<br />
of the natural grain.<br />
Clean up<br />
1. Clean your work area.<br />
2. Store excess stain & strippers<br />
carefully. Do not leave them open<br />
or store them in plastic containers.<br />
3. Record the stain or oil name and formula<br />
number for future reference.<br />
UNLOCK YOUR CREATIVITY<br />
For all of your home decorating and improvement needs,<br />
our trained and knowledgeable staff can help with your questions.
NOTES<br />
A STEP-BY-STEP GUIDE<br />
UNLOCK YOUR CREATIVITY<br />
For more information about our products, visit us on the web at<br />
www.cloverdalepaint.com
NOTES<br />
A STEP-BY-STEP GUIDE<br />
UNLOCK YOUR CREATIVITY<br />
For all of your home decorating and improvement needs,<br />
our trained and knowledgeable staff can help with your questions.
NOTES<br />
A STEP-BY-STEP GUIDE<br />
UNLOCK YOUR CREATIVITY<br />
For more information about our products, visit us on the web at<br />
www.cloverdalepaint.com
Your Local <strong>Cloverdale</strong> <strong>Paint</strong> Store<br />
www.cloverdalepaint.com<br />
Copyright © <strong>Cloverdale</strong> <strong>Paint</strong> Inc. 2005 86272