

150 Lb CapaCity atV Cargo Carrier - Harbor Freight Tools
150 Lb CapaCity atV Cargo Carrier - Harbor Freight Tools
150 Lb CapaCity atV Cargo Carrier - Harbor Freight Tools

Create successful ePaper yourself
Turn your PDF publications into a flip-book with our unique Google optimized e-Paper software.
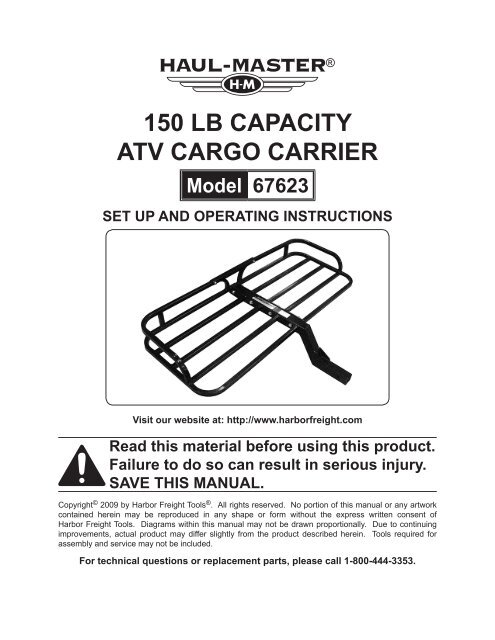
<strong>150</strong> <strong>Lb</strong> Capacity<br />
AtV <strong>Cargo</strong> <strong>Carrier</strong><br />
Model 67623<br />
Set up and Operating Instructions<br />
Visit our website at: http://www.harborfreight.com<br />
Read this material before using this product.<br />
Failure to do so can result in serious injury.<br />
Save this manual.<br />
Copyright © 2009 by <strong>Harbor</strong> <strong>Freight</strong> <strong>Tools</strong> ® . All rights reserved. No portion of this manual or any artwork<br />
contained herein may be reproduced in any shape or form without the express written consent of<br />
<strong>Harbor</strong> <strong>Freight</strong> <strong>Tools</strong>. Diagrams within this manual may not be drawn proportionally. Due to continuing<br />
improvements, actual product may differ slightly from the product described herein. <strong>Tools</strong> required for<br />
assembly and service may not be included.<br />
For technical questions or replacement parts, please call 1-800-444-3353.
Save This Manual<br />
Keep this manual for the safety warnings<br />
and precautions, assembly, operating,<br />
inspection, maintenance and cleaning<br />
procedures. Write the product’s serial number<br />
in the back of the manual near the assembly<br />
diagram (or month and year of purchase if<br />
product has no number). Keep this manual<br />
and the receipt in a safe and dry place for<br />
future reference.<br />
Important SAFETY<br />
Information<br />
In this manual, on the labeling, and<br />
all other information provided with<br />
this product:<br />
This is the safety alert<br />
symbol. It is used to alert<br />
you to potential personal<br />
injury hazards. Obey all<br />
safety messages that follow<br />
this symbol to avoid possible<br />
injury or death.<br />
DANGER indicates a<br />
hazardous situation<br />
which, if not avoided, will result<br />
in death or serious injury.<br />
WARNING indicates a<br />
hazardous situation<br />
which, if not avoided, could<br />
result in death or serious injury.<br />
CAUTION, used with<br />
the safety alert<br />
symbol, indicates a hazardous<br />
situation which, if not avoided,<br />
could result in minor or moderate<br />
injury.<br />
1.<br />
2.<br />
1.<br />
NOTICE is used to<br />
address practices not<br />
related to personal injury.<br />
CAUTION, without the<br />
safety alert symbol, is<br />
used to address practices not<br />
related to personal injury.<br />
General Safety Warnings<br />
WARNING Read all safety warnings<br />
and instructions. Failure to follow the<br />
warnings and instructions may result<br />
in serious injury.<br />
Save all warnings and instructions<br />
for future reference.<br />
Work area safety<br />
a. Keep work area clean and well lit.<br />
Cluttered or dark areas invite accidents.<br />
b. Keep children and bystanders away<br />
while operating a tool. Distractions<br />
can cause you to lose control.<br />
Personal safety<br />
a. Stay alert, watch what you are doing<br />
and use common sense when using<br />
the <strong>Carrier</strong>. Do not use while you are<br />
tired or under the influence of drugs,<br />
alcohol or medication. A moment of<br />
inattention while using the <strong>Carrier</strong> may<br />
result in serious personal injury.<br />
b. Use personal protective equipment.<br />
Always wear ANSI-approved safety<br />
goggles and heavy duty work gloves<br />
when setting up or taking down the<br />
<strong>Carrier</strong>. Safety equipment such a nonskid<br />
safety shoes will reduce personal<br />
injuries.<br />
<strong>Cargo</strong> <strong>Carrier</strong> Safety Warnings<br />
Only attach <strong>Carrier</strong> to properly installed<br />
hitch receiver capable of supporting<br />
<strong>Carrier</strong> and load.<br />
Page 2 For technical questions, please call 1-800-444-3353. SKU 67623
2.<br />
3.<br />
4.<br />
5.<br />
6.<br />
7.<br />
8.<br />
9.<br />
10.<br />
11.<br />
12.<br />
13.<br />
Install sufficiently far away from hot<br />
exhaust to prevent heat damage to<br />
carrier or cargo.<br />
Turn off vehicle, set parking brake, and<br />
chock wheels before installing.<br />
Follow DOT guidelines for installation<br />
and use.<br />
Do not exceed <strong>150</strong> lb. capacity. Be<br />
aware of dynamic loading. Sudden load<br />
movement may briefly create excess<br />
load causing product failure.<br />
Load heaviest items toward the center<br />
of the <strong>Carrier</strong>. Be aware of openings in<br />
the <strong>Carrier</strong>’s framework and use large<br />
enough containers that will not fall<br />
through gaps.<br />
Secure the <strong>Carrier</strong> as close to your<br />
vehicle as possible, minimizing the<br />
distance of the <strong>Carrier</strong> and its load from<br />
your vehicle.<br />
Secure loads before transporting.<br />
Inspect before use, including all bolts<br />
and nuts on the <strong>Carrier</strong>. Do not use if<br />
damaged.<br />
Keep the <strong>Carrier</strong> clean and dry.<br />
This product is not a toy. Keep it out of<br />
reach of children.<br />
Maintain labels and nameplates on<br />
the tool. These carry important safety<br />
information. If unreadable or missing,<br />
contact <strong>Harbor</strong> <strong>Freight</strong> <strong>Tools</strong> for a<br />
replacement.<br />
The warnings, precautions, and<br />
instructions discussed in this instruction<br />
manual cannot cover all possible<br />
conditions and situations that may occur.<br />
It must be understood by the operator<br />
that common sense and caution are<br />
factors which cannot be built into this<br />
product, but must be supplied by the<br />
operator.<br />
Save these<br />
instructions.<br />
SKU 67623<br />
For technical questions, please call 1-800-444-3353.<br />
Page 3
Specifications<br />
Assembly<br />
Maximum Capacity<br />
Vehicle Hitch<br />
Receiver Size<br />
Hitch Pin<br />
Dimensions<br />
<strong>150</strong> lbs.<br />
2”<br />
5/8” Dia.<br />
48-3/4”L x 32”W x 7-3/4”H<br />
Left <strong>Carrier</strong><br />
Platform (3)<br />
Unpacking<br />
When unpacking, make sure that the<br />
item is intact and undamaged. If any parts<br />
are missing or broken, please call <strong>Harbor</strong><br />
<strong>Freight</strong> <strong>Tools</strong> at 1-800-444-3353 as soon as<br />
possible.<br />
Instructions for putting<br />
into use<br />
Read the entire Important<br />
Safety Information<br />
section at the beginning of this<br />
manual including all text under<br />
subheadings therein before set up<br />
or use of this product.<br />
To prevent<br />
serious injury<br />
from accidental<br />
operation:<br />
Turn off vehicle, set parking<br />
brake, and chock wheels before<br />
mounting the <strong>Carrier</strong> on the<br />
vehicle.<br />
Right <strong>Carrier</strong><br />
Platform (2)<br />
Figure 1<br />
Post (1)<br />
1. Position the Post (1) on a bench with the<br />
angled section hanging over the bench<br />
edge. Place the Right and Left <strong>Carrier</strong><br />
Platforms (2 & 3) against the Post. Align<br />
their mounting holes.<br />
Nut (13)<br />
Spring<br />
Washer (12)<br />
Figure 2<br />
Flat Washers (11)<br />
Connecting<br />
Bolt (10)<br />
2. With a wrench (sold separately), fasten<br />
the Platforms to the Post using the<br />
Connecting Bolts (10), the Flat Washers<br />
(11), Spring Washers (12) and Nuts (13).<br />
Note: For additional information regarding the<br />
parts listed in the following pages, refer<br />
to the Assembly Diagram near the end of<br />
this manual.<br />
Page 4 For technical questions, please call 1-800-444-3353. SKU 67623
Flat Washers (8)<br />
Lock Cross Brace (6)<br />
Nut (13)<br />
Bolt (7)<br />
1.<br />
2.<br />
<strong>Carrier</strong> Use<br />
With assistance, place items to be<br />
loaded into the <strong>Carrier</strong>. Make sure the<br />
load is equally balanced on the <strong>Carrier</strong>.<br />
Place heaviest or bulkiest items in the<br />
center, and lighter items towards the<br />
sides.<br />
Figure 3<br />
3.<br />
Secure the load in place using<br />
appropriate tie-downs, ropes, tarps, flags<br />
etc (all sold separately).<br />
3. Set the Cross Brace (6) over the <strong>Carrier</strong><br />
Platforms (2/3) and fasten the Cross<br />
Brace to the Platforms using the Bolts<br />
(7), Flat Washers (8) and Lock Nuts (9).<br />
4.<br />
Make sure all connections are securely<br />
tightened.<br />
Note: Contact local DMV for DOT regulations<br />
before transporting.<br />
CAUTION: Do not exceed <strong>150</strong> lb. capacity.<br />
Be aware of dynamic loading. Sudden<br />
load movement may briefly create<br />
excess load causing product failure.<br />
Mounting<br />
Vehicle Hitch<br />
Post (1)<br />
Split Pin (4)<br />
Figure 4<br />
Hitch Pin (5)<br />
1. Remove the Split Pin (4) from the<br />
<strong>Carrier</strong>’s Hitch Pin (5).<br />
2.<br />
3.<br />
With assistance, lift the <strong>Carrier</strong> and insert<br />
the hitch end of the Post (1) into the<br />
towing vehicle’s tow hitch (not included).<br />
Align the holes in the Post (1) with the<br />
holes in the Vehicle Hitch. Slide the Hitch<br />
Pin through the holes and fasten in place<br />
by inserting the Split Pin.<br />
SKU 67623<br />
For technical questions, please call 1-800-444-3353.<br />
Page 5
Maintenance And<br />
Servicing<br />
Procedures not specifically<br />
explained in this manual must<br />
be performed only by a qualified<br />
technician.<br />
To prevent<br />
serious injury<br />
from accidental<br />
operation:<br />
Turn off vehicle, set parking<br />
brake, and chock wheels before<br />
inspecting the <strong>Carrier</strong> when it is<br />
mounted on the vehicle. Remove<br />
any load from unit before<br />
performing any inspection,<br />
maintenance, or cleaning<br />
procedures.<br />
To prevent serious injury<br />
from tool failure:<br />
Do not use damaged equipment.<br />
If abnormal noise or vibration<br />
occurs, have the problem<br />
corrected before further use.<br />
Cleaning, Maintenance, and<br />
Lubrication<br />
1. BEFORE EACH USE, inspect the<br />
general condition of the <strong>Carrier</strong>. Check<br />
for loose or damaged parts, and any<br />
other condition that may affect its safe<br />
operation.<br />
2.<br />
Clean off any dirt, debris, oil, grease, etc<br />
from the <strong>Carrier</strong> before loading.<br />
3. After Use, wipe external surfaces of<br />
the carrier with a clean, moist cloth. Do<br />
not use solvents.<br />
4.<br />
5.<br />
Check all hardware for tightness.<br />
Clean and store in a safe dry place when<br />
not in use.<br />
Page 6 For technical questions, please call 1-800-444-3353. SKU 67623
PLEASE READ THE FOLLOWING CAREFULLY<br />
The manufacturer and/or distributor has provided the parts list and assembly<br />
diagram in this manual as a reference tool only. Neither the manufacturer or<br />
distributor makes any representation or warranty of any kind to the buyer that he<br />
or she is qualified to make any repairs to the product, or that he or she is qualified<br />
to replace any parts of the product. In fact, the manufacturer and/or distributor<br />
expressly states that all repairs and parts replacements should be undertaken by<br />
certified and licensed technicians, and not by the buyer. The buyer assumes all risk<br />
and liability arising out of his or her repairs to the original product or replacement<br />
parts thereto, or arising out of his or her installation of replacement parts thereto.<br />
Parts List & ASSEMBLY DIAGRAM<br />
Part Description Qty<br />
1 Post 1<br />
2 Right <strong>Carrier</strong> Platform 1<br />
3 Left <strong>Carrier</strong> Platform 1<br />
4 Split Pin 1<br />
5 5/8” Hitch Pin 1<br />
6 Cross Brace 1<br />
7 Bolt M8 x 35 2<br />
Part Description Qty<br />
8 Flat Washer 8 4<br />
9 Lock Nut M8 2<br />
10 Bolt M10 x 80 4<br />
11 Flat Washer 10 8<br />
12 Spring Washer 10 4<br />
13 Nut M10 4<br />
SKU 67623<br />
For technical questions, please call 1-800-444-3353.<br />
Page 7
LIMITED 90 DAY WARRANTY<br />
<strong>Harbor</strong> <strong>Freight</strong> <strong>Tools</strong> Co. makes every effort to assure that its products meet high quality<br />
and durability standards, and warrants to the original purchaser that this product is free from<br />
defects in materials and workmanship for the period of 90 days from the date of purchase. This<br />
warranty does not apply to damage due directly or indirectly, to misuse, abuse, negligence or<br />
accidents, repairs or alterations outside our facilities, criminal activity, improper installation,<br />
normal wear and tear, or to lack of maintenance. We shall in no event be liable for death,<br />
injuries to persons or property, or for incidental, contingent, special or consequential damages<br />
arising from the use of our product. Some states do not allow the exclusion or limitation of<br />
incidental or consequential damages, so the above limitation of exclusion may not apply to<br />
you. This warranty is expressly in lieu of all other warranties, express<br />
or implied, including the warranties of merchantability and fitness.<br />
To take advantage of this warranty, the product or part must be returned to us with<br />
transportation charges prepaid. Proof of purchase date and an explanation of the complaint<br />
must accompany the merchandise. If our inspection verifies the defect, we will either repair or<br />
replace the product at our election or we may elect to refund the purchase price if we cannot<br />
readily and quickly provide you with a replacement. We will return repaired products at our<br />
expense, but if we determine there is no defect, or that the defect resulted from causes not<br />
within the scope of our warranty, then you must bear the cost of returning the product.<br />
This warranty gives you specific legal rights and you may also have other rights which<br />
vary from state to state.<br />
3491 Mission Oaks Blvd. • PO Box 6009 • Camarillo, CA 93011 • (800) 444-3353<br />
Record Product’s Serial Number Here:<br />
Note: If product has no serial number, record month and year of purchase instead.<br />
Note: Some parts are listed and shown for illustration purposes only, and are not available<br />
individually as replacement parts.<br />
Page 8 For technical questions, please call 1-800-444-3353. SKU 67623


