

Airless Paint Sprayer - Harbor Freight Tools
Airless Paint Sprayer - Harbor Freight Tools
Airless Paint Sprayer - Harbor Freight Tools

Create successful ePaper yourself
Turn your PDF publications into a flip-book with our unique Google optimized e-Paper software.
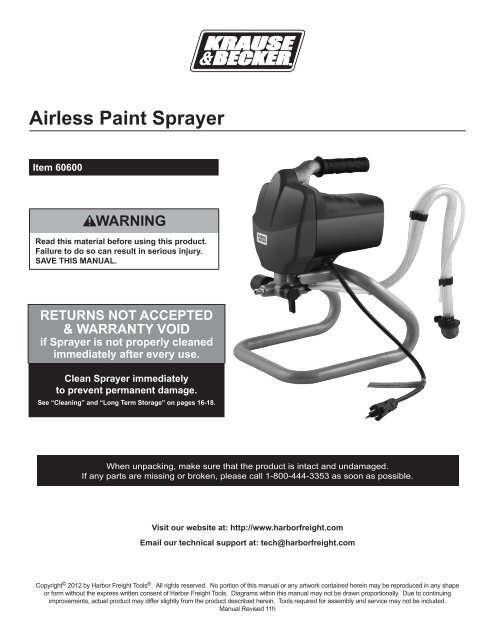
<strong>Airless</strong> <strong>Paint</strong> <strong>Sprayer</strong><br />
Item 60600<br />
Read this material before using this product.<br />
Failure to do so can result in serious injury.<br />
SAVE THIS MANUAL.<br />
RETURNS NOT ACCEPTED<br />
& WARRANTY VOID<br />
if <strong>Sprayer</strong> is not properly cleaned<br />
immediately after every use.<br />
Clean <strong>Sprayer</strong> immediately<br />
to prevent permanent damage.<br />
See “Cleaning” and “Long Term Storage” on pages 16-18.<br />
When unpacking, make sure that the product is intact and undamaged.<br />
If any parts are missing or broken, please call 1-800-444-3353 as soon as possible.<br />
Visit our website at: http://www.harborfreight.com<br />
Email our technical support at: tech@harborfreight.com<br />
Copyright © 2012 by <strong>Harbor</strong> <strong>Freight</strong> <strong>Tools</strong> ® . All rights reserved. No portion of this manual or any artwork contained herein may be reproduced in any shape<br />
or form without the express written consent of <strong>Harbor</strong> <strong>Freight</strong> <strong>Tools</strong>. Diagrams within this manual may not be drawn proportionally. Due to continuing<br />
improvements, actual product may differ slightly from the product described herein. <strong>Tools</strong> required for assembly and service may not be included.<br />
Manual Revised 11h
RETURNS NOT ACCEPTED & WARRANTY VOID<br />
if <strong>Sprayer</strong> is not properly cleaned immediately after every use.<br />
Clean <strong>Sprayer</strong> immediately to prevent permanent damage.<br />
Save This Manual<br />
Keep this manual for the safety warnings and precautions,<br />
assembly, operating, inspection, maintenance and cleaning<br />
procedures. Write the product’s serial number on the<br />
front page of the user’s manual (or month and year of<br />
purchase if product has no number). Keep this manual and<br />
the receipt in a safe and dry place for future reference.<br />
Important Safety Information<br />
In this manual, on the labeling, and all other<br />
information provided with this product:<br />
This is the safety alert symbol. It is used to<br />
alert you to potential personal injury hazards.<br />
Obey all safety messages that follow this<br />
symbol to avoid possible injury or death.<br />
DANGER indicates a hazardous situation which,<br />
if not avoided, will result in death or serious injury.<br />
WARNING indicates a hazardous situation which,<br />
if not avoided, could result in death or serious injury.<br />
CAUTION, used with the safety alert symbol,<br />
indicates a hazardous situation which, if not avoided,<br />
could result in minor or moderate injury.<br />
NOTICE is used to address practices<br />
not related to personal injury.<br />
CAUTION, without the safety alert symbol, is used to<br />
address practices not related to personal injury.<br />
Symbol Definitions<br />
Symbol<br />
PSI<br />
NPT<br />
NPS<br />
Property or statement<br />
Pounds per square inch of pressure<br />
National pipe thread, tapered<br />
National pipe thread, straight<br />
WARNING marking<br />
concerning Risk of Eye Injury.<br />
Wear ANSI‐approved eye protection.<br />
WARNING marking concerning<br />
Risk of Hearing Loss.<br />
Wear hearing protection.<br />
WARNING marking concerning<br />
Risk of Respiratory Injury. Wear<br />
NIOSH‐approved respirator.<br />
WARNING marking concerning<br />
Risk of Explosion.<br />
WARNING marking concerning<br />
Risk of Injection Injury.<br />
Do not direct spray at hands or body.<br />
Have injection injury treated immediately.<br />
WARNING marking concerning Risk of Fire.<br />
Ground any metal bucket used with sprayer.<br />
WARNING! Read all instructions.<br />
Failure to follow all instructions listed below<br />
may result in fire, serious injury and/or DEATH.<br />
The warnings and precautions discussed in this<br />
manual cannot cover all possible conditions and<br />
situations that may occur. It must be understood<br />
by the operator that common sense and caution<br />
are factors which cannot be built into this<br />
product, but must be supplied by the operator.<br />
SAVE THESE INSTRUCTIONS<br />
Page 2 For technical questions, please call 1-800-444-3353. ITEM 60600
Safety Warnings<br />
REV 11h<br />
ITEM 60600<br />
RETURNS NOT ACCEPTED & WARRANTY VOID<br />
if <strong>Sprayer</strong> is not properly cleaned immediately after every use.<br />
Clean <strong>Sprayer</strong> immediately to prevent permanent damage.<br />
WARNING Read all safety warnings<br />
and instructions. Failure to follow the warnings<br />
and instructions may result in serious injury.<br />
Save all warnings and instructions<br />
for future reference.<br />
1. Work area safety<br />
a. Keep work area clean and well lit.<br />
Cluttered or dark areas invite accidents<br />
b. Operate only in a well-ventilated area.<br />
<strong>Paint</strong> thinners and solvents may<br />
be harmful if inhaled.<br />
c. Do not operate the sprayer in explosive<br />
atmospheres, such as in the presence<br />
of flammable liquids, gases, or dust. The<br />
sprayer is able to create sparks resulting<br />
in the ignition of the dust or fumes.<br />
d. Keep children and bystanders<br />
away while operating a sprayer.<br />
Distractions can cause you to lose control.<br />
2. Electrical safety<br />
a. <strong>Sprayer</strong> plugs must match the outlet. Never<br />
modify the plug in any way. Do not use any<br />
adapter plugs with grounded sprayers.<br />
Unmodified plugs and matching outlets<br />
will reduce risk of electric shock.<br />
b. Avoid body contact with grounded surfaces<br />
such as pipes, radiators, ranges and<br />
refrigerators. There is an increased risk of<br />
electric shock if your body is grounded.<br />
c. Do not expose sprayers to rain or wet<br />
conditions. Water entering a sprayer will<br />
increase the risk of electric shock.<br />
d. Do not abuse the cord. Never use the cord for<br />
carrying, pulling or unplugging the sprayer.<br />
Keep cord away from heat, oil, sharp edges<br />
or moving parts. Damaged or entangled<br />
cords increase the risk of electric shock.<br />
e. When operating a sprayer outdoors, use<br />
an extension cord suitable for outdoor use.<br />
Use of a cord suitable for outdoor use<br />
reduces the risk of electric shock.<br />
f. If operating a sprayer in a damp location<br />
is unavoidable, use a Ground Fault Circuit<br />
Interrupter (GFCI) protected supply.<br />
Use of a GFCI reduces the risk of electric shock.<br />
3. Personal safety<br />
For technical questions, please call 1-800-444-3353.<br />
a. Stay alert. Watch what you are doing and use<br />
common sense when operating the sprayer.<br />
Do not use the sprayer while tired or under<br />
the influence of drugs, alcohol, or medication.<br />
A moment of inattention while operating the<br />
sprayer increases the risk of injury to persons.<br />
b. Dress properly. Do not wear loose<br />
clothing or jewelry. Contain long hair.<br />
Keep hair, clothing, and gloves away from<br />
moving parts. Loose clothes, jewelry, or long<br />
hair increases the risk of injury to persons as<br />
a result of being caught in moving parts.<br />
c. Avoid unintentional starting. Be sure the<br />
trigger is off before connecting to the<br />
power supply. Do not carry the sprayer with<br />
your finger on the trigger or connect the sprayer<br />
to the power supply with the trigger on.<br />
d. Do not overreach. Keep proper footing<br />
and balance at all times. Proper footing<br />
and balance enables better control of the<br />
sprayer in unexpected situations.<br />
e. Use safety equipment.<br />
Wear ANSI‐approved safety goggles,<br />
a NIOSH‐approved respirator,<br />
heavy‐duty work gloves and<br />
non‐skid safety shoes when priming,<br />
painting, cleaning, or servicing.<br />
4. <strong>Sprayer</strong> use and care<br />
a. Do not force the sprayer. Use the<br />
correct sprayer for your application.<br />
The correct sprayer will do the job better and<br />
safer at the rate for which it was designed.<br />
b. Do not use the sprayer if the switch<br />
does not turn it on and off. Any sprayer<br />
that cannot be controlled with the switch<br />
is dangerous and must be repaired.<br />
c. Disconnect the plug from the power<br />
source before making any adjustments,<br />
changing accessories, or storing sprayers.<br />
Such preventive safety measures reduce the<br />
risk of starting the sprayer accidentally.<br />
d. Store idle sprayers out of the reach of<br />
children and do not allow persons unfamiliar<br />
with the sprayer or these instructions<br />
to operate the sprayer. <strong>Sprayer</strong>s are<br />
dangerous in the hands of untrained users.<br />
e. Maintain the sprayer. Check for misalignment<br />
or binding of moving parts, breakage of parts<br />
and any other condition that may affect the<br />
Page 3
RETURNS NOT ACCEPTED & WARRANTY VOID<br />
if <strong>Sprayer</strong> is not properly cleaned immediately after every use.<br />
Clean <strong>Sprayer</strong> immediately to prevent permanent damage.<br />
sprayer’s operation. If damaged, have the<br />
sprayer repaired before use. Many accidents<br />
are caused by poorly maintained sprayers.<br />
f. Use the sprayer and accessories in<br />
accordance with these instructions, taking<br />
into account the working conditions and the<br />
work to be performed. Use of the sprayer<br />
for operations different from those intended<br />
could result in a hazardous situation.<br />
5. Service<br />
a. Have your sprayer serviced by a qualified<br />
repair person using only identical<br />
replacement parts. This will ensure that<br />
the safety of the sprayer is maintained.<br />
<strong>Paint</strong> <strong>Sprayer</strong> Safety Warnings<br />
1. INJECTION HAZARD!<br />
Although this paint gun is airless,<br />
it still puts out paint at a very high<br />
pressure. Through improper use, paint<br />
can be injected through a person’s skin,<br />
leading to serious injury, possibly amputation.<br />
If paint is accidentally injected into someone’s skin,<br />
contact a doctor immediately. Do not treat an injection<br />
injury as a simple cut. Injection can lead to amputation<br />
and requires immediate surgical treatment.<br />
2. Do not point your sprayer at anyone, including<br />
yourself. Do not place your hand in front of<br />
Spray Gun’s nozzle or attempt to deflect paint<br />
spray with your hand during use.<br />
Gloves and clothing don’t offer adequate protection<br />
from toxic paints, sealers, water-proofers, or stains.<br />
3. Do not come into contact with a fluid stream<br />
created by a leak in the paint hose.<br />
4. Engage the Spray Gun’s trigger<br />
lock when not spraying.<br />
5. Do not leave <strong>Paint</strong> <strong>Sprayer</strong> pressurized<br />
while unattended.<br />
6. Do not clean Spray Gun tip while it is<br />
still connected to paint hose.<br />
7. Keep the trigger and the electrical<br />
cord plug clean and paint-free.<br />
8. Do not run <strong>Paint</strong> <strong>Sprayer</strong> while empty.<br />
Damage to the unit may occur.<br />
9. Do not use <strong>Paint</strong> <strong>Sprayer</strong> to spray<br />
asbestos, metallic paints, glazes,<br />
red lead, cement, ground chalk,<br />
abrasive grainy paints containing lime, or bleach.<br />
These will damage the spray gun and void the warranty.<br />
10. Do not spray flammable materials in vicinity<br />
of open flame or near ignition sources. Motors,<br />
electrical equipment, and controls can cause electrical<br />
arcs that will ignite a flammable gas or vapor. Do not<br />
store flammable liquids or gases in vicinity of this unit.<br />
11. Keep fire-extinguishing equipment<br />
present and in good-working order.<br />
12. Keep pump away from spray area to avoid<br />
contact with solvents and paint fumes.<br />
13. Use <strong>Paint</strong> <strong>Sprayer</strong> with water-based or<br />
mineral spirit-type materials only.<br />
14. Do NOT use bleach, low-flash naphthalene,<br />
acetone alcohol or toluene when cleaning<br />
<strong>Paint</strong> <strong>Sprayer</strong> equipment.<br />
15. Do NOT use solvents with flash points less than<br />
70° F (21° C) to clean equipment. These may cause<br />
an explosion. Examples of acceptable cleaning<br />
solvents are water, mineral spirits and lacquer thinner.<br />
Note that some of these solvents may be<br />
inappropriate for certain kinds of paint; follow the paint<br />
supplier’s recommendations. Contact <strong>Harbor</strong> <strong>Freight</strong><br />
<strong>Tools</strong> to request a Material Safety Data Sheet (MSDS).<br />
16. Follow the material and solvent manufacturer’s<br />
safety precautions and warnings.<br />
17. Keep paint hose away from sharp objects.<br />
Bursting hoses may cause injury.<br />
Examine hoses regularly and replace if damaged.<br />
18. When flushing <strong>Paint</strong> <strong>Sprayer</strong> system,<br />
use lowest possible pressure setting.<br />
19. All hoses and spray gun accessories used with <strong>Paint</strong><br />
<strong>Sprayer</strong> must be pressure rated at or above 3000 PSI.<br />
20. The <strong>Paint</strong> <strong>Sprayer</strong> must be plugged into<br />
an outlet that is grounded in accordance<br />
with all local codes and ordinances.<br />
21. Use caution while spraying on windy days.<br />
22. Do not use <strong>Paint</strong> <strong>Sprayer</strong> without the<br />
Spray Gun’s nozzle guard in place.<br />
23. <strong>Paint</strong> <strong>Sprayer</strong>’s housing may become hot during use.<br />
Do not touch housing until it has completely cooled.<br />
Page 4 For technical questions, please call 1-800-444-3353. ITEM 60600
RETURNS NOT ACCEPTED & WARRANTY VOID<br />
if <strong>Sprayer</strong> is not properly cleaned immediately after every use.<br />
Clean <strong>Sprayer</strong> immediately to prevent permanent damage.<br />
24. Remove Spray Tip or turn to cleaning position<br />
BEFORE cleaning or flushing <strong>Paint</strong> <strong>Sprayer</strong> system.<br />
25. Do not use pliers to tighten or loosen<br />
high pressure connections.<br />
26. Sparks from improper grounding<br />
can ignite fumes!<br />
Follow all local regulations regarding the<br />
use of fluid supply containers and solvent<br />
pails used with flushing the <strong>Paint</strong> <strong>Sprayer</strong>.<br />
Use only conductive metal pails placed on a grounded<br />
(concrete) surface. Do not place pails on<br />
nonconductive surfaces (such as cardboard or paper).<br />
Ground all metal pails by clamping one end of a ground<br />
wire to the pail and the other end to a<br />
grounded structure (such as a nearby pipe).<br />
Maintain grounding, even when flushing or relieving<br />
pressure from <strong>Paint</strong> <strong>Sprayer</strong> into metal pail.<br />
The force of the spray can knock a metal pail over,<br />
so hold down the metal pail and keep the metal part of<br />
the spray gun set against the grounded metal pail when<br />
pressing the spray gun trigger.<br />
27. Maintain labels and nameplates on the sprayer.<br />
These carry important safety information.<br />
If unreadable or missing,<br />
contact <strong>Harbor</strong> <strong>Freight</strong> <strong>Tools</strong> for a replacement.<br />
28. Avoid unintentional starting. Prepare to begin work<br />
before turning on the sprayer.<br />
31. WARNING: Some dust created by power<br />
sanding, sawing, grinding, drilling, and other<br />
construction activities, contains chemicals known<br />
[to the State of California] to cause cancer,<br />
birth defects or other reproductive harm.<br />
Some examples of these chemicals are:<br />
• Lead from lead-based paints<br />
• Crystalline silica from bricks and cement or<br />
other masonry products<br />
• Arsenic and chromium from chemically treated lumber<br />
Your risk from these exposures varies,<br />
depending on how often you do this type of work.<br />
To reduce your exposure to these chemicals:<br />
work in a well ventilated area, and work with approved<br />
safety equipment, such as those dust masks that are<br />
specially designed to filter out microscopic particles.<br />
(California Health & Safety Code § 25249.5, et seq.)<br />
32. WARNING: Handling the cord on this product will<br />
expose you to lead, a chemical known to the State<br />
of California to cause cancer, and birth defects or<br />
other reproductive harm. Wash hands after handling.<br />
(California Health & Safety Code § 25249.5, et seq.)<br />
SAVE THESE<br />
INSTRUCTIONS.<br />
29. This product is not a toy.<br />
Keep it out of reach of children.<br />
30. People with pacemakers should consult their<br />
physician(s) before use. Electromagnetic fields in<br />
close proximity to heart pacemaker could cause<br />
pacemaker interference or pacemaker failure.<br />
ITEM 60600<br />
For technical questions, please call 1-800-444-3353.<br />
Page 5
Grounding<br />
RETURNS NOT ACCEPTED & WARRANTY VOID<br />
if <strong>Sprayer</strong> is not properly cleaned immediately after every use.<br />
Clean <strong>Sprayer</strong> immediately to prevent permanent damage.<br />
TO PREVENT ELECTRIC SHOCK AND<br />
DEATH FROM INCORRECT<br />
GROUNDING WIRE CONNECTION:<br />
Check with a qualified electrician if you are<br />
in doubt as to whether the outlet is properly grounded.<br />
Do not modify the power cord plug provided with the<br />
sprayer. Never remove the grounding prong from the<br />
plug. Do not use the sprayer if the power cord or plug<br />
is damaged. If damaged, have it repaired by a service<br />
facility before use. If the plug will not fit the outlet,<br />
have a proper outlet installed by a qualified electrician.<br />
Grounded <strong>Sprayer</strong>s:<br />
<strong>Sprayer</strong>s With Three Prong Plugs<br />
Extension Cords<br />
1. Grounded sprayers require a three<br />
wire extension cord. Double Insulated sprayers<br />
can use either a two or three wire extension cord.<br />
2. As the distance from the supply outlet increases, you<br />
must use a heavier gauge extension cord. Using<br />
extension cords with inadequately sized wire causes<br />
a serious drop in voltage, resulting in loss of power<br />
and possible sprayer damage. (See Table A.)<br />
3. The smaller the gauge number of the wire, the<br />
greater the capacity of the cord. For example,<br />
a 14 gauge cord can carry a higher current<br />
than a 16 gauge cord. (See Table A.)<br />
4. When using more than one extension cord to make<br />
up the total length, make sure each cord contains at<br />
least the minimum wire size required. (See Table A.)<br />
5. If you are using one extension cord for more<br />
than one sprayer, add the nameplate amperes<br />
and use the sum to determine the required<br />
minimum cord size. (See Table A.)<br />
6. If you are using an extension cord outdoors, make<br />
sure it is marked with the suffix “W-A” (“W” in<br />
Canada) to indicate it is acceptable for outdoor use.<br />
3-Prong Plug and Outlet<br />
1. <strong>Sprayer</strong>s marked with “Grounding Required” have a<br />
three wire cord and three prong grounding plug. The<br />
plug must be connected to a properly grounded outlet.<br />
If the sprayer should electrically malfunction or break<br />
down, grounding provides a low resistance path to<br />
carry electricity away from the user, reducing the risk<br />
of electric shock. (See 3-Prong Plug and Outlet.)<br />
2. The grounding prong in the plug is connected through<br />
the green wire inside the cord to the grounding system<br />
in the sprayer. The green wire in the cord must be<br />
the only wire connected to the sprayer’s grounding<br />
system and must never be attached to an electrically<br />
“live” terminal. (See 3-Prong Plug and Outlet.)<br />
3. The sprayer must be plugged into an appropriate<br />
outlet, properly installed and grounded in accordance<br />
with all codes and ordinances. The plug and<br />
outlet should look like those in the preceding<br />
illustration. (See 3-Prong Plug and Outlet.)<br />
7. Make sure the extension cord is properly wired<br />
and in good electrical condition. Always replace<br />
a damaged extension cord or have it repaired<br />
by a qualified electrician before using it.<br />
8. Protect the extension cords from sharp objects,<br />
excessive heat, and damp or wet areas.<br />
RECOMMENDED MINIMUM WIRE GAUGE<br />
FOR EXTENSION CORDS* (120/240 VOLT)<br />
NAMEPLATE<br />
AMPERES<br />
EXTENSION CORD<br />
LENGTH<br />
(at full load) 25’ 50’ 75’ 100’ 150’<br />
0 – 2.0 18 18 18 18 16<br />
2.1 – 3.4 18 18 18 16 14<br />
3.5 – 5.0 18 18 16 14 12<br />
5.1 – 7.0 18 16 14 12 12<br />
7.1 – 12.0 18 14 12 10 -<br />
12.1 – 16.0 14 12 10 - -<br />
16.1 – 20.0 12 10 - - -<br />
TABLE A<br />
* Based on limiting the line voltage<br />
drop to five volts at 150% of<br />
the rated amperes.<br />
Page 6 For technical questions, please call 1-800-444-3353. ITEM 60600
RETURNS NOT ACCEPTED & WARRANTY VOID<br />
if <strong>Sprayer</strong> is not properly cleaned immediately after every use.<br />
Clean <strong>Sprayer</strong> immediately to prevent permanent damage.<br />
Symbology<br />
Double Insulated<br />
Canadian Standards Association<br />
V~<br />
A<br />
n 0 xxxx/min.<br />
Underwriters Laboratories, Inc.<br />
Volts Alternating Current<br />
Amperes<br />
No Load Revolutions<br />
per Minute (RPM)<br />
ITEM 60600<br />
For technical questions, please call 1-800-444-3353.<br />
Page 7
RETURNS NOT ACCEPTED & WARRANTY VOID<br />
if <strong>Sprayer</strong> is not properly cleaned immediately after every use.<br />
Clean <strong>Sprayer</strong> immediately to prevent permanent damage.<br />
Before You Begin<br />
Familiarize yourself with the <strong>Paint</strong> <strong>Sprayer</strong> and its functions.<br />
Handle<br />
Suction Tube<br />
ON/OFF<br />
Switch<br />
(Not Shown)<br />
Priming Tube<br />
Pressure<br />
Control<br />
Knob<br />
<strong>Paint</strong> Hose Outlet<br />
Prime/Spray Switch<br />
Filter<br />
Power Cord<br />
Spray Tip<br />
Hanging Hook<br />
Spray Tip Guard<br />
Spray Gun<br />
Trigger Lock<br />
Trigger Guard<br />
Trigger<br />
<strong>Paint</strong> Hose<br />
Page 8 For technical questions, please call 1-800-444-3353. ITEM 60600
RETURNS NOT ACCEPTED & WARRANTY VOID<br />
if <strong>Sprayer</strong> is not properly cleaned immediately after every use.<br />
Clean <strong>Sprayer</strong> immediately to prevent permanent damage.<br />
Prime/Spray Switch<br />
This switch toggles the unit between<br />
priming mode and spraying mode.<br />
Prime<br />
Spray<br />
Locked<br />
Unlocked<br />
Trigger Lock<br />
When engaged, this mechanism<br />
prevents the trigger from<br />
being pulled accidentally such<br />
as if the gun is dropped.<br />
Lock whenever not in use.<br />
Nozzle<br />
The nozzle is reversible and<br />
removable to make cleaning<br />
and unclogging easier.<br />
Turn to Spray ( ) position<br />
to use the spray gun.<br />
Turn to Clean (Eject) position<br />
to clean the nozzle.<br />
Spray /<br />
Clean / Eject<br />
Pressure Control Knob<br />
The Pressure Control Knob can be adjusted for High Pressure Spraying,<br />
Low Pressure Spraying, Priming/Cleaning, or Rolling. Align the Pressure<br />
Control Knob with indicator on the <strong>Sprayer</strong> Housing to set the function.<br />
Low Pressure Spray<br />
Rolling<br />
Hi Spray Low Spray Prime/Clean Roll<br />
High Pressure Spray<br />
ITEM 60600<br />
Prime/Clean<br />
For technical questions, please call 1-800-444-3353.<br />
Page 9
RETURNS NOT ACCEPTED & WARRANTY VOID<br />
if <strong>Sprayer</strong> is not properly cleaned immediately after every use.<br />
Clean <strong>Sprayer</strong> immediately to prevent permanent damage.<br />
Setup<br />
Note: Remove or cover objects that you want<br />
to protect from overspray (paint mist).<br />
2. Attach <strong>Paint</strong> Hose to <strong>Paint</strong> Gun and<br />
tighten with two wrenches.<br />
1. Attach <strong>Paint</strong> Hose to <strong>Paint</strong> Hose Outlet<br />
and tighten with wrench.<br />
3. Turn Pressure Control Knob to<br />
Low Pressure Spray setting.<br />
Page 10 For technical questions, please call 1-800-444-3353. ITEM 60600
RETURNS NOT ACCEPTED & WARRANTY VOID<br />
if <strong>Sprayer</strong> is not properly cleaned immediately after every use.<br />
Clean <strong>Sprayer</strong> immediately to prevent permanent damage.<br />
To Relieve <strong>Sprayer</strong> Pressure<br />
OFF<br />
4. Turn Trigger Lock Knob to Locking position.<br />
1.<br />
Turn Power Switch off and unplug unit from outlet.<br />
Note: Always set to Prime mode between uses.<br />
2. Switch Prime/Spray switch to Prime mode.<br />
3. Point gun into paint pail and activate<br />
<strong>Sprayer</strong> Trigger to relieve pressure.<br />
ITEM 60600<br />
For technical questions, please call 1-800-444-3353.<br />
Page 11
RETURNS NOT ACCEPTED & WARRANTY VOID<br />
if <strong>Sprayer</strong> is not properly cleaned immediately after every use.<br />
Clean <strong>Sprayer</strong> immediately to prevent permanent damage.<br />
Priming Spray Gun<br />
This procedure is used for first time operation and also to<br />
flush storage fluids out of the <strong>Sprayer</strong>.<br />
Priming Water-Based vs. Oil-Based <strong>Paint</strong>s<br />
Oil-based <strong>Paint</strong>:<br />
Flush with mineral spirits followed by warm clean water.<br />
WARNING! TO PREVENT FIRE:<br />
When using mineral spirits, ground gun by holding<br />
it against a metal container while flushing.<br />
4. Turn Prime/Spray switch to Prime mode.<br />
Water-based (Latex) <strong>Paint</strong>:<br />
Flush with warm clean water.<br />
Priming and Startup Steps<br />
Hi Spray Low Spray Prime/Clean Roll<br />
5.<br />
Adjust Pressure Control Knob to Prime/Clean setting.<br />
ON<br />
1. Separate smaller Priming Tube from Suction Tube.<br />
6.<br />
Plug in <strong>Sprayer</strong> and turn on power.<br />
2. Place Priming Tube in waste bucket.<br />
OFF<br />
3. Submerge Suction Tube in water or flushing solvent.<br />
7.<br />
<strong>Sprayer</strong> will start pumping and water or flushing solvent<br />
as well as air bubbles will be purged from system.<br />
Let fluids discharge from Priming Tube into waste<br />
bucket for 30 to 60 seconds then switch Power to Off.<br />
Page 12 For technical questions, please call 1-800-444-3353. ITEM 60600
RETURNS NOT ACCEPTED & WARRANTY VOID<br />
if <strong>Sprayer</strong> is not properly cleaned immediately after every use.<br />
Clean <strong>Sprayer</strong> immediately to prevent permanent damage.<br />
8. Remove Suction Tube from water or flushing<br />
solvent and submerge in paint pail.<br />
11. Turn Spray/Prime Switch to Spray mode and<br />
continue to spray into waste bucket.<br />
ON<br />
9.<br />
Switch Power to On.<br />
12. Stop spraying and activate trigger lock.<br />
10. <strong>Paint</strong> should work itself from Suction Tube to <strong>Sprayer</strong> to<br />
Priming Tube until paint discharges from Return Tube.<br />
Point gun into waste bucket and pull trigger.<br />
13. Remove the Priming Tube from the waste bucket and<br />
clip to Suction Tube and submerge in paint pail.<br />
14. If the motor stops, the pump and tubes are primed.<br />
If it does not stop, repeat priming steps.<br />
15. Start <strong>Paint</strong>ing.<br />
ITEM 60600<br />
For technical questions, please call 1-800-444-3353.<br />
Page 13
RETURNS NOT ACCEPTED & WARRANTY VOID<br />
if <strong>Sprayer</strong> is not properly cleaned immediately after every use.<br />
Clean <strong>Sprayer</strong> immediately to prevent permanent damage.<br />
<strong>Paint</strong>ing<br />
Before painting, ensure the <strong>Sprayer</strong> has been primed<br />
(see Priming and Startup steps) and verify<br />
that Nozzle Tip is aligned properly.<br />
Note: Remove or cover objects that you want<br />
to protect from overspray and paint mist.<br />
<strong>Paint</strong>ing Techniques<br />
Before painting, ensure the <strong>Sprayer</strong> has been primed<br />
(see Priming and Startup steps) and<br />
verify that Nozzle Tip is aligned properly.<br />
Keep the gun approximately 1 foot from the surface.<br />
1. Once primed, adjust nozzle to Spray setting.<br />
1. Keep gun straight and move arm across at a steady<br />
rate while staying one foot from the surface.<br />
Hi Spray Low Spray Prime/Clean Roll<br />
2. Do not fan the gun or paint will be uneven.<br />
2.<br />
Start spraying at the lowest setting on the Pressure<br />
Control Knob and increase pressure as needed by<br />
turning clockwise to create a good spray pattern.<br />
Overlap<br />
Strokes<br />
3.<br />
Overlap strokes by half, always aim<br />
stroke at bottom edge of last stroke.<br />
Page 14 For technical questions, please call 1-800-444-3353. ITEM 60600
RETURNS NOT ACCEPTED & WARRANTY VOID<br />
if <strong>Sprayer</strong> is not properly cleaned immediately after every use.<br />
Clean <strong>Sprayer</strong> immediately to prevent permanent damage.<br />
Clearing Spray Tip<br />
Occasionally, the Spray Gun Tip will become clogged with<br />
paint. Follow these instructions to clear Spray Gun Tip.<br />
OFF<br />
5. Unlock Trigger.<br />
1.<br />
Switch power off and set Trigger Lock.<br />
6. Spray into waste bucket until clog clears.<br />
2. Adjust nozzle to clean setting.<br />
7. Release Trigger and engage Trigger Lock.<br />
3. Turn Spray/Prime Switch to Spray mode.<br />
ON<br />
4.<br />
Turn power on.<br />
8. Adjust nozzle to Spray mode.<br />
ITEM 60600<br />
For technical questions, please call 1-800-444-3353.<br />
Page 15
RETURNS NOT ACCEPTED & WARRANTY VOID<br />
if <strong>Sprayer</strong> is not properly cleaned immediately after every use.<br />
Clean <strong>Sprayer</strong> immediately to prevent permanent damage.<br />
Cleaning<br />
5. Unthread Spray Tip and remove.<br />
1. Relieve pressure and drain paint from Tubes.<br />
6. Turn to Spray mode.<br />
2. Separate tubes.<br />
ON<br />
7.<br />
Switch power to on.<br />
3. Place Priming Tube in empty waste bucket.<br />
8. Spray paint into paint pail.<br />
4. Submerge Suction Tube in water or flushing fluid.<br />
Page 16 For technical questions, please call 1-800-444-3353. ITEM 60600
RETURNS NOT ACCEPTED & WARRANTY VOID<br />
if <strong>Sprayer</strong> is not properly cleaned immediately after every use.<br />
Clean <strong>Sprayer</strong> immediately to prevent permanent damage.<br />
9. Change to waste bucket as paint thins.<br />
13. Remove trigger guard from housing.<br />
10. Turn to Prime mode.<br />
14. Unscrew nut.<br />
11. Continue to flush until clear.<br />
OFF<br />
15. Remove filter.<br />
12.<br />
Release trigger, turn power off and relieve pressure.<br />
16. Clean all parts in warm, soapy water or<br />
flushing fluid with a bristled brush.<br />
ITEM 60600<br />
For technical questions, please call 1-800-444-3353.<br />
Page 17
RETURNS NOT ACCEPTED & WARRANTY VOID<br />
if <strong>Sprayer</strong> is not properly cleaned immediately after every use.<br />
Clean <strong>Sprayer</strong> immediately to prevent permanent damage.<br />
Long Term Storage<br />
When cleaning for long term storage (more than 48 hours).<br />
It is very important that the <strong>Paint</strong> <strong>Sprayer</strong> is not stored with<br />
any water or water-based material left in the Pump, Hose,<br />
Tubes, or Spray Gun. This will corrode the product.<br />
IMPORTANT: Clean<br />
the <strong>Sprayer</strong> before<br />
storage. See “Cleaning”<br />
on pages 16-17.<br />
1. Remove paint hose if not<br />
already removed.<br />
6. Hold a rag over the paint<br />
hose outlet.<br />
7. Switch Power to ON for<br />
five seconds, then turn the<br />
power OFF.<br />
ON 5 seconds<br />
then OFF<br />
2. Turn the unit over and<br />
loosen the Clamps<br />
from both Tubes, then<br />
disconnect Tubes from<br />
the Pump Body.<br />
8. Turn Prime/Spray switch<br />
to Prime, this will keep<br />
storage fluids in sprayer.<br />
3. Add one ounce of light<br />
household oil or a<br />
pump storage product<br />
into each inlet.<br />
9. Replace the Tubes and<br />
secure with the Clamps.<br />
4. Turn Prime/Spray switch<br />
to Spray.<br />
10. Wipe the sprayer with a clean cloth. Store in a<br />
clean dry location out of reach of children.<br />
5. Turn Pressure Control<br />
Knob to Low/Spray.<br />
Hi Spray Low Spray Prime/Clean Roll<br />
Page 18 For technical questions, please call 1-800-444-3353. ITEM 60600
RETURNS NOT ACCEPTED & WARRANTY VOID<br />
if <strong>Sprayer</strong> is not properly cleaned immediately after every use.<br />
Clean <strong>Sprayer</strong> immediately to prevent permanent damage.<br />
Disposal Instructions<br />
Improper disposal of paint is against the law and a health and environmental hazard.<br />
Dispose of paint through local recycling facility. Visit www.earth911.com to find a facility near you.<br />
Troubleshooting<br />
Problem Possible Causes Likely Solutions<br />
Decreased output. Obstructed trigger. Clean around trigger to ensure movement.<br />
Inconsistent paint flow,<br />
blobs and splatters.<br />
<strong>Paint</strong> surface is bumpy or<br />
has orange peel texture.<br />
<strong>Paint</strong> sags or runs.<br />
Blotchy surface (blushing)<br />
or uneven color.<br />
Spots on surface<br />
with light center (fish eyes).<br />
Spots on surface with dark<br />
center (contamination).<br />
1. Clogged Spray Tip or<br />
damaged/clogged Fluid Filter.<br />
2. Contaminated paint.<br />
1. <strong>Paint</strong> is applied too thick.<br />
2. Incorrect paint volume.<br />
3. <strong>Paint</strong> gun too far from paint<br />
surface during spraying.<br />
1. Excess thinning of paint.<br />
2. <strong>Paint</strong> applied too thick.<br />
3. <strong>Paint</strong> gun too close<br />
to work surface.<br />
4. Uneven or hesitant<br />
motion of spray gun.<br />
5. Excess overlapping of<br />
each spray stroke.<br />
1. <strong>Paint</strong> dries too slowly.<br />
2. Uneven paint application.<br />
3. Work material absorbs<br />
paint unevenly.<br />
1. <strong>Paint</strong> mixture too thin.<br />
2. Improper primer or<br />
incompatible surface.<br />
3. Surface contamination.<br />
1. Dust or dirt on surface.<br />
2. Insufficiently sanded.<br />
3. Raised grain.<br />
1. Clean, adjust or replace Spray Tip or Fluid Filter.<br />
2. Remove paint and filter it.<br />
1. <strong>Paint</strong> must be thinned properly before spraying.<br />
2. Adjust Fluid Control Knob.<br />
3. Hold spray gun closer to surface during spraying.<br />
1. Recheck paint viscosity.<br />
Add unmixed paint to thicken mixture.<br />
2. Apply thinner coats, allowing paint<br />
to get tacky between coats.<br />
3. Move spray gun further back from paint<br />
surface when applying paint.<br />
4. Keep spray gun moving during painting.<br />
Hesitations can cause sags or runs.<br />
5. Overlap each stroke to keep the coverage even,<br />
but be aware that you are adding<br />
coat thickness by overlapping.<br />
1. Use less thinner or add a drier.<br />
2. Start each stroke off the work material<br />
and overlap each stroke consistently.<br />
3. Use a conditioner or sealer coat<br />
before applying the finish coat.<br />
1. Add undiluted paint to thicken mixture.<br />
2. Check manufacturer’s recommendations<br />
for primer or compatible surfaces.<br />
3. Clean surface thoroughly with<br />
thinner before applying paint.<br />
1. Clean surface with compressed air<br />
or tack cloth before painting.<br />
2. Sand wood to a sufficiently fine grit before painting.<br />
3. Wipe wood surface with thinner to raise grain,<br />
then sand with fine grit to knock off “hairs”.<br />
ITEM 60600<br />
For technical questions, please call 1-800-444-3353.<br />
Page 19
Parts List<br />
Part Description Qty<br />
1 Spray Gun 1<br />
2 <strong>Paint</strong> Hose 1<br />
3 Base Frame 1<br />
4 Hex Bolt (M6x4) 2<br />
5 Pressure Relief Valve Label 1<br />
6 Housing Cover 1<br />
7 Output Gear Bushing 2<br />
8 Rolling Bearing 1<br />
9 Output Pole 1<br />
10 Gear 1<br />
11 Middle Gear Bushing 2<br />
12 Output Gear 1<br />
13 Pin (5x12) 2<br />
14 Screw 1<br />
15 <strong>Paint</strong> Outlet 1<br />
16 O-Ring (10x1.8) 1<br />
17 Output Spring 1<br />
18 Mandrel 1<br />
19 Steel Ball (6.4) 1<br />
20 Seal Seat 1<br />
21 Output Pusher 1<br />
22 Pump Body 1<br />
23 Nylon Washer 1<br />
24 Insert Block 1<br />
25 Pressure Relief Valve 1<br />
26 Nylon Ring 1<br />
27 O-Ring (5x1.8) 1<br />
28 Pressure Relief Pole 1<br />
29 Pressure Relief Spring 1<br />
30 Spring Seat 1<br />
31 Pin (3x8) 1<br />
32 Control Valve Seat 1<br />
33 Prime/Spray Valve 1<br />
34 Pin 1<br />
35 Nylon Cable Tie 1<br />
36 Inlet Spring Holder 1<br />
37 Input Spring 1<br />
38 Steel Ball (12.7) 1<br />
39 Input Seal 1<br />
40 Input Washer 1<br />
41 O-Ring (17x1.8) 1<br />
42 <strong>Paint</strong> Input Adaptor 1<br />
43 Pressure Relief Plug 1<br />
44 Small Clamp 1<br />
45 Large Clamp 1<br />
46 Priming Tube 1<br />
47 Suction Tube 1<br />
48 Clip 3<br />
49 Inlet Pipe Lock Ring 1<br />
50 Filtrate Seat Assembly 1<br />
51 Wire label 1<br />
52 Power Cord 1<br />
53 Locking Ring 1<br />
54 Screw (M4x14) 2<br />
Part Description Qty<br />
55 Wire Fastening Seat 1<br />
56 Label 1<br />
57 Hex Bolt (M6x10) 3<br />
58 Housing 1<br />
59 Label 1<br />
60 Motor Assembly 1<br />
61 Power Switch 1<br />
62 Pin (3x12) 1<br />
63 Hex Bolt (M5x14) 4<br />
64 Elastic Washer 4<br />
65 O-Ring (12.5x2.65) 2<br />
66 Joint Stopper 1<br />
67 Position Washer 1<br />
68 Wave Washer 1<br />
69 White Seal 3<br />
70 Black Seal 2<br />
71 Copper Washer 1<br />
72 O-Ring (22.5x1.8) 2<br />
73 Connector 1<br />
74 Copper Guide Bushing 1<br />
75 Piston 1<br />
76 Lock Sleeve 1<br />
77 White Seal 2<br />
78 Pressure Control Pin 1<br />
79 O-Ring (8.8x1.9) 1<br />
80 O-Ring (27x2.4) 1<br />
81 Hex Bolt (M3x10) 1<br />
82 Pressure Seal Cover 1<br />
83 Micro Switch 1<br />
84 Micro Switch Cover 1<br />
85 Pressure Control Switch 1<br />
86 Switch Cover 1<br />
87 Pressure Adjusting Spring 1<br />
88 Spring Pusher 1<br />
89 Pressure Control Label 1<br />
90 Pressure Knob 1<br />
91 Pressure Control Bolt 1<br />
92 Label 1<br />
93 Handle Grip 1<br />
94 Handle 1<br />
95 Hex Bolt (M6x30) 2<br />
96 PCB Supporter 1<br />
97 Wire Connector 1<br />
98 Nylon Cable Tie 1<br />
99 Safety Cover 1<br />
100 PCB Assembly 1<br />
101 Tapping Screw 2<br />
102 Power Cord Fixer 1<br />
103 Hex Bolt (M4x20) 2<br />
104 Cup 1<br />
105 Bolt (M5x20) 1<br />
106 Pole Stopper 1<br />
107 Small Gear Washer 1<br />
Page 20 For technical questions, please call 1-800-444-3353. ITEM 60600
Assembly Diagram<br />
84<br />
92 91 90 89 88 87 86 85<br />
93 94 95<br />
96<br />
98<br />
97<br />
99<br />
54<br />
84<br />
100<br />
101<br />
102 103<br />
104<br />
105<br />
75<br />
74<br />
65<br />
73<br />
72<br />
83<br />
71<br />
82 81 80 79 78 77 76<br />
107<br />
106<br />
11<br />
7<br />
10<br />
9<br />
8<br />
15<br />
7<br />
14<br />
6<br />
5<br />
4<br />
3<br />
12<br />
16<br />
11<br />
13<br />
17 18 19<br />
68<br />
67<br />
66<br />
65<br />
21<br />
20<br />
51<br />
60 59 58 57 56 55 54 53 52<br />
70<br />
69<br />
61<br />
64 63 62<br />
41<br />
4243<br />
40<br />
39<br />
37 38<br />
36<br />
35<br />
47<br />
46<br />
45<br />
44<br />
22 23 24 25 26 27 28 29 30 31 32 33<br />
34<br />
1<br />
2<br />
48<br />
49<br />
50<br />
ITEM 60600<br />
For technical questions, please call 1-800-444-3353.<br />
Page 21
Limited 90 Day Warranty<br />
<strong>Harbor</strong> <strong>Freight</strong> <strong>Tools</strong> Co. makes every effort to assure that its products meet high quality and durability standards,<br />
and warrants to the original purchaser that this product is free from defects in materials and workmanship for the<br />
period of 90 days from the date of purchase. This warranty does not apply to damage due directly or indirectly,<br />
to misuse, abuse, negligence or accidents, repairs or alterations outside our facilities, criminal activity, improper<br />
installation, normal wear and tear, or to lack of maintenance. We shall in no event be liable for death, injuries<br />
to persons or property, or for incidental, contingent, special or consequential damages arising from the use of<br />
our product. Some states do not allow the exclusion or limitation of incidental or consequential damages, so the<br />
above limitation of exclusion may not apply to you. THIS WARRANTY IS EXPRESSLY IN LIEU OF ALL OTHER<br />
WARRANTIES, EXPRESS OR IMPLIED, INCLUDING THE WARRANTIES OF MERCHANTABILITY AND FITNESS.<br />
To take advantage of this warranty, the product or part must be returned to us with transportation charges<br />
prepaid. Proof of purchase date and an explanation of the complaint must accompany the merchandise. If<br />
our inspection verifies the defect, we will either repair or replace the product at our election or we may elect<br />
to refund the purchase price if we cannot readily and quickly provide you with a replacement. We will return<br />
repaired products at our expense, but if we determine there is no defect, or that the defect resulted from<br />
causes not within the scope of our warranty, then you must bear the cost of returning the product.<br />
This warranty gives you specific legal rights and you may also have other rights which vary from state to state.<br />
PLEASE READ THE FOLLOWING CAREFULLY<br />
THE MANUFACTURER AND/OR DISTRIBUTOR HAS PROVIDED THE PARTS DIAGRAM IN THIS MANUAL<br />
AS A REFERENCE TOOL ONLY. NEITHER THE MANUFACTURER NOR DISTRIBUTOR MAKES ANY<br />
REPRESENTATION OR WARRANTY OF ANY KIND TO THE BUYER THAT HE OR SHE IS QUALIFIED TO<br />
MAKE ANY REPAIRS TO THE PRODUCT OR THAT HE OR SHE IS QUALIFIED TO REPLACE ANY PARTS<br />
OF THE PRODUCT. IN FACT, THE MANUFACTURER AND/OR DISTRIBUTOR EXPRESSLY STATES<br />
THAT ALL REPAIRS AND PARTS REPLACEMENTS SHOULD BE UNDERTAKEN BY CERTIFIED AND<br />
LICENSED TECHNICIANS AND NOT BY THE BUYER. THE BUYER ASSUMES ALL RISK AND LIABILITY<br />
ARISING OUT OF HIS OR HER REPAIRS TO THE ORIGINAL PRODUCT OR REPLACEMENT PARTS<br />
THERETO, OR ARISING OUT OF HIS OR HER INSTALLATION OF REPLACEMENT PARTS THERETO.<br />
Page 22 For technical questions, please call 1-800-444-3353. ITEM 60600
Specifications<br />
Electrical Input<br />
Motor<br />
Max. Working Pressure<br />
Outlet<br />
<strong>Paint</strong> Hose<br />
120V~ / 60Hz / 7A<br />
5/8 HP<br />
3000 PSI<br />
1/4″-NPSM<br />
25′ Long<br />
ITEM 60600<br />
For technical questions, please call 1-800-444-3353.<br />
Page 23
3491 Mission Oaks Blvd. • PO Box 6009 • Camarillo, CA 93011 • (800) 444-3353<br />
www.harborfreight.com


