

caliper - 6â digital - Harbor Freight Tools
caliper - 6â digital - Harbor Freight Tools
caliper - 6â digital - Harbor Freight Tools

You also want an ePaper? Increase the reach of your titles
YUMPU automatically turns print PDFs into web optimized ePapers that Google loves.
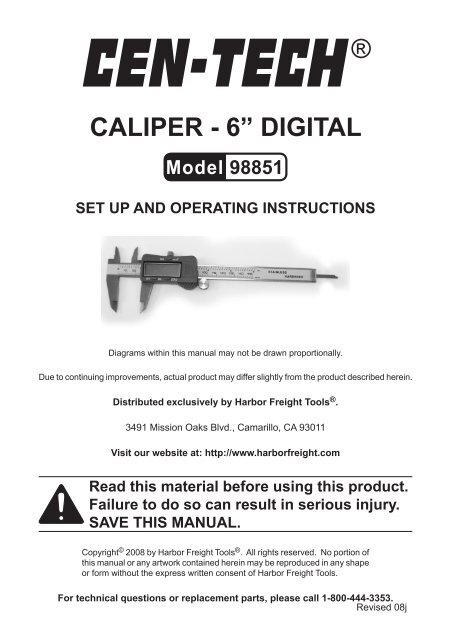
<strong>caliper</strong> - 6” <strong>digital</strong><br />
Model 98851<br />
Set up And Operating Instructions<br />
Diagrams within this manual may not be drawn proportionally.<br />
Due to continuing improvements, actual product may differ slightly from the product described herein.<br />
Distributed exclusively by <strong>Harbor</strong> <strong>Freight</strong> <strong>Tools</strong> ® .<br />
3491 Mission Oaks Blvd., Camarillo, CA 93011<br />
Visit our website at: http://www.harborfreight.com<br />
Read this material before using this product.<br />
Failure to do so can result in serious injury.<br />
Save this manual.<br />
Copyright © 2008 by <strong>Harbor</strong> <strong>Freight</strong> <strong>Tools</strong> ® . All rights reserved. No portion of<br />
this manual or any artwork contained herein may be reproduced in any shape<br />
or form without the express written consent of <strong>Harbor</strong> <strong>Freight</strong> <strong>Tools</strong>.<br />
For technical questions or replacement parts, please call 1-800-444-3353.<br />
Revised 08j
Save This Manual<br />
Keep this manual for the safety<br />
warnings and precautions, assembly,<br />
operating, inspection, maintenance and<br />
cleaning procedures. Write the product’s<br />
serial number in the back of the manual<br />
near the assembly diagram (or month and<br />
year of purchase if product has no number).<br />
Keep this manual and the receipt in<br />
a safe and dry place for future reference.<br />
Important SAFETY<br />
Information<br />
In this manual, on the labeling,<br />
and all other information<br />
provided with this product:<br />
This is the safety alert<br />
symbol. It is used to alert<br />
you to potential personal<br />
injury hazards. Obey all<br />
safety messages that<br />
follow this symbol to avoid<br />
possible injury or death.<br />
DANGER indicates<br />
a hazardous<br />
situation which, if not<br />
avoided, will result in death or<br />
serious injury.<br />
WARNING indicates<br />
a hazardous<br />
situation which, if not<br />
avoided, could result in death<br />
or serious injury.<br />
CAUTION, used<br />
with the safety alert<br />
symbol, indicates a<br />
hazardous situation which, if<br />
not avoided, could result in<br />
minor or moderate injury.<br />
NOTICE is used to<br />
address practices<br />
not related to personal injury.<br />
CAUTION, without<br />
the safety alert<br />
symbol, is used to address<br />
practices not related to<br />
personal injury.<br />
General and specific<br />
Safety Rules<br />
WARNING! Read all<br />
instructions<br />
Failure to follow all instructions<br />
listed below may result in<br />
serious injury.<br />
SAVE THESE INSTRUCTIONS<br />
1.<br />
Work area safety<br />
a. Keep out of the reach of children.<br />
b. Wear ANSI-approved safety<br />
goggles during use.<br />
c. Read this manual before use.<br />
d. Keep work area clean and well<br />
lit. Cluttered or dark areas invite<br />
accidents.<br />
e. When not in use, store in a dry<br />
location.<br />
f. This Digital Caliper was designed<br />
for specific tasks. Do not modify<br />
this tool and do not use it for purposes<br />
for which it was not intended.<br />
g. Do not operate while you are<br />
tired, or under the influence of<br />
alcohol or drugs. A moment of<br />
inattention may result in damage to<br />
your project and/or personal injury.<br />
Maintain labels and nameplates<br />
h.<br />
on the tool. These carry important<br />
safety information. If unreadable<br />
or missing, contact <strong>Harbor</strong> <strong>Freight</strong><br />
<strong>Tools</strong> for a replacement.<br />
SKU 98851 For technical questions, please call 1-800-444-3353.<br />
Page 2
2.<br />
i. The warnings, precautions, and<br />
instructions discussed in this<br />
instruction manual cannot cover all<br />
possible conditions and situations<br />
that may occur. It must be understood<br />
by the operator that common<br />
sense and caution are factors which<br />
cannot be built into this product, but<br />
must be supplied by the operator.<br />
Service<br />
Have your Digital Caliper serviced by a<br />
qualified repair person. This will ensure<br />
the integrity of this tool is maintained.<br />
Save these<br />
instructions.<br />
Display Scales<br />
Display Digits<br />
Specifications<br />
Decimals, Fractions, &<br />
Millimeters<br />
LCD (Liquid Crystal Display)<br />
Calipers Range 0” - 6”, Or 0mm - 150mm<br />
Measuring Speed 1.5m/sec OR 60in/sec<br />
Measuring<br />
Positions<br />
Power Supply<br />
Shut-Off<br />
4-Way Measuring:<br />
Outside<br />
Inside<br />
Depth<br />
Step<br />
One 1.5V DC LR44 Button<br />
Cell Battery (Included)<br />
4 Minute (Automatic)<br />
List of contents<br />
Part(s) Description Q’ty<br />
1 6” Digital Caliper 1<br />
1 Plastic Storage Case 1<br />
Operating Instructions<br />
Read the entire<br />
Important Safety<br />
Information section at the<br />
beginning of this manual<br />
including all text under<br />
subheadings therein before set<br />
up or use of this product.<br />
DO NOT bump, or shock the Digital<br />
Caliper when applying it to the workpiece.<br />
Rough treatment may damage the highly<br />
sensitive mechanism.<br />
1.<br />
Measuring the Outside of an<br />
Object<br />
Push the “ON” Button. To change the<br />
setting from inches to fractions, or to<br />
millimeters, press the “ON/Inch/Fraction/MM”<br />
Button. Each time the Button<br />
is pressed, the mode will change.<br />
Figure 1<br />
On/Inch/MM/Fraction<br />
Unpacking<br />
When unpacking, check to make<br />
sure that the item is intact and undamaged.<br />
If any parts are missing or broken,<br />
please call <strong>Harbor</strong> <strong>Freight</strong> <strong>Tools</strong> at the<br />
number shown on the cover of this manual<br />
as soon as possible.<br />
Off<br />
Zero Button<br />
2. Slide apart the Jaws of the Calliper.<br />
See Figure 1.<br />
SKU 98851 For technical questions, please call 1-800-444-3353.<br />
Page 3
3.<br />
Press the “Zero-Button” to clear the<br />
reading, then place the object you<br />
wish to measure between the Jaws.<br />
until the Base of the Head is even<br />
with the top of the opening you are<br />
measuring.<br />
4.<br />
When the Jaws of the Caliper make<br />
gentle contact with the object, the<br />
LCD Screen will show the correct<br />
measurement.<br />
4.<br />
The depth will show on the LCD<br />
Readout Screen.<br />
Measuring Steps<br />
5.<br />
When finished measuring, press the<br />
“OFF” Button to turn the Digital Calliper<br />
off.<br />
Figure 2<br />
1.<br />
2.<br />
3.<br />
4.<br />
5.<br />
1.<br />
2.<br />
3.<br />
Measuring the Inside of an<br />
Object<br />
After turning on the Digital Calliper,<br />
set the read-out to zero by pressing<br />
the “Zero-Button”. Make sure<br />
the “Zero” is set while the Jaws are<br />
closed.<br />
Place the Jaws inside the object to be<br />
measured and gently spread the Jaws<br />
apart until they touch the sides of the<br />
object. See Figure 1.<br />
The LCD readout will show the measurement.<br />
When finished measuring, press<br />
the “OFF” Button to turn the Digital<br />
Caliper off.<br />
Replace into the Case (included) and<br />
store inside in dry area away from<br />
children.<br />
Measuring Depth<br />
Pull the Depth Tab out of the end of<br />
the Digital Caliper Handle. See Figure<br />
3 on page 5 of this manual.<br />
Place the end of the Depth Tab inside<br />
the object whose depth you wish to<br />
measure touching the bottom of the<br />
object.<br />
Set the LCD Readout to zero and<br />
slowly, push the Caliper Head down<br />
Caliper Head<br />
SKU 98851 For technical questions, please call 1-800-444-3353.<br />
LCD Readout<br />
1. Set the LCD readout to zero by<br />
pressing the Zero-Button. Place the<br />
Caliper Head at the base of the step<br />
you wish to measure. See Figure 2.<br />
2.<br />
3.<br />
4.<br />
1.<br />
Slide the Caliper outside measurement<br />
jaws apart to the height of the<br />
step.<br />
The LCD readout will give you the<br />
step height.<br />
When finished, close the Caliper Jaws<br />
and press the “OFF” Button.<br />
Replacing the Battery<br />
Remove the Battery Compartment<br />
Cover. See Figure 1.<br />
Page 4
2.<br />
Remove the existing Battery and replace with identical Battery as listed in the<br />
“Specifications” chart on page 3 of this manual. NOTE: Dispose of the used<br />
Battery in accordance with all local ordinances. Replace the Battery Compartment<br />
Cover.<br />
Caliper Head<br />
Inside Measurement Prongs<br />
On/Inch/MM/Fraction<br />
Slide Lock<br />
LCD Readout<br />
Off Button<br />
Thumb Wheel<br />
Depth Gauge<br />
Outside Measurement Jaws Zero Button Battery Compartment<br />
Figure 3<br />
1.<br />
2.<br />
3.<br />
4.<br />
5.<br />
Cleaning and Maintenance<br />
BEFORE EACH USE, inspect the general condition of the tool. Check for any<br />
condition that may affect its safe operation.<br />
After use, wipe with soft, clean cloth and store inside, away from extreme hot, or<br />
cold and where children do not have access.<br />
Face should be wiped periodically with a clean, dry, lint-free cloth. Lubricate body<br />
of Caliper with a few drops of clock oil. Acetone or alcohol should never be used.<br />
Keep Battery Compartment clean, dry and free of corrosion.<br />
Keep this Caliper dry at all times to prevent destroying the electronics.<br />
PLEASE READ THE FOLLOWING CAREFULLY<br />
The manufacturer and/or distributor has provided the parts list and assembly<br />
diagram in this manual as a reference tool only. Neither the manufacturer or<br />
distributor makes any representation or warranty of any kind to the buyer that he<br />
or she is qualified to make any repairs to the product, or that he or she is qualified<br />
to replace any parts of the product. In fact, the manufacturer and/or distributor<br />
expressly states that all repairs and parts replacements should be undertaken by<br />
certified and licensed technicians, and not by the buyer. The buyer assumes all risk<br />
and liability arising out of his or her repairs to the original product or replacement<br />
parts thereto, or arising out of his or her installation of replacement parts<br />
thereto.<br />
SKU 98851 For technical questions, please call 1-800-444-3353.<br />
Page 5
LIMITED 90 DAY WARRANTY<br />
<strong>Harbor</strong> <strong>Freight</strong> <strong>Tools</strong> Co. makes every effort to assure that its products meet high<br />
quality and durability standards, and warrants to the original purchaser that this product<br />
is free from defects in materials and workmanship for the period of 90 days from the date<br />
of purchase. This warranty does not apply to damage due directly or indirectly, to misuse,<br />
abuse, negligence or accidents, repairs or alterations outside our facilities, criminal activity,<br />
improper installation, normal wear and tear, or to lack of maintenance. We shall in no event<br />
be liable for death, injuries to persons or property, or for incidental, contingent, special<br />
or consequential damages arising from the use of our product. Some states do not allow<br />
the exclusion or limitation of incidental or consequential damages, so the above limitation<br />
of exclusion may not apply to you. This warranty is expressly in lieu of all<br />
other warranties, express or implied, including the warranties of<br />
merchantability and fitness.<br />
To take advantage of this warranty, the product or part must be returned to us<br />
with transportation charges prepaid. Proof of purchase date and an explanation of the<br />
complaint must accompany the merchandise. If our inspection verifies the defect, we<br />
will either repair or replace the product at our election or we may elect to refund the<br />
purchase price if we cannot readily and quickly provide you with a replacement. We will<br />
return repaired products at our expense, but if we determine there is no defect, or that<br />
the defect resulted from causes not within the scope of our warranty, then you must bear<br />
the cost of returning the product.<br />
This warranty gives you specific legal rights and you may also have other rights<br />
which vary from state to state.<br />
3491 Mission Oaks Blvd. • PO Box 6009 • Camarillo, CA 93011 • (800) 444-3353<br />
Record Product’s Serial Number Here:<br />
Note: If product has no serial number, record month and year of purchase instead.<br />
Note: Some parts are listed and shown for illustration purposes only, and are not available<br />
individually as replacement parts.<br />
SKU 98851 For technical questions, please call 1-800-444-3353.<br />
Page 6


