

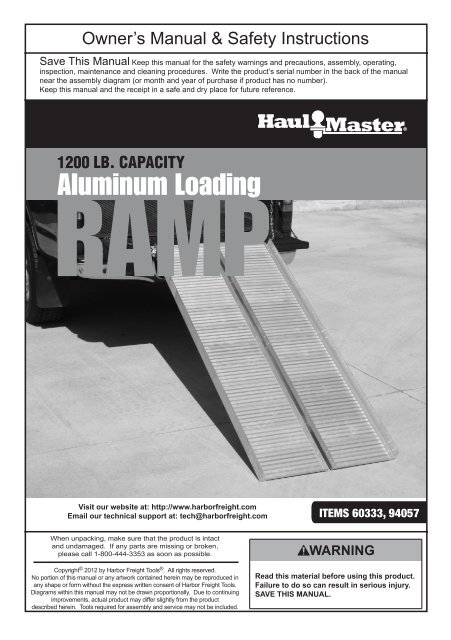
1200 LB. CAPACITY RAMP - Harbor Freight Tools
1200 LB. CAPACITY RAMP - Harbor Freight Tools
1200 LB. CAPACITY RAMP - Harbor Freight Tools

You also want an ePaper? Increase the reach of your titles
YUMPU automatically turns print PDFs into web optimized ePapers that Google loves.
Owner’s Manual & Safety Instructions<br />
Save This Manual Keep this manual for the safety warnings and precautions, assembly, operating,<br />
inspection, maintenance and cleaning procedures. Write the product’s serial number in the back of the manual<br />
near the assembly diagram (or month and year of purchase if product has no number).<br />
Keep this manual and the receipt in a safe and dry place for future reference.<br />
<strong>1200</strong> <strong>LB</strong>. <strong>CAPACITY</strong><br />
Aluminum Loading<br />
<strong>RAMP</strong><br />
Visit our website at: http://www.harborfreight.com<br />
Email our technical support at: tech@harborfreight.com ITEMS 60333, 94057<br />
When unpacking, make sure that the product is intact<br />
and undamaged. If any parts are missing or broken,<br />
please call 1-800-444-3353 as soon as possible.<br />
Copyright © 2012 by <strong>Harbor</strong> <strong>Freight</strong> <strong>Tools</strong> ® . All rights reserved.<br />
No portion of this manual or any artwork contained herein may be reproduced in<br />
any shape or form without the express written consent of <strong>Harbor</strong> <strong>Freight</strong> <strong>Tools</strong>.<br />
Diagrams within this manual may not be drawn proportionally. Due to continuing<br />
improvements, actual product may differ slightly from the product<br />
described herein. <strong>Tools</strong> required for assembly and service may not be included.<br />
Read this material before using this product.<br />
Failure to do so can result in serious injury.<br />
SAVE THIS MANUAL.
Specifications<br />
Capacity<br />
Max. Tailgate Height 36″<br />
Dimensions<br />
1,200 lb., evenly distributed<br />
(Static Conditions)*<br />
72″ L x 30″ W x 2- 13 ⁄ 16 ″ H<br />
Important Safety Information<br />
1. Before use:<br />
a. Read and understand manual.<br />
b. Inspect before every use; do not<br />
use if parts loose or damaged.<br />
c. Turn vehicle’s ignition OFF<br />
and set parking brake.<br />
d. Clean dirt, oil and debris off<br />
Ramp and allow Ramp to dry.<br />
e. Unfold Ramp completely.<br />
f. Set up only on solid,<br />
level, dry surface.<br />
g. Turn Ramp so flange end faces<br />
downward. Position Ramp so that<br />
tongues fully contact tailgate.<br />
h. Properly connect safety chains.<br />
2. Load vehicle slowly.<br />
Do not ride vehicle down Ramp.<br />
3. Do not exceed 1,200 lb. capacity,<br />
evenly distributed.<br />
Be aware of dynamic loading!<br />
Sudden load movement may<br />
briefly create excess load<br />
causing product failure.<br />
4. Use safety chains as intended only.<br />
5. Use as intended only. Do not use:<br />
a. as ladder,<br />
b. if tailgate on carrying vehicle<br />
is higher than 36″, or<br />
c. to load vehicle with wheel<br />
width wider than Ramp.<br />
6. Ground contact. Use your Ramp<br />
on a solid, level, flat, dry surface.<br />
Make sure the Tongue edge fully<br />
contacts the tailgate of the vehicle.<br />
7. Clean Ramp. Prior to each use, clean<br />
dirt, oil, or any debris off Ramp.<br />
8. Be aware of dynamic loading!<br />
Sudden load movement may<br />
briefly create excess load<br />
causing product failure.<br />
9. This product is not a toy. Do not allow<br />
children to play with or near this item.<br />
10. Maintain product labels and<br />
nameplates. These carry<br />
important safety information.<br />
If unreadable or missing, contact<br />
<strong>Harbor</strong> <strong>Freight</strong> <strong>Tools</strong> for a replacement.<br />
11. All persons not involved in the<br />
loading process must stand<br />
clear of the loading Ramp.<br />
Keep children away. Children must<br />
not be allowed in the work area.<br />
Page 2 For technical questions, please call 1-800-444-3353. Item 60333 94057
12. Do not exceed tailgate capacity.<br />
13. Avoid working alone. If an accident<br />
happens, an assistant can bring help.<br />
14. Keep work area clean and well lit.<br />
Cluttered and dark areas invite injuries.<br />
15. Store idle equipment.<br />
When not in use, store Ramp in<br />
a dry location to inhibit rust.<br />
16. Dress properly. Do not wear loose<br />
clothing or jewelry. Protective clothes<br />
and nonskid footwear are recommended<br />
when working. Wear restrictive hair<br />
covering to contain long hair.<br />
17. Wear ANSI-approved impact<br />
safety goggles, a safety helmet,<br />
and heavy‐duty work gloves when<br />
loading, unloading or handling Ramp.<br />
18. Keep proper footing and balance<br />
when loading or unloading.<br />
19. Do not modify this product.<br />
20. Stay alert. Watch what you are doing,<br />
use common sense. Do not use<br />
any Ramp when you are tired.<br />
21. Check for damaged parts.<br />
Before using any Ramp, any part that<br />
appears damaged should be carefully<br />
checked to determine that it will perform<br />
its intended function. Check for any<br />
broken parts or mounting fixtures and<br />
any other condition that may affect<br />
proper operation. Any part that is<br />
damaged should be properly repaired<br />
or replaced by a qualified technician.<br />
22. Replacement parts and<br />
accessories. When servicing,<br />
use only identical replacement parts.<br />
Use of any other parts will void the<br />
warranty. Only use accessories<br />
intended for use with this Ramp.<br />
23. Do not use Ramp if under the<br />
influence of alcohol or drugs.<br />
Read warning labels on prescriptions to<br />
determine if your judgment or reflexes<br />
are impaired while taking drugs. If there<br />
is any doubt, do not use the Ramp.<br />
24. The warnings, cautions, and instructions<br />
discussed in this instruction manual<br />
cannot cover all possible conditions<br />
and situations that may occur. It must<br />
be understood by the operator that<br />
common sense and caution are factors<br />
which cannot be built into this product,<br />
but must be supplied by the operator.<br />
SAVE THESE INSTRUCTIONS.<br />
Item 60333 94057<br />
For technical questions, please call 1-800-444-3353.<br />
Page 3
Setup and Operation Instructions<br />
Read the ENTIRE IMPORTANT SAFETY INFORMATION section<br />
at the beginning of this manual including all text under<br />
subheadings therein before set up or use of this product.<br />
TO PREVENT SERIOUS INJURY:<br />
Before loading or unloading turn vehicle’s engine off, set its transmission<br />
in gear or park, engage its emergency brake and block its wheels.<br />
Make sure the Ramp is clean and dry before loading or unloading.<br />
Setup<br />
1. The tailgate the Ramp will sit<br />
on and the Ramp must be<br />
dry and clean. Check for and<br />
tighten any loose hardware.<br />
2. Sit the tongue (angled lip) of the Ramp<br />
on the tailgate. The Tongue Edge<br />
must face down and fully contact<br />
the truck’s tailgate. Extend the<br />
Safety Chain on each side of the Ramp<br />
up into the inside of the truck bed;<br />
attach each Safety Chain to a secure<br />
attachment point on the truck chassis.<br />
Chain Adjustment<br />
1. Remove the bolt and washer that<br />
hold the safety chain to the Ramp.<br />
2. Reinsert the bolt through a link that<br />
will shorten the chain so the loading<br />
Ramp can not be pulled backwards<br />
more than an inch or two.<br />
WARNING! CONNECT SAFETY CHAINS<br />
TO SECURE ATTACHMENT POINTS<br />
WITHIN THE TRUCK BED ABLE TO<br />
WITHSTAND THE PULLING FORCE<br />
OF LOADING. THEY MUST ALSO<br />
BE TAUT ENOUGH TO PREVENT<br />
THE <strong>RAMP</strong> FROM COMING OFF<br />
THE VEHICLE BEING LOADED.<br />
3. Pull the loading Ramp back until<br />
the chains are tight. The entire<br />
tongue portion of the Ramp must<br />
fit onto the tailgate; if not, adjust<br />
the Safety Chains accordingly, or<br />
shorter chains must be used.<br />
3. Make sure the washer prevents the bolt<br />
from slipping through the chain link<br />
and tighten the bolt securely.<br />
4. Adjust the other chain to equal length.<br />
Page 4 For technical questions, please call 1-800-444-3353. Item 60333 94057
4- Wheel ATV Loading and Unloading<br />
• This Ramp is for use with 2-wheeled dirt bikes and 4-wheeled ATV’s only.<br />
• Do not use this Ramp to load or unload any vehicle that weighs more than <strong>1200</strong> lb.<br />
• Do not use this Ramp to load or unload any vehicle that is wider than the Ramp.<br />
• Do not use this Ramp to load or unload any vehicle that is carrying gear on its racks.<br />
• Do not use this Ramp if the tailgate on the vehicle being<br />
loaded or unloaded is higher than half each Ramp’s length (36″).<br />
WARNING: Be aware of dynamic loading!<br />
Sudden load movement may briefly create excess load causing the Ramp to fail.<br />
WARNING! All persons not involved in the process must stand clear<br />
of the Ramp and truck. Make sure no pets are nearby.<br />
Loading Using a Winch (not included)<br />
1. The winch and mounting/<br />
connection points must all have<br />
appropriate capacity to pull the<br />
ATV up the Ramp safely.<br />
2. ATV Mounted Winch Setup: Unwind<br />
cable from the winch and attach it to a<br />
secure mounting location on the truck,<br />
at the same height as the winch will<br />
be after the ATV has been loaded.<br />
3. Truck Mounted Winch Setup:<br />
Attach the cable to the bottom<br />
front part of the frame.<br />
4. While operating the winch,<br />
stand back and to the side of the<br />
ATV, with the vehicle between<br />
you and the winch cable.<br />
5. Operate the winch to slowly load<br />
the ATV onto the vehicle.<br />
Unloading<br />
WARNING! Riding an ATV while unloading<br />
is dangerous and should not be attempted.<br />
1. Have an assistant monitor the Ramp<br />
tongues for slippage on the tailgate.<br />
2. Setup the Ramp on the truck bed<br />
as explained under operation.<br />
Remove all tie down straps and<br />
securing equipment from the ATV.<br />
WARNING! Be sure the 4-wheel<br />
ATV is centered on Ramp.<br />
3. While staying off the ATV,<br />
start the engine, disengage the parking<br />
brake, put the transmission into<br />
reverse, and make sure the wheels<br />
are in a straight line with the Ramp.<br />
While holding the brake, position<br />
yourself in front of the ATV.<br />
4. Release the brake and push on the ATV<br />
to get it started down the Ramp. Allow<br />
the ATV to roll down naturally, do not<br />
attempt to steer it or apply the brakes.<br />
If it stops while on the Ramp, gently<br />
give it throttle to back it off the Ramp.<br />
Item 60333 94057<br />
For technical questions, please call 1-800-444-3353.<br />
Page 5
Expert Loading Directions<br />
Only for individuals certified by the ASI (ATV Safety Institute)<br />
By using directions in this section, you are agreeing that you are an ASI trained, certified rider<br />
and that you understand that your safety in performing this procedure is<br />
based on your ability to control the vehicle.<br />
1. Have an assistant monitor the Ramp<br />
tongues for slippage on the tailgate.<br />
2. Confirm that the weight of the ATV<br />
and rider combined is still less than<br />
the <strong>1200</strong> lb. capacity of this Ramp.<br />
3. While wearing a safety helmet,<br />
drive your ATV onto Ramp at less than<br />
1 mile per hour using the lowest gear<br />
possible. Drive up at a slow, steady<br />
speed while leaning forward on the<br />
front pegs to keep proper balance.<br />
Avoid bouncing or jerking, because<br />
they will increase stress on the Ramp.<br />
WARNING! Be sure the 4-wheeled<br />
ATV is centered on Ramp.<br />
4. Once the ATV is in truck bed,<br />
set its brake & securely tie it down.<br />
Remove the Ramp and secure them<br />
with the Safety Chains and Hooks.<br />
CAUTION: Contact between the tongue<br />
of the Ramp and the tailgate may result<br />
in damage to the vehicle’s finish.<br />
WARNING! WHENEVER possible,<br />
use a winch (not included) to load the ATV.<br />
This is the safest way to load an ATV.<br />
Page 6 For technical questions, please call 1-800-444-3353. Item 60333 94057
2-Wheel Bike Loading<br />
1. Do not attempt to load any dirt bike<br />
or other 2-wheel motor bike alone.<br />
Have a qualified adult assist.<br />
2. Line up the 2-wheel bike<br />
with one of the Ramp.<br />
3. With one person pushing the bike<br />
slowly up the Ramp, a helper should be<br />
in the bed of the hauling vehicle both<br />
to guide and to apply the brake if it is<br />
necessary to stop the bike while it is<br />
on the Ramp. Have one person with a<br />
hand on the bike hand brake for safety.<br />
2-Wheel Bike Unloading<br />
1. Position the Ramp against the<br />
truck tailgate behind the rear<br />
tire of the bike and attach the<br />
Safety Chain to the truck bed.<br />
2. Remove the tie-down<br />
straps (not included).<br />
4. Once the person inside the truck bed<br />
has hold of the handle bars, apply<br />
the brake and steady the bike while<br />
the other person moves behind the<br />
bike (but off to one side) and pushes<br />
it all the way into the truck bed.<br />
NOTE: While most dirt bikes are light<br />
enough to safely load with two people, a third<br />
person can make the job easier and safer.<br />
5. Once the bike is safely loaded, secure it<br />
with four tie down straps (not included),<br />
one on each side of the front, and one<br />
on each side at the rear of the bike.<br />
3. Slowly and carefully while using an<br />
assistant, push the bike backwards until<br />
the back tire is at the top of the Ramp.<br />
With one person on the ground behind<br />
and to the side of the Ramp, slowly<br />
push the bike onto the Ramp. Someone<br />
must always hold the hand brake.<br />
4. Slowly work the bike down the<br />
Ramp and onto the ground.<br />
Item 60333 94057<br />
For technical questions, please call 1-800-444-3353.<br />
Page 7
Maintenance and Servicing<br />
Procedures not specifically explained in this manual must<br />
be performed only by a qualified technician.<br />
TO PREVENT SERIOUS INJURY:<br />
Remove the Ramp from the vehicle before performing any maintenance or service.<br />
Do not use damaged equipment.<br />
If Ramp is damaged, have the problem corrected before further use.<br />
Cleaning, Maintenance, and Lubrication<br />
1. BEFORE EACH USE,<br />
inspect the general condition<br />
of the Ramp. Check for:<br />
• loose hardware,<br />
• misalignment or binding of parts,<br />
• cracked or broken parts, and<br />
• any other condition that may<br />
affect its safe operation.<br />
2. Clean the Ramp after each use.<br />
Make sure any dirt, oil, grease, or<br />
debris are not on the Ramp.<br />
Page 8 For technical questions, please call 1-800-444-3353. Item 60333 94057
PLEASE READ THE FOLLOWING CAREFULLY<br />
THE MANUFACTURER AND/OR DISTRIBUTOR HAS PROVIDED THE PARTS<br />
LIST AND ASSEMBLY DIAGRAM IN THIS MANUAL AS A REFERENCE TOOL<br />
ONLY. NEITHER THE MANUFACTURER OR DISTRIBUTOR MAKES ANY<br />
REPRESENTATION OR WARRANTY OF ANY KIND TO THE BUYER THAT HE<br />
OR SHE IS QUALIFIED TO MAKE ANY REPAIRS TO THE PRODUCT, OR THAT<br />
HE OR SHE IS QUALIFIED TO REPLACE ANY PARTS OF THE PRODUCT. IN<br />
FACT, THE MANUFACTURER AND/OR DISTRIBUTOR EXPRESSLY STATES THAT<br />
ALL REPAIRS AND PARTS REPLACEMENTS SHOULD BE UNDERTAKEN BY<br />
CERTIFIED AND LICENSED TECHNICIANS, AND NOT BY THE BUYER. THE BUYER<br />
ASSUMES ALL RISK AND LIABILITY ARISING OUT OF HIS OR HER REPAIRS TO<br />
THE ORIGINAL PRODUCT OR REPLACEMENT PARTS THERETO, OR ARISING<br />
OUT OF HIS OR HER INSTALLATION OF REPLACEMENT PARTS THERETO.<br />
Item 60333 94057<br />
For technical questions, please call 1-800-444-3353.<br />
Page 9
Parts List and Diagram<br />
Parts List<br />
Part Description Qty.<br />
1 Left Ramp 1<br />
2 Right Ramp 1<br />
3 Hinge 6<br />
4 Bolt 3<br />
5 Lock Nut M6 3<br />
Part Description Qty.<br />
6 Bolt M6 x 25 6<br />
7 Lock Nut M6 8<br />
8 Bolt M6 x 40 2<br />
9 Chain 2<br />
Record Product’s Serial Number Here:<br />
Note: If product has no serial number, record month and year of purchase instead.<br />
Note: Some parts are listed and shown for illustration purposes only,<br />
and are not available individually as replacement parts.<br />
Page 10 For technical questions, please call 1-800-444-3353. Item 60333 94057
Assembly Diagram<br />
7<br />
8<br />
9<br />
1<br />
6<br />
6<br />
7<br />
4<br />
5<br />
3<br />
9<br />
2<br />
Item 60333 94057<br />
For technical questions, please call 1-800-444-3353.<br />
Page 11
Limited 90 Day Warranty<br />
<strong>Harbor</strong> <strong>Freight</strong> <strong>Tools</strong> Co. makes every effort to assure that its products meet high quality<br />
and durability standards, and warrants to the original purchaser that this product is free from<br />
defects in materials and workmanship for the period of 90 days from the date of purchase.<br />
This warranty does not apply to damage due directly or indirectly, to misuse, abuse, negligence<br />
or accidents, repairs or alterations outside our facilities, criminal activity, improper installation,<br />
normal wear and tear, or to lack of maintenance. We shall in no event be liable for death,<br />
injuries to persons or property, or for incidental, contingent, special or consequential damages<br />
arising from the use of our product. Some states do not allow the exclusion or limitation of<br />
incidental or consequential damages, so the above limitation of exclusion may not apply to you.<br />
THIS WARRANTY IS EXPRESSLY IN LIEU OF ALL OTHER WARRANTIES, EXPRESS OR<br />
IMPLIED, INCLUDING THE WARRANTIES OF MERCHANTABILITY AND FITNESS.<br />
To take advantage of this warranty, the product or part must be returned to us with transportation<br />
charges prepaid. Proof of purchase date and an explanation of the complaint must accompany<br />
the merchandise. If our inspection verifies the defect, we will either repair or replace<br />
the product at our election or we may elect to refund the purchase price if we cannot readily<br />
and quickly provide you with a replacement. We will return repaired products at our expense,<br />
but if we determine there is no defect, or that the defect resulted from causes not within<br />
the scope of our warranty, then you must bear the cost of returning the product.<br />
This warranty gives you specific legal rights and you may also<br />
have other rights which vary from state to state.<br />
3491 Mission Oaks Blvd. • PO Box 6009 • Camarillo, CA 93011 • (800) 444-3353


