

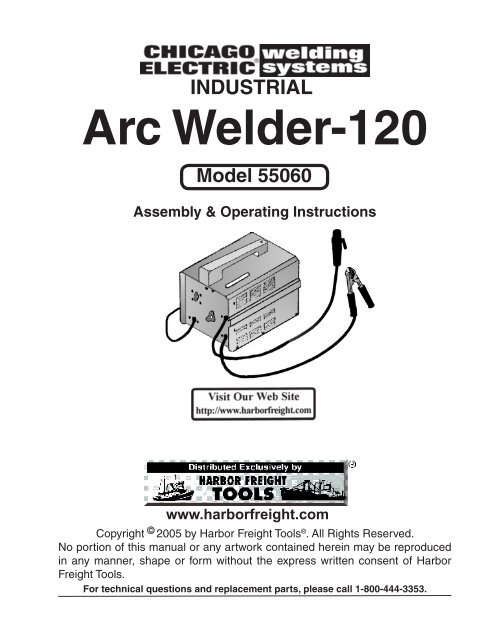
Arc Welder-120 - Harbor Freight Tools
Arc Welder-120 - Harbor Freight Tools
Arc Welder-120 - Harbor Freight Tools

Create successful ePaper yourself
Turn your PDF publications into a flip-book with our unique Google optimized e-Paper software.
INDUSTRIAL<br />
<strong>Arc</strong> <strong>Welder</strong>-<strong>120</strong><br />
Model 55060<br />
Assembly & Operating Instructions<br />
www.harborfreight.com<br />
Copyright 2005 by <strong>Harbor</strong> <strong>Freight</strong> <strong>Tools</strong> ® . All Rights Reserved.<br />
No portion of this manual or any artwork contained herein may be reproduced<br />
in any manner, shape or form without the express written consent of <strong>Harbor</strong><br />
<strong>Freight</strong> <strong>Tools</strong>.<br />
For technical questions and replacement parts, please call 1-800-444-3353.
<strong>Arc</strong> <strong>Welder</strong> -140 Model #55060<br />
Specifications<br />
Input Power:<br />
115/230V AC<br />
Maximum Amperage Output: <strong>120</strong> Amps<br />
Electrode Sizes: (Note: Elect- 1/16” to 5/64” (115V)<br />
rodes are not included) 1/16” to 3/32” (230V)<br />
Amperage Draw:<br />
42 Amps.<br />
Overall Dimensions: 14-9/16” x 10-1/4” x 13-1/2”<br />
Net Weight:<br />
33.5 lbs.<br />
Product Features<br />
This is a high-quality hobby arc welder, delivering up to 140 Amps welding current. It will<br />
hold electrodes sizes from 1/16” to 3/32” in diameter. It is thermally protected, and has a high<br />
temperature warning light. Step-less variable Amperage is easily adjustable using a control<br />
knob, with an easy-to-read gauge on top of the unit. This welder is easily portable, using the<br />
attached carrying handle. This welder will use either 115 Volt or 230 Volt current.<br />
Save This Manual<br />
You will need the manual for the safety warnings and precautions, assembly instructions,<br />
operating and maintenance procedures, parts list and diagram. Keep your invoice with this<br />
manual. Write the invoice number on the inside of the front cover. Keep the manual and invoice<br />
in a safe and dry place for future reference.<br />
Safety Warnings and Precautions<br />
WARNING: When using tool, basic safety precautions should always be followed to<br />
reduce the risk of personal injury and damage to equipment.<br />
Read all instructions before using this tool!<br />
1. Keep work area clean. Cluttered areas invite injuries.<br />
2. Observe work area conditions. Do not use machines or power tools in damp or wet locations.<br />
Don’t expose to rain. Keep work area well lighted. Do not use electrically powered tools in the<br />
presence of flammable gases or liquids.<br />
3. Keep children away. Children must never be allowed in the work area. Do not let them handle<br />
machines, tools, or extension cords.<br />
4. Store idle equipment. When not in use, tools must be stored in a dry location to inhibit rust.<br />
Always lock up tools and keep out of reach of children.<br />
5. Do not force tool. It will do the job better and more safely at the rate for which it was intended.<br />
Do not use inappropriate attachments in an attempt to exceed the tool capacity.<br />
6. Use the right tool for the job. Do not attempt to force a small tool or attachment to do the work<br />
of a larger industrial tool. Do not use a tool for a purpose for which it was not intended.<br />
7. Dress properly. Do not wear loose clothing or jewelry as they can be caught in moving parts.<br />
Protective, electrically non-conductive clothes and non-skid footwear are recommended when<br />
working. Wear restrictive hair covering to contain long hair.<br />
Page #2- SKU: 55060
8. Use eye and ear protection. Always wear ANSI approved impact safety goggles at all times.<br />
Wear a full face shield if you are producing metal filings or wood chips. Wear an ANSI approved<br />
dust mask or respirator when working around metal, wood, and chemical dusts and mists.<br />
9. Do not overreach. Keep proper footing and balance at all times. Do not reach over or across<br />
running machines.<br />
10. Maintain tools with care. Keep tools sharp and clean for better and safer performance. Follow<br />
instructions for lubricating and changing accessories. Inspect tool cords periodically and,<br />
if damaged, have them repaired by an authorized technician. The handles must be kept clean,<br />
dry, and free from oil and grease at all times.<br />
11. Disconnect power. Unplug electrical equipment when not in use.<br />
12. Remove adjusting keys and wrenches. Check that keys and adjusting wrenches are removed<br />
from the tool or machine work surface before plugging it in.<br />
13. Avoid unintentional starting. Be sure the switch is in the Off position when not in use and<br />
before plugging in. Do not carry any tool with your finger on the trigger, whether it is plugged in<br />
or not.<br />
14. Stay alert. Watch what you are doing, use common sense. Do not operate any tool when<br />
tired.<br />
15. Check for damaged parts. Before using any tool, any part that appears damaged should be<br />
carefully checked to determine that it will operate properly and perform its intended function.<br />
Check for alignment and binding of moving parts, any broken parts or mounting fixtures, and any<br />
other condition that may affect proper operation. Any part that is damaged should be properly<br />
repaired or replaced by a qualified technician. Do not use the tool if any switch does not turn On<br />
and Off properly.<br />
16. Guard against electric shock. Prevent body contact with grounded surfaces such as pipes,<br />
clamps, vises, and metal enclosures.<br />
17. Replacement parts and accessories. When servicing, use only identical replacement parts.<br />
Use of any other parts will void the warranty. Only use accessories intended for use with this<br />
tool. Approved accessories are available from <strong>Harbor</strong> <strong>Freight</strong> <strong>Tools</strong>.<br />
18. Do not operate tool if under the influence of alcohol or drugs. Read warning labels on<br />
prescriptions to determine if your judgment or reflexes are impaired while taking drugs. If there<br />
is any doubt, do not operate the tool.<br />
WARNING: The warnings, precautions, and instructions discussed in this instruction<br />
manual cannot cover all possible conditions and situations that may occur. It must be<br />
understood by the operator that common sense and caution are factors which cannot<br />
Page #3- SKU: 55060<br />
Safety Warnings and Precautions for <strong>Arc</strong> Welding<br />
Warning: <strong>Arc</strong> Welding Can be Hazardous.<br />
It is your responsibility to operate this equipment in a safe manner.<br />
Fire or Explosion Precautions<br />
<strong>Arc</strong> welding creates heat and sparks. These can cause fire or explosion. Please follow<br />
these safety considerations while using your spot welder.<br />
1. Be aware of flying sparks. Only weld in an area that does not contain any materials which can<br />
be ignited by flying sparks. Extinguish any significant flying sparks before continuing to weld.<br />
2. Protect yourself and others around you from burns which can be caused by flying sparks.
3. Never weld in an area which contains materials which can be ignited by flying sparks.<br />
4. Be sure that you have a fire extinguisher nearby before using this welder.<br />
5. Never weld enclosed containers. Sparks in an enclosed container can trigger an explosion.<br />
6. Never weld in an atmosphere which might contain flammable fumes.<br />
7. Periodically during welding, and after completion of job, inspect your area for any ignition that<br />
might have been caused by flying sparks.<br />
Electric Shock Hazard Precautions<br />
Be aware that your arc welder operates through high resistance electrical current. Exposure<br />
to this current can cause injury or death. Please use safety precautions against electrical<br />
shock while using your welder.<br />
1. Always unplug your welder prior to making any adjustments or repairs.<br />
2. Never leave your welder unattended while plugged in.<br />
3. Never use your welder in a wet environment, or while you are wet or on a wet surface.<br />
4. Always wear electrical insulating clothing, gloves and shoes while using your welder.<br />
5. Never use an extension cord which is not properly approved and rated for this equipment.<br />
6. Assure that you are drawing from an electrical supply which is protected by a 30 Amp fuse or<br />
breaker switch.<br />
Personal Safety Precautions<br />
Flying Sparks can cause injury, and Hot Materials can cause burns. Please wear appropriate<br />
safety clothing, and observe precautions to prevent burns or injury to yourself or others.<br />
1. Wear ANSI approved safety goggles or glasses when using this equipment.<br />
2. Wear protective clothing such as heavy gloves, apron, boots, mask or hood.<br />
3. Do not look directly into the welding arc without appropriate protective eyeshields. Do not allow<br />
others to look directly into the arc without appropriate eye protection.<br />
4. Wear protective gloves while welding. Welding causes the metal to become very hot, which can<br />
cause burns. Do not touch welded areas until you are certain they have cooled.<br />
5. Assure that hot welded materials are not placed where others can touch them, or they can cause<br />
a fire.<br />
6. The electrode, and especially the welding rods become very hot during welding. Exercise extreme<br />
caution to prevent burns to yourself or others from these areas.<br />
WA R N I N G : T h i s<br />
product, when used<br />
for welding and similar<br />
applications, produces<br />
chemicals known to<br />
the State of California<br />
to cause cancer and<br />
birth defects (or other<br />
reproductive harm).<br />
(California Health &<br />
Safety Code 25249.5,<br />
et seq.)<br />
Page #4- SKU: 55060
<strong>Arc</strong> <strong>Welder</strong> Assembly<br />
Installing the Handle<br />
1. Locate the HANDLE (#27) and SCREW (#28).<br />
2. Slide the HANDLE (#27) onto the top of the<br />
CASE (#26), indexing the tabs on the under<br />
side of the HANDLE onto the slots on top of<br />
the CASE, as indicated by lines (A) in Figure 1.<br />
3. Insert the SCREW (#28) through the HANDLE<br />
(#27), as shown in Figure 1, and tighten<br />
securely with a screwdriver.<br />
Figure 1. Handle Installation<br />
Installing the Ground Clamp<br />
WARNING: Be sure to connect the Ground Clamp to the GROUND WIRE (#4) ONLY. Check<br />
the Parts Diagram to be sure you have selected the correct wire.<br />
1. Locate the Ground Clamp which is included in your welder kit, as shown in Figure 2,<br />
step 1.<br />
2. Slide the Handle Grip off the Ground Clamp, exposing the Wire Attachment area. Slide<br />
the Handle Grip over the end of the Ground Wire (#4), as shown in Figure 2, Step 2.<br />
3. Attach the Ground Wire (#4) to the Ground Clamp, using a Bolt, Nut and Washer,<br />
as shown in Figure 2, Step 3.<br />
4. With the GROUND WIRE secure, slide the Handle Grip over the Ground Clamp,<br />
covering the attachment of the Ground Wire to the Ground Clamp.<br />
5. Your assembled Ground Clamp will look like Figure 2, Step 5.<br />
Warning, your welder produces powerful electrical currents. It is critical that you remain<br />
insulated from this current. Never use your welder if any of the insulating Handle Grips are<br />
not in good repair.<br />
Figure 2.<br />
Ground Clamp<br />
Installation<br />
Page #5- SKU: 55060
Installing the Electrode Handle<br />
Figure 3. Installing<br />
the Electrode Handle<br />
1. Locate the ELECTRODE CABLE (#5), as shown in the parts diagram, and the<br />
Electrode Handle as shown in figure 3, Step 1 above.<br />
2. Slide the Handle Grip off the Electrode Handle, as shown in Step 2 above.<br />
3. Insert the ELECTRODE CABLE (#5) through the Handle Grip, and attach to the<br />
Electrode Handle as shown in Step 3 above. Note: You must place bare end of<br />
ELECTRODE CABLE wire into opening in end of Electrode Handle, then by tightening<br />
the Screw, tighten the Clamping Plate onto the bare end of the ELECTRODE CABLE,<br />
clamping it securely into place.<br />
4. With the ELECTRODE CABLE secured into the Electrode Handle, slide the Handle<br />
Grip over the wire connection, as shown in Step 4 above. Tighten the Handle Grip<br />
securely in place by tightening the screw in the base of the Handle Grip, as shown.<br />
WARNING: Never use your welder if the Insulating Handle Grips are not in good condition<br />
and securely in place. Dangerous potentially fatal shocks can result from improper handle<br />
insulation.<br />
Page #6- SKU: 55060
Installing the Power Plug<br />
Note: This <strong>Arc</strong> <strong>Welder</strong> is equipped to operate with either 115Volts or 230Volts power supply. Standard<br />
“household” current in the U.S. is 110-<strong>120</strong> Volts. If you will be using a “household” outlet, follow<br />
directions for 115 Volt wiring. Electric service for appliances such as stoves in the U.S. are 220-240<br />
Volts. If you will be using an “appliance” outlet, follow directions for 230 Volt wiring. If you have ANY<br />
DOUBT, consult a qualified electrician. Severe damage can result from improperly wiring this <strong>Arc</strong><br />
<strong>Welder</strong>.<br />
1. Determine which voltage you will be using, and secure a UL approved plug for the selected<br />
voltage which will fit your wall outlet.<br />
2. Identify the correct wires you will be using for your voltage from the chart below.<br />
115 Volt installation 230 Volt Installation<br />
Ground: Green Green<br />
Neutral:<br />
Blue<br />
Hot: Brown L1 Brown L1, Black L2<br />
Tied Off Wire: Black Blue<br />
3. Prepare the wires by stripping approximately 1/2” of the insulation from the end of each wire.<br />
4. Depending on the plug design, insert the prepared cable ends into the plug from the back.<br />
5. Attach the Green wire to the Ground pole of the plug.<br />
6. Wire the appropriate plug as shown in #2 above.<br />
7. To tie off the wire shown in #2 above: Using a Wire Nut, cap the bare end of the<br />
unused wire, carefully insulating it from contact with any metal or conducting surface.<br />
WARNING: Before operating this welder, make sure that the plug is properly wired for the<br />
voltage to be used, AND that the selector switch (#1) is set for the proper voltage. The<br />
Selector Switch must be set before the <strong>Arc</strong> <strong>Welder</strong> is plugged in and turned on. Severe equipment<br />
failure and property damage can result from improper wiring or switch selection.<br />
Warning: If <strong>Arc</strong> <strong>Welder</strong> is operated at 115V, be sure not to regulate the current<br />
over 70 Amp., or the 30A breaker in your house line will trip.<br />
Page #7- SKU: 55060
Page #8- SKU: 55060<br />
Wiring Diagram for <strong>Arc</strong> <strong>Welder</strong> Model #55060
Preparing a Safe Workplace Environment to Avoid Hazardous Conditions<br />
The primary hazards to be managed when using <strong>Arc</strong> Welding equipment include Electric Shock,<br />
Fumes and Gasses, Sparks and Fire, <strong>Arc</strong> Light, and <strong>Tools</strong> and Equipment in the Work Area.<br />
Electrical Hazards<br />
1. Work only in a dry environment. This includes dry clothing, shoes, floors and tools.<br />
2. Maintain an insulation layer between yourself and the electrodes, the workpiece and the<br />
floor. Keep the Electrode Insulated Handle Grips in good condition, wear insulated gloves,<br />
and insulated shoes.<br />
3. Do not plug in or turn on the welder until you are prepared to work, and are confident that it<br />
is safe to do so. Do not allow the Welding Rod, or Electrode Holder to touch any thing that<br />
you do not intend to weld.<br />
Fumes and Gasses<br />
1. The Flux and alloying metals components of the welding rods gives off fumes as the rod is<br />
used. Be sure to work in a well-ventilated are to avoid excessive inhalation of these fumes.<br />
2. The heat generated by welding, and the sparks and splatter that can fly out can ignite any<br />
flammable materials or gasses in the area. Be sure that there are no flammable materials in<br />
the are before beginning to weld.<br />
3. Work piece coatings may burn or fume with <strong>Arc</strong> ignition. Be sure to provide for proper<br />
ventilation.<br />
Sparks and Fire<br />
1. <strong>Arc</strong> welding creates considerable heat, both in the workpiece, and in sparks and splatter that<br />
may fly or drip from the workpiece.<br />
2. Remove any combustibles from the area.<br />
3. Always have a second person present to watch for fires.<br />
4. Keep a fire extinguisher available at the worksite.<br />
5. Remember that the workpiece becomes very hot, and can cause fire or injury.<br />
<strong>Arc</strong> Light<br />
1. The light created by <strong>Arc</strong> Welding can damage your eyes and skin.<br />
2. Always wear an ANSI approved welding face shield before striking an arc.<br />
3. Never allow an onlooker to view the welding <strong>Arc</strong>.<br />
4. Wear dark colored long sleeve clothing to protect your skin.<br />
General Workplace Cautions<br />
1. Prepare and maintain a safe, uncluttered workplace.<br />
2. Make sure the welding ground circuit is direct to the work. Be wary of hoist chains,<br />
cables, scaffolding, etc.<br />
3. Avoid contacting other electrical equipment in the area, such as hoists, grinders, etc.<br />
4. Always unplug the power line before servicing this equipment.<br />
5. Be aware of your surroundings and hazards caused by debris, tools, equipment, etc.<br />
6. Always be aware of the risk of fire caused by sparks and splatter.<br />
Page #9- SKU: 55060
Additional Equipment Recommended for Safe and Successful Welding<br />
1. Always wear heavy protective gloves when welding, to protect yourself from sparks, splatter<br />
and hot workpieces.<br />
2. If welding overhead, always wear protective leather welder’s jacket and overalls.<br />
3. Always wear sturdy shoes or boots for protection against splatter, and to provide insulation<br />
from the ground.<br />
4. Always wear a protective face shield, with UV and IR rated filters matching the process and<br />
amperage you will be using. The helmet should have a clear splatter shield to protect the<br />
filter.<br />
5. You will need a slag hammer to chip slag off the surface of the weld.<br />
6. You will need a stainless steel scratch brush for each type of material you weld, e.g.. Steel,<br />
Stainless, Aluminum, etc.<br />
7. A skull cap or beanie will protect your hair while wearing the helmet.<br />
8. You will need an assortment of locking pliers, clamps, and fixtures to hold your workpieces<br />
for accurate joining.<br />
Preparing the Workpiece for Welding<br />
1. For successful welding the workpiece must be clean, and free of corrosion, dirt and grease.<br />
2. Test fit the workpiece prior to welding to assure it will assemble properly.<br />
3. Hold the workpieces in place with an appropriate and secure clamping system<br />
Selecting the Correct Welding Rod<br />
1. Welding rods are available in a variety of alloys, sizes and fluxes for various welding<br />
applications. Be sure you are using the correct welding rod before commencing work.<br />
2. Note: Welding rods are variously referred to as “Electrodes”, “Rods”, and “Sticks”.<br />
Do not confuse these with “MIG Wire” which is used in a different process.<br />
Page #10- SKU: 55060
Controls on Your <strong>Arc</strong> <strong>Welder</strong><br />
1. Power Switch (#1). Use this selector to turn the<br />
welder Off, or On to the correct Voltage. WARNING: It<br />
is imperative that you select ONLY the Voltage setting<br />
for which you have wired the Power Cable.<br />
2. Power Cable (#2). You will have wired this for<br />
either 115 or 230 Volts.<br />
3. Amperage Control Knob (#3). Use this<br />
control to regulate the Amperage. Turn in the direction<br />
indicated by the arrow to increase or decrease<br />
Amperage.<br />
4. Ground Cable (#4). Use the clamp on this cable<br />
to ground your workpiece.<br />
5. Electrode Cable (#5). Use the Electrode on<br />
this cable to hold the welding rod, and to weld.<br />
6. Green Pilot Lamp (#6). This lamp indicates that<br />
the <strong>Welder</strong> is turned On.<br />
7. Yellow Lamp (#7). This lamp lights when the <strong>Welder</strong> has overheated, and the thermostat has<br />
tripped. Notice: If the Yellow Warning Light goes on. Stop welding, turn off and unplug the welder, and<br />
wait at least 15 minutes for the unit to cool down. Recheck your electrode selection and Amperage<br />
setting to determine if they are correct for the welds being made. When restarting, either use a lower<br />
Amperage setting, or allow more time between welds to avoid overheating the <strong>Welder</strong>. Continued<br />
overheating can cause damage.<br />
Setting the Correct Amperage<br />
Control the Amperage of your <strong>Arc</strong> <strong>Welder</strong> by turning the Amperage Control Knob (#3) on the<br />
front of the welder, and reading the setting through the CLEAR COVER (#23) on top of the welder,<br />
and comparing the position of the Indicator (#24) with the information on the label.<br />
Warning: If welding at 115 Volts, do not exceed 70Amps, or the 30Amp breaker<br />
switch in your power source will trip.<br />
Warning: Never use an extension cord for this unit that is not UL rated for the<br />
Voltage and Amperage that you are using.<br />
Page #11- SKU: 55060
<strong>Arc</strong> Welding Basics<br />
1. In <strong>Arc</strong> Welding, the electrical arc struck between the electrode and the welding joint<br />
generates such a high temperature that it melts both the electrode and the base metal. As<br />
this molten metal pool cools, it welds the joint.<br />
2. To consistently achieve good weld joints, it is important to have the right equipment,<br />
use the proper electrodes, prepare the workpiece properly, and utilize skill which can only<br />
be gained through training and practice. While this booklet provides useful and important<br />
information, you are strongly urged to obtain appropriate training, and to practice on noncritical<br />
test pieces before attempting to weld important items.<br />
3. To begin welding, first observe all safety precautions, then attach the Ground Clamp to<br />
the workpiece in such a way as to provide good electrical conductivity between the weld area<br />
and the ground clamp. Adjust the Amperage to the correct setting, by turning the Amperage<br />
Control Knob (#3) and observing the Indicator (#24) through the Clear Cover<br />
(#23).<br />
4. While wearing protective clothing, and holding the Electrode Clamp away from any<br />
conducting surface, insert the correct electrode (welding rod) into the Electrode Clamp, at a<br />
convenient angle.<br />
5. Turn the Switch (#1) to the correct Voltage, and pause momentarily for the<br />
Transformer (#19) to fully charge.<br />
6. Drag the electrode along the workpiece in a motion similar to striking a match. Do not<br />
“rap” the electrode on the workpiece as that may damage the electrode by dislodging flux and<br />
inhibit proper welding performance.<br />
7. Once the arc is ignited, position the electrode at a 30 o angle to the workpiece. While<br />
working, maintain the arc by holding the electrode away from the workpiece a distance equal<br />
to the electrode’s diameter.<br />
8. Proceed at a smooth, steady pace. Observe the weld as you proceed, tempering your<br />
motions to achieve a good weld.<br />
Tips for Welding Success<br />
1. Good welds depend on the action of an appropriate flux. Flux is a fusible material that prevents<br />
the formation of Oxides, Nitrides, and other undesirable inclusions formed in welding. Your welding rods<br />
come with a flux coating. Do not use welding rods which have a damaged or missing flux coating.<br />
2. Experienced welders often use a “weaving” technique. This is a smooth oscillating motion of<br />
the electrode during the weld process to evenly disperse the weld puddle throughout the joint. This<br />
also results in a repetitive wave-like pattern on the surface of the weld.<br />
3. As you progress, periodically use a “Slag Hammer” and “Scratch Brush” to remove flux and<br />
slag deposits on the surface of the weld before the weld is fully cooled. This will help prevent inclusions<br />
and pitting in the weld.<br />
4. Strive for an even weld joint that fully penetrates the workpiece, and is completely filled with<br />
the pooled welding material. Avoid leaving gaps, undercuts, cavities or excess material overflowing<br />
from the joint.<br />
5. Minimize the Heat Affected Zone (HAZ) of your workpiece. The welding process heats the base<br />
material, and may adversely affect its tensile strength or state of heat-treatment. Expert welders apply<br />
only the amount of heat needed to produce a good weld by moving smoothly along the weld joint,<br />
using the correct setting, and applying the electrode efficiently.<br />
6. Do not contaminate the joint by using dirty materials or tools, or using slag hammers or scratch<br />
brushes which have been previously used on a different material. For example, a scratch brush previously<br />
used on a steel weld may cause rust contamination if used on a stainless steel weld.<br />
Page #12- SKU: 55060
Trouble Shooting <strong>Arc</strong> Welding Defects<br />
Porosity and Surface Holes:<br />
Most porosity cannot be seen, but serious porosity weakens the weld.<br />
1. Before welding, remove all surface contaminants, such as Mill Scale, Rust, Paint, Dirt,<br />
Grease, or Moisture.<br />
2. Keep the weld puddle molten for a longer period, as this will allow time for gasses to boil off.<br />
3. Steel with an extra low Manganese or Carbon content, or with a high percentage of Sulfur or<br />
Phosphorous will need to be welded using an E7018 rod.<br />
4. Use a shorter arc length electrode, such as E7018.<br />
Under Cut:<br />
Undercutting appears as slight scratches at the bead edges. Under certain conditions it can seriously<br />
decrease the weld strength.<br />
1. Reduce the Amperage, travel speed, or electrode diameter until the puddle size becomes<br />
manageable.<br />
2. Adjust the Electrode angle so the <strong>Arc</strong> Force holds the metal in the corners.<br />
3. Use a uniform travel speed, and avoid excessive weaving.<br />
Weld Material Spatter:<br />
Spattering does not influence weld strength, but is considered an appearance defect.<br />
1. Lower the current, check the specified range for the electrode being used.<br />
2. Be sure you are using the correct polarity.<br />
3. Try to minimize the arc length.<br />
4. Look for <strong>Arc</strong> Blow conditions. Note: <strong>Arc</strong> Blow generally occurs only when using a DC<br />
welder. This is an AC welder.<br />
5. Wet or moist flux or workpiece may cause splatter. Note: Wet electrodes may be dried by<br />
baking at 300 O F until the moisture is gone, usually in 1-2 hours.<br />
Poor Fusion:<br />
Poor Fusion is bad bonding of the weld metal to any part of the work piece. This must be corrected,<br />
since it results in a weak weld joint.<br />
1. Increase the Amperage.<br />
2. Clean the joint edges of dirt, rust, paint, or use an E6013 electrode.<br />
3. Decrease the gap between the work pieces.<br />
4. Use a weaving technique to better fill the gap.<br />
Visual Inspection of the finished weld<br />
Compare your weld joints to these drawings<br />
for suggestions on achieving better welds.<br />
Page #13- SKU: 55060
Parts List <strong>Arc</strong> <strong>Welder</strong> Model #55060<br />
Part # Code Qty Description<br />
1 CA10a212-620 01 SWITCH 115/230V<br />
2 BA.B12.6 01 POWER CABLE<br />
3 BA.B12.4 01 AMPERAGE CONTROL KNOB<br />
4 BA.B12.7 01 GROUND CABLE<br />
5 BA.B12.7 01 ELECTRODE CABLE<br />
6 VDA 10 01 GREEN PILOT LAMP<br />
7 VDA 10 01 YELLOW LAMP<br />
8 GB8 18-85 04 SCREW M4 X 12<br />
9 01 WELDING STEP SELECTOR<br />
10 GB8 18-85 01 SCREW M2.5 x 10<br />
11 BA.B 12.4-1 01 LOCATING COLLAR<br />
12 BA.B 12-5 01 BASE FRAME<br />
13 BA.B12-6 04 FOOT<br />
14 GB96-85 04 WASHER<br />
15 GB18-85 04 SCREW M14 x 16<br />
16 BA.B12-4 01 FRAME FOR MOVABLE IRON<br />
CORE<br />
17 BA.B 12.3 02 MOVABLE IRON CORE<br />
18 BA.B 12.3-1 02 INSULATION CUSHION<br />
19 BA.B 12.2 01 TRANSFORMER 40 x 60 2;OV<br />
20 BA.B 12.-8 02 TRANSFORMER CARRIAGE<br />
21 JUX-15A 01 THERMOSTAT<br />
22 BA.B 12-7 01 BAFFLE<br />
23 BA.B 04-7 01 CLEAR COVER<br />
24 BA.B 12-2 01 INDICATOR<br />
25 BA.B 12-3 02 CLAMP RING<br />
26 BA.B 1 2.1 01 CASE<br />
27 BA.B 12-1 01 HANDLE<br />
28 GB8 45-85 01 SCREW ST3.9 x 25<br />
PLEASE READ THE FOLLOWING CAREFULLY<br />
THE MANUFACTURER AND/OR DISTRIBUTOR HAS PROVIDED THE PARTS DIAGRAM IN THIS<br />
MANUAL AS A REFERENCE TOOL ONLY. NEITHER THE MANUFACTURER NOR DISTRIBUTOR<br />
MAKES ANY REPRESENTATION OR WARRANTY OF ANY KIND TO THE BUYER THAT HE OR SHE<br />
IS QUALIFIED TO MAKE ANY REPAIRS TO THE PRODUCT OR THAT HE OR SHE IS QUALIFIED TO<br />
REPLACE ANY PARTS OF THE PRODUCT. IN FACT, THE MANUFACTURER AND/OR DISTRIBUTOR<br />
EXPRESSLY STATES That ALL REPAIRS AND PARTS REPLACEMENTS SHOULD BE UNDERTAKEN<br />
BY CERTIFIED AND LICENSED TECHNICIANS AND NOT BY THE BUYER. THE BUYER ASSUMES<br />
ALL RISK AND LIABILITY ARISING OUT OF HIS OR HER REPAIRS TO THE ORIGINAL PRODUCT<br />
OR REPLACEMENT PARTS THERETO, OR ARISING OUT OF HIS OR HER INSTALLATION OF<br />
REPLACEMENT PARTS THERETO.<br />
Page #14- SKU: 55060
Page #15- SKU: 55060<br />
<strong>Arc</strong> <strong>Welder</strong> Model #55060 Exploded View


