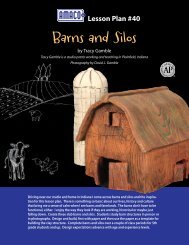
Creating a Japanese Garden Lantern in Crea-Stone - Amaco
Creating a Japanese Garden Lantern in Crea-Stone - Amaco
Creating a Japanese Garden Lantern in Crea-Stone - Amaco

You also want an ePaper? Increase the reach of your titles
YUMPU automatically turns print PDFs into web optimized ePapers that Google loves.
Lesson #28<br />
<strong><strong>Crea</strong>t<strong>in</strong>g</strong> a <strong>Japanese</strong><br />
<strong>Garden</strong> <strong>Lantern</strong> <strong>in</strong> <strong>Crea</strong>-<strong>Stone</strong><br />
by George Debikey<br />
Pagodas orig<strong>in</strong>ated <strong>in</strong> ancient Ch<strong>in</strong>a many centuries ago and were <strong>in</strong>spired by the Indian Stupa. A Stupa is a bellshaped<br />
monument that is used to house relics or sacred Buddhist scriptures. <strong>Japanese</strong> stone garden lanterns reflect this<br />
ancient Pagoda design, which consists of a base pedestal, a platform for the firebox, the firebox, and the roof. <strong>Japanese</strong><br />
lanterns were orig<strong>in</strong>ally placed around Buddhist temples and shr<strong>in</strong>es. Later they were <strong>in</strong>troduced by tea masters to guide<br />
guests through gardens to the tea ceremonies that were held <strong>in</strong> the even<strong>in</strong>gs.<br />
Today, garden lanterns are not only used <strong>in</strong> the Orient but have become part of our western culture. We use these<br />
beautiful natural look<strong>in</strong>g structures as decorative accents for patio entrances, garden pond areas, to add harmony and<br />
balance or as a focal po<strong>in</strong>t <strong>in</strong> a specific spot <strong>in</strong> a flower garden. A candle or oil lamp can be placed <strong>in</strong> the firebox as a<br />
decorative element or to give light <strong>in</strong> a walkway. Simple and yet seem<strong>in</strong>gly div<strong>in</strong>e, they add a mystic quality, spirituality<br />
and harmony to the home and garden<br />
AMACO ® <strong>Crea</strong>-stone is a lightweight cast<strong>in</strong>g/sculpt<strong>in</strong>g material that has a granite look and texture when it is hard.<br />
<strong>Crea</strong>-stone mixes with water to achieve a thick paste like cement mix. Pour this paste <strong>in</strong>to available objects to create<br />
the <strong>Japanese</strong> <strong>Garden</strong> <strong>Lantern</strong>. Once the paste starts to set up you can take it out of the cardboard box/mold and start<br />
do<strong>in</strong>g any needed carv<strong>in</strong>g to enhance the cast shape. Usually this can be done after lett<strong>in</strong>g it harden for about 18 hours<br />
of pour<strong>in</strong>g. At that po<strong>in</strong>t, although hard, the piece can easily be carved with a knife. As you are carv<strong>in</strong>g, <strong>Crea</strong>-stone<br />
is go<strong>in</strong>g through a chemical reaction and becom<strong>in</strong>g harder all the time. Therefore, try to keep it wet with water, but<br />
also work fast. As you progress you will have to change your carv<strong>in</strong>g tools accord<strong>in</strong>gly from a knife to a hammer and<br />
chisel. Try to cast and f<strong>in</strong>ish each section of the lantern at a time before it gets to be too hard and chose a cast<strong>in</strong>g box/<br />
mold as close to the f<strong>in</strong>ished shape as possible. This will reduce the need to do too much carv<strong>in</strong>g.<br />
Mix enough material only for the part of the lantern that you are work<strong>in</strong>g on at the time. Try not to mix more than you<br />
need. If you are a little bit short on the amount, you can readily do another small mix to f<strong>in</strong>ish the section.<br />
Before you start, wear a NIOSH approved mask for dust and mist and make sure to wear v<strong>in</strong>yl gloves. <strong>Crea</strong>-stone is<br />
an alkal<strong>in</strong>e material and will otherwise irritate your hands.
Supplies and Tools:<br />
3 boxes of <strong>Crea</strong>-stone<br />
V<strong>in</strong>yl gloves<br />
Plastic conta<strong>in</strong>er for mix<strong>in</strong>g<br />
<strong>Crea</strong>-stone<br />
Mold Maker’s Knife<br />
Hammer<br />
Chisel<br />
Rasp<br />
Utility Knife<br />
Ruler<br />
Drill with ½" bit<br />
Metal rod about 8" long<br />
Drill bit the same thickness as metal<br />
rod<br />
Any other sculpt<strong>in</strong>g tool that you<br />
have available or like to work<br />
with<br />
1 cardboard box 16" x 16" x 11½"<br />
deep for the base pedestal<br />
4 cardboard pieces 16" x 16" x 12"<br />
for fabricat<strong>in</strong>g the angular or pyramid<br />
shape of the Base Pedestal<br />
1 cardboard box 16" x 16" x 8" deep<br />
for the roof<br />
1 cardboard box 14" x 14" x 6" deep<br />
for the firebox platform<br />
Plastic bucket or box about 9½"<br />
wide or diameter x 8" deep for<br />
the firebox<br />
Cottage Cheese conta<strong>in</strong>er 4½" or<br />
5" diameter or similar for <strong>in</strong>side<br />
firebox<br />
You will use square cardboard boxes<br />
to do this project, however any k<strong>in</strong>d<br />
of readily available conta<strong>in</strong>er can<br />
also be used for a mold. You can use<br />
circular shaped boxes or buckets and<br />
create an <strong>in</strong>f<strong>in</strong>ite variety of shapes.<br />
Photo #1<br />
2. Pour <strong>Crea</strong>-stone <strong>in</strong>to the mix<strong>in</strong>g<br />
conta<strong>in</strong>er. Add water slowly and<br />
mix thoroughly. Be careful not to<br />
add too much water as the paste<br />
will tend to want to flow and level<br />
<strong>in</strong> areas where you do not have<br />
a mold<strong>in</strong>g material to restra<strong>in</strong> it.<br />
The mix should be just wet but not<br />
soupy. As you proceed with this<br />
project do not mix too much <strong>Crea</strong>stone<br />
at a time. If you do not have<br />
enough paste for the section of the<br />
piece you can always mix some<br />
more and add to it. <strong>Crea</strong>-stone<br />
does not set up <strong>in</strong>stantaneously.<br />
Spread some <strong>Crea</strong>-stone paste<br />
<strong>in</strong> the bottom of the box, and then<br />
place the plastic bucket on top of the<br />
paste <strong>in</strong> the center of the box. Make<br />
sure that the rim of the bucket is at<br />
the same height as the rim of the<br />
box, then add more <strong>Crea</strong>-stone<br />
paste to build the four legs of the<br />
base pedestal (see photo #2).<br />
3. Let <strong>Crea</strong>-stone start sett<strong>in</strong>g up<br />
for about 18 hours. Once it is<br />
stiff, pull the plastic bucket out (see<br />
photo #3) and turn the box upside<br />
down and pull away the box from<br />
the cast shape (see photo #4).<br />
Save the bucket to use aga<strong>in</strong> <strong>in</strong><br />
step 6. Now that the shape is out<br />
you can carve to round up the corners<br />
on the legs and on the upper<br />
rim of the pedestal. Leave a center<br />
6" x 6" flat area on the top of the<br />
pedestal. When you are done use<br />
the rasp all over the Base Pedestal<br />
to smooth the shape and give it a<br />
sculptured mark<strong>in</strong>gs with the rasp<br />
(see photo #5).<br />
Photo #4<br />
<strong><strong>Crea</strong>t<strong>in</strong>g</strong> the Base<br />
Pedestal<br />
1. Start by build<strong>in</strong>g a mold for the<br />
base pedestal us<strong>in</strong>g the 16" x<br />
16" x 11½" box. Place two of the<br />
16" x 16" x 12" cardboard pieces<br />
on opposite sides <strong>in</strong>side the box<br />
to form the first two sides of the<br />
upside-down pyramid. Measure<br />
the area at the bottom between<br />
them and cut the slanted shapes<br />
of the other two sides of the pyramid.<br />
Place them <strong>in</strong>side the box<br />
thus form<strong>in</strong>g the 4 sides of the<br />
upside-down pyramid. Tape all<br />
corners (see photo #1).<br />
Photo #2<br />
Photo #3<br />
2<br />
Photo #5<br />
<strong><strong>Crea</strong>t<strong>in</strong>g</strong> the Platform<br />
for the Firebox<br />
4. Prepare the 14" x 14" x 6" cardboard<br />
box by mark<strong>in</strong>g the <strong>in</strong>side<br />
wall with a pencil l<strong>in</strong>e at 2"<br />
from the bottom. This will be<br />
your thickness guide. Mix enough<br />
<strong>Crea</strong>-stone with water to the<br />
right consistency and spread the<br />
paste <strong>in</strong>side the box up to the<br />
pencil level. You do not have to<br />
fill up the corners (see photo #6).<br />
Let the cast stiffen for 10 m<strong>in</strong>utes<br />
then add paste to create ridges<br />
on the corners and on the sides,<br />
to create a wavy edge.
Photo #6<br />
5. Leave the cast piece for about 18<br />
hours like you did with the base<br />
pedestal, then remove it from the<br />
box and carve the corners and<br />
the ridges strait. You will need to<br />
carve on the bottom too, to form<br />
the flow<strong>in</strong>g up and down wavy<br />
shape of the platform. When you<br />
are satisfied with the shape use<br />
the rasp to even out and smooth<br />
the surface. Also the rasp will<br />
leave a nice texture simulat<strong>in</strong>g a<br />
chiseled form (see photo #7).<br />
Photo #7<br />
<strong><strong>Crea</strong>t<strong>in</strong>g</strong> the Firebox<br />
6. You will need the plastic bucket<br />
from step #2 plus a smaller plastic<br />
bucket to mold the firebox. For<br />
easier release of the form you can<br />
brush dish soap on the <strong>in</strong>side of<br />
the bucket and on the outside of<br />
the small conta<strong>in</strong>er. Mix enough<br />
<strong>Crea</strong>-stone with water to the<br />
right consistency and spread the<br />
paste <strong>in</strong> the bottom of the bucket.<br />
Place the small conta<strong>in</strong>er over the<br />
paste <strong>in</strong> the center of the bucket,<br />
mak<strong>in</strong>g sure the rim of both<br />
conta<strong>in</strong>ers is at the same level.<br />
Use a piece of wood or ruler on<br />
top to make sure. Fill the space<br />
around the small conta<strong>in</strong>er to the<br />
top of the bucket. Leave the ruler<br />
or place a sheet of plywood over<br />
the bucket and put some weight<br />
<strong>in</strong> order to keep everyth<strong>in</strong>g level<br />
until it sets up (see photo #8).<br />
Photo #8<br />
7. When <strong>Crea</strong>-stone has set up,<br />
remove it from the bucket and<br />
remove the small conta<strong>in</strong>er from<br />
<strong>in</strong>side the cast<strong>in</strong>g. If the bucket is<br />
square like the one used <strong>in</strong> this<br />
project, round up the corners with<br />
the knife. If you are us<strong>in</strong>g a round<br />
bucket, carve the outside, mak<strong>in</strong>g it<br />
<strong>in</strong>to a more or less 4-sided shape,<br />
but do not leave sharp corners.<br />
Draw the open<strong>in</strong>gs that you want <strong>in</strong><br />
the firebox with a pencil (see photo<br />
#9). Us<strong>in</strong>g the drill with the ½"<br />
drill bit, drill holes <strong>in</strong> the open<strong>in</strong>gs,<br />
and then us<strong>in</strong>g the knife you can<br />
carve them further and shape them<br />
accord<strong>in</strong>g to your drawn design.<br />
When done use the rasp aga<strong>in</strong> to<br />
smooth out any irregularities and<br />
texture it with a chiseled like surface<br />
(see photo #10). Make sure the<br />
bottom of the firebox is also 6" x 6"<br />
wide to match the platform and the<br />
pedestal.<br />
Photo #9<br />
Photo #10<br />
3<br />
<strong><strong>Crea</strong>t<strong>in</strong>g</strong> the Roof<br />
8. You will use the 16" x 16" x 8" box<br />
for the roof. First, cut 3 layers of<br />
cardboard to fit the bottom of the<br />
box. Cut a hole <strong>in</strong> the middle the<br />
same size as the rim of the small<br />
conta<strong>in</strong>er used <strong>in</strong> the Firebox,<br />
and place them <strong>in</strong> the bottom<br />
of the box. You can also cut a<br />
½" strip from the small conta<strong>in</strong>er<br />
that you used for the firebox and<br />
<strong>in</strong>sert it <strong>in</strong> the hole that you cut.<br />
The hole <strong>in</strong> the center will be the<br />
plug that will fit as a cover for<br />
the firebox. Build corners out of<br />
cardboard to cut on carv<strong>in</strong>g time<br />
and effort (see photo #11). Mark<br />
the <strong>in</strong>side wall of the box with a<br />
l<strong>in</strong>e about 2" from the bottom.<br />
This will be your thickness limit.<br />
Photo #11<br />
9. Mix enough Cre-stone with water<br />
to the right consistency as you did<br />
<strong>in</strong> step #2. Fill the plug <strong>in</strong> the<br />
center then spread the paste to the<br />
thickness l<strong>in</strong>e, let the paste stiffen<br />
for 10 m<strong>in</strong>utes then build a two<br />
levels hill <strong>in</strong> the center of the box<br />
and po<strong>in</strong>ted ridges on the corners.<br />
When the <strong>Crea</strong>-stone has set<br />
up, remove it from the box and<br />
carve the surface of the ridges<br />
and top <strong>in</strong>to a nice shape, then<br />
go over all irregularities with the<br />
rasp and smooth it out to repeat<br />
the chiseled like surface you did<br />
on the other pieces. Now you<br />
have all 4 parts of the lantern<br />
ready (see photo #12).
13. Mark the center on the base pedestal<br />
top and drill a hole the same<br />
thickness as the rod that you have<br />
prepared. The hole depth does<br />
not need to be deeper that 4",<br />
just make sure not to drill the hole<br />
all the way threw the bottom of<br />
the base pedestal. You also need<br />
to drill the same size hole through<br />
the center of the firebox platform<br />
and one <strong>in</strong> the center of the bottom<br />
of the firebox.<br />
Photo #12<br />
Photo #13<br />
<strong>Lantern</strong> Assembly<br />
14. Place the metal rod <strong>in</strong> the base<br />
pedestal. It will be stick<strong>in</strong>g out for<br />
the most part.<br />
15. Place the firebox platform on top<br />
of the base pedestal by slid<strong>in</strong>g it<br />
through the hole <strong>in</strong> the center (see<br />
photo #13).<br />
16. Place the firebox on top of the<br />
firebox platform by slid<strong>in</strong>g it<br />
through the hole <strong>in</strong> the bottom. If<br />
the metal rod is stick<strong>in</strong>g <strong>in</strong>side the<br />
firebox, cut it so it would be flat<br />
with the <strong>in</strong>side floor of the firebox,<br />
so you can place a candle of oil<br />
lamp if you want to.<br />
17. Place the roof on top of the<br />
firebox by <strong>in</strong>sert<strong>in</strong>g the bottom<br />
plug <strong>in</strong>to the top of the firebox.<br />
Now your lantern is complete (see<br />
photo on front).<br />
Let the natural elements and the<br />
concept of balance contribute to<br />
the harmonious balance of your<br />
home and surround<strong>in</strong>g area by<br />
plann<strong>in</strong>g your garden and plac<strong>in</strong>g<br />
this lantern where it is mean<strong>in</strong>gful<br />
to you.<br />
This is Lesson #28 <strong>in</strong> a series of art plans for elementary and secondary pro grams us<strong>in</strong>g American Art Clay Co., Inc. prod ucts.<br />
American Art Clay Co., Inc. • 6060 Guion Road • In di a nap o lis, In di ana 46254 • (317) 244-6871 • (800) 374-1600<br />
4