Bosch PSM 18 LI Cordless Sander Manual - Tooled-Up.com
Bosch PSM 18 LI Cordless Sander Manual - Tooled-Up.com
Bosch PSM 18 LI Cordless Sander Manual - Tooled-Up.com

Create successful ePaper yourself
Turn your PDF publications into a flip-book with our unique Google optimized e-Paper software.
OBJ_DOKU-21514-002.fm Page 1 Monday, June 17, 2013 11:29 AM<br />
WEU<br />
WEU<br />
Robert <strong>Bosch</strong> GmbH<br />
Power Tools Division<br />
70745 Leinfelden-Echterdingen<br />
Germany<br />
www.bosch-pt.<strong>com</strong><br />
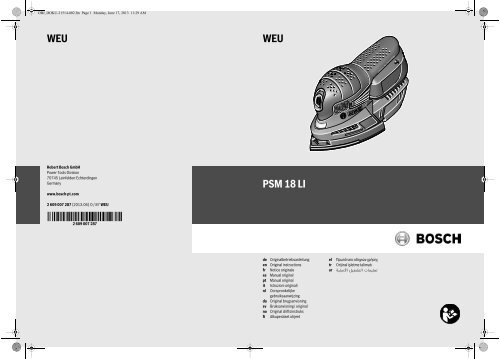
<strong>PSM</strong> <strong>18</strong> <strong>LI</strong><br />
2 609 007 287 (2013.06) O / 87 WEU<br />
de<br />
en<br />
fr<br />
es<br />
pt<br />
it<br />
nl<br />
da<br />
sv<br />
no<br />
fi<br />
Originalbetriebsanleitung<br />
Original instructions<br />
Notice originale<br />
<strong>Manual</strong> original<br />
<strong>Manual</strong> original<br />
Istruzioni originali<br />
Oorspronkelijke<br />
gebruiksaanwijzing<br />
Original brugsanvisning<br />
Bruksanvisning i original<br />
Original driftsinstruks<br />
Alkuperäiset ohjeet<br />
el<br />
tr<br />
ar<br />
Πρωτότυπο οδηγιών χρήσης<br />
Orijinal işletme talimatı
OBJ_BUCH-1201-002.book Page 3 Monday, June 17, 2013 11:30 AM<br />
| 3<br />
1<br />
2<br />
8<br />
3<br />
7<br />
6<br />
5<br />
4 9<br />
<strong>PSM</strong> <strong>18</strong> <strong>LI</strong><br />
<strong>Bosch</strong> Power Tools 2 609 007 287 | (17.6.13)
OBJ_BUCH-1201-002.book Page 4 Monday, June 17, 2013 11:30 AM<br />
4 |<br />
A<br />
2<br />
1<br />
B<br />
2<br />
1<br />
C1<br />
C2<br />
3<br />
3<br />
10<br />
C3<br />
C4<br />
11<br />
3<br />
2 609 007 287 | (17.6.13) <strong>Bosch</strong> Power Tools
OBJ_BUCH-1201-002.book Page 5 Monday, June 17, 2013 11:30 AM<br />
| 5<br />
D<br />
E<br />
13<br />
5<br />
12<br />
10<br />
4<br />
F<br />
6<br />
G<br />
14<br />
5<br />
6<br />
4<br />
5<br />
H<br />
I<br />
16<br />
15<br />
16<br />
17<br />
16<br />
<strong>Bosch</strong> Power Tools 2 609 007 287 | (17.6.13)
OBJ_BUCH-1201-002.book Page 11 Monday, June 17, 2013 11:30 AM<br />
English | 11<br />
Kundendienst und Anwendungsberatung<br />
Der Kundendienst beantwortet Ihre Fragen zu Reparatur und<br />
Wartung Ihres Produkts sowie zu Ersatzteilen. Explosionszeichnungen<br />
und Informationen zu Ersatzteilen finden Sie<br />
auch unter:<br />
www.bosch-pt.<strong>com</strong><br />
Das <strong>Bosch</strong>-Anwendungsberatungs-Team hilft Ihnen gerne bei<br />
Fragen zu unseren Produkten und deren Zubehör.<br />
www.bosch-do-it.de, das Internetportal für Heimwerker und<br />
Gartenfreunde.<br />
www.1-2-do.<strong>com</strong><br />
In der Heimwerker-Community 1-2-do.<strong>com</strong> können Sie<br />
Produkttester werden, Ideen sammeln oder sich mit anderen<br />
Heimwerkern austauschen.<br />
www.dha.de, das komplette Service-Angebot der Deutschen<br />
Heimwerker Akademie.<br />
Geben Sie bei allen Rückfragen und Ersatzteilbestellungen<br />
bitte unbedingt die 10-stellige Sachnummer laut Typenschild<br />
des Elektrowerkzeuges an.<br />
Deutschland<br />
Robert <strong>Bosch</strong> GmbH<br />
Servicezentrum Elektrowerkzeuge<br />
Zur Luhne 2<br />
37589 Kalefeld – Willershausen<br />
Unter www.bosch-pt.<strong>com</strong> können Sie online Ersatzteile bestellen<br />
oder Reparaturen anmelden.<br />
Kundendienst: Tel.: (0711) 40040480<br />
Fax: (0711) 40040481<br />
E-Mail: Servicezentrum.Elektrowerkzeuge@de.bosch.<strong>com</strong><br />
Anwendungsberatung: Tel.: (0711) 40040480<br />
Fax: (0711) 40040482<br />
E-Mail: Anwendungsberatung.pt@de.bosch.<strong>com</strong><br />
Österreich<br />
Tel.: (01) 797222010<br />
Fax: (01) 797222011<br />
E-Mail: service.elektrowerkzeuge@at.bosch.<strong>com</strong><br />
Schweiz<br />
Tel.: (044) 8471511<br />
Fax: (044) 8471551<br />
E-Mail: Aftersales.Service@de.bosch.<strong>com</strong><br />
Luxemburg<br />
Tel.: +32 2 588 0589<br />
Fax: +32 2 588 0595<br />
E-Mail: outillage.gereedschap@be.bosch.<strong>com</strong><br />
Transport<br />
Versenden Sie Akkus nur, wenn das Gehäuse unbeschädigt<br />
ist. Kleben Sie offene Kontakte ab und verpacken Sie den Akku<br />
so, dass er sich nicht in der Verpackung bewegt.<br />
Bitte beachten Sie auch eventuelle weiterführende nationale<br />
Vorschriften.<br />
Die enthaltenen Li-Ionen-Akkus unterliegen den Anforderungen<br />
des Gefahrgutrechts. Die Akkus können durch den Benutzer<br />
ohne weitere Auflagen auf der Straße transportiert werden.<br />
Beim Versand durch Dritte (z.B.: Lufttransport oder Spedition)<br />
sind besondere Anforderungen an Verpackung und Kennzeichnung<br />
zu beachten. Hier muss bei der Vorbereitung des<br />
Versandstückes ein Gefahrgut-Experte hinzugezogen werden.<br />
Entsorgung<br />
Elektrowerkzeuge, Akkus, Zubehör und Verpackungen<br />
sollen einer umweltgerechten Wiederverwertung<br />
zugeführt werden.<br />
Werfen Sie Elektrowerkzeuge und Akkus/Batterien nicht in<br />
den Hausmüll!<br />
Nur für EU-Länder:<br />
Gemäß der europäischen Richtlinie<br />
2012/19/EU müssen nicht mehr gebrauchsfähige<br />
Elektrowerkzeuge und gemäß<br />
der europäischen Richtlinie<br />
2006/66/EG müssen defekte oder verbrauchte<br />
Akkus/Batterien getrennt gesammelt<br />
und einer umweltgerechten Wiederverwendung zugeführt<br />
werden.<br />
Nicht mehr gebrauchsfähige Akkus/Batterien können direkt<br />
abgegeben werden bei:<br />
Deutschland<br />
Recyclingzentrum Elektrowerkzeuge<br />
Osteroder Landstraße 3<br />
37589 Kalefeld<br />
Schweiz<br />
Batrec AG<br />
3752 Wimmis BE<br />
Akkus/Batterien:<br />
Li-Ion:<br />
Bitte beachten Sie die Hinweise im Abschnitt<br />
„Transport“, Seite 11.<br />
Änderungen vorbehalten.<br />
English<br />
Safety Notes<br />
General Power Tool Safety Warnings<br />
WARNING<br />
Read all safety warnings and all instructions.<br />
Failure to follow the warnings<br />
and instructions may result in electric shock, fire and/or serious<br />
injury.<br />
Save all warnings and instructions for future reference.<br />
The term “power tool” in the warnings refers to your mainsoperated<br />
(corded) power tool or battery-operated (cordless)<br />
power tool.<br />
<strong>Bosch</strong> Power Tools 2 609 007 287 | (17.6.13)
OBJ_BUCH-1201-002.book Page 12 Monday, June 17, 2013 11:30 AM<br />
12 | English<br />
Work area safety<br />
Keep work area clean and well lit. Cluttered or dark areas<br />
invite accidents.<br />
Do not operate power tools in explosive atmospheres,<br />
such as in the presence of flammable liquids, gases or<br />
dust. Power tools create sparks which may ignite the dust<br />
or fumes.<br />
Keep children and bystanders away while operating a<br />
power tool. Distractions can cause you to lose control.<br />
Electrical safety<br />
Power tool plugs must match the outlet. Never modify<br />
the plug in any way. Do not use any adapter plugs with<br />
earthed (grounded) power tools. Unmodified plugs and<br />
matching outlets will reduce risk of electric shock.<br />
Avoid body contact with earthed or grounded surfaces,<br />
such as pipes, radiators, ranges and refrigerators.<br />
There is an increased risk of electric shock if your body is<br />
earthed or grounded.<br />
Do not expose power tools to rain or wet conditions.<br />
Water entering a power tool will increase the risk of electric<br />
shock.<br />
Do not abuse the cord. Never use the cord for carrying,<br />
pulling or unplugging the power tool. Keep cord away<br />
from heat, oil, sharp edges and moving parts. Damaged<br />
or entangled cords increase the risk of electric shock.<br />
When operating a power tool outdoors, use an extension<br />
cord suitable for outdoor use. Use of a cord suitable<br />
for outdoor use reduces the risk of electric shock.<br />
If operating a power tool in a damp location is unavoidable,<br />
use a residual current device (RCD) protected<br />
supply. Use of an RCD reduces the risk of electric shock.<br />
Personal safety<br />
Stay alert, watch what you are doing and use <strong>com</strong>mon<br />
sense when operating a power tool. Do not use a power<br />
tool while you are tired or under the influence of drugs,<br />
alcohol or medication. A moment of inattention while operating<br />
power tools may result in serious personal injury.<br />
Use personal protective equipment. Always wear eye<br />
protection. Protective equipment such as dust mask,<br />
non-skid safety shoes, hard hat, or hearing protection<br />
used for appropriate conditions will reduce personal injuries.<br />
Prevent unintentional starting. Ensure the switch is in<br />
the off-position before connecting to power source<br />
and/or battery pack, picking up or carrying the tool.<br />
Carrying power tools with your finger on the switch or energising<br />
power tools that have the switch on invites accidents.<br />
Remove any adjusting key or wrench before turning<br />
the power tool on. A wrench or a key left attached to a rotating<br />
part of the power tool may result in personal injury.<br />
Do not overreach. Keep proper footing and balance at<br />
all times. This enables better control of the power tool in<br />
unexpected situations.<br />
Dress properly. Do not wear loose clothing or jewellery.<br />
Keep your hair, clothing and gloves away from<br />
moving parts. Loose clothes, jewellery or long hair can be<br />
caught in moving parts.<br />
If devices are provided for the connection of dust extraction<br />
and collection facilities, ensure these are connected<br />
and properly used. Use of dust collection can reduce<br />
dust-related hazards.<br />
Power tool use and care<br />
Do not force the power tool. Use the correct power tool<br />
for your application. The correct power tool will do the<br />
job better and safer at the rate for which it was designed.<br />
Do not use the power tool if the switch does not turn it<br />
on and off. Any power tool that cannot be controlled with<br />
the switch is dangerous and must be repaired.<br />
Disconnect the plug from the power source and/or the<br />
battery pack from the power tool before making any<br />
adjustments, changing accessories, or storing power<br />
tools. Such preventive safety measures reduce the risk of<br />
starting the power tool accidentally.<br />
Store idle power tools out of the reach of children and<br />
do not allow persons unfamiliar with the power tool or<br />
these instructions to operate the power tool. Power<br />
tools are dangerous in the hands of untrained users.<br />
Maintain power tools. Check for misalignment or binding<br />
of moving parts, breakage of parts and any other<br />
condition that may affect the power tool’s operation. If<br />
damaged, have the power tool repaired before use.<br />
Many accidents are caused by poorly maintained power<br />
tools.<br />
Keep cutting tools sharp and clean. Properly maintained<br />
cutting tools with sharp cutting edges are less likely to bind<br />
and are easier to control.<br />
Use the power tool, accessories and tool bits etc. in accordance<br />
with these instructions, taking into account<br />
the working conditions and the work to be performed.<br />
Use of the power tool for operations different from those<br />
intended could result in a hazardous situation.<br />
Battery tool use and care<br />
Recharge only with the charger specified by the manufacturer.<br />
A charger that is suitable for one type of battery<br />
pack may create a risk of fire when used with another battery<br />
pack.<br />
Use power tools only with specifically designated battery<br />
packs. Use of any other battery packs may create a<br />
risk of injury and fire.<br />
When battery pack is not in use, keep it away from other<br />
metal objects, like paper clips, coins, keys, nails,<br />
screws or other small metal objects, that can make a<br />
connection from one terminal to another. Shorting the<br />
battery terminals together may cause burns or a fire.<br />
Under abusive conditions, liquid may be ejected from<br />
the battery; avoid contact. If contact accidentally occurs,<br />
flush with water. If liquid contacts eyes, additionally<br />
seek medical help. Liquid ejected from the battery<br />
may cause irritation or burns.<br />
2 609 007 287 | (17.6.13) <strong>Bosch</strong> Power Tools
OBJ_BUCH-1201-002.book Page 13 Monday, June 17, 2013 11:30 AM<br />
English | 13<br />
Service<br />
Have your power tool serviced by a qualified repair person<br />
using only identical replacement parts. This will ensure<br />
that the safety of the power tool is maintained.<br />
Safety Warnings for <strong>Sander</strong><br />
Use the machine only for dry sanding. Penetration of water<br />
into the machine increases the risk of an electric shock.<br />
Caution, fire hazard! Avoid overheating the object being<br />
sanded as well as the sander. Always empty the<br />
dust collector before taking breaks. In unfavourable<br />
conditions, e. g., when sparks emit from sanding metals,<br />
sanding debris in the dust bag, micro filter or paper sack<br />
(or in the filter sack or filter of the vacuum cleaner) can<br />
self-ignite. Particularly when mixed with remainders of varnish,<br />
polyurethane or other chemical materials and when<br />
the sanding debris is hot after long periods of working.<br />
Secure the workpiece. A workpiece clamped with clamping<br />
devices or in a vice is held more secure than by hand.<br />
Keep your workplace clean. Blends of materials are particularly<br />
dangerous. Dust from light alloys can burn or explode.<br />
Do not open the battery. Danger of short-circuiting.<br />
Protect the battery against heat, e. g., against<br />
continuous intense sunlight, fire, water, and<br />
moisture. Danger of explosion.<br />
In case of damage and improper use of the battery, vapours<br />
may be emitted. Ventilate the area and seek<br />
medical help in case of <strong>com</strong>plaints. The vapours can irritate<br />
the respiratory system.<br />
Use the battery only in conjunction with your <strong>Bosch</strong><br />
power tool. This measure alone protects the battery<br />
against dangerous overload.<br />
Use only original <strong>Bosch</strong> batteries with the voltage listed<br />
on the nameplate of your power tool. When using other<br />
batteries, e.g. imitations, reconditioned batteries or<br />
other brands, there is danger of injury as well as property<br />
damage through exploding batteries.<br />
Product Description and Specifications<br />
Read all safety warnings and all instructions.<br />
Failure to follow the warnings and instructions<br />
may result in electric shock, fire<br />
and/or serious injury.<br />
Intended Use<br />
The machine is intended for dry sanding and polishing of<br />
wood, filler and coated surfaces. It is especially suitable for<br />
profiles, corners or hard to reach locations.<br />
Product Features<br />
The numbering of the product features refers to the illustration<br />
of the machine on the graphics page.<br />
1 Battery unlocking button<br />
2 Battery pack *<br />
3 Dust box, <strong>com</strong>plete (Microfilter System)<br />
4 Sanding sheet*<br />
5 Sanding plate<br />
6 SDS button for release of the sanding plate<br />
7 Battery charge-control indicator<br />
8 On/Off switch<br />
9 Handle (insulated gripping surface)<br />
10 Extraction outlet<br />
11 Filter element (Microfilter System)<br />
12 Extraction adapter*<br />
13 Vacuum hose*<br />
14 Pad extender*<br />
15 Narrow pad extender*<br />
16 Sanding sheet for extender*<br />
17 Narrow rounded pad extender*<br />
*Accessories shown or described are not part of the standard delivery<br />
scope of the product. A <strong>com</strong>plete overview of accessories<br />
can be found in our accessories program.<br />
Technical Data<br />
<strong>Cordless</strong> Multi <strong>Sander</strong><br />
<strong>PSM</strong> <strong>18</strong> <strong>LI</strong><br />
Article number 3 603 CA1 3..<br />
Rated voltage V= <strong>18</strong><br />
No-load speed min -1 11000<br />
No-load orbital stroke rate min -1 22000<br />
Sanding sheet surface cm 2 104<br />
Orbit diameter mm 1.6<br />
Weight according to<br />
EPTA-Procedure 01/2003 kg 1.3<br />
Noise/Vibration Information<br />
Measured sound values determined according to EN 60745.<br />
Typically the A-weighted sound pressure level of the product<br />
is 72 dB(A). Uncertainty K=3 dB.<br />
The noise level when working can exceed 80 dB(A).<br />
Wear hearing protection!<br />
Vibration total values a h (triax vector sum) and uncertainty K<br />
determined according to EN 60745:<br />
a h =7 m/s 2 , K=1.5 m/s 2 .<br />
The vibration emission level given in this information sheet has<br />
been measured in accordance with a standardised test given<br />
in EN 60745 and may be used to <strong>com</strong>pare one tool with another.<br />
It may be used for a preliminary assessment of exposure.<br />
The declared vibration emission level represents the main applications<br />
of the tool. However if the tool is used for different<br />
applications, with different accessories or poorly maintained,<br />
the vibration emission may differ. This may significantly increase<br />
the exposure level over the total working period.<br />
An estimation of the level of exposure to vibration should also<br />
take into account the times when the tool is switched off or<br />
when it is running but not actually doing the job. This may significantly<br />
reduce the exposure level over the total working period.<br />
<strong>Bosch</strong> Power Tools 2 609 007 287 | (17.6.13)
OBJ_BUCH-1201-002.book Page 14 Monday, June 17, 2013 11:30 AM<br />
14 | English<br />
Identify additional safety measures to protect the operator<br />
from the effects of vibration such as: maintain the tool and the<br />
accessories, keep hands warm, organise work patterns.<br />
Declaration of Conformity<br />
We declare under our sole responsibility that the product described<br />
under “Technical Data” is in conformity with the following<br />
standards or standardization documents: EN 60745<br />
according to the provisions of the directives 2011/65/EU,<br />
2004/108/EC, 2006/42/EC.<br />
Technical file (2006/42/EC) at:<br />
Robert <strong>Bosch</strong> GmbH, PT/ETM9,<br />
D-70745 Leinfelden-Echterdingen<br />
Henk Becker<br />
Executive Vice President<br />
Engineering<br />
Robert <strong>Bosch</strong> GmbH, Power Tools Division<br />
D-70745 Leinfelden-Echterdingen<br />
26.04.2013<br />
Assembly<br />
Helmut Heinzelmann<br />
Head of Product Certification<br />
PT/ETM9<br />
Before any work on the machine (e. g. maintenance,<br />
changing the tool, etc.) as well as during its transport<br />
and storage, lock the On/Off switch in the off position.<br />
There is danger of injury when the On/Off switch is unintentionally<br />
actuated.<br />
Battery Charging (see figures A–B)<br />
Use only the battery chargers listed on the accessories<br />
page. Only these battery chargers are matched to the lithium<br />
ion battery of your power tool.<br />
Note: The battery is supplied partially charged. To ensure full<br />
capacity of the battery, <strong>com</strong>pletely charge the battery in the<br />
battery charger before using your power tool for the first time.<br />
The lithium ion battery can be charged at any time without reducing<br />
its service life. Interrupting the charging procedure<br />
does not damage the battery.<br />
The Lithium-Ion battery is protected against deep discharging<br />
by the “Electronic Cell Protection (ECP)”. When the battery is<br />
empty, the machine is switched off by means of a protective<br />
circuit: The inserted tool no longer rotates.<br />
Do not continue to press the On/Off switch after the<br />
machine has been automatically switched off. The battery<br />
can be damaged.<br />
To remove the battery 2, press the battery unlocking button 1<br />
and pull the battery out of the power tool toward the rear. Do<br />
not exert any force.<br />
The battery is equipped with a NTC temperature control<br />
which allows charging only within a temperature range of between<br />
0 °C and 45 °C. A long battery service life is achieved<br />
in this manner.<br />
Observe the notes for disposal.<br />
Dust/Chip Extraction<br />
Dusts from materials such as lead-containing coatings,<br />
some wood types, minerals and metal can be harmful to<br />
one’s health. Touching or breathing-in the dusts can cause<br />
allergic reactions and/or lead to respiratory infections of<br />
the user or bystanders.<br />
Certain dusts, such as oak or beech dust, are considered<br />
as carcinogenic, especially in connection with wood-treatment<br />
additives (chromate, wood preservative). Materials<br />
containing asbestos may only be worked by specialists.<br />
– As far as possible, use a dust extraction system suitable<br />
for the material.<br />
– Provide for good ventilation of the working place.<br />
– It is re<strong>com</strong>mended to wear a P2 filter-class respirator.<br />
Observe the relevant regulations in your country for the<br />
materials to be worked.<br />
Integrated Dust Extraction with Dust Box<br />
(see figures C1 – C4)<br />
Attach the dust box 3 onto the extraction outlet 10 until it<br />
latches.<br />
To empty the dust box 3, pull off the dust box downward.<br />
Before opening the dust box 3, it is re<strong>com</strong>mended to loosen<br />
the dust from the filter element by gently striking it against a<br />
firm support (as shown in the figure).<br />
Hold the dust box 3 firmly, fold the filter element 11 upward<br />
and empty the dust box. Clean the thin plates of the filter element<br />
11 with a soft brush.<br />
External Dust Extraction (see figure D)<br />
Slide the extraction adapter 12 onto the outlet piece 10. The<br />
extraction adapter 12 accepts a vacuum hose with a diameter<br />
of 19 mm.<br />
An overview for connecting to different vacuum cleaners can<br />
be found at the end of these operating instructions.<br />
The vacuum cleaner must be suitable for the material being<br />
worked.<br />
When vacuuming dry dust that is especially detrimental to<br />
health or carcinogenic, use a special vacuum cleaner.<br />
Replacing the Sanding Sheet (see figure E)<br />
When attaching a new sanding sheet, remove any dust or debris<br />
from the sanding plate 5 (e. g. with a brush).<br />
To ensure optimum dust extraction, pay attention that the<br />
punched holes in the sanding sheet match with the holes in<br />
the sanding plate.<br />
The sanding plate 5 is fitted with Velcro backing for quick and<br />
easy fastening of sanding sheets with Velcro adhesion.<br />
Before attaching the sanding sheet 4, free the Velcro backing<br />
of the sanding plate 5 from any debris by tapping against it in<br />
order to enable optimum adhesion.<br />
The machine is fitted with 2 sanding sheets that can be<br />
changed individually, depending on the degree of wear.<br />
Only use the machine when both sanding sheets are<br />
mounted.<br />
Only use sanding sheets with the same grain size.<br />
2 609 007 287 | (17.6.13) <strong>Bosch</strong> Power Tools
OBJ_BUCH-1201-002.book Page 15 Monday, June 17, 2013 11:30 AM<br />
English | 15<br />
Position the sanding sheet 4 flush alongside one edge of the<br />
sanding plate 5, then lay the sanding sheet onto the sanding<br />
plate and press firmly.<br />
To remove the sanding sheet 4, grasp it at one of the tips and<br />
pull it off from the sanding plate 5.<br />
Sanding sheets of the <strong>Bosch</strong> Delta <strong>Sander</strong> can be used.<br />
Sanding accessories, such as fleece pads/polishing cloth<br />
pads, are attached to the sanding plate in the same manner.<br />
Selecting the Sanding Sheet<br />
Depending on the material to be worked and the required rate<br />
of material removal, different sanding sheets are available:<br />
Grain size<br />
40—<strong>18</strong>0<br />
For the working of all wooden<br />
materials<br />
For coarse-sanding, e. g. of rough, coarse 40<br />
unplaned beams and boards<br />
For face sanding and planing small medium 80, 120<br />
irregularities<br />
For finish and fine sanding of wood fine <strong>18</strong>0<br />
40—<strong>18</strong>0<br />
For the working of paint/enamel<br />
coats or primers and fillers<br />
For sanding off paint coarse 40<br />
For sanding primer medium 80, 120<br />
For final sanding of primers before fine <strong>18</strong>0<br />
coating<br />
For reworking or polishing, especially of metal and stone, use<br />
fleece/polishing cloth pad.<br />
Depending on the desired surface quality of the workpiece,<br />
different fleece types or polishing cloth pads are to be used.<br />
Replacing the Sanding Plate (see figure F)<br />
Slide the SDS button for release of the sanding plate 6 all<br />
the way to the right.<br />
Remove the sanding plate 5.<br />
Guide the sanding plate 5 from below against the sanding<br />
plate holder and firmly press them together.<br />
Slide the SDS button for release of the sanding plate 6 all<br />
the way to the left.<br />
If, e. g., the front tip of the sanding sheet is worn, you can also<br />
remove the <strong>com</strong>plete sanding plate and reattach it turned by<br />
120°.<br />
Specialty Sanding Plates<br />
You can replace the supplied sanding plate 5 with a specialty<br />
sanding plate, which is available as an accessory.<br />
The specialty sanding plate is attached in the same manner as<br />
the one supplied.<br />
Attach and remove the respective sanding sheets in the same<br />
manner as when changing original sanding sheets.<br />
Pad Extender (see figure G)<br />
With the pad extender 14 you can sand surfaces that are difficult<br />
to access, such as sills on windows, cabinets or doors.<br />
Pad Extender, Narrow (see figure H)<br />
With the narrow pad extender 15 you can sand narrow openings,<br />
slots and passages.<br />
Pad Extender, Narrow Rounded (see figure I)<br />
The narrow rounded pad extender 17 allows you to sand<br />
curved and hollow areas or surfaces that are curved inward,<br />
such as on furniture, rails or heating radiators.<br />
Operation<br />
Starting Operation<br />
Inserting the battery<br />
Use only original <strong>Bosch</strong> lithium ion batteries with the<br />
voltage listed on the nameplate of your power tool. Using<br />
other batteries can lead to injuries and pose a fire hazard.<br />
Switching On and Off<br />
To start the machine, push the ON/Off switch 8 downward to<br />
position “1”.<br />
To switch off the machine, push the On/Off switch 8 upward<br />
to positon “0”.<br />
To save energy, only switch the power tool on when using it.<br />
Battery Charge-control Indication<br />
The battery charge-control indicator 7 indicates the charge<br />
condition of the battery when the machine is switched on. It<br />
consists of 3 green LEDs.<br />
LED<br />
Capacity<br />
Continuous lighting 3 x green ≥ 66%<br />
Continuous lighting 2 x green 34—65%<br />
Continuous lighting 1 x green 11—33%<br />
Slow flashing 1 x green ≤ 10%<br />
Temperature Dependent Overload Protection<br />
When using as intended for, the power tool cannot be subject<br />
to overload. When the load is too high or the allowable battery<br />
temperature of 70 °C is exceeded, the electronic control<br />
switches off the power tool until the temperature is in the optimum<br />
temperature range again.<br />
The 3 LEDs of the battery charge-control indicator 7 flash rapidly<br />
when the battery temperature is not within the operating<br />
temperature range of –20 to +70°C, and/or when the overload<br />
protection has responded.<br />
Protection Against Deep Discharging<br />
The Lithium-Ion battery is protected against deep discharging<br />
by the “Electronic Cell Protection (ECP)”. When the battery is<br />
empty, the machine is switched off by means of a protective<br />
circuit: The inserted tool no longer rotates.<br />
<strong>Bosch</strong> Power Tools 2 609 007 287 | (17.6.13)
OBJ_BUCH-1201-002.book Page 16 Monday, June 17, 2013 11:30 AM<br />
16 | English<br />
Working Advice<br />
Wait until the machine has <strong>com</strong>e to a standstill before<br />
placing it down.<br />
The removal capacity during sanding is mainly determined by<br />
the selection of the sanding sheet.<br />
Only flawless sanding sheets achieve good sanding capacity<br />
and extend the service life of the machine.<br />
Pay attention to apply uniform sanding pressure; this increases<br />
the working life of the sanding sheets.<br />
Intensifiying the sanding pressure does not lead to an increase<br />
of the sanding capacity, but to increased wear of the<br />
machine and the sanding sheet.<br />
For precise on-the-spot sanding of edges, corners and hard to<br />
reach areas, it is also possible to work only with the tip or an<br />
edge of the sanding plate.<br />
A sanding sheet that has been used for metal should not be<br />
used for other materials.<br />
Use only original <strong>Bosch</strong> sanding accessories.<br />
Maintenance and Service<br />
Maintenance and Cleaning<br />
Before any work on the machine (e. g. maintenance,<br />
changing the tool, etc.) as well as during its transport<br />
and storage, lock the On/Off switch in the off position.<br />
There is danger of injury when the On/Off switch is unintentionally<br />
actuated.<br />
For safe and proper working, always keep the machine<br />
and ventilation slots clean.<br />
When the battery is no longer operative, please refer to an authorised<br />
after-sales service agent for <strong>Bosch</strong> power tools.<br />
After-sales Service and Application Service<br />
Our after-sales service responds to your questions concerning<br />
maintenance and repair of your product as well as spare<br />
parts. Exploded views and information on spare parts can also<br />
be found under:<br />
www.bosch-pt.<strong>com</strong><br />
<strong>Bosch</strong>’s application service team will gladly answer questions<br />
concerning our products and their accessories.<br />
In all correspondence and spare parts order, please always include<br />
the 10-digit article number given on the type plate of<br />
the machine.<br />
Great Britain<br />
Robert <strong>Bosch</strong> Ltd. (B.S.C.)<br />
P.O. Box 98<br />
Broadwater Park<br />
North Orbital Road<br />
Denham<br />
Uxbridge<br />
UB 9 5HJ<br />
Tel. Service: (0844) 7360109<br />
Fax: (0844) 7360146<br />
E-Mail: boschservicecentre@bosch.<strong>com</strong><br />
Ireland<br />
Origo Ltd.<br />
Unit 23 Magna Drive<br />
Magna Business Park<br />
City West<br />
Dublin 24<br />
Tel. Service: (01) 4666700<br />
Fax: (01) 4666888<br />
Australia, New Zealand and Pacific Islands<br />
Robert <strong>Bosch</strong> Australia Pty. Ltd.<br />
Power Tools<br />
Locked Bag 66<br />
Clayton South VIC 3169<br />
Customer Contact Center<br />
Inside Australia:<br />
Phone: (01300) 307044<br />
Fax: (01300) 307045<br />
Inside New Zealand:<br />
Phone: (0800) 543353<br />
Fax: (0800) 428570<br />
Outside AU and NZ:<br />
Phone: +61 3 95415555<br />
www.bosch.<strong>com</strong>.au<br />
Republic of South Africa<br />
Customer service<br />
Hotline: (011) 6519600<br />
Gauteng – BSC Service Centre<br />
35 Roper Street, New Centre<br />
Johannesburg<br />
Tel.: (011) 4939375<br />
Fax: (011) 4930126<br />
E-Mail: bsctools@icon.co.za<br />
KZN – BSC Service Centre<br />
Unit E, Almar Centre<br />
143 Crompton Street<br />
Pinetown<br />
Tel.: (031) 7012120<br />
Fax: (031) 7012446<br />
E-Mail: bsc.dur@za.bosch.<strong>com</strong><br />
Western Cape – BSC Service Centre<br />
Democracy Way, Prosperity Park<br />
Milnerton<br />
Tel.: (021) 5512577<br />
Fax: (021) 5513223<br />
E-Mail: bsc@zsd.co.za<br />
<strong>Bosch</strong> Headquarters<br />
Midrand, Gauteng<br />
Tel.: (011) 6519600<br />
Fax: (011) 6519880<br />
E-Mail: rbsa-hq.pts@za.bosch.<strong>com</strong><br />
Transport<br />
Dispatch batteries only when the housing is undamaged.<br />
Tape or mask off open contacts and pack up the battery in<br />
such a manner that it cannot move around in the packaging.<br />
Please also observe possibly more detailed national regulations.<br />
2 609 007 287 | (17.6.13) <strong>Bosch</strong> Power Tools