

PDF Version - Glidewell Dental Labs
PDF Version - Glidewell Dental Labs
PDF Version - Glidewell Dental Labs

You also want an ePaper? Increase the reach of your titles
YUMPU automatically turns print PDFs into web optimized ePapers that Google loves.
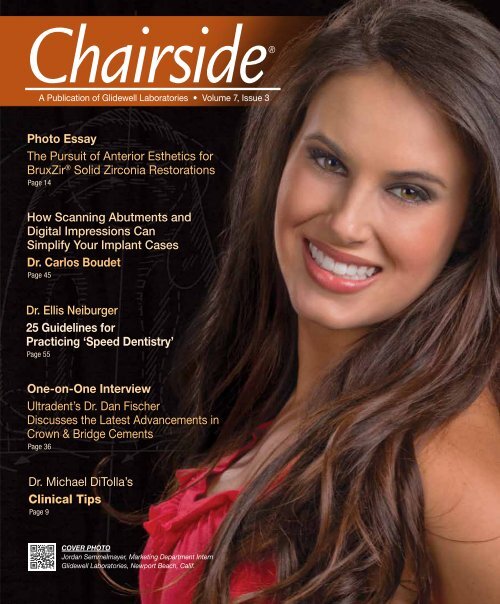
Chairside®<br />
A Publication of <strong>Glidewell</strong> Laboratories • Volume 7, Issue 3<br />
Photo Essay<br />
The Pursuit of Anterior Esthetics for<br />
BruxZir ® Solid Zirconia Restorations<br />
Page 14<br />
How Scanning Abutments and<br />
Digital Impressions Can<br />
Simplify Your Implant Cases<br />
Dr. Carlos Boudet<br />
Page 45<br />
Dr. Ellis Neiburger<br />
25 Guidelines for<br />
Practicing ‘Speed Dentistry’<br />
Page 55<br />
One-on-One Interview<br />
Ultradent’s Dr. Dan Fischer<br />
Discusses the Latest Advancements in<br />
Crown & Bridge Cements<br />
Page 36<br />
Dr. Michael DiTolla’s<br />
Clinical Tips<br />
Page 9<br />
COVER PHOTO<br />
Jordan Semmelmayer, Marketing Department Intern<br />
<strong>Glidewell</strong> Laboratories, Newport Beach, Calif.
Contents<br />
9 Dr. DiTolla’s Clinical Tips<br />
In this issue, I highlight two useful resources for<br />
boosting your practice: a new dentist-conceived<br />
app that is a must-have for the dental office, and a<br />
subscription-based dental coding search engine<br />
pioneered by Dr. Charles Blair that will help you<br />
eliminate costly coding errors and recover lost revenue.<br />
Also featured are LuxaBite from DMG America, my<br />
bite material of choice for its high degree of stiffness<br />
and accuracy; and Ultradent’s UltraCem, the first<br />
liquid-powder RRGI cement that can be mixed and<br />
delivered through a syringe.<br />
14 Photo Essay: The Pursuit of BruxZir<br />
Anterior Esthetics<br />
As <strong>Glidewell</strong> Laboratories works to improve the esthetic<br />
properties of BruxZir Solid Zirconia, it continues to<br />
test what the lab can do with this increasingly popular<br />
restorative material. This photo essay illustrates our<br />
latest anterior case where we replaced an endodontically<br />
treated tooth #8 and an existing PFM on tooth #9 with<br />
BruxZir crowns. After viewing the case, I think you<br />
will see that BruxZir is closer than ever to becoming a<br />
strong contender for esthetic anterior crowns & bridges.<br />
36 One-on-One with Dr. Michael DiTolla:<br />
Interview of Dr. Dan Fischer<br />
For this issue’s featured interview, I checked in with<br />
dental innovator and Ultradent CEO Dr. Dan Fischer<br />
to hear about his company’s latest research and how<br />
his search for a cure for dental caries is coming along.<br />
Give it a read to find out how the company developed<br />
its new liquid-powder RRGI cement, the differences<br />
between powder-liquid and paste-paste cements, and<br />
what led to the company becoming the exclusive distributor<br />
of Triodent products in the U.S.<br />
45 Scannable Abutments:<br />
Digital Impressions for <strong>Dental</strong> Implants<br />
In this article, Dr. Carlos Boudet aims to increase awareness<br />
of scannable abutments that can be used with<br />
chairside digital impression systems to capture digital<br />
impressions for implant restorations. He demonstrates<br />
the simplicity of this relatively new modality in a case<br />
where he uses one of <strong>Glidewell</strong> Laboratories’ Inclusive<br />
Scanning Abutments and a widely used digital impression<br />
system to restore a popular brand of dental implant.<br />
Can’t get enough Chairside? Check out our Chairside<br />
Live Web series featuring dental news, Dr. DiTolla’s Case<br />
of the Week and more — now available on YouTube,<br />
iTunes and at www.glidewelldental.com.<br />
Contents 1
Contents<br />
49 Case Report: The Creation of a<br />
Soft Tissue Emergence Profile with a<br />
Long-Term Ribbond-THM Provisional<br />
One distinct advantage of using fiber-reinforcing<br />
materials such as Ribbond THM for temporary restorations<br />
in traditional composite restorative techniques<br />
is the significant decrease in gingival microleakage,<br />
suggest Drs. Len Boksman and Robert Margeas. Their<br />
case report illustrates four case examples showing the<br />
type of positive tissue response that can be created<br />
with this approach.<br />
55 Speed Dentistry: Fast Is Better —<br />
Up to a Point<br />
“Modern dentistry … is often practiced slowly; that<br />
is, more slowly than it needs to be,” argues Dr. Ellis<br />
Neiburger in this article exploring the practice of<br />
doing dental treatments faster and better — a concept<br />
he calls “speed dentistry.” Giving 25 guidelines for<br />
dentists to follow, the frequent Chairside contributor<br />
claims that by investing a little bit of time and<br />
energy toward learning to practice speed dentistry,<br />
they can greatly benefit themselves, their patients and<br />
their practice.<br />
<strong>Glidewell</strong> Publications iPad App<br />
To experience Chairside magazine on<br />
the iPad, search “<strong>Glidewell</strong>” in the iTunes<br />
Store and download the free <strong>Glidewell</strong><br />
Publications app.<br />
63 Digital Imaging: An Important Visual Aid in<br />
Treatment Planning and Case Acceptance<br />
Dr. Tarun Agarwal suggests that digital imaging should<br />
play a vital role in every dentist’s practice, especially<br />
when treating anterior cases. His clinical case study<br />
helps make his point by demonstrating how an<br />
affordable, off-the-shelf imaging solution can be used<br />
to effectively communicate treatment possibilities and<br />
aid in patient treatment acceptance, leading to final<br />
results that meet or exceed patient expectations.<br />
ALSO IN THIS ISSUE<br />
8 By the Numbers<br />
68 Chairside Photo Hunt Results<br />
2<br />
www.chairsidemagazine.com
Publisher<br />
Jim <strong>Glidewell</strong>, CDT<br />
Editor-in-Chief and Clinical Editor<br />
Michael C. DiTolla, DDS, FAGD<br />
Managing Editors<br />
Jim Shuck; Mike Cash, CDT<br />
Creative Director<br />
Rachel Pacillas<br />
Copy Editors<br />
Jennifer Holstein,<br />
David Frickman, Megan Strong<br />
Statistical Editor<br />
Darryl Withrow<br />
Digital Marketing Manager<br />
Kevin Keithley<br />
Graphic Designers<br />
Emily Arata, Jamie Austin, Deb Evans,<br />
Joel Guerra, Audrey Kame, Phil Nguyen,<br />
Kelley Pelton, Makara You<br />
Web Designers<br />
Jamie Austin, Melanie Solis, Ty Tran<br />
Photographer<br />
Sharon Dowd<br />
Illustrator<br />
Wolfgang Friebauer, MDT<br />
Coordinator and Ad Representative<br />
Teri Arthur<br />
(teri.arthur@glidewelldental.com)<br />
If you have questions, comments or complaints regarding<br />
this issue, we want to hear from you. Please e-mail us at<br />
chairside@glidewelldental.com. Your comments may be<br />
featured in an upcoming issue or on our website:<br />
www.chairsidemagazine.com.<br />
© 2012 <strong>Glidewell</strong> Laboratories<br />
Neither Chairside magazine nor any employees involved in its publication<br />
(“publisher”), makes any warranty, express or implied, or assumes any<br />
liability<br />
Neither<br />
or<br />
Chairside<br />
responsibility<br />
Magazine<br />
for the<br />
nor<br />
accuracy,<br />
any employees<br />
completeness,<br />
involved<br />
or<br />
in its<br />
usefulness<br />
publication<br />
of any<br />
(“publisher”),<br />
information,<br />
makes<br />
apparatus,<br />
any warranty,<br />
product,<br />
express<br />
or process<br />
or implied,<br />
disclosed,<br />
or assumes<br />
or<br />
represents<br />
any liability<br />
that<br />
or<br />
its<br />
responsibility<br />
use would<br />
for<br />
not<br />
the<br />
infringe<br />
accuracy,<br />
proprietary<br />
completeness,<br />
rights. Reference<br />
or usefulness<br />
herein to<br />
of any<br />
any<br />
information,<br />
specific commercial<br />
apparatus, product,<br />
products,<br />
or<br />
process,<br />
process disclosed,<br />
or services<br />
or<br />
by<br />
represents<br />
trade name,<br />
that its<br />
trademark,<br />
use would<br />
manufacturer<br />
not infringe proprietary<br />
or otherwise<br />
rights. Reference<br />
does not<br />
necessarily<br />
herein to<br />
constitute<br />
any specific<br />
or<br />
commercial<br />
imply its endorsement,<br />
products, process,<br />
recommendation,<br />
or services by<br />
or<br />
favoring<br />
trade name,<br />
by the<br />
trademark,<br />
publisher. The<br />
manufacturer<br />
views and<br />
or<br />
opinions<br />
otherwise<br />
of<br />
does<br />
authors<br />
not<br />
expressed<br />
necessarily<br />
constitute<br />
herein do not necessarily<br />
or imply its<br />
state<br />
endorsement,<br />
or reflect<br />
recommendation,<br />
those of the publisher<br />
or favoring<br />
and<br />
shall<br />
by<br />
not<br />
the<br />
be<br />
publisher.<br />
used for<br />
The<br />
advertising<br />
views and<br />
or product<br />
opinions<br />
endorsement<br />
of authors expressed<br />
purposes.<br />
CAUTION:<br />
herein do<br />
When<br />
not necessarily<br />
viewing the<br />
state<br />
techniques,<br />
or reflect those<br />
procedures,<br />
of the publisher<br />
theories<br />
and<br />
and<br />
materials<br />
shall not<br />
that<br />
be<br />
are<br />
used<br />
presented,<br />
for advertising<br />
you must<br />
or<br />
make<br />
product<br />
your<br />
endorsement<br />
own decisions<br />
purposes.<br />
about<br />
specific<br />
CAUTION:<br />
treatment<br />
When viewing<br />
for patients<br />
the techniques,<br />
and exercise<br />
procedures,<br />
personal<br />
theories<br />
professional<br />
and materials<br />
that<br />
judgment regarding<br />
are presented,<br />
the need for<br />
you<br />
further<br />
must make<br />
clinical<br />
your<br />
testing<br />
own<br />
or<br />
decisions<br />
education<br />
about<br />
and<br />
your<br />
specific<br />
own clinical<br />
treatment<br />
expertise<br />
for patients<br />
before<br />
and<br />
trying<br />
exercise<br />
to implement<br />
personal professional<br />
new procedures.<br />
judgment<br />
regarding the need for further clinical testing or education and<br />
your own clinical expertise before trying to implement new procedures.<br />
Chairside is a registered trademark of <strong>Glidewell</strong> Laboratories.<br />
Chairside ® Magazine is a registered trademark of <strong>Glidewell</strong> Laboratories.<br />
Editor’s Letter<br />
It was interesting to read recently that students at NYU<br />
College of Dentistry received a letter from the faculty<br />
informing them that the dental school’s default direct<br />
restorative material was being changed from amalgam<br />
to composite. It’s not that the school has completely<br />
abandoned amalgam — the amalgam technique will still<br />
be taught in preclinical, and dental school patients with<br />
clinically acceptable amalgams will not have to have those<br />
restorations replaced — but new amalgam restorations will<br />
now require justification by faculty for placement. I wonder<br />
how often amalgams will be approved?<br />
A main reason for the faculty’s decision to make composite<br />
the dental school’s default restoration is the material’s ability<br />
to be used as a “caries-specific restoration.” In other words,<br />
the faculty feels that with bonded composite resin, the<br />
students only need to remove the caries and the surrounding<br />
affected dentin before restoring the lesion. This is in contrast<br />
to an amalgam preparation that needs to be a certain depth<br />
for strength, regardless of the depth of the caries. So they<br />
made the decision to conserve as much tooth structure as<br />
possible by going with composite over amalgam.<br />
When you consider that amalgam has been a successful<br />
restorative material for nearly 150 years, some might think<br />
the conservative choice would be utilizing the material with<br />
that amazing track record. In the letter to the students,<br />
the faculty quotes a 12-year study showing that bonded<br />
composite performs as well or better than amalgam over<br />
that time period. It would seem there is more than one way<br />
to define conservatism in dentistry.<br />
At the laboratory, our most popular product is BruxZir ®<br />
Solid Zirconia. While it doesn’t have the track record of<br />
PFMs, it is the most conservative material we have for fullcoverage<br />
crowns — with the exception of full-cast gold.<br />
Considering that many patients are reluctant to have cast<br />
gold placed in their mouths, BruxZir crowns are the only<br />
tooth-colored crowns we offer that can be prepared with<br />
feather-edge margins and milled as thin as 0.6 mm.<br />
I didn’t think I would live to see composite become the<br />
restoration of choice in a dental school, or a time when<br />
a high-strength, cementable all-ceramic restoration like<br />
BruxZir Solid Zirconia would outsell PFMs by a margin of<br />
3-1, but both are here.<br />
Yours in quality dentistry,<br />
Dr. Michael C. DiTolla<br />
Editor-in-Chief, Clinical Editor<br />
mditolla@glidewelldental.com<br />
Editor’s Letter 3
Letters to the Editor<br />
Dear Dr. DiTolla,<br />
I have been watching the free clinical videos<br />
on the <strong>Glidewell</strong> website and am impressed.<br />
Thank you for making these resources available<br />
at a price that’s hard to beat.<br />
If you wouldn’t mind, could you answer a<br />
few questions? These questions focus on<br />
the video “Diagnosis & Placement of No-<br />
Prep Veneers”:<br />
1) Would it be helpful to relate midsagittal<br />
and interpupillary planes to the lab, as in<br />
a Kois Dento-Facial Analyzer (Panadent;<br />
Colton, Calif.), or in your experience is this<br />
not necessary?<br />
2) What brand of retractors were used (two<br />
types are shown)?<br />
3) How do you deal with interproximal contact<br />
issues — hyper or hypo — at try-in,<br />
especially as there is no gingival margin to<br />
act as a stop?<br />
4) How do you know when you need to use<br />
“shade-adjustable” porcelain?<br />
– Vincent Johnson, DDS<br />
Bay City, Mich.<br />
Dear Vincent,<br />
Thanks for writing and for the kind<br />
words! Here are some attempts at answering<br />
your questions:<br />
4<br />
www.chairsidemagazine.com<br />
1) It is very helpful to include that<br />
information; however, if you parallel<br />
the incisal edges of your preps to the<br />
interpupillary line, that is our default<br />
way of mounting the cast. That being<br />
said, it is much easier for us to do<br />
that if a Kois Dento-Facial Analyzer, or<br />
even a stick bite, is included.<br />
2) The one I like best is the SeeMORE<br />
retractor from Discus <strong>Dental</strong>. There<br />
are rumors that they may stop selling<br />
that product, so I am looking into having<br />
it made here at the lab because we<br />
have an injection-molding machine on<br />
the premises.<br />
3) The contact/seating issue is the<br />
worst thing about no-prep veneers.<br />
Sometimes I have the lab make a little<br />
finger of ceramic on the incisal edge<br />
of the veneer to prevent overseating,<br />
but then you have to grind that<br />
all away after bonding it into place.<br />
Really, it all comes down to “feel” and<br />
some educated guesswork. I hate procedures<br />
like that, but I haven’t found a<br />
better way yet.<br />
4) You never have to ask for shadeadjustable<br />
ceramic anymore because<br />
it is now the material we use on all<br />
these types of cases, except for the<br />
ones where we are trying to block out<br />
a darker shade of tooth — something<br />
lower in value than an A3. In those<br />
cases, we either need to opaque the<br />
inside of the veneers or have the doctor<br />
prep the tooth so we can make the<br />
veneer a little thicker.<br />
Since that video was produced, however,<br />
I now do nearly all my veneers<br />
in IPS e.max ® (Ivoclar Vivadent; Amherst,<br />
N.Y.). Because it is three-times<br />
stronger than IPS Empress ® (Ivoclar<br />
Vivadent), I have yet to experience<br />
any of the incisal chipping or breakage<br />
that I did over the years with IPS<br />
Empress. In fact, IPS Empress is dying<br />
a slow death in our laboratory, while<br />
the number of IPS e.max veneers we<br />
do continues to grow. I foresee a time<br />
in the not-too-distant future when all<br />
veneers will be IPS e.max because of<br />
its optimum esthetics and strength.<br />
Hope that helps!<br />
– Mike<br />
Dear Dr. DiTolla,<br />
Just wanted to send you a note to say<br />
how much I enjoy reading your interviews<br />
in Chairside magazine. The two with<br />
Drs. Howard Farran and Paul Homoly are<br />
must-reads for all dentists. Sometimes I<br />
feel you read my mind with your questions.<br />
Keep up the good work.<br />
– Steven Bellantese, DDS<br />
Bronxville, N.Y.<br />
Dear Steve,<br />
Thank you for your kind words. I love<br />
long-form interviews, yet they seem to<br />
be such a rarity in dental magazines<br />
these days. I never feel like I learn<br />
anything from the one-pagers. It takes<br />
a few pages to ask follow-ups and give<br />
someone the space to answer.<br />
– Mike<br />
Dear Dr. DiTolla,<br />
Thank you very much for the practically<br />
helpful educational support your lab provides<br />
to dentists. I wonder if you give written<br />
directions or drawings to the lab technician<br />
about the desired thickness of the wax-up<br />
design (in other words, how much dental<br />
tissue it is safe to prep). As a rule, technicians<br />
overprep teeth on the model, which<br />
leads to extra time to fit.<br />
Cordially,<br />
– Alex Zavyalov, DDS<br />
New York, N.Y.<br />
Dear Alex,<br />
Yes, when I am having a diagnostic<br />
wax-up done, I will often send along<br />
one of my 0.6 mm depth cutters from<br />
my Reverse Preparation Set (Axis
<strong>Dental</strong>; Coppell, Texas), and have the<br />
technician use it to place depth cuts.<br />
I let the technician know that is the<br />
most I want removed from the teeth to<br />
ensure that I stay in enamel.<br />
– Mike<br />
Dear Dr. DiTolla,<br />
I really enjoy watching the educational<br />
videos you provide through the <strong>Glidewell</strong><br />
website. Recently I have noticed an<br />
increased incidence of porcelain fracturing<br />
from the zirconia (Prismatik CZ and some<br />
NobelProcera [Nobel Biocare; Yorba Linda,<br />
Calif.]). I have started to use more BruxZir ®<br />
restorations in the posterior, but its limited<br />
esthetics are sometimes a problem. I<br />
fear I may have to return to PFMs. Any<br />
recommendations?<br />
– Dr. Fred Curcio<br />
Ridgefield Park, N.J.<br />
Dear Fred,<br />
Like you, I noticed a good deal of fracturing<br />
of porcelain-fused-to-zirconia<br />
restorations and have drifted to monolithic<br />
BruxZir Solid Zirconia. I find<br />
BruxZir restorations to be esthetically<br />
acceptable on first and second molars,<br />
especially when the patient’s other<br />
choice is cast gold! I am also very<br />
happy with the results I am getting<br />
with IPS e.max. So, basically, I usually<br />
go for IPS e.max in the anterior and<br />
BruxZir restorations in the posterior.<br />
I haven’t done a single-unit PFM in<br />
two years, but I still use porcelainfused-to-metal<br />
for many bridge cases<br />
where I don’t trust BruxZir as much —<br />
it’s still an all-ceramic product. Also,<br />
as you may have noticed, I am starting<br />
to put more anterior BruxZir cases on<br />
our website, but keep in mind these<br />
cases are being accomplished with the<br />
help of an in-office technician.<br />
If you aren’t happy with the esthetics<br />
of BruxZir restorations, you may have<br />
to return to PFMs, unless you are<br />
convinced that IPS e.max is strong<br />
enough for the posterior. My personal<br />
feeling is that with 1.5 mm of occlusal<br />
reduction, IPS e.max is strong enough,<br />
but many dentists don’t give us that<br />
much reduction.<br />
Hope that helps!<br />
– Mike<br />
Dear Dr. DiTolla,<br />
I recently watched a video from <strong>Glidewell</strong><br />
Laboratories where you were discussing the<br />
“cleaning” process for the internal surface<br />
of a zirconia crown (BruxZir ® crown, etc.)<br />
prior to cementation. You mentioned using<br />
Ivoclean (Ivoclar Vivadent; Amherst, N.Y.)<br />
and a zirconia primer. I will typically cement<br />
my zirconia crowns with the RMGI RelyX <br />
Luting Plus (3M ESPE; St. Paul, Minn.).<br />
Would you recommend using Ivoclean and<br />
the zirconia primer prior to cementing with<br />
RelyX Luting Plus or only with resin-type<br />
cements (RelyX Unicem or RelyX Ultimate)?<br />
Thanks so much for your help. I really enjoy<br />
your videos through the lab and find them<br />
all very helpful.<br />
– Kevin G. Jones, DDS<br />
Little Rock, Ark.<br />
Dear Kevin,<br />
It comes down to how retentive your<br />
prep is. If the prep is, say, 4 mm in<br />
vertical height and has no more than<br />
10 degrees of taper, then cementing<br />
with a RMGI without the zirconia<br />
primer will work fine. As the prep<br />
gets shorter or more tapered, that<br />
is when you should consider using<br />
Ivoclean and Z-PRIME Plus (BISCO;<br />
Schaumburg, Ill.) in conjunction with<br />
an RMGI such as RelyX Luting Plus.<br />
When you need maximum retention,<br />
such as on a short mandibular<br />
second molar, you should probably<br />
go with Ivoclean, Z-PRIME Plus and<br />
a self-etching resin cement like RelyX<br />
Unicem. I now use Ceramir ® (Doxa<br />
<strong>Dental</strong> Inc.; Newport Beach, Calif.) as<br />
my everyday cement. One of its chief<br />
benefits is that it has a natural bond<br />
to BruxZir crowns, once the inside<br />
of the crown has been cleaned with<br />
Ivoclean. I also really like the way<br />
Ceramir cleans up, making it a very<br />
enjoyable cement to use.<br />
Hope that helps!<br />
– Mike<br />
CONNECT WITH CHAIRSIDE<br />
FOLLOW US ON TWITTER<br />
Find us @<strong>Glidewell</strong><strong>Dental</strong><br />
FIND US ON FACEBOOK<br />
Search “<strong>Glidewell</strong>” to see<br />
what’s new.<br />
iTUNES WATCH AND<br />
LEARN<br />
Go the iTunes store and search<br />
“<strong>Glidewell</strong>.” Plus, download<br />
the free <strong>Glidewell</strong> Publications<br />
app for iPad.<br />
SHARE YOUR THOUGHTS<br />
Visit www.chairsidemagazine.com<br />
and select “Contact Us.” Or write to:<br />
<strong>Glidewell</strong> Laboratories<br />
ATTN: Chairside magazine<br />
4141 MacArthur Blvd.<br />
Newport Beach, CA 92660<br />
ACCESS OUR RESOURCES<br />
Clinical videos, product information<br />
and patient resources are a click<br />
away at www.glidewelldental.com.<br />
ADVERTISE/SUBMIT AN<br />
ARTICLE<br />
Call 888-303-4221<br />
Letters should include writer’s full name,<br />
address and daytime phone number. All<br />
correspondence may be published and<br />
edited for clarity and length.<br />
Letters to the Editor 5
Contributors<br />
Michael C. DiTolla, DDS, FAGD<br />
Dr. Michael DiTolla is a graduate of University of the Pacific Arthur A. Dugoni School of Dentistry. As<br />
Director of Clinical Education and Research at <strong>Glidewell</strong> Laboratories in Newport Beach, Calif., he performs<br />
clinical testing on new products in conjunction with the company’s R&D department. <strong>Glidewell</strong> dental<br />
technicians have the privilege of rotating through Dr. DiTolla’s operatory and experiencing his commitment<br />
to excellence through his prepping and placement of their restorations. He is a CR evaluator and lectures<br />
nationwide on both restorative and cosmetic dentistry. Dr. DiTolla has several clinical programs available<br />
on DVD through <strong>Glidewell</strong> Laboratories. For more information on his articles or to receive a free copy of<br />
Dr. DiTolla’s clinical presentations, call 888-303-4221 or e-mail mditolla@glidewelldental.com.<br />
Tarun Agarwal, DDS, PA<br />
Dr. Tarun Agarwal is a 1999 graduate of the University of Missouri-Kansas City. He maintains a full-time private<br />
practice emphasizing esthetic, restorative and implant dentistry in Raleigh, N.C., and regularly presents<br />
programs to study clubs and dental organizations nationally. Through his real-world approach to dentistry,<br />
practice enhancement and life balance, Dr. Agarwal seeks to motivate dentists and energize team members to<br />
increase productivity and profitability. His work and practice have been featured in numerous consumer and<br />
dental publications. Contact him at dra@raleighdentalarts.com or visit http://raleighdentalarts.com.<br />
Leendert Boksman, DDS, BSc, FADI, FICD<br />
Dr. Leendert “Len” Boksman is a former tenured associate professor and adjunct professor at the Schulich<br />
School of Medicine and Dentistry in London, Ontario, Canada, and former director of clinical affairs<br />
for Clinical Research <strong>Dental</strong> and CLINICIAN’S CHOICE. He retired from practice at the end of 2011,<br />
and currently does freelance consulting and lecturing. He also authors articles of interest to the general<br />
practitioner. Contact him at lenboksman@rogers.blackberry.net.<br />
Carlos A. Boudet, DDS, DICOI<br />
Dr. Carlos Boudet graduated from Medical College of Virginia (now VCU Medical Center) in 1980 with a<br />
DDS degree. Soon after, he became a commissioned officer for the United States Public Health Service. His<br />
tour ended in 1982, when he was asked to serve as director of four dental clinics around Lake Okeechobee,<br />
Fla. Dr. Boudet established his dental practice in West Palm Beach in 1983 and has practiced in the same<br />
location ever since. He is a Diplomate of the International Congress of Oral Implantologists, a member of<br />
the Central Palm Beach County <strong>Dental</strong> Society and sits in the board of directors of the Atlantic Coast <strong>Dental</strong><br />
Research Clinic. Contact him at www.boudetdds.com or 561-968-6022.<br />
6<br />
www.chairsidemagazine.com
Dan E. Fischer, DDS<br />
Dr. Dan Fischer graduated from Loma Linda University with a DDS in 1974. He maintained a full-time<br />
private practice for 15 years, working after hours on research and development. Since 1990, Dr. Fischer has<br />
worked extensively in research and development, but still maintains a part-time practice with an emphasis<br />
on esthetic dentistry. As the president/CEO of Utah-based Ultradent Products Inc., he is extensively involved<br />
in the research and development of many products widely used in the dental profession, with numerous<br />
U.S. and foreign patents granted or pending. Dr. Fischer also serves as an adjunct professor at Loma<br />
Linda University and the University of Texas-San Antonio. He is a member of the ADA, IADR, Academy of<br />
Operative Dentists, AGD and ACD, and received the AACD’s Lifetime Achievement Award in 2005. Contact<br />
him at chairside@glidewelldental.com.<br />
Robert C. Margeas, DDS<br />
Dr. Robert Margeas received his DDS from the University of Iowa College of Dentistry in 1986 and completed<br />
an AEGD residency in 1987. He currently serves as an adjunct professor in the Department of Operative<br />
Dentistry at the University of Iowa. He is also a clinical instructor at the Center for Excellence ® in Chicago,<br />
Ill. Dr. Margeas is board certified by the American Board of Operative Dentistry, and is a Fellow of the<br />
AGD. He lectures both nationally and internationally, and he has published several articles in major<br />
dental journals. Dr. Margeas maintains a private practice devoted to esthetic dentistry in Des Moines, Iowa.<br />
Contact him at chairside@glidewelldental.com.<br />
Ellis J. Neiburger, DDS<br />
Dr. Ellis “Skip” Neiburger graduated from the University of Illinois at Chicago College of Dentistry in 1968,<br />
where he did postgraduate work on pulp histology in the department of oral pathology. Dr. Neiburger<br />
currently practices general dentistry in Waukegan, Ill. A former vice president of the American Association<br />
of Forensic Dentists, Dr. Neiburger has been the association’s journal editor since 1978. He also was<br />
publisher/editor for <strong>Dental</strong> Computer Newsletter (the journal that introduced computing to the dental field).<br />
Contact him at 847-244-0292 or eneiburger@comcast.net.<br />
Contributors 7
Numbers<br />
by the<br />
2<br />
26%<br />
Percentage of Brits over<br />
the age of 73 who have<br />
lost all of their teeth<br />
Source: DENTALFAX Weekly,<br />
www.dentalfax.com<br />
Gordon Christensen’s<br />
recommended maximum<br />
number of units for a<br />
quadrant double-arch<br />
impression tray<br />
Source: Gordon J. Christensen<br />
Practical Clinical Courses,<br />
“Predictable Fixed & Removable<br />
Prosthodontic Impressions,”<br />
www.pccdental.com/v1931<br />
33,272<br />
Total number of digital impressions<br />
received at <strong>Glidewell</strong> Laboratories to date<br />
37%<br />
Percentage of <strong>Glidewell</strong><br />
Laboratories’ cases of 3 or<br />
more units that are impressed in<br />
double-arch quadrant trays<br />
#2<br />
BruxZir ® Solid Zirconia is the second-most<br />
prescribed anterior restoration at<br />
<strong>Glidewell</strong> Laboratories<br />
8<br />
www.chairsidemagazine.com
Dr. DiTolla’s<br />
CLINICAL TIPS<br />
PRODUCT........ Kick Your Apps ® DDS App<br />
SOURCE........... Kick Your Apps Inc. (Poway, Calif.)<br />
800-631-2021, www.kickyourapps.com<br />
It took a dentist, Dr. Bob Marcus, to realize how cool it would be for dentists to have an app for their dental<br />
office. Patients can get directions, call the office and request appointments through the app. The “Refer A<br />
Friend” button sends an e-mail with your office info to the patient’s friend with less than 10 seconds of effort.<br />
Another page has maps, hours and services. There is even a before-and-after photo gallery tab. The killer<br />
feature, however, is the “Emergency” button prominently featured in the bottom row. With a touch of a button,<br />
the patient can reach you or your answering service any time they have an emergency. It shows that you walk<br />
the talk and are serious about treating patients right. It’s your chance to look cutting-edge and caring at the<br />
same time. Bob’s company is called Kick Your Apps and charges a one-time fee of $899 to set up your app.<br />
The company is offering a $50 discount to anyone who enters the promo code: <strong>Glidewell</strong>. And even though<br />
I am all Mac, all the time, I would be remiss if I did not mention that it is available for Android and Blackberry<br />
phones as well.
Dr. DiTolla’s<br />
CLINICAL TIPS<br />
PRODUCT........ Practice Booster ® Code Advisor<br />
SOURCE........... Practice Booster (Belmont, N.C.)<br />
866-858-7596, www.practicebooster.com<br />
I am always surprised at how many calls we get at the lab from dentists and front office<br />
staff wanting to know what the best insurance code is for a restoration, especially for<br />
newer ones like BruxZir ® Solid Zirconia or Lava Ultimate (3M ESPE; St. Paul, Minn.).<br />
I quickly refer all of these calls to the man who knows more about insurance coding<br />
than anyone I know: Dr. Charles Blair. I purchased his Practice Booster Code Advisor<br />
and have been thoroughly impressed by how easy he has made it to access so much<br />
information. Because it’s Web-based, it is simple for the company to make updates that<br />
you can see instantly without having to perform a software update. A simple glance at<br />
Code D2950-Core Buildup shows why this program is so valuable. In addition to giving<br />
you warnings and cautions for when these services won’t be covered, it also includes<br />
sample narratives for how to get build-ups approved when they are indicated. You<br />
really have to see it in action to appreciate how thorough it is. Visit the Practice Builder<br />
website to check it out, and stop leaving money on the table.
Dr. DiTolla’s<br />
CLINICAL TIPS<br />
PRODUCT........ UltraCem RRGI Cement<br />
SOURCE........... Ultradent Products Inc. (South Jordan, Utah)<br />
888-230-1420, www.ultradent.com<br />
It’s been a long time since we have seen a new resin-reinforced glass ionomer<br />
(RRGI) on the market, but when it came from the people at Ultradent, I sat up and<br />
took notice because they typically do not come out with a product unless they feel<br />
they have made a leap forward in quality, convenience or both. When the UltraCem<br />
syringe landed on my desk, I stared at it for a good week trying to appreciate just<br />
how much was going on there. You expect Ultradent to put most things in a syringe,<br />
mainly for dispensing purposes, but this was a powder-liquid cement that has to<br />
be mixed prior to using. A simple impression syringe with a mix tip was not going<br />
to work in this situation. Somehow, the research and development department<br />
in Utah figured out how to pull this off! See my interview with Dr. Dan Fischer on<br />
page 36 for a more in-depth discussion about this cement and others. Dan really<br />
opened my eyes with his research and frank opinions about the current state of<br />
paste-paste RRGI crown & bridge cements.<br />
Dr. DiTolla’s Clinical Tips11
Dr. DiTolla’s<br />
CLINICAL TIPS<br />
PRODUCT........ LuxaBite ® Bite Registration Material<br />
SOURCE........... DMG America (Englewood, N.J.)<br />
800-662-6383, www.dmg-america.com<br />
For me, the harder bite registration is, the better. I used to watch my dad use wax material for bites, and I<br />
was amazed how easily it could distort, especially once you threw it in a case pan with a couple of stone<br />
models. In dental school we used Aluwax (Aluwax <strong>Dental</strong> Products Company; Allendale, Mich.), and I<br />
was always worried that I was going to somehow distort it while handling it and would have to get the<br />
patient to come back for a redo. When Blu-Mousse ® (Parkell Inc.; Edgewood, N.Y.) came out, it was a huge<br />
step in the right direction and polyvinyl siloxanes became the de facto standard for bite registrations. We<br />
only see about 15 percent of our crown & bridge cases coming in with wax bites these days, even though<br />
it still seems to be the standard for partial denture cases. Today, LuxaBite is my bite material of choice<br />
because as a bisacryl material it has a higher degree of stiffness and accuracy than any other material on<br />
the market. It also offers little to no resistance to biting when placed on the prep and the patient closes<br />
into it. If you are familiar with LuxaTemp, then you are essentially familiar with LuxaBite because they are<br />
both bisacryl materials. There simply is not a more accurate way to take a bite today.<br />
12 www.chairsidemagazine.com
14 www.chairsidemagazine.com
Photo Essay<br />
The Pursuit of BruxZir ®<br />
Anterior Esthetics<br />
– ARTICLE by Michael C. DiTolla, DDS, FAGD<br />
<strong>Glidewell</strong> Laboratories continues to test what the lab can do with BruxZir ® Solid Zirconia crowns & bridges as it<br />
works to improve the esthetic nature of this zirconia material. BruxZir crowns now account for 15 percent of<br />
the anterior crowns fabricated at the lab, and as this number will likely continue to rise, the lab is committed to<br />
increasing the material’s ability to be predictably prescribed in anterior situations. This photo essay illustrates a case where<br />
we are prepping tooth #8 and #9 for BruxZir crowns. Tooth #8 is a natural tooth that has been endodontically treated,<br />
and tooth #9 has an existing PFM that needs to be replaced. To view a live video of the case, visit our Video Gallery at<br />
www.glidewelldental.com.<br />
Figure 1: Following my own advice, I am taking<br />
the shade before I do anything else to ensure<br />
that the teeth have no chance of dehydrating.<br />
When teeth dehydrate, they appear to be higher<br />
in value than they actually are. I am using the<br />
VITA Easyshade ® Compact (Vident; Brea, Calif.)<br />
to determine the shades on the adjacent teeth.<br />
Typically, I try to position the tip of the device<br />
in the middle third of the tooth, avoiding the<br />
increased chroma in the gingival third and the<br />
increased translucency in the incisal third.<br />
1<br />
Photo Essay: The Pursuit of BruxZir Anterior Esthetics15
Figure 2: This case does a good job of illustrating<br />
why I like the VITA 3D-Master ® shade guide<br />
better than the VITA Classical shade guide.<br />
Notice that on tooth #7, the VITA Easyshade<br />
Compact is telling me that the closest Classical<br />
shade is A2, while the closest 3D-Master shade<br />
is 2.5R2. It will soon be evident why it’s helpful<br />
that the VITA Easyshade compact takes both<br />
shades simultaneously.<br />
Figure 3: The VITA Easyshade Compact has a<br />
relatively short learning curve, but the first step<br />
in using it successfully is understanding how<br />
to maximize the surface area of the tip that is<br />
in contact with the tooth surface. As the facial<br />
surfaces of anterior teeth are rarely flat, the tip<br />
will not fit completely flush against the tooth<br />
structure. I always have a finger ready to stabilize<br />
the tip and allow me to make slight rotations<br />
so that most of the tip comes in contact with<br />
the tooth.<br />
2<br />
Figure 4: The shade reading from the middle<br />
third of tooth #10 also is an A2 on the Classical<br />
guide, but a 2R2 on the 3D-Master guide.<br />
Because of the considerable jumps between<br />
adjacent shades in the Classical system, many<br />
teeth that register as Classical A2s can be<br />
more accurately classified within the 3D-Master<br />
system. (View the “Modern Shade Taking<br />
Methods for Enhanced Lab Communication”<br />
video online at www.glidewelldental.com for an<br />
in-depth explanation of this.)<br />
3<br />
4<br />
16 www.chairsidemagazine.com
Figure 5: This is the shade taken from tooth #8,<br />
the natural tooth that I will be prepping. Again,<br />
the measurement from the middle third of the<br />
tooth gives us an A2 reading on the Classical<br />
scale, while the 3D-Master shade registers as a<br />
2M2.5. That’s three different 3D-Master shades<br />
that are being called an A2 by the Classical<br />
system. In an instance such as this, I assure you<br />
that our technicians can make a closer shade<br />
match with a 3D-Master shade.<br />
5<br />
Figure 6: The all-new VITA 3D-Master<br />
Linearguide is my shade guide of choice today.<br />
Because my three shade choices are all in the<br />
“2” family, I remove the 2 shade guide and<br />
check to see how these shades compare to<br />
the natural adjacent teeth. Even if tooth #7, #8<br />
and #10 are all different shades, we will have<br />
to make some compromise because #8 and #9<br />
have to be identical to avoid asymmetry.<br />
6<br />
Figure 7: I decide on 2M2.5 as my final shade<br />
for the BruxZir crowns on tooth #8 and #9.<br />
Shade 2M2.5 is made by mixing 2M2 and 2M3<br />
in equal amounts, something not possible in<br />
the Classical system (there is no such thing as<br />
A2.5). Even if the lab uses an A2 shade in the<br />
material you request, they will have the 2M2.5<br />
shade tab to help with characterization before<br />
it leaves the lab. This is why 3D-Master shades<br />
work better, even if the material you request is<br />
only available in VITA Classical shades.<br />
7<br />
Photo Essay: The Pursuit of BruxZir Anterior Esthetics17
Figure 8: Correctly selecting the closest shade<br />
is half the battle. No shade matches a tooth<br />
perfectly, so it is incredibly helpful to the dental<br />
technician if you take and include a digital<br />
photograph of the selected shade tab next to<br />
the tooth you are matching. There is no easier<br />
way to immediately improve your esthetic results<br />
than to e-mail some digital shade pictures with<br />
your case. Technicians simply try harder when<br />
you give them a road map to follow.<br />
Figure 9: Now I am placing the PFG gel (Steven’s<br />
Pharmacy; Costa Mesa, Calif.), an important first<br />
step in giving a pain-free injection. Placing the<br />
gel with an Ultradent syringe makes it easier to<br />
“sneak” some of the anesthetic into the sulcus,<br />
so that the patient does not feel the insertion<br />
of the needle through the attachment. After 60<br />
seconds, we wash the PFG gel off tooth #8 and<br />
#9 and begin the injection.<br />
8<br />
Figure 10: Part of the advantage of using the<br />
STA Single Tooth Anesthesia System ® device<br />
(Milestone Scientific; Livingston, N.J.) is being<br />
able to give painful infiltrations right under a<br />
patient’s nose. The STA device allows me to<br />
predictably get pulpal anesthesia with a painfree<br />
PDL injection. I slide the 30 gauge extra<br />
short needle into the sulcus without going<br />
through the attachment. I step on the STA<br />
foot pedal and give a few drops of Septocaine<br />
into the sulcus prior to going through the<br />
attachment. I honestly don’t know if this helps<br />
in any way, but I know it doesn’t hurt, and it<br />
makes me feel better. Once I give a few drops,<br />
I continue to express the Septocaine while the<br />
needle tip is advanced through the attachment<br />
until it reaches the crest of the bone.<br />
9<br />
10<br />
18 www.chairsidemagazine.com
Figure 11: Because of the pressure that is<br />
generated with any PDL injection, if you move<br />
the needle to reposition it, anesthetic will squirt<br />
out that we don’t want the patient to taste.<br />
Likewise, when we finish the injection and<br />
remove the needle, anesthetic will squirt out<br />
again. As shown here, my assistant places a<br />
saliva ejector next to the insertion point to make<br />
sure that when the anesthetic spills out, she is<br />
able to control it. A cotton roll placed next to the<br />
needle tip can serve the same purpose.<br />
11<br />
Figure 12: Another benefit of the STA device<br />
is the nature of the syringe itself. In order to<br />
inject with a typical syringe, the thumb, index<br />
and middle fingers must be in predetermined<br />
positions to generate the force to express the<br />
anesthetic. With the STA device, you are able to<br />
grasp the syringe at any point along its length,<br />
so I typically hold it much closer to the tip, as<br />
shown here. This gives me a greater degree of<br />
control and assists me in rolling the syringe if I<br />
need to reorient the bevel.<br />
12<br />
Figure 13: The fastest way I’ve found to remove<br />
an existing PFM is to use an aggressive carbide<br />
like the Razor ® Carbide bur (Axis <strong>Dental</strong>;<br />
Coppell, Texas). This bur easily cuts through the<br />
ceramic material and the metal substructure.<br />
In the past, I would use an old diamond to cut<br />
though the porcelain material and would then<br />
switch to a carbide to cut through the metal<br />
substructure. The Razor Carbide does the job of<br />
both of these burs and can be used with a light<br />
touch when cutting through the metal, so as not<br />
to inadvertently damage the tooth underneath.<br />
13<br />
Photo Essay: The Pursuit of BruxZir Anterior Esthetics19
Figure 14: Once the prep is exposed, I use a<br />
Christensen Crown Remover (Hu-Friedy; Chicago,<br />
Ill.) to loosen the crown. You will notice<br />
that I do not cut through the metal coping at<br />
the gingival margin. Too often when I try to cut<br />
through that last strap of metal, I inadvertently<br />
tear up the facial tissue in the one area where I<br />
would like to have very healthy tissue. Using the<br />
Christensen Crown Remover, I can usually rock<br />
the crown loose without having to cut through<br />
the last strip of metal.<br />
Figure 15: Now that the crown on tooth #9<br />
has been removed, we can start prepping<br />
tooth #8. Because this tooth has not yet been<br />
prepared, I am able to take advantage of the<br />
Reverse Preparation Technique. The mesial<br />
contact is already broken from when I removed<br />
the adjacent crown, so I now break the distal<br />
contact with a #55 bur as you can see here. The<br />
reason we break the contacts first is because<br />
this technique requires the first retraction cord<br />
to be placed immediately.<br />
14<br />
Figure 16: The first cord I use is an Ultrapak<br />
cord #00 (Ultradent; South Jordan, Utah). This<br />
is a plain cord that has not been soaked in any<br />
medicaments, and I literally floss it into place on<br />
the mesial and distal as though it were dental<br />
floss. With the two interproximal portions of the<br />
cord locked into place, I now pack the facial<br />
segment subgingivally.<br />
15<br />
16<br />
20 www.chairsidemagazine.com
Figure 17: On the lingual, I cut the two ends<br />
of the retraction cord so they will butt up<br />
against each another, as I do not want them<br />
to overlap. Because this #00 cord is hollow,<br />
it packs very easily into the sulcus. I have to<br />
yet to find a sulcus that it will not fit into. It is<br />
important to make sure that none of this cord is<br />
visible supragingival because in addition to not<br />
providing vertical retraction, there would be a<br />
chance the bur could catch it during prepping.<br />
17<br />
Figure 18: The pre-existing crown on tooth #9<br />
has irritated the gingiva, so before I try to pack<br />
a #00 cord around this tooth, I do a pre-emptive<br />
strike with some ViscoStat ® Clear (Ultradent).<br />
This is a 25 percent aluminum chloride gel, so<br />
it will not discolor either the gingival tissue or<br />
the prep itself. Even when there is no bleeding,<br />
I often use ViscoStat Clear in the anterior to<br />
“pre-seal” the capillaries before I pack the cord.<br />
18<br />
Figure 19: I take a look with the mirror and<br />
can see some of the #00 cord peeking out<br />
from under the tissue. Now that the rest of the<br />
retraction cord is in place, it is often easier to<br />
get any difficult-to-pack segments subgingival.<br />
Not having the #00 cord subgingival also<br />
presents problems later in the pre-preparation<br />
technique when we place the #2E cord on top<br />
of this cord. It is imperative that when the #2E<br />
cord is placed, it does not get underneath the<br />
#00 cord; otherwise, when we pull out the top<br />
cord, the bottom cord will come out as well,<br />
which will lead to bleeding right before we take<br />
the impression.<br />
19<br />
Photo Essay: The Pursuit of BruxZir Anterior Esthetics21
Figure 20: The #00 bottom cord provides about<br />
0.5 mm of vertical retraction of the tissue. This<br />
retraction allows us to prep the gingival margin<br />
right at the free margin of the gingiva, knowing<br />
that when the #00 cord is removed, we will end<br />
up with a margin that is slightly subgingival.<br />
Even though we have many esthetic choices for<br />
anterior crowns, I still prefer to hide my margin<br />
just slightly subgingival.<br />
Figure 21: I use the 801-021 round diamond bur<br />
from the Reverse Preparation Set (Axis <strong>Dental</strong>)<br />
to cut a half-circle into the gingival third of the<br />
tooth. This half-circle is the formation for the<br />
perfect margin. After we do the axial reduction,<br />
we will be left with a perfect quarter-circle,<br />
which will end up being our deep chamfer or<br />
shallow shoulder. Not only do we end up with<br />
a simple, nearly perfect margin, but we also<br />
ensure that we reduce enough in the gingival<br />
third, an area that is typically under-reduced.<br />
20<br />
Figure 22: I then take the 801-021 round bur and<br />
trace it around the gingival margin on the lingual<br />
as well. BruxZir crowns work with feather-edge<br />
margins, so I don’t necessarily have to do this,<br />
but because most of our dentists would use<br />
IPS e.max ® (Ivoclar Vivadent; Amherst N.Y.) in<br />
a situation like this, this technique will provide a<br />
great margin for either restoration. As this round<br />
bur is typically too large to fit interproximally,<br />
I take the bur from mesial contact to distal<br />
contact. I will connect the facial and lingual<br />
round bur cuts later with an 856-025 diamond<br />
(Axis <strong>Dental</strong>).<br />
21<br />
22<br />
22 www.chairsidemagazine.com
Figure 23: I make my next depth cut to ensure<br />
adequate incisal reduction. I use the MADC-020<br />
bur (Axis <strong>Dental</strong>) to place 2 mm depth cuts in the<br />
incisal edge of tooth #8. This 2 mm of reduction<br />
will give the technician a good opportunity to<br />
build an esthetic, strong incisal edge. It also<br />
helps to keep the final restoration from being<br />
too far to the facial, aka too “bucky.” However,<br />
if you are planning on adding some length to<br />
the central (0.5 mm for example) you only need<br />
to reduce 1.5 mm to give your technician 2 mm<br />
of space.<br />
23<br />
Figure 24: I now switch to the MADC-015 bur<br />
(Axis <strong>Dental</strong>), which gives me a self-limiting<br />
depth cut of 1.5 mm. I turn the handpiece so<br />
that it is perpendicular to the facial surface of<br />
the tooth and place a 1.5 mm depth cut at the<br />
junction of the incisal and middle thirds. The<br />
placement of this depth cut ensures that there<br />
will be enough facial reduction to enable the<br />
technician to create a flat facial profile on the<br />
final crown. When crowns are too “fat” facially,<br />
they will never blend in naturally with the<br />
surrounding natural dentition.<br />
24<br />
Figure 25: At this point, all of the depth cuts<br />
are in place. We can see the half-circle in the<br />
gingival third that is approximately 1 mm deep.<br />
The 1.5 mm depth cut is at the junction of the<br />
incisal third and the middle third, and the 2 mm<br />
depth cuts in the incisal edge are there as well.<br />
The beauty of these depth cuts is that there is no<br />
guessing whether we have reduced enough —<br />
we simply prep until the depth cuts are no<br />
longer present. Once you break through the<br />
enamel surface with a diamond, it becomes very<br />
difficult to judge how much you have reduced. I<br />
have not found an easier way to prep teeth than<br />
with depth cuts.<br />
25<br />
Photo Essay: The Pursuit of BruxZir Anterior Esthetics23
Figure 26: It’s now time to connect all the<br />
depth cuts with the workhorse bur in the<br />
Reverse Preparation Set: the 856-025 bur. I love<br />
prepping with this large bur because it cuts very<br />
smoothly and does not have a tendency to dip<br />
into the tooth, even if you have build-up material<br />
on the tooth. As shown here, the reduction is<br />
already finished in the gingival third, so we are<br />
working on reducing the incisal and middle<br />
thirds and blending these planes together.<br />
Figure 27: This is also the time when we need to<br />
blend our facial reduction with the interproximal<br />
reduction that was started with the 55 bur.<br />
Because tooth #9 has already been prepped, we<br />
were able to use the round bur interproximally<br />
on the mesial, which we usually cannot do. A<br />
glance back at Figure 25 shows that round bur<br />
cut on the mesial of tooth #8. Because tooth #9<br />
is already prepped, we are also able to take the<br />
856-025 bur onto the mesial surface. Typically,<br />
we have to switch to the 856-016 bur (Axis<br />
<strong>Dental</strong>) to do this, which is the same shape, but<br />
has a smaller diameter.<br />
26<br />
Figure 28: The reduction on the lingual surface<br />
is accomplished with an Alpen 379-023 football<br />
bur (Coltène/Whaledent Inc.; Cuyahoga Falls,<br />
Ohio). I typically do not place a depth cut on<br />
the lingual surface of anterior teeth because<br />
I find it easy to check the reduction against<br />
the lower anterior teeth simply by having the<br />
patient close. Unlike on posterior teeth where<br />
eyeballing occlusal reduction is very difficult<br />
(especially on lingual cusps), I don’t have this<br />
same problem on maxillary anterior teeth. Of<br />
course, if you wanted to place a 1 mm depth cut<br />
on the lingual, there would be nothing wrong<br />
with that.<br />
27<br />
28<br />
24 www.chairsidemagazine.com
Figure 29: Toward the end of the preparation<br />
sequence, when most of the gross reduction<br />
has been done, I need to be able to visualize<br />
what I am doing at the margin. I turn off the<br />
water to my KaVo ELECTROtorque handpiece<br />
(KaVo <strong>Dental</strong>; Charlotte, N.C.), turn the speed<br />
down to around 3,000 rpm, and slowly take<br />
my 856-025 bur back and forth across the<br />
margin, smoothing it out. With the water off, I<br />
can see everything I am doing, and by turning<br />
the rpm down low, I can keep from overheating<br />
the tooth. Being able to run a handpiece at<br />
low speeds with no water and high torque<br />
is the number one reason I insist on using<br />
electric handpieces.<br />
29<br />
Figure 30: I notice we still have some decay<br />
on the mesial of tooth #8, so I remove that now<br />
with some Sable Seek ® and Seek ® Caries<br />
Indicator (Ultradent) and a small round bur. I find<br />
it easier to remove any remaining caries at the<br />
end of the preparation sequence rather than at<br />
the beginning, mainly for better access to the<br />
lesion itself, but also because I find I can do a<br />
better job with the bonding steps when I have<br />
better access.<br />
30<br />
Figure 31: I have intact tooth structure on all<br />
sides of the carious lesion, so I have a high<br />
degree of confidence about the retention of<br />
this small composite filler I am doing to restore<br />
this (Vertise Flow [Kerr Corp.; Orange, Calif.]).<br />
Vertise Flow is a self-etching flowable composite<br />
that is perfect for small situations like this.<br />
Because it is a self-etching product, there is no<br />
separate etch and bond step. Vertise Flow also<br />
works very well for small Class I restorations,<br />
sealants, preventive resin restorations and quick<br />
little build-ups like this one.<br />
31<br />
Photo Essay: The Pursuit of BruxZir Anterior Esthetics25
Figure 32: Next, we syringe an initial layer of<br />
Vertise Flow into the preparation. As shown<br />
here, this composite contains a self-etching<br />
bonding agent that is activated by using a<br />
disposable brush to burnish the material into<br />
the dentin for 20 seconds. In reality, you end up<br />
removing most of the first layer from the prep<br />
while doing this, but the point is to get a very<br />
thin layer in close contact with the dentin.<br />
Figure 33: Here we are light-curing the initial<br />
layer of Vertise Flow for 20 seconds. The light<br />
curing actually stops the self-etching of the<br />
dentin that was taking place. Now that we have<br />
that layer bonded to the dentin, we can add 2<br />
mm layers of Vertise Flow, curing for 20 seconds<br />
between each increment. As we are just bonding<br />
composite to composite at this point, there is<br />
no need to use the brush or agitate the material<br />
any more. The process simply is to add some<br />
material, light cure and repeat. Most flowables<br />
won’t support their own weight, so you are<br />
better off placing them in smaller increments.<br />
32<br />
Figure 34: I always slightly overbuild these<br />
types of small build-ups, or fillers. I want to be<br />
able to prep it back flush against the natural<br />
tooth, so that I don’t leave an undercut in the<br />
tooth. We receive far too many maxillary anterior<br />
impressions at the lab with multiple undercuts<br />
in the teeth where direct composites used to<br />
be. Not only does this cause the impression to<br />
distort, but it also creates weakened dies. It is<br />
my hope that a simplified build-up technique<br />
like this one with Vertise Flow will help more<br />
dentists invest the time needed to place and<br />
charge for these build-ups.<br />
33<br />
34<br />
26 www.chairsidemagazine.com
Figure 35: The next step of the Reverse<br />
Preparation Technique is to place the top cord,<br />
the #2E Ultrapak cord (Ultradent). The “2” in the<br />
cord’s name refers to its size, while “E” refers<br />
to it being an epi cord. I know there may be<br />
some controversy with the use of epinephrine,<br />
but my experience has always been that if<br />
a patient can tolerate epinephrine in a local<br />
anesthetic injection, then they can tolerate it in<br />
the retraction cord. If a patient requires a nonepi<br />
vasoconstrictor in their anesthetic, epi cord<br />
would not be an option.<br />
35<br />
Figure 36: Packing this second cord, or top<br />
cord, is more difficult for a number of reasons.<br />
You can’t floss it into place interproximally like<br />
you can with the first cord because doing so<br />
would disrupt the bottom cord, which we want<br />
to stay firmly planted at the base of the sulcus.<br />
Also, even though this cord is hollow, it can be<br />
hard to pack in certain clinical situations where<br />
there is minimal attached gingiva. Because of<br />
this, on some maxillary bicuspids and lower<br />
anteriors, I will use a smaller #1E cord instead.<br />
In extreme cases, a cordless technique with<br />
Access ® Edge gingival retraction paste (Centrix;<br />
Shelton, Conn.) can be used in place of the<br />
top cord.<br />
36<br />
Figure 37: Once the top cord is in place, you<br />
get one last look at your margin. In this case, I<br />
am not entirely happy with what I see because<br />
the shape of my margin does not match the<br />
contour of the gingiva. The margin is not as<br />
smooth as it could be, but keep in mind that it<br />
was prepped with a super coarse 856-025 bur.<br />
This bur is fantastic for quick tooth reduction,<br />
but because of the size of the diamond particles,<br />
it leaves little chips in the margin. At this point,<br />
I switch to my fine grit 856-025 bur with the<br />
red stripe to get rid of that choppiness in the<br />
marginal surface.<br />
37<br />
Photo Essay: The Pursuit of BruxZir Anterior Esthetics27
Figure 38: The margin has now been<br />
recontoured with the 856-025 fine bur. Again,<br />
the speed can be turned down to 2,000 rpm to<br />
avoid overheating the tooth. In my experience, I<br />
can clearly visualize the margin only if I turn the<br />
water off to see what I am doing. Now that I have<br />
dropped the prep margin down to the gingival<br />
margin with both cords in place, the resulting<br />
facial margin will now be approximately 1 mm<br />
subgingival. I typically do this in cases with a<br />
dark prep shade to keep the dark shade from<br />
showing through.<br />
Figure 39: Now we place two ROEKO<br />
Comprecap Anatomic compression caps<br />
(Coltène/Whaledent) onto the preps, and have<br />
the patient bite down for 8 to 10 minutes. This<br />
time frame is really not negotiable, as these<br />
compression caps work wonders if given<br />
enough time. Because they are “anatomic,”<br />
there is a cutout on the mesial and distal of each<br />
cap to prevent the interproximal papilla from<br />
getting blunted. We moisten the inside of the<br />
Comprecaps before placing them on the teeth<br />
so that when we remove them, we don’t have<br />
cotton fibers sticking to the prep. Comprecaps<br />
are a great way to prevent bleeding during the<br />
impression process.<br />
38<br />
Figure 40: After waiting 8 to 10 minutes, we<br />
remove the Comprecaps and then the top cord<br />
from the sulcus. We can expect no bleeding<br />
nearly all of the time thanks to the attention<br />
we have given the gingiva throughout the prep<br />
sequence. When you add in the epi strand in<br />
the top cord and the pressure hemostasis from<br />
the Comprecaps, it should not be surprising<br />
that there is no bleeding at this stage. Quality<br />
restorative dentistry is more dependent on a<br />
great impression than a great preparation, so<br />
this is the moment of truth!<br />
39<br />
40<br />
28 www.chairsidemagazine.com
Figure 41: The bottom cord provides the<br />
vertical retraction of the tissue, while the<br />
top cord provides the lateral retraction that<br />
creates the space for the impression material<br />
to flow into. It is imperative that we get a nice<br />
thickness to the marginal impression material,<br />
or it has a tendency to tear when the impression<br />
is removed. Keep in mind that the impression<br />
material is in contact with the #00 cord in the<br />
base of the sulcus, and the cord is preventing<br />
bleeding by remaining in place against the<br />
inflamed base of the sulcus.<br />
41<br />
Figure 42: Removal of the top cord leaves<br />
behind a wide-open sulcus in which to place<br />
the impression material. It is not the type of<br />
situation where you are racing against gingival<br />
blood flowing into the sulcus. Take your time<br />
and make sure to go around each tooth three<br />
or four times to prevent any pulls or voids in the<br />
material. These pulls and voids are especially<br />
difficult when you get back to the point where<br />
you started expressing the material. I have<br />
watched slow-motion footage of moisture<br />
being pushed around the sulcus in front of the<br />
material and creating a pull when the syringe<br />
tip gets back to the starting point, hence the<br />
recommendation to go around each tooth three<br />
or four times with the tip in the sulcus.<br />
42<br />
Figure 43: Here I am using a custom impression<br />
tray. I never used a custom tray for two single<br />
anterior crowns in the past, so I admit this<br />
is overkill — perhaps I am a little spoiled by<br />
working within a lab — but I can confidently<br />
say that if you got them for free and they were<br />
always available, you would use them too! In a<br />
case like this, it is perfectly acceptable to use<br />
an anterior double-arch tray for this impression.<br />
The biggest challenge when using anterior<br />
double-arch trays is being able to see whether<br />
the patient is in maximum intercuspation.<br />
Always hold the impression up to the light to<br />
verify that the un-prepped teeth are in contact.<br />
43<br />
Photo Essay: The Pursuit of BruxZir Anterior Esthetics29
Figure 44: Because I’m not using a double-arch<br />
tray, I have to take a bite registration so that the<br />
lab will be able to articulate the models. With<br />
full upper and lower models, it would be pretty<br />
easy for the lab to hand articulate the models<br />
and verify with wear facets, but the use of a<br />
bite registration does a good job of verifying<br />
the mounting. A properly done bite registration<br />
should only contact the incisal third of the teeth<br />
that have been prepped, and the incisal third of<br />
the opposing teeth. It will be trimmed back in<br />
the lab, but try to keep the registration material<br />
off the soft tissue.<br />
Figure 45: When removing a polyvinyl siloxane<br />
impression from the mouth, do it gently with<br />
a slight rocking motion. This cord technique<br />
gives us a deep subgingival impression of the<br />
root structure, so we want to make sure we give<br />
the material the chance to stretch and pull the<br />
bottom cord off the sulcus if it is attached. This<br />
is the opposite of an alginate impression, which<br />
should be removed with a sudden snapping<br />
motion. One of the benefits of silicon impression<br />
materials is their ability to set in an undercut and<br />
be removed without tearing, so give it a chance<br />
to release.<br />
44<br />
Figure 46: It has been five days, the temps have<br />
been removed, and the preps cleaned with<br />
Consepsis ® (Ultradent). The more I shorten the<br />
time between prepping and seating, the less<br />
adjustments and the lower remakes I have. The<br />
best example of this is same-day restorations<br />
and their almost nonexistent remake rate. My<br />
hope is that as digital impressions continue to<br />
make inroads into more dental offices, threeday<br />
turnarounds will become the standard for<br />
model-less monolithic crowns. The temporary<br />
crown is the biggest source of error and movement<br />
in the crown fabrication timeline, and the<br />
less time that it is in the mouth, the better the<br />
chance the crown will drop into place without<br />
any adjustments.<br />
45<br />
46<br />
30 www.chairsidemagazine.com
Figure 47: The BruxZir crowns fit well and the<br />
patient has approved them, so it is time to start<br />
the cementation procedure. The more I work with<br />
BruxZir restorations, the more familiar I become<br />
with some of its unique properties, which<br />
hold true for all zirconia-based restorations.<br />
Zirconia crowns are susceptible to salivary<br />
contamination when they are tried in the mouth,<br />
which is something that doesn’t affect other<br />
types of crowns to any great degree. The only<br />
materials that bond reliably to zirconia oxide are<br />
phosphate groups. The phospholipids in saliva<br />
bond to the internal surfaces of zirconia-based<br />
restorations, so if you simply rinse them out<br />
with water as I am doing here, you remove the<br />
visible saliva, but the phosphate groups remain<br />
bonded to the zirconia surface.<br />
47<br />
Figure 48: Fortunately, Ivoclean (Ivoclar Vivadent)<br />
was released earlier this year, specifically<br />
for the purpose of cleaning out restorations<br />
prior to bonding or cementation. I place a couple<br />
drops in both of the crowns that will stay<br />
in place for 20 seconds. Ivoclean is a concentrated<br />
zirconia oxide solution. When placed in<br />
crowns, it sets up a concentration gradient so<br />
that the salivary phosphate groups bonded to<br />
the inside of the crowns are drawn across the<br />
gradient to the zirconia particles in the Ivoclean,<br />
which can then be rinsed away.<br />
48<br />
Figure 49: I use a microbrush to ensure that the<br />
Ivoclean is evenly distributed and has come in<br />
contact with all of the internal surfaces of the<br />
crowns, although it is not necessary to agitate it<br />
against the surface as we might do with a selfetching<br />
resin material. We just want to ensure<br />
that the purple Ivoclean material is coating the<br />
entire internal surface of the crown; then, after<br />
20 seconds, it can be rinsed out.<br />
49<br />
Photo Essay: The Pursuit of BruxZir Anterior Esthetics31
Figure 50: Ironically, perhaps the worst thing<br />
you can do to clean out zirconia-based crowns<br />
after try-in is to use phosphoric acid to clean<br />
them. As you might imagine, phosphoric acid<br />
is full of phosphate groups, and in your attempt<br />
to clean the salivary phosphate groups still<br />
bonded to the zirconia, using phosphoric acid<br />
will flood the area with phosphates and occupy<br />
every receptor site on the zirconia. It is only by<br />
flooding the crowns with zirconia oxide that<br />
we can decontaminate the internal surfaces in<br />
preparation for cementation.<br />
Figure 51: Now that we have freed up the<br />
bonding sites on the zirconia with the Ivoclean,<br />
there is no better way to cement a BruxZir crown<br />
than with a cement that contains the same<br />
phosphate groups that bond to zirconia. That<br />
cement is Ceramir ® (Doxa <strong>Dental</strong> Inc.; Newport<br />
Beach, Calif.). Doxa <strong>Dental</strong> recently finished its<br />
clinical trials with the <strong>Dental</strong> Advisor to<br />
show that Ceramir does in fact bond to BruxZir.<br />
Here I am activating the Ceramir capsule in<br />
the activator by holding the handle down for<br />
three seconds.<br />
50<br />
Figure 52: It’s a good thing I didn’t get rid of<br />
my triturator! Next, I place the Ceramir capsule<br />
in the 3M ESPE RotoMix capsule mixer for<br />
10 seconds to ensure a complete mix. I know<br />
this method of dispensing this cement seems<br />
a little 1980s compared to modern paste-paste<br />
cements, but I find it to be well worth the little<br />
bit of extra effort. Just the ease of cleanup alone<br />
makes Ceramir a no-brainer for me. Unlike most<br />
resin-modified glass ionomer cements, Ceramir<br />
has a “putty” stage that allows you peel it all off<br />
in one piece. In fact, my dental assistant never<br />
has to call me in anymore to dig out chunks<br />
interproximally that have set rock hard.<br />
51<br />
52<br />
32 www.chairsidemagazine.com
Figure 53: I fill the BruxZir crowns with the<br />
Ceramir and seat them simultaneously on the<br />
preps. Because the Ceramir is so moisture<br />
tolerant, I no longer have to vigorously air-dry<br />
the preps prior to cementation. Instead, I often<br />
just place a few cotton rolls around the preps<br />
to remove any pools of moisture. Not having<br />
to blast the preps with air anymore, I find that<br />
I have to anesthetize far fewer patients for<br />
crown seats than before. We use pinewood<br />
sticks to ensure that the crowns stay in place<br />
while the cement sets, in case there is any soft<br />
tissue rebound.<br />
53<br />
Figure 54: Due to Ceramir’s tolerance to<br />
moisture, it is OK if the patient’s tongue or saliva<br />
hits the cement while it sets. Many BruxZir<br />
crown preps tend to be slightly shorter clinical<br />
crowns than the ones shown in this case, so<br />
having the Ceramir cement bond to the BruxZir<br />
crown is a good insurance policy without having<br />
to use a silane. As promised, you can see I am<br />
able to remove the entire facial surface of excess<br />
cement in one piece, followed by the lingual. I<br />
then run some Oral-B ® Superfloss ® (Procter &<br />
Gamble; Cincinnati, Ohio) interproximally to<br />
remove those pieces.<br />
54<br />
Figure 55: Here are the cemented final BruxZir<br />
crowns on tooth #8 and #9. Having an in-house<br />
technician makes it easier for me to match<br />
anterior BruxZir crowns, so I’m not suggesting<br />
that you switch to BruxZir for all of your anterior<br />
crowns. In fact, I’m going to suggest that you<br />
stick with IPS e.max for this type of situation<br />
unless you see that the patient has broken other<br />
restorations or shows higher-than-average wear.<br />
However, it’s becoming clear we are getting<br />
closer to having BruxZir Solid Zirconia become<br />
the go-to anterior crown & bridge material. CM<br />
55<br />
Photo Essay: The Pursuit of BruxZir Anterior Esthetics33
36 www.chairsidemagazine.com
Interview with Dr. Dan Fischer<br />
– INTERVIEW of Dan E. Fischer, DDS<br />
by Michael C. DiTolla, DDS, FAGD<br />
<strong>Dental</strong> innovator and Ultradent Products Inc. CEO Dr. Dan<br />
Fischer continues to ensure that his company’s products<br />
play a large role in the clinical techniques of many dentists.<br />
I like to check in with him once a year or so to find out what<br />
his company has been working on, and how his mission to<br />
stamp out dental caries is going. If you are ever in Utah,<br />
you owe it to yourself to visit Ultradent and take a look into<br />
the testing the company does to formulate its products. I<br />
guarantee you will come away impressed.<br />
Interview with Dr. Dan Fischer37
Dr. Michael DiTolla: I’ve always admired Ultradent and what<br />
you guys have done because you’ve brought a lot of common<br />
sense to dentistry. You’ve taken some product categories<br />
and dispensing systems that needed cleaning up and really<br />
made things easier for those of us out there practicing. One<br />
of your newer products that came across my desk the other<br />
day is UltraCem (Ultradent; South Jordan, Utah), your resinreinforced<br />
glass ionomer (RRGI) cement. I’ve always felt like<br />
this was a product category that could use another product<br />
or two in it. It’s far from the sexiest product in dentistry, but<br />
it seemed like there were only two companies dominating the<br />
market. So not only did you come out with a traditional crown<br />
& bridge cement, but you put it into a dispensing system that is<br />
so novel, it could only be from Ultradent. Can you share a little<br />
bit about the development process?<br />
Dr. Dan Fischer: Sure. Most of the credit on that syringe<br />
mixing device for the liquid and powder goes to our young<br />
team in R&D that picked up on the passion of the ease<br />
of use of a syringe. If you think about it, a syringe is one<br />
of the simplest hydraulic devices on the planet. But to be<br />
able to mix a liquid and a powder brings so much to the<br />
equation, on the logic that no paste-paste resin-modified<br />
glass ionomer (RMGI)* can be as strong as a pure liquidpowder<br />
— you just can’t get enough of the glass ionomer<br />
powder into a resin-based system.<br />
MD: So when you guys started development of UltraCem, you<br />
already realized that, in order to have the best physical properties<br />
for this cement, you were essentially going to have to take<br />
*RRGI and RMGI are used interchangeably in this interview.<br />
Ketac-Cem - 3M ESPE<br />
RelyX Luting Plus - 3M ESPE<br />
RelyX Luting - 3M ESPE<br />
GC FujiCEM - GC America<br />
GC Fuji PLUS - GC America<br />
UltraCem - Ultradent<br />
Bond Strengths of Popular Luting Cements<br />
3.65 MPa<br />
4.36 MPa<br />
5.25 MPa<br />
5.12 MPa<br />
4.76 MPa<br />
1 2 3 4 5 6 7 8 9 10 11<br />
Metal Button Shear to Dentin<br />
a step back to a powder-liquid and move away from the pastebased<br />
systems?<br />
DF: Yep. In fact, if you look at what was the strongest RMGI<br />
out there prior to UltraCem, it was GC’s FujiCEM , and that<br />
is a liquid-powder mix in a capsule. And it’s the same with<br />
3M ESPE RelyX Luting Cement; their strongest RMGI is<br />
still a liquid-powder mix in a capsule. As soon as you have<br />
to go to paste-paste, you lose the opportunity to get the<br />
amount of the glass ionomer silica in there that you’d like<br />
to have for creating a very strong cement.<br />
There was something else we realized, which we feel puts<br />
this product into its own distinctive category, Mike, and<br />
that is: RMGI is so fabulous for bonding to metal, and it<br />
is wonderful for bonding to zirconia, especially with the<br />
zirconia primer. But to really bond well to dentin and enamel,<br />
you need to have a minimal dwell time of the polyacrylic<br />
against the dentin to be able to etch it. That’s why UltraCem<br />
comes only in a regular set. If we were to bring it out in a<br />
fast set, it wouldn’t have that dwell time. But by having that<br />
dwell time, you have the first self-etching, resin-modified<br />
glass ionomer, which gives us a bond strength that more<br />
than doubles GC Fuji’s, which was the strongest heretofore.<br />
MD: You said a couple things there that I want to touch on.<br />
So the paste-paste delivery system, which has kind of become<br />
the norm — I think it’s probably the biggest seller in the<br />
category — it sounds like that was designed more for the<br />
dentist’s convenience than for the quality of the cement that<br />
comes from that mix. Is that right?<br />
10.89 MPa<br />
Courtesy of Ultradent Products Inc.<br />
DF: Absolutely. It’s been the same<br />
name of the game for 90 percent of<br />
the bonding agents out there: they<br />
have been designed more for the<br />
dentist’s convenience. Tragically, in<br />
that process, we’ve had some great<br />
fourth- and fifth-generation bonding<br />
agents that have kind of been pushed<br />
aside, with the dentist running to<br />
the single bottles and the like, many<br />
of which, Mike, give one-fourth to<br />
one-half the bond strength of what a<br />
non-compromising adhesive can<br />
provide. So you take something like<br />
Clearfil SE (Kuraray America Inc.;<br />
New York, N.Y.) or OptiBond ® (Kerr<br />
Corporation; Orange, Calif.) or our<br />
Peak ® (Ultradent) — these are a handful<br />
of what I call “non-compromising<br />
adhesives” — and these can give an<br />
adhesion to dentin at around 65 to<br />
75 percent of the actual strength of<br />
the dentin. Yet so many adhesives<br />
designed in the sense of speed can<br />
38 www.chairsidemagazine.com
give you one-fourth to one-half that, and it’s really a lost<br />
opportunity. It prevents the dentist from being able to place<br />
larger, direct-bonded restorations.<br />
For the RMGI, it’s succumbed to the same gig: put it in a<br />
double-barrel type device and run it through a static mixer.<br />
When you’re doing that, you’re leaning more toward a resin<br />
cement with a minimal amount of resin-modified glass<br />
ionomer. Doing this was kind of a stepping stone to our resin<br />
cement. The best resin cement today can’t perform as well<br />
as UltraCem RRGI. Additionally, they don’t get the fluoride<br />
release like a RMGI can get. So, all in all, to push the level<br />
of the RMGI to a higher level, you’re getting a great, strong<br />
cement to metal with the self-etching feature, over twice<br />
the bond strength to dentin as what you’d get with the best<br />
out there heretofore, and you’re getting the fluoride release.<br />
You also get a great film thickness that’s around 25 microns.<br />
So we’re kind of passionate about that. Furthermore, to<br />
eliminate the need for that plier that’s required to break the<br />
capsule before you can put it into the Wig-L-Bug ® (Dentsply<br />
Rinn; Elgin, Ill.) to mix it, and to eliminate the Wig-L-Bug<br />
mixing and then to eliminate the little mix device, it brings<br />
about a lot of simplicity in our own office. Our guys have<br />
fallen in love with it because it’s so simplistic. Schools love<br />
it, too. You can probably remember when you had one<br />
Wig-L-Bug mixer between maybe 20 to 40 students, and you<br />
had to leave the patient and travel some distance to get your<br />
little capsule mixed, and then you headed back hoping you<br />
would be able to get everything in place before it set.<br />
MD: Not only that, but I remember mixing about 10 crowns’<br />
worth of cement for every actual dose of cement that I needed to<br />
cement one crown. So, I’m sure that for<br />
the schools it’s also going to eliminate a<br />
lot of waste, in addition to streamlining<br />
the cementation appointment. That<br />
really is amazing that you’ve been able<br />
25<br />
to have UltraCem be self-etching and<br />
take advantage of those higher bond<br />
strengths, yet still have the fluoride release<br />
and not have to kowtow to going<br />
20<br />
down the paste-paste route.<br />
Now you mentioned the bonding agents.<br />
I think dentists are probably a little<br />
confused. I think sometimes they see<br />
products that appear too good to be true.<br />
One company releases a product like<br />
this and then the bigger companies, like<br />
the 3Ms, figure it’s selling so well that<br />
they need to release their own one-bottle<br />
system or their own paste-paste cement<br />
to keep up with the Joneses. I guess<br />
when the reputable companies release a<br />
product, the dentist tends to think: this<br />
product must be OK.<br />
PPM<br />
15<br />
10<br />
5<br />
DF: Yeah, it’s frustrating. And with your dentist hat on, it’s<br />
doubly frustrating because it’s the patient that loses in the<br />
process. The patient is totally ignorant as to what’s going<br />
on. When you consider that there is somewhere around 100<br />
brands of bonding agents out there now, and you’ve only<br />
got a small handful that are really non-compromising ones,<br />
that’s disconcerting.<br />
Every time I’ve lectured over the last year, I share with<br />
dentists that there are two products that have a greater<br />
influence on the quality of your resin restorations than<br />
any other two products, simply based on what you choose<br />
to purchase. One of those is your bonding agent, and the<br />
second is your curing light. There are a number of quality<br />
composites out there, and there are a number of different<br />
matrix systems and the like, but, everything else being equal,<br />
the two factors that have the greatest impact on the quality<br />
of your restorations is the quality of your adhesive and<br />
the quality of your curing light. For posterior composites,<br />
you’ve got to have a curing light that will deliver around<br />
15 to 16 joules entirely into the floor of your Class II box.<br />
You get on a first or second molar with one of these light<br />
guides that has the bend it in, and you just can’t direct<br />
that light directly down into those Class II boxes. So when<br />
I’m lecturing to dentists, I share with them that if you are<br />
using a compromising adhesive down on the gingival floor<br />
of that Class II box, or if you are using a light that just can’t<br />
illuminate the gingival floor of a Class II box then, yes,<br />
there is a much higher potential for recurrent decay in the<br />
next two to three years under that area. It’s sad to say that<br />
our patients, when we notify them of such, just look up at<br />
us and say, “Well, doc, don’t worry, I just have soft teeth.” It<br />
Fluoride Release — One Week<br />
Day 1 Day 2 Day 3 Day 4 Day 5 Day 6 Day 7<br />
• UltraCem - (Ultradent)<br />
• Fuji PLUS - (GC America)<br />
Courtesy of Ultradent Products Inc.<br />
Interview with Dr. Dan Fischer39
just underscores the importance of us really thinking about<br />
the things we don’t think about more. If you envision a<br />
metal matrix wrapping a first or second molar, and you<br />
imagine a mesial-proximal box, with a light guide, the area<br />
that is behind that metal matrix down in the gingival box<br />
is in the shadows to a substantial degree. So, it’s a big deal<br />
to not only have adequate power, but to have a design that<br />
can illuminate the posterior preparations, or restorations,<br />
if you will. These light guides, they work fine for front<br />
teeth, but they sure are not predictable and appropriate for<br />
illuminating in proximal boxes on molars. You take those<br />
big light guides into a child’s mouth and it’s a joke!<br />
MD: Right. There’s no chance of getting down there in those<br />
types of clinical situations. Do you think you face an uphill<br />
battle with this dispensing system? Just in the sense that dentists<br />
are used to and love the fact that you guys have put everything<br />
in a syringe over the years, but this is the first time that we’ve<br />
seen a permanent cement like this that needs to be mixed up<br />
in the syringe. Or do you feel like this is a product that once<br />
dentists get a chance to use it once or twice, they’re going to say<br />
it’s pretty simple to use and that they can sleep better at night<br />
knowing it’s a great cement with no compromises?<br />
DF: The beauty of UltraCem is that the liquid and the powder<br />
are dosed in accurate ways, so you know you’re going to<br />
get a great mix. This is also the case for the capsule with<br />
the Wig-L-Bug; the syringe just eliminates the Wig-L-Bug<br />
and the other apparatus. But, certainly, if they don’t want<br />
to go that way, we offer it in a bottle and a scoop as well,<br />
because we believe in the cement standalone as a quality<br />
self-etching RMGI. But, ideally, they’ll pick up on the beauty<br />
of that syringe just like many other dentists. Many dentists<br />
have found the value of syringes and other dentists prefer<br />
just to bottle. You can’t convince all of them to go down the<br />
same path.<br />
MD: That’s really interesting. I think 3M ESPE’s RelyX Luting<br />
Cement, which used to be Vitremer Luting Cement, has<br />
probably been the product category leader for a while. When<br />
it was a powder and liquid, I don’t think a lot of dentists<br />
had complaints about having to mix the cement and put it<br />
in the crown and cement it. I don’t think it was something<br />
that dentists looked at as being overly laborious or technical<br />
or a pain. So when it came out in the paste-paste form and it<br />
was from the same company, I think dentists just thought: all<br />
right, this is the upgrade. This must be version 3.0, instead<br />
of 2.0. This must be the better version of it. It’s really kind of<br />
stunning to hear you talk about the physical properties and<br />
how, clinically, in the patient’s best interest, it was kind of a<br />
step backward. I hope dentists read this and really stop to think<br />
a little more because I think sometimes marketing can lead us<br />
astray in the case of a product like this.<br />
DF: We need marketing and marketing is important, but it’s<br />
the patient in the chair that it’s all about. We can’t afford to<br />
lose sight of that because they’re the ones who ultimately<br />
pay the price if things don’t work out, and they’re the ones<br />
who ultimately benefit if things do work out. From my point<br />
of view, this is just part of being a patient-centered dentist.<br />
MD: I completely agree. And, obviously, as somebody who<br />
practices within a dental laboratory and talks to a lot of<br />
dentists who are cementing restorations, I’m very happy this is<br />
going to be in our magazine that goes out to 125,000 dentists<br />
across the U.S. But I’m especially happy this will go out to our<br />
customers, so they will get an opportunity to see what your<br />
research has proven.<br />
Another thing that I’m passionate about is impressions. One<br />
of the trays I started using awhile back was the Triotray Pro <br />
from Triodent. They came to us as a laboratory and said they<br />
thought we’d like this tray and that our clients would be able<br />
to get better, less-distorted impressions with it. I started using<br />
it and I liked it, and we started promoting it to our customers<br />
who didn’t like the idea of a disposable tray. Then, I woke up<br />
one morning and saw that Ultradent was now distributing the<br />
tray! I thought, “Well, that’s great. Two companies that I really<br />
enjoy are getting along well together.” I’m interested in why,<br />
when you guys seem to develop a lot of things from scratch on<br />
your own and take a new approach to traditional products,<br />
you decided to join up with Triodent, rather than coming up<br />
with your own tray.<br />
DF: There are a couple things that have been at work here<br />
— maybe more than two. Obviously, Triodent’s Dr. Simon<br />
McDonald and his R&D team have been hard at work down<br />
there in New Zealand pushing the envelope with their<br />
fabulous system. We’ve been working for years to push the<br />
envelope where we could. Both companies are driven by<br />
R&D. We’ve probably put more money into R&D for each<br />
dollar of product we sell than any other companies, and<br />
that’s where the first level of our similarity comes.<br />
The next level of our similarity comes in that both of us are<br />
owned and managed by dentists, so we have that dentist’s<br />
need, that necessity-is-the-mother-of-convention drive to<br />
find a better way to skin the cat.<br />
Then, it’s the words that frame the Ultradent brand as determined<br />
by a large, outside marketing entity that surveyed our<br />
customers about six years ago. The two words they found<br />
that were repeated most often by our customers were “progressive”<br />
and “trustworthy.” So when we looked at what the<br />
Triodent guys have done with this matrix — bringing the<br />
ultimate level of finesse, incorporating science and facilitating<br />
virtually 100 percent of the time tight contacts and nice,<br />
anatomically correct broad contacts for the direct-placed<br />
restoration — we thought, “Should we try and reinvent the<br />
wheel on this, or is it logical that we work together?”<br />
Now I bring about the fourth leg of this discussion and that<br />
is, we decided a couple years ago that even if we applied<br />
40 www.chairsidemagazine.com
ourselves darn hard, it’s still not logical to think that we<br />
can invent everything that a dentist needs and have it be<br />
the absolute best product out there. We pride ourselves<br />
on having progressive, trustworthy products. We pride<br />
ourselves on bringing out what is among the best. But to<br />
do that on every front, to be the best at everything, that<br />
gets to be a challenge. And, if you’re not careful, it can<br />
even be a little bit arrogant. So when they approached us<br />
about distributing their matrix system, we studied it and<br />
thought, “You know, this company is aligning pretty good<br />
with our culture. They’re aligning well with our vision to<br />
improve oral health globally. They’re aligning on so many<br />
fronts, so let’s take the leap and for the first time market<br />
and sell another company’s brand of product.” We’re glad<br />
we did that, and I think they’re glad we did it. Certainly,<br />
our sales team focuses not on 20 or 30 different brands of<br />
thousands of different products like the large distributors<br />
do; they focus on a narrower range. We believe if we can<br />
keep that range narrow, even extending beyond our own<br />
brand if an appropriate opportunity presents itself, that we<br />
really can serve the dentist and their needs in much more<br />
knowledgeable, educated, quality, caring ways.<br />
MD: I think you’re right. I think there is a lot of hubris if you<br />
start to go down the road of: we can do everything better than<br />
everybody else. I think, at some point, you do need to realize<br />
that there are a lot of smart people in this industry, and at least<br />
this one team has spent all their time looking at this one thing.<br />
When you sit and look at that impression tray, there are so<br />
many desirable aspects about it: how it’s taller in the anterior<br />
to help you get the impression of the cuspid, and the way the<br />
material locks into it, and how it has the little seal on the back<br />
to keep the extra impression material from running out the<br />
posterior part of the tray. It’s very stiff; it’s hard to squeeze it<br />
laterally and have it bend at all. So, it really is well thought out.<br />
multi-unit bridge, that problem escalates virtually algorithmically.<br />
So, it just made a whole lot of sense to embrace a<br />
quality impression tray such as what Simon and his team<br />
had developed. And I concur with you, when you look at<br />
the finesse, when you look at the details that you described<br />
— higher in the front for cuspids and the like — you can<br />
tell that a lot of thought has gone into it from entities who<br />
are knowledgeable on dental anatomy and dentists’ needs<br />
and patients’ capabilities in the chair and the rest. It all<br />
comes together.<br />
MD: Even the disposable mesh that goes in the tray, when I<br />
first looked at it I thought there was a mistake in the factory<br />
because the mesh was so loose in the front. But, of course, it<br />
was intentional so that a patient with a deep overbite could<br />
get into maximum intercuspation without tearing the mesh.<br />
So even that little mesh insert has had a lot of thought that’s<br />
gone into it. It’s like you locked seven people in a room and<br />
gave them some quadrant impression trays and told them they<br />
could come out in a year. It looks like that’s the kind of time<br />
that was spent, and it’s pretty ingenious.<br />
I heard you say something that I didn’t know about you.<br />
You started off early in your career doing a lot of full-mouth<br />
reconstruction? I’m surprised because I know you hate crowns<br />
now. (laughs)<br />
DF: Quite frankly, Mike, I don’t hate crowns. In fact, just<br />
this morning I prepared a crown on a patient. What I say is:<br />
I place fewer crowns than I used to in my younger years. I<br />
don’t plead with my colleagues not to place crowns anymore,<br />
but rather to try and push that more invasive procedure<br />
back in a patient’s life. Not committing them to the invasive<br />
procedure of a full-crown prep in their 20s, 30s and 40s,<br />
When you look at our laboratory statistics, 75 percent of the<br />
impressions we get here are for single-unit crowns, but almost<br />
75 percent of those are still in plastic disposable impression<br />
trays. When you take these disposable trays and you squeeze<br />
them, they distort very easily. We know polyvinyl siloxane<br />
materials already shrink on their own as they cure. Frankly,<br />
it’s amazing that crowns fit as often as they do. Have you done<br />
any research into disposable impression trays? Or do you just<br />
kind of have a feel for how much better these Triotrays work?<br />
DF: We basically believe the same concepts you do. In fact,<br />
my initial passion out of dental school in Loma Linda in the<br />
mid-’70s was full-mouth reconstruction. I ate, drank and<br />
slept that type of dentistry for some time. What you said is<br />
so true: The research that extends for decades shows the<br />
importance of a tray that’s not deformed, that’s rigid, that<br />
holds its shape and supports that impression material to<br />
the best of its ability. And, certainly, when you compound<br />
that with moldable units beyond one unit — boy! With just<br />
a tiny bit of inaccuracy extended out over the length of a<br />
Interview with Dr. Dan Fischer41
ut to try and buy time with less-invasive procedures —<br />
giving the pulp chamber a chance to become smaller,<br />
giving the dentinal tubules a chance to become smaller, and<br />
saving that more invasive procedure for their later years.<br />
When you do so, you minimize the number of root canal<br />
treatments that are required later, you minimize the amount<br />
of replacements that have to occur with crowns and the like.<br />
We will always, within my lifetime, I believe, have the need<br />
for full-coverage crowns. I’ve got one that my daughter put<br />
in my mouth just four years ago. It was an upper second<br />
molar that was a virgin tooth, but it succumbed finally to<br />
the “dental student syndrome.” Namely, when I was a junior,<br />
a senior student had to take out impacted wisdom teeth in<br />
order to graduate, and I became the volunteer. The student<br />
wasn’t the sharpest knife in the drawer and took out some<br />
of the buccal plate over my second molar, and I’m sure he<br />
leaned that elevator on that root. Later, bacteria got in that<br />
crack and it was discovered, much later, probably about<br />
eight years ago, when the tooth abscessed and became a<br />
sinus infection and all the rest. If you’ve got a tooth like<br />
that, or you’ve got a molar that’s taking a heavy load, or a<br />
tooth that’s had root canal treatment — you’ve got to put<br />
crowns on those kinds of things.<br />
MD: Of course! And I know you don’t hate crowns. I know that<br />
what you don’t like is the overuse of full crowns as the easy<br />
way out, or kowtowing to what the patient’s insurance might<br />
pay. Did you go with cast gold on that crown?<br />
DF: It’s solid cast gold on this upper second molar.<br />
MD: Good choice! We like to see that. That’s becoming an<br />
endangered species in the laboratory today. I guess part of<br />
that is gold hitting $1,700 an ounce. It’s also patients giving<br />
some pushback about having gold in their mouth — even on a<br />
second molar — which is kind of crazy, especially after we tell<br />
them it’s the best material we’ve ever had in dentistry.<br />
DF: Well, when you said, “Good choice, that’s what we like<br />
to see,” the truth is at the end of the day, you can’t even<br />
see it, Mike! (I’m teasing you a little based on the meaning<br />
here.) But, yes, it’s true: if nobody is going to see it, you<br />
can’t beat it. That being said, I am impressed with how<br />
zirconia continues to improve. In fact, boy, with the cost of<br />
metals and the like, thank goodness we’ve got materials like<br />
zirconia that are evolving to where they are.<br />
MD: Right. Let me share some numbers with you. In 2007,<br />
66 percent of the crowns that we fabricated here were PFM<br />
crowns and 23 percent were all-ceramic crowns. If you look<br />
at 2011 and the first half of 2012, and PFMs have gone from<br />
66 percent to 20 percent, and all-ceramics have risen from<br />
22 percent to 68 percent of the restorations, and it’s because of<br />
zirconia and lithium disilicate. It’s shocking to me, and even<br />
to us as a laboratory, to see how quickly dentists have changed<br />
their allegiance and have been willing to kind of drop the<br />
PFM. It has been an amazing transformation largely pushed<br />
on by zirconia and dentists being somewhat satisfied with the<br />
material because they continue to order it.<br />
Let me ask you about one other thing I find fascinating about<br />
you: your drive to find a cure for dental caries. I don’t think<br />
there could be a higher mission on the planet, and least in the<br />
dental world, than to tackle something like this, and I don’t<br />
hear anybody else really talking about this. In fact, I saw in<br />
a recent article that the city of Phoenix is thinking about not<br />
fluoridating their public water supply. Can you tell me how<br />
your drive to find a cure for dental caries is going?<br />
DF: The progress has been slow. Not because of the<br />
technology, but because of regulatory constraints that we’re<br />
up against with the FDA. We have a technology that we feel<br />
can go a significant distance on this. We’re being very active<br />
on it, and we feel like we’re making some good inroads<br />
relative to explaining the technology to the FDA. It’s a little<br />
device that in the first human studies — four kids in a lower<br />
social economic group for which oral hygiene is pretty<br />
low — was shown to decrease caries 76 percent. If we can<br />
reduce caries 76 percent, we can reduce the incidence of<br />
the abscessed tooth 95 percent, which is exciting to me.<br />
But, yes, we’re still battling that.<br />
That being said, and I don’t know if I told you this last<br />
time or not, Mike, but if we could bring about a cure to<br />
caries today, we’d still need more dentists. I mean, when<br />
you consider that in our country before the recession, onethird<br />
of our fellow Americans couldn’t afford to go to the<br />
dentist except for emergency treatment. When you consider<br />
that teeth are like tires — they’re good for so many miles,<br />
and then the treads wear out, the sidewalls give out. When<br />
you consider the jobs of the Western world, there’s hardly<br />
42 www.chairsidemagazine.com
one job I can think of in Western countries that makes it<br />
easy for a patient with a missing central or dark, disfigured<br />
teeth to get a job. It’s a different world than it used to be. If<br />
we can bring about a cure for caries today, we’d still need<br />
more dentists.<br />
The most exciting news to me would be the amount of<br />
suffering we could stop for those who can’t afford Western<br />
dentists. Whereas one-third of our fellow Americans can’t<br />
afford treatment, two-thirds of the world doesn’t even<br />
have access to dentists. You’ve got humans who would<br />
jump off a cliff to escape the pain of an abscessed tooth.<br />
You’ve got humans who are known to pick up a boulder<br />
and mash it into the side of their head trying to escape the<br />
pain of an abscessed tooth. In so many parts of the world,<br />
including America, there are 12-, 13-, 14-year-old kids who<br />
are totally edentulous! The magnitude of this infectious<br />
disease is so devastating, when humans don’t have access<br />
to or can’t afford access to our Western-trained dentists. I<br />
believe it’s something we have to be serious about, just out<br />
of humanitarian reasons beyond mastication, chewing and<br />
the like.<br />
MD: I thought it was kind of self-evident that we’d still need<br />
dentists, even if we found a cure for caries. Can you clarify<br />
what you mean by that?<br />
DF: What I meant to say is, for sure we’ll need dentists. But<br />
I believe, even if we bring about a cure for caries, we’ll need<br />
more dentists.<br />
MD: Right. But are you saying there’s some pushback from the<br />
dental industry when you talk about curing dental caries?<br />
DF: I say that, quite frankly, just to let the dental industry<br />
know it shouldn’t be afraid of any source that is going to bring<br />
about a cure to caries because, whether it be us, whether<br />
it be NIH, whether it be JNJ, whether it be any company<br />
that comes out with a cure for caries, we’ll still need more<br />
dentists. So in a proactive way I’m saying: dentists shouldn’t<br />
be afraid of that, dental companies shouldn’t be afraid of<br />
that. Teeth being like tires, look at the challenges to the<br />
dentition with people living longer and keeping their teeth<br />
longer. We’d have a shifting demographic. We’d have less<br />
need to be addressing severe, early childhood caries. We<br />
would be working more on older people. But that would be<br />
a good problem, Mike.<br />
MD: I actually think that sounds like a great practice! In fact,<br />
most of the dentists I know who work on adult populations<br />
refer the kids out anyway. They don’t enjoy treating childhood<br />
caries. They prefer doing restorative dentistry on older patients.<br />
For dentists who say they want to do more esthetic dentistry, if<br />
you get rid of caries, a large part of it will be esthetic dentistry.<br />
So that sounds like a very modern, desirable way to practice. I<br />
like your vision of the future.<br />
DF: And if more families, even in lower socioeconomic<br />
groups, didn’t have to spend as much money addressing<br />
caries, they could potentially have more there, including<br />
the insurance companies they align with to help them get<br />
orthodontics for their kids. So you’d have more pediatric<br />
dentists doing more orthodontics, taking more ortho<br />
courses. There’s always going to be the need for it all, we<br />
just will be shifting to somewhat different demographics.<br />
But we’ll still need more dentists, Mike.<br />
MD: I think that’s such a noble effort that you’re putting forth<br />
toward doing that, especially for somebody from a restorative<br />
company — although, as you point out, it’s really not going to<br />
put anybody in dentistry out of business. Business will boom.<br />
It will just be a slightly different treatment modality than we<br />
practice today.<br />
It’s been fascinating hearing about UltraCem, especially<br />
because when I first looked at the product, honestly, without a<br />
bunch of the literature, I just thought that you had reinvented<br />
the dispensing system. But I really appreciate you informing<br />
me on the difference between the powder-liquid and the pastepaste<br />
cement. It’s nice to hear that you guys decided to go<br />
with the product that was the best clinical product available<br />
and not just chase the easier money and high convenience.<br />
You chose something that’s going to stand the test of time and<br />
ultimately benefit the patient.<br />
DF: That’s right. I think it’s important that the dentist sees<br />
it’s not just a fancy, fun mixer, but that it’s actually a superior<br />
cement.<br />
One other quick note on this: You know how frustrating<br />
it is if, say, there’s not adequate retention on a preparation<br />
and the crown comes off, but I’m sure you also know the<br />
most challenging of all cases when that occurs is when you<br />
have compromised retention on one abutment and good<br />
retention on the other and one side of the bridge comes<br />
loose. For dentists who are cementing crowns in which they<br />
have less-than-ideal vertical wall retention capabilities or<br />
any concern over one side of a bridge coming off, they<br />
can take that bond strength — which is a little more than<br />
double GC Fuji’s — and double it again simply by putting<br />
a little of our Peak on the preparation before they cement.<br />
MD: Interesting. That’s certainly an easy way to double the<br />
bond strength. And with the UltraCem, they get all the fluoride<br />
release as well, so they don’t have to make that compromise.<br />
DF: Yes, you are still getting the fluoride release, and you go<br />
from twice the bond strength of a GC Fuji to four times the<br />
bond strength. And the GC Fuji and UltraCem are higher in<br />
bond strength than the self-etching resin cements that are<br />
out there today. CM<br />
For more information on Ultradent, visit www.ultradent.com or call 888-230-1420.<br />
Interview with Dr. Dan Fischer43
Scannable Abutments:<br />
Digital Impressions for<br />
<strong>Dental</strong> Implants<br />
Astra Tech, Straumann,<br />
Neoss and Zimmer, as<br />
well as Certain® (BIOMET<br />
3i; Warsaw, Ind.),<br />
PrimaConnex® (Keystone<br />
<strong>Dental</strong>; Burlington,<br />
Mass.), and Brånemark®<br />
System, NobelActive<br />
and NobelReplace (Nobel<br />
Biocare; Yorba Linda,<br />
Calif.). They are also<br />
available for the lab’s<br />
– ARTICLE and PHOTOS by Carlos A. Boudet, DDS, DICOI<br />
Technological advances are making it easier than<br />
ever to practice dentistry in almost every dental<br />
procedure. 1 The purpose of this article is to increase<br />
awareness of a new modality for the restoration<br />
of implants by general practitioners and prosthodontists<br />
utilizing chairside digital impression systems. 2<br />
The conventional protocol for taking an implant impression<br />
for crowns & bridges requires a stock or custom impression<br />
tray loaded with a polyvinyl siloxane or polyether material<br />
that is placed in the mouth to record the position of a<br />
properly seated impression coping. This impression is then<br />
used to pour a stone model from which the laboratory<br />
fabricates the final restoration.<br />
Digital intraoral impressions were first introduced in 1987<br />
by Siemens with the CEREC 1. 3 There are now several wellestablished<br />
systems that offer intraoral scanning and digital<br />
impression capabilities for the construction of crowns &<br />
bridges without the need for impression trays or materials. 4,5<br />
For the dentist who needed an implant impression, however,<br />
this technology was not yet available. In 2004, BIOMET 3i<br />
introduced a coded implant healing abutment that provided<br />
all of the necessary implant information without the need<br />
for impression copings. 6 This was proprietary to 3i and<br />
more costly than a standard impression, but it was a step in<br />
the right direction.<br />
Scannable Abutments: Digital Impressions for <strong>Dental</strong> Implants45
In late 2010, Straumann introduced a scannable abutment<br />
called a “scanbody,” which allowed for the taking of a digital<br />
implant impression. We needed this option to be available<br />
for most commonly used implant systems, however. At this<br />
time, Straumann only works with iTero (Align Technology<br />
Inc., formerly Cadent Inc.; San Jose, Calif.).<br />
A dental laboratory in Canada, 5 Axis <strong>Dental</strong> Design Center,<br />
has since taken the concept further by developing scannable<br />
abutments that are compatible with implant systems from<br />
most of the major implant companies, allowing dentists<br />
to submit digital impressions for CAD/CAM design and<br />
milling of implant abutments and fixed restorations.<br />
However, at the time of this writing, they too can only use<br />
the iTero scanner. 7<br />
In February 2012, <strong>Glidewell</strong> Laboratories introduced intraoral<br />
scanning abutments under its Inclusive ® line of implant<br />
products for implant systems from Astra Tech, Straumann,<br />
Neoss and Zimmer, as well as Certain ® (BIOMET 3i; Warsaw,<br />
Ind.), PrimaConnex ® (Keystone <strong>Dental</strong>; Burlington, Mass.),<br />
and Brånemark System ® , NobelActive and NobelReplace <br />
(Nobel Biocare; Yorba Linda, Calif.). These Inclusive Scanning<br />
Abutments are also available for the lab’s line of Inclusive<br />
Tapered Implants, and they can be used to create digital<br />
implant impressions with the available, compatible intraoral<br />
scanners, such as iTero, Lava C.O.S. ® (3M ESPE; St. Paul,<br />
Minn.), CEREC ® (Sirona <strong>Dental</strong> Systems Inc.; Charlotte, N.C.),<br />
IOS FastScan ® (IOS Technologies; San Diego, Calif.) and the<br />
soon-to-be-compatible E4D ® Dentist (D4D Technologies;<br />
Richardson, Texas). Heraeus projects to have a new intraoral<br />
scanner, the cara TRIOS ® , available this year.<br />
This is a rapidly developing field, and I would not be<br />
surprised if in the near future we see a greater number of<br />
compatible implant systems and more dental laboratories<br />
offering this service.<br />
When you compare the<br />
simple steps involved<br />
in capturing digital<br />
implant impressions<br />
using scannable<br />
abutments to<br />
conventional impression<br />
systems, the<br />
digital method is<br />
simpler, easier and<br />
makes you a better,<br />
happier and more<br />
productive dentist.<br />
Figure 1: Implant ready to be restored<br />
The following case example demonstrates the simplicity of<br />
capturing a digital implant impression using an Inclusive<br />
Scanning Abutment and CEREC Redcam acquisition unit<br />
with version 3.8 CEREC Connect* software to restore a<br />
Zimmer Screw-Vent ® implant. However, any of the previously<br />
mentioned chairside digital impression systems available<br />
today are compatible and can be used for this technique.<br />
Case Presentation<br />
The patient in this case is a 62-year-old male who needed<br />
the restoration of a Zimmer Screw-Vent 4.7 wide implant<br />
in the area of the right mandibular first molar (Fig. 1). The<br />
gingiva had healed around the healing abutment and was<br />
ready for the implant impression (Fig. 2).<br />
Figure 2: Implant with healing abutment<br />
*In April 2012, Sirona renamed its digital impression portal Sirona Connect.<br />
According to the company, the Sirona Connect portal, accessible via www.sironaconnect.net,<br />
is compatible with all existing versions of CEREC Connect.<br />
46 www.chairsidemagazine.com
Figure 3: Inclusive Scanning Abutment finger-tightened on implant<br />
Figure 6: Additional information tab in CEREC Connect software<br />
Figure 4: Scans for digital impression<br />
Figure 7: Fine-tuning the design with <strong>Glidewell</strong> Laboratories<br />
Figure 5: Digital models correlated with buccal bite<br />
Figure 8: CAD/CAM abutment try-in<br />
Scannable Abutments: Digital Impressions for <strong>Dental</strong> Implants47
Our last step was to select <strong>Glidewell</strong> Laboratories as the<br />
dental laboratory in the CEREC Connect software, and<br />
complete the detailed prescription for the simultaneous<br />
fabrication of the CAD/CAM custom abutment and crown<br />
(Fig. 6). I selected a titanium abutment and BruxZir ® Solid<br />
Zirconia crown. Before the lab began the milling process,<br />
the technician called as I had requested, and we fine-tuned<br />
the design (Fig. 7).<br />
The case arrived at my office nicely packaged and organized.<br />
I tried in and verified the fit of the CAD/CAM abutment<br />
(Figs. 8, 9), torqued it to the recommended specifications,<br />
and then cemented the BruxZir ® crown with very minimal<br />
adjustment (Fig. 10).<br />
Figure 9: Radiographic verification of seating of abutment<br />
Conclusion<br />
As I have done many times, I could have handled this<br />
case in-office with good results using soft tissue models, a<br />
prefabricated titanium abutment prepared extraorally and<br />
an IPS e.max ® crown (Ivoclar Vivadent; Amherst, N.Y.), but<br />
why would I want to spend more time doing laboratory<br />
work when I have the option of being more productive<br />
and delivering state-of-the-art dentistry to my patients?<br />
When you compare the simple steps involved in capturing<br />
digital implant impressions using scannable abutments to<br />
conventional impression systems, the digital method is<br />
simpler, easier and makes you a better, happier and more<br />
productive dentist. 8 CM<br />
Dr. Carlos Boudet is in private practice in West Palm Beach, Fla. Contact him at<br />
www.boudetdds.com or 561-968-6022.<br />
Figure 10: Cemented BruxZir crown<br />
After removing the healing abutment, I placed the Inclusive<br />
Scanning Abutment and finger-tightened it over the implant<br />
(Fig 3). If tissue shaping is required for proper emergence<br />
of the final abutment because you did not use a custom<br />
healing abutment, you can do it at this time. This will give<br />
the laboratory a good idea of the desired emergence profile.<br />
The downside is that you will need good hemostasis, as any<br />
bleeding will interfere with the impression.<br />
References<br />
1. Zweig A. Improving impressions: go digital! Dent Today. 2009 Nov;28(11):100, 102,<br />
104.<br />
2. Patel N. Integrating three-dimensional digital technologies for comprehensive<br />
implant dentistry. J Am Dent Assoc. 2010 Jun;141 Suppl 2:20S-24S.<br />
3. Mörmann WH. The evolution of the CEREC system. J Am Dent Assoc. 2006 Sep;<br />
137 Suppl:7S-13S.<br />
4. Boudet CA. CEREC Connect: a welcomed upgrade for CEREC users. Chairside.<br />
Spring 2011;V6I2:38-44.<br />
5. Fuster-Torres MA, et al. CAD/CAM dental systems in implant dentistry: update.<br />
Med Oral Patol Oral Cir Bucal. 2009 Mar 1;14(3):E141-5.<br />
6. Garg AK. Cadent iTero’s digital system for dental impressions: the end of trays and<br />
putty? Dent Implantol Update. 2008 Jan;19(1):1-4.<br />
7. Personal communication between laboratory owner and author.<br />
8. Lee SJ, Gallucci GO. Digital vs. conventional implant impressions: efficiency outcomes.<br />
Clin Oral Implants Res. 2012 Feb 22. Article first published online.<br />
Next, we powdered the scanning abutment and adjacent<br />
teeth, and took the scans for the digital impression (Fig. 4).<br />
I then took the buccal bite and correlated (stitched) the<br />
models (Fig. 5), before replacing the scanning abutment<br />
with the healing abutment.<br />
48 www.chairsidemagazine.com
– ARTICLE and CLINICAL PHOTOS by<br />
Leendert Boksman, DDS, BSc, FADI, FICD and<br />
Robert C. Margeas, DDS<br />
Case Report<br />
The Creation of a Soft Tissue Emergence Profile<br />
with a Long-Term Ribbond ® -THM Provisional<br />
There is an ever-increasing body of<br />
dental research literature evaluating<br />
the use of fibers to reinforce the clinical<br />
performance of dental composites and<br />
acrylics. Teeth restored with fiber posts<br />
show a significantly higher resistance<br />
to fracture than titanium 1 and stainless<br />
steel posts. 2 Teeth restored with fiber<br />
posts are significantly stronger in<br />
static and fatigue fracture testing than<br />
teeth restored with metallic posts, 3<br />
resulting from an elastic modulus<br />
that more closely approaches dentin,<br />
producing less concentrated stress<br />
on the root. 4 Similarly, custom fiberreinforced<br />
posts (Ribbond ® [Ribbond;<br />
Seattle, Wash.]) fabricated directly<br />
into the root canal space with<br />
composite show that polyethylene<br />
fiber reinforced posts with composite<br />
cores demonstrate high survival rates<br />
and can be recommended for use. 5,6<br />
Additionally, the insertion of Ribbond<br />
inside the cavity has a positive effect<br />
on fracture strength of endodontically<br />
treated molar teeth with MOD cavity<br />
preparation and cuspal fracture, 7 as<br />
well as the ability to reinforce severely<br />
compromised teeth which have been<br />
endodontically treated. 8<br />
The use of fiber reinforcement has<br />
distinct advantages in traditional composite<br />
restorative techniques. The use<br />
of fiber under composite restorations<br />
can save the tooth structure by changing<br />
fracture lines if cusp failure should<br />
occur 9 and significantly increases<br />
fracture strength of MOD composite<br />
restorations, especially if placed in<br />
a buccal to lingual direction. 10 The<br />
fatigue strengths of particulate filler<br />
composite resins is 49–57 MPa, and<br />
those of fiber-reinforced composites is<br />
90–209 MPa, with the strain of UHM-<br />
WPE (ultra-high molecular weight<br />
polyethylene, i.e., Ribbond) being the<br />
highest. 11 Strain energy absorption can<br />
be increased 433 percent over unreinforced<br />
composite, with the leno-weave<br />
reinforced composite having the highest<br />
consistency due to the details of<br />
its architecture, which restricts fabric<br />
shearing and movement during placement.<br />
12 Polyethylene reinforcing fiber,<br />
when used in combination with<br />
a flowable resin in high C-factor<br />
cavity preparations, results in stable<br />
bond strengths and an increase in<br />
the microtensile bond strength to the<br />
dentin floor. 13 Another significant<br />
advantage of using fiber reinforcement<br />
in traditional Class II composite resins<br />
is the significant decrease in gingival<br />
microleakage. 14<br />
The Creation of a Soft Tissue Emergence Profile with a Long-Term Ribbond-THM Provisional49
Strassler has written<br />
extensively on the benefits<br />
of fiber-reinforcing<br />
material with dental<br />
resins and has used fiber<br />
reinforcing in single-tooth replacement<br />
techniques, 15 single visit, natural<br />
tooth pontic bridges 16 and periodontal<br />
splinting with thin-high-modulus polyethylene<br />
ribbon. 17 The high molecular<br />
weight polyethylene has a high wear<br />
resistance and high impact strength, 18<br />
with its plasma treatment resulting in<br />
chemical integration with composite<br />
resins. 19 With a locked-stitched lenoweave,<br />
the fibers maintain their orientation<br />
when adapted to the tooth<br />
structure or integrated into temporization<br />
and do not unravel when cut. 20<br />
The addition of fibers to provisional<br />
Figure 1: Initial presentation of patient with<br />
fractured tooth #8 and resorbing tooth #9<br />
resins increases the fracture toughness<br />
and flexural strength, 21 with the clinical<br />
implication of a reduced incidence<br />
of fixed provisional restoration failure 22<br />
due to enhanced fracture resistance. 23<br />
Additional strengthening of the connector<br />
areas can be achieved through the<br />
use of a fiber-reinforcing material such<br />
as Ribbond ® -THM (Ribbond). 24 Polyethylene<br />
fiber-reinforced composite<br />
bridges can be considered as a permanent<br />
treatment due to their strength 25,26<br />
with selection of appropriate fiber reinforcement<br />
and placement of the fibers<br />
allowing long-term clinical success. 27<br />
CASE PRESENTATION<br />
A 55-year-old patient presented to<br />
the practice with two failing upper<br />
centrals (Fig. 1). Tooth #8 had a vertical<br />
fracture and tooth #9 had a failing root<br />
canal treatment. Upon presentation<br />
of the various options to restore the<br />
area, the patient opted for placement<br />
of a 4-unit fixed bridge. The centrals<br />
were atraumatically extracted with<br />
minimal trauma to the soft tissues and<br />
alveolar process (Fig. 2). The lateral<br />
incisors were minimally prepared for<br />
the initial long-term temporization so<br />
that the gingival tissues would have an<br />
opportunity to stabilize.<br />
Utilizing a previously fabricated polyvinyl<br />
siloxane matrix, an appropriate<br />
length of Ribbond-THM (thinner<br />
higher modulus) was cut to extend<br />
from lateral to lateral incisor (Fig. 3).<br />
The Ribbond-THM was wetted using<br />
unfilled bonding adhesive, the excess<br />
blotted off with a lint-free gauze and<br />
the saturated Ribbond was placed onto<br />
the lingual surface of the PVS matrix,<br />
followed by injection of Temptation ®<br />
(CLINICIAN’S CHOICE; New Milford,<br />
Conn.) (Fig. 4). A small amount of<br />
Temptation was also placed into the<br />
extraction sockets (Fig. 5), and the PVS<br />
matrix was seated intraorally (Fig. 6).<br />
After polymerization was complete,<br />
the matrix was removed, and the temporary<br />
bridge was removed from the<br />
matrix (Fig. 7). To create the desired<br />
soft tissue emergence profile (ovate<br />
pontic form) for the final restoration,<br />
the temporary bridge was fabricated to<br />
extend 3 mm below the free margin of<br />
the gingival tissue. The over-extension<br />
Figure 2: Atraumatic extraction of centrals<br />
maintaining tissue and bony contours, with initial<br />
minimal full-coverage preparations on lateral<br />
incisors<br />
Figure 4: Placement of Temptation over the<br />
wetted Ribbond-THM<br />
Figure 6: Seating of the temporary matrix<br />
Figure 3: Evaluation of the length of Ribbond-<br />
THM required to adapt from lateral to lateral<br />
incisor. Note: Ribbond Triaxial (Ribbond) is used<br />
for larger cases.<br />
Figure 5: Injection of Temptation into the extraction<br />
sockets<br />
Figure 7: Temporary removed from the matrix<br />
and flowable added to create initial convex pontic<br />
form<br />
50 www.chairsidemagazine.com
was removed (Fig. 8), and both pontics<br />
were shaped and contoured to measure<br />
exactly 3 mm from the marked<br />
position of the free margin with flowable<br />
composite (Figs. 9, 10).<br />
Initial shaping of the temporary bridge<br />
was followed by the application of<br />
Tempglaze (CLINICIAN’S CHOICE),<br />
which was cured with a broad<br />
spectrum curing light for 30 seconds<br />
per unit (Fig. 11). The temporary was<br />
cemented with Cling2 ® (CLINICIAN’S<br />
CHOICE), and all temporary cement<br />
was removed (Fig. 12). After 10 weeks,<br />
the soft tissue showed excellent tissue<br />
contours, which will allow for naturallooking<br />
emergence profiles for the<br />
#8 and #9 pontics<br />
(Fig. 13).<br />
Three additional<br />
clinical cases are<br />
presented in photo format only, to<br />
show the type of tissue response that<br />
can be created with this technique<br />
(Figs. 14–19). CM<br />
Figure 8: Trimming the pontic tissue surface to<br />
create a conically shaped pontic profile, which<br />
will be 3 mm below the tissue margin.<br />
Figure 12: Cementation with Cling2 and excess<br />
cement removed.<br />
Figure 16: Tissue profile after removing temporary<br />
bridge<br />
Figure 9: Marking the level of the free margin<br />
to allow for accurate length measurement of<br />
the apical projection.<br />
Figure 13: Tissue profile after removal of<br />
the temporary bridge, which was in place for<br />
10 weeks<br />
Figure 17: Fixed restoration showing excellent<br />
tissue profile<br />
Figure 10: Addition and modification of the tissue<br />
adaptive surface with flowable resin<br />
Figure 14: Six-unit anterior case showing tissue<br />
profile after removing the temporary bridge<br />
Figure 18: Tissue contours after removal of<br />
temporization<br />
Figure 11: Application of Tempglaze to the<br />
shaped temporary bridge, which was cured<br />
with a broad band curing light for 30 seconds<br />
per unit<br />
Figure 15: Same case final restoration immediately<br />
post cementation<br />
Figure 19: Final fixed restoration<br />
The Creation of a Soft Tissue Emergence Profile with a Long-Term Ribbond-THM Provisional51
Dr. Len Boksman formerly was director of clinical affairs for Clinical Research <strong>Dental</strong> and CLINICIAN’S CHOICE. He<br />
currently does freelance consulting and lecturing for the general practitioner. He can be reached at lenboksman@rogers.<br />
blackberry.net.<br />
Dr. Robert Margeas is an adjunct professor in the department of operative dentistry at the University of Iowa and a clinical<br />
instructor at the Center for Excellence ® in Chicago, Ill. He maintains a private practice devoted to esthetic dentistry in<br />
Des Moines, Iowa.<br />
REFERENCES<br />
1. Amenisalehi E. Strength of incisors restored by<br />
metallic, fiber and ceramic posts. J Dent Res.<br />
2005;84 (Spec Issue B), African and Middle East<br />
section (www.dentalresearch.org).<br />
2. Barjau-Escribano A, Sanho-Bru JL, Forner-<br />
Navarro L, Rodríguez-Cervantes PJ, Pérez-<br />
Gónzález A, Sánchez-Marín FT. Influence of prefabricated<br />
post material on restored teeth: fracture<br />
strength and stress distribution. Oper Dent.<br />
2006 Jan-Feb;31(1):47-54.<br />
3. Hayashi M, Sugeta A, Takahashi Y, Imazato S,<br />
Ebisu S. Static and fatigue fracture resistance<br />
of pulpless teeth restored with post-cores. Dent<br />
Mater J. 2008 Sep; 24(9):1178-86. Epub 2008<br />
Mar 28.<br />
4. Nakamura T, Ohyama T, Waki T, Kinuta S, Wakabayashi<br />
K, Mutobe Y, Takano N, Yatani H. Stress<br />
analysis of endodontically treated anterior teeth<br />
restored with different types of post material.<br />
Dent Mater J. 2006 Mar;25(1):145-50.<br />
5. Piovesan EM, Demarco FF, Cenci MS, Pereira-<br />
Cenci T. Survival rates of endodontically treated<br />
teeth restored with fiber-reinforced custom posts<br />
and cores: a 97 month study. Int J Prosthodont.<br />
2007 Nov-Dec;20(6):633-9.<br />
6. Bae JM, Kim MJ, Jung WC, Son DK. Evaluation<br />
of the mechanical properties of experimental<br />
fiber-reinforced composite posts. Abstract #2686<br />
IADR/AADR/CADR 85th General Session 2007<br />
(http://iadr.confex.com/iadr/2007orleans/<br />
techprogram/abstract_91891.htm).<br />
7. Belli S, Cobankara FK, Eraslan O, Eskitascioglu G,<br />
Karbhari V. The effect of fiber insertion on fracture<br />
resistance of endodontically treated molars with<br />
MOD cavity and reattached fractured lingual<br />
cusps. J Biomed Mater Res B Appl Biomater.<br />
2006 Oct;79(1):35-41.<br />
8. Kirzioglu Z, Ertürk MS. Reconstruction and<br />
recovery of hemisectioned teeth using direct<br />
fiber-reinforced composite resin: case report.<br />
J Dent Child (Chic). 2008 Jan-Apr;75(1):95-8.<br />
9. Yldirim C, Kahveci O, Akman M, Belli S, Eskitascioglu<br />
G. Effect of fibre on fracture strength of<br />
teeth with MOD cavity. Abstract #0940<br />
IADR/AADR/CADR 85th General Session<br />
(http://iadr.confex.com/iadr/2007orleans/tech<br />
program/abstract_89686.htm).<br />
10. Belli S, Erdemir A, Yildirim C. Reinforcement<br />
effect of polyethylene fibre in root-filled teeth:<br />
comparison of two restoration techniques.<br />
Int Endod J. 2006 Feb;39(2):136-42.<br />
11. Bae JM, Kim KN, Hattori M, Hasegawa K,<br />
Yoshinari M, Kawada E, Oda Y. Fatigue strengths<br />
of particulate filler composites reinforced with<br />
fibers. Dent Mater J. 2004 Jun;23(2):166-74.<br />
12. Karbhari VM, Strassler H. Effect of fiber architecture<br />
on flexural characteristics and fracture of<br />
fiber-reinforced dental composites. Dent Mater<br />
J. 2007 Aug;23(8):960-8. Epub 2006 Nov 7.<br />
13. Belli S, Dönmez N, Eskitascioglu G. The effect<br />
of c-factor and flowable resin or fiber use at the<br />
interface on microtensile bond strength to dentin.<br />
J Adhes Dent. 2006 Aug;8(4):247-53.<br />
14. El-Mowafy O, El-Badrawy W, Eltanty A, Abbasi K,<br />
Habib N. Gingival microleakage of Class II resin<br />
composite restorations with fiber inserts. Oper<br />
Dent. 2007 May-Jun;32(3):298-305.<br />
15. Strassler HE, Taler D, Sensi LG. Fiber reinforcement<br />
for one-visit single-tooth replacement. Dent<br />
Today. 2007 Jun;26(6):120, 122-125.<br />
16. Strassler H. Single visit natural tooth pontic bridge<br />
with fiber reinforcement ribbon. Tex Dent J. 2007<br />
Jan;124(1):110-3.<br />
17. Strassler HE, Brown C. Periodontal splinting<br />
with a thin high-modulus polyethylene ribbon.<br />
Compend Contin Educ Dent. 2001 Aug;22(8):<br />
696-700, 702, 704.<br />
18. Rose RM, Crugnola A, Ries M, Cimino WR, Paul<br />
I, Radin EL. On the origins of high in vivo wear<br />
rates in polyethylene components of total joint<br />
prostheses. Clin Orthop Relat Res. 1979 Nov-<br />
Dec;(145):277-86.<br />
19. Rudo DN, Karbhari VM. Physical behaviors of<br />
fiber reinforcement as applied to tooth stabilization.<br />
Dent Clin North Am. 1999 Jan;43(1):7-35.<br />
20. Strassler HE. Clinical materials review: fiberreinforcing<br />
materials for dental resins. Inside<br />
Dentistry. 2008 May;5(4):76-85.<br />
21. Hamza TA, Rosenstiel SF, Elhosary MM, Ibraheem<br />
RM. The effect of fiber reinforcement on the<br />
fracture toughness and flexural strength of<br />
provisional restorative resins. J Prosthet Dent.<br />
2004 Mar;91(3):258-64.<br />
22. Ramos V Jr, Runyan DA, Christensen LC. The<br />
effect of plasma-treated polyethylene fiber on<br />
the fracture strength of polymethyl methacrylate.<br />
J Prosthet Dent. 1996 Jul;76(1):94-6.<br />
23. Pfeiffer P, Grube L. In vitro resistance of reinforced<br />
interim fixed partial dentures. J Prosthet<br />
Dent. 2003 Feb;89(2):170-4.<br />
24. Heymann HO. The Carolina bridge: a novel<br />
interim all-porcelain bonded prosthesis. J Esthet<br />
Dent. 2006;18(2):81-92.<br />
25. Chafaie A, Portier R. Anterior fiber-reinforced<br />
composite resin bridge: a case report. Pediatr<br />
Dent. 2004 Nov-Dec;26(6):530-4.<br />
26. Karakaya S, Gursel M, Ozer F. Replacement of<br />
natural teeth using fiber-reinforced restoration:<br />
clinical reports. Abstract #0330 IADR 2005<br />
(http://iadr.confex. com/iadr/eur05/techprogram/<br />
abstract_68611.htm).<br />
27. Trushkowsky R. Fiber-reinforced composite<br />
bridge and splint. Replacing congenitally missing<br />
teeth. NYS Dent J. 2004 May-Jun;70(5):34-8.<br />
Reprinted by permission of Oral Health, December<br />
2008.<br />
52 www.chairsidemagazine.com
SSS
SPEED<br />
DENTISTRY<br />
Fast Is Better — Up to a Point<br />
– ARTICLE by Ellis J. Neiburger, DDS<br />
This article will explore the concept of “speed<br />
dentistry,” the practice of doing dental treatments<br />
faster and better. In today’s world, just about<br />
everyone wants things to go faster. This need for<br />
speed extends to many aspects of our lives, including travel,<br />
food, data transmission and services. Time is money, and<br />
slower times cost more money. Many modern businesses<br />
pride themselves on — even advertise — their ability to do<br />
things rapidly and do them “right.” Be it a fast haircut, fast<br />
cost analysis, fast trades or fast dental care, society wants —<br />
even demands — rapid service and high quality. If a<br />
procedure takes less time, the individual has to spend less<br />
time on that project. Any extra time gained can then be used<br />
for doing something else, usually something considered<br />
“more important.” We have all experienced the anguish of<br />
slow food service or post office lines where the operations<br />
are done at a snail’s pace. This can be frustrating and costly,<br />
and dentistry is no exception.<br />
Even before they are seated in the dental chair, patients do<br />
not want to wait. They don’t like spending long minutes with<br />
their mouths open or in uncomfortable situations. Having<br />
an uncomfortable procedure done is more tolerable when<br />
done with speed rather than lethargy. There is no patient<br />
who would rather have a tooth extraction done slowly than<br />
with the utmost speed. Our patients expect speed, comfort<br />
and convenience. They will flock to dentists who provide<br />
these things and shun those who don’t.<br />
TAUGHT TO BE SLOW<br />
Dentists have routinely been associated with slow<br />
procedures. This is in part because a patient experiencing<br />
an emotionally charged procedure (e.g., extraction) is under<br />
stress and experiencing pain or discomfort — physically<br />
and psychologically — so time seems to go slower for the<br />
patient than it would if he were experiencing something<br />
enjoyable. Consequently, the generally held perception is<br />
that dentistry goes slowly.<br />
Modern dentistry, as done by many dentists and their staff,<br />
is often practiced slowly; that is, more slowly than it needs<br />
to be. For example, Dr. Slow is doing an occlusal amalgam.<br />
The dentist slowly sits down, chats a bit with the patient,<br />
then slowly puts on some gloves, slowly adjusts the fit,<br />
then looks at the bracket table, slowly selects a mirror and<br />
explorer, and then slowly focuses on the anxious patient’s<br />
mouth. He then looks at the record, slowly adjusts the chair<br />
Speed Dentistry: Fast Is Better — Up to a Point55
position, lights and his loupes, and then slowly reads the<br />
record again. Then he slowly looks in the patient’s mouth<br />
at the offending caries. He will take his time examining<br />
the tooth, slowly looking at it from several angles, then<br />
glancing at the record, then back at the tooth. He has seen<br />
it several times before, but just to be sure, he looks at it<br />
again — and again.<br />
Talking slowly, Dr. Slow then advises the patient that an<br />
anesthetic is needed and opens a drawer, slowly selects a<br />
syringe, studies a small stack of loose carpules and selects<br />
one. He then slowly takes it in his hands and inserts it into<br />
the syringe, checks the fit and slowly examines the tip of<br />
the needle as solution is slowly expressed. Then he slowly<br />
brings the syringe to the patient’s mouth, elevates the lip,<br />
slowly examines the injection site and then slowly inserts the<br />
needle into the mucosa, slowly injecting as he slowly drives<br />
the needle tip deeper into the tissues. Taking a minute or so,<br />
he then finishes the injection while he painstakingly moves<br />
the syringe from side to side. He then slowly withdraws the<br />
needle and syringe, taking his time to insert the safety cap<br />
back on the instrument. A 5- to 10-minute wait ensues for<br />
what is deemed “good anesthesia.” After asking the patient<br />
several times if he is numb, poking at the gingiva and any<br />
other tissue within range, Dr. Slow lifts his handpiece and<br />
slowly looks at the bur, then looks away and toward his bur<br />
block for an appropriate bur. He might look at several burs,<br />
slowly considering each one before he makes his selection,<br />
and then slowly pick up a chuck tool to loosen the old bur<br />
and slowly insert the new bur. This process can go on and<br />
on for what seems like forever! I’m sure you get the idea.<br />
Instead of taking five minutes, Dr. Slow takes 30 minutes to<br />
do a simple restoration. We are all more or less guilty of this<br />
type of patient abuse.<br />
Why do we do this? Why is practicing dentistry so slow and<br />
methodical? Why must it take so much time when it really<br />
is not necessary? The reason is simple: We were taught to<br />
be slow in dental school. How many times were we told by<br />
instructors, “Take your time and do it right” or “You’re doing<br />
this too fast”?<br />
ADVANTAGES OF SPEED DENTISTRY<br />
The faster you do something, the quicker you will finish.<br />
If you are torturing (treating) a patient, the faster you do<br />
it, the less discomfort the patient will feel over the length<br />
of the visit. If you are being paid for a treatment and you<br />
do it quickly, then you will be making more money, faster.<br />
If you treat 10 patients an hour rather than 10 patients<br />
in four hours, you will be going home earlier and richer.<br />
The patients will be better served because they will not<br />
have to wait for treatment, and they will spend less time<br />
in the chair and experience less stress. Physiologically,<br />
as adrenalin secretion or stress suppresses the immune<br />
system, less patient stress means less adrenalin secretion<br />
and faster healing.<br />
Another advantage is that you pay less for your staff because<br />
they work fewer hours. However, if you choose to spend<br />
the same amount of time in the office as you did doing<br />
slow dentistry (same basic overhead), you will be able to<br />
treat more people and thus increase your income, try new<br />
techniques you previously didn’t have time for, study or<br />
give more to charity. Speed dentistry has its financial as well<br />
as professional advantages.<br />
Many people object to the concept of speed dentistry<br />
because they believe slow is better than fast, equating<br />
reduced speed to precision. This began in 1900 America<br />
with a great surgeon, Dr. William Halsted, who, after<br />
having a stroke, perfected his technique of general surgery<br />
by methodically going slow. Compared to the slip-shod,<br />
microbe-contaminated surgical techniques of the Victorian<br />
era, the new Halsted technique — along with dependable<br />
anesthesia — produced fabulous results. Unfortunately, it<br />
had an effect on dentistry. In most of our dental school<br />
experiences, instructors believed that procedures done<br />
When dental students are first shown a procedure, it is<br />
usually demonstrated slowly to ensure comprehension. It is<br />
then practiced slowly. Rarely, if ever, are we told or taught<br />
to speed up the process. Unfortunately, this dental school<br />
experience transfers over into real life and our dental<br />
practices. Certainly, when we have a crowded schedule<br />
or have to leave the office early, we speed up and push a<br />
bit, but this is an occasional effort, not a continuous one.<br />
We need to be consistently faster because it is good for<br />
our patients, ourselves, our staff and our profession. With<br />
the right training, equipment and mindset, we can all be<br />
practicing speed dentistry.<br />
56 www.chairsidemagazine.com
apidly would lead to more mistakes and lower quality, as<br />
well as potential injury to the patient or the dentist. They<br />
encouraged “slow.” That concept is not held true today,<br />
especially in practice. Doing dentistry rapidly, if you are<br />
adequately trained, can be done safely and with a high level<br />
of quality and patient comfort.<br />
THE DROP-OFF POINT<br />
The drop-off point is the point in a procedure where your<br />
quality or control suffers. For example, if you are carrying<br />
a tray of filled wine glasses and walking a 40-meter path<br />
over uneven ground, you may spill the drinks if you<br />
a) walk so slowly that you spend an inordinate amount of<br />
time, thus becoming unsteady and fatigued or b) walk so<br />
rapidly that you lose control of the tray or trip, thus shaking<br />
it and spilling the cargo. These points are termed “dropoff<br />
points” because you lose control and quality suffers<br />
catastrophically. The area between the too slow and too fast<br />
drop-off points is where you want to be with your speed<br />
dentistry technique, and the closer you are to the too rapid<br />
drop-off point without reaching it, the faster you will be<br />
giving quality treatment.<br />
Here’s another example: If you drive to a destination on<br />
city streets going 15 mph, it will take you longer to get<br />
there than if you drive at 30 mph. The traffic will pile up<br />
behind you, some cars may pass inappropriately and irate<br />
drivers my become distracted trying to flip you the bird or<br />
honking. Some people may even become confused and hit<br />
your car. You will probably be safer and drive the journey<br />
more efficiently if you go 30 mph. Sixty mph is too fast,<br />
30 mph is not, yet many dentists do their dentistry at 10–15<br />
mph speeds because they believe going slow is good.<br />
QUALITY<br />
DROP-OFF POINT (SLOW)<br />
DROP-OFF POINT (FAST)<br />
SPEED (TIME)<br />
Quality and increased speed of doing dentistry are ensured as long as<br />
you stay between the slow and fast drop-off points. Going beyond the<br />
drop-off points reduces treatment quality.<br />
It is important to recognize and not<br />
exceed your slow and fast drop-off<br />
points. As long as you stay in that<br />
range, your treatments will be of<br />
high quality.<br />
How can you tell when you reach your drop-off point?<br />
You’ve reached it when you start to make errors and<br />
mistakes. When you see this happening, ease off a bit and<br />
slow down. Speed affects different people in different ways,<br />
so you will have to test yourself. No one can tell you how<br />
fast to go.<br />
It is important to recognize and not exceed your slow<br />
and fast drop-off points. As long as you stay in that range,<br />
your treatments will be of high quality. With some practice<br />
and new equipment or techniques, you may even expand<br />
your drop-off point to higher levels. The message is that<br />
slowness is not always good, and speed is not always bad.<br />
Be careful not to confuse slow speed with quality dentistry.<br />
Doing dentistry at a snail’s pace can often be harmful to the<br />
patient and to you, the dentist. For example, slowly doing<br />
a reflected surgical flap procedure in 40 minutes is more<br />
harmful to the tissues than the same flap procedure done in<br />
just 10 minutes. Speed dentistry is beneficial, as long as you<br />
do not exceed your drop-off point.<br />
DOING SPEED DENTISTRY<br />
How does one increase their speed in dentistry? Just doing<br />
a procedure rapidly is not sufficiently beneficial because it<br />
often becomes a hit-or-miss adventure. Carefully planning<br />
how you will increase your speed and repeatedly performing<br />
at that level will yield permanent and controllable results.<br />
You need to think about how you will speed up your<br />
treatment technique. Ask yourself what you are going to<br />
do, what instruments you will need and what materials will<br />
be necessary. Plan what you will do if this or that happens,<br />
such as the enamel breaks or the patient moves. Then have<br />
everything ready.<br />
Every dentist works differently, using his own techniques,<br />
instruments and other customized methods of doing<br />
dentistry. Everyone is unique and produces different results,<br />
even with the same patient, materials and techniques. There<br />
is no one method for speed dentistry. Dentists must identify<br />
a variety of faster techniques, try them out to see what<br />
works and what methods are effective, and then perfect<br />
them. They must execute a little faster here, a little faster<br />
there, until they see substantially improved results.<br />
Speed Dentistry: Fast Is Better — Up to a Point57
Here are some reliable and generally successful ways<br />
many dentists have used to increase their speed and begin<br />
practicing speed dentistry:<br />
1. Simply think you will do dentistry better and faster.<br />
Many dentists have never considered this concept, so<br />
they just continue to work slowly like they did in dental<br />
school. Once you decide to do your dentistry more<br />
rapidly, you will.<br />
One way to check how you are doing is to place a<br />
timer in each operatory. Time how long it takes you<br />
to do a procedure. Log the time. Try to do it a bit<br />
more rapidly the next time, and the next. Experiment.<br />
Test different ways of doing a procedure or handling<br />
a patient. Use that timer with every patient and<br />
every procedure. Keep records and analyze your<br />
results. Once you are timing yourself, you will begin<br />
working faster and doing speed dentistry. Remember,<br />
the true measure of speed dentistry is the amount<br />
of time the patient is in the chair. It doesn’t help<br />
much if you quickly do a restoration and then squander<br />
all the time you saved by telling stories or cracking<br />
jokes with the now-completed patient.<br />
2. Identify those procedures that take up most of your time<br />
and then decide how you will speed up the process.<br />
Can you do the treatment differently and shave off<br />
a second or two? Can you use fast-set amalgam or<br />
a stronger curing light to speed up your restoration<br />
technique? Will special instruments or preset trays<br />
increase your speed while maintaining quality?<br />
For example, use locking pliers with a cotton pellet<br />
already attached. It is faster than stopping your<br />
procedure, hunting for a cotton pellet in a capped<br />
dispenser (requires uncapping and recapping),<br />
selecting the pellet with your cotton pliers and then<br />
using the instrument. Save 15 seconds using this<br />
technique. Now, if you do it 30 times a week, 48 weeks<br />
a year, you do the math on how much time it saves.<br />
3. Quit talking so much. Talking sucks time. If you must<br />
talk — keep in mind, most patients appreciate a<br />
few words — speak while you are doing something<br />
productive. Avoid talking about yourself. Instead, talk<br />
to your patients about their lives. Everyone likes to talk<br />
about themselves, so let them. If someone needs to be<br />
calmed down or relaxed, have your dental assistant do<br />
most of the work. If you save 30 seconds of idle talk<br />
per patient, and you see 20 patients per day, four days<br />
a week, 48 weeks a year, you will save 32 hours of<br />
chairtime per year. Think about how much you make<br />
in one hour of chairtime. And that’s just 30 seconds.<br />
Go for more.<br />
4. Increase the air pressure of your dental handpieces to<br />
60–80 psi. They run faster, cut faster, and you finish<br />
faster. My experience is that the handpiece cartridges<br />
will also last longer, despite the common industry<br />
recommendations to keep the pressure at 30 psi.<br />
5. Use sharp instruments. Sharpen the edges of your<br />
plastic instruments, the tips of your explorers, spoons<br />
and other hand instruments. Scalers and curettes must<br />
always be sharp. Do the sharpening before the patient<br />
is in the chair, not during the visit.<br />
6. Use topical anesthetics and rapid-induction hypnosis<br />
anesthesia (waking hypnosis) rather than injecting — and<br />
waiting — for every little cavity prep or procedure. Using<br />
fast-acting medications and materials will save you time.<br />
58 www.chairsidemagazine.com
7. Move faster and have your staff move fast, too. If they<br />
resist or complain, fire them. A slacker with a mopey<br />
attitude will never change. You are operating a service<br />
business, not an employment depot for the low and<br />
slow of our society.<br />
8. Analyze each movement during a procedure. Is it necessary?<br />
Is it needed? Can you do without it or change the<br />
procedure to omit it entirely? For example, many practitioners<br />
wipe instruments on the patient’s bib. This<br />
takes a few seconds to do and then re-establish focus<br />
on the tooth being treated. Instead, place some gauze<br />
in the patient’s mouth and wipe your instrument on it<br />
there. This positions you closer to the action, takes less<br />
time to do, does not divert focus out of the mouth and<br />
is probably more sterile. Saves a second — or four.<br />
9. Have prearranged instrument setups for each procedure.<br />
This is infinitely faster than picking a multitude of<br />
instruments out of a chest of dental drawers with the<br />
patient watching. When the patient is in the chair, do<br />
dentistry. Don’t waste your time and the patient’s time<br />
setting up to do dentistry.<br />
10. Determine if there are simpler treatment methods. For<br />
example, seventh-generation bonding is an all-in-one<br />
technique that is considerably faster than a fourthgeneration<br />
technique of separately etching, separately<br />
priming and separately bonding a composite. Saves<br />
two minutes.<br />
11. Don’t spend time “making it pretty” if it doesn’t matter to<br />
the patient. Carving secondary anatomy in a composite<br />
or amalgam wastes significant time and will do<br />
nothing to improve the restoration. If you want to be<br />
an “artist,” paint or sculpt during your free time or<br />
off hours. Does amalgam really need to be polished?<br />
How about composites? Do you need frequent recall<br />
appointments for an asymptomatic, healthy patient?<br />
Do you need to do all those adjustments? Can you<br />
place dissolvable sutures instead of using silk sutures<br />
and scheduling an extra and time-consuming sutureremoving<br />
appointment? Don’t waste your time doing<br />
extra, unnecessary work.<br />
12. Look at the treatment area (gingiva, tooth) intently, but<br />
just once. Then treat. Don’t waste time looking, then<br />
relooking, then cleaning off your mirror to look again.<br />
Concentrate and don’t play.<br />
13. Don’t do services that take more time than they are<br />
worth. For example, if maxillary third molar endo on a<br />
difficult patient takes too much time and energy, refer<br />
it out to someone else. If you produce $1,000 an hour<br />
at the chair and take two 50-minute sessions to do<br />
a molar endo for which you are charging $900, then<br />
you are losing big money and not helping the patient.<br />
Refer the patient to someone who can do the job<br />
in 30 minutes. You can’t do it all! Dump the timeconsuming<br />
procedures.<br />
14. Get rid of difficult patients. Difficult patients take up lots<br />
of time. Spending time to argue, constantly reassure<br />
and repeat slows your work and forces your other<br />
patients to wait and possibly suffer. Send your difficult<br />
patients a note saying, “because of our communication<br />
problems, I cannot continue being your dentist.” You<br />
don’t need them or the time-sucking referrals they may<br />
bring. If a patient wastes your time by often arriving<br />
late or breaking appointments, get rid of them. If you<br />
can’t bear to kick them out of your practice, then<br />
charge them double: they’ll leave. The ones who truly<br />
love you will stay and pay the bill. Another technique<br />
is to have them wait one hour in the reception room<br />
before you see them. They’ll get angry and leave.<br />
15. Prepare a series of information sheets with drawings<br />
or photos on each procedure you will do. Personally<br />
giving an info sheet to a patient as you are going to<br />
another operatory and asking him to “look at this,<br />
Speed Dentistry: Fast Is Better — Up to a Point59
John” saves a lot of non-productive chairtime you<br />
would otherwise spend describing the dental work you<br />
will be doing. Practice discussing dental procedures<br />
or treatment options using the most direct, simplest<br />
way you can communicate. Long-winded lectures are<br />
boring to the patient and wasteful, and they should<br />
be eliminated. For example: “John, we can save your<br />
tooth with root canal treatment costing $700 or pull<br />
it out for $200. Your insurance will pay half. You will<br />
pay the other half.” If the patient dawdles, give him<br />
some speedy direction, “John, if it were my tooth and I<br />
had the $350, I would save it.” Save time by practicing<br />
your role in these situations so you will be prepared to<br />
quickly present yourself when the day comes.<br />
16. Make use of hand signals to your staff. For example,<br />
waving an index finger means to mix the cement. This<br />
saves time, especially when you are communicating<br />
with your patient and need to communicate with your<br />
dental assistant at the same moment.<br />
17. Control phone calls and other non-essential interruptions.<br />
You can call them back at convenient moments.<br />
Grabbing a phone in the middle of an operation is<br />
a time waster, foolish, and insulting to the patient<br />
and staff.<br />
18. Do as much as you can in one sitting. Try to avoid<br />
wasting time by getting up, walking out, coming back,<br />
re-gloving, re-washing and reappointing. Do it all at<br />
one time.<br />
19. Have spare instruments available for quick access. If<br />
you drop a mirror or bend a needle, you should have<br />
a replacement within easy reach. Do not lose time<br />
waiting for your dental assistant to run and get another<br />
instrument in the next room.<br />
20. Always be well stocked with an accurate and dependable<br />
supply of disposables, instruments and other dental<br />
materials. There is no value in running out of widgets<br />
when you need them. Being well stocked is common<br />
sense. Devise an automatic inventory system and<br />
implement it.<br />
21. Have redundant systems that can quickly be utilized in<br />
case of malfunction. If your compressor or vacuum goes<br />
out, you can simply turn on your spare. If you don’t<br />
have a spare, you will waste time and lose money. Be<br />
sure everything is hooked up and ready to go. Having<br />
a spare compressor in your garage doesn’t help you in<br />
the office. Quick plumbing disconnects and standard<br />
electric plugs/sockets can make it possible to switch<br />
equipment in a few minutes. This converts a timewasting<br />
disaster into a minor inconvenience. It’s going<br />
to happen to you some day, so be prepared.<br />
22. If it takes too much time to learn or use, you don’t need it.<br />
Our lives are filled with “labor-saving” gadgets, which<br />
we buy only to find out that they take too much time<br />
to use. “Modern” and “new” is not always the best.<br />
Software is a prime culprit. Beware of the time-wasting<br />
learning curve. Keyboard entry may be considerably<br />
slower than quickly scribbling on a record sheet. If you<br />
have to computerize, let your staff transfer the patient’s<br />
written records to the computer.<br />
23. Keep appointments to a minimum. If the patient has four<br />
restorations to do, do them all in one appointment, if<br />
practical. Don’t schedule another appointment if you<br />
don’t have to. Reappointing takes up considerable<br />
time: greeting the patient at the door, seating the<br />
patient in the dental chair, looking at the patient’s<br />
record, chatting with the patient, etc. With your speed<br />
dentistry technique, you can do more work in less<br />
time. Your patients will appreciate it.<br />
24. Inject anesthetics rapidly. Some dental instructors say it<br />
is better to inject slowly, but they are wrong. Why do<br />
it rapidly? Because it takes less time. Patients may feel<br />
a bit more pressure, but they will suffer less emotional<br />
trauma if you inject in 15 seconds instead of giving a<br />
slow, torturous 65-second injection. If you are going to<br />
inflict pain, the faster you do it, the less net discomfort<br />
there will be.<br />
25. Move with a sense of purpose. Avoid wasted movement.<br />
60 www.chairsidemagazine.com
There is no one method for speed dentistry. Dentists must identify a variety<br />
of faster techniques, try them out to see what works and what methods are<br />
effective, and then perfect them. They must execute a little faster here, a little<br />
faster there, until they see substantially improved results.<br />
BE HUMANE<br />
Let’s face it: Everything in dentistry is not about time and<br />
money. You may confront a situation in which you must<br />
take more time to do a procedure or talk to a patient. If<br />
necessary, you must sacrifice cold efficiency for good<br />
humanity. However, you must keep these time sinks to a<br />
minimum or direct them to that portion of the day when<br />
you can take a little more time. Sometimes a lonely elderly<br />
patient wants to tell you a joke that goes on forever, or<br />
worse, talk about their divorce or operation. Do your best<br />
without insulting the patient. Devise techniques for such<br />
situations. Just keep it controlled.<br />
PROBLEMS<br />
Speed dentistry, like any endeavor, has advantages and<br />
disadvantages. If you are going to speed up, you will use<br />
more energy. If you speed up gradually, your stamina will<br />
increase, but you may be more tired by the end of the day.<br />
That is the cost of speed dentistry. Of course, if you do two<br />
days’ worth of patients in one day, you can take another day<br />
off to rest and recover with no net financial loss. Decide<br />
what you are going to do with that extra time and money.<br />
If the way you decide to use it is productive — great. If it is<br />
self-absorbed and abusive, such as spending your newfound<br />
time at the local bar, then perhaps you should go back to<br />
the office. Think about it. Speed dentistry is not for the<br />
lazy dentist.<br />
START NOW<br />
So where do you start? As previously suggested, start by<br />
realizing how speed dentistry will help you, your patients<br />
and your practice. Get some idea of how long it takes to do<br />
a procedure or see a patient. Start with exams, cleanings<br />
and restorative procedures. Using a timer (or a group of<br />
timers), identify how long it takes to do a procedure. Make<br />
some changes. Time yourself again. See if you can shave off<br />
some seconds or maybe even a minute or two. Use quicker<br />
materials and techniques. Keep track of the time. Perfect<br />
your technique. Watch for your drop-off point. You may<br />
become a fast dentist or a good dentist, but what you really<br />
want to strive for is being a fast, good dentist. This is an art<br />
form. Try it and good luck! CM<br />
Sections of this article come from the book “Speed Dentistry,” by E.J. Neiburger,<br />
DDS. Andent Publishing, 1000 North Ave., Waukegan, IL 60085. Copies are available<br />
at www.andent.net.<br />
Dr. Ellis Neiburger is a general practitioner in Waukegan, Ill. Contact him at 847-244-<br />
0292 or eneiburger@comcast.net.<br />
© 2012 by E. Neiburger. First publication rights granted to Chairside magazine.<br />
Speed Dentistry: Fast Is Better — Up to a Point61
– ARTICLE and CLINICAL PHOTOS by<br />
Tarun Agarwal, DDS, PA<br />
Digital<br />
Imaging:<br />
An Important Visual Aid in<br />
Treatment Planning and Case Acceptance<br />
Photographic imaging has been available in dentistry<br />
for many years. Typically, it has been used for full-smile<br />
makeover simulations. Full-smile simulations can be very<br />
difficult and time consuming, however, and can often create<br />
unrealistic expectations or outcomes. This challenge, added<br />
to the expense of investing in traditional dental imaging<br />
software, leads many clinicians to completely avoid the use<br />
of digital imaging in their practice.<br />
For anterior cases, digital imaging can and should play a<br />
vital role in patient education and decision-making. In fact,<br />
in situations where a few teeth are being treated, its use<br />
may be even more important than for full-smile restorations.<br />
This case study will demonstrate how digital imaging can be<br />
used to communicate different treatment possibilities and<br />
assist in patient treatment acceptance. It will also detail the<br />
clinical technique used for achieving the patient’s desired<br />
final result (Figs. 1, 2).<br />
Case Presentation<br />
A 34-year-old male presented to our office for cosmetic<br />
consultation at the urging of his girlfriend. His major<br />
concern was to fix the chip on the mesial-incisal corner<br />
of tooth #8 and a broken tooth #9 (Figs. 3, 4). During our<br />
consultation, I inquired about his overall treatment goals.<br />
He said he wasn’t sure what he wanted and that he hadn’t<br />
given the matter much thought.<br />
This particular case was not cut and dry, and there were<br />
multiple treatment options and things to consider. Do<br />
we close the diastema or leave it open? Do we keep the<br />
Figure 1: “Before” photo<br />
Figure 2: “After” photo<br />
Figure 3: Preoperative photo showing chipped tooth #8 and fractured<br />
tooth #9<br />
Figure 4: Close-up photo of tooth #8 and #9<br />
Digital Imaging: An Important Visual Aid in Treatment Planning and Case Acceptance63
centrals at the current length or shorten them? Do we<br />
use direct composite in-office or send the case out to<br />
the lab for porcelain restorations? Does the patient want<br />
teeth whitening? These were all appropriate options, and<br />
the suitable treatment depended on the patient’s desires.<br />
Deciding on these factors would not only impact the<br />
cosmetic outcome, but also influence the clinical treatment.<br />
Figure 5: Simulated photo showing treatment with the diastema left in<br />
place<br />
At this point, I decided visual communication using digital<br />
imaging would simplify the decision-making process.<br />
Using Adobe ® Photoshop ® Elements (Adobe Systems; San<br />
Jose, Calif.), an off-the-shelf photo manipulation software,<br />
I completed several simulations of the various treatment<br />
options. The first simulation showed repairs made to tooth<br />
#8 and #9 using direct bonding, leaving the diastema in<br />
place (Figs. 5, 6). The second simulation showed porcelain<br />
veneers being used to repair tooth #8 and #9 and close the<br />
diastema (Figs. 7, 8). The final simulation showed the patient<br />
what his teeth would look like if he whitened them (Fig. 9).<br />
After seeing all treatment possibilities, the patient decided<br />
to whiten his teeth followed by having porcelain veneers<br />
placed on tooth #8 and #9 that would close the diastema.<br />
The patient whitened his teeth for about two weeks and<br />
then allowed two weeks for rebound (Fig. 10).<br />
Figure 6: Close-up simulated photo of first treatment option<br />
Figure 7: Simulated photo showing second treatment option, closing the<br />
diastema<br />
Clinical Technique<br />
The decision was made to utilize feldspathic porcelain<br />
veneers. Feldspathic veneers require only 0.5 mm of facial<br />
reduction and 1 mm of incisal reduction for adequate<br />
strength and beauty. Feldspathic veneers are layered and<br />
allow the characterizations and color to be built deep within<br />
the restoration. This combination yields a conservative, yet<br />
vital result.<br />
After achieving adequate anesthesia, the teeth were<br />
prepared using the “connect-the-dots” approach. First, a<br />
0.5 mm depth-cutting bur (LVS1 [Brasseler USA; Savannah,<br />
Ga.]) was used to ensure minimum thickness on the facial<br />
surface (Fig. 11), and incisal depth cuts were placed to ensure<br />
minimal incisal reduction (Fig. 12). Incisal depth cuts were<br />
not necessary on tooth #9 because it was being lengthened.<br />
Next, preparations were made for closing the diastema.<br />
When closing a diastema, the preparation margins must<br />
be placed subgingival interproximally and carried to the<br />
lingual to allow for a proper emergence profile. A twogrit<br />
diamond bur (LVS3, Brasseler USA) was used for final<br />
margination (Fig. 13).<br />
Figure 8: Close-up simulated photo of second treatment option<br />
Porcelain restorations require rounded preparations that<br />
are free of sharp angles and unsupported enamel. A coarse<br />
polishing disk (EP2, Brasseler USA) was used to round<br />
all line angles and sharp edges to ensure a smooth final<br />
preparation (Fig. 14).<br />
64 www.chairsidemagazine.com
Figure 9: Simulated photo showing tooth whitening<br />
Figure 10: Preoperative photo after patient completes at-home whitening<br />
Figure 11: Facial depth cuts<br />
Figure 12: Incisal depth cuts<br />
Figure 13: Two-grit diamond finalizing the preparations<br />
Figure 14: Diamond disc smoothing the preparations<br />
For anterior cases, digital imaging can and should play a vital role in<br />
patient education and decision-making. In fact, in situations where<br />
a few teeth are being treated, its use may be even more important<br />
than for full-smile restorations.<br />
Digital Imaging: An Important Visual Aid in Treatment Planning and Case Acceptance65
Retraction cord was used to gently displace the soft tissue<br />
to assist in capturing the final preparation details (Fig. 15).<br />
Impressions were then taken and sent to the laboratory<br />
along with digital pictures to communicate tooth length,<br />
form, color and characteristics.<br />
Once the restorations were received from the lab, they<br />
were verified on the solid models and then tried in the<br />
mouth with appropriate try-in gels (Fig. 16). After receiving<br />
patient approval, the restorations were bonded into place<br />
using the total-etch technique. The final result successfully<br />
accomplished the treatment goals of closing the diastema,<br />
correcting the fractures and looking natural (Figs. 17, 18).<br />
Figure 15: Final preparations<br />
Conclusion<br />
Digital imaging is a powerful tool for helping patients<br />
decide which treatment option is best for them when<br />
multiple alternatives exist. It allows the dentist to visually<br />
communicate realistic results to the patient and involves the<br />
patient in the treatment decision-making process. Giving<br />
patients an active role in their treatment breaks down<br />
barriers between clinicians and their patients, leading to<br />
increased treatment acceptance.<br />
By using an off-the-shelf digital imaging solution, the<br />
clinician can significantly lower the cost of adding this<br />
technology to their practice. This type of software is widely<br />
available, and many community colleges conveniently offer<br />
inexpensive user training courses. CM<br />
Figure 16: Porcelain restorations in place with try-in gel for patient<br />
approval<br />
Dr. Tarun Agarwal maintains a full-time private practice in Raleigh, N.C.,<br />
emphasizing esthetic, restorative and implant dentistry. Contact him via e-mail<br />
at dra@raleighdentalarts.com or visit http://raleighdentalarts.com.<br />
Figure 17: Final restorations immediately after bonding<br />
Figure 18: Postoperative close-up photo showing esthetic integration of<br />
feldspathic veneers<br />
66 www.chairsidemagazine.com
Congratulations, Chairside ® PHOT<br />
A<br />
Hunt Winners!<br />
This must have been an especially<br />
challenging edition of<br />
the Chairside Photo Hunt because<br />
only three of you found<br />
all 20 differences. Maybe you<br />
were too distracted by the<br />
cutting-edge digital impression<br />
technology you see me<br />
demonstrating in the photo,<br />
which was taken during one<br />
of the courses I teach on the<br />
subject at the <strong>Glidewell</strong> International<br />
Technology Center.<br />
If you’re looking to pick up<br />
some continuing education<br />
credits or your interest is<br />
piqued by what’s going on<br />
in the photo, you may want<br />
to visit www.glidewellce.com<br />
for info on upcoming courses.<br />
Thanks for playing!<br />
Here are the results:<br />
B<br />
• First-place winners:<br />
3 dentists found all 20<br />
differences and will receive<br />
$500 in lab credit each.<br />
• Second-place winners: 15<br />
dentists found all but one<br />
difference and will receive<br />
$100 in lab credit each.<br />
• Third-place winners: 39<br />
dentists found all but two<br />
differences and will receive<br />
$100 in lab credit each.<br />
Not sure what to use your<br />
lab credit for? Why not help<br />
your patients who have had<br />
orthodontic treatment protect<br />
their investment by prescribing<br />
them Clear-Lock Retainers<br />
for Life . This convenient lifetime<br />
replacement service for<br />
retainers includes digital file<br />
storage of the patient’s models<br />
for easy reordering when<br />
retainers are broken or lost.<br />
Chairside Photo Hunt Contest entries were<br />
individually scored after being sent to the<br />
lab via e-mail and standard mail. Prize winners<br />
were notified by standard mail and/or<br />
phone. In total, 57 prizes were awarded.


