

Chairside - Glidewell Dental Labs
Chairside - Glidewell Dental Labs
Chairside - Glidewell Dental Labs

You also want an ePaper? Increase the reach of your titles
YUMPU automatically turns print PDFs into web optimized ePapers that Google loves.
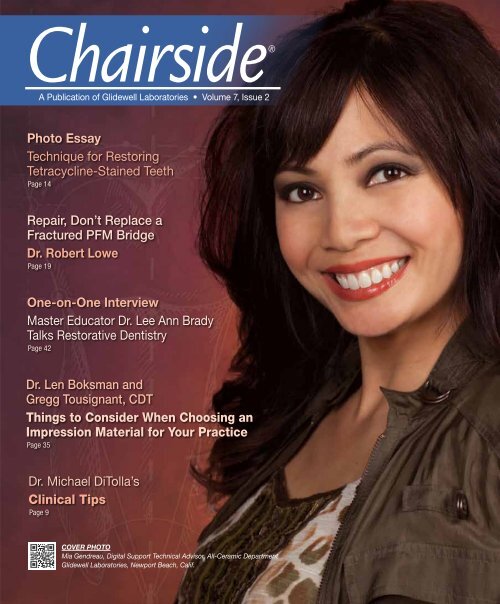
<strong>Chairside</strong>®<br />
A Publication of <strong>Glidewell</strong> Laboratories • Volume 7, Issue 2<br />
Photo Essay<br />
Technique for Restoring<br />
Tetracycline-Stained Teeth<br />
Page 14<br />
Repair, Don’t Replace a<br />
Fractured PFM Bridge<br />
Dr. Robert Lowe<br />
Page 19<br />
One-on-One Interview<br />
Master Educator Dr. Lee Ann Brady<br />
Talks Restorative Dentistry<br />
Page 42<br />
Dr. Len Boksman and<br />
Gregg Tousignant, CDT<br />
Things to Consider When Choosing an<br />
Impression Material for Your Practice<br />
Page 35<br />
Dr. Michael DiTolla’s<br />
Clinical Tips<br />
Page 9<br />
COVER PHOTO<br />
Mia Gendreau, Digital Support Technical Advisor, All-Ceramic Department<br />
<strong>Glidewell</strong> Laboratories, Newport Beach, Calif.
Contents<br />
9 Dr. DiTolla’s Clinical Tips<br />
This issue features four new products that are making it<br />
easier and faster to practice dentistry: the next-generation<br />
formula of Luxatemp provisional material from DMG<br />
America; Centrix GripStrip proximal finishing and polishing<br />
strips; Picasso Lite, an affordable diode laser from AMD<br />
LASERS; and VOCO America’s easy-to-use Rebilda Post<br />
System for endodontic post cementation and core build-up.<br />
14 Photo Essay: Porcelain Veneers for<br />
Tetracycline Using Blockout Method<br />
REALITY Publishing’s Dr. Michael Miller illustrates a<br />
common esthetic challenge we face as dentists: placing<br />
porcelain veneers on tetracycline-stained teeth. See what<br />
techniques this leading clinician uses to mask the stains<br />
and satisfy the patient’s desired tooth color change.<br />
19 Repair, Don’t Replace – Part 1:<br />
Resurfacing an Existing Porcelain<br />
Fused to Metal Restoration with a<br />
Porcelain Veneer<br />
What’s the best way to handle a broken porcelain or<br />
PFM restoration? While the traditional practice is to use<br />
composite resin to repair the chipped porcelain, find<br />
out why Dr. Robert Lowe thinks porcelain veneers are<br />
a better treatment option, especially when dealing with<br />
multiple-unit fixed bridgework.<br />
27 Repair, Don’t Replace – Part 2:<br />
The “Saddle Crown”<br />
In Part 2 of his series on repairing a fractured porcelain<br />
bridge, Dr. Robert Lowe presents a second case<br />
involving a larger fracture exposing the underlying metal<br />
framework. Discover why cementing a modified crown<br />
covering only the facial and lingual surfaces can, in some<br />
cases, be an effective alternative to replacing the entire<br />
multi-unit restoration.<br />
Can’t get enough <strong>Chairside</strong>? Be sure to check out <strong>Chairside</strong> Live,<br />
our new Web series featuring dental news, a Case of the Week<br />
from Dr. Michael DiTolla and more — now available on YouTube,<br />
iTunes and at www.chairsidemagazine.com!<br />
Contents 1
Contents<br />
35 Faster Is Not Always Better When It Comes<br />
to Impressioning<br />
When it comes to impression materials, the product<br />
you use can significantly impact the final fit of your<br />
restorations. Exploring the pros and cons of fast-setting<br />
versus standard impression materials on the market today,<br />
Gregg Tousignant, CDT, and Dr. Len Boksman discuss the<br />
many things to consider when choosing a new impression<br />
material for your practice.<br />
42 One-on-One with Dr. Michael DiTolla:<br />
Interview of Dr. Lee Ann Brady<br />
A nationally recognized dental educator who recently reentered<br />
private practice, Dr. Lee Ann Brady has taught at<br />
two of the top continuing education centers alongside some<br />
of the industry’s biggest names. Spend some time with<br />
this experienced clinician in this lively interview covering<br />
occlusion, adhesion, preparation, dental photography and<br />
topics in between.<br />
57 An Introduction to <strong>Dental</strong> Photography<br />
Keeping photographic records of your dental cases can<br />
be an important part of promoting your dental practice<br />
and increasing your case acceptance. In this brief tutorial,<br />
Dr. Carlos Boudet introduces a simple but effective way of<br />
documenting your cases with dental photography.<br />
<strong>Glidewell</strong> Publications for iPad<br />
iPAD APP Experience <strong>Chairside</strong> magazine<br />
on the iPad. Search “<strong>Glidewell</strong>” in<br />
the iTunes Store and download the free<br />
<strong>Glidewell</strong> Publications app.<br />
62 Biologic Shaping: An Alternative to<br />
Extracting a Tooth with a Severe Fracture<br />
Extraction is a commonly considered treatment when<br />
dealing with a tooth that fractures subgingivally,<br />
but it isn’t the only option. Biologic shaping, argues<br />
Dr. Daniel Melker, is another, more conservative procedure<br />
that can lead to long-term stability and a successful<br />
restorative outcome.<br />
ALSO IN THIS ISSUE<br />
8 By the Numbers<br />
65 Figures in Dentistry Spotlight<br />
68 The <strong>Chairside</strong> Photo Hunt<br />
2<br />
www.chairsidemagazine.com
Publisher<br />
Jim <strong>Glidewell</strong>, CDT<br />
Editor-in-Chief and Clinical Editor<br />
Michael C. DiTolla, DDS, FAGD<br />
Managing Editors<br />
Jim Shuck; Mike Cash, CDT<br />
Creative Director<br />
Rachel Pacillas<br />
Copy Editors<br />
Jennifer Holstein,<br />
David Frickman, Megan Strong<br />
Statistical Editor<br />
Darryl Withrow<br />
Digital Marketing Manager<br />
Kevin Keithley<br />
Graphic Designers<br />
Jamie Austin, Deb Evans, Joel Guerra, Audrey Kame,<br />
Phil Nguyen, Kelley Pelton, Makara You<br />
Web Designers<br />
Jamie Austin, Lindsey Lauria,<br />
Melanie Solis, Ty Tran<br />
Photographer<br />
Sharon Dowd<br />
Illustrator<br />
Wolfgang Friebauer, MDT<br />
Coordinator and Ad Representative<br />
Teri Arthur<br />
(teri.arthur@glidewelldental.com)<br />
If you have questions, comments or complaints regarding<br />
this issue, we want to hear from you. Please e-mail us at<br />
chairside@glidewelldental.com. Your comments may be<br />
featured in an upcoming issue or on our website:<br />
www.chairsidemagazine.com.<br />
© 2012 <strong>Glidewell</strong> Laboratories<br />
Neither <strong>Chairside</strong> magazine nor any employees involved in its publication<br />
(“publisher”), makes any warranty, express or implied, or assumes any<br />
liability<br />
Neither<br />
or<br />
<strong>Chairside</strong><br />
responsibility<br />
Magazine<br />
for the<br />
nor<br />
accuracy,<br />
any employees<br />
completeness,<br />
involved<br />
or<br />
in its<br />
usefulness<br />
publication<br />
of any<br />
(“publisher”),<br />
information,<br />
makes<br />
apparatus,<br />
any warranty,<br />
product,<br />
express<br />
or process<br />
or implied,<br />
disclosed,<br />
or assumes<br />
or<br />
represents<br />
any liability<br />
that<br />
or<br />
its<br />
responsibility<br />
use would<br />
for<br />
not<br />
the<br />
infringe<br />
accuracy,<br />
proprietary<br />
completeness,<br />
rights. Reference<br />
or usefulness<br />
herein to<br />
of any<br />
any<br />
information,<br />
specific commercial<br />
apparatus, product,<br />
products,<br />
or<br />
process,<br />
process disclosed,<br />
or services<br />
or<br />
by<br />
represents<br />
trade name,<br />
that its<br />
trademark,<br />
use would<br />
manufacturer<br />
not infringe proprietary<br />
or otherwise<br />
rights. Reference<br />
does not<br />
necessarily<br />
herein to<br />
constitute<br />
any specific<br />
or<br />
commercial<br />
imply its endorsement,<br />
products, process,<br />
recommendation,<br />
or services by<br />
or<br />
favoring<br />
trade name,<br />
by the<br />
trademark,<br />
publisher. The<br />
manufacturer<br />
views and<br />
or<br />
opinions<br />
otherwise<br />
of<br />
does<br />
authors<br />
not<br />
expressed<br />
necessarily<br />
constitute<br />
herein do not necessarily<br />
or imply its<br />
state<br />
endorsement,<br />
or reflect<br />
recommendation,<br />
those of the publisher<br />
or favoring<br />
and<br />
shall<br />
by<br />
not<br />
the<br />
be<br />
publisher.<br />
used for<br />
The<br />
advertising<br />
views and<br />
or product<br />
opinions<br />
endorsement<br />
of authors expressed<br />
purposes.<br />
CAUTION:<br />
herein do<br />
When<br />
not necessarily<br />
viewing the<br />
state<br />
techniques,<br />
or reflect those<br />
procedures,<br />
of the publisher<br />
theories<br />
and<br />
and<br />
materials<br />
shall not<br />
that<br />
be<br />
are<br />
used<br />
presented,<br />
for advertising<br />
you must<br />
or<br />
make<br />
product<br />
your<br />
endorsement<br />
own decisions<br />
purposes.<br />
about<br />
specific<br />
CAUTION:<br />
treatment<br />
When viewing<br />
for patients<br />
the techniques,<br />
and exercise<br />
procedures,<br />
personal<br />
theories<br />
professional<br />
and materials<br />
that<br />
judgment regarding<br />
are presented,<br />
the need for<br />
you<br />
further<br />
must make<br />
clinical<br />
your<br />
testing<br />
own<br />
or<br />
decisions<br />
education<br />
about<br />
and<br />
your<br />
specific<br />
own<br />
treatment<br />
clinical expertise<br />
for patients<br />
before<br />
and<br />
trying<br />
exercise<br />
to implement<br />
personal<br />
new<br />
professional<br />
procedures.<br />
judgment<br />
regarding the need for further clinical testing or education and<br />
your own clinical expertise before trying to implement new procedures.<br />
<strong>Chairside</strong> is a registered trademark of <strong>Glidewell</strong> Laboratories.<br />
<strong>Chairside</strong> ® Magazine is a registered trademark of <strong>Glidewell</strong> Laboratories.<br />
Editor’s Letter<br />
I have always thought it would be a good idea to do an<br />
educational video that focused strictly on restorative<br />
repairs, but this has proven to be a more difficult program<br />
to put together than I expected. It’s not as if fractured<br />
ceramic restorations walk through the door every day, yet<br />
when they do, it sure is nice to have a good solution. So<br />
I thought the next best thing would be a pair of articles<br />
on repairs from Dr. Robert Lowe, a frequent contributor<br />
to <strong>Chairside</strong>.<br />
In Part 1, Bob shows you how he repairs a broken PFM<br />
restoration with a porcelain veneer, or more specifically,<br />
how he gives new life to an old PFM by “resurfacing” it with<br />
a porcelain veneer. This strategy works well when the metal<br />
substructure is not completely exposed.<br />
In Part 2, Bob makes use of a “saddle crown” to cover a<br />
fully exposed metal substructure, which he has prepared to<br />
give the saddle crown adequate strength and esthetics. This<br />
technique can be extremely helpful when you have completed<br />
a large anterior bridge, for example, and something<br />
chips or breaks within the first year.<br />
The other thing that made me abandon the idea of putting<br />
together a video on repairs is the shrinking number of<br />
repairs I’ve had to do since becoming a predominately<br />
“monolithic” dentist. In other words, I use a lot of<br />
IPS e.max ® in the anterior and a lot of BruxZir ® Solid<br />
Zirconia in the posterior, and I just don’t see either of<br />
these restorations fracturing.<br />
Even though I haven’t done a single-unit PFM in years, I<br />
still use PFMs for bridges. As any bilayered restoration has<br />
the potential for those layers to separate, Bob’s repair techniques<br />
will continue to be useful for the foreseeable future.<br />
Yours in quality dentistry,<br />
Dr. Michael C. DiTolla<br />
Editor-in-Chief, Clinical Editor<br />
mditolla@glidewelldental.com<br />
Editor’s Letter 3
Letters to the Editor<br />
Dear Dr. DiTolla,<br />
Thanks for another great issue of <strong>Chairside</strong>.<br />
We were disappointed that we received the<br />
Fall 2011 issue on Jan. 2 and the contest<br />
deadline was Dec. 30.<br />
I am using Capture ® impression material<br />
now and am very happy with it. I am using<br />
the green light body. Is there any reason<br />
why you favor the purple medium body over<br />
the green?<br />
I impressed my first no-prep veneer case<br />
(tooth #8–11, with an implant on tooth #7)<br />
this week. Your DVD videos are great! To<br />
prepare, I watched the video online on<br />
tissue contouring and placement of no-prep<br />
veneers (“Diagnosis & Placement of No-<br />
Prep Veneers”), which was very helpful, in<br />
addition to reading Dr. Robert Lowe’s article<br />
in the Winter 2012 issue of <strong>Chairside</strong>. Is there<br />
a reason why you don’t retract the tissue for<br />
these no-prep veneers? Dr. Lowe seems to<br />
make a very strong case to do so. Either<br />
way, I contoured one area and did pack cord<br />
(no offense!).<br />
What cement are you using to cement these<br />
veneers?<br />
Once again, thanks for teaching me the<br />
dentistry I practice with every day!<br />
– Robert M. Lieder, DDS<br />
Baltimore, Md.<br />
4<br />
www.chairsidemagazine.com<br />
Dear Robert,<br />
Thanks for the kind words!<br />
That early due date was a mistake on<br />
our part, and we will do our best to<br />
make sure it doesn’t happen again.<br />
I use the medium body (purple) as<br />
my syringe material, just to make sure<br />
it doesn’t tear because I get it to go<br />
about 1 mm into the sulcus with the<br />
two-cord technique. Also, it will often<br />
set in contact with the #00 cord, which<br />
can increase the chances of it tearing.<br />
The medium body prevents that<br />
from happening.<br />
Because the margins of no-prep/minimal<br />
prep veneers tend to make a little<br />
speed bump on the tooth, due to there<br />
typically being no prep at the margin,<br />
I prefer to leave that bump at the free<br />
margin of the gingiva, rather than<br />
placing it subgingivally. With conventionally<br />
prepped veneers, I always<br />
place the margins subgingival.<br />
As for not retracting the tissue, that’s<br />
just my personal preference. You<br />
won’t go wrong following Bob Lowe’s<br />
method when it comes to any aspect<br />
of clinical dentistry. He continues to<br />
be one of my clinical mentors, which<br />
is why his articles are in nearly every<br />
issue of <strong>Chairside</strong>.<br />
My favorite veneer cement continues<br />
to be the translucent shade of NX3<br />
Nexus ® Third Generation from Kerr,<br />
which is something Bob Lowe and I<br />
definitely agree on.<br />
Hope that helps!<br />
– Mike<br />
Dear Dr. DiTolla,<br />
I enjoyed reading the “Figures in Dentistry<br />
Spotlight” on G.V. Black in the Fall 2011 issue<br />
of <strong>Chairside</strong>. Unfortunately, there was no<br />
mention of his most important contribution<br />
to dental literature, “The Pathology of the<br />
Hard Tissues of the Teeth,” first published in<br />
1906. Most dentists have never heard of this<br />
book, but as I was studying ways to control<br />
caries with a medical model, I ran across a<br />
reference to the book. It took awhile to find<br />
a copy, but when I finally read it, I was totally<br />
blown away by the advanced understanding<br />
that G.V. Black had about the microbiology<br />
of caries. His chapter on treating children<br />
is more advanced than any pediatric dental<br />
text I have ever read, and I have read them<br />
all. I would encourage you to take a look<br />
at this classic. Attached is a little paper<br />
that talks about G.V. Black’s volume in the<br />
context of advances in cariology.<br />
Best wishes,<br />
– Steve Duffin, DDS<br />
Portland, Ore.<br />
Dear Steve,<br />
Thanks for sending me your paper.<br />
I really enjoyed reading it! With<br />
your permission, I would love to<br />
publish your paper in a future issue<br />
of <strong>Chairside</strong>.<br />
– Mike<br />
Dear Dr. DiTolla,<br />
First, I want to say how much I enjoyed<br />
your recent webinar (“State-of-the-Art<br />
Impression Techniques,” hosted by Catapult<br />
University). What a great way to learn!<br />
I hope it becomes a regular occurrence.<br />
Can you e-mail me about the burs you use<br />
for your crown preps? What brand do you<br />
use? I like the whole idea and am looking<br />
forward to trying the technique. I plan on<br />
doing a lot more BruxZir crowns.<br />
Thanks again,<br />
– Grigg DeWitt, DDS<br />
Salinas, Calif.<br />
Dear Grigg,<br />
Thanks for the kind words!<br />
The burs I use to prep are from the<br />
Reverse Preparation Set from Axis<br />
<strong>Dental</strong>, available through all dental
dealers. It’s a universal prep technique<br />
that works for all materials, although<br />
as the next letter in this section points<br />
out, the strength of BruxZir ® Solid<br />
Zirconia is starting to change how<br />
much we have to reduce, especially at<br />
the margin.<br />
– Mike<br />
Dear Dr. DiTolla,<br />
First, thank you very much for your<br />
educational support and updated dental<br />
market information. The latest issue of<br />
<strong>Chairside</strong> (Vol. 7, Issue 1) includes your<br />
very interesting and helpful article “BruxZir ®<br />
Solid Zirconia Anterior Esthetic Challenge.”<br />
I would appreciate it if you could give me<br />
information about labial and palatal crown<br />
thickness (Figs. 31–34). I wonder why you<br />
used a shoulder preparation technique<br />
when the BruxZir website says that feather<br />
edge is acceptable?<br />
Cordially,<br />
– Alex Zavyalov, DDS<br />
New York, N.Y.<br />
Dear Alex,<br />
Good question! I guess the best<br />
answer is that having spent the last<br />
20 years prepping all-ceramic crown<br />
preps at a certain thickness, old habits<br />
die hard. My Reverse Preparation<br />
Technique uses a round bur to ensure<br />
that I get 1 mm of reduction in the<br />
gingival third to help the esthetics and<br />
the emergence profile. As you pointed<br />
out, BruxZir ® Solid Zirconia is the<br />
one monolithic material (besides cast<br />
gold) that can handle a feather-edge<br />
margin, and we are just getting started<br />
with a Minimal Prep Crown Project to<br />
see just how little we can reduce an<br />
anterior tooth and still have a decentlooking<br />
BruxZir crown. Imagine if we<br />
could prep a tooth and stay within the<br />
enamel, yet be able to cement a highstrength<br />
all-ceramic crown, rather<br />
than bonding a veneer. So, yes, even<br />
though I did not prep conservative<br />
margins on those teeth, you certainly<br />
can prep those types of margins with<br />
BruxZir crowns. Even if you were<br />
worried about esthetics on the facial,<br />
you could still prep a conservative<br />
margin on the lingual.<br />
– Mike<br />
Dear Dr. DiTolla,<br />
Regarding Dr. Ellis Neiburger’s article<br />
in the last issue of <strong>Chairside</strong>, “Is It Time<br />
to Do Routine Adult Pulpotomies?”<br />
(Vol. 7, Issue 1), there should have been<br />
more discussion about using lasers to sterilize<br />
the pulp instead of formocresol, and<br />
other options instead of IRM, like MTA.<br />
– Brian Danielsson, DDS<br />
Ridgecrest, Calif.<br />
Response from Dr. Neiburger:<br />
Dear Brian,<br />
The article focused on time-tested<br />
pulpotomy techniques that, in light of<br />
the world’s poor economic situation,<br />
can be done easily, quickly and<br />
inexpensively. Laser sterilization of<br />
the pulp chamber is relatively new,<br />
has only a small amount of research<br />
to establish efficacy and requires laser<br />
equipment more costly than a $10<br />
bottle of formocresol. It holds promise<br />
and should be further investigated.<br />
CONNECT WITH CHAIRSIDE<br />
FOLLOW US ON TWITTER<br />
Find us @<strong>Glidewell</strong><strong>Dental</strong><br />
FIND US ON FACEBOOK<br />
Search “<strong>Glidewell</strong>” to see<br />
what’s new.<br />
ITUNES WATCH AND<br />
LEARN<br />
Go the iTunes store and search<br />
“<strong>Glidewell</strong>.” Plus, download<br />
the free <strong>Glidewell</strong> Publications<br />
app for iPad.<br />
SHARE YOUR THOUGHTS<br />
Visit www.chairsidemagazine.com<br />
and select “Contact Us.” Or write to:<br />
<strong>Glidewell</strong> Laboratories<br />
ATTN: <strong>Chairside</strong> magazine<br />
4141 MacArthur Blvd.<br />
Newport Beach, CA 92660<br />
ACCESS OUR RESOURCES<br />
Clinical videos, product information<br />
and patient resources are a click<br />
away at www.glidewelldental.com.<br />
ADVERTISE/SUBMIT AN<br />
ARTICLE<br />
Call 888-303-4221<br />
Letters should include writer’s full name,<br />
address and daytime phone number. All<br />
correspondence may be published and<br />
edited for clarity and length.<br />
Letters to the Editor 5
Contributors<br />
Michael C. DiTolla, DDS, FAGD<br />
Dr. Michael DiTolla is a graduate of University of the Pacific Arthur A. Dugoni School of Dentistry. As<br />
director of clinical education and research at <strong>Glidewell</strong> Laboratories in Newport Beach, Calif., he performs<br />
clinical testing on new products in conjunction with the company’s R&D department. <strong>Glidewell</strong> dental technicians<br />
have the privilege of rotating through Dr. DiTolla’s operatory and experiencing his commitment to<br />
excellence through his prepping and placement of their restorations. He is a CR Foundation evaluator and<br />
lectures nationwide on both restorative and cosmetic dentistry. Dr. DiTolla has several clinical programs<br />
available on DVD through <strong>Glidewell</strong> Laboratories. For more information on his articles or to receive a free<br />
copy of Dr. DiTolla’s clinical presentations, call 888-303-4221 or e-mail mditolla@glidewelldental.com.<br />
Leendert Boksman, DDS, BSc, FADI, FICD<br />
Dr. Leendert “Len” Boksman is a former tenured associate professor and adjunct professor at the Schulich<br />
School of Medicine and Dentistry in London, Ontario, Canada, and former director of clinical affairs for<br />
Clinical Research <strong>Dental</strong>/CLINICIAN’S CHOICE. He retired from practice at the end of 2011, and currently<br />
does freelance consulting and lecturing. He also authors articles of interest to the general practitioner.<br />
Contact him at lenboksman@rogers.blackberry.net.<br />
Carlos A. Boudet, DDS, DICOI<br />
Dr. Carlos Boudet graduated from Medical College of Virginia (now VCU Medical Center) in 1980 with a<br />
DDS degree. Soon after, he became a commissioned officer for the United States Public Health Service. His<br />
tour ended in 1982, when he was asked to serve as director of four dental clinics around Lake Okeechobee,<br />
Fla. Dr. Boudet established his dental practice in West Palm Beach. Fla., in 1983 and has been in the same<br />
location for 26 years. He is a Diplomate of the International Congress of Oral Implantologists, a member of<br />
the Central Palm Beach County <strong>Dental</strong> Society and sits in the board of directors of the Atlantic Coast <strong>Dental</strong><br />
Research Clinic. Contact him at www.boudetdds.com or 561-968-6022.<br />
Lee Ann Brady, DMD<br />
Dr. Lee Ann Brady is a privately practicing dentist and nationally recognized educator and writer. She has<br />
worked in practice models ranging from small fee-for-service offices to large insurance-dependent practices,<br />
as an associate and practice owner. From 2005 to 2008, Dr. Brady held the positions of resident faculty and<br />
clinical director for the Pankey Institute. In 2008, she moved to Scottsdale, Ariz., to join Dr. Frank Spear in<br />
the formation of Spear Education, where she served as executive VP of clinical education until June 2011.<br />
As director of education and president of Lee Ann Brady LLC, she offers daily clinical and practice content<br />
through her website, www.leeannbrady.com, as well as innovative online and live education programs.<br />
Contact her at lee@leeannbrady.com.<br />
6<br />
www.chairsidemagazine.com
Robert A. Lowe, DDS, FAGD, FICD, FADI, FACD, FIADFE<br />
Dr. Robert Lowe graduated magna cum laude from Loyola University School of Dentistry in 1982 and was<br />
a clinical professor in restorative dentistry at the school until its closure in 1993. Since January 2000,<br />
Dr. Lowe has maintained a private practice in Charlotte, N.C. He lectures internationally and his work is<br />
frequently published in dental journals on esthetic and restorative dentistry. Dr. Lowe received fellowships in<br />
the Academy of General Dentistry, International and American Colleges of Dentists, Academy of Dentistry<br />
International and the International Academy for <strong>Dental</strong>-Facial Esthetics, and in 2005, Diplomat status on<br />
the American Board of Esthetic Dentistry. He was also awarded the 2004 Gordon Christensen Outstanding<br />
Lecturers Award. Contact Dr. Lowe at 704-364-4711 or boblowedds@aol.com.<br />
Daniel J. Melker, DDS<br />
Dr. Daniel Melker graduated from the Boston University School of Graduate Dentistry in 1975 with specialty<br />
training in periodontics. Since then, he has maintained a private practice in periodontics in Clearwater,<br />
Fla. Dr. Melker lectures at the University of Florida Periodontic and Prosthodontic graduate programs on<br />
the periodontic-restorative relationship. He also presents at the University of Alabama at Birmingham,<br />
University of Houston, Baylor University and Louisiana State University’s graduate periodontal program.<br />
Dr. Melker has published several articles in national dental magazines, as well as The International Journal<br />
of Periodontics & Restorative Dentistry, and has twice been honored with the Florida Academy of Cosmetic<br />
Dentistry Gold Medal. Contact him at 727-725-0100.<br />
Michael B. Miller, DDS<br />
Dr. Michael Miller is the co-founder, president and editor-in-chief of REALITY, and maintains a dental<br />
practice in Houston, Texas. He is a Fellow of the Academy of General Dentistry, as well as a founding and<br />
accredited member and Fellow of the American Academy of Cosmetic Dentistry, for which he created its<br />
acclaimed accreditation program. Dr. Miller has contributed to several texts and authors regular columns<br />
for General Dentistry, the AGD’s peer-reviewed journal. He is also a founding board member of the National<br />
Children’s Oral Health Foundation. He can be reached at mm@realityesthetics.com.<br />
Gregg Tousignant, CDT<br />
Gregg Tousignant graduated from George Brown College with a dental technology degree in 1992. Two<br />
years later, he earned CDT designation from the National Board for Certification in <strong>Dental</strong> Laboratory<br />
Technology. He lectures and teaches hands-on courses for the general and cosmetic dentist and at dental<br />
and hygiene schools across Canada on tooth whitening, impressioning, temporization, adhesives, and<br />
direct anterior and posterior composites. Gregg currently serves as manager of technical support for<br />
Clinical Research <strong>Dental</strong>, where he provides continuing education programs consistent with the company’s<br />
philosophy, “Teaching Better Dentistry.” Contact him at gtousignant@clinicalresearchdental.com.<br />
Contributors 7
Numbers<br />
by the<br />
52%<br />
Percentage of dentists in<br />
Virginia who sent cases to<br />
<strong>Glidewell</strong> Laboratories in 2011<br />
50,000<br />
Number of case evaluation<br />
slips filled out by <strong>Glidewell</strong><br />
customers in 2011<br />
96% MARGINS<br />
Percentage of those<br />
slips marked as<br />
“GOOD”<br />
57%<br />
Percentage of Americans over the<br />
age of 65 who wear either full or<br />
partial removable dentures<br />
Source: www.orawave.com<br />
856,250<br />
Total number of full<br />
or partial removable<br />
dentures fabricated by<br />
<strong>Glidewell</strong> Laboratories<br />
since 1993<br />
Percentage of<br />
80%<br />
metal-based (PFM and<br />
28%<br />
cast gold) vs. all-ceramic<br />
crowns & bridges<br />
fabricated by <strong>Glidewell</strong><br />
Laboratories in 1997<br />
Percentage of<br />
metal-based (PFM and<br />
cast gold) vs. all-ceramic<br />
crowns & bridges<br />
fabricated by <strong>Glidewell</strong><br />
Laboratories in 2012<br />
8<br />
www.chairsidemagazine.com
Dr. DiTolla’s<br />
CLINICAL TIPS<br />
PRODUCT........ Rebilda ® Post System<br />
SOURCE........... VOCO America Inc. (Briarcliff Manor, N.Y.)<br />
888-658-2584, www.vocoamerica.com<br />
Considering that placing posts and cores isn’t an everyday procedure<br />
for most dentists, it’s surprising how many e-mails I get asking which<br />
post-and-core system I prefer. I continue to try different systems on an<br />
ongoing basis, but it’s a niche filled with me-too products for the most<br />
part. I recently ordered the Rebilda Post System from VOCO America<br />
and was pleasantly surprised from the moment I opened the box and<br />
found the directions on the lid — the rest of the industry could learn a<br />
thing or two from VOCO about directions! Beyond that, the fiber posts<br />
are highly translucent, while being more radiopaque than the posts I was<br />
using before, and the drill sizes are well-matched to the post sizes. The<br />
kit also includes VOCO’s bonding agent and dual-cure build-up material<br />
to ensure the chemistry will work to provide maximum retention.<br />
Dr. DiTolla’s Clinical Tips 9
Dr. DiTolla’s<br />
CLINICAL TIPS<br />
PRODUCT........ GripStrip <br />
SOURCE........... Centrix (Shelton, Conn.)<br />
800-235-5862, www.centrixdental.com<br />
It would be impossible to practice modern adhesive dentistry without finishing strips, yet I haven’t seen many<br />
products to get excited about in the last few years. Enter GripStrip diamond-coated strips. Someone really<br />
smart over at Centrix realized how much easier it would be for dental professionals to control the use of metal<br />
finishing strips if there was a better way to hold onto them, and the perforated tabs at either end of these<br />
finishing and polishing strips solve that problem. There is an uncoated zone in the middle of each strip where<br />
there is no abrasive, allowing you to pull it through tight interproximal areas. Each strip also has a 40-micron<br />
grit side for finishing and a 15-micron grit side for polishing. It’s pretty much the perfect interproximal strip.<br />
Here’s hoping they come out with a serrated version for breaking through inadvertently fused contacts.<br />
10 www.chairsidemagazine.com
Dr. DiTolla’s<br />
CLINICAL TIPS<br />
PRODUCT........ Luxatemp ® Ultra<br />
SOURCE........... DMG America (Englewood, N.J.)<br />
800-662-6383, www.dmg-america.com<br />
Has it really been two decades since Luxatemp was introduced? Much like when your oldest child turns<br />
21, this is one of those times when you ask, “Where did the time go?” Maybe it’s because Luxatemp<br />
has been my only chairside temporary material for 20 years, except when using BioTemps ® provisionals.<br />
In the past, I hated not being able to reline BioTemps with Luxatemp, due to its quick-setting reaction.<br />
It was the only time I would have to break out the stinky methyl methacrylate. The new Luxatemp Ultra<br />
has an elastic phase, so you can pump the BioTemps up and down on the preps to ensure they don’t get<br />
stuck in an undercut. Now, after being my longtime chairside temporary material of choice, Luxatemp’s<br />
newest formulation has become my BioTemps reline material of choice as well.<br />
Dr. DiTolla’s Clinical Tips11
Dr. DiTolla’s<br />
CLINICAL TIPS<br />
PRODUCT........ Picasso ® Lite<br />
SOURCE........... AMD LASERS ® LLC (Indianapolis, Ind.)<br />
866-999-2635, www.amdlasers.com<br />
I use my diode laser on nearly half of my patients, typically for small amounts of gingival recontouring or<br />
pre-impression troughing. There really isn’t any other instrument that can do what the diode does as quickly<br />
and as bloodlessly. When I ask most dentists why they don’t have a diode laser in their operatory, it’s always<br />
the same answer: “I’m waiting for the price to come down.” Good news: That day has come. The affordable<br />
laser is here. You can now have a full-featured Picasso Lite diode laser in your practice, without losing any<br />
sleep over what you paid for it. Whether you use it to clean up tissue prior to taking an impression or seating<br />
a crown, perform a gingivectomy next to Class V decay, or make the clinical crown length of tooth #8 match<br />
tooth #9, you’ll wonder how you ever lived without your Picasso Lite.<br />
12 www.chairsidemagazine.com
Photo Essay<br />
Porcelain Veneers for Tetracycline<br />
Using<br />
Blockout<br />
Method<br />
– ARTICLE and CLINICAL PHOTOS by<br />
Michael B. Miller, DDS<br />
NOTE FROM THE EDITOR: I don’t know how<br />
many dental books you own, but I have a<br />
couple of cabinets full of them. Most of them<br />
start gathering dust after my initial read, some<br />
come out a couple times per year (especially my<br />
favorite local anesthesia book), but only one<br />
has its own permanent parking spot on my<br />
desk: REALITY Publishing’s “The Techniques:<br />
Volume 1.” This publication, based on everyday<br />
applications of research and clinical<br />
experience, is the greatest gift young dentists<br />
could receive to help them achieve success in<br />
esthetic dentistry. It is also a useful reference<br />
manual for us older dentists. Dr. Michael Miller<br />
put this volume together and has been generous<br />
enough to share excerpts of it in <strong>Chairside</strong>. In<br />
this installment, Dr. Miller shares an esthetic<br />
challenge we have all faced: placing porcelain<br />
veneers on tetracycline-stained teeth. Visit<br />
www.realityesthetics.com for more infor mation<br />
on REALITY’s various publications.<br />
14 www.chairsidemagazine.com
1<br />
2<br />
3<br />
4<br />
5<br />
Figures 1–5: Patient, with recently completed orthodontics and<br />
maxillary all-ceramic crowns on incisors and porcelain veneers on<br />
canines and premolars, wants mandibular veneers to mask tetracycline<br />
stains, despite not showing his mandibular teeth in a full smile. This<br />
type of color change can be done with an extended regimen of home<br />
bleaching instead of the expense and invasive nature of veneers, but<br />
patient wants immediate improvement and is not concerned about the<br />
upkeep necessary or cost for veneers.<br />
Note that the tetracycline stains are in the incisal half of each tooth,<br />
except for the central incisors, where the stains extend almost to the<br />
gingival crest. Masking stains in the more incisal portions of the teeth is<br />
much easier than when the stains are at the gingival margins. Because<br />
the stains are more incisal, the gingival color is quite normal.<br />
Porcelain Veneers for Tetracycline Using Blockout Method15
6<br />
Figure 6: Cord is placed prior to the preparation to accelerate the<br />
procedure.<br />
7<br />
Figure 7: Finished preparations. Note that tetracycline teeth usually<br />
become darker when they are prepared. The bonded lingual retainer<br />
obviously eliminates interproximal extensions.<br />
8<br />
9<br />
Figures 8, 9: Areas of preparations not to be masked with opaquer are covered with resin blockout material. Only dark stained areas need to be masked.<br />
Resin blockout material keeps etchant and adhesive off stained areas.<br />
10<br />
Figure 10: Opaquer has been applied to dark stained areas after<br />
etching and adhesive application. Even though the preparations are<br />
relatively aggressive, mandibular teeth cannot be reduced to the extent<br />
possible for larger maxillary siblings. Therefore, the opaquer must be<br />
kept quite thin.<br />
11<br />
Figure 11: Resin blockout has been removed. Note that only darkstained<br />
areas are covered by the opaquer.<br />
16 www.chairsidemagazine.com
12<br />
Figure 12: Veneers returned from the lab. Note that, despite their<br />
polychromatic buildup, the veneers have built-in masking ability. This<br />
built-in masking can eliminate the need to apply opaquer directly<br />
on the teeth in all but the darkest cases, assuming the veneers are at<br />
least 1 mm thick.<br />
13<br />
Figure 13: Mandibular anterior teeth at luting appointment two weeks<br />
after preparations. No provisionals were placed, but tissue is still<br />
inflamed.<br />
14<br />
15<br />
16<br />
17<br />
Figures 14–17: Postoperative views two months after seating veneers. Maxillary and mandibular restorations match perfectly. There is no evidence of<br />
dark stains and tissue health has improved. Patient has been using an electronic interproximal cleaning device, which may have caused minor recession<br />
of papillae. CM<br />
Dr. Michael Miller is the co-founder, president and editor-in-chief of REALITY. He maintains a dental practice in Houston, Texas. Contact him at mm@realityesthetics.com.<br />
Reprinted by permission of REALITY Publishing. REALITY: The Information Source for Esthetic Dentistry, The Techniques, Volume 1, 2003, REALITY Publishing Company,<br />
pp. 272–74.<br />
Porcelain Veneers for Tetracycline Using Blockout Method17
Repair,<br />
Don’t<br />
Replace<br />
Part 1<br />
Resurfacing an Existing Porcelain Fused to<br />
Metal Restoration with a Porcelain Veneer<br />
– ARTICLE and CLINICAL PHOTOS by<br />
Robert A. Lowe<br />
DDS, FAGD, FICD, FADI, FACD, FIADFE<br />
Introduction: The Porcelain “Repair”<br />
Repairing a broken porcelain (or porcelain-fused-to-metal)<br />
restoration is a clinical reality in every dentist’s practice.<br />
The traditional technique is to use composite resin to repair<br />
chipped porcelain. This is an attempt to use unlike materials<br />
to accomplish a long-term repair, but it rarely works.<br />
Early “porcelain repair kits” used 37 percent phosphoric<br />
etch, silane primer, and adhesive and composite resin to<br />
repair chipped porcelain. This system did not work because<br />
37 percent phosphoric acid cannot appreciably etch a<br />
porcelain surface. Without adequate micromechanical retention<br />
to affix the composite resin to the porcelain surface,<br />
any repair will likely not withstand the forces of mastication.<br />
The use of hydrofluoric acid provides an adequate etched<br />
surface to create an improved micromechanical bond of<br />
composite to porcelain. However, the bond of composite<br />
to porcelain is not the only clinical problem. Another is the<br />
finishing and polishing of the porcelain-composite interface.<br />
Regardless of the finishing and polishing technique and<br />
materials used, the fine line of demarcation between the<br />
composite and porcelain is hard to eradicate.<br />
Repair, Don’t Replace – Part 119
Figure 1: A smile in need of a remake. The patient requested a porcelain<br />
makeover of the esthetic zone with occlusal corrections to prevent future<br />
porcelain fracture. The posterior bridgework is clinically acceptable; however,<br />
the anterior abutments in the esthetic zone will require resurfacing to<br />
match the anterior units.<br />
Figure 2: Preparations for porcelain veneers on tooth #27 and #28. The<br />
small metal exposures will not appreciably affect the bond of the veneers<br />
to the porcelain surface.<br />
Figure 3: A 2x magnified facial view of the veneer preparations<br />
Figure 4: A dentin desensitizer with antibacterial agent (AcquaSeal B,<br />
AcquaMed Technologies) is applied to cleanse the prepared tooth surface<br />
prior to the etching procedure.<br />
If the broken restoration is a single unit, a complete remake<br />
may be the most predicable solution. But what about<br />
multiple-unit fixed bridgework? It may not be feasible<br />
economically or clinically to sacrifice a long-span restoration<br />
for one unit with a porcelain fracture. In esthetic cases, a<br />
clinically acceptable posterior bridge may not be the same<br />
shade as the one chosen for the anterior reconstruction. So,<br />
for these clinical problems, is there a long-term solution<br />
short of replacing the entire restoration?<br />
Reveneering Existing Porcelain Restorations<br />
The patient in Figure 1 presented with the desire to remake<br />
his porcelain reconstruction. Some of the anterior units<br />
were fractured due to occlusal issues. The patient’s desire<br />
was to remake the restorations in the esthetic zone with a<br />
high value shade. The posterior bridgework was clinically<br />
acceptable, but the shade was much lower in value and hue<br />
than the desired anterior shade. Figure 2 shows a segment<br />
of this reconstruction, where an old single-unit crown was<br />
replaced and a veneer preparation was made into the existing<br />
anterior abutment of the posterior bridge immediately distal<br />
to it. The key to success with this procedure is the original<br />
thickness of porcelain on the existing bridge. The goal is<br />
to have little or no metal exposed. Tooth #27 and #28 are<br />
prepared for stacked porcelain veneer restorations (Fig. 3).<br />
The total thickness of the labial reduction of the natural<br />
tooth surface and porcelain surface is 0.5 mm facially and<br />
1 mm incisally.<br />
20 www.chairsidemagazine.com
Figure 5: Hydrofluoric acid is used to etch the porcelain preparation.<br />
Figure 6: Phosphoric acid is used to etch the prepared tooth surface.<br />
Figure 7: Both solutions are rinsed off with copious amounts of water.<br />
Figure 8: Preparations prior to placement of adhesive resin<br />
Once preparations are complete, the natural tooth surface<br />
is treated with a dentin desensitizer that has an antibacterial<br />
component (AcquaSeal B [AcquaMed Technologies; West<br />
Chicago, Ill.]) (Fig. 4). The porcelain preparation is treated<br />
with hydrofluoric acid for 60 seconds (Fig. 5). This material<br />
can be caustic to the gingival tissues, so if tissue contact is<br />
anticipated, a light-cured “liquid dam” is applied for patient<br />
protection. Thirty-seven percent phosphoric acid is applied<br />
for a 15-second total etch to the prepared tooth surface<br />
(tooth #27) (Fig. 6). Thoroughly rinse both the tooth and<br />
porcelain surface with water for 60 seconds (Fig. 7). Figure 8<br />
shows the natural tooth surface and porcelain surface<br />
after rinsing and air-drying. AcquaSeal B is reapplied to<br />
tooth #27 and the excess is removed using a high-volume<br />
Without adequate micromechanical<br />
retention to affix<br />
the composite resin to the<br />
porcelain surface, any repair<br />
will likely not withstand the<br />
forces of mastication.<br />
Repair, Don’t Replace – Part 121
Figure 9: Bonding resin is applied to both prepared surfaces.<br />
Figure 10: Bonding resin is light-cured for 30 seconds.<br />
Figure 11: Facial view of the prepared surfaces after curing of the adhesive<br />
resin. Note the shiny appearance of both the dentin and porcelain surfaces.<br />
This clinically shows the presence of the hybrid zone for bonding.<br />
Figure 12: The porcelain veneer for tooth #28 is filled with resin cement<br />
and placed on the preparation.<br />
suction. A moist, wet surface is left for the application of<br />
a hydrophilic bonding resin, and adhesive resin is applied<br />
in multiple applications to create a quality hybrid zone for<br />
bonding (Fig. 9).<br />
Following air thinning, the adhesive resin is light-cured<br />
(Fig. 10). Figure 11 shows the prepared surfaces after the<br />
adhesive resin has been placed and cured. The porcelain<br />
veneers are now ready for placement. A dual-cured resin<br />
cement is placed on the inside surface of the veneer<br />
restoration and the veneer is placed on the porcelain<br />
prepared surface (Fig. 12). A number 2 Keystone brush<br />
(Patterson <strong>Dental</strong>; El Segundo, Calif.) is used to remove<br />
excess resin cement prior to reaching a gel set (Fig. 13). The<br />
porcelain veneer restoration is then placed on tooth #27<br />
(Fig. 14). The porcelain veneer on tooth #27 is stabilized<br />
using veneer stabilizers (Nash/Taylor Esthetic Instrument<br />
Kit [Hu-Friedy; Chicago, Ill.]) while the gel set is completed<br />
(Fig. 15). After using a scaler to remove marginal cement<br />
excess post gel set (Fig. 16), a cotton pledget is used to<br />
complete resin cleanup prior to light curing (Fig. 17).<br />
22 www.chairsidemagazine.com
Figure 13: The excess resin cement can be removed with a Keystone<br />
brush.<br />
Figure 14: The restoration is placed on tooth #27.<br />
Figure 15: The veneer is stabilized while the gel set is completed.<br />
Figure 16: The excess can then be removed easily with a sharp scaler<br />
or explorer.<br />
It may not be feasible<br />
economically or clinically<br />
to sacrifice a long-span<br />
restoration for one unit<br />
with a porcelain fracture.<br />
Figure 17: Before the final cure, any excess resin can be removed from the<br />
surface of the restoration with a cotton pledget.<br />
Repair, Don’t Replace – Part 123
Figure 18: Cross section through a crown that had been veneered with<br />
porcelain. The distal abutment of this bridge had failed, necessitating<br />
removal. Note the uniform thickness of the remaining porcelain and the<br />
veneer restoration. The film thickness of the resin cement is also very<br />
uniform and micromechanically lutes the surfaces together.<br />
Figure 19: A full-smile, retracted view after delivery of restorations on<br />
tooth #4–12 and #21–28. The veneers on tooth #4 and #5 are veneered to<br />
a long-span PFM bridge as well. Note how well these restorations blend<br />
in with the new anterior restorations.<br />
Figure 18 shows a cross section through a porcelainfused-to-metal<br />
crown that was reveneered with porcelain<br />
to change the facial color to a brighter value, in order to<br />
match the adjacent restorations. Note the uniform thickness<br />
of resin cement and veneered porcelain. The bond of the<br />
porcelain veneer to the prepared porcelain surface is as<br />
strong as that bonded to dentin. Figure 19 shows the<br />
affected area in a full-arch, retracted view after placement<br />
of the esthetic anterior restorations. The previous bridge<br />
was retained, however the facial surface that was visible in<br />
the patient’s smile (tooth #28) was altered with a porcelain<br />
veneer to match the anterior restorations.<br />
Conclusion<br />
This technique demonstrates how to repair existing porcelain<br />
restorations by bonding a porcelain veneer to the affected<br />
porcelain surface. By taking advantage of the strength of a<br />
porcelain-to-porcelain bond using resin cement technology,<br />
we can now make predictable porcelain repairs and resurface<br />
existing porcelain (and porcelain-fused-to-metal) crown &<br />
bridge restorations in a very predictable manner. CM<br />
Dr. Robert Lowe is in private practice in Charlotte, N.C. He lectures internationally<br />
and publishes on esthetic and restorative dentistry. Contact him at 704-364-4711<br />
or boblowedds@aol.com.<br />
24 www.chairsidemagazine.com
Repair,<br />
Don’t<br />
Replace<br />
The “Saddle Crown”<br />
Part 2<br />
– ARTICLE and CLINICAL PHOTOS by<br />
Robert A. Lowe<br />
DDS, FAGD, FICD, FADI, FACD, FIADFE<br />
In the first part of this series on repairing an existing bridge (“Repair, Don’t<br />
Replace – Part 1,” page 19), a case was presented where a patient fractured the<br />
facial ceramic of a maxillary central incisor on a six-unit porcelain-fused-to-metal<br />
bridge. The facial fracture was stress related and did not involve the exposure of<br />
the underlying metal substructure. A successful repair was made by creating a<br />
veneer preparation into the ceramic and placing a new porcelain veneer on top<br />
of the affected surface.<br />
Now, what happens if the ceramic fracture is substantially larger and involves<br />
the exposure of the underlying metal framework? The following case will demonstrate<br />
how, in some circumstances, the remaining porcelain can be removed<br />
from the metal and a “saddle crown” can be fabricated and cemented over the<br />
existing bridge.<br />
Repair, Don’t Replace – Part 227
Figure 1: A preoperative view of tooth #7, part of a multiple-unit fixed<br />
bridge that has sustained a porcelain fracture on the facial surface<br />
Figure 2: An incisal view of the fractured abutment showing a porcelain<br />
fracture down to metal on the disto-incisal angle<br />
Figure 3: The fractured unit has been prepared using rotary diamond<br />
instrumentation down to the metal understructure, then polished with a<br />
fine diamond and rubber polishing abrasives. Care was taken not to disturb<br />
the porcelain on the adjacent teeth and the metal covering the damaged<br />
unit, especially the interproximal metal bridge connectors.<br />
Figure 4: Lingual view showing the surface after preparation. The original<br />
bridge had metal lingual surfaces, so preparation was made into the metal<br />
to create space for the “saddle crown” on the functional surface. Some<br />
of the metal was removed to tooth structure, but care was taken not to<br />
remove so much as to compromise the integrity of the original bridge.<br />
A patient presented with a porcelain fracture on an anterior<br />
multiple-unit fixed bridge (Fig. 1). The fracture involved<br />
the entire facial surface of tooth #7 and exposed the metal<br />
framework at the disto-incisal angle. When viewed from<br />
the lingual aspect (Fig. 2), the fracture extends down to<br />
the porcelain-metal junction of the mostly metallic lingual<br />
surface. Because of the occlusal forces placed on this tooth<br />
in both protrusive and lateral excursions, it was decided to<br />
prepare the remaining porcelain down to the metal understructure<br />
and create a “saddle crown” to repair the defect.<br />
The saddle crown consists of a facial and lingual surface<br />
only. These surfaces are only joined proximally incisal to<br />
the solder joint of the existing bridge. The preparation<br />
is designed to create negative space for this “telescopic”<br />
structure without compromising the structural integrity of<br />
the bridgework below.<br />
A round-ended, tapered, coarse diamond is used to prepare<br />
the remaining porcelain and metal. Care must be<br />
taken not to score the adjacent proximal ceramic surfaces<br />
during the preparation phase (Figs. 3, 4). Also, be careful<br />
not to create undercuts when preparing the cervical areas<br />
of the preparation. In this case, it was a challenge to create<br />
sufficient space on the lingual surface without prepping<br />
away some of the existing metal framework. This should<br />
be kept to an absolute minimum to avoid compromising<br />
the strength of the existing bridge.<br />
Figure 5 shows the incisal clearance created for the saddle<br />
crown as the patient closes into centric occlusion. This<br />
28 www.chairsidemagazine.com
Figure 5: This view shows the space created for incisal reduction as<br />
the patient closes to centric occlusion. 1.5 mm of space is needed in all<br />
functional movements.<br />
Figure 6: Retraction cords in place on the facial and lingual surfaces prior<br />
to the registration of the master impression<br />
Figure 7: Facial view of the gingival retraction cords in place<br />
Figure 8: The #00 cord is left in place after removal of the #1 cord, leaving<br />
an obvious sulcus prior to injection of the light-bodied impression material.<br />
clearance is checked in protrusive and lateral excursions<br />
as well, to make sure adequate space has been provided.<br />
The preparation is polished with a round-ended 30 micron<br />
finishing diamond, followed by rubber polishing abrasives<br />
to smooth the cut metal substructure and porcelain.<br />
Next, a retraction cord (UltraPak ® [Ultradent; South Jordan,<br />
Utah]) is placed on the facial and lingual marginal<br />
areas of the preparation (Figs. 6, 7). A two-cord technique<br />
is used, first placing a #00 cord, then a #1 on top of it.<br />
After a few minutes, the top cord is removed leaving<br />
the #00 in the sulcus (Fig. 8). The master impression is<br />
then made using a syringeable light-bodied and heavybodied<br />
vinyl polysiloxane impression material (Honigum<br />
[DMG America; Englewood, N.J.]) (Fig. 9).<br />
Figure 9: The impression is made using a polyvinyl siloxane impression<br />
material. Note the margin is captured, as well as approximately 0.5 mm<br />
of tooth or root surface apical to the prepared margin. This will ensure an<br />
accurate fit of the saddle crown.<br />
Repair, Don’t Replace – Part 229
Figure 10: A provisional restoration is fabricated from a preoperative<br />
impression taken prior to preparation of the fractured unit. Flowable composite<br />
resin was used to fill in the fracture prior to taking the impression, so<br />
that the provisional restoration would have the correct contours.<br />
Figure 11: The fabricated saddle crown on the master laboratory model,<br />
shown from the facial aspect<br />
The saddle crown consists of a<br />
facial and lingual surface only.<br />
These surfaces are only joined<br />
proximally incisal to the solder<br />
joint of the existing bridge.<br />
Figure 12: Incisal view of the preparation as seen on the master laboratory<br />
model<br />
A provisional restoration is then fabricated using a bisacrylic<br />
provisional material (Luxatemp ® [DMG America])<br />
and is cemented with polycarboxylate cement (Fig. 10).<br />
Digital photographs are provided to the ceramist to aid<br />
in characterization.<br />
Figure 11 is a facial view of the saddle crown on the laboratory<br />
cast model. An incisal view of the master cast shows<br />
the preparation design that basically strips the porcelain<br />
down to the metal substructure on the facial and lingual,<br />
and is “tied in” with a continuous mesial and distal proximal<br />
finish line on the metal connectors of the preexisting<br />
bridge (Fig. 12). A proximal view of the completed restoration<br />
highlights the “saddle” design (Fig. 13). Interproximal<br />
margins are in metal and are located incisal to the metal<br />
connectors of the understructure. The lingual surface of<br />
the restoration is made in metal to match the preexisting<br />
bridge and limit the amount of lingual reduction (Fig. 14).<br />
The completed saddle crown is tried in after removal of<br />
the provisional restoration (Fig. 15). After verification of fit<br />
and checking occlusion with articulating paper, the restoration<br />
is ready for cementation. In this case, resin-modified<br />
glass ionomer cement was used (Fig. 16). A 4-META-type<br />
cement is also good to cement metal to metal if retention<br />
is less than ideal. The cement is mixed according to the<br />
manufacturer’s instructions (Fig. 17) and pushed into place<br />
on the preparation (Fig. 18). It is recommended to hold the<br />
30 www.chairsidemagazine.com
Figure 13: The saddle crown shown from the proximal view<br />
Figure 14: The saddle crown on the master laboratory model from the<br />
lingual aspect<br />
Figure 15: After removal of the provisional restoration, the saddle crown<br />
is tried in and the fit is evaluated.<br />
Figure 16: A resin ionomer cement (RelyX Luting Cement [3M ESPE;<br />
St. Paul, Minn.]) is dispensed prior to mixing.<br />
Figure 17: The mixed cement is placed into the saddle crown.<br />
Figure 18: The saddle crown is held in place while the cement is allowed<br />
to set.<br />
Repair, Don’t Replace – Part 231
Figure 19: A lingual view of the cemented saddle crown<br />
Figure 20: A view of the completed saddle crown on tooth #7 from the<br />
facial aspect<br />
Figure 21: A view of tooth #7 prior to the fracture. Compare this to<br />
Figure 20, which is the same view of the repaired bridge using a saddle<br />
crown. A beautiful, esthetic and functional match was made without having<br />
to remake the entire bridge.<br />
restoration in place until the cement is completely set, as<br />
hydraulic pressure can in some cases push the restoration<br />
incisally as the cement sets.<br />
Figure 19 is a lingual view of the cemented restoration.<br />
The metal lingual surface of the saddle crown fits the adjacent<br />
metal margin of the bridge like an inlay. Figure 20 is<br />
a facial view of the completed saddle crown. Compare this<br />
to Figure 21, which is a facial view of the previous bridge<br />
prior to the fracture.<br />
The esthetics of a repair made using a saddle crown makes<br />
it an excellent alternative to replacing the entire multiunit<br />
restoration. This solution works well in anterior and<br />
posterior regions for pontics as well as abutments. CM<br />
Dr. Robert Lowe is in private practice in Charlotte, N.C. He lectures internationally<br />
and publishes on esthetic and restorative dentistry. Contact him at 704-364-4711<br />
or boblowedds@aol.com.<br />
The esthetics of a repair<br />
made using a saddle crown<br />
makes it an excellent<br />
alternative to replacing the<br />
entire multi-unit restoration.<br />
32 www.chairsidemagazine.com
– ARTICLE and CLINICAL PHOTOS by Gregg Tousignant, CDT<br />
and Leendert Boksman, DDS, BSc, FADI, FICD<br />
In practice, many dentists today want to use the fastestsetting<br />
dental products, the fastest curing lights, the fastest<br />
single-step adhesives and the fastest-setting impression<br />
materials. These faster products are desired for a number<br />
of reasons. Some clinicians want to save time in order<br />
to pack more patients into the day. Some want to make<br />
procedures faster and more comfortable for their patients.<br />
Some manufacturers even promote the so-called fast curing<br />
lights in ways to make you think you will save so much<br />
time you can take extra vacation days at the end of the year.<br />
One light manufacturer even claims that all you need is a<br />
one-second cure for a 4 mm layer of composite resin!<br />
Freedman states that “faster setting impression materials<br />
are very advantageous in the efficient practice.” 1 He then<br />
rightly qualifies this statement with “the underlying assumption<br />
is that faster setting in no way compromises the<br />
Faster Is Not Always Better When It Comes to Impressioning35
quality of the impression.” However, in a recent study of<br />
the quality of dental impressions for fixed partial dentures,<br />
89 percent of the impressions had one or more detectable<br />
errors that would impact the final fit of the restorations;<br />
51 percent had voids or tears at the finish line (Fig. 1);<br />
40 percent had air bubbles at the finish line (Fig. 2); and<br />
24 percent had flow problems (Fig. 3). 2 Could there be<br />
any relationship to using fast-set impression materials?<br />
Figure 1: Impression of molar with multiple voids at the margins<br />
Figure 2: Air bubbles and voids incorporated into the light body<br />
When it comes to impression materials, the goal of a fast-set<br />
product is to limit the amount of time the impression is in the<br />
mouth, both for patient comfort and to limit the opportunity<br />
for the patient to move and distort the impression while it is<br />
setting. 3 Although the concept is admirable, many clinicians<br />
experience drags, pulls (Fig. 4), inaccuracies (Fig. 5) and<br />
distortion in their impressions simply because they don’t<br />
understand how much working time they really have.<br />
Terry, in his article on the impression process, gives us two<br />
definitions: “The setting time of impression materials is the<br />
total time from the start of the mix until the impression material<br />
has completely set and can be removed from the oral<br />
cavity without distortion, and the working time is measured<br />
from the start of the mix until the material can no longer<br />
be manipulated without introducing distortion or inaccuracy<br />
in the final impression.” 4 These two processes are, of<br />
course, intimately related by the chemistry of the impression<br />
material. Many clinicians think they know the working<br />
time of their light-body and heavy-body impression<br />
materials, but we can pretty much guarantee that most do<br />
not! One of the disadvantages of PVS impression materials<br />
is their relatively short working time. 5 If you think the<br />
working times of your light-body polyvinyl siloxanes are<br />
what is listed in the manufacturer’s instructions, then you,<br />
too, may not understand the true “intraoral” working times<br />
of your material.<br />
In a recent study of the quality of<br />
dental impressions for fixed partial<br />
dentures, 89 percent of the<br />
impressions had one or more<br />
detectable errors that would impact<br />
the final fit of the restorations.<br />
Figure 3: Flow problems demonstrated as multiple areas of lack of<br />
adaptation<br />
36 www.chairsidemagazine.com
By specification, the working times of impression materials<br />
are calculated at 23 degrees Celsius and at 50 percent relative<br />
humidity. Unfortunately, the oral cavity is much warmer<br />
and significantly wetter. In the ADA Professional Report on<br />
Elastomeric Impression Materials, the ADA found that times<br />
measured at 23 degrees Celsius were 66 to 77 percent longer<br />
than those measured at 35 degrees Celsius (intraoral<br />
temperature range). 6 Some PVS impressioning materials<br />
such as Genie Ultra Hydrophilic (Sultan Healthcare Inc.;<br />
Hackensack, N.J.) and Correct Plus (Pentron Clinical Technologies<br />
LLC; Wallingford, Conn.), whose instructions claim<br />
working times of 135 and 90 seconds respectively, actually<br />
have less than 10 seconds working time intraorally. 6 This<br />
makes it difficult for some, and impossible for others, to<br />
impress a single unit, let alone multiple units, and be able<br />
to deliver the tray prior to the light body setting.<br />
So why is this relevant? In order to ensure a fluid blend<br />
between your light-body and heavy-body PVS impression<br />
materials, both materials must be fluid and unpolymerized<br />
at the time the tray is inserted. If not, this could lead to<br />
gaps or ledges between the different viscosities of material<br />
(Figs. 6, 7), which will lead to inaccuracies and high<br />
occlusion of your final restoration. We as practitioners also<br />
assume that upon insertion of our heavy body material,<br />
it will drive the light body into better adaptation to our<br />
preparation. Of course, this is not possible when the light<br />
body is already set (Fig. 8). This means that unless the<br />
light body is meticulously placed in the first instance, we<br />
cannot improve the impression by the hydraulics of the<br />
heavy body impression material.<br />
Where are your impression materials stored? Are they<br />
stored in a wall cabinet with hot fluorescent lights underneath?<br />
Is your air conditioning on a timer? Do you turn the<br />
air conditioning down to save energy over the weekend?<br />
Figure 4: Drags or pulls resulting from premature set of the impression<br />
heavy body<br />
Figure 5: Inaccurate margins due to lack of flow, lack of hydraulics or<br />
inadequate retraction<br />
To ensure a fluid blend between<br />
your light-body and heavy-body<br />
PVS impression materials,<br />
both materials must be fluid and<br />
unpolymerized at the time<br />
the tray is inserted.<br />
Figure 6: Obvious gap between the light body and heavy body<br />
Faster Is Not Always Better When It Comes to Impressioning37
Figure 7: Gaps and ledges with lack of union between light and<br />
heavy body<br />
Figure 8: Lack of adaptation of light body around implants — light<br />
body was set and could not be moved by heavy-body hydraulics<br />
If your air conditioning is on a timer or the temperature of<br />
your operatory or office is higher than 23 degrees Celsius<br />
over the weekend or during the day, you need to keep in<br />
mind that it takes eight hours for impression materials to<br />
acclimatize. On those hot humid summer days or nights,<br />
your impression materials can get significantly warmer<br />
than room temperature (70 degrees Celsius) and will not<br />
cool back down until eight hours after the air conditioning<br />
comes back on. This is of significant importance when it<br />
comes to your working times. For every 10 degrees above<br />
room temperature, you lose up to 50 percent of your working<br />
time! For some materials, this may mean less than five<br />
seconds intraoral working time. It is impossible to impress<br />
one unit of crown & bridge in this time, let alone multiple<br />
units. Hence the need for a temperature-controlled storage<br />
unit for temperature-sensitive materials or strict control of<br />
the office temperature environment.<br />
In clinical crown & bridge cases where you must take<br />
an impression of multiple units, it can be difficult (if not<br />
impossible) with any standard impression material, due to the<br />
shortened intraoral working times, which for most materials<br />
on the market today is less than half or even a third of what<br />
is stated on the manufacturer’s instructions. However, there<br />
was a product introduced to the market a number of years<br />
ago which is designed specifically for these cases. Multi-Prep<br />
from the Affinity line of impression materials (CLINICIAN’S<br />
CHOICE <strong>Dental</strong> Products Inc.; New Milford, Conn.) has<br />
the longest intraoral working time on the market today.<br />
Although not the 2:40 minutes stated in the manufacturer’s<br />
instructions, it has an intraoral working time of 90 seconds<br />
followed by a relatively short and independent intraoral set<br />
time. Figure 9 shows a full-mouth reconstruction impression<br />
taken with Multi-Prep, which shows superb detail,<br />
adaptation and marginal capture. Two other materials come<br />
close to this working time for their light bodies as tested<br />
by the ADA: Examix NDS (GC America Inc.; Alsip, Ill.) at<br />
70 seconds and the polyether Impregum Penta Soft Quick<br />
Step (3M ESPE ; St. Paul, Minn.) at 70 seconds.<br />
For every 10 degrees above<br />
room temperature, you lose up to<br />
50 percent of your working time!<br />
For some materials, this may<br />
Figure 9: Full-arch rehabilitation Multi-Prep impression showing<br />
excellent detail, flow, adaptation and marginal capture due to<br />
proper working time<br />
mean less than five seconds<br />
intraoral working time.<br />
38 www.chairsidemagazine.com
If you are trying to make a decision on choosing a new<br />
impression material for your practice, you must beware of<br />
clever marketing and advertisements. Many manufacturers<br />
will make you think singular qualities of their material<br />
should be important in your decision-making process. One<br />
example shows images of the contact angles of water droplets<br />
on the manufacturer’s material, which are lower than the<br />
contact angle of others. What does this prove? The idea is to<br />
make you think that if the contact angle is lower than their<br />
competitors that it must flow better in the presence of moisture<br />
or effectively displace moisture during impressioning.<br />
Some of these tests are done on set impression materials,<br />
which is a clinically irrelevant test, as we use the materials<br />
during the polymerization process. With some PVS materials,<br />
the movement of the surfactant to the surface to affect<br />
the wetting properties becomes limited as the material is<br />
polymerizing. 7 “Hydrophilic” PVS impression materials may<br />
continue to be hydrophobic in the unpolymerized state, and<br />
they will not properly capture detail on wet surfaces, but<br />
the surfactants have enhanced PVS wettability with gypsum<br />
products. 8 There is no relation between the contact angle<br />
and the ability to displace moisture contamination. 9 Similarly,<br />
another example is the “shark fin test,” which is designed<br />
to test how a material flows — the larger the fin, the more<br />
it must flow. Yet, how relevant is this if you have less than<br />
10 seconds to take the impression? There is no correlation<br />
between results of the shark fin test versus dimensional accuracy,<br />
and respectively, surface detail reproduction. 10<br />
References<br />
1. Freedman G. Buyers’ guide to impression materials. Dent Today. 2006<br />
Mar;25(3):144-5.<br />
2. Samet N, Shohat M, Livny A, Weiss EI. A clinical evaluation of fixed<br />
partial denture impressions. J Prosthet Dent. 2005 Aug;94(2):112-7.<br />
3. Pitel ML. Successful impression taking, first time, every time. 1st Ed.<br />
Armonk, NY: Heraeus Kulzer; 2005.<br />
4. Terry DA. The impression process: part 1 — material selection. Pract<br />
Proced Aesthet Dent. 2006 Oct;18(9):576-8.<br />
5. Chee WW, Donovan TE. Polyvinyl siloxanes impression materials:<br />
a review of properties and techniques. J Prosthet Dent. 1992<br />
Nov;68(5):728-32.<br />
6. ADA Professional Product Report. Elastomeric impression materials.<br />
2007;2(3):11.<br />
7. Grudke K, Michel S, Knipel G, Grudler A. Wettability of silicone and<br />
polyether impression materials: characterization by surface tension<br />
and contact angle measurements. Colloids and Surfaces A: Physicochemical<br />
and Engineering Aspects. March 2008;317(1-3):598-609.<br />
8. Trushkowsy R. Accurate impression material and technique for<br />
well-adapted restorations. Dent Today. 2007 Feb;26(2):120, 122-3.<br />
9. Norling BK, Ibarra J, Gonzales J, Cardenas HL. Wettability and<br />
moisture displacement of vinyl polysiloxane impression materials.<br />
University of Texas at San Antonio, IADR/AADR/CADR 82nd General<br />
Session, March 2004, #1927.<br />
10. Balkenhol M, Wöstmann B, Kanehira M, Finger WJ. Shark fin<br />
test and impression quality: a correlation analysis. J Dent. 2007<br />
May;35(5):409-15. Epub 2007 Jan 24.<br />
Reprinted by permission of Oral Health, November 2011.<br />
There are a number of choices for impression materials<br />
on the market today and, as with anything, each has its<br />
pros and cons. Should your decision be based on: water<br />
droplet contact angles, shark fin tests, price, color and<br />
taste, and powerful advertising? Or should it be based on<br />
clinically relevant qualities such as: intraoral working times,<br />
polymerization rate, dimensional stability, tear strength,<br />
accuracy, consistency, quality control, and most important<br />
of all, independent clinically relevant research? CM<br />
Gregg Tousignant, CDT, is a technical support manager for Clinical Research<br />
<strong>Dental</strong>, where he provides technical support and hands-on courses. E-mail him at<br />
gtousignant@clinicalresearchdental.com.<br />
Dr. Len Boksman retired from practice in London, Ontario, Canada, at the end of<br />
2011 and currently does freelance consulting and lecturing for the general practitioner.<br />
He can be reached at lenboksman@rogers.blackberry.net.<br />
Faster Is Not Always Better When It Comes to Impressioning39
42 www.chairsidemagazine.com
Interview with Dr. Lee Ann Brady<br />
– INTERVIEW of Lee Ann Brady, DMD<br />
by Michael C. DiTolla, DDS, FAGD<br />
As someone who is involved in dental<br />
education, reading Dr. Lee Ann<br />
Brady’s résumé makes my head spin!<br />
Having spent several years teaching side<br />
by side with some of dentistry’s best,<br />
she recently re-entered private practice<br />
to reclaim her nights and weekends.<br />
Lee is smart and funny, and I have<br />
been lucky enough to spend time with<br />
her when lecturing. I hope you enjoy<br />
our conversation.<br />
Interview with Dr. Lee Ann Brady43
Dr. Michael DiTolla: The thing I love about you, Lee, is that<br />
you are dentistry’s version of Justin Timberlake, in the sense<br />
that you really do it all. You teach photography. You teach<br />
occlusion. You teach adhesion. You teach preparation. There’s<br />
almost nothing beyond your reach. I think that’s due to a<br />
combination of talent and your educational background. It’s<br />
been an amazing path that has taken you to where you are<br />
today. So as we get started, for our readers who are not familiar<br />
with your background, take us through what you’ve done since<br />
you graduated from dental school.<br />
Dr. Lee Ann Brady: Absolutely. As you were describing that<br />
broad range of topics, one of the things that came up for<br />
me is that it also mimics what I do in my practice every<br />
day because I’m a general practitioner, so I have to be well<br />
versed in all of those topics. My path did not happen with<br />
intention, so much as it just happened serendipitously. I am<br />
a general dentist, as I said. I graduated from the University<br />
of Florida in 1988 and was in and out of various practice<br />
models in the years between then and 2005, when I was<br />
asked to join the Pankey Institute down in Key Biscayne,<br />
Florida, as a full-time faculty member. So I moved down<br />
to Pankey and taught there full-time. I was their clinical<br />
director for four years.<br />
MD: That’s amazing to me that you got asked to be a part of<br />
Pankey because the only communication I’ve had with Pankey<br />
is they have asked me not to come to the courses.<br />
LB: (laughs) Oh, come on!<br />
I was sitting in one of their classes ...<br />
and Monday morning of that class,<br />
Irwin Becker, who was chairman of the<br />
department of education at the time,<br />
came up to me and said, “I’d really like<br />
for us to talk privately.” And, honestly,<br />
I thought for sure they were kicking<br />
me out. It was like being called into<br />
the principal’s office.<br />
MD: So I’m amazed that they asked you to come on board like<br />
that. How did that happen?<br />
LB: You know, I’ll tell you as best as I know the story.<br />
From a purely factual perspective, I was sitting in one<br />
of their classes — I was taking their second class, which<br />
at the time they called “C2,” their bite splint class —<br />
and Monday morning of that class, Irwin Becker, who<br />
was chairman of the department of education at the<br />
time, came up to me and said, “I’d really like for us to<br />
talk privately.” And, honestly, I thought for sure they<br />
were kicking me out. It was like being called into the<br />
principal’s office.<br />
MD: You thought he was going to hand you a check with a<br />
refund for your tuition and have you leave out the back door?<br />
LB: (laughs) Exactly. “Get out of here!” So I was nervous<br />
until we found a time to talk. We finally found the time<br />
and went to lunch together and he asked me, “Have you<br />
ever considered doing anything in dental education?” That’s<br />
literally how I got asked. Up until that point, I really hadn’t<br />
considered it. I taught briefly at the dental hygiene program<br />
at Santa Fe Community College, which is in Gainesville,<br />
Florida, my first year or two out of dental school, just<br />
because my practice wasn’t busy and I was looking to keep<br />
44 www.chairsidemagazine.com
usy and make a little more money. So I went and taught<br />
in the dental hygiene clinic. But other than that, I had no<br />
experience in dental education. I went in cold turkey.<br />
MD: So that was in 2005. How long were you there?<br />
LB: I was there until the end of 2008, so just shy of four<br />
years. That accounts for my huge background in occlusion.<br />
I had already been doing that. Actually, as a student, I<br />
had decided at one point that I might focus my practice<br />
on TMD patients. I was taking some courses with Mark<br />
Piper. I went through the craniofacial pain mini-residency<br />
at the University of Florida with Henry Gremillion and<br />
was taking Pankey courses. When you’re there full-time at<br />
Pankey for four years, you are immersed in the conversation<br />
on occlusion.<br />
MD: How interesting that early on you thought you might focus<br />
your practice on TMD patients. For most of the dentists I know,<br />
that’s one of the first early referrals they decide to make — pedo<br />
patients and TMD patients. I used to run from those patients.<br />
What drew you to that?<br />
LB: I still do a fair number of those patients. But I decided<br />
that, as much as I enjoyed TMD, I also missed restorative<br />
dentistry. I loved that, too. So I’ve created a balance now in<br />
my practice. What I love about it is the unknown and the<br />
mystery. In the beginning, it’s daunting, and you wonder<br />
how you will ever figure it out. The more I got to learn<br />
about it, the more I realized it’s just a puzzle that can be<br />
solved if you are willing to stay curious and stay in the<br />
puzzle with the patient, and combine what they’re telling<br />
you with what you are finding in an exam. You really have<br />
to work through it. One of the things that I think is hard for<br />
folks to grasp when they start treating TMD patients is, you<br />
don’t actually know when you start what we call “therapy,”<br />
which for most of us is an appliance, that this is actually<br />
the therapy. The appliance is almost as much diagnostic as<br />
it is anything else, because you make it based on a design<br />
you think might work. But then, if it does or doesn’t work,<br />
that’s diagnostic information. It makes you go, “Oh, I need<br />
to go down this other path.” So I like that piece of it. I like<br />
the investigative piece of it; that it’s different and always a<br />
challenge. It’s not repetitive, like doing an MO composite.<br />
MD: That might be where the disconnect is for some dentists.<br />
We take a bitewing radiograph. We find some decay. We go in<br />
and we drill it out. We place a restoration. It’s done, problem<br />
solved, and we’re on to the next thing. But TMD is not like<br />
that. It’s ongoing and you have to be inquisitive. You have<br />
to interpret what the patient is telling you and what you’re<br />
seeing through the therapy you’re providing.<br />
LB: Exactly. If you’re one of those folks where you like to<br />
just do what you do and be done, and then in your mind<br />
it’s handled, TMD should not be the part of dentistry you<br />
go into. If you like the challenge of it being a continuous<br />
process and asking what’s next and how are we going to<br />
do this, then TMD is a great aspect of dentistry that has<br />
that, whereas a lot of other aspects of restorative dentistry<br />
don’t. For me, like I’ve said, I’ve balanced it. I like treating<br />
TMD patients in my practice, but I would miss restorative<br />
dentistry, so I don’t do that every day that I’m in my office.<br />
I have created a balance, and I think a lot of other folks can<br />
do that, too.<br />
MD: So you like to be able to mix it up and change gears a<br />
little bit, go in and solve a few problems, and then also see a<br />
few TMD patients. This is starting to sound like what might be<br />
called the “thinking man’s dentistry,” if you will. Less about<br />
handpieces and injections, and more about interpretation and<br />
trying to figure out what might make the situation better.<br />
LB: That’s the best way I’ve ever heard it explained!<br />
MD: Well, then we’re going to end the interview here. Thanks so<br />
much for being with us. (laughs) So you were at Pankey until<br />
the end of 2008?<br />
LB: Yep. Then I was asked to join Frank Spear. It was right<br />
when he was moving the Seattle Institute for Advanced<br />
<strong>Dental</strong> Education from Seattle and partnering with the<br />
Scottsdale Center for Dentistry, which of course now<br />
has become Spear Education and is based in Scottsdale<br />
(Arizona). So he asked me to be part of that transition, and<br />
be the person who moved to Scottsdale, because he and<br />
Greg Kinzer and Gary DeWood were still all in Seattle at<br />
that point. So I did that at the end of 2008, and I was there<br />
full-time until last year.<br />
MD: How did that invitation come about? Because now, for the<br />
second time in your illustrious career, you’re being tagged by<br />
one of the more powerful people in dentistry to come be part<br />
of their organization. Are you just relying on your good looks?<br />
How did this happen?<br />
LB: You know, that could be a part of it, and we won’t dismiss<br />
that piece. But, honestly, I knew Frank as a student because<br />
I had taken his classes in my own continuing education<br />
journey, and he also used to come down to Pankey once<br />
a year to do a program called “Masters Week,” so I got to<br />
know him even better at that point. Gary DeWood, who is<br />
a dear friend who I worked with at Pankey, was already<br />
in Seattle and had joined Frank at the Seattle Institute for<br />
Advanced <strong>Dental</strong> Education. I also had three kids at that<br />
point, and my daughters, who are now almost done with<br />
high school, were just on the crux of being teenagers. So I<br />
really was looking to not live in Miami anymore, to have my<br />
kids someplace where I felt more comfortable with them<br />
learning to drive and starting to date and do all of those<br />
things in a less cosmopolitan setting. Gary knew that, so I’m<br />
sure that was part of it. And, talk about having your heart<br />
stop, there’s nothing on the planet like having your phone<br />
ring (at that point I still had an actual house phone) and<br />
Interview with Dr. Lee Ann Brady45
you go over and the caller ID says “Frank Spear,” and you’re<br />
like, “Really?” I can remember that evening at my house<br />
because I went over to the phone and was screaming to my<br />
husband, “It says Frank Spear.” My kids were like: “Answer<br />
it. What’s your problem?”<br />
MD: That’s great. And when you answered the phone, did you<br />
say, “Frank, I’d love to talk, but I’ve got Gordon Christensen on<br />
the other line”?<br />
LB: (laughs) No. Unfortunately, I was so tongue-tied that I<br />
don’t know what I said!<br />
MD: I don’t blame you! So what was your role at Spear?<br />
LB: I was the executive VP of clinical education.<br />
MD: And you were there for how many years? About the same<br />
amount of time you were at Pankey?<br />
LB: A little bit less. I was there for almost three years fulltime.<br />
MD: And you recently decided to get back into private practice<br />
and spend a little more free time with your family?<br />
LB: Absolutely. June of last year I left Spear Education as<br />
an employee and went back into private practice. I practice<br />
here in Glendale, Arizona. I am still teaching. My intent was<br />
always to continue to teach some. But I really wanted a lot<br />
more control over my schedule because, as I said, I’ve got<br />
three kids and two of them are in high school and the other<br />
is just about to be in high school. The other part of it for<br />
me was I felt like I really needed to be seeing patients in<br />
order to continue to grow as an educator. I had spent eight<br />
years in formal general continuing education with very little<br />
opportunity to interact with patients, so I wanted to go out<br />
and do the things I was talking to other folks about.<br />
MD: As I alluded to earlier, that really is an amazing<br />
background. With the experience you’ve had, I’m not sure<br />
what’s left for you to do, except maybe I’ll nominate you for<br />
ADA president because it sounds like you have a hard time<br />
saying “no.” But it really is an amazing background, and it<br />
has all added up to someone who is not only able to do all these<br />
things in your practice, but you’re able to teach it and teach it<br />
well. That’s a gift, too.<br />
To get back to occlusion, because I know you’re so well<br />
grounded in that, here at the laboratory, about 75 percent of<br />
the restorations we do are single-unit restorations, and then<br />
another 11 percent are 2 adjacent units. Basically, 86 percent<br />
of what we do here at the lab is either 1 or 2 units. So, from our<br />
perspective, for the typical dentist out there sending us work,<br />
it looks like dentistry is being done one crown at a time; not<br />
big, full-mouth rehabs. For the doctors who spend most of their<br />
time doing single-unit crowns, I think occlusion is having the<br />
patient bite on the paper, see the blue dot and getting rid of an<br />
interference, and that may be all they need to be concerned<br />
about. But for those kind of basic cases, what do you do? What<br />
do you look for? Are you doing full-mouth occlusal adjustments<br />
on those patients who come into your practice and maybe just<br />
need one crown?<br />
LB: That’s a great question, and my practice really mirrors<br />
what you guys are seeing in the lab. For the majority of my<br />
patients, we do dentistry in very small units. Honestly, even<br />
when I do patients where we’ve talked together about a<br />
comprehensive treatment plan and the patient is ready to<br />
do that, because of their time constraints or their economic<br />
constraints, we have to figure out how we do dentistry in<br />
little pieces over 10 years. So that’s mostly what I send to<br />
the laboratory.<br />
MD: Wouldn’t you agree that it’s much easier for most of us to<br />
do 28 units of crown & bridge one or two crowns at a time then<br />
it is to do it all at once?<br />
LB: It depends what you mean by easier, but I think there<br />
are pieces of it that are easier. It’s easier on the patient,<br />
definitely, from a patient experience. Unless you’ve been<br />
a patient and sat in the chair and had 14 units prepped<br />
on the same day, you have trouble comparing that. There<br />
are pieces of it that are easier from a treatment-planning<br />
perspective, from a case-presentation perspective.<br />
I guess for me, when you ask what people should know<br />
about occlusion, it does go back to that planning piece. I<br />
think we need to spend a little bit of energy understanding<br />
who are our high-risk patients from an occlusal perspective.<br />
Those are the ones where you do the single-unit or the<br />
2-unit, and now you find yourself in a situation you’re<br />
not sure how to get out of. So you lose your clearance on<br />
your prep, or you grind the crown in and the patient never<br />
feels that their bite is the same. You’re looking at the dots<br />
thinking it looks right to you and wondering what the heck<br />
they’re talking about. Or maybe, the worst one, where you<br />
come in and there’s a hole in the provisional. In the old days<br />
with porcelain fused to metal, at least you knew you could<br />
adjust through and the worst thing that would happen is<br />
you would tell the patient they had a little silver amalgam<br />
in their crown. With all-porcelain, now you don’t have that<br />
opportunity to back out any more. So I would say, figure<br />
out who those high-risk patients are and, at a minimum,<br />
know for yourself and have a conversation with the patient,<br />
so if some of those sequelae happen, now it’s something<br />
you knew might happen and it’s something you’ve already<br />
talked about and predicted. It’s not something where you’re<br />
wondering how you are going to make it right.<br />
MD: Give me an example of a typical case that might walk in<br />
off the street, something simple like a single-unit crown. The<br />
patient walks in with a broken cusp — it’s cutting their tongue<br />
or their cheek — and they’re basically begging you to prep it.<br />
46 www.chairsidemagazine.com
Give me an example of a case that might be one of those highrisk<br />
cases.<br />
LB: Well, the first one I think of, which is super common<br />
in your scenario of a fractured cusp, is you’re going to do<br />
an upper or lower second molar. For most folks, if we look<br />
at, percentage-wise, which tooth in the arch is the one that<br />
trains our lateral pterygoid and has our brain know how to<br />
find intercuspal position, it’s going to be on a second molar.<br />
Now you look at that tooth and you don’t know, when you<br />
prep the rest of the occlusal table away, if they are going<br />
to lose that muscle memory, and therefore, the instant you<br />
do your prep, you go in to check and there’s no occlusal<br />
clearance. I don’t know if you’ve done this, but I’m geeky<br />
enough that I’ve actually looked at the research, and five<br />
minutes is nowhere on the bell curve for normal supereruption.<br />
Teeth don’t do that. If you lose your occlusal<br />
clearance literally while you’re prepping, it’s because the<br />
lateral pterygoid muscle is relaxing and releasing and the<br />
condyle is receding.<br />
So what do I look for in that situation? Sometimes it’s hard<br />
if the cusp is broken because they may have just eliminated<br />
their own first point of contact. But I look for wear because<br />
patients who have wear on their second molars — no place<br />
else on their arch but on their second molars — what runs<br />
through my head is they get their condyles back in centric<br />
relation. They either peri-function back there or this is a<br />
place they go to. I need to be thinking about this. I also<br />
always look for the difference between intercuspal position<br />
and that seated condylar position from a standpoint of the<br />
relationship of their front teeth. How much do their front<br />
teeth come apart vertically? Is there an A-P piece of that?<br />
What’s the distance? Because if their front teeth open 3 or<br />
4 millimeters when you get their condyle seated, and that<br />
gets deprogrammed, that is going to translate to 1 or 1.5<br />
millimeters off the top of your prep, and there goes your<br />
clearance. If the discrepancy is little, which fortunately for<br />
us it is in 85 percent of the population — it’s less than<br />
1 to 1.5 millimeters — we’re never even going to notice on<br />
that second molar.<br />
MD: OK, let’s say the patient comes in and it’s not a broken<br />
cusp. Somebody’s got a large amalgam in a lower second molar<br />
and it’s got a little recurrent decay and you’re getting ready to<br />
prepare it. How do you handle that and how do you go into that<br />
to minimize the risk of those kinds of sequelae happening when<br />
you prep that second molar?<br />
LB: For me, it’s super simple. I reach for a leaf gauge. I keep<br />
a leaf gauge on my exam tray. It takes me probably less<br />
than a minute with a leaf gauge to find out, number one, if<br />
they have a positive load test, which tells me their lateral<br />
pterygoid is kind of tight. If I can get it released, can I find<br />
first point of contact? Is it marking on the tooth I’m about<br />
to prep? If it’s marking on a different tooth, my risk is really<br />
For the majority of my patients, we do<br />
dentistry in very small units. Honestly,<br />
even when I do patients where we’ve<br />
talked about a comprehensive treatment<br />
plan and the patient is ready to<br />
do that, because of their time restraints<br />
or their economic restraints, we have<br />
to figure out how we do dentistry in<br />
little pieces over 10 years.<br />
Interview with Dr. Lee Ann Brady47
low. If I’m about to prep away that contact, now the risk<br />
just went up. I can also see visually with the leaf gauge in,<br />
when they’re touching that first contact, how far apart their<br />
front teeth are. Again, if the number is 3 or 4 millimeters<br />
and something changes, I know I’m going to see it and it’s<br />
going to affect my prep.<br />
MD: So the take-home message for dentists is that the most<br />
common trap we’re going to fall into is on those second molars?<br />
LB: Exactly. Then, statistically, are there first molars? Sure,<br />
but it’s a smaller number. Are there people who have it on a<br />
pre-molar? Sure, but now it’s a really small number. Maybe<br />
you do nothing more than stopping before you prep the<br />
second molar and asking if this is the tooth that’s the first<br />
point of contact. I used to get really weird about that when<br />
I thought I had to do a bilateral manipulation, and I don’t<br />
think I’m unique to that. I think that’s a technique where<br />
people aren’t sure what the heck they’re doing. But do it<br />
with a leaf gauge, and it’s super simple. You can learn to do<br />
it with a leaf gauge very quickly, probably one time using it<br />
and having someone explain it to you, and now you have it<br />
on your tray so you can figure that out.<br />
MD: I’m sure that is of the things you teach in your course. In<br />
fact, you do some online courses as well. Is that one of them, the<br />
occlusal therapy course?<br />
LB: Absolutely. I just completed the online course called<br />
“Occlusal Diagnosis: Identifying Risk,” and it really is<br />
geared toward the general dentist, the restorative dentist.<br />
What we talk about is how you do an exam in a way that,<br />
if somebody is going to have risks from joints, muscles<br />
or their occlusion, you can identify those people; those<br />
red flags are obvious. With this group of people you can<br />
say to yourself, I’m going to slow down and get more<br />
information, versus the folks where you can just prep<br />
the teeth.<br />
MD: If people want to find that online and sign up for that<br />
course or watch that course, where do they go?<br />
LB: They just go to my website: www.leeannbrady.com.<br />
MD: Perfect. That would be a great place for them to go.<br />
I was just reading the American Association of Cosmetic<br />
Dentistry’s State of the Cosmetic Dentistry Industry report they<br />
released for 2011, and it talks about how cosmetic dentistry<br />
has really been down. How veneers have been down almost 10<br />
percent since 2007. When you break down the veneer numbers<br />
here in our laboratory, the IPS Empress ® veneers (Ivoclar<br />
Vivadent) continue to shrink and shrink at an alarming rate.<br />
But the good news is, at least for the veneer department, that the<br />
IPS e.max ® (Ivoclar Vivadent) numbers for veneers continue<br />
to grow, and that mirrors what I do for any multi-veneer case<br />
now. IPS e.max is my go-to material, and I love something that<br />
looks essentially as esthetic as IPS Empress, though maybe not<br />
exactly the same in terms of esthetics, but certainly no patient<br />
can tell the difference. I love the fact that it’s three-times as<br />
strong as IPS Empress. Are you finding yourself using e.max<br />
more for veneers as well?<br />
LB: That is a great question. Of my posterior restorations in<br />
my practice now, I can’t tell you what percentage are e.max,<br />
but the vast majority of them are lithium disilicate. For me,<br />
it has really replaced porcelain fused to metal. I do lithium<br />
disilicate almost exclusively in the posterior now. For the<br />
anterior, it’s a place where I’m playing with it. I go to the<br />
research and I look up how important that extra strength<br />
is in the anterior. Really the science doesn’t support that<br />
it makes much difference around materials, and we went<br />
through that for years when we talked about the different<br />
kinds of ceramics in the anterior. Now if you want to talk<br />
about a patient who is a bruxer, who has edge-to-edge<br />
wear, I wouldn’t even think twice about it now. When<br />
people say, “I want to do beautiful anterior veneers and<br />
I’m concerned about strength,” e.max, or lithium disilicate,<br />
is definitely the material of choice. But in patients where<br />
that’s not a concern, I don’t have a strong preference.<br />
I’ll tell you how I do it: I actually talk with my technician.<br />
I send my technician all of the pre-op photographs for the<br />
case. I tell them what the pre-op shade is. I show them<br />
that this is what the patient wants. The patient wants this<br />
much of a shade change in the final restoration. They want<br />
Hollywood, where it’s monochromatic and it’s really high<br />
value, or they want totally natural. I give the technician all<br />
of those parameters, and then I say, “What do you think you<br />
can get me the best results with? What do you feel like you<br />
work with the best to get me those results?” At that point,<br />
it’s really an esthetics decision. I have preferences over what<br />
kind of composite I use for different esthetic situations, and<br />
I want them to know that I happen to like this color system<br />
or this staining system better, but because the ceramist is<br />
the person stacking the material and working with it, they<br />
get to choose.<br />
One of the technicians I work with all of the time is a<br />
huge fan of lithium disilicate, so I have had a chance to<br />
do a number of anterior cases, veneer cases, using lithium<br />
disilicate. What they have done with the esthetics is just<br />
dramatic in the last couple of years. With the esthetics of<br />
Ivoclar’s new Opal series, their ingots and their blocks, it’s<br />
going to get to a place here really, really quickly, where<br />
it’s going to be hard to differentiate, from an esthetic point<br />
of view, what material was used. In that case, sure, why<br />
wouldn’t we use the strongest thing we have out there?<br />
MD: If you look at the numbers of what we’re doing in the<br />
lab, probably the most shocking thing in the last two years<br />
has been how the PFM is literally disappearing. It’s gone from<br />
being about two-thirds of the crowns we made here five years<br />
48 www.chairsidemagazine.com
ago to less than a quarter of the crowns we make here today.<br />
You would almost think that a bunch of research came out<br />
saying PFMs are causing cancer or something because of the<br />
way dentists are turning and running from them. But, really,<br />
it’s these high-strength, cementable all-ceramics like IPS e.max,<br />
and a product that is a little less researched and a little uglier<br />
than IPS e.max, the full-contour zirconia material BruxZir ®<br />
Solid Zirconia — the one that we’re doing here at <strong>Glidewell</strong>.<br />
It’s amazing. We totally underestimated how much more the<br />
average American dentist was concerned about strength than<br />
they were about esthetics. So with what I’ve seen here in the<br />
laboratory, it has evolved to the point where I’m doing mainly<br />
BruxZir restorations in the posterior and the less esthetic<br />
areas, and mainly IPS e.max in the anteriors. I don’t do that<br />
many single-unit PFMs anymore. For me, the PFM has just<br />
really become a bridge material. Is that what you find for<br />
PFMs as well?<br />
LB: Exactly. I cannot think of the last single-unit PFM that<br />
I did. Actually, I can. I had a patient who had some of the<br />
worst discolored teeth — combinations of secondary dentin<br />
and old metal post/cores — and we just decided to go with<br />
PFMs with metal cutbacks to try to maximize the esthetics.<br />
But that was a very unique situation. Single-unit PFMs in<br />
the posterior? I can’t remember the last time I did one. And,<br />
yes, <strong>Glidewell</strong> is right on the cutting edge of developing<br />
those materials.<br />
I guess it doesn’t surprise me how it’s been adopted, simply<br />
because I think a lot of dentists, like me, have the experience<br />
of recommending a crown for a person and having them get<br />
this weird look on their face. If you actually stop and ask<br />
them about their reaction, they ask if the crown is going to<br />
have this “black line”? And they point someplace in their<br />
mouth to an old PFM that was done with a metal margin. It’s<br />
amazing to me how patients find that so offensive, where<br />
they can see that metal margin, way more so than having to<br />
have the exact shade of a posterior tooth match. It’s really<br />
rare for me with a patient, especially when you are doing<br />
single teeth, to have the patient say, “Oh no, I don’t want<br />
you to cement that one because it’s slightly darker than my<br />
tooth or slightly brighter than my tooth.” I actually show<br />
them. I will actually hand them a mirror and say, “I want<br />
you to look at the color before it’s fully cemented in.” And<br />
they usually look at me and say, “Why are you asking me<br />
this?” But that metal margin, they just hate. So my guess is<br />
that other folks’ experiences are similar. And then you know<br />
you have a material that’s strong, which has always been<br />
the PFM’s claim to fame. Why wouldn’t you use something<br />
that’s all-porcelain? You also have patients who say to you<br />
that they don’t want any metal in their mouth.<br />
MD: I’ve had a couple of patients over the years get really<br />
demonstrative about that, and they did happen to be women<br />
— probably because they pay more attention to themselves<br />
than men do! Once most men get married, we just give up<br />
and stop caring about how we look. But I had a woman get<br />
really upset because she could see a lingual metal margin on<br />
an upper second molar. I told her no one was ever going to see<br />
it, and she said, “You can see it if I’m lying on my back with<br />
my mouth open.” I had to ask her what she did for a living. I<br />
mean, how often does someone find themself in this situation?”<br />
I saw a patient who had a gold stud in her nose, but shuddered<br />
when I mentioned placing gold in her mouth on a lower second<br />
molar where I didn’t think I would be able to get enough<br />
occlusal reduction. So there is something weird. Gold is highly<br />
acceptable around your neck, hanging from your ears, stuck<br />
through your nostril, for some people, but you put it next to a<br />
tooth and it’s a cardinal sin.<br />
LB: I agree. I think that’s been a huge boon to it. I also think<br />
the other part of it is it allows us to be more conservative,<br />
if we don’t have to put all of the margins subgingival. And<br />
dentists love saving a half-millimeter or a millimeter. I think<br />
that’s one of the things I love about our profession, how<br />
concerned we are about preserving tooth structure.<br />
MD: Well, OK, I’ll give you that. I know that you’re conservative<br />
and you want to do that, but many of us under-reduce<br />
and when called out on it, we say we were trying to be<br />
conservative. If a dentist prescribes a PFM, for which our lab<br />
and the manufacturers of the materials have always asked<br />
for 2 millimeters of occlusal reduction, and they give us threequarters<br />
of a millimeter, I’m not going to say, “Oh, doctor,<br />
you’re so conservative.” If you’re that conservative, prescribe<br />
a cast gold crown because you’re under-preparing. It’s either<br />
laziness or not having a system to reduce enough. But I hear<br />
what you’re saying because one of the things about BruxZir,<br />
or any solid zirconia for that matter, is it can be made thinner<br />
than, for example, an IPS e.max crown, especially if it’s not on<br />
a posterior tooth. You can’t go below a half-millimeter with a<br />
contoured zirconia restoration on a posterior tooth, but on an<br />
anterior tooth, you can get away with a half-millimeter, maybe<br />
a little less.<br />
I’m going to start experimenting with minimally invasive<br />
crowns, where we remove the least amount of material possible<br />
and see what it looks like to put one of these super-thin, highstrength<br />
crowns on top of it. We’re not going to start selling<br />
those anytime soon, but we are going to start experimenting<br />
with those. It would allow us to be more conservative, like we’ve<br />
seen for veneers. When I went through LVI, we were not only<br />
prepping veneers into dentin, but prepping into deep dentin.<br />
Have you noticed over the years the change in the way that you<br />
prepare veneers, in terms of the depth?<br />
LB: Oh, absolutely. I am much more conservative now. I<br />
make decisions about the amount of tooth reduction based<br />
on things like how much I am going to change the shade of<br />
the tooth. I don’t want to tie my technician’s hands behind<br />
his back and say, “I’ve given you 0.3 millimeter of reduction,<br />
but can you take this from an A5 to an OM3 please?” Part of<br />
Interview with Dr. Lee Ann Brady49
that is we have to give the technician adequate reduction. I<br />
would tell you from the experience of teaching a lot of handson<br />
preparation courses — and I think every technician in<br />
every laboratory I’ve ever talked to agrees with this — that<br />
under-reducing is the classic problem in dentistry when we<br />
do indirect restorations. When I work with dentists on prep<br />
design, what I find is they mentally know how much tooth<br />
reduction they want to send the laboratory. Where it breaks<br />
down is they’re using their visual cues to try to assess how<br />
much they have, instead of actually using hard facts like<br />
depth-cutting diamonds to know how much they’re doing<br />
their depth cuts and reduction, and then going back and<br />
checking the amount of reduction.<br />
I do a thing in my prep course where<br />
I have everybody prep a tooth without<br />
measuring. I have them write down<br />
how much they want to prepare,<br />
then prep the tooth. Then I go back<br />
and show them how to measure, and<br />
everybody, across the board, underreduces.<br />
I do it! If I don’t measure,<br />
I always under-reduce.<br />
I do a thing in my prep course where I have everybody<br />
prep a tooth without measuring. I have them write down<br />
how much they want to prepare, then prep the tooth. Then<br />
I go back and show them how to measure, and everybody,<br />
across the board, under-reduces. I do it! If I don’t measure, I<br />
always under-reduce. Now, one of the things that’s happened<br />
after a couple of years of doing a prep design technique,<br />
where I have been very meticulous about measuring my<br />
reductions, is that now my eye is getting better because<br />
I’m sort of training it. But I still don’t trust it. So one of<br />
the classic things that I’ve gone back to, if I’m going to do<br />
occlusal reduction on a posterior tooth, is placing depth<br />
cuts. But you’ve got to know what you’re doing. Pull out<br />
an old 330 carbide bur. Everybody has one of those in the<br />
office somewhere. You don’t use them for anything because<br />
they’re too wimpy for most preparations anymore, but<br />
they’re exactly 1.5 millimeters from the tip of the bur to<br />
where the shank starts. Just drop a bunch of pinholes in an<br />
occlusal table. Go up on the cuspid. Go on the inclines. Go<br />
on the central groove. And then connect the dots.<br />
MD: Yeah, I had to do that when I started practicing in the<br />
lab and we started filming everything. I realized I had to start<br />
getting better in a hurry. I was a chronic under-prepper, too.<br />
I stumbled onto these depth-cutting burs, these self-limiting<br />
depth-cutting burs that come in different depths. There’s a<br />
1.5 and 2 millimeter. I was shocked when I put a 2 millimeter<br />
hole in the occlusal surface of a molar and then prepped until<br />
I thought I was done. I had half the hole left the very first time!<br />
And I thought, no wonder I was chronically under-preparing,<br />
because if you’re not used to seeing 2 millimeters, it looks like a<br />
really deep hole. It looks like an endo access.<br />
LB: It does!<br />
MD: But the weird thing is that dentists will never give us,<br />
as a laboratory, 2 millimeters of occlusal reduction because<br />
when you under-prep for so long, it feels like malpractice to<br />
do 2 millimeters of occlusal reduction. But, meanwhile, they’ll<br />
do 2 millimeters of occlusal reduction for a Class I amalgam<br />
or composite, or a Class II amalgam or composite all day<br />
long because every time you do a crown prep and make a<br />
50 www.chairsidemagazine.com
2 millimeter hole in a molar, it goes all the way down to the<br />
base of the amalgam. So, for some reason, dentists don’t have a<br />
problem prepping 2 millimeters into the tooth if it’s for a direct<br />
restoration, but when it comes to an indirect restoration, all<br />
of sudden, 2 millimeters seems like it’s over the top. I’ve never<br />
quite figured out where that disconnect comes from.<br />
LB: I actually don’t know. I haven’t thought about that.<br />
But, you’re right, that’s my experience of it, as well. I don’t<br />
know, maybe it looks more aggressive when the cusps are<br />
gone, but with a Class I or Class II direct restoration, it<br />
looks like there’s tooth there. I’m old enough that, when I<br />
first learned how to do crown preps, we actually depended<br />
on retention form and resistance form to keep them in.<br />
So my brain is going, “How much wall height do I go?”<br />
Nowadays, we bond everything, so that’s really almost<br />
become a non-conversation.<br />
I know that when I really started paying attention to this,<br />
one of my least favorite words ever in dental school was<br />
“armamentarium.” If someone says that to me again, I’m<br />
going to lose it. Every day in the clinic you’d go to get ready<br />
and they would say, “Tell me about your armamentarium.”<br />
Oh man! Now I teach that to dentists and I use that word<br />
because, especially when it comes to preps and indirect<br />
preps, you’ve got to know what you’re putting in that<br />
handpiece. Tell me the diameter of that bur. Tell me the<br />
length of that bur. Tell me what the tip looks like. Are you<br />
trying to cut a chamfer or a shoulder? Well you need to put<br />
the right bur in the handpiece to do that, or you’re going<br />
to frustrate yourself and your lab is going to wonder what<br />
they’re supposed to do with it.<br />
MD: Exactly, and so my prep technique — I just had to come<br />
up with it for myself because I couldn’t prep well without it —<br />
is really intellectually insulting, in a sense. I’m a professional,<br />
and my whole prep technique is a 2 millimeter hole on the<br />
top and a 1.5 millimeter one on the axial and a 1 millimeter<br />
round bur cut on the gingival. At times I think, “I should be<br />
better than this.” I graduated the same year you did. I should be<br />
able to prep this tooth and get it right without any depth cuts.<br />
But, you know what, it’s not a big deal. Pilots have a checklist<br />
before they take off in a plane for the 2,000th time. To me, it’s<br />
just an easier way to do it than to prep it and then go in with<br />
bite registration after the fact, or wax and calipers, and try to<br />
measure how much you took off. Just put some holes there and<br />
prep until you can’t see the holes.<br />
LB: That’s exactly how I do it. The other thing I would<br />
say on that is, I think it’s actually more efficient. When I<br />
watch dentists prep, it seems less efficient when they’re<br />
taking the same burs in and out of the handpiece multiple<br />
times, versus using this one first until they’re done, this<br />
one second until they’re done. I find that by having those<br />
marks on the tooth, I can cut a tooth way faster and more<br />
efficiently than I ever did before, and it’s more effective! So I<br />
don’t get those phone calls from the laboratory. We love you<br />
guys and all, but I have to tell you that when my assistant<br />
tells me the lab is on the phone during the day in the office,<br />
I’m thinking: “Oh really? What did I screw up?” (laughs)<br />
MD: Exactly. Once you have the depth cuts in, it’s just a race<br />
to see how quickly you can get the rest of the tooth structure<br />
off because you know exactly where you’re going. And, by the<br />
way, I hate the word “armamentarium,” too. I want to back<br />
you up on that. It’s my second least favorite word. My least<br />
favorite word in dentistry is “dentifrice.” Why are we calling it<br />
dentifrice? I hate when we try to sound like we know more than<br />
the patient does. “I’m going to suggest a dentifrice for you that<br />
I think is going to help with your abrasion problem.”<br />
One of the things I teach at my courses, which I’ve learned from<br />
being here in the laboratory, is there doesn’t seem to be any<br />
easier or quicker thing you can do to get better results from<br />
your laboratory when it comes to esthetic dentistry than digital<br />
photography. I just notice here when I watch the technicians<br />
work that they try harder when there is a digital photograph in<br />
front of them because now they see what they’re aiming at. We<br />
are here in California, but we have dentists that prep crowns on<br />
tooth #8 and #9 in New Jersey, and they’ll send us the impression<br />
to make crowns on #8 and #9 using IPS e.max, shade A2, and<br />
there’s no photograph that goes with it. We can match the shape<br />
of the laterals next to it on the model, but there’s nothing about<br />
what the teeth look like, what the lateral incisors look like. It<br />
seems like a tall order for the technicians, and they have to<br />
think: “You’ve got to be kidding me. You want me to make<br />
crowns and match these teeth based on a yellow stone model?”<br />
I see what happens when we give them digital photographs.<br />
Then they know it’s a dentist who cares, who has a little bit<br />
higher standards. Even if they weren’t great photographs, I<br />
think digital photography is a great way to ensure that you<br />
get the highest-quality esthetic dentistry your lab is capable of.<br />
I know you teach courses on digital photography, and I just<br />
want to get your take on that.<br />
LB: I couldn’t agree more. I couldn’t practice without<br />
photography. Let’s go back one step even before laboratory<br />
work. I would tell you that taking photographs in my<br />
practice is the thing that transformed my case acceptance,<br />
even if it’s just four simple photographs. You just want to<br />
take an upper and lower occlusal, a smile and a retracted<br />
with the front teeth in it. Now you and the patient can sit<br />
and look at the same thing. We don’t think about the fact<br />
that our patients don’t know what their teeth look like.<br />
They don’t know what their mouth looks like.<br />
MD: Did you use an intraoral camera at any point, or have<br />
you always done it with digital photography?<br />
LB: Yes, I used to use an intraoral camera myself. I actually<br />
still have an intraoral camera and both of my hygiene<br />
operators have them. To show a patient a single tooth, such<br />
as a recall patient where everything is healthy, but there<br />
Interview with Dr. Lee Ann Brady51
is one little spot where there’s a little recurrent decay or a<br />
little recession, I think an intraoral camera is great for that.<br />
I always use my digital camera, mostly for new patients. I<br />
want them to see their whole mouth. I want to be able to<br />
talk to them about that ugly, old black filling on their lower<br />
first molar, and have them be able to see, without me saying<br />
it, that there are four more on their lower teeth, because<br />
they are all in the photograph.<br />
MD: I take it you’re not just showing them this on the little LCD<br />
screen on the back of a camera after you shoot these four shots.<br />
LB: No. Our protocol is I take the four photographs: upper<br />
and lower occlusal, full smile, and then with retractors<br />
in and the patient’s upper and lower teeth apart so both<br />
occlusal planes are visible. Then we take the card out of the<br />
camera, throw it into a card reader that’s connected to a PC<br />
in my office, Microsoft Photo Viewer comes up, which is<br />
preprogrammed on every Windows PC in the world, and it<br />
lets us print those four pictures on a single sheet of paper.<br />
I actually do it on plain paper; I don’t buy photo paper. I’ll<br />
print them and take them to the patient. My conversation<br />
with patients will be, “We’ve got these in your chart as a<br />
part of your permanent record, but I thought you might<br />
want a copy of these,” and I’ll hand them to the patient.<br />
Most patients will then look at them. As soon as they do, my<br />
next comment is: “Do you see anything in the photographs<br />
of your teeth that you’re curious about or that you have a<br />
question about? Let’s really make sure we talk about that,”<br />
and I’ll hand them a pen.<br />
MD: Wow. See, I hand it to them and say things like, “I bet you<br />
didn’t know your smile was so ugly!” That’s too strong maybe.<br />
LB: (laughs) That might be less effective. So I can’t imagine<br />
practicing without photography. For me, when I’m sending<br />
stuff to the laboratory, I actually need to go overboard and<br />
send too many photographs. This has made such a big<br />
difference for me as far as what I get back in shade matching.<br />
People say to me all the time, people who are techie, “But<br />
it’s not all color corrected,” and I say that’s almost not the<br />
point. The point is that the technician can actually see,<br />
relative to the other teeth, what that looks like. They can<br />
see nuances from the standpoint of chromo-gradient and if<br />
there are little decalcification spots. My experience is that<br />
every technician I’ve ever met sees 100 times more in a<br />
photograph of teeth than I do as a dentist because they<br />
have that eye.<br />
MD: Exactly. Technicians love to have, not only the picture of<br />
the teeth, but let’s say an A2 in there next to the adjacent tooth.<br />
It doesn’t need to be a perfect match. They just need to see how<br />
it looks relative to the A2 shade tab because they’ve got that<br />
same shade tab in the lab and they can use that as a reference.<br />
Are you taking all of those pictures, or is your staff able to take<br />
those four pictures if you’re off doing something else?<br />
LB: My assistants are all trained to use the camera and take<br />
digital photography. I’d say that a few of them are better<br />
photographers than I am. So we can switch in and out to do<br />
that. If I’m doing a single central and it’s really challenging<br />
because it’s a high-esthetic-demand patient, I’ll probably go<br />
in and do the photographs, because then I can get analretentive<br />
and do stuff like exposure bracketing, give the<br />
ceramist one that’s a little dark and one that’s a little light.<br />
But that’s not my routine. My routine is usually two to four<br />
photographs with the shade tab in there, without the shade<br />
tab in there, and the ladies in my office all do that very well.<br />
MD: I bring that up mainly because I want dentists to<br />
understand that this isn’t something they have to do themselves.<br />
In fact, my assistant is as good as I am at this point, and she<br />
complains less. If I have to take those four photographs, and<br />
she’s not in there to help me, I’m pissed! But somehow she does<br />
all four without me anywhere near her, so in that respect I<br />
guess she does it better than I do. But I don’t want the doctors<br />
to feel like this is something else that’s thrown on their plate.<br />
This isn’t. You could just walk into the operatory and have the<br />
patient already be holding the sheet with the four pictures on it,<br />
and you could just sit next to them, say hi, ask them what they<br />
think, and let them tell you.<br />
LB: Exactly. I’m a huge fan of photography, and it’s so<br />
much easier than it used to be. Most of the cameras we<br />
use in dentistry now are basically the same camera bodies<br />
that you can buy anywhere, so you can learn to use them.<br />
<strong>Dental</strong> photography companies have training sessions,<br />
there’s online stuff, there’s stuff on YouTube. There are so<br />
many resources now to get over the initial learning curve,<br />
and most of the new cameras can be set on automatic.<br />
MD: Exactly. I understand why dentists were turned off from<br />
it in the past. I remember you would shoot Kodachrome<br />
or Ektachrome, and you would have to send it out for E-6<br />
processing and you’d get it back a week later. Before you could<br />
even prep the case, you had to make sure the “before” pictures<br />
turned out. That was crazy. But it’s instantaneous feedback<br />
now and, literally, any dental assistant can be taught to do it<br />
now. There are plenty of good classes like yours, and there are<br />
tutorials on YouTube. For all we know, we’re two years away<br />
from taking these pictures with our iPhone and then sending<br />
them to the laboratory.<br />
LB: Exactly.<br />
MD: As you do a lot of stuff with adhesive dentistry, I want<br />
to talk to you about self-etching adhesives. One of the things I<br />
noticed after I came out of LVI and started doing a lot of deep<br />
veneer preps using the total-etch technique was that I had more<br />
postoperative sensitivity than I cared to see. It always bothered<br />
me when a patient came in, completely asymptomatic, and we<br />
did 10 veneers on them, and now he had two teeth that were<br />
pretty hot for a few months and maybe one of them needed<br />
endo. That was always one of the things that disappointed<br />
52 www.chairsidemagazine.com
me. I can’t blame the technique or the materials or myself. It<br />
was some combination of all three — I’m willing the take the<br />
blame. But when self-etching materials came out, it seemed like,<br />
by lowering the postoperative sensitivity potential, that it was<br />
going to be a step in the right direction, even if we didn’t have<br />
the same high bond strengths. I interviewed Dr. Jose-Luis Ruiz a<br />
few months ago, and he has gone fully self-etch for everything.<br />
He does not use total-etch anymore. So that’s one far end of<br />
the spectrum. I think over at the other far end of the spectrum<br />
are the dentists who just love total-etch and still use it all the<br />
time. Maybe they will use self-etch under a direct composite,<br />
or something like that. What has your experience been with<br />
self-etch adhesives, and where do you find yourself using<br />
them most?<br />
LB: I’m probably one of the folks in the middle. I was, for<br />
years, a total-etch fourth generation. I used to teach it as<br />
the gold standard. Technically, if you just want to look at<br />
brass tacks research numbers for bond strength, it’s still the<br />
gold standard. The challenge, for most people, is that it’s<br />
so technique sensitive that whether you talk about post-op<br />
sensitivity from the etching technique or marginal integrity<br />
because of the film thickness those generations of dentists<br />
use, the average general practitioner runs into trouble.<br />
So now we have three other generations of self-etching<br />
products and new total-etch products.<br />
What I use right now is what we call a “selective etching<br />
technique.” I actually use phosphoric acid and I etch only<br />
the enamel, and then I let it go for 25 seconds and I rinse it<br />
off and dry it. What do I avoid with that technique? I’m not<br />
worried about over-etching, which is having the phosphoric<br />
acid against the dentin for more than 15 seconds, or overdrying<br />
the dentin; these are the two big reasons why<br />
dentists have post-op sensitivity with phosphoric acid. Then<br />
I switch to a self-etching dentin adhesive. I apply it over<br />
all of the dentin surfaces — if I get it on the enamel, it’s<br />
not going to hurt anybody, and I use a self-etcher to do the<br />
dentin. Actually, I was recently reading up on some new<br />
research, and what folks are finding in the newer research<br />
with the newer generation of self-etchers, is that it actually<br />
gets higher bond strength than the old, fourth generation<br />
total-etch technique.<br />
I can’t imagine practicing without<br />
photography. For me, when I’m sending<br />
stuff to the laboratory, I actually need<br />
to go overboard and send too many<br />
photographs. This has made such a<br />
big difference for me as far as what<br />
I get back in shade matching.<br />
MD: Wow. Isn’t it ironic? When we graduated in 1988, I<br />
remember Ultradent, in addition to the etch they made, also<br />
made something to put on the dentin to identify it so we didn’t<br />
accidentally etch it. So now you’re talking about a technique<br />
that’s a great middle ground, with the ability to etch the enamel<br />
like that with selective etching, and then go in and do a selfetch<br />
on the dentin. It’s kind of the best of both worlds and really<br />
represents a step forward in terms of common sense for what<br />
we’ve been doing in adhesive dentistry.<br />
LB: I think so, too. It takes the stress off of worrying about<br />
the phosphoric acid, but it also takes the stress off of<br />
Interview with Dr. Lee Ann Brady53
worrying that self-etchers don’t have the same bond strength<br />
to enamel. So you are getting the best of both worlds. It’s<br />
a technique I’ve been using now for almost a year, and it’s<br />
working really, really well. The other thing I like about it is<br />
I can do it for both direct and indirect. I can use the same<br />
technique, and that makes it easy as well. I’m fond of my<br />
new technique.<br />
MD: So tell me what you’re going to do on a deep, Class I<br />
posterior composite, something simple like that.<br />
LB: How deep? Am I worried about the pulp? Am I thinking<br />
pulp cap?<br />
MD: No. You’ve got 1.5 millimeters of remaining dentin. I just<br />
mean something that’s primarily bonding to dentin with an<br />
enamel rim around it. Are you doing your selective etching on<br />
those direct composites as well?<br />
Whether it’s a Class I, Class II or<br />
Class III composite, even a metal<br />
Class V composite, I do selective<br />
etching. I put phosphoric acid just on<br />
the enamel. One of the things about<br />
that is you have to play with your<br />
etchings because you want one that<br />
is very viscous. It can’t be runny, or it<br />
runs everywhere.<br />
LB: I am. I’m doing my selective etching on those. I have<br />
been doing adhesive dentistry for a lot of years, and I really<br />
don’t have a lot of reason in my practice to not trust dentin<br />
bonding. Even with that, I like preparations that have enamel<br />
margins, and I want to make sure I have a great bond to<br />
that enamel. So even with something like that, whether it’s a<br />
Class I, Class II or Class III composite, even a metal Class V<br />
composite, I do selective etching. I put phosphoric acid just<br />
on the enamel. One of the things about that is you have<br />
to play with your etchings because you want one that is<br />
very viscous. It can’t be runny, or it runs everywhere. I’m<br />
actually using the new Select HV Etch from Bisco, and I<br />
use it for that reason, because it’s very thick. But the other<br />
reason I love it is the tip on there is teeny-tiny, so you can<br />
get literally a band of phosphoric acid that’s no more than<br />
a millimeter wide.<br />
MD: Are you placing any kind of flowable in there as the base<br />
of that restoration?<br />
LB: You know, I’m not. The only place I use flowable in my<br />
direct composites is on Class II and Class III, and I just run<br />
a little bead of it at the marginal interface on the box. I only<br />
do that because we still know that there are issues with<br />
adequate condensation right down into the corners of those<br />
proximal boxes. I’m not using it as a liner.<br />
MD: Are you finding much use for self-etching resin cements?<br />
Walk me through what you might use for a PFM bridge; for an<br />
IPS e.max crown; and for a bonded, single-tooth restoration,<br />
an all-ceramic in the anterior. I’m curious to see if you’re<br />
finding much use for the self-etching resin cements.<br />
LB: I do use the self-etching, self-priming resin cement<br />
family. I use them when I want to cement; when I have a<br />
prep that has retention form and resistance form, so I’m<br />
not worried about the bonding being my retention, and I<br />
want something translucent. If I’m doing a PFM and I’ve got<br />
54 www.chairsidemagazine.com
subgingival margins, I don’t need something translucent.<br />
I’ll probably go with a resin-modified glass ionomer. If I’m<br />
doing that PFM and I’ve got supragingival margins because<br />
I did a 360 porcelain butt joint, I’ll use a self-etching, selfpriming<br />
resin cement because I don’t want the white at the<br />
margins; I want the translucency of those resin cements.<br />
If I’m doing full-coverage or I’m doing BruxZir or I’m<br />
doing lithium disilicate, but my prep is such that I’ve got<br />
great retention form and great resistance form, I’ll use a<br />
self-etching, self-priming resin cement. Or, I might actually<br />
even bond and go to a true dual-cure resin cement, and that<br />
would more depend on isolation than it would the material.<br />
So if I’m going to have problems isolating and I need to get<br />
in and out quick and I want a true cement, I’m using a selfetching,<br />
self-priming. If I have great isolation and I really<br />
want to bond this, I’m going to go to something dual-cure<br />
in the posterior. In the anterior, I just use regular light-cure<br />
veneer cement.<br />
MD: Our dentists love brand names. Give me some examples of<br />
your favorite resin-modified glass ionomers.<br />
LB: Right now, my favorite resin-modified glass ionomer<br />
is RelyX Luting Plus (3M ESPE ), and I’ve actually been<br />
using that for years. I used that when it was Vitremer<br />
Luting Cement. They’ve just changed the name a few times<br />
over the years. So I am still using that. As far as my dualcure<br />
resin cement, right now I’m using NX3 Nexus ® Third<br />
Generation from Kerr, and I use that because one of the<br />
things you run into with dual-cure resin cements is you<br />
need to think about your dentin adhesive and make sure<br />
it’s compatible. Kerr’s new self-etching OptiBond XTR<br />
actually is cured by their NX3, so it turns it into a dual-cure<br />
dentin adhesive. I am a little old-fashioned because I still<br />
don’t cure dentin adhesives prior to indirect placement.<br />
MD: Oh, look at you. You’re bucking the trend! You are going<br />
old school. It makes sense, as long as you’re confident in your<br />
ability to cure that. I think that’s a good idea.<br />
LB: Exactly. So I’ll use the OptiBond XTR with the NX3.<br />
I also use Multilink ® Automix from Ivoclar. I use them<br />
interchangeably. When do I choose one versus the other?<br />
Part of it, for me, probably has to do with working time.<br />
If I’ve got a patient that’s really great, and I’m not worried<br />
about getting in and out, I’ll probably using NX3. Multilink,<br />
for me, sets so much faster. If I do need to get in and out<br />
and get it cured because I’m worried about patient isolation<br />
or something like that, I’ll go to Multilink.<br />
MD: I think that makes sense.<br />
LB: For anteriors, Variolink ® Veneer (Ivoclar Vivadent) is<br />
my preferred veneer cement. I also do keep RelyX Veneer<br />
Cement (3M ESPE ) in the office. The reason I keep the<br />
RelyX is because it’s more viscous. So if I think I need<br />
something to fill a bigger gap underneath, then I’ll use the<br />
RelyX. Especially with a 0.3 or 0.5 millimeter veneer, I like<br />
that the Variolink isn’t viscous; it doesn’t feel like you’re<br />
going to crack something when you seat it.<br />
MD: Exactly. I know doctors who actually use Herculite ®<br />
(Kerr) to seat veneers. And you know they’re prepping at least<br />
a millimeter to be able to push a veneer down and not have<br />
it crack with an actual composite resin underneath it, versus<br />
cement. So as I have gotten more conservative and our veneers<br />
have gotten thinner and thinner, I have gone to something<br />
that’s a little less viscous, where you feel like you can get it<br />
completely seated, move it around and really get it settled<br />
without feeling like you’re going to crack the veneer down the<br />
middle. That would obviously be a mess.<br />
Well, Lee Ann, I want to thank you so much for your time today.<br />
It’s been a fascinating look at how you got to where you are,<br />
and what you’re currently doing in your practice. I like that it<br />
all has a common sense ring to it. Even though you spent all<br />
the time that you have at these institutions of higher learning,<br />
it sounds like you still have that connection to what most of us<br />
are going through on a daily basis as we treat these patients. It<br />
doesn’t sound like you’re telling us to go in and do full-mouth<br />
equilibration on every patient who walks in the door, even if<br />
they are just there for a Class I composite.<br />
LB: No, I don’t do that. (laughs)<br />
MD: I like that. That’s what I like about you, that your approach<br />
is more common sense. That’s what really resonates with<br />
dentists. They need something that’s going to work for them in<br />
their practices and in the outside world, where they can still<br />
make a good living. But, like you said, they need to be able to be<br />
focused on not stepping into those huge potholes, where you’re<br />
prepping those lower second molars and things like that. That’s<br />
why I think your courses are so good, because they’re going to<br />
help dentists avoid those nightmare cases, the ones you never<br />
forget and make it hard to sleep at night.<br />
I’m going to recommend that our readers go to your website<br />
and see where you’re going to be next. If they can’t get out to<br />
one of your lectures, I hope they will look you up and find one<br />
of your webinars, so they can connect with you that way.<br />
<strong>Chairside</strong> readers: Please read Lee’s blog. It’s a fantastic blog; I<br />
read it all the time. She’s very dedicated to making sure she puts<br />
something up on a regular basis. In fact, I’m kind of jealous<br />
and wish I had the drive to be able to update something as often<br />
as she does.<br />
I appreciate what you do for our profession, Lee, and I<br />
appreciate you spending an hour with us. Thanks so much.<br />
LB: My pleasure. It’s always fun to talk with you. CM<br />
Dr. Lee Ann Brady is a privately practicing general dentist in Glendale, Ariz., and a<br />
nationally recognized educator and writer. Contact her at www.leeannbrady.com or<br />
lee@leeannbrady.com.<br />
Interview with Dr. Lee Ann Brady55
– ARTICLE and CLINICAL PHOTOS by Carlos A. Boudet, DDS, DICOI<br />
After many years of sharing information with colleagues, I have noticed that<br />
the majority of dentists do not take the time to document their work — even<br />
the interesting cases — with photographic records. In today’s economic and<br />
business environment, it has become increasingly necessary to adequately<br />
promote your practice, and I consider taking photographs to be a very important<br />
part of that.<br />
With this article, I would like to introduce a simple, but effective way of<br />
documenting your cases with dental photography. Following these guidelines<br />
will help your practice in many ways.<br />
An Introduction to <strong>Dental</strong> Photography57
Photo Documentation<br />
<strong>Dental</strong> photography has two parts: intraoral and extraoral<br />
photography. Here are some basic tools you will need:<br />
1. A camera that allows you to take both full-face and profile<br />
pictures, as well as intraoral close-up shots.<br />
2. Two sets of intraoral photographic mirrors and two sets<br />
of retractors. There should be one occlusal mirror and<br />
one lateral mirror in each set.<br />
I have adopted a simple series of standard dental photographs<br />
to document my cases. I take one set of preoperative<br />
pictures, and I take another postoperative set to document<br />
the final results. Simple before-and-after pictures of your<br />
work can help patients visualize and accept the work they<br />
need done (Figs. 1, 2). If I think I might make a presentation<br />
of the case, I take additional photos of the procedural steps.<br />
1<br />
Figure 1: Documenting treatments with high-quality “before” images<br />
is important.<br />
Standard Photos<br />
The required views for clinical case submission to the<br />
American Academy of Cosmetic Dentistry are 12 preoperative<br />
views and 12 postoperative views. My standard set of<br />
photographs consists of the following:<br />
1. Three extraoral photos: Two frontal views of the face<br />
(one in repose and one smiling) and one profile shot<br />
2. Five intraoral photos: Five retracted views, including<br />
an anterior view, a right view and a left view, and two<br />
mirror occlusal shots (one of the mandible and one of<br />
the maxilla)<br />
3. For cosmetic cases, an anterior retracted view with the<br />
teeth apart is very helpful. This makes for six intraoral<br />
photos instead of five.<br />
2<br />
Figure 2: This “after” photograph shows just how well the case was<br />
completed.<br />
Camera Choices<br />
Now let’s talk about cameras. Undoubtedly, the best camera<br />
system is an SLR digital camera like a Canon T3i or a Nikon<br />
D90, with a dedicated 100 mm macro lens and a ring flash.<br />
In this basic tutorial, however, we use a point-and-shoot<br />
camera. It’s simpler to use because there are no settings to<br />
change and focusing is automatic. This simple system was<br />
chosen because of the different levels of expertise exhibited<br />
by the dentists attending our courses, as well as the need<br />
for a camera that could take the use and abuse.<br />
We chose the Pentax Optio W90 for its simple-to-use<br />
instructions, as well as for its shockproof and waterproof<br />
characteristics. This 12-megapixel camera allows you to<br />
take great face shots and intraoral views without changing<br />
settings on the camera.<br />
3<br />
Figure 3: With the chair completely horizontal, you can take the<br />
maxillary and mandibular occlusal mirror views.<br />
58 www.chairsidemagazine.com
Patient Positioning<br />
You can take the necessary pictures with the chair in two<br />
positions: completely horizontal and at 45 degrees from<br />
horizontal (Figs. 3, 4). With the chair at an inclination of<br />
about 45 degrees, you can take the anterior, right and left<br />
retracted views, as well as the three headshots. For nicer<br />
looking pictures, you can take the three headshots with the<br />
patient standing in front of a contrasting background.<br />
Tips for Better Photos<br />
• Standardize the photographs by taking them at the same<br />
distance from the subject every time. That way, it will be<br />
easier to compare “before” and “after” shots.<br />
• Do not change the “P” or program mode in the Pentax<br />
Optio W90. This will standardize your exposure settings<br />
because the camera’s default setting will adjust the focus<br />
and the exposure for you automatically, and the lighting<br />
should not change in the operatory.<br />
4<br />
Figure 4: With the chair inclined at about 45 degrees, you can<br />
take the anterior, right and left retracted views, as well as the three<br />
headshots.<br />
• Proper positioning of the camera avoids the errors associated<br />
with canting and taking the shots at angles that are<br />
“too high” or “too low.”<br />
• Reposition the patient’s head slightly instead of leaning<br />
over the patient.<br />
• For better headshot photographs, use a background. Do<br />
not place the patient too close to the background as this<br />
can create shadows.<br />
• Try to take the occlusal views looking down the incisal<br />
edges of the anteriors.<br />
5a 5b 5c<br />
Figures 5a–5c: The three headshots (full-face resting, profile and<br />
full-face smiling)<br />
• Use the interpupillary line and the vertical midline to<br />
orient the camera.<br />
• Finally, try to remove anything that would make the<br />
picture look bad, such as excess saliva, blood and food.<br />
The full-face shots should be at about a 1:10 magnification,<br />
while all the other frontal, lateral and occlusal retracted<br />
views should be at a 1:2 magnification. When you are taking<br />
headshots with the Optio W90 camera, be sure to place<br />
the camera about five feet from the patient’s face and zoom<br />
in or out to frame the patient’s head on the screen. For<br />
the intraoral shots, the retracted frontal and lateral views<br />
should be taken about one foot away from the patient’s<br />
face at maximum optical zoom, and about two feet away for<br />
the occlusals.<br />
Figures 5a–9b illustrate the series of standard photographs<br />
previously described:<br />
6a<br />
6b<br />
Figures 6a, 6b: The two occlusal shots of the maxilla and the<br />
mandible<br />
An Introduction to <strong>Dental</strong> Photography59
Photo Editing<br />
A photo editing program is a very useful tool when working<br />
with digital pictures. There are a lot of good ones on the<br />
market, from free applications such as GIMP, Picasa and<br />
Photoscape, to those geared toward the professional such<br />
as Adobe Photoshop. Other programs include Adobe<br />
Photoshop Lightroom, Adobe Photoshop Elements, Corel<br />
PaintShop Pro and ArcSoft PhotoStudio.<br />
7a<br />
These programs will let you tweak your photos by cropping,<br />
rotating and adjusting exposure so they look great,<br />
even if you are not the greatest photographer. As a final<br />
note, make sure that your patients sign a simple photography<br />
release form that gives you permission to show their<br />
pictures.<br />
This brief tutorial was written in the hope that it will<br />
encourage more dentists to document their cases with<br />
photography. This will increase your cosmetic and implant<br />
case acceptance, and lead to patients inquiring about having<br />
you do their dental work. It will also benefit your marketing<br />
efforts, while making you a more humble and better dentist<br />
in the process. CM<br />
7b<br />
Figures 7a, 7b: The right and left lateral retracted views<br />
Dr. Carlos Boudet is in private practice in West Palm Beach, Fla. Contact him at<br />
www.boudetdds.com or 561-968-6022.<br />
General References<br />
• Goldstein MB. Digital photography update: 2011. Dent Today. 2011 May;<br />
138-142.<br />
• American Academy of Cosmetic Dentistry. Photographic documentation and<br />
evaluation in cosmetic dentistry: a guide to accreditation photography.<br />
• Maher R. Practical dental photography & high tech case presentation. 2005.<br />
8<br />
Figure 8: The anterior view<br />
• Soileau T. <strong>Dental</strong> digital photography columns. Dent Econ.<br />
• Terry DA, Snow SR, McLaren EA. Contemporary dental photography: selection<br />
and application. Compend Contin Educ Dent. 2008 Oct;29(8).<br />
• Bengel W. Mastering digital dental photography. 1st ed. Quintessence. Berlin,<br />
Germany. 2006.<br />
9a<br />
9b<br />
Figures 9a, 9b: The 1:1 views are reserved for case documentation,<br />
such as when you want to show one to three teeth in the picture, as<br />
in a step-by-step documentation of a case.<br />
60 www.chairsidemagazine.com
BIOLOGIC SHAPING<br />
An Alternative to Extracting a<br />
Tooth with a Severe Fracture<br />
– ARTICLE and CLINICAL PHOTOS by<br />
Daniel J. Melker, DDS<br />
When a cusp of a tooth is fractured subgingivally<br />
approximating the bone, extraction is a commonly<br />
considered treatment, due to concern about the significant<br />
bone removal required by other procedures to create<br />
space for the biologic width. That being said, addressing<br />
this primary concern of removing bone to create space for<br />
the biologic width presents the alternative procedure of<br />
biologic shaping.<br />
The premise for traditional crown lengthening to preserve<br />
a fractured tooth is that the surgeon must remove enough<br />
bone, starting from the most apical portion of the fracture,<br />
to create space for the biologic width. This method can<br />
result in a significant loss of bone, tooth mobility and, if<br />
the fracture is located near the furcation, a compromised<br />
furcation area.<br />
Biologic shaping offers an alternative to conventional crown<br />
lengthening through removal of the fractured portion of the<br />
tooth, allowing for a new biologic width to reform without<br />
significant removal of bone. The case presented here<br />
illustrates this technique.<br />
62 www.chairsidemagazine.com
CASE EXAMPLE<br />
Figure 1: Provisional crown placed after the buccal cusps of tooth<br />
#30 fractured approximating the bone<br />
Figure 2: Removal of provisional crown to access the fractured tooth<br />
surface<br />
Figure 3: Reflected tissue verifying location of fracture into the<br />
furcation and approximating the bone<br />
Figure 4: Removal of fractured tooth surface using a coarse<br />
diamond bur<br />
Biologic Shaping: An Alternative to Extracting a Tooth with a Severe Fracture63
Figure 5: Smoothing the tooth’s surface using a superfine diamond<br />
bur (40 microns) to completely remove the old fractured portion of<br />
the tooth surface<br />
Figure 6: Smoothing the root surface creates a parabolic architecture<br />
to mimic the soft tissue contours, allowing for a new biologic width to<br />
reestablish without having to significantly alter the bone.<br />
CONCLUSION<br />
When performing traditional crown lengthening for a<br />
fractured tooth, the potential need to remove excessive bone<br />
to create space for the biologic width is cause for concern.<br />
Conventional thinking is to locate the apical location of<br />
the fracture and start removing bone from that point. With<br />
biologic shaping, however, the fractured portion of the<br />
tooth is removed first to preserve as much bone as possible.<br />
This conservative procedure can avoid excessive removal<br />
of bone and help preserve bone in the furcation area,<br />
leading to long-term stability and a successful restorative<br />
outcome. CM<br />
Figure 7: After 12 weeks of healing and the establishment of the<br />
biologic width, a new crown was placed just coronal to the gingival<br />
collar. Notice that the location of the new margin is in perfect harmony<br />
with the adjacent teeth.<br />
Dr. Daniel Melker is in private practice in Clearwater, Fla., and lectures nationwide<br />
on periodontics. Contact him at 727-725-0100.<br />
64 www.chairsidemagazine.com
Figures in Dentistry Spotlight:<br />
• Doc Holliday •<br />
– ARTICLE by Michael C. DiTolla, DDS, FAGD<br />
and Megan Strong<br />
onsidering the incredible<br />
fear surrounding<br />
extractions, root canals<br />
and dental work in general,<br />
being known as “history’s most<br />
fearsome dentist” wouldn’t exactly<br />
bode well for one’s private practice. You<br />
get the feeling that his reviews on Yelp<br />
would have been less than stellar, and that<br />
word-of-mouth referrals would be few and far<br />
between. As a dentist in a time when any dental<br />
procedure seemed like something out of a nightmare,<br />
Dr. John Henry “Doc” Holliday was a man unafraid of<br />
blood, guts and violence. Doc spent his short but historically<br />
eventful life roaming the dusty trail in search of<br />
danger, fortune and caries.<br />
Born in Georgia to a wealthy family, Doc came into this<br />
world on Aug. 14, 1851. After losing both his mother and<br />
adopted brother to tuberculosis,<br />
Doc went on to attend the<br />
Pennsylvania College of <strong>Dental</strong><br />
Surgery, which his cousin, Robert<br />
Holliday, founded. He graduated in 1872<br />
with a thesis titled “Diseases of the Teeth.”<br />
The next time you feel like complaining about<br />
how difficult state boards were, consider yourself<br />
lucky that you didn’t have to write a thesis. Or even<br />
read a thesis, for that matter.<br />
Shortly after graduating with a dental degree, Doc began<br />
work as a dentist in the office of Dr. Arthur C. Ford in<br />
Atlanta, Ga. It wasn’t long after starting his practice that<br />
he came down with tuberculosis, the same disease that<br />
claimed his mother and brother. Thinking the drier climate<br />
of the Wild, Wild West would be better for his health, he<br />
headed to the other side of the country.<br />
Figures in Dentistry Spotlight65
Doc moved to Dallas, Texas, and quickly picked up his<br />
instruments again as he started work with Dr. John A.<br />
Seeger. However, his dental career came to a screeching<br />
halt as the coughing spells from his disease began to scare<br />
patients away. Even though universal precautions wouldn’t<br />
be adopted for another 100 years or so, these patients had<br />
the good sense not to let someone with active tuberculosis<br />
cough into their open mouth. Doc Holliday was forced to<br />
find another way to earn a living.<br />
Naturally, he did what any dentist would do and turned<br />
to a career in gambling. An intelligent man, Doc was a<br />
successful gambler. Doc was made miserable, however, by<br />
the knowledge of his impending death. Moody, a heavy<br />
drinker and with no fear of death, he perhaps was more<br />
prone to the life he came to lead.<br />
Knowing he had to protect himself, given his dangerous<br />
occupation and his disease-weakened body, he began to<br />
train with a six-shooter. He quickly gained a reputation as<br />
word of this nearly 6-foot-tall, gun-slingin’ dentist spread<br />
like wildfire. After his first accounted gunfight on Jan. 2,<br />
1875, when Doc and a local saloonkeeper had a disagreement<br />
that quickly turned violent, Doc became increasingly<br />
fearless and dangerous. While several shots were fired, neither<br />
Doc nor the saloonkeeper was struck and both men<br />
were arrested, reported the Dallas Weekly Herald. Initially,<br />
the locals thought the gunfight was amusing, until just a<br />
few days later when Doc got into another disagreement,<br />
this time killing a prominent citizen with two aimed bullets.<br />
Only Wyatt Earp strolled out of it unharmed. Despite the<br />
name, the gunfight actually went down six doors west of<br />
the rear entrance to the O.K. Corral, as well as in the middle<br />
of the street. Shots were fired, and bullets flew for about<br />
30 seconds. Ike Clanton filed murder charges against the<br />
Earp brothers and Doc, but they were all acquitted.<br />
Doc was a nomadic creature, moving from one town to the<br />
next, staying only long enough to win some money at the<br />
table and put someone in their place. Dodging any serious<br />
jail time, Doc continued his wild rampage engaging in<br />
infamous showdowns and run-ins with the law, only to be<br />
eventually taken down not by a gun, but by his tuberculosis.<br />
When his health began to rapidly deteriorate in 1887, he<br />
headed to Glenwood Springs, Colo., in hopes that the<br />
natural hot springs there would improve his condition.<br />
Unfortunately, he did not recover, and a few months later,<br />
died at the age of 36. As the story goes, Doc always figured<br />
he would be killed with his boots on, so when he found<br />
himself barefoot on his deathbed, he asked for a glass of<br />
whiskey and drank it down. Then, looking at his feet, said,<br />
“This is funny,” and died. CM<br />
Fleeing Dallas, Doc moved to Jacksboro, Texas, where he<br />
found a job dealing Faro, a notoriously crooked French<br />
card game. He had become an expert shot, and quickly got<br />
caught up in some more wild shenanigans. Even though he<br />
left one man dead in the dust in a series of gunfights, no<br />
legal action was taken against him. However, his luck turned<br />
in the summer of 1876, when Doc killed a soldier, bringing<br />
the U.S. government into the matter. A reward went out for<br />
his capture, and the Army, Texas Rangers, U.S. Marshalls,<br />
local lawmen and ordinary residents all pursued him.<br />
To escape his inevitable demise if captured, Doc fled to<br />
the Kansas Territory (present-day Colorado), making stops<br />
along the way, where he left three more dead bodies in his<br />
wake. From there, Doc engaged in numerous shoot-outs<br />
and brawls, making friends and enemies along the way.<br />
Most notably, he gained the friendship of Wyatt Earp and<br />
his brothers, who were by his side fighting in the famous<br />
gunfight at the O.K. Corral in Tombstone, Ariz.<br />
On Oct. 26, 1881, outlaw cowboys Billy Clanton, Tom<br />
McLaury and his brother Frank McLaury battled it out<br />
against the Earp brothers (Wyatt, Virgil and Morgan) and<br />
Doc Holliday. Cowboys Ike Clanton and Billy Clairborne ran<br />
from the fight, but Billy Clanton and both McLaurys were<br />
killed. Doc and Morgan and Virgil Earp were wounded.<br />
66 www.chairsidemagazine.com
Congratulations, <strong>Chairside</strong> ® PHOT<br />
A<br />
Hunt Winners!<br />
This must have been the most<br />
challenging <strong>Chairside</strong> Photo<br />
Hunt yet because not one set<br />
of your trained eyes found all<br />
27 differences. Based on your<br />
submissions, the toughest to<br />
find were the three differences<br />
circled in green. I guess we<br />
outdid ourselves this time!<br />
To reward your efforts, we<br />
decided to grade this contest<br />
on a curve and award the<br />
usual first-, second- and thirdplace<br />
prizes to those of you<br />
with the strongest results.<br />
• First-place winners:<br />
21 dentists will receive<br />
$500 in lab credit each.<br />
• Second-place winners:<br />
39 dentists will receive<br />
$100 in lab credit each.<br />
B<br />
• Third-place winners:<br />
53 dentists will receive<br />
$100 in lab credit each.<br />
If you need a suggestion for<br />
using your lab credit, you<br />
might consider prescribing<br />
BruxZir ® Solid Zirconia for<br />
your next crown or bridge<br />
case. As durable as ever, this<br />
monolithic zirconia restoration<br />
is now more esthetic for use<br />
in the anterior. What’s more,<br />
we consistently hear from<br />
dentists that the margins on<br />
their BruxZir crowns & bridges<br />
feel better to their explorer<br />
than those on the PFMs they<br />
used to prescribe.<br />
<strong>Chairside</strong> Photo Hunt Contest entries<br />
were individually scored after being<br />
sent to the lab via e-mail and standard<br />
mail. Prizewinners were notified by<br />
standard mail and/or phone. In total,<br />
113 prizes were awarded.<br />
Contest Results67
The <strong>Chairside</strong>® PHOT Hunt<br />
This photo was taken during one of<br />
the continuing education courses<br />
I give on digital intraoral scanning<br />
at the <strong>Glidewell</strong> International Technology<br />
Center. My assistant and I<br />
are demonstrating how to use various<br />
digital impression systems on<br />
a live patient.<br />
How many differences between the<br />
two pictures can you find? Circle<br />
the differences on version B below.<br />
Then, write down how many differences<br />
you found, tear out this page<br />
and send it to:<br />
<strong>Glidewell</strong> Laboratories<br />
Attn: <strong>Chairside</strong> magazine<br />
4141 MacArthur Blvd.<br />
Newport Beach, CA 92660<br />
Or scan your entry and e-mail it to<br />
chairside@glidewelldental.com.<br />
A<br />
Due to legibility issues, faxed entries<br />
will not be accepted. One<br />
entry per office. Participation grants<br />
<strong>Chairside</strong> magazine permission to<br />
print your name in a future issue or<br />
on its website.<br />
The winner of the Vol. 7, Issue 2,<br />
<strong>Chairside</strong> Photo Hunt Contest will<br />
receive $500 in <strong>Glidewell</strong> credit<br />
or a $500 credit toward his or her<br />
account. The second- and thirdplace<br />
winners will each receive<br />
$100 in <strong>Glidewell</strong> credit or a $100<br />
credit toward their account.<br />
B<br />
Entries must be received by<br />
July 6, 2012. The results will be<br />
announced in the summer issue of<br />
<strong>Chairside</strong> magazine.<br />
______________________________<br />
Name<br />
____________________________<br />
City, State of Practice<br />
____________________________<br />
Phone<br />
Total Found:________<br />
68 www.chairsidemagazine.com


