

PDF Download - Glidewell Dental Labs
PDF Download - Glidewell Dental Labs
PDF Download - Glidewell Dental Labs

Create successful ePaper yourself
Turn your PDF publications into a flip-book with our unique Google optimized e-Paper software.
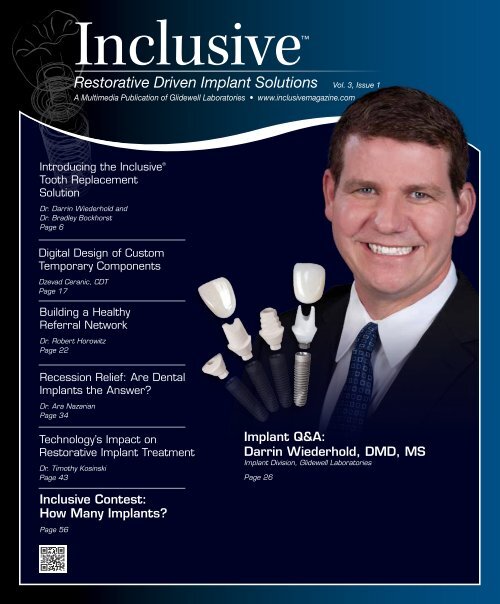
Inclusive<br />
Restorative Driven Implant Solutions Vol. 3, Issue 1<br />
A Multimedia Publication of <strong>Glidewell</strong> Laboratories • www.inclusivemagazine.com<br />
Introducing the Inclusive ®<br />
Tooth Replacement<br />
Solution<br />
Dr. Darrin Wiederhold and<br />
Dr. Bradley Bockhorst<br />
Page 6<br />
Digital Design of Custom<br />
Temporary Components<br />
Dzevad Ceranic, CDT<br />
Page 17<br />
Building a Healthy<br />
Referral Network<br />
Dr. Robert Horowitz<br />
Page 22<br />
Recession Relief: Are <strong>Dental</strong><br />
Implants the Answer?<br />
Dr. Ara Nazarian<br />
Page 34<br />
Technology’s Impact on<br />
Restorative Implant Treatment<br />
Dr. Timothy Kosinski<br />
Page 43<br />
Implant Q&A:<br />
Darrin Wiederhold, DMD, MS<br />
Implant Division, <strong>Glidewell</strong> Laboratories<br />
Page 26<br />
Inclusive Contest:<br />
How Many Implants?<br />
Page 56
On the Web<br />
Here’s a sneak peek at additional<br />
Inclusive magazine content available online<br />
ONLINE Video Presentations<br />
• Dr. Darrin Wiederhold introduces the Inclusive ® Tooth Replacement<br />
Solution, a comprehensive package for predictably placing<br />
and restoring dental implants.<br />
• The <strong>Glidewell</strong> Laboratories Implant Department staff outlines<br />
the lab’s process of designing and milling custom temporary<br />
components.<br />
• Dr. Wiederhold discusses his experience with the Inclusive Tooth<br />
Replacement Solution and shares his vision for upcoming educational<br />
courses at the <strong>Glidewell</strong> International Technology Center.<br />
• Dr. Timothy Kosinski explores the role of new technologies in<br />
simplifying and improving implant treatment services.<br />
• Dr. Bradley Bockhorst discusses specific guidelines when working<br />
with the Inclusive Tooth Replacement Solution, including<br />
proper implant orientation and seating of custom components.<br />
Check out the latest issue of Inclusive<br />
magazine online or via your smartphone at<br />
www.inclusivemagazine.com<br />
gIDE LECTURE-ON-DEMAND PREVIEW<br />
• Dr. Stefan Paul discusses a vital component for long-term implant<br />
success in this gIDE video lecture, “Restorative Excellence —<br />
Occlusion on Implant-Retained Restorations.”<br />
ONLINE CE credit<br />
• Get free CE credit for the material in this issue with each test you<br />
complete and pass. To get started, visit our website and look for<br />
the articles marked with “CE.”<br />
Look for these icons on the pages that follow<br />
for additional content available online
Contents<br />
ALSO IN THIS ISSUE<br />
14 Clinical Tip: Implant Orientation for<br />
Inclusive Tooth Replacement Solution<br />
Components<br />
17 Lab Sense: Virtual Design of<br />
Inclusive Custom Temporary<br />
Components<br />
40 Clinical Tip: Placing Custom<br />
Healing Abutments<br />
52 Restorative Driven Implant<br />
Treatment: From Immediate<br />
Temporization to Final Restoration<br />
56 Inclusive Contest:<br />
How Many Implants?<br />
6<br />
22<br />
26<br />
34<br />
43<br />
Benefits of the Inclusive ® Tooth Replacement Solution<br />
Complex treatment modalities can make it difficult to treat implant<br />
patients efficiently while still maintaining quality of care. With<br />
their in-depth look at the Inclusive ® Tooth Replacement Solution,<br />
Drs. Darrin Wiederhold and Bradley Bockhorst address this<br />
challenge by utilizing predesigned custom temporary components<br />
to provide patient-specific temporization and contoured healing.<br />
Building a Restorative Driven Referral Network<br />
A thriving surgical practice is largely dependent on the success of<br />
the restorative dentists, laboratory technicians and other co-treating<br />
professionals who help carry an implant case to completion. Experienced<br />
periodontist Dr. Robert Horowitz identifies some of the most<br />
common areas of miscommunication in the treatment progression<br />
and looks at how implant specialists might help to maximize<br />
patient satisfaction and profitability for their referring doctors.<br />
Implant Q&A: An Interview with Dr. Darrin Wiederhold<br />
For some clinicians, venturing into the realm of dental implants is<br />
a daunting prospect. In his first published interview as a member<br />
of the <strong>Glidewell</strong> Laboratories clinical team, accomplished dentist<br />
Dr. Darrin Wiederhold outlines some of the practical steps a clinician<br />
can take to gain the knowledge, confidence and experience required<br />
to successfully join the ranks of implant professionals.<br />
Incorporating Implants into Your Daily Practice<br />
A dentist feeling the pinch in a difficult economy is apt to seek<br />
more efficient ways to provide services, or to take on new services<br />
typically referred to another provider. Dr. Ara Nazarian addresses<br />
the difficulties of traditional implant treatment and explains how a<br />
restorative-driven approach simplifies the process, making it more<br />
convenient and affordable for both the dentist and the patient.<br />
Implant Solutions Utilizing the Latest Technology<br />
Dentists today stand to benefit from technological innovations that<br />
make procedures more predictable and less invasive. Dr. Timothy<br />
Kosinski showcases the use of digital treatment planning to promote<br />
safe and simple guided implant delivery, followed by the placement<br />
of prefabricated custom temporary components that allow<br />
for unprecedented versatility at the time of surgery.<br />
– Contents – 1
Letter from the Editor<br />
Clinicians are faced with many challenges when restoring dental implants. One of these is<br />
sculpting the soft tissue into the optimal contours, and then transferring those contours to<br />
the master cast to allow for fabrication of the final restoration. In the past, various attempts<br />
to achieve this goal ranged from modifying healing abutments to adding composite to stock<br />
impression copings. These procedures were often cumbersome and did not offer a simple,<br />
complete solution. With advances in virtual design and CAD/CAM technologies, an array of<br />
prosthetic components can now be custom made — pre- or post-surgically — to address<br />
these issues.<br />
<strong>Glidewell</strong> Laboratories receives more than 200 implant cases a day, and we routinely see<br />
impressions where a narrow impression coping was utilized. The challenge in these cases<br />
is to create a restoration that has a natural emergence profile. This problem, coupled with<br />
our experience designing and milling custom abutments, led to the development of the<br />
Inclusive ® Tooth Replacement Solution.<br />
At the core of the Inclusive Tooth Replacement Solution is an anatomically shaped transgingival<br />
section that is virtually designed over the proposed implant site. This base design<br />
is then used to create a custom healing abutment or a custom temporary abutment and a<br />
provisional crown. A matching custom impression coping allows for the soft tissue contours<br />
to be transferred to the master cast, resulting in a superior final restoration.<br />
The solution offers flexibility in that the case can be immediately temporized, if appropriate,<br />
or the alternate custom healing abutment can be delivered. The components can easily be<br />
adjusted or modified as needed.<br />
The goal of the Inclusive Tooth Replacement Solution is to provide the clinician with a<br />
complete, restorative-driven solution for a missing tooth, from treatment planning to final<br />
prosthesis, with all of the necessary components and tools, including the implant. This issue<br />
of Inclusive magazine was conceived to introduce you to our laboratory’s new conventionaldiameter<br />
implant system and tooth replacement solution. Eager for your feedback, we<br />
invite you to read the articles and check out the multimedia content available online at<br />
www.inclusivemagazine.com.<br />
Dr. Bradley C. Bockhorst<br />
Editor-in-Chief, Clinical Editor<br />
inclusivemagazine@glidewelldental.com<br />
– Letter from the Editor – 3
Publisher<br />
Jim <strong>Glidewell</strong>, CDT<br />
Editor-in-Chief and clinical editor<br />
Bradley C. Bockhorst, DMD<br />
Managing Editors<br />
Jim Shuck; Mike Cash, CDT<br />
Creative Director<br />
Rachel Pacillas<br />
Contributing editors<br />
Greg Minzenmayer; Dzevad Ceranic, CDT;<br />
David Casper; Tim Torbenson<br />
copy editors<br />
Eldon Thompson, Barbara Young,<br />
Megan Affleck, David Frickman, Jennifer Holstein<br />
digital marketing manager<br />
Kevin Keithley<br />
Graphic Designers/Web Designers<br />
Jamie Austin, Deb Evans, Joel Guerra,<br />
Audrey Kame, Lindsey Lauria, Phil Nguyen,<br />
Kelley Pelton, Melanie Solis, Ty Tran, Makara You<br />
Photographers/Clinical Videographers<br />
Sharon Dowd, Mariela Lopez<br />
James Kwasniewski, Marc Repaire, Sterling Wright<br />
Illustrator<br />
Phil Nguyen<br />
coordinatorS/AD Representatives<br />
Teri Arthur, Vivian Tsang<br />
If you have questions, comments or suggestions, e-mail us at<br />
inclusivemagazine@glidewelldental.com. Your comments may<br />
be featured in an upcoming issue or on our website.<br />
© 2012 <strong>Glidewell</strong> Laboratories<br />
Neither Inclusive magazine nor any employees involved in its publication<br />
(“publisher”) makes any warranty, express or implied, or assumes<br />
any liability or responsibility for the accuracy, completeness, or usefulness<br />
of any information, apparatus, product, or process disclosed, or<br />
represents that its use would not infringe proprietary rights. Reference<br />
herein to any specific commercial products, process, or services by<br />
trade name, trademark, manufacturer or otherwise does not necessarily<br />
constitute or imply its endorsement, recommendation, or favoring<br />
by the publisher. The views and opinions of authors expressed<br />
herein do not necessarily state or reflect those of the publisher and<br />
shall not be used for advertising or product endorsement purposes.<br />
CAUTION: When viewing the techniques, procedures, theories and<br />
materials that are presented, you must make your own decisions<br />
about specific treatment for patients and exercise personal professional<br />
judgment regarding the need for further clinical testing or education<br />
and your own clinical expertise before trying to implement new<br />
procedures.<br />
Inclusive is a registered trademark of Inclusive <strong>Dental</strong> Solutions.<br />
Contributors<br />
■ Bradley C. Bockhorst, DMD<br />
After receiving his dental degree from Washington<br />
University School of <strong>Dental</strong> Medicine,<br />
Dr. Bradley Bockhorst served as a Navy <strong>Dental</strong><br />
Officer. Dr. Bockhorst is director of clinical<br />
technologies at <strong>Glidewell</strong> Laboratories, where he<br />
oversees Inclusive ® Digital Implant Treatment<br />
Planning services and is editor-in-chief and<br />
clinical editor of Inclusive magazine. A member of the CDA,<br />
ADA, AO, ICOI and the AAID, Dr. Bockhorst lectures internationally<br />
on an array of dental implant topics. Contact him at<br />
800-521-0576 or inclusivemagazine@glidewelldental.com.<br />
■ DZEVAD CERANIC, CDT<br />
Dzevad Ceranic began his career at <strong>Glidewell</strong><br />
Laboratories while attending Pasadena<br />
City College’s dental laboratory technology<br />
program. In 1999, Dzevad began working<br />
at <strong>Glidewell</strong> as a waxer and metal finisher,<br />
then as a ceramist. After being promoted to<br />
general manager of the Full-Cast department,<br />
he assisted in facilitating the lab’s transition to CAD/CAM.<br />
In June 2008, Dzevad took on the company’s rapidly growing<br />
Implant department, and in 2009 completed an eight-month<br />
implants course at UCLA School of Dentistry. Today, Dzevad<br />
leads a team of 220 people at the lab and continues to implement<br />
cutting-edge technology throughout his department. Contact him<br />
at inclusivemagazine@glidewelldental.com.<br />
■ ROBERT A. HOROWITZ, DDS<br />
Dr. Robert Horowitz graduated from Columbia<br />
University School of <strong>Dental</strong> and Oral Surgery<br />
in 1982. After a one-year general practice<br />
residency, he finished a two-year specialty<br />
training program in periodontics at New York<br />
University and the Manhattan VA Hospital.<br />
In 1996, Dr. Horowitz completed a two-year<br />
fellowship program in Implant Surgery at NYU, focusing on<br />
bone grafting procedures. He is a clinical assistant professor<br />
in the department of periodontology and implant dentistry at<br />
NYU College of Dentistry, where he teaches and conducts<br />
research in bone grafting. He is also on faculty and conducts<br />
research in the departments of oral surgery, biomaterials<br />
and biomimetics, and oral diagnosis. Dr. Horowitz has<br />
lectured nationally and internationally and published more<br />
than 40 scientific articles and case studies. Contact him at<br />
inclusivemagazine@glidewelldental.com.<br />
4<br />
– www.inclusivemagazine.com –
■ TIMOTHY F. KOSINSKI, DDS, MAGD<br />
Dr. Timothy Kosinski graduated from the<br />
University of Detroit Mercy School of Dentistry<br />
and received a Master of Science degree in<br />
biochemistry from Wayne State University School<br />
of Medicine. An adjunct assistant professor at<br />
UDM School of Dentistry, he serves on the editorial<br />
review board of numerous dental journals and is<br />
a Diplomate of the ABOI/ID, ICOI and AO. Dr. Kosinski is a Fellow<br />
of the AAID and received his Mastership in the AGD, from which<br />
he received the 2009 Lifelong Learning and Service Recognition<br />
award. Contact him at 248-646-8651, drkosin@aol.com or www.<br />
smilecreator.net.<br />
■ Darrin M. Wiederhold, DMD, MS<br />
Dr. Darrin Wiederhold received his DMD in<br />
1997 from Temple University School of Dentistry<br />
and a master’s degree in oral biology in 2006<br />
from the Medical University of Ohio at Toledo.<br />
Before joining <strong>Glidewell</strong> in August 2011, he<br />
worked in several private practices and as a<br />
staff dentist for the U.S. Navy. As staff dentist<br />
in <strong>Glidewell</strong>’s Implant division, he performs implant and<br />
conventional restorative procedures at the lab’s on-site training<br />
facility, and helps support the lab’s digital treatment planning<br />
and guided surgery services. An integral part of the lab’s Implant<br />
Research & Development group, he is also involved in training<br />
and education on implant surgery and prosthetics. Contact him<br />
at inclusivemagazine@glidewelldental.com.<br />
■ ARA NAZARIAN, DDS, DICOI<br />
Dr. Ara Nazarian maintains a private practice in<br />
Troy, Mich., with an emphasis on comprehensive<br />
and restorative care. He is the director of the<br />
Reconstructive Dentistry Institute, a Diplomate<br />
of the ICOI, and has conducted lectures and<br />
hands-on workshops on esthetic materials and<br />
dental implants throughout the U.S., Europe,<br />
New Zealand and Australia. Dr. Nazarian is also the creator of<br />
the DemoDent patient education model system. His articles have<br />
been published in many of today’s popular dental publications.<br />
Contact him at 248-457-0500 or www.aranazariandds.com.<br />
■ PAresh B. Patel, DDS<br />
Dr. Patel is a graduate of the University of North<br />
Carolina at Chapel Hill School of Dentistry<br />
and the Medical College of Georgia/AAID<br />
MaxiCourse. He is cofounder of the American<br />
Academy of Small Diameter Implants and<br />
a clinical instructor at the Reconstructive<br />
Dentistry Institute. Dr. Patel has placed more<br />
than 2,500 small-diameter implants and has worked as a lecturer<br />
and clinical consultant on mini implants for various companies.<br />
He belongs to numerous dental organizations, including the<br />
ADA, North Carolina <strong>Dental</strong> Society and AACD. Dr. Patel is also<br />
a member and president of the Iredell County <strong>Dental</strong> Society in<br />
Mooresville, N.C. Contact him at pareshpateldds2@gmail.com or<br />
www.dentalminiimplant.com.<br />
– Contributors – 5
Clinical Benefits of the<br />
Inclusive ® Tooth Replacement Solution<br />
Go online for<br />
in-depth content<br />
by Darrin W. Wiederhold, DMD, MS and Bradley C. Bockhorst, DMD<br />
We live in a society of 60-second fast-food drive-thrus, global news<br />
delivered instantly on our smartphones and bundled cable packages.<br />
We demand ever-faster results and increasingly streamlined efficiency. Even dentists are<br />
powerless against the current of progress and the need to accomplish more in less time.<br />
A hallmark of the most successful modern clinicians is the ability to strike a balance<br />
between a daily load of 12 to 16 patients and maintaining the same high standard of<br />
care. No easy task, to be sure — particularly when it comes to treatment involving<br />
dental implants.<br />
Current protocols for implant patients are compartmentalized. The implant manufacturer<br />
is responsible for the components, and the dental laboratory is responsible for<br />
the restoration — after the clinical situation has been determined. From the restorative<br />
perspective, this is equivalent to erecting a house upon an existing foundation, limiting<br />
the builder to what is already there. Developing proper esthetics in an implant case<br />
involves soft tissue contouring that begins at a foundational level, the moment the<br />
implant is placed. Stock components do not allow for this, which means the doctor must<br />
spend valuable chairtime developing custom components or forgo their use altogether,<br />
forcing a choice between quantity of cases or quality of individual patient care.<br />
With the advent of the Inclusive ® Tooth Replacement Solution from <strong>Glidewell</strong> Laboratories,<br />
practitioners no longer have to choose one or the other. Specially designed custom<br />
temporary components allow for immediate provisionalization specific to the needs of<br />
each patient, and a matching custom impression coping communicates the final gingival<br />
architecture to the dental laboratory. Add to this the implant, surgical drills, a prosthetic<br />
guide, final custom abutment and final BruxZir ® Solid Zirconia restoration (<strong>Glidewell</strong><br />
Laboratories), and the clinician receives, in a single box, all the components needed to<br />
place, provisionalize and restore the implant up front. In addition to providing the physical<br />
components (Figs. 1a, 1b), the Inclusive Tooth Replacement Solution supports an easyto-follow<br />
workflow that helps ensure predictability and long-term success, streamlining<br />
the entire process for maximum efficiency. Armed with a clear sense of the endgame and<br />
the tools and road map to get there, experienced and novice clinicians alike can place and<br />
restore dental implants with greater confidence and ease.<br />
6<br />
– www.inclusivemagazine.com –
Inclusive Tooth Replacement Solution<br />
Conventional Procedure – Single Tooth<br />
Step-by-Step<br />
Clinician<br />
<strong>Glidewell</strong> Laboratories<br />
Appointment<br />
1<br />
Consultation Data Collection<br />
• Complete Inclusive Tooth Replacement Solution Rx<br />
indicating desired implant size, drill preference, tooth #,<br />
required shade for BioTemps provisional crown and any<br />
special design instructions.<br />
• Take PVS impressions.<br />
• Take bite registration.<br />
• Take photos.<br />
• Send Rx to <strong>Glidewell</strong> with impressions, bite registration<br />
and photos.<br />
Design and fabricate Inclusive Tooth<br />
Replacement Solution components<br />
(7 days in lab):<br />
• Prosthetic guide<br />
• Custom healing abutment<br />
• Custom impression coping<br />
• Custom temporary abutment and<br />
BioTemps crown<br />
• Inclusive implant<br />
• Disposable surgical drills<br />
Appointment<br />
2<br />
Surgery<br />
• Try in prosthetic guide.<br />
• Place implant.<br />
• Deliver custom healing abutment or custom temporary<br />
abutment and BioTemps provisional crown.<br />
• Set post-op recall schedule.<br />
• Keep custom impression coping in patient’s chart or<br />
forward to restorative dentist.<br />
Appointment<br />
3<br />
Final Impressions<br />
• Remove custom temporary components and seat custom<br />
impression coping. Tighten coping screw. Take a PA film to<br />
verify seating, if necessary.<br />
• Take a full-arch impression, opposing impression and bite<br />
registration, as well as a shade.<br />
• Replace the impression coping with the temporary<br />
restoration or healing abutment.<br />
• Complete Inclusive Tooth Replacement Solution Rx,<br />
indicating choice of Inclusive Custom Abutment (titanium<br />
or zirconia) and final shade.<br />
• Send Rx to <strong>Glidewell</strong> with the impressions and bite<br />
registration.<br />
Design and mill final restorative<br />
components (13 days in lab):<br />
• Inclusive Custom Abutment<br />
(titanium or zirconia)<br />
• BruxZir Solid Zirconia or IPS e.max<br />
crown<br />
Appointment Final<br />
4<br />
Delivery<br />
• Remove custom temporary components for the implant<br />
and irrigate thoroughly.<br />
• Seat final abutment and tighten abutment screw to<br />
35 Ncm. Take a PA to verify seating, if necessary.<br />
• Try in crown. Adjust interproximal and occlusal contacts<br />
as needed.<br />
• Cement crown. Ensure all excess cement is removed.<br />
• Set recall schedule.<br />
– Clinical Benefits of the Inclusive Tooth Replacement Solution – 7
Inclusive Tooth Replacement<br />
Solution Implant Treatment<br />
Workflow<br />
1. Implant Consultation and<br />
Data Collection<br />
2. Day of Surgery Protocol<br />
3. Healing Phase<br />
4. Restorative Phase:<br />
Final Impressions<br />
5. Delivery of Final Prosthesis<br />
Implant Consultation<br />
and Data Collection<br />
As with any larger, more complex<br />
dental case, the taking of preoperative<br />
records and thorough treatment<br />
planning are of paramount importance<br />
when implants are prescribed —<br />
whether it be a single-tooth replacement<br />
or full-mouth rehabilitation. A<br />
truly comprehensive treatment plan<br />
consists of the following:<br />
1. Full-arch upper and lower impressions<br />
(preferably PVS) for the<br />
fabrication of study models<br />
2. An accurate bite registration<br />
3. Full-mouth radiographs, including<br />
a panoramic and CBCT scan (as<br />
needed)<br />
NOTE: If you do not have a CBCT scanner<br />
in your office, the patient can be referred<br />
to an imaging center.<br />
4. Shade match of the existing dentition<br />
5. Preoperative patient photos<br />
While obtaining the aforementioned<br />
records will minimize risk and optimize<br />
the chances of success, the issue<br />
of cost can be a limiting factor, particularly<br />
when dealing with a CBCT scan.<br />
If necessary, explain to the patient the<br />
rationale for the expense of the CBCT<br />
scan by detailing the advantages of<br />
this technology over conventional radiography.<br />
In instances where the cost<br />
is prohibitive, single-tooth implant<br />
cases can still be undertaken with<br />
a high degree of predictability using<br />
conventional radiography alone. Success<br />
in such cases is largely dependent<br />
on the experience level of the clinician,<br />
so an honest assessment of your own<br />
comfort level and abilities will be invaluable<br />
in avoiding potential pitfalls.<br />
Once you have collected the various<br />
data mentioned above and selected<br />
a diameter and length of implant,<br />
forward the appropriate diagnostic<br />
materials (i.e., impressions, models,<br />
bite registration, shade selection and<br />
implant size) to <strong>Glidewell</strong> Laboratories<br />
for fabrication of the Inclusive Tooth<br />
Replacement Solution components.<br />
Upon receipt, the laboratory will pour<br />
and articulate the models, then assemble<br />
the following components:<br />
1. Prosthetic guide (Fig. 1a)<br />
2.Custom temporary abutment<br />
(Fig. 1a)<br />
3.BioTemps ® provisional crown<br />
(<strong>Glidewell</strong> Laboratories) (Fig. 1a)<br />
4. Custom healing abutment<br />
(Fig. 1a)<br />
5. Custom impression coping<br />
(Fig. 1a)<br />
6. Surgical drills (Fig. 1b)<br />
7. Inclusive ® Tapered Implant<br />
(<strong>Glidewell</strong> Laboratories) (Fig. 1b)<br />
The complete set of necessary items<br />
will be delivered to you in one convenient,<br />
all-inclusive box (Fig. 2).<br />
<br />
Figure 1a: Prosthetic guide, custom temporary abutment,<br />
BioTemps provisional crown, custom healing<br />
abutment, custom impression coping<br />
Figure 1b: Inclusive Tapered Implant and disposable<br />
surgical drills<br />
Figure 2: Inclusive Tooth Replacement Solution<br />
Developing proper esthetics in an implant<br />
case involves soft tissue contouring<br />
that begins at a foundational level,<br />
the moment the implant is placed.<br />
<br />
8<br />
– www.inclusivemagazine.com –
Day of Surgery Protocol<br />
On the day of the implant surgery,<br />
remove the contents of the box and<br />
place them alongside your usual surgical<br />
armamentarium. Confirm the fit<br />
of the prosthetic guide prior to beginning<br />
the procedure (Fig. 3). Make<br />
sure the guide fits snugly around the<br />
teeth, and that there is no rocking or<br />
displacement. Be sure also to visually<br />
confirm that the proposed location of<br />
the implant osteotomy correlates with<br />
your planned location.<br />
Once the implant has been placed<br />
(Figs. 4–11), the decision is made —<br />
based on the level of primary stability<br />
— to place either the custom healing<br />
abutment or the custom temporary<br />
abutment and accompanying Bio-<br />
Temps crown. Either option affords<br />
the opportunity to begin sculpting<br />
the soft tissue architecture around the<br />
implant and developing the future<br />
emergence profile.<br />
To ensure the optimal soft tissue<br />
response and facilitate complete seating<br />
of either the custom healing abutment<br />
or custom temporary abutment and<br />
BioTemps crown, it is recommended<br />
that a tissue punch, or other surgical<br />
means, be utilized to remove the<br />
soft tissue over the osteotomy site.<br />
Note also that the margin of the<br />
custom temporary abutment is set<br />
at approximately 2 mm. Depending<br />
on the thickness of the patient’s soft<br />
tissue, the abutment can be adjusted<br />
and the BioTemps crown relined as<br />
needed. It is critical that the custom<br />
healing abutment or BioTemps crown<br />
be 1–1.5 mm out of occlusion to avoid<br />
any occlusal stresses on the implant as<br />
it osseointegrates (Figs. 12–14).<br />
Once the appropriate custom abutment<br />
has been placed, the implant is<br />
allowed to osseointegrate as normal.<br />
The custom impression coping should<br />
be stored with the patient’s chart to<br />
be used when the implant is ready<br />
to be restored.<br />
Figure 3: Prosthetic guide try-in<br />
Figure 4: 2.3/2.0 mm pilot drill through prosthetic<br />
guide<br />
Figure 6: 2.3/2.0 mm pilot drill to depth<br />
Figure 8: Implant on carrier<br />
Figure 5: Periapical radiograph to verify position<br />
Figure 7: Completed osteotomy following use of the<br />
2.8/2.3 mm surgical drill<br />
Figure 9: Final seating of implant with torque wrench<br />
– Clinical Benefits of the Inclusive Tooth Replacement Solution – 9
Healing Phase<br />
As with any implant treatment protocol,<br />
it is generally advisable that the<br />
patient return for monthly follow-up<br />
appointments to ensure osseointegration<br />
is proceeding well and to adjust<br />
the provisional restoration as needed.<br />
Figure 10: Flat oriented toward the facial<br />
Figure 12: Custom temporary abutment seated<br />
Figure 14: BioTemps crown temporarily cemented<br />
Figure 11: Periapical radiograph to verify implant<br />
position<br />
Figure 13: Abutment screw tightened to 15 Ncm,<br />
with access opening sealed and flap sutured back<br />
into place<br />
Figure 15: Custom impression coping and screw<br />
access opening sealed with soft wax<br />
Restorative Phase:<br />
Final Impressions<br />
When an adequate amount of time has<br />
elapsed and successful osseointegration<br />
of the implant has been confirmed,<br />
the restorative phase begins. Fortunately,<br />
because the contours of the custom<br />
impression coping match those of the<br />
custom healing abutment or custom<br />
temporary abutment, it is simple to<br />
remove the custom abutment, seat the<br />
custom impression coping (Fig. 15)<br />
and take an accurate final impression<br />
(Fig. 16). Either a closed-tray or opentray<br />
technique may be used, but it<br />
should be a full-arch impression. A<br />
full-arch opposing impression and<br />
bite registration are also required.<br />
You then complete a simple prescription<br />
form included with the original<br />
solution components, selecting<br />
your choice of final custom abutment<br />
(titanium or zirconia) and indicating<br />
the final shade for your BruxZir<br />
or IPS e.max ® (Ivoclar Vivadent; Amherst,<br />
N.Y.) restoration. There are no<br />
additional laboratory fees at this point<br />
because the cost of these final restorative<br />
components is included in the<br />
price of the solution. Simply forward<br />
the final impressions and bite registration<br />
along with the completed prescription<br />
to <strong>Glidewell</strong> Laboratories for<br />
fabrication of the definitive restoration.<br />
Figure 16: Final impression<br />
10<br />
– www.inclusivemagazine.com –
Delivery of Final Prosthesis<br />
The final step in the process is delivery<br />
of the final prosthesis (Figs. 17–23). On<br />
the day of delivery, the custom temporary<br />
abutment is once again removed<br />
and all debris cleaned from inside and<br />
around the implant. The final Inclusive<br />
® Custom Abutment (<strong>Glidewell</strong> Laboratories)<br />
and BruxZir crown are tried in,<br />
and the contours, contacts and occlusion<br />
checked and adjusted as needed.<br />
Final occlusion should be light on the<br />
implant-retained crown, with forces<br />
directed as much as possible along the<br />
long axis, minimizing lateral forces.<br />
The abutment screw is tightened to<br />
35 Ncm, the head of the abutment screw<br />
is covered and the crown cemented. It<br />
is imperative to meticulously remove<br />
all excess cement. Home care instructions<br />
are given to the patient, and a<br />
recall schedule is set.<br />
<br />
Because the<br />
contours of the<br />
custom impression<br />
coping match those<br />
of the custom healing<br />
abutment or custom<br />
temporary abutment,<br />
it is simple to<br />
remove the custom<br />
abutment, seat the<br />
custom impression<br />
coping and take<br />
an accurate<br />
final impression.<br />
<br />
Figure 17: Delivery of Inclusive Zirconia Custom Abutment<br />
Figure 18: Abutment screw tightened to 35 Ncm Figure 19: Access opening sealed<br />
Figure 20: Interproximal and occlusal contacts checked<br />
– Clinical Benefits of the Inclusive Tooth Replacement Solution – 11
Figure 21: BruxZir crown cemented in place and all excess cement removed<br />
Figure 22: Final restoration (buccal view)<br />
Figure 23: Final restoration (occlusal view)<br />
<br />
Conclusion<br />
Implants can be a rewarding, profitable<br />
addition to any practice. As our<br />
patient population becomes more<br />
dental savvy, the demand for clinicians<br />
who are adept at placing and<br />
restoring dental implants continues<br />
to grow exponentially. <strong>Dental</strong> implant<br />
treatment is very much the future of<br />
dentistry as a solution to partial or<br />
total edentulism, and it should be part<br />
of any discussion with patients regarding<br />
the restoration of missing teeth.<br />
A key challenge lies in treating a maximum<br />
number of patients in a minimum<br />
amount of time — without sacrificing<br />
the quality of treatment. An excellent<br />
way to address this is by providing<br />
patient-specific temporization and<br />
contoured healing through the use of<br />
predesigned custom temporary components.<br />
Temporization sets the tone<br />
for the final esthetic outcome, the parameters<br />
for which are unique to each<br />
patient. So why treat them all with the<br />
same stock temporary components?<br />
As the demand for implants grows,<br />
so does the need for cost- and timeeffective<br />
ways to provide this service.<br />
The Inclusive Tooth Replacement<br />
Solution provides a highly efficient,<br />
predictable and affordable method<br />
of both placing and restoring dental<br />
implants. In conjunction with the<br />
clinician’s experience and skill, it is<br />
designed to equip dentists with the<br />
tools to provide this service in a single,<br />
comprehensive package. IM<br />
A key challenge lies in treating a maximum number of patients<br />
in a minimum amount of time — without sacrificing the quality<br />
of treatment. An excellent way to address this is by providing<br />
patient-specific temporization and contoured healing through<br />
the use of predesigned custom temporary components.<br />
<br />
12<br />
– www.inclusivemagazine.com –
Clinical Tip:<br />
Go online for<br />
in-depth content<br />
Implant Orientation for Inclusive® Tooth<br />
Replacement Solution Components<br />
by Bradley C. Bockhorst, DMD and<br />
Darrin M. Wiederhold, DMD, MS<br />
The Inclusive ® Tooth Replacement<br />
Solution from <strong>Glidewell</strong> Laboratories<br />
features custom temporary components<br />
designed to guide soft tissue<br />
contours during the healing phase.<br />
Whether you utilize the custom temporary<br />
abutment or custom healing<br />
abutment, the following guidelines<br />
can help to ensure a smooth delivery<br />
at the time of surgery.<br />
Aligning the Abutment Connection<br />
The custom temporary components<br />
of the Inclusive Tooth Replacement<br />
Solution are designed, presurgically,<br />
with one flat of the internal<br />
hex positioned toward the<br />
facial. During surgery, the final<br />
position of the implant should match<br />
this orientation. This is accomplished<br />
by aligning one of the flats on the implant<br />
driver to the facial (Figs. 1–3). If<br />
the seated abutment is rotated slightly,<br />
it can be removed and minor adjustments<br />
made to the rotational position<br />
of the implant.<br />
Seating the Custom Abutment<br />
Assuming there is adequate attached<br />
gingiva and no grafting is planned,<br />
flapless surgery can minimize postoperative<br />
discomfort and swelling,<br />
leading to higher patient satisfaction.<br />
Also, because the periosteum is not reflected,<br />
the blood supply to the bone<br />
is not disrupted, reducing potential resorption.<br />
With the growing popularity<br />
of minimally invasive surgery, the use<br />
of a tissue punch (or other tools, such<br />
as a laser) can make it much simpler<br />
to seat anatomically contoured abutments<br />
during a flapless procedure<br />
(Figs. 4–9). Once adequate tissue has<br />
been removed, the custom temporary<br />
abutment is seated and the abutment<br />
screw tightened to 15 Ncm. A periapical<br />
film should be taken, if necessary,<br />
to verify complete seating. The screw<br />
opening is sealed and the BioTemps ®<br />
provisional crown (<strong>Glidewell</strong> Laboratories)<br />
is seated with provisional<br />
cement. It is absolutely critical that all<br />
excess cement be removed and the<br />
temporary taken out of occlusion.<br />
In flapped cases, the abutment can be<br />
delivered and the complete seating<br />
visualized directly. The soft tissue can<br />
then be reapproximated and sutured<br />
around the abutment (Figs. 10–12). IM<br />
Figure 1: Flat to facial in flapped case<br />
Figure 2: Flat to facial in flapless case<br />
Figure 3: Final implant position<br />
14<br />
– www.inclusivemagazine.com –
Case 1: Tissue Punch<br />
Figure 4: Tissue punch Figure 5: Custom temporary abutment seated Figure 6: BioTemps crown cemented into place<br />
Case 2: Laser (Case courtesy of Dr. Dean Saiki, Oceanside, Calif.)<br />
Figure 7: Laser-assisted gingivoplasty Figure 8: Custom temporary abutment seated Figure 9: BioTemps crown cemented into place<br />
Case 3: Flapped<br />
Figure 10: Custom temporary abutment seated<br />
Figure 11: Flap sutured around abutment<br />
Figure 12: BioTemps crown cemented into place<br />
– Clinical Tip: Implant Orientation for Inclusive Tooth Replacement Solution Components – 15
Lab Sense:<br />
Virtual Design of Inclusive®<br />
Custom Temporary Components<br />
Go online for<br />
in-depth content<br />
by Dzevad Ceranic, CDT<br />
In processing restorations for more than 160,000 implant cases, the Implant<br />
Department at <strong>Glidewell</strong> Laboratories has accumulated a unique understanding<br />
of the industry as a whole, observing everything from shifting trends to emerging techniques<br />
to common difficulties experienced by practicing clinicians. In this column, we endeavor to<br />
share some of the insights we have obtained, in hopes of improving the quality and efficiency<br />
of cases everywhere.<br />
The esthetic result of any crown & bridge restoration is greatly dependent on the gingival<br />
contours from which that restoration emerges. Implant restorations pose greater difficulty<br />
given the collapse of soft tissue that typically occurs in the edentulous site, and stock abutments<br />
employed during the healing phase may not provide suitable tissue support to achieve the<br />
desired gingival anatomy. A custom temporary abutment and provisional restoration give<br />
the clinician greater control over papillae development and gingival contours, but even if<br />
the desired anatomy is developed intraorally, how does one accurately convey the final soft<br />
tissue architecture to the laboratory using a traditional impression post? To better assist the<br />
technician in designing the most natural emergence profile, a custom impression coping<br />
is required to properly replicate the soft tissue anatomy during the impression procedure.<br />
Yet, the majority of cases received here at <strong>Glidewell</strong> Laboratories suggest that methods for<br />
developing a custom impression coping chairside are either too tedious or time-consuming<br />
for most clinicians to trouble with, outside of the most demanding anterior situations.<br />
Drawing on our experience with CAD/CAM technology, however, it is now possible to provide<br />
a complete custom temporary solution consisting of a custom BioTemps ® provisional crown<br />
(<strong>Glidewell</strong> Laboratories) over a custom temporary abutment, an optional custom healing<br />
abutment (for cases in which immediate loading may be contraindicated) and a matching<br />
custom impression coping. Use of these components allows the restorative clinician to<br />
shape and support the soft tissue as desired during the healing phase, and maintain and<br />
capture that carefully contoured gingival anatomy during the impression procedure. Given<br />
this information, the laboratory technician has an accurate understanding of the gingival<br />
architecture from which to design a natural emergence profile for the most predictable and<br />
pleasing esthetic result.<br />
17
Digital Manufacturing Process<br />
The process by which <strong>Glidewell</strong> Laboratories<br />
designs and mills its custom temporary components<br />
is much the same as that it uses to produce<br />
its Inclusive ® Custom Implant Abutments. Using<br />
this proven CAD/CAM technology, our laboratory<br />
has successfully manufactured more than 160,000<br />
custom abutments.<br />
•Step 1: Model Scan<br />
For conventional cases, the process begins with<br />
articulated, presurgical study models, in which the<br />
proposed implant location is indexed with the aid<br />
of the prosthetic guide. A scanning abutment is then<br />
placed in the proposed implant site. The purpose of<br />
the scanning abutment is to capture the implant’s<br />
angulation, its location relative to the adjacent dentition,<br />
and the abutment connection orientation,<br />
all of which is translated to the design software<br />
when the model undergoes three-dimensional optical<br />
scanning (Fig. 1).<br />
•Step 2: Design of Custom Components<br />
Once a virtual model is created (Fig. 2), complete<br />
with a virtual analog demonstrating the proposed<br />
implant location (Fig. 3), the custom temporary<br />
abutment, custom BioTemps crown, custom healing<br />
abutment and custom impression coping are<br />
Figure 1: Model placed into optical scanner<br />
Figure 2: Scanned model with opposing<br />
Figure 3: Virtual analog placement<br />
18<br />
– www.inclusivemagazine.com –
designed using a proprietary add-on software module<br />
developed for the <strong>Dental</strong>Designer system from<br />
3Shape (New Providence, N.J.). The computer software<br />
allows the digital technician to manipulate the<br />
size and shape of the component using precise measurements<br />
(Figs. 4–7).<br />
Such precision is critical in implant cases, where<br />
contacts and occlusion help to determine the<br />
functional load to be placed on the implant. To allow<br />
for discrepancies in implant placement following<br />
surgery, the BioTemps provisional is designed with<br />
extra relief space within the cement space (Fig. 8),<br />
providing an internal offset in the area between the<br />
temporary crown and custom temporary abutment.<br />
Figure 4: Custom healing abutment designed<br />
Figure 5: Custom impression coping designed<br />
Figure 6: Custom temporary abutment designed<br />
Figure 7: BioTemps crown designed<br />
Figure 8: BioTemps crown designed with internal relief space<br />
– Lab Sense: Virtual Design of Inclusive Custom Temporary Components – 19
•Step 3: Milling of Custom Components<br />
Once the digital design of each component<br />
has been finalized, the files are transferred to a<br />
state-of-the-art computer-aided milling station. The<br />
custom impression coping, custom temporary<br />
abutment and custom healing abutment are all<br />
milled from polyether ether ketone (PEEK), an<br />
organic polymer thermoplastic (Figs. 9, 10).<br />
The BioTemps provisional crown is milled from<br />
poly(methyl methacrylate) (PMMA), a transparent<br />
thermoplastic sometimes referred to as acrylic glass<br />
(Figs. 11, 12). After seating is confirmed, the custom<br />
temporary crown is stained according to the shade<br />
prescribed by the clinician, then glazed before a<br />
final quality inspection is performed.<br />
Figure 9: PEEK abutment blank ready for milling<br />
Figure 10: Milled PEEK abutment<br />
Figure 11: Close-up of PMMA milling<br />
Figure 12: PMMA block after milling<br />
20<br />
– www.inclusivemagazine.com –
Figure 12: PMMA block after milling<br />
Figure 12: PMMA block after milling<br />
Inclusive ® Tooth Replacement Solution<br />
The finished custom temporary components<br />
(Fig. 13), along with the physical models and<br />
prosthetic guide, are sent to the clinician as part of<br />
the newly launched Inclusive ® Tooth Replacement<br />
Solution. One of the goals of this solution, which<br />
also includes an Inclusive ® Tapered Implant and<br />
the appropriate surgical drills (Fig. 14), is to provide<br />
clinicians with everything they need to provisionalize<br />
the case at the time of implant placement. This way,<br />
the patient can leave the office with an esthetic<br />
restoration in place. These custom temporary<br />
components not only serve to manage and maintain<br />
the desired gingival contours critical to a natural<br />
emergence profile, but also give the clinician and<br />
patient a chance to preview the ultimate result —<br />
providing valuable preliminary information and<br />
increasing the likelihood of acceptance upon<br />
delivery of the final restorative components<br />
(Inclusive Custom Abutment and BruxZir ® Solid<br />
Zirconia crown [<strong>Glidewell</strong> Laboratories]) that<br />
complete the Inclusive Tooth Replacement Solution.<br />
Summary<br />
Without proper communication of the desired<br />
gingival architecture, a laboratory technician must<br />
rely on model manipulation and guesswork when<br />
designing a patient’s final implant restoration.<br />
Such techniques tend to be less predictable and<br />
may compromise the esthetic outcome. Custom<br />
temporary components designed and milled using<br />
proven CAD/CAM techniques enable clinicians to<br />
guide soft tissue contours during the healing phase,<br />
and a matching custom impression coping serves<br />
to accurately preserve and capture these contours<br />
during the impression procedure. The overall<br />
result of this custom temporary solution is a clear<br />
translation of the desired gingival anatomy to the<br />
lab technician for use in designing the optimal<br />
emergence profile, greatly increasing the esthetic<br />
predictability of the final restorative result. IM<br />
Custom temporary components ... enable clinicians to guide soft tissue contours<br />
during the healing phase, and a matching custom impression coping serves to<br />
accurately preserve and capture these contours during the impression procedure.<br />
Figure 13: Inclusive Tooth Replacement Solution custom temporary components<br />
Figure 14: Inclusive Tapered Implant with surgical drills<br />
– Lab Sense: Virtual Design of Inclusive Custom Temporary Components – 21
Building a Referral Network Through<br />
Restorative Driven Implant Concepts<br />
by Robert A. Horowitz, DDS<br />
Introduction<br />
One might argue that the outcome of any implant case<br />
begins with a successful surgery. Most patients are less<br />
concerned with root-form placement, however, than<br />
they are with the esthetics and functionality of the final<br />
restoration. The success of any surgical practice is therefore<br />
highly dependent on the success of its referral network —<br />
the restorative dentists, laboratory technicians and other<br />
co-treating professionals who help to carry an implant case<br />
to completion.<br />
that have been known to complicate implant cases between<br />
the surgical and restorative phases. Intended to promote<br />
an effective, streamlined process resulting in a predictable<br />
outcome, this all-in-one, restorative-based solution (Fig. 1)<br />
offers a number of advantages for the team of providers<br />
working together to ensure each patient receives the best<br />
possible care.<br />
Fortunately, the factors that drive growth for a specialist<br />
practice are the same as those that drive growth for a<br />
general practice or laboratory, chiefly patient satisfaction<br />
and profitability — factors that derive from proper planning,<br />
efficient treatment and minimal complications. Treatment<br />
planning each case to include restorative considerations<br />
from the outset and ensuring proper collaboration and<br />
communication among all members of the team will greatly<br />
enhance the likelihood of a successful outcome and the<br />
efficiency with which it is achieved.<br />
The Inclusive ® Tooth Replacement Solution from <strong>Glidewell</strong><br />
Laboratories represents an intriguing new tool in the effort<br />
to address planning, communication and component issues<br />
Figure 1: Temporary, impression and final phases of the patient-specific Inclusive<br />
Tooth Replacement Solution<br />
22<br />
– www.inclusivemagazine.com –
Restorative Treatment Planning<br />
To obtain an ideal surgical outcome, a full diagnosis must<br />
be completed before the initiation of treatment. The final<br />
prosthetic design should also be considered. The more<br />
comprehensive the diagnosis, the better the final restoration<br />
will be. Clinical photographs and radiographs, periodontal<br />
evaluation, esthetic evaluation, diagnostic casts on an<br />
adjustable articulator with a wax-up of the teeth (present<br />
and missing) in ideal functional and esthetic locations, and<br />
a cone beam volumetric tomogram taken with a radioopaque<br />
stent are all helpful tools for accomplishing this.<br />
The laboratory technician is forced to approximate the<br />
design of the restorative components. In many cases, this<br />
results in an abutment or crown that does not quite fit<br />
properly, causes tissue blanching or looks less than natural<br />
where it emerges from the gingiva. Adjustments or even a<br />
remake may be required, costing the clinician and patient<br />
valuable chairtime.<br />
It is tempting for some surgical specialists to take prosthetic<br />
diagnosis and soft tissue sculpting for granted. They might<br />
think these are concerns chiefly for the restorative dentist.<br />
Why should a specialist take time to do general work? The<br />
truth is, these are foundational components that help lay<br />
the groundwork for the definitive restoration. Extra time<br />
spent in the planning stages can be rewarded tenfold in<br />
terms of time saved addressing complications that may<br />
otherwise result later in the case. Making the restorative<br />
clinician’s job easier is pleasing to both the clinician and the<br />
patient, fostering goodwill and leading to a greater number<br />
of future referrals.<br />
The Inclusive Tooth Replacement Solution places a great<br />
degree of emphasis on the preplanning of each case from<br />
a restorative perspective. Implant and case-specific surgical<br />
drills are provided according to the surgeon’s prescription,<br />
along with a prosthetic guide — fabricated from an initial<br />
impression — to help ensure proper implant placement<br />
(Fig. 2). Laboratory technicians then utilize digital technology<br />
to design and mill a custom temporary abutment and<br />
provisional restoration (Fig. 3), making them available at<br />
the time of surgery. For clinical flexibility, a custom healing<br />
abutment is also provided (Fig. 3). The purpose of these<br />
custom temporary components is to begin sculpting the<br />
gingiva on the day the implant is inserted. Rather than<br />
ignoring the soft tissue contours or leaving them to chance,<br />
they are guided during the healing phase to prepare for<br />
an ideal emergence profile of the final restoration. And<br />
because the components are pre-milled, the chairside<br />
time that might otherwise be spent crafting a provisional<br />
restoration is eliminated.<br />
Figure 2: The Inclusive Tooth Replacement Solution includes a prosthetic guide<br />
to help ensure proper implant placement.<br />
Restorative Communication<br />
Upon completion of the healing phase, the patient<br />
returns to the referring restorative clinician, who takes<br />
the impression for the lab. The typical challenge with<br />
implant cases is that a stock, cylindrical impression<br />
coping cannot properly capture the gingival architecture.<br />
Figure 3: The Inclusive Tooth Replacement Solution also includes a custom temporary<br />
abutment, a provisional restoration, and a custom healing abutment.<br />
– Building a Referral Network Through Restorative Driven Implant Concepts – 23
Figure 4: A custom impression coping (right) is designed to match the gingival<br />
architecture sculpted by the custom temporary abutment (center) and custom<br />
healing abutment (left). The custom impression coping would be forwarded to the<br />
restorative dentist.<br />
The Inclusive Tooth Replacement Solution addresses this<br />
issue from the outset with a custom impression coping<br />
(Fig. 4) designed to match the gingival architecture sculpted<br />
by the custom temporary abutment. When the patient<br />
returns to the referring doctor, the doctor simply removes<br />
the temporary, places the custom impression coping, takes<br />
the impression and sends it to the lab. The full gingival<br />
architecture is precisely captured for lab use, without the<br />
need to create a custom impression coping chairside.<br />
Restorative Outcome<br />
When utilizing the Inclusive Tooth Replacement Solution,<br />
restorative dentists get the benefit of a laboratory that<br />
has restored more than 160,000 implant cases. They can<br />
therefore expect precise, quality restorations without<br />
any unnecessary complications. A custom abutment and<br />
monolithic crown are milled to precisely match the digital<br />
design files used in the creation of the custom temporary<br />
components. Because of this, the abutment and crown<br />
should seat easily with a precise fit. Any adjustments should<br />
be minimal, allowing the patient to leave the office with a<br />
natural-looking definitive restoration requiring no further<br />
corrective appointments.<br />
Laboratory Support<br />
To maximize the number of successful referrals, an implant<br />
specialist needs to offer support to less-experienced<br />
restorative providers. An important ancillary benefit to<br />
<strong>Glidewell</strong>’s Inclusive Tooth Replacement Solution is that<br />
each case incorporates patient-specific custom components,<br />
simplifying treatment steps for less-experienced restorative<br />
clinicians. Further, the solution includes the customer<br />
support of a highly experienced team of technical advisors<br />
who can assist the restorative doctor with any questions or<br />
concerns that arise. This frees up the specialist staff to focus<br />
on specialized procedures, while still providing the referring<br />
doctor with answers to any questions or concerns. Users<br />
of the Inclusive Tooth Replacement Solution also benefit<br />
from a significant cost savings over the price of individual<br />
components. As the laboratory manufactures the implants<br />
and all other components on site at its state-of-the-art<br />
U.S. facility, vendor markups are reduced. A single price<br />
covers the entire cost of the solution, eliminating the<br />
guesswork often associated with determining treatment fees<br />
for the placement and restoration of implants.<br />
Summary<br />
The success of those who specialize in the placement of<br />
dental implants is determined in no small measure by<br />
the success of their restorative teams. A specialist who<br />
demonstrates an appreciation for the concerns of his cotreating<br />
professionals stands a better chance of achieving<br />
a positive outcome for the patient in the most efficient,<br />
predictable manner possible. With the Inclusive Tooth<br />
Replacement Solution, many of the communication gaps<br />
that traditionally interrupt the treatment chain are avoided.<br />
Soft tissue architecture is carefully managed from the outset<br />
and communicated effectively to the restorative team.<br />
Parts produced with CAD/CAM technology demonstrate<br />
precise fit and proper occlusion. The restorative process is<br />
simplified, encouraging referrals from clinicians who might<br />
otherwise be reluctant to prescribe implants, considering<br />
them too complex or time-consuming. By maximizing the<br />
patient satisfaction and profitability of referring doctors, the<br />
specialist practice will ultimately benefit. IM<br />
24<br />
– www.inclusivemagazine.com –
Implant Q&A:<br />
An Interview with<br />
Dr. Darrin Wiederhold<br />
Go online for<br />
in-depth content<br />
Interview of Darrin M. Wiederhold, DMD, MS<br />
by Bradley C. Bockhorst, DMD<br />
Dr. Darrin Wiederhold is an accomplished dentist and a<br />
new member of the <strong>Glidewell</strong> Laboratories clinical team. In this<br />
exclusive interview, he outlines the preparatory steps a clinician<br />
can take to successfully incorporate implant dentistry<br />
into their practice. He also discusses his experience<br />
with the new Inclusive ® Tapered Implant System and<br />
Inclusive ® Tooth Replacement Solution, and shares<br />
his vision for upcoming educational courses at the<br />
<strong>Glidewell</strong> International Technology Center.<br />
Dr. Bradley Bockhorst: Today we will spend some time talking with the<br />
newest member of the <strong>Glidewell</strong> clinical team, Dr. Darrin Wiederhold, about<br />
some of the projects and technologies we’ve been working on here at the laboratory.<br />
Darrin, can you tell the Inclusive audience a little bit about yourself?<br />
Dr. Darrin Wiederhold: Sure, I’d be happy to. I’m originally from the East Coast;<br />
a Pennsylvania boy. My dad worked for the CIA, so I had an opportunity to<br />
travel throughout my childhood and live in or visit six of the seven continents.<br />
I haven’t made it to Antarctica yet, but being a lover of the sun, I don’t see<br />
myself heading that way anytime soon. When I graduated from high school in<br />
Indonesia, I came back to Pennsylvania, went to college up in University Park<br />
and then to Temple University School of Dentistry down in Philadelphia.<br />
When I finished dental school, I had already started to get some experience<br />
with implants. I became interested in surgery during dental school, so I<br />
started to take some courses to prepare for possibly placing implants<br />
as a restorative dentist or, ultimately, as an oral surgeon. I was about<br />
99 percent sure I wanted to do oral surgery when I got out, but I wanted<br />
to be 100 percent sure before I made that commitment, so I enrolled in a<br />
GPR program up in Buffalo, New York, that had an extensive oral surgery<br />
component. I got a chance to do a lot of trauma cases and even got some<br />
26<br />
– www.inclusivemagazine.com –
early exposure to implants there. I decided that it was absolutely what I wanted<br />
to do. So, I applied and was admitted into an oral surgery residency program at<br />
the University of Kentucky at Lexington. I was there a year and had just finished<br />
my intern year when, for personal reasons, I had to withdraw from the program<br />
and take some time off. Two years later, I came back and did a second year of<br />
GPR down in Kentucky as their chief resident. So I had an opportunity to do<br />
about three years of additional training after dental school.<br />
BB: That brings up an interesting question. There’s a lot of interest among general<br />
dentists in starting to place implants. I think just like doing any other kind of<br />
procedure, whether it is wisdom teeth extractions, root canals or ortho, you have<br />
to make sure you’re well trained, confident and competent before you start doing<br />
it. Now, they don’t necessarily have to go through two GPRs and an oral surgery<br />
residency, but what are your thoughts as far as what general dentists should do in<br />
preparation for starting to place implants?<br />
DW: I don’t know that they need all of that additional training, but you do<br />
want more than just a weekend course. You really want to take a comprehensive<br />
course that’s going to expose you to bone physiology, make sure you’re familiar<br />
with all the terminology, allow you to do some live surgeries and develop your<br />
treatment planning skills. You want to become proficient in those aspects and<br />
work as much as you can.<br />
You really<br />
want to take a<br />
comprehensive<br />
course that’s<br />
going to ... allow<br />
you to do some<br />
live surgeries<br />
and develop<br />
your treatment<br />
planning skills.<br />
– Implant Q&A: An Interview with Dr. Darrin Wiederhold – 27
BB: There are some excellent implant courses out there, such as those at the Misch<br />
International Implant Institute and the AAID MaxiCourses ® . The Implants A-to-Z<br />
course at UCLA with Drs. Sascha Jovanovic and George Perri is also a great course.<br />
DW: Absolutely. If you have the opportunity and can invest in one of the yearlong<br />
courses, do it. Essentially, you can’t get enough education. That’s the takeaway<br />
here. Gaining understanding of the fundamentals is crucial. You really want to<br />
be proficient beyond just having a good sense of your surgical skills, the bone<br />
morphology and the anatomy in that area.<br />
Beyond that, though, I would say, managing cases postoperatively is imperative.<br />
You hope every case you do is going to be flawless, but complications can arise,<br />
and the more cases you do, it’s inevitable that you are going to encounter some<br />
challenges and difficulties. It’s important to work at becoming increasingly<br />
proficient and minimizing those complications, so when they do arise, you’ll<br />
have a good sense of how you’re going to handle the situation and can keep<br />
levelheaded during the surgery if you do encounter a problem. If you have a<br />
solid foundation to draw from and something unexpected comes up, you’ll have<br />
fewer sleepless nights.<br />
BB: So the key is knowing how to manage complications. Or, even better, how to<br />
avoid them by recognizing them ahead of time. Another recommendation might be<br />
to have a mentor.<br />
DW: Sure, if you have the opportunity to shadow someone — an oral surgeon,<br />
a periodontist or a general dentist who has extensive experience placing<br />
implants — you can shadow them in their office, watch them, and have them<br />
with you while you’re doing several of your cases.<br />
Additionally, I would say the number one thing would be case selection. You<br />
want to make sure that the first few cases you do are what you would consider<br />
“the ideal.” These cases are going to be the most straightforward, and will,<br />
hopefully, present you with the least challenges so that you can develop your<br />
skills, confidence and competence. Having that safety net in place, with a mentor<br />
or someone you can shadow, makes the process a lot easier.<br />
The number one<br />
thing would be<br />
case selection.<br />
You want to<br />
make sure that<br />
the first few<br />
cases you do<br />
are what you<br />
would consider<br />
“the ideal.”<br />
BB: OK, so we’ve got the correct amount of education. We’ve found a mentor<br />
and those ideal cases. Now what? What’s the ideal first case a clinician should be<br />
looking for?<br />
DW: I would say a maxillary first premolar. It affords all the surgical challenges<br />
that come with the maxilla, whether it be the sinus or avoiding the adjacent<br />
teeth. It allows you to work in the less dense bone, so it’s less forgiving and<br />
you have to be more proficient with it, but it gives you easy access without the<br />
esthetic challenges of an anterior tooth. So, if you can round up a good number<br />
of maxillary premolar cases out of the gate, really get your hands wet, then<br />
repetition is the key. If it seems like they’re getting too easy — that’s a good sign.<br />
It means you’re developing your skills and comfort level. Once you get that true<br />
sense of confidence in yourself and your cases are going well, then it might be<br />
time to branch out to an anterior tooth or a molar. You really can’t put a number<br />
on it, but the more “straightforward” cases you can do will really go a long way<br />
toward increasing your chances for success.<br />
BB: I think that goes back to a key point: having a mentor who can provide surgical<br />
backup. It’s about knowing what cases you’re comfortable with and what you should<br />
refer out. That way, if you run into a problem, you’ve got somebody who has your<br />
back as far as helping you through those cases.<br />
28<br />
– www.inclusivemagazine.com –
DW: Right. The thing that you gain most from those experiences is the ability to<br />
recognize when you’re in over your head a little bit, perhaps. There are people<br />
out there who are great at it, who have a natural instinct for it and can take<br />
right to it. But every day someone runs into a challenge that they either haven’t<br />
experienced before or they’re a little uncomfortable handing, or it’s something<br />
that they just would rather not deal with. So, when you are presented with a case<br />
that’s too challenging, there’s no shame in referring it out. Anyone out there who<br />
has had that experience and feels comfortable handling those challenges only<br />
got that way by having gone through it themselves. There’s no reason to feel that<br />
this is a knock against you as a surgeon in any way. It’s just recognizing that you<br />
haven’t seen this before, and figuring out how you’re going to handle it.<br />
BB: It’s part of your learning curve.<br />
DW: Absolutely.<br />
BB: One of the main things that you’ve been doing since you joined us is placing<br />
Inclusive ® Tapered Implants. Can you tell us a little bit about what you think of that<br />
system compared to other ones you have worked with in the past?<br />
DW: Sure. The system has all the advantages that the test of time has proven<br />
with implants of old — the internal hex being the most popular connection out<br />
there in dentistry. It’s got a thread design that maximizes your initial stability and<br />
helps promote osseointegration. It’s intuitively very easy to use. Anyone who<br />
has had experience with any of the large systems out there is going to be very<br />
comfortable using it and is going to be able to transition into Inclusive Tapered<br />
Implants very easily.<br />
The entire<br />
process from<br />
start to finish —<br />
from implant<br />
placement to<br />
the definitive<br />
restoration — is<br />
controlled, very<br />
predictable and<br />
optimal in terms<br />
of improving<br />
your chances<br />
of success.<br />
BB: It’s a system put together by a very experienced team. We have a lot of engineers<br />
and technicians who actually came from the implant industry. Key to being the first<br />
laboratory to introduce an implant system, though, is that we can encompass a full<br />
package. We can help with everything from planning the case to the final restoration,<br />
which leads into one of the major projects we’ve been working on, which is the<br />
Inclusive ® Tooth Replacement Solution. Can you tell us a little bit about that?<br />
DW: It’s basically a comprehensive package that has the full <strong>Glidewell</strong> expertise<br />
and experience behind it. In addition to the implant, the dentist receives up front<br />
a prosthetic guide, a custom healing abutment, a custom temporary abutment<br />
and BioTemps ® provisional crown (<strong>Glidewell</strong> Laboratories) to provide early<br />
contouring of the soft tissue, a matching custom impression coping, as well as<br />
the final prosthesis. So, the entire process from start to finish — from implant<br />
placement to the definitive restoration — is controlled, very predictable and<br />
optimal in terms of improving your chances of success. It’s a comprehensive<br />
package that you have laid out before you, before you ever get started. I think<br />
clinicians are really going to take to it.<br />
BB: Right. I think core to this solution is versatility. At implant placement, you’ll<br />
have a custom healing abutment that was made for you pre-surgery, a custom<br />
temporary abutment, a BioTemps crown and a matching impression coping. A<br />
surgical specialist who has a restorative-driven surgical practice can start<br />
sculpting those soft tissues correctly, making it easier for his restorative dentist.<br />
He can then either immediately provisionalize it, or he can put the healing abutment<br />
on it. And later, he can send that custom impression coping to the restorative<br />
dentist, who can then transfer those contours correctly to the laboratory. One of<br />
the biggest challenges for the lab is clinicians using narrow, round impression<br />
copings, and then trying to make an anatomically shaped tooth. This issue is core<br />
to the Inclusive Tooth Replacement Solution, so maybe you can expand on that.<br />
– Implant Q&A: An Interview with Dr. Darrin Wiederhold – 29
We’re excited about<br />
all the upcoming<br />
courses, and how<br />
we can gear them<br />
toward general<br />
practitioners and<br />
specialists alike to<br />
work hand-in-hand<br />
with us to improve<br />
their efficacy<br />
and efficiency.<br />
DW: Sure. For general practitioners who are doing both the surgery and the<br />
restorative procedures, it’s certainly a comprehensive package. If you are a surgical<br />
specialist looking to develop your referral base, then you have the advantage of<br />
being able to communicate to your general practitioner: “I’m not only going to<br />
place the implant for you, I’m going to start the restorative process. I’m going<br />
to place the healing abutment for you, so it can begin the soft tissue contour, to<br />
make your life much easier down the road — predictably.” It is something that<br />
can be easily reproduced. And the additional components can be forwarded to<br />
the restorative dentist, as you mentioned. When the time comes, they can place<br />
the custom impression coping that matches that emergence profile that’s been<br />
developed. So, there’s predictability and a great sense of continuity there. It’s<br />
also a great builder for a referral base for specialists who want to help out in the<br />
process beyond just placing implants.<br />
BB: And then, ultimately, it provides the final restoration — a superior restoration —<br />
which means better patient care.<br />
DW: Absolutely.<br />
BB: Let’s move on to other technologies: guided surgery. Can you tell us what your<br />
background was before and what you’re doing now with digital treatment planning<br />
and guided surgery?<br />
DW: I’ve been doing guided surgery for about six months now, since coming to<br />
<strong>Glidewell</strong>. Prior to that, I was doing freehand almost exclusively — reflecting a<br />
flap, going in there and eyeballing it, and performing the surgeries. The guided<br />
surgery is great, though. Not only does it allow you to take advantage of Cone<br />
Beam CT scanning capabilities, but it also allows you to anticipate if there’s<br />
going to be a need for a graft, whether you have enough available bone, or if<br />
there are any structures you need to avoid. So, the guided surgery has been<br />
very useful as far as minimizing flaps when necessary, as it virtually eliminates<br />
flaps. The postoperative healing period is certainly much better. It gives you<br />
peace of mind that is unparalleled. If you have the knowledge, going in, of<br />
where the structures are, where the adjacent roots are, the apices, the sinus, the<br />
alveolar nerve — whatever it might be — it’s just an extra tool that gives you<br />
that confidence.<br />
BB: Right. It provides something not only for the person new to placing implants,<br />
but also for the experienced surgical specialist who is using that three-dimensional<br />
view and planning everything so they don’t have those surprises when they go into it.<br />
Digital treatment planning is one of those things we can offer with our service, and<br />
it ties in with CBCT.<br />
There are other technologies we’ve been working with as well. Can you tell us a little<br />
bit about intraoral scanning?<br />
DW: You know, one of the greatest things about working at <strong>Glidewell</strong> is that we<br />
get the opportunity to play with all of the latest and greatest technologies. CBCT<br />
technology is a big component of those recent developments. We have a PreXion<br />
3D unit that we use. Intraoral scanners, I think, are also going to be a standard<br />
in the future. We’re certainly moving toward a digital era, and if we can eliminate<br />
the need for impression material, it cuts down on costs. If we have the ability<br />
to communicate and upload the images to the <strong>Glidewell</strong> laboratory right away<br />
to get started on the prosthesis, it reduces the turnaround time. It’s just a much<br />
more comfortable experience for the patient overall, and helps to ensure the<br />
best possible product for the dentist and, ultimately, for the patient, which is<br />
most important.<br />
30<br />
– www.inclusivemagazine.com –
BB: A colleague of mine refers to <strong>Glidewell</strong> as a <strong>Dental</strong> Disneyland because of all<br />
the technologies we have here. Any technology that’s on the market is, literally, in<br />
production here — and in production in a big way — so you can get an education<br />
here quickly.<br />
To wrap things up, another large role you’re going to have with us is running courses<br />
at the <strong>Glidewell</strong> International Technology Center. Can you talk about how we’re<br />
going to use these technologies to show dentists how they can easily incorporate them<br />
into their private practices?<br />
DW: Absolutely. We offer the opportunity to take courses on the lab’s premises.<br />
These are not courses designed to make a novice into an expert implantologist<br />
— again, you want to make sure you get those comprehensive, extended courses<br />
prior to coming in — but they’re an adjunct, something they can build on. For<br />
those who feel comfortable doing implants already, this is a way of streamlining<br />
everything for them, to make things easier for them and the patient.<br />
We’re going to be doing courses that address specifically the Inclusive Tooth<br />
Replacement Solution program. That certainly is going to help doctors down the<br />
road. Alternatively, we’re hoping to offer courses in both mini implants and our<br />
conventional-diameter implants that we’re launching. These courses are intended<br />
to familiarize clinicians and staff with the Inclusive system, and how it can benefit<br />
them in their practices. We’re going to have some courses on CBCT technology,<br />
offering the opportunity for folks who may not have access to that technology,<br />
or who are on the fence about it, to come in and see the benefits it can provide<br />
them. I know you are going to be doing digital treatment planning programs to<br />
expose folks to that technology. So, we’re excited about all the upcoming courses,<br />
and how we can gear them toward general practitioners and specialists alike<br />
to work hand-in-hand with us to improve their efficacy and efficiency — and<br />
ultimately perform better dentistry for their patients.<br />
BB: Very good. I sure appreciate having you here. Welcome aboard! IM<br />
31
Recession Relief:<br />
Incorporating <strong>Dental</strong> Implants<br />
into Your Daily Practice<br />
Go online for<br />
in-depth content<br />
by Ara Nazarian DDS, DICO<br />
Challenging economic circumstances create a<br />
number of consequences for dentists. More<br />
patients put off getting care when they need it, some<br />
don’t want to take time off from work to attend dental<br />
appointments and others feel more urgent needs require their<br />
limited funds. Many show up for care only when they can<br />
no longer tolerate the pain caused by their deteriorating<br />
oral condition or when infection threatens their overall<br />
health. By that point, they often have multiple problems,<br />
requiring any number of separate therapeutic procedures.<br />
A crucial way for any general dentist to recession-proof<br />
their practice is to provide patients with as many types of<br />
services as possible under one roof. Even if the prescribed<br />
service requires placement of an implant, this should be<br />
no exception. While many general dentists have avoided<br />
placing implants for various reasons, instrumentation and<br />
protocols have evolved to the degree that it is now possible<br />
for more dentists than ever to offer this standard of care.<br />
Among the newest breakthroughs is the convenient Inclusive<br />
® Tooth Replacement Solution introduced by <strong>Glidewell</strong><br />
Laboratories. For one inclusive price, dentists looking to<br />
offer a single-tooth replacement<br />
service receive virtually everything<br />
that is needed to provide the patient<br />
with a safe, predictable and highly<br />
esthetic implant restoration. But the<br />
“tooth-in-a-box” concept behind the<br />
Inclusive Tooth Replacement Solution<br />
goes well beyond the initial<br />
cost advantages of a bundled implant<br />
solution, benefitting greatly<br />
from a restorative-driven focus one<br />
might expect of a world-class dental<br />
lab. Initially, the dentist receives<br />
A crucial way for any<br />
general dentist to recessionproof<br />
their practice is<br />
to provide patients with as<br />
many types of services<br />
as possible under one roof.<br />
a prosthetic guide that enables fast and simple drilling, disposable<br />
drills, a state-of-the-art implant, a custom (patientspecific)<br />
healing abutment, a custom temporary abutment,<br />
a BioTemps ® provisional crown (<strong>Glidewell</strong> Laboratories),<br />
and a custom impression coping. After healing is complete,<br />
the dentist also receives a custom CAD/CAM final abutment<br />
and BruxZir ® Solid Zirconia crown (<strong>Glidewell</strong> Laboratories).<br />
The use of a prosthetic guide offers more than one benefit.<br />
By simplifying creation of the implant osteotomy, it takes<br />
significantly less time to place the implant. Even more<br />
importantly, the general dentist gains control, ensuring that<br />
placement occurs in the best location to support an optimal<br />
final restoration.<br />
If high primary stability is obtained, the dentist may choose<br />
to deliver the custom temporary abutment and BioTemps<br />
crown at the time of implant placement. Alternately, the<br />
custom healing abutment may be placed and the implant<br />
allowed to heal. Either way, the anatomical shape of<br />
the custom healing component serves to guide the soft<br />
tissue contours during osseointegration, and the custom<br />
impression coping — designed with<br />
the same anatomical contours —<br />
serves to precisely capture the final<br />
gingival architecture for the lab, thus<br />
increasing the likelihood that an ideal<br />
emergence profile will be achieved.<br />
The following case report presents a<br />
situation where the Inclusive Tooth<br />
Replacement Solution simplified the<br />
planning, placement and restoration<br />
of a posterior tooth, resulting in a<br />
high level of patient satisfaction.<br />
34<br />
– www.inclusivemagazine.com –
Among the newest breakthroughs<br />
is the convenient Inclusive ®<br />
Tooth Replacement Solution. ... For one<br />
inclusive price, dentists looking to offer a<br />
single-tooth replacement service receive<br />
virtually everything that is needed to provide<br />
the patient with a safe, predictable and<br />
highly esthetic implant restoration.<br />
Figure 1: Clinical view of edentulous area #3<br />
Figure 2: Preoperative X-ray of edentulous area #3<br />
Case Report<br />
The 33-year-old female patient presented with concerns<br />
about her missing maxillary first molar (Figs. 1, 2). She<br />
wondered about the potential for the adjacent teeth<br />
shifting, and she also worried that the missing tooth might<br />
compromise her job-hunting prospects. The patient’s medical<br />
history was non-contributory, and she was in excellent<br />
health. The tooth had been endodontically treated and<br />
subsequently removed due to a vertical fracture that had<br />
occurred five months earlier. Upon clinical examination, it<br />
was evident that the ridge was sufficient to accommodate<br />
a traditional-sized dental implant to restore the area to<br />
proper esthetics, form and function. After all the risks<br />
and benefits of the various treatment alternatives were<br />
reviewed with the patient, she chose to have an implant<br />
placed in the area of the missing first molar.<br />
In order to plan for this implant and restoration, an<br />
Figure 3: Prosthetic guide with gutta-percha<br />
impression of the upper and lower arches was taken,<br />
along with a bite registration, and forwarded to <strong>Glidewell</strong><br />
Laboratories. Radiography and clinical evaluation led to the<br />
prescription of an Inclusive ® Tapered Implant (<strong>Glidewell</strong><br />
Laboratories), 5.2 mm in diameter and 11.5 mm in length.<br />
Based on information from the models and radiograph, the<br />
laboratory fabricated a clear prosthetic guide that identified<br />
the parameters for ideal implant placement. A custom<br />
polyether ether ketone (PEEK) healing abutment, a custom<br />
PEEK temporary abutment, a custom impression coping and<br />
a BioTemps provisional crown were designed and milled.<br />
All items — including the implant and related drills — were<br />
delivered from <strong>Glidewell</strong> in a single, convenient package.<br />
The first molar area was anesthetized using 1.8 ml 4%<br />
Septocaine with 1:100,000 epinephrine. The prosthetic<br />
guide was placed on the adjacent teeth, and a gutta-percha<br />
point was positioned in the access hole (Fig. 3). A radiograph<br />
– Recession Relief: Incorporating <strong>Dental</strong> Implants into Your Daily Practice – 35
was taken; however, because the gutta-percha point was<br />
radiopaque, its position on the radiograph was used to<br />
confirm the proper drilling angle, relative to the surrounding<br />
structures (Fig. 4).<br />
Once the drilling angle was<br />
confirmed, the 2.3/2.0 mm pilot<br />
drill was used to drill through<br />
the prosthetic guide and the soft<br />
tissue into the underlying bone,<br />
using copious amounts of sterile<br />
saline. The prosthetic guide<br />
ensured that the osteotomy was<br />
centered buccolingually, as well as<br />
mesiodistally. A paralleling pin was placed into the osteotomy<br />
(Fig. 5), and another X-ray was taken to verify the pin’s<br />
angulation. The osteotomy was then further extended to the<br />
recommended length for the selected implant. Using a rotary<br />
tissue punch, a 5 mm outline was created over the initial<br />
osteotomy (Fig. 6), and the tissue plug was removed with a<br />
curette. Drills of increasing size<br />
were sequentially utilized until<br />
the desired width was achieved.<br />
The implant was torqued to its<br />
final depth, reaching a torque level<br />
of 45 Ncm with one of the<br />
internal hex flats facing buccally.<br />
Once the osteotomy was<br />
completed, the implant (Fig. 7)<br />
was placed in the osteotomy<br />
using the accompanying carrier<br />
(Fig. 8) and initially handtightened.<br />
The torque wrench<br />
was then connected to the<br />
implant driver (Fig. 9), and the implant was torqued to its<br />
final depth (Fig. 10), reaching a torque level of 45 Ncm with<br />
one of the internal hex flats facing buccally. This is important,<br />
Figure 4: X-ray of gutta-percha<br />
Figure 5: Paralleling pin placed in osteotomy<br />
Figure 6: Tissue punch over the initial osteotomy<br />
Figure 7: Inclusive Tapered Implant<br />
36<br />
– www.inclusivemagazine.com –
as all patient-specific temporary components were fabricated<br />
assuming the final connection orientation.<br />
A periapical radiograph was taken to confirm the position<br />
of the implant (Fig. 11). Use of an Osstell ® ISQ implant<br />
stability meter (Osstell Inc. USA; Linthicum, Md.) showed<br />
values of 72/68. (According to the manufacturer, a reading<br />
above 55 indicates excellent primary stability.) Because the<br />
implant was not in the esthetic zone, it was not immediately<br />
provisionalized. Instead, the custom healing abutment was<br />
connected to the implant (Fig. 12).<br />
Four months later, the patient returned for impressions for<br />
the final abutment and crown restoration. Using the custom<br />
impression coping and a polyvinyl siloxane impression<br />
material (Capture ® PVS, <strong>Glidewell</strong> Laboratories), a full-arch<br />
impression was taken of the upper arch, along with the<br />
Figure 8: Finger driver and implant<br />
Figure 9: Implant placed with torque driver<br />
Figure 10: Implant seated at final depth<br />
Figure 11: X-ray verifying implant placement<br />
Figure 12: Custom healing abutment connected to the implant<br />
– Recession Relief: Incorporating <strong>Dental</strong> Implants into Your Daily Practice – 37
opposing arch impression and bite registration. The<br />
prefabricated custom temporary abutment and provisional<br />
crown were placed during the two-week period while the<br />
final restoration was being fabricated. The custom temporary<br />
abutment was hand-tightened (Fig. 13), and the BioTemps<br />
crown (Fig. 14) was cemented with TempBond ® Clear <br />
with Triclosan temporary crown & bridge cement (Kerr<br />
Corporation; Orange, Calif.).<br />
Two weeks later, the patient returned for the placement of<br />
the final Inclusive ® Titanium Custom Abutment (Fig. 15) and<br />
BruxZir Solid Zirconia restoration (<strong>Glidewell</strong> Laboratories)<br />
(Fig 16). As the laboratory fee for the final abutment and<br />
crown was included in the price of the Inclusive Tooth<br />
Replacement Solution, there were no additional charges at<br />
this stage, further simplifying the treatment process from a<br />
business standpoint.<br />
Conclusion<br />
A key tactic for any dentist feeling the pinch in a difficult<br />
economy is to seek more efficient ways to provide service<br />
offerings, or to take on new services previously outsourced<br />
to another provider. While traditional implant treatment can<br />
be difficult, costly and time-consuming, the restorative-driven<br />
Inclusive Tooth Replacement Solution serves to simplify the<br />
process of placing and restoring dental implants, making<br />
it more convenient and affordable for both the dentist and<br />
the patient.<br />
In the case presented here, initial implant placement was<br />
completed in just 20 minutes, with subsequent delivery of the<br />
custom temporary abutment and temporary crown requiring<br />
even less time. The patient was extremely pleased to be able<br />
to have her missing tooth replaced and her compromised<br />
appearance addressed with a high-quality provisional in such<br />
a short amount of time, and the custom healing components<br />
and custom impression coping helped ensure an optimal<br />
emergence profile for her definitive restoration. With minimal<br />
hassle, an esthetic final result and built-in savings, the “toothin-a-box”<br />
concept behind the Inclusive Tooth Replacement<br />
Solution gives dentists of any experience level another worthy<br />
option for strengthening their practice in today’s recessionaddled<br />
marketplace. IM<br />
Figure 13: Custom temporary abutment in place<br />
Figure 14: BioTemps crown in place<br />
Figure 15: Final Inclusive Titanium Custom Abutment in place<br />
Figure 16: Final BruxZir crown in place<br />
38<br />
– www.inclusivemagazine.com –
Clinical Tip:<br />
Placing Custom Healing Abutments<br />
Go online for<br />
in-depth content<br />
by Bradley C. Bockhorst, DMD<br />
For some cases, delivering a restoration on<br />
an implant that has a standard, round healing<br />
abutment can literally be the equivalent of putting a square<br />
or triangular peg in a round hole. Integral to the <strong>Glidewell</strong><br />
Laboratories Inclusive ® Tooth Replacement Solution are the<br />
components that help sculpt the peri-implant soft tissues.<br />
Utilizing an anatomically shaped custom healing abutment<br />
not only sets the stage for a superior restoration, but also<br />
simplifies the restorative process, allowing for easier, complete<br />
seating of the prosthetic components.<br />
Custom healing abutments provide a superior option<br />
to standard, round healing abutments if the case is not<br />
going to be immediately provisionalized. The abutments<br />
are fabricated from polyether ether ketone (PEEK), and<br />
can be modified as needed. In cases where the soft tissue<br />
is reflected, complete seating can be visualized and the<br />
flap reapproximated and sutured into place around the<br />
abutment. In flapless cases, the sulcus can be created<br />
by various surgical means, such as a tissue punch of<br />
appropriate diameter, a scalpel or a bur. In this case, a CO 2<br />
laser was used. The model was used as a guide to remove<br />
the tissue in the approximate transgingival shape of the<br />
healing abutment. Complete seating can be confirmed with<br />
a periapical radiograph.<br />
When placing a custom healing abutment, the abutment<br />
screw should be tightened to 12–15 Ncm. If space allows,<br />
the screw access opening should be sealed to prevent food<br />
and debris from accumulating in the screw access hole.<br />
Cover the head of the screw with a cotton pellet, Teflon tape<br />
or gutta-percha. Seal the opening with composite, acrylic or<br />
a light-cure resin cement, as is demonstrated in this case.<br />
For the final impressions, the screw can easily be uncovered,<br />
and the custom healing abutment removed and replaced<br />
with the matching custom impression coping.<br />
The following case, courtesy of Dr. Dean Saiki, Oceanside,<br />
Calif., illustrates this technique. IM<br />
Figure 1: Custom healing abutment in place on the model<br />
Figure 2: Laser-assisted gingivectomy prior to implant placement<br />
Figure 3: Implant in situ<br />
40<br />
– www.inclusivemagazine.com –
Figure 4: Custom healing abutment in place in the patient’s mouth<br />
Figure 5: Abutment screw tightened to 15 Ncm<br />
Figure 6: Cotton pellet placed over head of screw<br />
Figure 7: Access opening sealed with Maxcem Elite self-etch/self-adhesive resin<br />
cement (Kerr Corporation; Orange, Calif.)<br />
Figure 8a: One week post-op (occlusal view)<br />
Figure 8b: One week post-op (buccal view)<br />
– Clinical Tip: Placing Custom Healing Abutments – 41
Restorative Driven Implant Solutions<br />
Utilizing the Latest Technology<br />
Go online for<br />
in-depth content<br />
by Timothy F. Kosinski, DDS, MAGD<br />
As a general dentist who has placed nearly 7,000 dental implants, I have come to understand the importance<br />
of planning from day one for the implant placement and soft tissue healing that will help me achieve my prosthetic<br />
goals for the patient. Being able to visualize the finished case prior to starting is even more relevant today, given<br />
patient expectations with regard to efficiency and outcome. Due to recent advancements in dental technology, this is easier<br />
than ever before.<br />
With CBCT-aided diagnoses and treatment planning, for example, we are able to predictably and virtually place implants<br />
using the latest computer software. The use of surgical guides based on a virtual plan has made procedures predictable and<br />
less invasive for the patient. 1 Often, flapless surgical procedures can be used, which further minimizes healing time and<br />
patient discomfort.<br />
– Restorative Driven Implant Solutions Utilizing the Latest Technology – 43
Meanwhile, the next generation of CAD technology affords us the ability not only to determine implant positioning in bone,<br />
but also to determine soft tissue contours utilizing custom, patient-specific transitional appliances: custom-milled healing<br />
abutments for maximizing final tissue contours, custom-milled transitional or temporary abutments for supporting the transitional<br />
prosthetic appliance, and custom-milled impression copings that match the tissue contours created by the healing<br />
abutment or transitional abutment. The utilization of these appliances allows the tissue to heal properly in the best position<br />
possible, the patient and dentist to visualize the emergence profile of the transitional restoration, and the laboratory technician<br />
to ultimately understand tissue health, contour and ideal esthetics.<br />
Despite such technological innovations, many general dentists still avoid placing implants, demonstrating a seeming lack<br />
of interest in providing what is a progressive, predictable treatment in an exciting field of dentistry. Some express a lack<br />
of confidence in the surgical applications and the fear of damaging a nerve or sinus. Others worry that they will not be<br />
able to anticipate all the costs involved in order to deliver their services profitably. Traditionally, implant dentists have had<br />
to maintain complicated inventories of drills, implants and related components. Laboratory fees and other costs have not<br />
always been predictable either. For these and other reasons, the adoption of implant treatment services by many general<br />
practitioners remains a daunting prospect.<br />
However, the introduction of the Inclusive ® Tooth Replacement Solution from <strong>Glidewell</strong> Laboratories represents a significant<br />
breakthrough. With all of the necessary components provided for a single, fixed price, concerns about cost control are<br />
eliminated from the outset. Moreover, users can routinely offer their patients implant solutions that are restorative-driven at<br />
every step of the treatment. Rather than wait until the implant has healed to learn whether an esthetic final restoration can<br />
be created, the dentist can feel confident in advance that it will be.<br />
Planning Phase<br />
While the Inclusive Tooth Replacement Solution does not require use of a CT scan, a scan can provide accurate anatomical<br />
information that would be otherwise inaccessible, eliminating risks and simplifying the surgery. Virtually placing an implant<br />
prior to ever touching the patient is a logical treatment step. Most patients seem to understand this and are willing to invest<br />
in a CT diagnosis.<br />
After the CT scan, the scan data and impressions are sent to <strong>Glidewell</strong> Laboratories, where the model is fabricated and<br />
optically scanned. The scan of the model and CT scan of the patient are imported into planning software. A Web-based<br />
teleconference is then conducted with the treating dentist to finalize the plan. The surgical guide and a 3-D model are<br />
printed. The custom healing abutment, custom temporary abutment, BioTemps ® provisional crown (<strong>Glidewell</strong> Laboratories)<br />
and matching impression coping are designed and milled. All of these customized components, along with the desired<br />
implant and related drills, are delivered to the practice approximately one week later in a single box.<br />
Surgical Phase<br />
For implant placement, the optimal implant positioning is directed through use of either a prosthetic guide, which is provided<br />
when stone models are used for diagnosis, or a surgical guide based on a CT scan. This guide not only helps to ensure<br />
a safe and predictable path of insertion, but also positions the implant and prosthetic platform in an optimal orientation for<br />
placement of the transitional (and later, final) restorative components.<br />
Through placement of a custom-milled temporary abutment, sculpting of the soft tissue begins as soon as the implant is sufficiently<br />
stable, either at the time of surgery or after initial healing. In my experience, if an implant can be torqued into place<br />
in the initial osteotomy site to 35 Ncm or more, it can be predictably loaded with a transitional crown, as long as excursive<br />
contacts are removed and there is no excessive occlusal force placed. 2,3 CT planning ensures that implants and crowns<br />
are ideally situated, so that forces are maintained along the long axis of the implant. If the implant is torqued to less than<br />
35 Ncm, the custom healing abutment at the level of the soft tissue can be used. With either component, soft tissue<br />
sculpting commences immediately post-surgery.<br />
Restorative Phase<br />
Upon successful osseointegration and appropriate soft tissue healing, a final impression is made using a custom impression<br />
coping. Milled to replicate the gingival architecture created during the healing phase, the custom impression coping<br />
captures the exact soft tissue contours formed by the custom temporary abutment. This can be of tremendous assistance to<br />
44<br />
– www.inclusivemagazine.com –
the laboratory in the creation of an ideal final prosthesis, as it provides a clearer image of the definitive emergence profile,<br />
which is critical to the esthetic outcome. A traditional stock impression coping does not accurately convey the soft tissue<br />
architecture around the margin, thus making the laboratory’s job more difficult and the final restoration less predictable.<br />
While techniques exist for the fabrication of a custom impression coping chairside, clinicians seeking to maximize clinical<br />
efficiencies and reduce chairtime will appreciate the convenience of having this custom component prepackaged for initiation<br />
of the restorative phase.<br />
Case Reports<br />
For the cases that follow, a CT scan was done with the patients’ bite open at least 5 mm. You do not want the patient to be<br />
scanned in a fully occluded state, as this could create overlap and inaccuracies. The laboratory can provide various surgical<br />
guide options to help you with this important step. Here, a single surgical guide compatible with Universal SurgiGuide ®<br />
Drill Keys (Materialise <strong>Dental</strong> Inc.; Glen Burnie, Md.) was used for each case. Keys based on the drill diameters to be used<br />
were placed in the sleeves of the surgical guide to direct each drill precisely. Based on the virtual plan and clinical determination<br />
that there was adequate attached gingiva, the cases were done following a flapless procedure.<br />
CASE ONE:<br />
Figure 1: Edentulous anterior maxilla. The patient lost her maxillary central and<br />
lateral incisors following an accident.<br />
Figure 2: The patient had worn an RPD appliance for more than eight months.<br />
As her quality of life was remarkably diminished, she requested a permanent, fixed<br />
restoration.<br />
Figure 3: A CT scan was done, and the implant placement virtually planned.<br />
Figure 4: A surgical guide was fabricated with sleeves to accommodate drill keys<br />
for each drill.<br />
– Restorative Driven Implant Solutions Utilizing the Latest Technology – 45
Figure 5: A 2.3 mm diameter key was inserted into the sleeve of the surgical<br />
guide, and the 2.3/2.0 mm pilot drill was used to create the initial osteotomy to<br />
the predetermined depth.<br />
Figure 6: A 2.8 mm diameter key was used for the 2.8/2.3 mm surgical drill.<br />
Figure 7: Based on the patient’s bone density, the 3.4/2.8 mm surgical drill was<br />
used to create the final width of the osteotomy to accept the 3.7 mm diameter<br />
Inclusive ® Tapered Implant (<strong>Glidewell</strong> Laboratories). A 3.5 mm key was used in this<br />
case to provide proper guidance.<br />
Figure 8: The surgical guide was removed from the mouth and the implant<br />
inserted.<br />
Figure 9: The implant driver was utilized with the torque wrench for final seating<br />
of the implant. One flat on the internal hex of the implant should face the labial,<br />
matching the orientation of the implant analog in the model.<br />
Figure 10: Immediate placement of the implants in the maxillary right and left<br />
lateral incisor areas showed little to no bleeding. The flapless procedure was relatively<br />
noninvasive.<br />
46<br />
– www.inclusivemagazine.com –
a<br />
b<br />
Figures 11a, 11b: Digital radiograph of the implants ideally positioned per the<br />
CT planning software and final CT illustrating position of the implants, which mimics<br />
the pre-surgical virtual determination<br />
Figure 12: The Inclusive Tooth Replacement Solution for this case includes: custom<br />
temporary abutments used if the implants are torqued to a minimum of 35 Ncm;<br />
a BioTemps bridge #7–10; custom healing abutments approximating ideal tissue<br />
contours; and custom impression copings to be used after integration and tissue<br />
healing. All are custom-fabricated to assist in developing the ideal soft tissue contours<br />
and emergence profiles.<br />
Figure 13: Because the implants were torqued to over 35 Ncm, custom temporary<br />
abutments were positioned to accept the premade provisional bridge. Tissue<br />
contours were established immediately following surgical placement of the implants.<br />
Figure 14: The transitional bridge was seated over the custom temporary abutments<br />
immediately at implant placement.<br />
Figure 15: With the transitional bridge in place, the patient exhibited a Class II<br />
relationship with no anterior occlusion.<br />
Figure 16: Occlusal view of the transitional bridge<br />
– Restorative Driven Implant Solutions Utilizing the Latest Technology – 47
a<br />
b<br />
Figure 17: The final impression was made using the custom impression copings.<br />
This enabled the laboratory to begin fabrication of the final zirconia abutments and<br />
bridge while the patient was healing. Note that the impression components capture<br />
the exact soft tissue contours formed by the custom temporary abutments, assisting<br />
the laboratory in creating an ideal final prosthesis.<br />
Figures 18a, 18b: The impression was made and the impression copings snapped<br />
into the impression for the laboratory to fabricate the master cast.<br />
CASE TWO:<br />
Figure 1: Preoperative view of periodontally involved maxillary left central incisor<br />
Figure 2: Digital radiograph of periodontally involved tooth #9<br />
Figure 3: CT-based virtual plan of maxillary left central incisor, indicating where the<br />
implant will be placed at the time of extraction<br />
Figure 4: A computer-generated model was fabricated once virtual placement was<br />
completed.<br />
48<br />
– www.inclusivemagazine.com –
Figure 5: A surgical guide was then created to position the implant correctly.<br />
Figure 6: Using the Inclusive Tooth Replacement Solution, a custom temporary<br />
abutment and BioTemps provisional crown, custom healing abutment, and custom<br />
impression coping were fabricated.<br />
Figure 7: Planning for the possibility of low insertion torque and the patient’s desire<br />
for a provisional restoration at the time of surgery, a removable partial denture<br />
was also fabricated.<br />
Figure 8: The tooth was atraumatically extracted using Physics ® Forceps (Golden<br />
<strong>Dental</strong> Solutions Inc.; Detroit, Mich.).<br />
Figure 9: The surgical guide was positioned over the osteotomy site.<br />
Figure 10: A 2.4 mm diameter key was used to guide the 2.3/2.0 mm pilot drill.<br />
– Restorative Driven Implant Solutions Utilizing the Latest Technology – 49
Figure 11: A 3.9 mm diameter key was used to guide the 3.8/3.4 mm surgical<br />
drill.<br />
Figure 12: The osteotomy was completed with the 4.4/3.8 mm surgical drill.<br />
Figure 13: To maintain sterility, the 4.7 mm Inclusive Tapered Implant was carried<br />
to the osteotomy site using the attached carrier.<br />
Figure 14: The implant was advanced using the attached carrier as a finger driver.<br />
Figure 15: A torque wrench was used for final seating, positioning the implant with<br />
one of the internal hex flats to the facial, matching the orientation in the model as<br />
closely as possible. Final insertion torque did not exceed 35 Ncm.<br />
Figure 16: Digital radiograph of implant positioned, approximating the cementoenamel<br />
junction (CEJ) of the adjacent roots<br />
50<br />
– www.inclusivemagazine.com –
Figure 17: Due to the lower-than-requisite final torque value, the decision was<br />
made to place the custom healing abutment and seat the RPD appliance, rather<br />
than load the implant with the custom temporary abutment and provisional crown.<br />
Figure 18: With the RPD appliance in place, integration was allowed to progress<br />
predictably, with minimal stress on the implant site.<br />
Discussion<br />
Success with implant dentistry is based on the need to achieve primary stabilization and secondary integration of the implant,<br />
while maintaining hard and soft tissue contours to create long-term function and esthetics. 4,5 Just as CT scanning<br />
software is changing the way we practice implant surgery, CAD/CAM technology is changing the restorative aspects of our<br />
practices. These improved, patient-specific materials and techniques are fast becoming preferential to conventional components.<br />
Precise, biocompatible materials with great mechanical strength and esthetics are constantly improving the fabrication<br />
of our prostheses, making them more predictable.<br />
A striking feature of the Inclusive Tooth Replacement Solution is that it allows for substantial treatment versatility, enabling<br />
excellent soft tissue contouring regardless of the choices made. If the dentist finds it impossible to torque an implant to at<br />
least 35 Ncm, the included custom healing abutment can be utilized and the soft tissue around the implant trained to an<br />
ideal contour.<br />
After osseointegration has been achieved, the custom healing abutment can be replaced with the custom temporary abutment,<br />
which duplicates the tissue contours of the healing abutment. Because the contours of the temporary abutment mimic<br />
those of the patient’s original tooth root, the soft tissue healing that occurs around it sets the stage for an optimal emergence<br />
profile when the final abutment and restoration are delivered. Alternately, if a torque of greater than 35 Ncm is achieved<br />
when the implant is placed, the custom temporary abutment and BioTemps crown can be placed immediately. 6<br />
Summary<br />
Within just the past few years, advances in diagnostic technology and surgical protocols have made dental implant treatment<br />
substantially simpler, safer and faster. The introduction of the Inclusive Tooth Replacement Solution takes that simplification<br />
even further, as it eliminates the biggest barriers to placing implants and provides all the tools necessary to work from the<br />
very onset of treatment toward achieving the most esthetic restoration possible. As dentists, don’t we have an obligation to<br />
provide our patients with the most innovative, proven techniques available? IM<br />
references<br />
1. Ganz SD. Restoratively driven implant dentistry utilizing advanced software and CBCT: realistic abutments and virtual teeth. Dent Today. 2008;27:122–27.<br />
2. Lee CY. Immediate load protocol for anterior maxilla with cortical bone from mandibular ramus. Implant Dent. 2006 Jun;15(2):153–59.<br />
3. Balshi SF, Wolfinger GJ, Balshi TJ. A prospective study of immediate functional loading following the Teeth in a Day protocol: a case series of 55 consecutive edentulous<br />
maxillas. Clin Implant Dent Relat Res. 2005;7(1):24–31.<br />
4. van Steenberghe D, Glauser R, Blombäck U, et al. A computed tomographic scan-derived customized surgical template and fixed prosthesis for flapless surgery and immediate<br />
loading of implants in fully edentulous maxillae: a prospective multicenter study. Clin Implant Dent Relat Res. 2005;7 Suppl 1:111–20.<br />
5. Glauser R, Rée A, Lundgren A, et al. Immediate occlusal loading of Brånemark implants applied in various jaw bone regions: a prospective, 1-year study. Clin Implant Dent<br />
Relat Res. 2001;3(4):204–13.<br />
6. Locante WM. Single-tooth replacements in the esthetic zone with an immediate function implant: a preliminary report. J Oral Implantol. 2004;30(6):369–75.<br />
– Restorative Driven Implant Solutions Utilizing the Latest Technology – 51
Restorative Driven Implant Treatment:<br />
From Immediate Temporization<br />
to Final Restoration<br />
Go online for<br />
in-depth content<br />
by Paresh B. Patel, DDS<br />
When dentists place implants, a decision is<br />
typically made — depending on the quality<br />
of the bone encountered during osteotomy preparation<br />
and the degree of primary stability obtained — to immediately<br />
load the implant with a temporary abutment<br />
and provisional crown, or to place a healing abutment<br />
on the implant to better protect it from occlusal forces.<br />
Stock components for either approach typically have the<br />
disadvantage of being round; thus, as the soft tissue heals<br />
around them, the ground is laid for an unnaturally shaped<br />
emergence profile on which a final restoration with<br />
less-than-optimal esthetics must be created. While the<br />
development of CAD/CAM techniques made possible the<br />
creation of custom, anatomically shaped components,<br />
their use has been reserved for producing the definitive<br />
abutment, and doing so introduced uncertainties about<br />
the total cost of treatment — until now.<br />
The introduction of the Inclusive ® Tooth Replacement<br />
Solution from <strong>Glidewell</strong> Laboratories changes this substantially.<br />
Ingenious in its simplicity, the “tooth-in-a-box”<br />
concept behind this solution makes it easier to place an<br />
implant that will support the best possible final crown,<br />
while maximizing treatment options and eliminating all<br />
uncertainty about total cost. For a single price, the dentist<br />
receives an implant and all of the components necessary<br />
to sculpt the soft tissue and shape the final emergence<br />
profile, no matter what conditions are encountered during<br />
implant placement.<br />
The following case illustrates use of the Inclusive Tooth<br />
Replacement Solution to replace a patient’s maxillary premolar,<br />
employing conventional diagnostic methods.<br />
Case Report<br />
A 42-year-old female patient presented with an unremarkable<br />
medical and dental history. Her chief complaint was a<br />
missing maxillary left premolar, which she lost after failed<br />
root canal treatment. No socket preservation was done<br />
upon removal of the tooth more than nine months earlier.<br />
Since then, the patient had been functioning without any<br />
prosthesis. She wanted to replace the missing tooth with<br />
an implant, and stated she was willing to continue living<br />
without a temporary crown if implant primary stability<br />
could not be achieved.<br />
Thorough clinical examination — including diagnostic<br />
impressions, bone sounding and a panoramic radiograph<br />
— revealed adequate width and height of bone at the<br />
premolar site. Although some collapse of the buccal bone<br />
was evident, it was determined that a sufficient amount<br />
was present to proceed with implant therapy. Soft tissue<br />
examination revealed that the attached gingival volume<br />
was adequate and the tissue was healthy. Because more<br />
than 7 mm of space existed between the two adjacent<br />
Figure 1a: Custom healing abutment, custom temporary abutment, BioTemps<br />
provisional crown, custom impression coping<br />
52<br />
– www.inclusivemagazine.com –
teeth, placement of a 3.7 mm diameter implant would leave<br />
more than 1.5 mm of space between the implant and each<br />
adjoining tooth, a distance generally acknowledged as<br />
sufficient to reduce marginal bone loss and the resultant<br />
negative loss of papillae. 1,2<br />
Figure 1b: Prosthetic guide<br />
The optimal treatment plan called for using the custom<br />
temporary abutment if 35 Ncm of torque could be obtained.<br />
The patient would then have to comply with a soft diet during<br />
the progression of healing from primary to secondary<br />
stability. If primary stability could not be achieved, the<br />
custom healing abutment included as part of the Inclusive<br />
Tooth Replacement Solution would be placed.<br />
Clinical Procedure<br />
Figure 2: Prosthetic guide seated<br />
Figure 3: Initial osteotomy<br />
Figure 4: Custom healing abutment seated<br />
Figure 5: Custom temporary (occlusal view)<br />
A full-arch polyvinyl siloxane impression using Capture ®<br />
PVS impression material (<strong>Glidewell</strong> Laboratories) was taken,<br />
along with a bite registration. A shade selection was made<br />
and a digital photograph was taken. All of these were sent<br />
to <strong>Glidewell</strong> Laboratories, along with an Inclusive Tooth<br />
Replacement Solution prescription form. There, the information<br />
was used to pour a stone model of both arches to<br />
create the diagnostic study models for the Inclusive Tooth<br />
Replacement Solution process.<br />
Following scanning, the digital study models were used to<br />
fabricate a custom healing abutment, custom temporary<br />
abutment and custom impression coping — all with matching<br />
gingival contours — along with a BioTemps ® provisional<br />
crown (<strong>Glidewell</strong> Laboratories) (Fig. 1a). These items, as<br />
well as a prosthetic guide (Fig. 1b) that communicated to the<br />
dentist the optimal osteotomy position in order to ensure<br />
creation of an esthetic final crown, were all delivered from<br />
<strong>Glidewell</strong> prior to treatment.<br />
On the day of implant placement, the prosthetic guide was<br />
seated securely into place (Fig. 2). A flapless osteotomy was<br />
created (Fig. 3), beginning with a pilot drill, followed by a<br />
tissue punch and, finally, sequential widening of the osteotomy<br />
using the disposable drills packaged with the Inclusive<br />
Tooth Replacement Solution. A 3.7 mm x 13 mm Inclusive ®<br />
Tapered Implant was then placed. However, only 30 Ncm of<br />
torque was achieved. Because it was not possible to tighten<br />
the implant more than 35 Ncm, the custom healing abutment<br />
was utilized (Fig. 4).<br />
Five weeks later, the patient returned, the healing abutment<br />
was removed and the implant was found to be stable and<br />
healing uneventfully. The custom impression coping was<br />
connected to the implant and an impression was taken.<br />
Careful inspection of the custom impression coping confirmed<br />
that it featured the same gingival contours as the<br />
custom healing abutment, ensuring all minute details of the<br />
carefully sculpted soft tissue would be properly communicated<br />
to the laboratory. The custom temporary abutment<br />
– Restorative Driven Implant Treatment: From Immediate Temporization to Final Restoration – 53
and BioTemps crown were then seated (Figs. 5, 6). No adjustment<br />
was necessary, as the crown was just slightly out of<br />
occlusion and slightly under the gingival tissue.<br />
Figure 6: Custom temporary (buccal view)<br />
Figure 7a: Inclusive Titanium Custom Abutment on laboratory<br />
model<br />
Figure 7b: BruxZir Solid Zirconia crown on laboratory model<br />
The impression was sent to <strong>Glidewell</strong> Laboratories for fabrication<br />
of the final Inclusive ® Titanium Custom Abutment<br />
(Fig. 7a) and BruxZir ® Solid Zirconia crown (Fig. 7b). Two<br />
weeks later, the patient returned for delivery of the final<br />
restoration (Figs. 8a, 8b).<br />
Discussion<br />
Although it was not possible in this case to place the custom<br />
temporary abutment and provisional crown at the time of<br />
implant placement, the custom healing abutment still offered<br />
the advantage of sculpting the soft tissue to conform to the<br />
eventual final crown contours. When the healing abutment was<br />
replaced by the custom temporary abutment and BioTemps<br />
crown at the impression appointment, this further improved the<br />
esthetic outcome for the patient and enabled controlled, progressive<br />
loading of the implant, which is believed to accelerate<br />
bone remodeling and eventual peri-implant density. 3<br />
It should be noted that while the prosthetic guide provided<br />
in the Inclusive Tooth Replacement Solution directs the position<br />
of the osteotomy, the angulation is less constrained than<br />
it would be by a surgical guide created from a CT scan and<br />
three-dimensional computer model. If, during osteotomy creation,<br />
the dentist fails to encounter bone where it is expected,<br />
small adjustments can be made to the prosthetic guide to alter<br />
the drilling angulation. It should also be noted that if the custom<br />
temporary abutment and provisional crown had not fit<br />
perfectly and been in the optimal prosthetic position as they<br />
were in this case, they too could have been easily modified or<br />
reshaped chairside.<br />
Conclusion<br />
Figure 8a: Final Inclusive Titanium Custom Abutment in place<br />
The Inclusive Tooth Replacement Solution is the first complete,<br />
fully restorative-driven implant solution, where patient-specific<br />
custom temporary components are fabricated and delivered —<br />
with the implant — prior to treatment. The concept and functionality<br />
of this treatment package help dentists achieve exceptional,<br />
cost-effective results while simplifying otherwise complex and<br />
time-consuming procedures. IM<br />
References<br />
Figure 8b: Final BruxZir crown in place<br />
1. Van Oosterwyck H, Duyck J, Vander Sloten J, et al. The influence of bone mechanical<br />
properties and implant fixation upon bone loading around oral implants. Clin Oral<br />
Implants Res. 1998 Dec;9(6):407-18.<br />
2. Esposito M, Ekestubbe A, Gröndahl K. Radiological evaluation of marginal bone<br />
loss at tooth surfaces facing single Brånemark implants. Clin Oral Implant Res. 1993<br />
Sep;4(3):151-7.<br />
3. Misch C. Progressive bone loading. Dent Today. 1995 Jan;14(1):80-3.<br />
54<br />
– www.inclusivemagazine.com –
Congratulations, Inclusive Image Contest Winners!<br />
The microgrooves<br />
and abutment connection<br />
are clues.<br />
Vents are unique.<br />
Body shape and<br />
thread pattern will<br />
lead to the answer.<br />
Thread pattern is<br />
the giveaway.<br />
The neck gives it<br />
away.<br />
Threads and apical<br />
design are the<br />
telling features.<br />
No clues are<br />
needed.<br />
Can’t miss that<br />
thread pattern.<br />
No internal threads<br />
are present.<br />
Press-fit with<br />
coronal grooves.<br />
A. NobelActive - internal connection (Nobel Biocare)<br />
B. Hexed-Head Press Fit Spike Universal (3M ESPE)<br />
C. Sustain Cylinder External Hex (Keystone <strong>Dental</strong>)<br />
D. Core-Vent (Zimmer <strong>Dental</strong>)<br />
E. Tapered Internal (BioHorizons)<br />
F. OsseoSpeed (Astra Tech <strong>Dental</strong>)<br />
G. Hollow Cylinder (Straumann)<br />
H. NanoTite Tapered Prevail (Biomet 3i)<br />
I. NobelReplace Tapered (Nobel Biocare)<br />
J. Screw-Vent (Zimmer <strong>Dental</strong>)<br />
Great job to the dentists who correctly identified all 10 implants. We were impressed by your implant<br />
knowledge! The winners were each awarded $100 in <strong>Glidewell</strong> credit, good toward any implant-related<br />
product or service.<br />
Sorry you missed out on “Name That Implant”? Turn the page and make a guess in this issue’s “How Many<br />
Implants?” challenge. Good luck!<br />
Inclusive Image Contest entries were individually scored after being sent to the lab via e-mail and standard mail. Prizewinners were notified by standard mail and/or phone.<br />
– Contest Results – 55
Inclusive Contest: How Many Implants?<br />
Can you guess how many implants are in this beaker? Use the implant specification clues below to estimate the<br />
number of implants for your chance to win an Inclusive ® Custom Abutment of your choice. Write your answer on<br />
the beaker in the white frosted area.<br />
Bonus Question: How much water would this 100 ml beaker hold with these implants inside? Answer correctly<br />
and win a BruxZir ® Solid Zirconia crown. Answer:<br />
Length: 13 mm<br />
Diameter: 3.7 mm<br />
Mass: 0.29 g<br />
Surface Area: 319.14 mm 2<br />
Surface Roughness Average (Ra): 1.5 μ<br />
Center of Mass: Y = -6.52 mm<br />
Nitrogen Content (max.): 0.05%<br />
Oxygen Content (max.): 0.130%<br />
Internal Hex Depth: 2.0 mm<br />
To submit your answers, tear out this page and send it to:<br />
<strong>Glidewell</strong> Laboratories<br />
Attn: Inclusive magazine<br />
4141 MacArthur Blvd.<br />
Newport Beach, CA 92660<br />
Or scan your entry and e-mail it to<br />
inclusive@glidewelldental.com<br />
The first 100 closest guesses to the actual number of implants will each receive one free Inclusive Custom Abutment.<br />
The first 100 entries to correctly answer the Bonus Question will each receive one free BruxZir Solid Zirconia crown.<br />
(Yes, you could win an abutment, a crown or both!)<br />
Entries must be received by April 30, 2012. The results will be announced in the spring issue of Inclusive magazine. One entry per office.<br />
Participation grants Inclusive magazine permission to print your name in a future issue and/or on its website.<br />
________________________________________ _________________________________________ __________________________<br />
Name City, State of Practice Phone<br />
56<br />
– www.inclusivemagazine.com –


