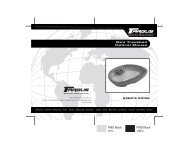
USB Mini Business Card Scanner Installation Guide - Targus
USB Mini Business Card Scanner Installation Guide - Targus
USB Mini Business Card Scanner Installation Guide - Targus

You also want an ePaper? Increase the reach of your titles
YUMPU automatically turns print PDFs into web optimized ePapers that Google loves.
Support Center<br />
USA<br />
Germany<br />
NewSoft America, Inc.<br />
SoftBay GmbH<br />
4113 Clipper Court<br />
Fremont, CA 94538, U.S.A.<br />
Carlstrase 50<br />
D - 52531 Ubach-Palenberg<br />
Tel: 1-510-445-8616 Tel: + 49 - (0) 24 - 519 112 647<br />
Email: contactus@newsoftinc.com Fax: + 49 - (0) 24 - 514 096 42<br />
Internet: http://www.newsoftinc.com Email: newsoft@softbay.de<br />
<strong>USB</strong> <strong>Mini</strong> <strong>Business</strong><br />
<strong>Card</strong> <strong>Scanner</strong><br />
England<br />
Taiwan<br />
Guildsoft Inc.<br />
NewSoft Technology Corp.<br />
The Software Centre<br />
3F NO. 19-3, Sanchong RD.<br />
East Way, Lee Mill Industrial Estate, Nankang, Taipei, Taiwan<br />
Ivybridge, Devon, PL21 9PE, UK Tel: 886-2-26551201<br />
Tel: (44) 01752-201148<br />
Email: support@newsoft.com.tw<br />
Fax: (44) 01752-894833<br />
Internet: http://www.newsoft.com.tw<br />
Email: Tech@guildsoft.co.uk<br />
France<br />
Japan<br />
Graphics-France<br />
NewSoft Japan Corp.<br />
12 rue des bles<br />
93217 Saint Denis La Plaine cedex, France<br />
6-21-3 Shinbashi<br />
Minato-Ku, Tokyo 105-0004, Japan<br />
Tel: + 33 (0) 1 49 46 23 40 Tel: 81-3-5472-7008<br />
Fax: + 33 (0) 1 49 46 23 49<br />
Email: support@newsoft.co.jp<br />
Email: breader@graphics-france.com Internet: http://www.newsoft.co.jp<br />
Making Your Mobile Life Easier.<br />
Visit our Web site at: www.targus.com<br />
Features and specifications are subject to change without notice. © 2002 <strong>Targus</strong> Corp.<br />
PA570<br />
400-0068-001C<br />
INSTALLATION GUIDE<br />
Making Your Mobile Life Easier.<br />
BRUSSELS HANNOVER BARCELONA TOKYO MILANO AMSTERDAM SINGAPORE LONDON PARIS NEW YORK LOS ANGELES TORONTO HONG KONG SYDNEY
<strong>USB</strong> <strong>Mini</strong> <strong>Business</strong> <strong>Card</strong> <strong>Scanner</strong><br />
Congratulations on your purchase of the <strong>Targus</strong> <strong>USB</strong> <strong>Mini</strong> <strong>Business</strong> <strong>Card</strong><br />
<strong>Scanner</strong>. With the MBC <strong>Scanner</strong>, you can electronically store the names,<br />
addresses, phone numbers, and email addresses from your business card<br />
collection to your personal digital assistant (PDA) or personal information<br />
manager (PIM), such as Microsoft ® Outlook ® or Symantec ® ACT! ® .<br />
In addition to this installation guide, this package contains the <strong>Targus</strong> <strong>USB</strong> <strong>Mini</strong><br />
<strong>Business</strong> <strong>Card</strong> <strong>Scanner</strong> and driver software CD.<br />
System Requirements<br />
To use the MBC <strong>Scanner</strong>, your computer must meet the following hardware<br />
requirements and run one of the operating systems listed below.<br />
Hardware<br />
Operating System<br />
• PC with a Pentium® processor or equivalent • Windows ® 98<br />
• 32 MB of RAM and 40 MB of available hard<br />
disk space<br />
• Windows ® Millennium<br />
Edition<br />
• <strong>USB</strong> version 1.1 interface • Windows ® 2000<br />
• CD-ROM drive<br />
• Windows ® XP<br />
Installing the Device Driver<br />
To use the MBC <strong>Scanner</strong> you must first install the device driver and the<br />
application software. To do this:<br />
1 Insert the device driver CD into your computer’s CD-ROM drive.<br />
2 If setup does not begin automatically, click Start, then Run, and enter<br />
D:\setup.exe (where D: is the path of the CD-ROM drive) and then click OK.<br />
3 Select the language that you want to use during installation and click OK.<br />
4 When the Select Components screen appears, click Next to choose the<br />
default settings and continue the installation process.<br />
5 When the InstallShield Wizard Complete screen appears, click Finish. The<br />
operating system prompts you to restart your computer when installation is<br />
complete. Remove the device driver CD from your computer’s CD-ROM<br />
drive before restarting your computer.<br />
You are now ready to connect the MBC <strong>Scanner</strong> to your computer.<br />
2
Connecting the <strong>USB</strong> <strong>Mini</strong> <strong>Business</strong> <strong>Card</strong> <strong>Scanner</strong> to<br />
Your Computer<br />
1 Plug the standard <strong>USB</strong> end of the cable ( ) into an available <strong>USB</strong><br />
port on your computer.<br />
<strong>USB</strong> 1<br />
<strong>USB</strong> 2<br />
<strong>USB</strong> ports on your computer<br />
2 Connect the other end of the cable to the MBC <strong>Scanner</strong>’s port.<br />
The operating system automatically recognizes the MBC <strong>Scanner</strong> and<br />
locates the appropriate driver.<br />
You are now ready to begin using the MBC <strong>Scanner</strong>.<br />
Using the <strong>USB</strong> <strong>Mini</strong> <strong>Business</strong> <strong>Card</strong> <strong>Scanner</strong><br />
Calibrating the MBC <strong>Scanner</strong><br />
Before you use the MBC <strong>Scanner</strong> for the first time, you must calibrate it using the<br />
supplied calibration card. Calibrating the MBC <strong>Scanner</strong> ensures that you will<br />
receive high quality scanned images. To calibrate the MBC <strong>Scanner</strong>:<br />
1 Insert the supplied calibration card, with the white side facedown, into the<br />
scanner.<br />
2 Click the Scan icon ( ).<br />
The Calibration Page screen appears.<br />
Calibration Page screen<br />
3 Click OK.<br />
Once the MBC <strong>Scanner</strong> is calibrated, a confirmation message appears and<br />
you can begin scanning business cards.<br />
3
It is recommended that you recalibrate the MBC <strong>Scanner</strong> once a month or more,<br />
depending on how often you use the scanner, to continue receiving high quality<br />
scanned images. To recalibrate the MBC <strong>Scanner</strong>:<br />
1 Open the MBC <strong>Scanner</strong> application, click File and then select Preferences.<br />
2 Verify that the scan option is set to Scan with TWAIN User Interface.<br />
3 Click the Scan icon ( ).<br />
The <strong>Targus</strong> Bizcard <strong>Scanner</strong> screen appears.<br />
4 Click Calibrate and then follow the calibration procedures above.<br />
Scanning <strong>Business</strong> <strong>Card</strong>s<br />
Once the MBC <strong>Scanner</strong> is calibrated, you can being scanning business cards. To<br />
do this:<br />
1 Place a business card facedown into the scanner.<br />
Scanning a business card<br />
2 Click the Scan icon ( ).<br />
The <strong>Targus</strong> Bizcard <strong>Scanner</strong> screen appears.<br />
3 Click the on-screen Scan button.<br />
NOTES: The on-screen Scan button appears only when the scan option is set<br />
to Scan with TWAIN user Interface. To check the scan option, from the MBC<br />
<strong>Scanner</strong> application, click File and select Preferences.<br />
The MBC <strong>Scanner</strong> begins reading the business card and the MBC <strong>Scanner</strong><br />
application displays the recognition progress.<br />
Once scanning is complete, an image of the card and its categorized information<br />
appears on the screen allowing you to verify that the scanned information is<br />
correct.<br />
4
Synchronizing Your Information<br />
Using the MBC <strong>Scanner</strong> application, you can synchronize your scanned files<br />
with your PDA or PIM to ensure that all your resources contain the same, most<br />
current information.<br />
NOTE: To synchronize your information you need a PIM (personal<br />
information manager) such as Microsoft Outlook or Symantec ACT! or a<br />
PDA running either the Windows ® CE or Palm operating system.<br />
To export information (default setting):<br />
1 From the MBC <strong>Scanner</strong> application, click View, <strong>Card</strong> List and select the<br />
entries you want to export.<br />
2 Click File, then Synchronize with or click the Synchronize icon and<br />
select the program that you want to synchronize with.<br />
MBC <strong>Scanner</strong> application toolbar and synchronization options<br />
Once synchronization is complete, a confirmation message appears.<br />
To import information:<br />
1 From the MBC <strong>Scanner</strong> application, click File, Preferences and select the<br />
import mode.<br />
2 Click File, then Synchronize with or click the Synchronize icon and<br />
select the program that you want to synchronize with and follow the onscreen<br />
instructions.<br />
Once synchronization is complete, a confirmation message appears.<br />
NOTE: For more information on synchronizing information, click Help on the<br />
MBC <strong>Scanner</strong> application toolbar.<br />
Microsoft, Windows and Outlook are registered trademarks of Microsoft Corporation. Symantec and ACT! are<br />
registered trademarks of Symantec Corporation. Palm is a trademark of Palm, Inc. NewSoft is a trademark of<br />
NewSoft Technology Corporation. All other trademarks are the property of their respective owners.<br />
5