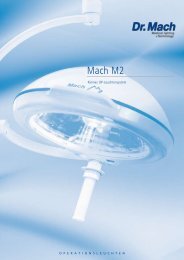
Trigenflex Ceiling, Wall, Stand Model Dr. Mach
Trigenflex Ceiling, Wall, Stand Model Dr. Mach
Trigenflex Ceiling, Wall, Stand Model Dr. Mach

Create successful ePaper yourself
Turn your PDF publications into a flip-book with our unique Google optimized e-Paper software.
<strong>Trigenflex</strong> <strong>Ceiling</strong>, <strong>Wall</strong>, <strong>Stand</strong> <strong>Model</strong><br />
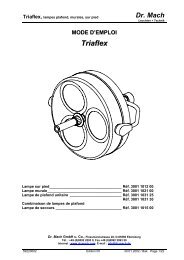
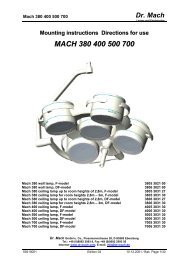
1<br />
4<br />
4<br />
2<br />
3<br />
5<br />
6<br />
7<br />
4.4.3 Changing the filter disk<br />
<strong>Dr</strong>. <strong>Mach</strong><br />
Lamps and Engineering<br />
The dielectric filter disk between reflector and splinter<br />
protection disk prevents a damaging heating of<br />
the illuminated area.<br />
The lamp may not be used without this filter.<br />
To change the filter disk proceed as follows:<br />
• Turn off the lamp.<br />
• Rotate the three quick-release fasteners 1 half<br />
a turn anticlockwise so that the corresponding<br />
disk bearer can be removed from the bottom<br />
part of the lamp housing.<br />
• Slightly loosen nuts 2, carefully bend the retaining<br />
springs 3 apart and change filter disk 4.<br />
Only use filter disks which have been cleaned<br />
accordingly.<br />
4.4.4 Changing the splinter protection<br />
disk<br />
In case the light quality is getting worse because of<br />
a dull splinter protection disk, it may be necessary<br />
to change the disk.<br />
To change the splinter protection disk proceed as<br />
follows:<br />
• Turn off the lamp.<br />
• Rotate the quick-release fasteners 1 half of a<br />
turn anticlockwise so that the corresponding disk<br />
bearer can be removed from the bottom part of<br />
the lamp housing.<br />
• Remove filter disk 4 as described at 4.4.3.<br />
• Loosen three nuts 2 M3, remove retaining spring<br />
3 and retaining ring 5.<br />
• Change splinter protection disk 6 and lay stay<br />
tube 7, retaining ring and retaining spring in the<br />
correct order on the disk bearer according to the<br />
illustration.<br />
• Place nuts 2 onto the threaded bolts according<br />
to the illustration and tighten.<br />
• Carefully bend the retaining springs 3 apart and<br />
replace filter disk.<br />
Only use filter disks which have been cleaned<br />
accordingly.<br />
• Replace disk bearer and fasten by turning the<br />
three quick-release fasteners 1.<br />
59230002 Edition 02 18.02.2002 / Bak Page 15/24