TM 3-4240-280-10
TM 3-4240-280-10
TM 3-4240-280-10

Create successful ePaper yourself
Turn your PDF publications into a flip-book with our unique Google optimized e-Paper software.
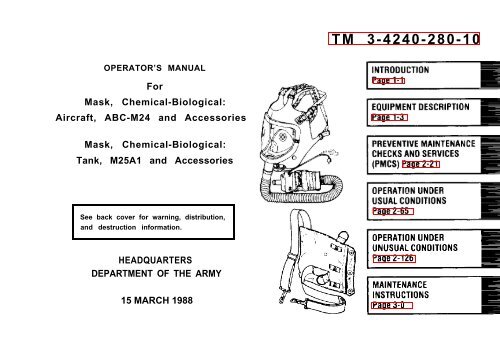
<strong>TM</strong> 3-<strong>4240</strong>-<strong>280</strong>-<strong>10</strong><br />
OPERATOR’S MANUAL<br />
For<br />
Mask, Chemical-Biological:<br />
Aircraft, ABC-M24 and Accessories<br />
Mask, Chemical-Biological:<br />
Tank, M25A1 and Accessories<br />
See back cover for warning, distribution,<br />
and destruction information.<br />
HEADQUARTERS<br />
DEPAR<strong>TM</strong>ENT OF THE ARMY<br />
15 MARCH 1988
<strong>TM</strong> 3-<strong>4240</strong>-<strong>280</strong>-<strong>10</strong><br />
WARNING<br />
The A6C-M24 or M25AI protective masks will not protect the wearer’ against<br />
ammonia of carbon monoxide gases. They are not effective in confined spaces<br />
where the oxygen antent of the air is too low.<br />
Stop breathing when putting on your facepiece. Toxic agents maybe in the<br />
surrounding air. Perform the steps for putting on your facepiece quickly. You<br />
must put cm your facepiece before you take another breath.<br />
The facepkce must be checked for leaks when it k initially fitted and each time it<br />
is usad. A leaky facepkace will not protect you from toxic agents.<br />
Do not break the seal between your facepkce and the side of your face when<br />
putting on your helmet or hood. This could cause leakage of toxic agents into the<br />
facepke.<br />
Do mm wear contact lenses with facepieca<br />
a
WARNING (CONT)<br />
Canister insert filter MUST be already installed in canister. Filter insert prevents<br />
leakage of dust particles during operational use.<br />
If you become overheated in very cold weather, do not remove your facepiece<br />
outdoors until your head cools and any sweat has dried. Frostbite may result if the<br />
facepiece is removed while your face is still wet. These precautions are not<br />
required if you are in a warm snelter.<br />
Keep mask dry. Moisture could clog the canistef and make it useless. Moisture<br />
could also short microphone connectors, which could cause a loss of communication<br />
in the tank or aircraft.<br />
Keep face clean shaven. An unshaven face could cause a bad seal between face<br />
and facepiece.<br />
Do not expose your facepiece to temperatures above 120”F<br />
(48.89°C). If facepiece is exposed to air or water<br />
temperatures above 120”F, allow lens to cool below 120”F<br />
for at least 15 minutes before flexing or stowing mask in<br />
carrier. After cooling, check lens carefully for cracks,<br />
especially around periphery.<br />
b
<strong>TM</strong> 3-<strong>4240</strong>-<strong>280</strong>-<strong>10</strong><br />
WARNING (CONT)<br />
Wash facec)ieca usina water below 120”F [48. 89” C). Extxxure of lens to<br />
ternperatu;es atxwe ~20”F (48.89-C) may cause lens to-crack and leak,<br />
FIRST AID<br />
For first aid,refertoFM21-11.<br />
c
WARNING<br />
HEALTH/ENVIRONflE NTAL HAZARD<br />
Filter canisters use ASC Nhetlerite Carbon which contains<br />
Chromium VI. Chromium VI is a known carcinogen i f inhaled<br />
or swal 1 owed. Damaged or unusable canisters are classi fled<br />
as hazardous waste:<br />
DO NOT throw away damaged or unusable canisters<br />
as ordinary trash.<br />
DO turn in damaged or unusable canisters to your<br />
hazardous waste mnagermnt office or Defense<br />
Reutilization and Harketing Office (DRHO).<br />
Canisters are completely safe to handle and use if they are<br />
not damaged in such a way that carbon leaks from them.<br />
In unlikely event that carbon should leak, use protection<br />
such as a dust respi rator to cover nose and nuuth and put<br />
carbon In container such as self-sealing plastic bag; turn<br />
in to hazardous waste management office or DRt+O.<br />
Oisposal of hazardous waste is restricted by the Resource<br />
Conservation and Recovery Act as amended (42 U. S.C.A<br />
sec 6901 et seq). Violation of these laws is subject<br />
to severe criml nal penalties.<br />
d<br />
Change 2
<strong>TM</strong> 3-<strong>4240</strong>-<strong>280</strong><strong>10</strong><br />
C3<br />
CHANGE<br />
HEADQUARTERS<br />
DEPAR<strong>TM</strong>ENT OF THE ARMY<br />
NO. 3 Washington, D.C., 9 May 1997<br />
OPERATOR’S MANUAL<br />
FOR<br />
MASK, CHEMICAL-BIOLOGICAL: AIRCRAFT, ABC-M24<br />
AND ACCESSORIES<br />
MASK, CHEMICAL-BIOLOGICAL: TANK, M25A1 AND ACCESSORIES<br />
DISTRIBUTION STATEMENT C: Distribution authorized to U.S. Government agencies and their contact to protect<br />
technical or operational information. This determination was made on 30 Jul 1987. Other requests for this document will<br />
be refereed to: Director, Armament and Chemical Acquisition and Logistic Activity, ATTN: AMSTAACNML, Rock Island,<br />
IL 61299-7630.<br />
DESTRUCTION NOTICE Destroy by any method that will prevent disclosure of contents or reconstruction of the<br />
document
<strong>TM</strong> 3-<strong>4240</strong>-<strong>280</strong>-<strong>10</strong>, 15 March 1988, is changed as follows:<br />
1. The purpose of this change is to update the Preventive Maintenance Checks and Services (PMCS) to the current table format.<br />
2. Remove old pages and insert new pages as Indicated below. New or changed material is indicated by a vertical bar.<br />
Remove Pages<br />
Insert Pages<br />
i and i,<br />
i and ii<br />
1-1 thru 1-4 1-1 thru 1-4<br />
2-21 thru 2-64 2-21 thru 2-64<br />
D-3 and D-4 D-3 and D-4<br />
DA Form 2028 ------------------<br />
Back Cover<br />
Back Cover<br />
3. File this change sheet in front of the publication for reference purposes.<br />
By Order of the Secretary of the Army:<br />
Official:<br />
JOEL B. HUDSON<br />
Administrative Assistant to the<br />
Secretary of the Army<br />
03415<br />
DENNIS J. REIMER<br />
General, United States Army<br />
Chief of Staff<br />
DISTRIBUTION: To be distributed in accordance with the initial distribution number (IDN) <strong>280</strong>425 requirements for <strong>TM</strong> 3-<strong>4240</strong>-<strong>280</strong>-<strong>10</strong>.
<strong>TM</strong> 3-<strong>4240</strong>-<strong>280</strong>-<strong>10</strong><br />
C 2<br />
CHANGE<br />
HEADQUARTERS<br />
DEPAR<strong>TM</strong>ENT OF THE ARMY<br />
No. 2 Washington, DC, 16 November<br />
1989<br />
WERATOR’S MANUAL<br />
Fcx?<br />
MASK, CHEMICAL-BIOLOGICAL: AIRCRAFT, ABC-M24<br />
AND ACCESSORIES<br />
MASK, CHEM[CAL-BIOLWICAL: TANK, M25AI AND ACCESSORIES<br />
<strong>TM</strong> 3-<strong>4240</strong>-<strong>280</strong>-<strong>10</strong> is changed .3S fO[[OWS:<br />
1. Remove old pages and lnser~ new pages as indicated<br />
below. New or changed material is lndlca?ed by a vertical<br />
bar.<br />
Remove Pages I n s e r t P a g e s<br />
a thru c/(d blank) a t h r u d<br />
2-7 and 2-8 2-7 and 2-8<br />
2-19 and 2-20 2-19 and 2-20<br />
2-43 thru 2-46 2-43 thru 2-46<br />
2-63 and 2-64 2-63 and 2-64<br />
2-<strong>10</strong>5 and 2-<strong>10</strong>6 2-<strong>10</strong>5 and 2-<strong>10</strong>6<br />
C-3 and C-4 C-3 and C-4
2. File this change sheet In front of the pub<br />
reference purposes.<br />
Icatlon<br />
for<br />
By Order of the Secretary of the Army:<br />
CARL E. VUONO<br />
General, United States Army<br />
Chief of Staff<br />
OFFICIAL<br />
w LLIAM J. MEEHAN I<br />
Briaadier General. United States Armv<br />
The Adjuta;t General<br />
DISTRIBUTION:<br />
To be distributed in accordance with DA Form 12-28<br />
(block 425), operator maintenance requirements for<br />
<strong>TM</strong> 3-<strong>4240</strong>-<strong>280</strong>-<strong>10</strong>.
*<strong>TM</strong> 3-<strong>4240</strong>-<strong>280</strong><strong>10</strong><br />
Technical Manual<br />
HEADOUARTERS<br />
DEPAR<strong>TM</strong>ENT OF THE ARMY<br />
No. 3-<strong>4240</strong>-<strong>280</strong>-<strong>10</strong> Washington, D.C., 15 March 1988<br />
Operator’s Manual<br />
For<br />
Mask, Chemical-Biological: Aircraft,<br />
ABC-M24 and Accessories<br />
Mask, Chemical Biological: Tank,<br />
M25A1 and Accessories<br />
REPORTING ERRORS AND RECOMMENDING IMPROVEMENTS<br />
You can help Improve this manual. If you find any mistakes, or If you know of a way to Improve the procedures, please<br />
let us know. Mall your letter or DA Form 2028 (Recommended Changes to Publications and Blank Forms), direct to:<br />
Director, Amament and Chemical Acquisition and Logistics Activity, ATTN: AMSTA-AC-NML, Rock Island, IL 61299-7630.<br />
A reply will be furbished to you.<br />
*This manual supersedes <strong>TM</strong> 3-<strong>4240</strong><strong>280</strong>-<strong>10</strong>, 15 June 1983, including all changes.<br />
Change 3 i
TABLE OF CONTENTS<br />
Page<br />
CHAPTER 1 INTRODUCTION 1 - 1<br />
Section<br />
I<br />
General Information . . . . . . . . . . . . . . . . . 1-1<br />
Section II<br />
Equipment Description 1-3<br />
CHAPTER 2<br />
OPERATING INSTRUCTIONS . . . . . . . . . . 2-0<br />
Section<br />
I<br />
Description and Use of Operator’s Controls and Indicators. 2-0<br />
Section II<br />
Preventive Maintenance Checks and Services (PMCS) 2-21<br />
Section<br />
III<br />
Operation Under Usual Conditions 2-65<br />
Section<br />
IV<br />
Operation Under Unusual Conditions 2-126<br />
ii
Page<br />
CHAPTER 3 MAINTENANCE INSTRUCTIONS . . . . . . . . . . . . . . . . . . . . . . . . . . 3-0<br />
Section I Lubrication Instructions . . . . . . . . . . . . . . . . . . . . . . . . . . . . . . . . . . . . 3-0<br />
Section II Troubleshooting Procedures . . . . . . . . . . . . . . . . . . . . . . . . . . . . . . . . 3-0<br />
Section III Maintenance Procedures . . . . . . . . . . . . . . . . . . . . . . . . . . . . . . . . . . . 3-1<br />
APPENDIX A REFERENCES . . . . . . . . . . . . . . . . . . . . . . . . . . . . . . . . . . . . . . . . . . . . . . A-1<br />
APPENDIX B COMPONENTS OF END ITEM AND BASIC ISSUE ITEMS LIST..... B-1<br />
APPENDIX C ADDITIONAL AUTHORIZATION LIST . . . . . . . . . . . . . . . . . . . . . . . . . . . C-1<br />
APPENDIX D EXPENDABLE/DURABLE SUPPLIES AND MATERIALS LIST . . . . . . D-1<br />
iii
1-0
<strong>TM</strong> 3-<strong>4240</strong>-<strong>280</strong>-<strong>10</strong><br />
CHAPTER 1<br />
INTRODUCTION<br />
Section I. GENERAL INFORMATION<br />
1-1. SCOPE.<br />
a. Typaof MarNJa/. Operator’s manual.<br />
b. Model Numbers and Equipment Names. Mask, Chemical-Biological, Aircraft, ABC- M24,<br />
and Mask, Chemical-Biological, Tank, M25A1.<br />
c. Purpose of Equipment. Your mask protects your face, eyes, and lungs from field concentrations<br />
of all known chemical-biological (CB) agents and riot control (RC) agents.<br />
d. Special Limfiations on Equipment. The mask does not protect the wearer against ammonia<br />
or carbon monoxide gases. Also it is not effective in confined spaces where the oxygen<br />
content of the air is too low.<br />
1-2. MAINTENANCE FORMS AND RECORDS.<br />
Department of the Army forms and procedures used for equipment maintenance will be those<br />
prescribed by DA PAM 738-750, The Army Maintenance Management System (TAMMS).<br />
1-1
1-3. REPORTING EQUIPMENT IMPROVEMENT RECOMMENDATIONS (EIR’s).<br />
If your mask needs Improvement, let us know. Send us an EIR. You, the user, are the only one who can tell us what you don’t like about your equipment. Let us<br />
know why you don’t like the design. Put It on an SF 368 (Quality Deficiency Report). Mall it to us at Commander, U.S. Army Armament Research, Development<br />
and Engineering Center, ATTN: AMSTA-AR-QAW-A (R)/Customer Feedback Center, Rock Island, IL 61299-7300. Well send you a reply.<br />
1-4. CORROSION DATA FEEDBACK.<br />
a. Corrosion Prevention and Control (CPC) of Army Materiel is a continuing concern. It Is important any corrosion problems with this item be reported so that<br />
the problem can be connected and Improvements can be made to prevent the problem in future Items.<br />
b. While corrosion is typically associated with rusting of metals, it can also Include deterioration of other materials such as rubber and plastic. Unusual<br />
cracking, softening, swelling, or breaking of these materials may be a corrosion problem.<br />
c. Such problems should be reported using SF368 (Quality Deficiency Report). Send the form to:<br />
Commander<br />
U.S. Army Armament Research, Development and Engineering Center<br />
ATTN: AMSTA-AR-QAW-A (R)/Customer Feedback Center<br />
Rock Island, IL 61299-7300<br />
Use of key words such as “corrosion,” “rust,” “deterioration” or “cracking” will assure that the information is identified as a CPC problem.<br />
1-2 Change 3
Section II. EQUIPMENT DESCRIPTION<br />
<strong>TM</strong> 3-<strong>4240</strong>-<strong>280</strong>-<strong>10</strong><br />
1-5. EQUIPMENT CHARACTERISTICS, CAPABILITIES, AND FEATURES.<br />
a. Pupae. The mask is used as an individual respirato~ protection device to protect your<br />
face, eyes, end lungs from all known chemical-biological (CB) and riot control (RC) agents.<br />
b. Capabilities and Features.<br />
WARNING<br />
The ABC-M24 or M25A1 protective masks will not protect the wearer against<br />
ammonia or carbon monoxide gases. They are not effective in confined spaces<br />
where the oxygen content of the air is too low.<br />
(1) Facepieces are supplied in three sizes: small (S), medhrn (M), and large(L) sizes. You<br />
will befitted and issued the size which best fits your face by your unit NBC NCO.<br />
(2) When the M25A1 mask is worn in a tank equipped with a filter unit, it can be coupled<br />
to the vehws filter unit by an air hose.<br />
(3) When the ABC-M24 mask is worn inside an aircraft, an oxygen adapter can be<br />
inatak$d for use with the aircraft oxygen system.<br />
(4) The Ml OA1 canister can be worn either fastened inside the carrier or with the canister<br />
carrying sling.<br />
(5) The facepiece can be fitted with optical inserts for personnel who must wear glasses.<br />
TIM inserts are available by medical prescription.<br />
1-3
1-6. DIFFERENCES BETWEEN MODELS.<br />
a. Throughout this manual, the term “mask” refers to the ABC-M24 an M25A1 masks. When data applies to one model only, the model will be<br />
specifically identified. Physical differences in appearance are covered in illustrations by blowouts and notations.<br />
b. The following table indicates specific differences between the models of masks covered in this manual.<br />
MASK ABC4-M24 M25A1<br />
M1 Canister Coupling<br />
X<br />
M13A1 Curler<br />
X<br />
M17 Carrier<br />
X<br />
M116G Microphone<br />
X<br />
M133W Microphone<br />
X<br />
M2 Antiglare Eyelens Outserts<br />
X<br />
ADDITIONAL AUTHORIED ITEMS<br />
ABC-M5 Task Mask Hood<br />
X<br />
Deleted<br />
M7 Aircraft Mask Hood<br />
X<br />
M8 Oxygen Supply Adapter<br />
X<br />
M2 Antiglare Eyelens Outserts<br />
x<br />
1-4 Change 3
1-7. EQUIPMENT DATA.<br />
<strong>TM</strong> 3-<strong>4240</strong>-<strong>280</strong>-<strong>10</strong><br />
a.<br />
Tabulated Data.<br />
Weight (with carrier):<br />
ABC-M24/M25Al masks, . . . . ...6.25 lb (2.83 kg)<br />
Dimensions (in carrier):<br />
ABC-M24mask . . . . . . . . . . . . . . ..4.ODX 12.OWX 12.OH<br />
(<strong>10</strong>. 15 X 30.47 X 30.47 cm)<br />
M25Almask . . . . . . . . . . . . . . . . ..6.5DX <strong>10</strong>.75WX12.4H<br />
(16.5 X 27.3 X 31.49 cm)<br />
b. Perforrrrarrce of ABC-hf24/M25A 1 Masks. Filters all known chemical-biolo~ ical (CB) and<br />
riot controi (RC) agents. The Ml OA1 canisters are replaced in accordance with crit&ia ih PMCS<br />
paragraph 2-5.<br />
1-5
CHAPTER 2<br />
OPERATING<br />
INSTRUCTIONS<br />
Section I.<br />
DESCRIPTION AND USE OF OPERATOR’S<br />
CONTROLS AND INDICATORS<br />
2-1.<br />
GENERAL.<br />
a. Before attempting to use the mask and additionally authorized items, make certain YOU are<br />
familiar with the location and operation of all parts.<br />
b. Functions of NBC NCO maybe performed by first line supervisor.<br />
2-2. DESCRIPTION OF MASK.<br />
a. Facepiece Asse,nb/y.<br />
l Rubber faceblank (1) covers face and chin providing an airtight seal.<br />
. Clear plastic lens (2) is permanently fixed into faceblank and permits clear vision.<br />
. Adjustable head harness (3) is made of elastic straps and secures facepiece on face and<br />
chin.<br />
2-0
<strong>TM</strong> 3-<strong>4240</strong>-<strong>280</strong>-<strong>10</strong><br />
2-1
2-2. DESCRIPTION OF MASK (CONT).<br />
a. Facepiece Assembly (Corrt).<br />
Two optical insert supports (4) are molded inside each side of faceblank. Two studs (5),<br />
one located on each side of the faceblank, are used to attach antiglare eyelens outserf<br />
and/or winterization eyelens.<br />
Inlet stem (6) provides attachment of hose to faceblank to permit passage of filtered air<br />
from canister.<br />
Cable stem (7) provides an airtight seal for entry of the microphone cable into the<br />
faceblank.<br />
Connector (8) plugs into tank or aircraft communication system and connects to microphone<br />
by a cable.<br />
2-2
<strong>TM</strong> 3-<strong>4240</strong>-<strong>280</strong>-<strong>10</strong><br />
2-3
2-2.<br />
b,<br />
DESCRIPTION OF MASK (CONT).<br />
Nosecup Assembly.<br />
l Nosecup (1) is a soft rubber cup<br />
which fits firmly over your nose and<br />
mouth. It contains two one-way<br />
valves and houses the microphone.<br />
l Nosecup valve seats and disks(2)<br />
are one-way valves which allow<br />
clean air to enter the nosecup for<br />
normal breathing but prevent moist<br />
exhaled air from contacting and fogging<br />
the lens in cold weather.<br />
l Microphone (3) fits into pocket in the<br />
nosecup to transmit your voice<br />
through the aircraft or tank communication<br />
system.<br />
2-4
c. Outlet Valve Assembly.<br />
<strong>TM</strong> 3-<strong>4240</strong>-<strong>280</strong>-<strong>10</strong><br />
0 Outlet valve (l)releases ”usedair’’ and<br />
consists of a metal valve seat (2), rubber<br />
outlet valve disk [3), and soft rubberwver<br />
(4).<br />
2-5
2-2. DESCRIPTION OF MASK (CONT).<br />
d. M1OA 1 Canister and Air Duct Hose.<br />
l Air duct hose (1) is flexible, about 2 feet long, and connects the faceblank to the Ml OA1<br />
canister. It carries clean air from canister to faceblank.<br />
. Ferrule (2) strengthens connection of air duct hose to faceblank.<br />
. Ml OA1 canister (3) is filled with filter material which removes all known CB and RC<br />
agents from air breathed by the operator.<br />
l Canister carrying sling (4) provides a method of carrying Ml OA1 canister when worn<br />
outside the carrier.<br />
. Ml canister coupling (5) adapts canister to connect to the vehicle gas patiiculate filter<br />
unit (GPFU) or M8 mask adapter to the aircraft oxygen supply when flying at altitudes<br />
requiring oxygen.<br />
2-6
<strong>TM</strong> 3-<strong>4240</strong>-<strong>280</strong>-<strong>10</strong><br />
2-7
2-2.<br />
e.<br />
DESCRIPTION OF MASK (CONT).<br />
Carriers.<br />
l<br />
l<br />
l<br />
l<br />
Ml 7 tamer (1) and Ml 3A1 carrier (2) are made of mildewproof, waterproof cotton duck<br />
and prowde for storage and carrying of mask and additionally authorized items.<br />
M17 came? (1), shoulder strap (3), and waist strap (4) are attached so the carrier is worn<br />
on the right side in the alrcratt.<br />
The Ml 3A1 carrier (2), shoulder straP (5), and waist stra~ (6) are attached so the tamer --<br />
is worn on the left side in the tank or vehicle.<br />
Quick opening flaps (7), held closed by three snap fasteners (older style) (8), or hook and .<br />
pile fasteners (newer Style) (9), provide easy access to the contents of either carrier.<br />
l Inside the carriers is an area with fleece lining (1 O) to protect faceblank lens. The carriers<br />
also have several pockets for holding items.-PoCket(11 ) holds Ml Al antifogging kit.<br />
pocket (12) holds the winterization kit, and pocket(13) holds decontamination kit, and<br />
F18 agent detector paper. Holding straps ( 14) secure the canister.<br />
2-8 Change 2
<strong>TM</strong> 3-<strong>4240</strong>-<strong>280</strong>-<strong>10</strong><br />
2-9
2-2. DESCRIPTION OF MASK (CONT).<br />
f. MIA 1 Antifogging Kit<br />
l Ml Al arrtifogging kit (1) IS a plastic container holding a piece of chemically treated<br />
cloth (2). When the faceblank lens is wiped with the cloth, moisture will not form and<br />
block the wearer’s vision.<br />
2-<strong>10</strong>
g. M2 Antiglare Eyelens Outsert .’<br />
<strong>TM</strong> 3-<strong>4240</strong>-<strong>280</strong>-<strong>10</strong><br />
0 M2 antiglare eyelens outsefl (1) is issued with the ABC-M24 mask because the protective<br />
flying helmet sun visor cannot be used when facepiece assembly is worn.<br />
l The M2 antiglare eyelens outsert snaps on two studs on facepiece assembly to cut<br />
down on sunglare.<br />
*Also issued as part of the M3 winterization kit and listed as an AAL item<br />
~for the M25A1 mask.<br />
2-11
2-2. DESCRIPTION OF MASK (CONT).<br />
h, M6A 1 Face form.<br />
NOTE<br />
Do not throw faceform away, Save for reuse.<br />
. The M6A1 faceform (1) is a fiberboard support placed in the facepiece assembly when it<br />
is stored in the carrier. .<br />
2-12
<strong>TM</strong> 3-<strong>4240</strong>-<strong>280</strong>-<strong>10</strong><br />
2-3. DESCRIPTION OF ADDITIONALLY AUTHORIZED ITEMS (APP C).<br />
a. ABC-M5 and M7 Hoods.<br />
l The ABC-M5 hood (1) is worn with the M25A1 tank mask. The M7 hood (2) is worn with<br />
the ABC-M24 aircraft’ mask,<br />
.,<br />
2-13
2-3. DESCRIPTION OF ADDITIONALLY AUTHORIZED ITEMS (APP C)<br />
(CONT).<br />
a. ABC-M5 (1) and M7 (2) Hoods (Cent).<br />
. Both hoods are made of rubber-coated fabric, which protects the neck areas of the head<br />
from toxic vapors or droplets.<br />
. Lens opening (3) provides unobstructed vision.<br />
. Neck cord (4) draws the hood close to neck by using slide fastener (5).<br />
. Underarm straps (6) keep hood down on the shoulders. Underarm straps (6) are fastened<br />
on fastening cloth (7) by tabs (8).<br />
. Hose cord (9) ties around hose or outlet valve for supporl and temple straps (1 O) attach<br />
to the facepiece assembly temple straps.<br />
2-14
<strong>TM</strong> 3-<strong>4240</strong>-<strong>280</strong>-<strong>10</strong><br />
2-15
2-3. DESCRIPTION OF ADDITIONALLY AUTHORIZED ITEMS (APP C)<br />
(CONT).<br />
b. M3 Wkrterization Kit.<br />
. M3 wintenzation kit (1) IS worn when the temperature falls below 200 F ( – 7°C).<br />
. Insulating jacket (2) is worn over chin portion of facepiece and upper end of hose to<br />
retain body heat inside the facepiece.<br />
. Winterization outsert (3) snaps on two adjustable studs on the facepiece and prevents<br />
the lens from frosting over.<br />
l Antiglare eyelens outsert (4) is worn to cut down on sunglare<br />
2-16
<strong>TM</strong> 3-<strong>4240</strong>-<strong>280</strong>-<strong>10</strong><br />
2-17
2-3. DESCRIPTION OF ADDITIONALLY AUTHORIZED ITEMS (APP C)<br />
(CONT).<br />
c. Optics/Inserts.<br />
WARNING<br />
Do not wear contact lenses with facepiece.<br />
l<br />
l<br />
Optical insert (1) is available by medical prescription and takes the place of operator’s<br />
eyeglasses while facepiece (2) is being worn.<br />
Prongs (3) on optical insert fit into holes in rubber flanges inside the facepiece to hold the<br />
insert in place.<br />
2-18
d. M8 Aircraff Mask Adapter.<br />
<strong>TM</strong> 3-<strong>4240</strong>-<strong>280</strong>-<strong>10</strong><br />
o The M8 aircraft mask adapter(1) is used with ABC-M24 mask in aircraft at altitudes<br />
which require oxygen.<br />
l The M8 a“rcraft mask adapter consists of an aircraft oxygen supply connector assembly<br />
(2) and Ml canister coupling (3).<br />
2-19
2-3.<br />
e.<br />
DESCRIPTION OF ADDITIONALLY AUTHORIZED ITEMS (APP C) (CONT).<br />
M258A 7 LkonLmurrafmg fit.<br />
l Consists of six packets in a plastrc case.<br />
l Three packets mntam gauze pads<br />
soaked wrth deccmtanwatron sokrdon.<br />
Three packets mntam gauze pads and<br />
glass capsules filled wth decontamnanon<br />
solution.<br />
l The M258A1 kit is used to demntammate<br />
skin and individual equ!pment.<br />
l Instnmrons for use are printed on the<br />
container and packets. Refer to<br />
<strong>TM</strong> 34230-216-<strong>10</strong>.<br />
f. M8 Chem!cal Agent Detecfor Paper.<br />
l Consists of a bcmk of perforated sheets of cAemImily treated, dye- impregnated paper.<br />
A cclor comparison bar chart is printed inside the front rover.<br />
Chemicals in the paper cause specific<br />
color when paper contacts liquid<br />
nerve or blister agents.<br />
Instructions on how to use the M8 paper<br />
are on the cover of book containing<br />
the detector paper.<br />
l The M8 paper is stored in me lower out-<br />
2-20
<strong>TM</strong> 3-<strong>4240</strong>-<strong>280</strong>-<strong>10</strong><br />
Section II. PREVENTIVE MAINTENANCE CHECKS<br />
AND SERVICES (PMCS)<br />
2-4. GENERAL<br />
a. Before you Operate. Always keep In mind CAUTIONS and WARNINGS. Perform your BEFORE PMCS on all missions.<br />
b. After you Operate. Be sure to perform your AFTER PMCS on all missions.<br />
c. Weekly (in combat situations). Be sure to perform your WEEKLY PMCS in combat ready<br />
situations only.<br />
2-5. PREVENTIVE MAINTENANCE CHECKS AND SERVICES (PMCS).<br />
The operator must perform scheduled services to ensure the mask will operate properly. The PMCS table lists required checks and services that must be done to<br />
ensure accurate performance of the mask and additionally authorized items. The first column contains the Item number which shall be used as a source of item<br />
numbers for the <strong>TM</strong> number column on DA Form 2404; the second column contains the PMCS interval; the third column contains the Item to be inspected; the<br />
fourth column contains the inspection procedures; and the fifth column contains conditions under which the mask and AAL Items are to be reported not ready.<br />
Change 3 2-21
2-5. PREVENTIVE MAINTENANCE CHECKS AND SERVICES (PMCS) (CONT).<br />
ITEM TO<br />
NOT FULLY<br />
ITEM CHECK/ MISSION<br />
NO. INTERVAL SERVICE PROCEDURE CAPABLE IF:<br />
1 BEFORE, FACEPIECE a. Visually inspect outside and Facepiece is dirty<br />
AFTER, ASSEMBLY Inside surface of facepiece Clean per paragraph<br />
WEEKLY (1) for dirt, mud, and greasy or 3-1.<br />
only substances.<br />
BEFORE, b. Check facepiece (1) for Facepiece has taken a<br />
AFTER, permanent set which may permanent set.<br />
WEEKLY<br />
prevent an airtight fit.<br />
Facepiece (1) is permanently<br />
set when it is difficult to spread<br />
open, and there is unusual or<br />
too much stiffness in the<br />
facepiece sealing areas.<br />
2-22 Change 3
<strong>TM</strong> 3-<strong>4240</strong>-<strong>280</strong>-<strong>10</strong><br />
ITEM TO<br />
NOT FULLY<br />
ITEM CHECK/ MISSION<br />
NO. INTERVAL SERVICE PROCEDURE CAPABLE IF:<br />
Change 3 2-23
2-5. PREVENTIVE AINTIENANCE CHECKS AND SERVICES (PMC8) (CONT).<br />
ITEM TO<br />
NOT FULLY<br />
ITEM CHECK/ MISSION<br />
NO. INTERVAL SERVICE PROCEDURE CAPABLE IF:<br />
1 BEFORE, c. Check facepiece(1) for hole, Facepiece has holes<br />
(nt) WEEKLY tear or splits. Check for tears, or splits which<br />
sticky or spongy areas. are deep an allow<br />
Facepiece has sticky<br />
or spongy area.<br />
BEFORE, d. Check facepiece (1) for dry rot Facepiece has stiff<br />
WEEKLY (stiff dry areas which crumble dry areas, which<br />
when rubbed between two crumble when rubbed<br />
fingers) or cracks that expand or crack which get<br />
when the rubber is stretched bigger when the<br />
rubber is stretched.<br />
2-24 Change 3
<strong>TM</strong> 3-<strong>4240</strong>-<strong>280</strong>-<strong>10</strong><br />
ITEM TO<br />
NOT FULLY<br />
ITEM CHECK/ MISSION<br />
NO. INTERVAL SERVICE PROCEDURE CAPABLE IF:<br />
Change 3 2-25
2-5. PREVENTIVE MAINTENANCE CHECKS AND SERVICES (PMCS) (CONT).<br />
ITEM TO<br />
NOT FULLY<br />
ITEM CHECK/ MISSION<br />
NO. INTERVAL SERVICE PROCEDURE CAPABLE IF:<br />
1 NOTE<br />
(cont)<br />
Dry rot in head harness tabs<br />
is not cause for recton f<br />
pull check Is withstood.<br />
BEFORE, e. Check for dry rot in head Pull check Is not<br />
WEEKLY harness tabs (2). Hold wtlfttood.<br />
facepiece as illustrated. Grasp<br />
metal buckle (3) and inside<br />
flange of rubber tab (2)<br />
between thumb and forefinger.<br />
Pull on rubber tab (2) until It<br />
extends 1/2 inch to 3/4 Inch<br />
(1.3 cm to 1.9 cm) from normal<br />
position.<br />
2-26 Change3
<strong>TM</strong> 3-<strong>4240</strong>-<strong>280</strong>-<strong>10</strong><br />
ITEM TO<br />
NOT FULLY<br />
ITEM CHECK/ MISSION<br />
NO. INTERVAL SERVICE PROCEDURE CAPABLE IF:<br />
BEFORE, f. Check rubber next to lens (4) to Lens pulls away from<br />
WEEKLY be sure lens will not pull away facepiece.<br />
From facepiece.<br />
Change 3 2-27
2-5. PREVENTIVE MAINTENANCE CHECKS AND SERVICES (PUCS) (CONT).<br />
ITEM TO<br />
NOT FULLY<br />
ITEM CHECK/ MISSION<br />
NO. INTERVAL SERVICE PROCEDURE CAPABLE IF:<br />
1 BEFORE, Check lens(4) for cracks, cuts, Lens has cracks,<br />
(cont) AFTER, team, scratches, or stains cur, tears,<br />
WEEKLY giving a different color or scratches, and stains<br />
haziness<br />
giving a different<br />
color or haziness<br />
which prevent normal<br />
vision.<br />
BEFORE h. Check lens (4) for presence of Lens has small black<br />
AFTER, small black dots which may dots that cannot be<br />
WEEKLY indicate organic growth removed by mask<br />
(fungus)<br />
cleaning/sanitizing.<br />
BEFORE, i.. Put on facepiece (1) to check Len is damaged<br />
WEEKLY that your vision Is dear. A lens causing severe<br />
(4) in a facepiece that causes distortion d vision.<br />
distorted vision may be used by<br />
a crewman but may not be<br />
suitable for a pilot or tan<br />
driver.<br />
2-28 Change 3
<strong>TM</strong> 3-<strong>4240</strong>-<strong>280</strong>-<strong>10</strong><br />
ITEM TO<br />
NOT FULLY<br />
ITEM CHECK/ MISSION<br />
NO. INTERVAL SERVICE PROCEDURE CAPABLE IF:<br />
BEFORE, j. Inspect optical outsert studs(5) Studs are loose or<br />
WEEKLY on each side of lens (4) to be rubber around holes<br />
sure they am secured to<br />
is torn.<br />
facepiece (1) and<br />
rubber around hole<br />
Is not tom.<br />
Change 3 2-29
2-5. PREVENTIVE MAINTENANCE CHECKS AND SERVICES (PMCS) (CONT).<br />
ITEM TO<br />
NOT FULLY<br />
ITEM CHECK/ MISSION<br />
NO. INTERVAL SERVICE PROCEDURE CAPABLE IF:<br />
1A FACEFORM CAUTION<br />
For storage and shipment:<br />
Make sure facepiece (NSN<br />
<strong>4240</strong>01-0321605) Is<br />
Installed in the facepiece to<br />
prevent damage to the lens<br />
and distortion to the mask.<br />
BEFORE, Check that faceform is not Faceform Is missing<br />
AFTER, missing or damaged. See or damaged.<br />
WEEKLY<br />
NBC NCO for replacement<br />
2-30 Change 3
<strong>TM</strong> 3-<strong>4240</strong>-<strong>280</strong>-<strong>10</strong><br />
ITEM TO<br />
NOT FULLY<br />
ITEM CHECK/ MISSION<br />
NO. INTERVAL SERVICE PROCEDURE CAPABLE IF:<br />
2 BUCKLE CAUTION<br />
ASSEMBLIES Over a period of time, copper<br />
poisoning migrating into the<br />
facepiec from an<br />
unlacquered buckle assembly<br />
will make the entire facepiece<br />
unserviceable.<br />
AFTER, a. Make sure finish (lacquer) on Finish (lacquer) Is<br />
WEEKLY buckle assembles (1) covers missing at point of<br />
all buckle assembly surfaces rubber contact.<br />
In contact with rubber.<br />
Change 3 2-30.1
2-5. PREVENTIVE MAINTENANCE CHECKS AND SERVICES (PMCS) (CONT).<br />
ITEM TO<br />
NOT FULLY<br />
ITEM CHECK/ MISSION<br />
NO. INTERVAL SERVICE PROCEDURE CAPABLE IF:<br />
2 AFTER, b. Check that metal parts of Metal parts are<br />
(cont) WEEKLY buckle assemblies (1) for broken, corroded,<br />
burns, breaks, corrosion, or have burns, or we<br />
missing parts<br />
missing.<br />
2-30.2/(2-31 blank) Change 3
<strong>TM</strong> 3-<strong>4240</strong>-<strong>280</strong>-<strong>10</strong><br />
b. Check metal parts of buckle assemblies<br />
(1 ) for burrs, breaks, corrosion,<br />
or missing parts.<br />
Metal parts are broken,<br />
corroded, have burrs, or<br />
are missing.<br />
2-31
2-5. PREVENTIVE MAINTENANCE CHECK AND SERVICES (PMCS) (CONT).<br />
ITEM TO<br />
NOT FULLY<br />
ITEM CHECK/ MISSION<br />
NO. INTERVAL SERVICE PROCEDURE CAPABLE IF:<br />
3 BEFORE, HEAD a. Put on facepiece (1) and check Head harness will not<br />
WEEKLY HARNESS head harness (2) for loss of hold facepieces firmly<br />
elasticity.<br />
against face.<br />
BEFORE, b. Inspect head harness (2) Head harness straps<br />
WEEKLY straps for dirt, cuts, team, or are cut, tom,<br />
missing hardware. Check mildewed, rayed or<br />
straps for mildew or fraying has missing parts.<br />
Clean with a stiff bristle brush<br />
(item 3, app D) if dirty or<br />
mildewed.<br />
2-32 Change 3
<strong>TM</strong> 3-<strong>4240</strong>-<strong>280</strong>-<strong>10</strong><br />
ITEM TO<br />
NOT FULLY<br />
ITEM CHECK/ MISSION<br />
NO. INTERVAL SERVICE PROCEDURE CAPABLE IF:<br />
Change 3 2-33
2-5. PREVENTIVE MAINTENANCE CHECKS AND SERVICES (PMCS) (CONT)<br />
ITEM TO<br />
NOT FULLY<br />
ITEM CHECK/ MISSION<br />
NO. INTERVAL SERVICE PROCEDURE CAPABLE IF:<br />
4 OUTLET CAUTION<br />
VALVE Do no use paper to remove<br />
ASSEMBLY moisture. Paper may break<br />
up and lodge In valve.<br />
AFTER, a. Remove outlet valve cover (1) Outlet valve disk and<br />
WEEKLY and check outlet valve disk (2) seat cannot be<br />
and outlet valve seat (3) for cleaned with a<br />
dust dirt, or moisture<br />
lint-free cheesecloth.<br />
Carefully remove any dust, dirt<br />
or debris with a damp<br />
cheesecloth (Item 4, app D).<br />
Then remove excess moisture<br />
with a dry, lint-free<br />
cheesecloth.<br />
2-34 Change 3
<strong>TM</strong> 3-<strong>4240</strong>-<strong>280</strong>-<strong>10</strong><br />
ITEM TO<br />
NOT FULLY<br />
ITEM CHECK/ MISSION<br />
NO. INTERVAL SERVICE PROCEDURE CAPABLE IF:<br />
Change 3 2-35
2-5. PREVENIVE UAINTENANCE CHECKS AND SERVICES (PMCS) (CONT).<br />
ITEM TO<br />
NOT FULLY<br />
ITEM CHECK/ MISSION<br />
NO. INTERVAL SERVICE PROCEDURE CAPABLE IF:<br />
4 BEFORE, b. Check outlet valve disk (2) for Outlet valve disk will<br />
(cont) WEEKLY proper seating, sticky rubber, not seat property or Is<br />
cracked or curled disk, tears, sticky, cracked,<br />
or cuts<br />
curled, tom, or cut<br />
BEFORE, c. Check outlet valve cover (1) for Cover is cut, tom, or<br />
WEEKLY permanent set and tears or has taken permanent<br />
cuts which might cause top of set.<br />
cover (1) to contact outlet<br />
valve disk. Signs of<br />
permanent set are defined In<br />
Item 1 of PMCS.<br />
BEFORE, d. Install outlet valve cover (1) Outlet valve cover is<br />
WEEKLY<br />
missing.<br />
2-36 Change 3
<strong>TM</strong> 3-<strong>4240</strong>-<strong>280</strong>-<strong>10</strong><br />
ITEM TO<br />
NOT FULLY<br />
ITEM CHECK/ MISSION<br />
NO. INTERVAL SERVICE PROCEDURE CAPABLE IF:<br />
Change 3 2-37
2-5. PREVENTIVE MAINTENANCE CHECKS AND SERVICES (PMCS) (CONT)<br />
ITEM TO<br />
NOT FULLY<br />
ITEM CHECK/ MISSION<br />
NO. INTERVAL SERVICE PROCEDURE CAPABLE IF:<br />
5 BEFORE, AIR DUCT a. Be sure air duct hose(1) Air duct hose<br />
WEEKLY HOSE connections (2) are tight connections are<br />
broke.<br />
BEFORE, b. Gently stretch the air duct Air duct hose has<br />
WEEKLY hose by pulling on facepiece holes, tears, cuts or<br />
(3) and M<strong>10</strong>A1 canister (4) is worn or frayed.<br />
While air duct hose (1) is Wire reinforcement is,<br />
stretched, examine ft for worn broken, crushed, or<br />
or frayed covering; broken or kinked.<br />
crushed wire reinforcement;<br />
kinks that may restrict<br />
breathing when mask is worn;<br />
holes, tears, cuts, dirt, and<br />
mildew. Use brush (item 1,<br />
app D) to clean off dirt and<br />
mildew from air duct hose.<br />
2-38 Change 3
<strong>TM</strong> 3-<strong>4240</strong>-<strong>280</strong>-<strong>10</strong><br />
ITEM TO<br />
NOT FULLY<br />
ITEM CHECK/ MISSION<br />
NO. INTERVAL SERVICE PROCEDURE CAPABLE IF:<br />
Change 3 2-39
2-5. PREVENTIVE MAINTENANCE CHECKS AND SERVICES (PMCS) (CONT)<br />
ITEM TO<br />
NOT FULLY<br />
ITEM CHECK/ MISSION<br />
NO. INTERVAL SERVICE PROCEDURE CAPABLE IF:<br />
6 AFTER, M9 CANISTER Examine canister carrying Strap are tom or<br />
WEEKLY CARRYING ding (1) for tears, broken missing. Hardware is<br />
SLING straps, missing hardware, dirt, missing.<br />
and mildew. Clean dirty straps<br />
with clear cool water. Brush<br />
off mildew with a stiff bristle<br />
brush. (Item 3, app D).<br />
2-40 Change 3
<strong>TM</strong> 3-<strong>4240</strong>-<strong>280</strong>-<strong>10</strong><br />
ITEM TO<br />
NOT FULLY<br />
ITEM CHECK/ MISSION<br />
NO. INTERVAL SERVICE PROCEDURE CAPABLE IF:<br />
7 AFTER, M1 CANISTER a. Remove canister coupling (1) Canister coupling Is<br />
WEEKLY COUPUNG and check rubber-cup portion cracked or has holes.<br />
for cracks or hoes.<br />
AFTER, b. Check nozzle (2) at end of M1 Nozzle Is burred,<br />
WEEKLY canister coupling (1) for burn, cracked, dented, or<br />
cracks, dents, or corrosion corroded.<br />
Change 3 2-41
2-5. PREVENTIVE MAINTENANCE CHECKS AND SERVICES (PMCS) (CONT).<br />
ITEM TO<br />
NOT FULLY<br />
ITEM CHECK/ MISSION<br />
NO. INTERVAL SERVICE PROCEDURE CAPABLE IF:<br />
7 AFTER, c. Replace canister coupling (1) M1 canister coupling<br />
(cont) WEEKLY Be sure rubber-cup portion fit does not fit snugly<br />
snugly over bottom of canister over M1 OA canister<br />
(3) and i properly seated end does not seat<br />
properly.<br />
2-42 Change 3
<strong>TM</strong> 3-<strong>4240</strong>-<strong>280</strong>-<strong>10</strong><br />
ITEM TO<br />
NOT FULLY<br />
ITEM CHECK/ MISSION<br />
NO. INTERVAL SERVICE PROCEDURE CAPABLE IF:<br />
8 M<strong>10</strong>A1 WARNING<br />
CANISTER DO NOT throw away<br />
dammed or unusable<br />
canisters as ordinary trash.<br />
DO turn In damaged or<br />
unusable canisters to your<br />
hazardous waste<br />
management office or<br />
Defense Reutilization and<br />
Marketing Office (DRMO).<br />
NOTE<br />
Refer to paragraph 2-6 for<br />
canister replacement criteria.<br />
Change 3 2-43
2-5. PREVENTIVE MAINTENANCE CHECKS AND SERVICES (PMCS) (CONT).<br />
ITEM TO<br />
NOT FULLY<br />
ITEM CHECK/ MISSION<br />
NO. INTERVAL SERVICE PROCEDURE CAPABLE IF:<br />
8 AFTER, a. Remove canister (1) Canister body has<br />
(cont) WEEKLY and slide canister carrying hole, splits, dents<br />
aling (2) o M<strong>10</strong>A1 canister<br />
over 1/4-nch deep,<br />
(3). Check canister (3) body rust over large areas,<br />
for holes, splits, dents over<br />
or rusted seams<br />
1/44nch deep, rust over large<br />
areas, and open or rusted<br />
seers.<br />
WARNING<br />
Canister insert filter MUST be<br />
installed In canister. Filter<br />
Insert prevents leakage of<br />
dust particles during<br />
operational use.<br />
2-44 Change 3
<strong>TM</strong> 3-<strong>4240</strong>-<strong>280</strong>-<strong>10</strong><br />
ITEM TO<br />
NOT FULLY<br />
ITEM CHECK/ MISSION<br />
NO. INTERVAL SERVICE PROCEDURE CAPABLE IF:<br />
BEFORE, b. Check that filter Inert has Canister not<br />
AFTER, been Installed In canister (3) marked “canister<br />
WEEKLY<br />
inset installed” or a<br />
black line has not<br />
been painted along<br />
the canister seem to<br />
Indicate filter Insert Is<br />
In place. See your<br />
unit NBC NCO.<br />
Change 3 2-45
2-5. PREVENTIVE MAIN TENANC CHECKS AND SERVICES (PMCS) (CONT’<br />
ITEM TO<br />
NOT FULLY<br />
ITEM CHECK/ MISSION<br />
NO. INTERVAL SERVICE PROCEDURE CAPABLE IF:<br />
8 BEFORE, c. Check that valve disk (4) Valve disk does not<br />
(cont) WEEKLY completely covers canister air cover air We<br />
Inlet (5).<br />
NOTE<br />
A canister partially clogged<br />
with dust will increase<br />
breathing resistance, but will<br />
not impair the ability of the<br />
canister to filter out CB<br />
agents. Refer to para 2- or<br />
canister replacement criteria.<br />
BEFORE, d. Check canter (3) for Deleted<br />
AFTER,<br />
exposure to toxic chemical<br />
WEEKLY<br />
agent. Your unit NBC NCO<br />
will provide guidance.<br />
2-46 Change 3
<strong>TM</strong> 3-<strong>4240</strong>-<strong>280</strong>-<strong>10</strong><br />
ITEM TO<br />
NOT FULLY<br />
ITEM CHECK/ MISSION<br />
NO. INTERVAL SERVICE PROCEDURE CAPABLE IF:<br />
BEFORE, e. Check to see that rubber Rubber portion of<br />
AFTER, portion of canister coupling (1) canister coupling Is<br />
WEEKLY is not tom tom.<br />
Change 3 2-47
2-5. PREVENTIVE MAINTENANCE CHECKS AND SERVICES (PMCS) (CONT)<br />
ITEM TO<br />
NOT FULLY<br />
ITEM CHECK/ MISSION<br />
NO. INTERVAL SERVICE PROCEDURE CAPABLE IF:<br />
9 BEFORE, NOSECUP a. Check nosecup value seat (1) Nosecup value seats<br />
WEEKLY ASSEMBLY to be sure the value seat have pulled apart<br />
have not pulled apart from from nosecup. Valve<br />
nosecup (2) and that valve disk locating stud is<br />
disks(3) are not curled. Turn missing or broken.<br />
each valve disk (3) to be sure<br />
it is not stuck on valve seat (1).<br />
2-46 Change 3
<strong>TM</strong> 3-<strong>4240</strong>-<strong>280</strong>-<strong>10</strong><br />
ITEM TO<br />
NOT FULLY<br />
ITEM CHECK/ MISSION<br />
NO. INTERVAL SERVICE PROCEDURE CAPABLE IF:<br />
Change 3 2-49
2-5. PREVENTIVE MAINTENANCE CHECKS AND SERVICES (PMCS) (CONT<br />
ITEM TO<br />
NOT FULLY<br />
ITEM CHECK/ MISSION<br />
NO. INTERVAL SERVICE PROCEDURE CAPABLE IF:<br />
9 BEFORE, b. Examine nosecup valve disks Valve disks are<br />
(cont) WEEKLY (3) or creases, spots, or punctured.<br />
Indentations. If they appear,<br />
carefully remove nosecup<br />
valve disks (3) and visually<br />
inspect the disks against a<br />
light source for punctures.<br />
NOTE<br />
Notify unit maintenance<br />
personnel to change valve<br />
disks if they are curled, tom,<br />
split, or punctured.<br />
2-50 Change 3
<strong>TM</strong> 3-<strong>4240</strong>-<strong>280</strong>-<strong>10</strong><br />
ITEM TO<br />
NOT FULLY<br />
ITEM CHECK/ MISSION<br />
NO. INTERVAL SERVICE PROCEDURE CAPABLE IF:<br />
BEFORE, c. Check nosecup (2) to be sure Buttons are broken or<br />
WEEKLY that its sides are buttoned to missing.<br />
facepiece (4). Rebutton H not<br />
Check that nosecup buttons<br />
(5) are not broken or missing.<br />
Change 3 2-51
2-5. PREVENTIVE MAINTENANCE CHECKS AND SERVICES (PMCS) (CONT).<br />
ITEM TO<br />
NOT FULLY<br />
ITEM CHECK/ MISSION<br />
NO. INTERVAL SERVICE PROCEDURE CAPABLE IF:<br />
<strong>10</strong> BEFORE, MICROPHONE a. Check that microphone (1) Microphone is not<br />
WEEKLY properly seated n pocket of seated properly.<br />
nosecup (2). Be sure there is Consult unit NBC<br />
a tight fit between<br />
NCO.<br />
Microphone (1) and<br />
nosecup (2).<br />
BEFORE, b. Check cable (3) for broken or Cable Is cut or wires<br />
WEEKLY loose connections and worn are bare. Connector<br />
insulation. Check connector plug Is cracked,<br />
plug (4) for cracks, chips, or chipped, or insulation<br />
broken Insulation. Plug is broken.<br />
microphone (1) Into<br />
Microphone does not<br />
communications system in work.<br />
helmet to make sure It s<br />
working properly.<br />
2-52 Change 3
<strong>TM</strong> 3-<strong>4240</strong>-<strong>280</strong>-<strong>10</strong><br />
ITEM TO<br />
NOT FULLY<br />
ITEM CHECK/ MISSION<br />
NO. INTERVAL SERVICE PROCEDURE CAPABLE IF:<br />
Change 3 2-53
2-5. PREVENTIVE MAINTE NACE CHECK8 AND SERVICES (PMCS) (CONT).<br />
ITEM TO<br />
NOT FULLY<br />
ITEM CHECK/ MISSION<br />
NO. INTERVAL SERVICE PROCEDURE CAPABLE IF:<br />
11 BEFORE, CARRIER Remove faceplace and Carrier is ripped<br />
WEEKLY contents from carrier (1). Straps are missing, or<br />
Check carrier for dirt, mildew, torn. Hardware is<br />
rip, torn straps, and missing<br />
missing.<br />
Hardware. Remove dirt or<br />
mildew by brushing with a stiff<br />
fiber brush (item 1, app D).<br />
2-54 Change 3
<strong>TM</strong> 3-<strong>4240</strong>-<strong>280</strong>-<strong>10</strong><br />
ITEM TO<br />
NOT FULLY<br />
ITEM CHECK/ MISSION<br />
NO. INTERVAL SERVICE PROCEDURE CAPABLE IF:<br />
12 BEFORE, M1A1 Open MIA1 antifogging kit (1) Rubbed area<br />
WEEKLY ANTIFOGGING and nib a small area of becomes fogged<br />
KIT facepiece with cloth (2) Antifogging kit Is no<br />
Breathe on lens. Refer to<br />
good.<br />
Instructions on container.<br />
Change 3 2-55
2-5. PREVENTIVE MAINTENANCE CHECKS AND SERVICES (PMCS) (CONT).<br />
ITEM TO<br />
NOT FULLY<br />
ITEM CHECK/ MISSION<br />
NO. INTERVAL SERVICE PROCEDURE CAPABLE IF:<br />
13 BEFORE, M2 Inspect antiglare eyelens Outsert has cracks,<br />
WEEKLY ANTIGLARE outer (1) for cracks, cuts, cuts, scratches, or<br />
EYELENS scratches, or bends which bends which prevent<br />
OUTSERT block or distort vision normal vision.<br />
2-56 Change 3
<strong>TM</strong> 3-<strong>4240</strong>-<strong>280</strong>-<strong>10</strong><br />
ITEM TO<br />
NOT FULLY<br />
ITEM CHECK/ MISSION<br />
NO. INTERVAL SERVICE PROCEDURE CAPABLE IF:<br />
ADDITIONALLY<br />
AUTHORIZED<br />
ITEMS<br />
NOTE<br />
Needle holes at the seams<br />
are acceptable<br />
14 BEFORE, ABC-M5 AND Check hood (1) for hoe, cuts, There are more than<br />
AFTER, M7 HOODS or teams two pin holes In any<br />
WEEKLY<br />
one panel. There are<br />
NOTE<br />
cuts or team in the<br />
Hoods unserviceable for<br />
hood<br />
protection against toxic<br />
agents may be used for<br />
training.<br />
Change 3 2-57
2-5. PREVENTIVE MAINTENANCE CHECKS AND SERVICES (PMCS) (CONT).<br />
ITEM TO<br />
NOT FULLY<br />
ITEM CHECK/ MISSION<br />
NO. INTERVAL SERVICE PROCEDURE CAPABLE IF:<br />
15 BEFORE, M3 a. Check insulating jacket (1) for Insulating jacket is<br />
WEEKLY WINTERIZATION dirt, tears, missing ties, or dirty, torn, or has ties<br />
KIT fastening cloths (2). missing<br />
BEFORE, b. Check winterization eyelens Outserts will not<br />
WEEKLY outsert (3) and antiglare fasten to faceplece or<br />
eyelens outsert (4) for<br />
their lens distort or<br />
damaged snaps or cracked, prevent dear vision.<br />
scratched, or bent lens.<br />
2-58 Change 3
<strong>TM</strong> 3-<strong>4240</strong>-<strong>280</strong>-<strong>10</strong><br />
ITEM TO<br />
NOT FULLY<br />
ITEM CHECK/ MISSION<br />
NO. INTERVAL SERVICE PROCEDURE CAPABLE IF:<br />
Change 3 2-59
2-5. PREVENTIVE MAINTENANCE CHECKS AND SERVICES (PMCS) (CONT).<br />
ITEM TO<br />
NOT FULLY<br />
ITEM CHECK/ MISSION<br />
NO. INTERVAL SERVICE PROCEDURE CAPABLE IF:<br />
16 BEFORE, OPTICAL Inspect optical insert (1), if Lens, hams, or<br />
WEEKLY INSERT Issued, for broken lens, frame, prongs are broken or<br />
or prongs or. missing lens or<br />
lens or prongs are<br />
prongs<br />
missing.<br />
2-60 Change 3
<strong>TM</strong> 3-<strong>4240</strong>-<strong>280</strong>-<strong>10</strong><br />
ITEM TO<br />
NOT FULLY<br />
ITEM CHECK/ MISSION<br />
NO. INTERVAL SERVICE PROCEDURE CAPABLE IF:<br />
17 BEFORE, M8 AIRCRAFT a Check oxygen connection (1) Oxygen connector<br />
WEEKLY MASK for burr, cracks, dents, or has burrs, dents,<br />
ADAPTER corrosion. Be sure oxygen cracks, corrosion, or<br />
(ABC-M24 supply adapter (2) is free of oil, is oily or greasy.<br />
MASK ONLY) grease, or dirt which will catch<br />
fire when In contact with<br />
oxygen under pressure.<br />
BEFORE, b. Examine M1 canister coupling Coupling Is cracked<br />
WEEKLY (3) for cracks or broken or connector Is<br />
connector (4).<br />
broken.<br />
Change 2-61
2-5. PREVENTIVE MAINTENANCE CHECKS AND SERVICES (PMCS) (CONT).<br />
ITEM TO<br />
NOT FULLY<br />
ITEM CHECK/ MISSION<br />
NO. INTERVAL SERVICE PROCEDURE CAPABLE IF:<br />
18 DELETED<br />
2-62 Change 3
<strong>TM</strong> 3-<strong>4240</strong>-<strong>280</strong>-<strong>10</strong><br />
ITEM TO<br />
NOT FULLY<br />
ITEM CHECK/ MISSION<br />
NO. INTERVAL SERVICE PROCEDURE CAPABLE IF:<br />
19 BEFORE, M8 PAPER, Check M8 paper (1) for M8 paper s damp or<br />
AFTER, CHEMICAL dampness or water damage water damaged.<br />
WEEKLY AGENT<br />
DETECTOR<br />
Change 3 2-62.1/(2-62.2 blank)
<strong>TM</strong> 3-<strong>4240</strong>-<strong>280</strong>-<strong>10</strong><br />
2-6. M <strong>10</strong>A1 CANISTER REPLACEMENT CRITERIA.<br />
a. The canister will be replaced under the following conditions when In use in a combat zone, rapid deployment unit (24 hours or less), or a special operation<br />
(e.g. Explosive Ordnance Disposal (EOD), Technical Escort, or Chemical Accident/Incident Response Association (CAIRA)).<br />
(1) If the nozzle Is damaged, heavily rusted or Insecurely fastened to the canister body.<br />
(2) if canister has been physically damaged (racks or breaks) or dents over 114 Inch deep, rust or pitting over large areas.<br />
(3) If over <strong>10</strong>% of the same are corroded.<br />
(4) If canister has been immersed in water.<br />
(5) When excessive breathing resistance is expend and visual Inspection reveals that the canister is clogged with dust (A canister clogged with dust will<br />
Increase breathing resistance but will not Impair the ability of the canister to remove CB agents.)<br />
(6) If S-3-3-2 lists the lot number of the canister as unserviceable.<br />
(7) if the canister has been in service for two years. NBC NCO will notify solder.<br />
(8) Every 30 days after exposure to a toxic agent and after each confirmed attack with blood agents.<br />
Change 3 2-63
2-6. M<strong>10</strong>A1 CANSTER REPLACEMENT CRITERIA (CONT)<br />
(9) If a blood agent threat, change fitter In accordance with the table below:<br />
M<strong>10</strong>A1 canister change criteria for COMBAT/SPECIAL UNITS only, by climate<br />
Climate<br />
Replacement<br />
Climate Description Intervals (Weeks)*<br />
Hot Hot-dry 52<br />
Hot-humid 13<br />
War Moderate 52<br />
Cold Humid 52<br />
*Filter elements that exceed these Intervals remain serviceable for TRADOC training activities only.<br />
(<strong>10</strong>) If no blood agent threat exist, change filter annually.<br />
(11) When directed by unit commander or unit NBC NCO.<br />
b. For all other units not listed In paragraph a above, the canister shall be replaced In a with a(1) through a.(5) and in addition, when notified of deployment.<br />
c. Turn in damaged or unusable canisters to your hazardous waste management office or Defense Reutilization and Marketing Office (DRMO).<br />
2-64 Change 3
2-7. GENERAL.<br />
Section III. OPERATION UNDER USUAL CONDITIONS<br />
<strong>TM</strong> 3-<strong>4240</strong>-<strong>280</strong>-<strong>10</strong><br />
WARNING<br />
Do not expose your facepiece to temperatures above 120”F (48.89” C). If facepieca<br />
is exposed to temperatures above 120”F (48.89’’C), allow lens to cool<br />
below this temperature before flexing lens or stowing facepiece in carrier or lens<br />
may crack and leak.<br />
This section contains operator’s instructions to put on and use the mask and additionally authorized<br />
items under normal conditions. For operation under unusual conditions, see paragraph 2-20.<br />
2-8. PUTTING ON YOUR FACEPIECE FOR FIT AND LEAK CHECK.<br />
NOTE<br />
A trained unit NBC NCO will supervise size selection and initial fitting of your<br />
facepiec-e. However, it’s your responsibility to make sure your facepiece fits<br />
properly, has a good seal, and is as comfortable as possible.<br />
2-65
2-8. PUTTING ON YOUR FACEPIECE FOR FIT AND LEAK CHECK (CONT).<br />
a. Loosen only head harness cheek<br />
straps (1) within 1 inch (2.5 cm) of metal<br />
clip ends (2).<br />
b. If you are wearing headgear and eyeglasses,<br />
remove them.<br />
2-66
<strong>TM</strong> 3-<strong>4240</strong>-<strong>280</strong>-<strong>10</strong><br />
c. Spread open the facepiece. Place your<br />
thumbs under cheek straps (1) and temple<br />
straps (3) with your little fingers<br />
wrapped around cheek straps and index<br />
fingers over temple straps. Then<br />
your hands to open facepiece (4)<br />
2-67
2-8. PUTTING ON YOUR FACEPIECE FOR FIT AND LEAK CHECK (CONT).<br />
NOTE<br />
Always put your chin in the facepiece first and pull the head harness up over your<br />
head.<br />
d.<br />
e.<br />
Put chm in facepiece chin pocket (<br />
Using both hands, slip head harne<br />
over your head and pull facepiece<br />
your face. Grasp ends of cheek st<br />
with both hands and adjust with a<br />
jerky motion.<br />
2-68
<strong>TM</strong> 3-<strong>4240</strong>-<strong>280</strong>-<strong>10</strong><br />
f. Using your fingers, smooth head harness<br />
straps to ensure they lie flat against<br />
your head and stroke the edges (7) of<br />
facepiece (4) to push them against your<br />
face.<br />
2-69
2-9. CHECKING THE FIT OF YOUR FACEPIECE.<br />
NOTE<br />
Although a qualified person has supervised the initial fitting of your mask, it is your<br />
responsibility to be sure you have the right size mask and that your mask fits properly<br />
Check the following items to ensure a proper fit:<br />
a. Top and side edges of facepiece (1 ) should come well up on your forehead and<br />
within 1 inch (2.5 cm) of your ear.<br />
b. The pupils of your eyes should be about 1 inch (2.5 cm) from top of lens (2).<br />
c. Head harness cheek and temple straps (3) should not cut into ears.<br />
d. The bottom of facepiece (4) should not cut into your throat.<br />
2-70
<strong>TM</strong> 3-<strong>4240</strong>-<strong>280</strong>-<strong>10</strong><br />
NOTE<br />
Make sure microphone is properly fitted into recess in nosecup. If not, nosecup<br />
will be distorted and will not fit properly over your nose.<br />
e. Nosecup (5) should not block your vision or press painfully on your nose. Microphone (6) is<br />
securely fitted into nosecup recess.<br />
2-71
2-<strong>10</strong>. CHECKING YOUR FACEPIECE FOR LEAKS.<br />
WARNING<br />
You must check the facepiece for leaks when it is fitted and each time you put it<br />
on. A leaky facepiece will not protect you from toxic agents.<br />
Keep face clean shaven. An unshaven face could cause a bad seal between face<br />
and facepiece.<br />
a. Check that canister (l) improperly<br />
fitted to air duct hose (2) by firmly<br />
grasping hose clamp (3) and<br />
attempting to twist air duct hose (2)<br />
with moderate pressure. If the air<br />
duct hose or clamo turns while<br />
applying moderate pressure, tighten<br />
clamp more securely.<br />
2-72
<strong>TM</strong> 3-<strong>4240</strong>-<strong>280</strong>-<strong>10</strong><br />
NOTE<br />
Tha following check is shown with canister removed from the carrier. If the<br />
canister coupling is attached, this check can be performed with the canister inside<br />
the carrier, since the end of the canister coupling sticks out of the back of the<br />
carrier.<br />
b. Press palm of your hand over Ml canister<br />
coupling (4). If canister coupling(4) is not on<br />
canister (1), cover entire canister inlet opening<br />
(5) with your palm.<br />
c. Then check for leaks by breathing in lightly<br />
and holding your breath for a few seconds. If<br />
fac%pieca (6) collapses, your facepieca is airtight<br />
and will protect you against toxic<br />
agents.<br />
2-73
2-<strong>10</strong>. CHECKING YOUR FACEPIECE FOR LEAKS (CONT).<br />
NOTE<br />
Leaks around the edge of your facepiece are usually caused by improper fit or wrong<br />
size. You may find a leak by feeling incoming air on your face, or you may feel a bulge at<br />
the edge of your facepiece with your finger, or a buddy may see a bulge.<br />
d. If facepiece (6) does not collapse and remain so, locate the leak<br />
e. After the leak has been located, tighten the appropriate straps to stop the leak.<br />
(1) To stop leaks at forehead, tighten temple straps (7).<br />
(2) To stop leaks at temple, ttghten forehead straps (8) and temple straps (7).<br />
(3) To stop leaks at cheek, lift the head harness higher on your head and tighten<br />
forehead straps (8),<br />
(4) To stop leaks at throat or under chin, lift mask higher on face and seat the chin<br />
firmly. Tightening cheek straps (9) may also help.<br />
2-74
<strong>TM</strong> 3-<strong>4240</strong>-<strong>280</strong>-<strong>10</strong><br />
2-75
2-<strong>10</strong>. CHECKING YOUR FACEPIECE FOR LEAKS (CONT).<br />
(5) Airleaks may becaused byafaulty outlet valve (l O)orbythe outlet valve Mingheld<br />
on by dirt or bloom (a waxy surface coating from rubber preservative). Breathe out<br />
forcefully several times. This will usually remove foreign matter or bloom. If not, pull<br />
down rubber outlet valve cover (11 ) and carefully remove any dust, ditl or debris on<br />
the valve disk and underside of the valve disk(12) with a damp cheesecloth (item 4,<br />
app D). Remove excess moisture with a dry cheesecloth. If outlet valve disk(12) is<br />
sticking, massage lightly with one finger.<br />
NOTE<br />
If you cannot stop leakage, see your unit NBC NCO for assistance,<br />
2-76
<strong>TM</strong> 3-<strong>4240</strong>-<strong>280</strong>-<strong>10</strong><br />
2-11. REMOVING YOUR FACEPIECE.<br />
a. Loosen cheek straps by rolling<br />
cheek strap buckles (1) forward.<br />
This relieves tension on facepiece<br />
cheek tabs (2).<br />
b. Remove facepiece by grasping<br />
facqkxe with both hands at<br />
chin (3) and pulling down, outward,<br />
and up.<br />
c. Install your hood (para 2-1 9) and<br />
stow facepiece with hood in carrier<br />
(para 2-16).<br />
2-77
2-12. MARKING YOUR MASK FOR IDENTIFICATION.<br />
NOTE<br />
Although a mask will be used only by the individual to whom it is issued and fitted,<br />
do not make permanent identification markings on either the facepiece or carrier<br />
(AR 700-84).<br />
a. Under supervision of your unit NBC NCO, attach a removable tape or tag marked with<br />
your name or a code number to your mask carrier.<br />
b. The code number, if required, may include date the facepiece was fitted and tested. Code<br />
number must not Identify parent organization or be similiar to a neighboring unit.<br />
2-78
2-13. PUTTING ON YOUR FACEPIECE, WITH HOOD ATTACHED, IN<br />
TRAINING OR COMBAT.<br />
<strong>TM</strong> 3-<strong>4240</strong>-<strong>280</strong>-<strong>10</strong><br />
WARNING<br />
Stop breathing when putting on your facepkce. Toxic agents maybe in the<br />
surrounding air. Perform the steps for putting on facepiece quickly. You must put<br />
the facepkce on before you take another breath.<br />
CAUTION<br />
Care must be taken not to scratch the clear plastic lens when handling the<br />
facepiece.<br />
NOTE<br />
If you are putthg on the facepiece without the hood, ignore the procedures<br />
relating to the hood.<br />
If the hood is attached to your facepiece, let it hang inside out on the front of the<br />
facepiace while putting on facepiece.<br />
2-79
2-13. PUTTING ON YOUR FACEPIECE, WITH HOOD ATTACHED, IN<br />
TRAINING OR COMBAT (CONT).<br />
a. Stop breathing.<br />
b. Remove helmet(1) and place<br />
between your knees, or on your lap.<br />
c. If you are wearing eyglasses remove<br />
and store them.<br />
2-80
<strong>TM</strong> 3-<strong>4240</strong>-<strong>280</strong>-<strong>10</strong><br />
d. Pull open flap (2) on carrier (3). Grasp<br />
facepiecs (4) at top and remove from<br />
carrier. Allow hood (5) to hang inside<br />
out in front of facepke.<br />
2-81
2-13. PUTTING ON YOUR FACEPIECE, WITH HOOD ATTACHED, IN<br />
TRAINING OR COMBAT (CONT).<br />
CAUTION<br />
Do not snap facepiece wide<br />
e.<br />
2-82
<strong>TM</strong> 3-<strong>4240</strong>-<strong>280</strong>-<strong>10</strong><br />
NOTE<br />
Always put your chin in the<br />
facepiece first and pull the<br />
harness up over your head.<br />
f.<br />
Put your chin in facepiece chin pocket (8).<br />
Using both hands, slip head harness (9)<br />
over your head and pull facepiece (4)<br />
up onto your face. Grab ends of cheek<br />
straps (6] with both hands, and adjust<br />
with a short jerky motion.<br />
2-83
2-13. PUTTING ON YOUR FACEPIECE, WITH HOOD ATTACHED, IN<br />
TRAINING OR COMBAT (CONT).<br />
g. Using your fingers, smooth head<br />
harness straps to ensure they lie<br />
flat against your head and stroke<br />
the edges (1 O) of facepiece (4) to<br />
push them against your face.<br />
h. Clear your facepiece by covering<br />
openings at bottom of outlet valve<br />
cover (11 ) with the palm of your<br />
right hand and breathing out forcefully<br />
so that air escapes around<br />
edges of facepiece (4).<br />
2-84
<strong>TM</strong> 3-<strong>4240</strong>-<strong>280</strong>-<strong>10</strong><br />
i. Check your facepiece for leaks by<br />
pressing palm over opening in Ml canister<br />
mupling(12) or canister inlet(13)<br />
to seal M1OA1 canister (14) and<br />
breathe in Iiahtlv.<br />
(1)<br />
(2)<br />
If faoeati collapses<br />
against your face, and<br />
remains so while you hold<br />
your breath, facepiece is airtight.<br />
If mask doesn’t collapse,<br />
check for hair or clothing<br />
between facepiece and your<br />
face. Adjust straps of head<br />
harness (9) if necesary and<br />
recheck.<br />
i.<br />
Start breathing normally.<br />
2-85
2-13. PUTTING ON YOUR FACEPIECE, WITH HOOD ATTACHED, IN<br />
TRAINING OR COMBAT (CONT).<br />
WARNING<br />
Do not break the seal between your facepiece and the side of your face when<br />
putting on your helmet or pulling hood up over your head. This could cause<br />
leakage of toxic agents into the faceplece.<br />
NOTE<br />
Perform step k below if wearing ABC-M24 mask with M7 aircraft hood. Wearers<br />
of M25AI mask and ABC-M5 tank hood should skip step k and proceed to step I<br />
k. On ABC-M24 mask only, carefully put on helmet (1) and secure it with neck strap. Unplug<br />
boom microphone connector from receptacle (15) in helmet and plug mask microphone<br />
connector (16) into receptacle (1 5).<br />
2-86
<strong>TM</strong> 3-<strong>4240</strong>-<strong>280</strong>-<strong>10</strong><br />
2-87
2-13. PUTTING ON YOUR FACEPIECE, WITH HOOD ATTACHED, IN<br />
TRAINING OR COMBAT (CONT).<br />
1. Grasp lower rear portion of hood (5) with both hands and role hood inward a few turns. Pull<br />
hood over helmet/head and unroll the hood while pushing it down to cover your neck and<br />
shoulders.<br />
2-88
m. Pull slider(17) to tighten neck cord(18) to a snug yet comfortable fit.<br />
<strong>TM</strong> 3-<strong>4240</strong>-<strong>280</strong>-<strong>10</strong><br />
n. Fasten preadjusted underarm straps(19) to obtain a snug yet comfortable fit.<br />
2-89
2-13. PUTTING ON YOUR FACEPIECE, WITH HOOD ATTACHED, IN<br />
TRAINING OR COMBAT (CONT).<br />
NOTE<br />
If wearing ABC-M24 aircraft<br />
mask and M7 aircraft hood, skip<br />
to step r below.<br />
o. On M25A1 mask, grasp helmet(1)<br />
inside next to earcups. Spread your<br />
hands to flex helmet(1) open. Put helmet<br />
(1) over your head and tilt forward<br />
so that helmet first touches part of<br />
facepiece resting on your forehead.<br />
Lower helmet (1) back and down over<br />
your head until it is seated in position.<br />
Carefully slide your hands out so that<br />
seal between your face and facepiece<br />
is not broken.<br />
2-90
<strong>TM</strong> 3-<strong>4240</strong>-<strong>280</strong>-<strong>10</strong><br />
p. On M25A1 mask, pull out boom<br />
microphone connector from receptac!a<br />
(20) in he4met (1 ) and plug in<br />
mask microphone connector to<br />
WWta@3 (20) in helmet (l).<br />
q. On M25A1 mask, coupie filter air<br />
hose to connector (21) on Ml canister<br />
cou~Ing(12) if the mask is worn<br />
inaide a combat vehicle equipped<br />
with a filter unit.<br />
2-91
2-13. PUTTING ON YOUR FACEPIECE, WITH HOOD ATTACHED, IN<br />
TRAINING OR COMBAT (CONT).<br />
r, On ABC-M24 mask, couple connector (21) on Ml canister coupling(12) to M8 oxygen<br />
adapter (22) if the aircraft is equipped with oxygen.<br />
s. Snap carrier flap closed and continue with your mission.<br />
2-92
<strong>TM</strong> 3-<strong>4240</strong>-<strong>280</strong>-<strong>10</strong><br />
2-14. REMOVING YOUR M25A1 TANK MASK WITH HOOD.<br />
a. Pull out microphone connector(1)<br />
from helmet (2).<br />
b. Remove helmet(2) and place<br />
between your knees or on your<br />
lap.<br />
2-93
2-14. REMOVING YOUR M25A1 TANK MASK WITH HOOD (CONT).<br />
c. Remove hood, lfworn, bydoing the following:<br />
(1) Unfasten underarm straps(3),<br />
(2) Loosen neckcord (4).<br />
(3) Pull backofhood (5) fowardover yourhead. Leave hood(5) attached to frontof<br />
facepiece (6).<br />
2-94
<strong>TM</strong> 3-<strong>4240</strong>-<strong>280</strong>-<strong>10</strong><br />
d. Remove faCepieCe (6) bydoingthefol-<br />
~’%osen chaek straps by rolling<br />
cheek strap buckles (7) forward.<br />
(2) Grasp facepi-(6) withboth<br />
hands at the chin area and pull<br />
down, outward, and UP.<br />
e. Put on helmet.<br />
2-95
2-14. REMOVING YOUR M25A1 TANK MASK WITH HOOD (CONT).<br />
f. Plug boom microphone connector(8)<br />
into-socket (9) in helmet (2). ‘ ‘<br />
g. Wipe facepiece with a clean cloth<br />
(item 4, app D) to remove any moisture<br />
or dampness,<br />
NOTE<br />
Refer to paragraph 2-17 for<br />
detailed instructions on how to<br />
stow the canister carrying straps<br />
when the canister is used outside<br />
the carrier, When not in use, stow<br />
your facepiece in carrier with eye-<br />
Iens outserts installed to protect<br />
eyelens,<br />
h. See paragraph 2-16 for detailed<br />
instructions for folding hood on facepiece<br />
and stowing both in carrier,<br />
2-96
<strong>TM</strong> 3-<strong>4240</strong>-<strong>280</strong>-<strong>10</strong><br />
2-15. REMOVING YOUR ABC-M24 AIRCRAFT MASK WITH HOOD.<br />
a. Remove hood, if worn, by doing the following:<br />
(1) Unfasten underarm straps (1)<br />
(2) Loosen neck cord (2).<br />
(3) Grasp the lower rear portion of hood (3) with both hands and roll hood outward a few<br />
turns. Pull hood forward over your helmet, Allow hoed (3) to hang on front of facepkxz<br />
(4).<br />
2-97
2-15. REMOVING YOUR ABC-M24 AIRCRAFT MASK WITH HOOD (CONT).<br />
b. Pull out mask microphone connector (5)<br />
from helmet (6),<br />
c, Remove helmet (6) and place between<br />
your knees or on your lap.<br />
2-98
<strong>TM</strong> 3-<strong>4240</strong>-<strong>280</strong>-<strong>10</strong><br />
d. Remove facepk?ce (4) by grasping<br />
the facepiece at chin area with<br />
both hands and pulling down, outward,<br />
and up.<br />
e. Put on helmet.<br />
2-99
2-15. REMOVING YOUR ABC-M24 AIRCRAFT MASK WITH HOOD (CONT).<br />
f.<br />
9<br />
Plug boom microphone connector (7)<br />
into socket (8) in helmet (6).<br />
Wipe facepiece with a clean cloth<br />
(item 4, app D) to remove any moisture<br />
or dampness.<br />
NOTE<br />
Refer to paragraph 2-17 for<br />
detailed instructions on how to<br />
stow the canister carrying straps<br />
when the canister is used outside<br />
the carrier. When not in use, stow<br />
your facepiece in carrier with eye-<br />
Iens outserts installed to protect<br />
eyelens.<br />
h<br />
See paragraph 2-16 for detailed instructions<br />
for folding hood on facepiece and<br />
stowing both in carrier,<br />
2-<strong>10</strong>0
<strong>TM</strong> 3-<strong>4240</strong>-<strong>280</strong>-<strong>10</strong><br />
2-16. STOWING YOUR FACEPIECE WITH HOOD AND CANISTER<br />
ATTACHED.<br />
CAUTION<br />
Keep the carrier free<br />
of grit and other foreign<br />
matter that might<br />
scratch the lens or<br />
block the valves.<br />
a.<br />
b.<br />
Check that facepiece is free<br />
of oil, solvents, and moisture<br />
before stowing.<br />
Adjust neck cord leather<br />
slider (1) on neck cord (2) to 2<br />
inches (5. 12 cm) from end of<br />
cord and make sure shoulder<br />
straps (3) are detached from<br />
hook and pile fasteners (4).<br />
2-<strong>10</strong>1
2-16. STOWING YOUR FACEPIECE WITH HOOD AND CANISTER<br />
ATTACHED (CONT).<br />
c. If mask will not be used for several<br />
days or is being turned in, a<br />
faceform (5) must be usad to<br />
support facepiece (6).<br />
d.<br />
Turn hood (7) inside out<br />
and let it hang freely in<br />
front of facepiece (6).<br />
2-<strong>10</strong>2
<strong>TM</strong> 3-<strong>4240</strong>-<strong>280</strong>-<strong>10</strong><br />
e. Hold the top front forehead area of facepiece (6) with one hand. Using your other hand,<br />
grasp the widest portion of your M7 hood (7), or area farthest from you on the M5 hood (7)<br />
and fold this material to the right side of your facepiece (6). Use your thumb to hold this<br />
2-<strong>10</strong>3
2-<strong>10</strong>4<br />
2-16. STOWING YOUR FACEPIECE WITH HOOD AND CANISTER<br />
ATTACHED (CONT).<br />
f. With your other hand, reach down and grasp shoulder straps (3), neck cord (2), and<br />
microphone cable (8) and fold them up along the right side of facepiece (6). Use the same<br />
thumb holding the fold of hood (7) to hold these items.
<strong>TM</strong> 3-<strong>4240</strong>-<strong>280</strong>-<strong>10</strong><br />
g. With your free hand, fold the bottom of hood (7)<br />
up to me right of facepiece (6). The bulk of the<br />
fold of the hood is now at the bottom right side<br />
of facepiece (6).<br />
h. Make sure canister (9) is stowed in<br />
the bottom of the carrier (<strong>10</strong>) and<br />
secured with the two short straps<br />
which fasten around the hose to<br />
hold canister in place.<br />
i. Fold air duct hose (11) into facepiece<br />
(6) and insert facepiece (6)<br />
with folded hood (7) into carrier (<strong>10</strong>)<br />
chin area first with lens up. Snap or<br />
press carrier flap (12) closed.<br />
2-<strong>10</strong>5
2-17. STOWING MASK AND ADDITIONALLY AUTHORIZED ITEMS<br />
IN CARRIER.<br />
a. Locations for Mask and AAL Items Inside Carrier.<br />
(1) The antifogging kit is stowed in<br />
the small pocket (1) in back of<br />
the carrier.<br />
(2) The M258A1 individual decontaminating<br />
kit, and M8<br />
agent detector paper is<br />
stowed in the small<br />
pocket (2) on the side<br />
of the carrier away from<br />
your body.<br />
(3) The winterization kit is stowed<br />
in the large pocket (3) on the<br />
side of the carrier next to you.<br />
(4) The canister is stowed in the<br />
bottom of the carrier where<br />
there are two short straps (4)<br />
which fasten around the hose<br />
to hold me canister in place.<br />
(5) The facepiece with folded hood<br />
and hose attached is stowed in<br />
the center area (5) of the carrier<br />
(para 2-16).<br />
2-<strong>10</strong>6 Change 2
<strong>TM</strong> 3-<strong>4240</strong>-<strong>280</strong>-<strong>10</strong><br />
b.<br />
Folding M9 Canister Carrying Sling and Stowing M<strong>10</strong>A1 Canister (When Canister Is Used<br />
Outside the Carrier).<br />
(1) Fold short straps (1) under flaps (2). D-rings (3) should extend beyond edge of<br />
flaps (2).<br />
2-<strong>10</strong>7
2-17. STOWING MASK AND ADDITIONALLY AUTHORIZED ITEMS IN<br />
CARRIER (CONT).<br />
b. Folding M9 Canister Carrying Sling and Stowing M<strong>10</strong>A1 Canister (When Canister is Used<br />
Outside the Carrier) (Cont).<br />
(2) Fold flaps (2) against M<strong>10</strong>A1<br />
canister (4). Wrap long<br />
straps (5) snugly over flaps (2)<br />
and around canister (4) body<br />
in opposite directions. Fasten<br />
snap hooks (6) together.<br />
2-<strong>10</strong>8
(3)<br />
(4)<br />
Adjust long straps (5) so that<br />
when snap hooks (6) are fastened<br />
they should hold long<br />
straps (5) snugly around canister<br />
(4) body.<br />
Place canister (4) in bottom of<br />
carrier (7) and secure it with<br />
two short straps (8).<br />
<strong>TM</strong> 3-<strong>4240</strong>-<strong>280</strong>-<strong>10</strong><br />
NOTE<br />
Some straps may be narrow<br />
with a single set of snaps. On<br />
M<strong>10</strong>A1 canisters which have<br />
the M1 canister coupling<br />
attached, make sure the coupling<br />
extends through the hole<br />
in the back of the carrier.<br />
2-<strong>10</strong>9
2-17. STOWING MASK AND ADDITIONALLY AUTHORIZED ITEMS IN<br />
CARRIER (CONT).<br />
CAUTION<br />
Do not store other items on top of your facepiece or place unauthorized items in<br />
the carrier. Damage to the facepiece might result.<br />
Dampness will reduce the life of the M<strong>10</strong>A1 canister. Be sure you store your mask<br />
in a dry place.<br />
c. Storing your Mask and Additionally Authorized Items. Store your mask and AAL items, in<br />
the carrier, in a cool, dry place. Do not hang carrier in direct sunlight. Hang it by shoulder<br />
strap or D-ring if possible.<br />
2-1<strong>10</strong>
2-18. WEARING YOUR CARRIER AND CANISTER CARRYING SLING.<br />
<strong>TM</strong> 3-<strong>4240</strong>-<strong>280</strong>-<strong>10</strong><br />
a. Wearing Carrier the Shoulder Carry Method.<br />
(1) Hold carrier (1) on your left side (M25A1) or right side (ABC-M24) and with your other<br />
hand bring shoulder strap (2) from back to front up and over opposite shoulder.<br />
(2) Fasten shoulder strap (2) to D-ring (3) and adjust to a comfortable length.<br />
(3) Fasten waist strap (4) to D-ring (5) and adjust to a comfortable fit.<br />
2-111
2-18. WEARING YOUR CARRIER AND CANISTER CARRYING SLING (CONT).<br />
b. Wearing M9 Canister Carrying Sling.<br />
(1) When seating space is limited remove M<strong>10</strong>A1 canister (1), with canister carrying<br />
sling (2) attached, from carrier.<br />
(2) Find a comfortable fit, for your location in vehicle or aircraft, with the canister either in<br />
front, on your right, or on your left side.<br />
(3) Lengthen and fasten carrying sling shoulder strap (3) and waist strap (4). Adjust<br />
straps as necessary.<br />
2-112
<strong>TM</strong> 3-<strong>4240</strong>-<strong>280</strong>-<strong>10</strong><br />
2-113
2-19. INSTALLING ADDITIONAL AUTHORIZED ITEMS TO YOUR MASK.<br />
a. Installing and Adjusting Your Hood.<br />
2-114<br />
NOTE<br />
The following procedures may be used for<br />
either the ABC-M5 Tank Mask Hood or M7<br />
Aircraft Mask Hood. Where procedures differ,<br />
the specific hood is identified.<br />
(1) Spread hood (1) out flat with<br />
opening for eyelens facing up.<br />
(2) Adjust neck cord leather<br />
slider (2) to 2 inches (5.12cm)<br />
from end of neck cord (3).<br />
(3) Preadjust underarm straps (4)<br />
for a snug but comfortable fit<br />
then unfasten them.<br />
(4) Put facepiece (5) inside hood<br />
through lens opening. Leave<br />
hose (6) and microphone<br />
cable (7) outside hood (1) for<br />
M5 hood. Put microphone<br />
cable (7) inside hood (1) with<br />
hose (6) outside hood (1) for<br />
the M7 hood.
(5) On the ABC-M5 hood only,<br />
temple straps (8) in hood (1)<br />
should be next to temple<br />
straps (9) on the facepiece.<br />
<strong>TM</strong> 3-<strong>4240</strong>-<strong>280</strong>-<strong>10</strong><br />
(6) Adjust hood (1) opening<br />
around eyelens rubber<br />
flange (<strong>10</strong>), and under microphone<br />
cable stem (11) for M5<br />
hood. Fit hood (1) opening<br />
around eyelens rubber<br />
flange (<strong>10</strong>) and over microphone<br />
cable stem (11) for M7<br />
hood.<br />
2-115
2-19. INSTALLING ADDITIONAL AUTHORIZED ITEMS TO YOUR MASK<br />
(CONT).<br />
a. installing and Adjusting Your Hood (Cont).<br />
NOTE<br />
In very cold weather (below 32°F), keeping the outlet valve outside the hood<br />
prevents moisture in exhaled breath from condensing and freezing under the<br />
hood. In very warm weather (above 85°F), keeping the outlet valve outside the<br />
hood prevents heat from getting in the hood.<br />
(7) For outside temperatures above 85°F or below 32°F be sure outlet valve (12) is<br />
positioned outside hood (1). Between 32°F and 85°F, outlet valve (12) should be<br />
inside hood (1).<br />
(8) On the ABC-M5 hood only, perform the following steps:<br />
(a) Reach inside hood (1) and fasten hood temple straps (8) to facepiece temple<br />
straps (9).<br />
(b) Pull cords (13) tight to draw hood (1) opening around eyelens rubber flange (<strong>10</strong>).<br />
(c) Tie cords (13) around hose (14) or outlet valve (12). Be sure hood (1) will not pull<br />
away from eyelens rubber flange (<strong>10</strong>).<br />
2-116
<strong>TM</strong> 3-<strong>4240</strong>-<strong>280</strong>-<strong>10</strong><br />
2-117
2-19. INSTALLING ADDITIONAL AUTHORIZED ITEMS TO YOUR MASK<br />
(CONT).<br />
a. Installing and Adjusting Your Hood (Cont).<br />
(9) Reverse hood (1) by pulling<br />
back of hood up and over<br />
facepiece (5) so that it hangs<br />
inside out from facepiece (5).<br />
NOTE<br />
When the hood is not going<br />
to be used, leave it hanging<br />
on the hose. Fold the hood<br />
into the facepiece and stow<br />
the facepiece and hood in<br />
carrier (para 2-16).<br />
For instructions on wearing<br />
your hood, refer to paragraph<br />
2-13.<br />
2-118
. Installing and Adjusting Your M8 Aircraft<br />
(1) Loosen canister straps (1) and<br />
remove M<strong>10</strong>A1 canister (2)<br />
from carrier (3). Hold<br />
canister (2) in one hand.<br />
(2) Fit M1 canister coupling (4)<br />
over inlet end of canister (2)<br />
and press it on.<br />
<strong>TM</strong> 3-<strong>4240</strong>-<strong>280</strong>-<strong>10</strong><br />
Oxygen Supply Adapter (ABC-M24 Mask Only).<br />
2-119
2-19. INSTALLING ADDITIONAL AUTHORIZED ITEMS TO YOUR MASK<br />
(CONT).<br />
b. Installing and Adjusting Your M8 Aircraft Oxygen Supply Adapter (ABC-M24 Mask Only<br />
(Cont).<br />
NOTE<br />
Pilots wearing the mask in helicopters carry the canister with the canister carrying<br />
sling because the carrier takes up too much space in the pilot’s seat.<br />
(3) Make sure canister coupling connector (5) extends through hole (6) in carrier (3).<br />
Fasten canister straps (1) in carrier (3) around air duct hose (7).<br />
2-120
<strong>TM</strong> 3-<strong>4240</strong>-<strong>280</strong>-<strong>10</strong><br />
(4) Plug male end (8) of oxygen connector (9) into aircraft oxygen supply system.<br />
(5) Plug connector (5) of canister coupling into socket (<strong>10</strong>) of oxygen connector (9). Fit<br />
strap (11) around shoulder.<br />
2-121
2-19. INSTALLING ADDITIONAL AUTHORIZED ITEMS TO YOUR MASK<br />
(CONT).<br />
c. Installing Your Winterization Kit When Temperature Falls Below 20°F (-7°C.).<br />
(1) Line up eyelens outsert (1) over lens (2) of facepiece (3). Push snap fastener sockets<br />
of eyelens outsert (1) over studs (4) on facepiece.<br />
(2) Line up eyelens outsert (1) over lens rubber frame (5) of facepiece. Pull cords (6) tight<br />
and cross them behind air duct hose (7). Bring cords (6) forward and tie them in a bow<br />
knot.<br />
(3) Open insulating jacket (8) fully and lift tab (9) to uncover slit (<strong>10</strong>) underneath. Push<br />
microphone plug (11) and cable through slit (<strong>10</strong>) from inside.<br />
2-122
<strong>TM</strong> 3-<strong>4240</strong>-<strong>280</strong>-<strong>10</strong><br />
2-123
2-19. INSTALLING ADDITIONAL AUTHORIZED ITEMS TO YOUR MASK<br />
(CONT).<br />
(4) Fasten insulating jacket (8) to facepiece (3) by performing the following:<br />
(a) Center insulating jacket (8) over front of air duct hose (7) and over chin portion of<br />
facepiece (3).<br />
(b) Place upper edge of insulating jacket (8) under lower edge of lens rubber<br />
frame (5).<br />
(c) Draw tie cords (12) up around lens rubber frame (5) and tie in a bow knot. Tuck<br />
ends of tie cords (12) in back of lens rubber frame (5).<br />
(5) Fasten insulating jacket (8) around air duct hose and outlet valve assembly by pressing<br />
together fastening cloth (13) at sides of jacket and then pressing tab (14) down<br />
firmly over cable (15).<br />
NOTE<br />
As the temperature rises, open the lower end of the insulating jacket as needed to<br />
prevent the incoming air from being warmed too much.<br />
2-124
<strong>TM</strong> 3-<strong>4240</strong>-<strong>280</strong>-<strong>10</strong><br />
2-125
Section IV. OPERATION UNDER UNUSUAL CONDITIONS<br />
2-20. USING MASK IN COLD WEATHER.<br />
WARNING<br />
Keep mask dry. Moisture could clog the canister and make it useless. Moisture<br />
could also short microphone connectors, which could cause a loss of communication<br />
in the tank or aircraft.<br />
a. General Instructions You Must Follow in Cold Weather.<br />
(1) During time between repeated uses, remove your facepiece from carrier and shake or<br />
flex facepiece to remove ice and snow.<br />
(2)<br />
(3)<br />
(4)<br />
(5)<br />
(6)<br />
CAUTION<br />
Do not warm up facepiece near a heater or open flame.<br />
Warm facepiece whenever you can.<br />
In a warm indoor area, dry facepiece with a clean cloth. Carefully dry outlet and<br />
nosecup valves.<br />
Before entering subzero temperatures, install winterization kit (para 2-19).<br />
Before entering a warm area from subzero temperatures, remove frost and snow<br />
from facepiece.<br />
Use antifogging kit to reduce fogging of lens.<br />
2-126
. Putting on Your Facepiece, With Hood attached, in Cold Weather.<br />
<strong>TM</strong> 3-<strong>4240</strong>-<strong>280</strong>-<strong>10</strong><br />
NOTE<br />
Your unit NBC NCO supervisor will determine when winterization kit is required.<br />
Take off gloves or mittens before attempting to put on your facepiece.<br />
(1)<br />
(2)<br />
Follow procedures for putting<br />
on your facepiece (1) (para 2-13<br />
steps a thru g).<br />
Clear the facepiece by doing<br />
the following:<br />
(a) Unfasten winterization kit,<br />
if worn.<br />
(b) Cover openings at bottom<br />
of outlet valve cover (2)<br />
with the palm of your right<br />
hand.<br />
(c) Breathe out gently so that<br />
air escapes around sides of<br />
facepiece (1). Do not clear<br />
facepiece by exhaling a<br />
large volume of air because<br />
moist air will frost the lens.<br />
2-127
2-20. USING MASK IN COLD WEATHER (CONT).<br />
b. Putting on Your FacePiece, With Hood Attached, in Cold Weather (Cont).<br />
(3) Follow procedures for checking<br />
your facepiece for leaks<br />
(para 2-13, step i).<br />
(4) Start breathing normally.<br />
(5) If the outlet valve disk (3) sticks<br />
to valve seat (4), do the following:<br />
(a) Partially open insulating<br />
jacket (5).<br />
(b) Pull outlet valve cover (2)<br />
down and massage outlet<br />
valve disk (3) with one finger<br />
when you exhale only. Keep<br />
doing this until the valve<br />
functions properly.<br />
(c) Reseat cover (2) and close<br />
insulating jacket (5).<br />
(6) Follow steps for donning hood<br />
and helmet (para 2-13, steps k<br />
thru s).<br />
2-128
c. Removing Your Facepiece, With Hood, in Cold Weather.<br />
<strong>TM</strong> 3-<strong>4240</strong>-<strong>280</strong>-<strong>10</strong><br />
WARNING<br />
If you become overheated in very cold weather, do not remove your facepiece<br />
until your head cools and any sweat has dried. Frostbite may result if the facepiece<br />
is removed while your face is still wet. These precautions are not required if<br />
you are in warm shelter.<br />
(1) Brush ice or snow from facepiece before taking it off.<br />
(2) Remove mittens or gloves, as necessary to remove facepiece.<br />
(3) Remove facepiece with hood (para 2-14 for M25A1 mask or para 2-15 for ABC-M24<br />
mask).<br />
(4) Wipe moisture or frost from insulating jacket of winterization kit after you unmask.<br />
Remove winterization kit if directed by unit NBC NCO.<br />
(5) Shake ice buildup from facepiece after you unmask.<br />
(6) Stow facepiece and hood in carrier (para 2-16).<br />
2-129
CHAPTER 3<br />
MAINTENANCE INSTRUCTIONS<br />
Section I. LUBRICATION INSTRUCTIONS<br />
No lubrication is required for the ABC-M24 and M25A1 masks.<br />
Section Il. TROUBLESHOOTING PROCEDURES<br />
There are no troubleshooting procedures for the ABC-M24 and M25A1 masks.<br />
3-0
Section lll. MAINTENANCE PROCEDURES<br />
<strong>TM</strong> 3-<strong>4240</strong>-<strong>280</strong>-<strong>10</strong><br />
3-1. DECONTAMlNATING, CLEANING, AND SANITIZING YOUR MASK.<br />
a. Decontaminating.<br />
T O decontaminate your mask, use the M258A1 individual decontaminating kit (see Additional<br />
Authorization List, Appendix C). Instructions for using the kit are printed on the<br />
container. FM 3-5 gives detailed instructions for decontaminating your mask.<br />
b. Cleaning.<br />
(1) Position canister (1) higher than facepiece (2).<br />
3-1
3-1. DECONTAMINATING, CLEANING, AND SANITIZING YOUR MASK (CONT).<br />
b. Cleaning (Cont)<br />
WARNING<br />
Wash facepiece using water below 120°F (48.89°C). Exposure of lens to temperatures<br />
above 120°F (48.89°C) may cause lens to crack and leak.<br />
CAUTION<br />
Wash the mask carefully so that the canister and microphone do not get wet.<br />
(2) Using a cheesecloth (3) (item 4, app D) which has been dipped in a utility pail (4)<br />
(item 6, app D) of warm soapy water (5) (item 8, app D) and wrung out almost dry,<br />
wipe facepiece (2) and hood (6) inside and out. You can also use a soft brush (item 2,<br />
app D) to remove stains.<br />
(3) Wipe facepiece (2) and hood (6) with a clean cheesecloth (3) (item 4, app D) that has<br />
been dipped in warm potable water and wrung out almost dry.<br />
(4) Wipe facepiece (2) and hood (6) dry with lint-free cheesecloth or allow to air dry.<br />
3-2
<strong>TM</strong> 3-424O-28O-1O<br />
3-3
3-1.<br />
b.<br />
DECONTAMINATING, CLEANING, AND SANITIZING YOUR MASK (CONT).<br />
Cleaning (Cont).<br />
(5) Check nosecup valve<br />
disks (7) to ensure that<br />
they have not been dislodged<br />
during cleaning.<br />
3-4
<strong>TM</strong> 3-<strong>4240</strong>-<strong>280</strong>-<strong>10</strong><br />
(6) Clean and polish eyelens (8)<br />
with plastic polish (item 7,<br />
app D) and cheesecloth<br />
(item 4, app D) as follows:<br />
NOTE<br />
Remove rings or other<br />
hard objects from hands<br />
before cleaning plastic<br />
surfaces. Do not use<br />
naphtha solvent on lens<br />
as it may harm facepiece<br />
rubber.<br />
(a) Using your bare hand,<br />
remove dirt, sand, or<br />
mud from eyelens (8).<br />
Wipe lens with cheesecloth<br />
(item 4, app D) saturated<br />
with potable<br />
water. Dry lens.<br />
3-5
3-1. DECONTAMINATING, CLEANING, AND SANITIZING YOUR MASK (CONT).<br />
b. Cleaning (Cont).<br />
(b) Apply plastic polish (item 7,<br />
app D) evenly, let dry, then<br />
wipe clean. Rub vigorously<br />
to remove light scratches.<br />
Do not rub too long in one<br />
place.<br />
(c) Remove any persistent<br />
smudges on eyelens (8) or<br />
polish left on rubber surfaces<br />
using isopropyl alcohol<br />
(item 5, app D) on<br />
cheesecloth (item 4, app D)<br />
(d) If the scratches and<br />
smudges cannot be<br />
removed, turn your mask<br />
into unit maintenance for<br />
replacement.<br />
3-6
<strong>TM</strong> 3-<strong>4240</strong>-<strong>280</strong>-<strong>10</strong><br />
(7) Using cleaning brush (item 1, app D), brush off surface dirt or mildew from air duct<br />
hose (9), M<strong>10</strong>A1 canister (1), and canister carrying sling (<strong>10</strong>).<br />
3-7
3-1.<br />
b.<br />
c.<br />
DECONTAMINATING, CLEANING, AND SANITIZING YOUR MASK (CONT).<br />
Cleaning (Cont).<br />
(8) Using cleaning brush (item 1 app D), brush any dirt or grit from carrier (11). lf<br />
carrier (11) is soiled, clean using scrub brush (item 3, app D), utility pail (item 6, app D),<br />
and potable cool water.<br />
Sanitizing.<br />
3-8<br />
NOTE<br />
The ABC-M24/M25A1 mask cannot be dipped in a sanitizing solution or water<br />
because sanitizing solution or water can damage the microphone and loosen the<br />
tape seal around the outlet valve.<br />
Mask is sanitized when it is turned in for reassignment.<br />
Sanitization of your mask, if required, will be done under the direction of unit personnel. See your<br />
NBC NCO or officer for assistance.
APPENDIX<br />
A<br />
REFERENCES<br />
<strong>TM</strong> 3-<strong>4240</strong>-<strong>280</strong>-<strong>10</strong><br />
A-1.<br />
SCOPE.<br />
This appendix lists all forms, field manuals, technical manuals, and miscellaneous publications.<br />
A-2. FORMS.<br />
DA Form 2028 . . . . . . . . Recommended Changes to Publications and Blank Forms<br />
DA Form 2404 . . . . . . . . Equipment Inspection and Maintenance Worksheet<br />
SF 368 . . . . . . . . . . . . . . Quality Deficiency Report<br />
A-3. FIELD MANUALS.<br />
FM 3-5 . . . . . . . . . . . . . . NBC Decontamination<br />
FM 21-11 . . . . . . . First Aid for Soldiers<br />
A-4. TECHNICAL MANUALS.<br />
<strong>TM</strong> 3-4230-218-<strong>10</strong> . . . . Operator’s Manual for Decontaminating Kit, Skin, M258A1<br />
A-1
A-5. COMMON TABLE OF ALLOWANCES.<br />
CTA 8-<strong>10</strong>0 . . . . . . . . . . . Army Medical Department Expendable/Durable Items<br />
CTA 50-970 . . . . . . . . . . Expendable/Durable Items (Except Medical, Class V, Repair Parts, and<br />
Heraldic Items)<br />
A-6. MISCELLANEOUS PUBLICATIONS.<br />
AR 40-63 . . . . . . . . . . Opthalmic Services<br />
AR 70-38 . . . . . . . . . . . . Research, Development, Test, and Evaluation of Materiel for Extreme<br />
Climatic Conditions<br />
AR 700-84 . . . . . Issue and Sale of Personal Clothing<br />
DA PAM 738-750 . . . . . The Army Maintenance Management System (TAMMS)<br />
SB 3-30-2 . . . . . . . . . . . . Chemical-Biological Canisters and Filter Elements: Serviceability Lists<br />
SB 740-94-2 Training Aid, Skin Decontammating<br />
A-2
APPENDIX B<br />
<strong>TM</strong> 3-<strong>4240</strong>-<strong>280</strong>-<strong>10</strong><br />
COMPONENTS OF END ITEM AND BASIC ISSUE ITEMS LIST<br />
B-1.<br />
SCOPE.<br />
Section l. INTRODUCTION<br />
This appendix lists components of end item and basic issue items for the ABC-M24 aircraft and<br />
M25A1 tank masks to help you inventory items required for safe and efficient operation.<br />
B-2. GENERAL.<br />
The Components of End Item and Basic Issue items Lists are divided into the following sections:<br />
a. Section Il. Components of End Item. This listing is for informational purposes only, and is not<br />
authority to requisition replacements. These items are part of the end item, but are removed and<br />
separately packaged for transportation or shipment. AS part of the end item, these items must be<br />
with the end item whenever it is issued or transferred between property accounts. Illustrations<br />
are furnished to assist you in identifying the items.<br />
B-1
. Section III. Basic IssueItems. These are the minimum essential items required to place the<br />
M24 Aircraft Mask/M25A1 Tank Mask in operation, to operate it, and to perform emergency<br />
repairs. Although shipped separately packaged, Bll must be with the M24 Aircraft Mask/M25A1<br />
Tank Mask during operation and whenever it is transferred between property accounts. The<br />
illustrations will assist you with hard-to-identify items. This manual is your authority to request/<br />
requisition replacement Bll, based on TOE/MTOE authorization of the end item.<br />
B-3. EXPLANATION OF COLUMNS.<br />
The following provides an explanation of columns found in the tabular listings:<br />
a. Column (1) - Illustration Number (IIIus Number). This column indicates the number of the<br />
illustration in which the item is shown.<br />
b. Column (2) - National Stock Number. Indicates the National stock number assigned to the<br />
item and will be used for requisitioning purposes.<br />
c. Column (3) - Description. Indicates the Federal item name and, if required, a minimum<br />
description to identify and locate the item. The last line for each item indicates the FSCM (in<br />
parentheses) followed by the part number.<br />
d. Column (4) - Unit of Measure (U/M). Indicates the measure used in performing the actual<br />
operational/maintenance function. This measure is expressed by a two-character alphabetical<br />
abbreviation (e.g., ea, in., pr).<br />
e. Column (5) - Quantity required (Qty rqr). Indicates the quantity of the item authorized to be<br />
used with/on the equipment.<br />
B-2
Section Il. COMPONENTS OF END ITEM<br />
<strong>TM</strong> 3-<strong>4240</strong>-<strong>280</strong>-<strong>10</strong><br />
There are no components of end item required<br />
B-3
Section Ill. BASIC ISSUE ITEMS LIST<br />
(1)<br />
Illus<br />
Number<br />
(2)<br />
National<br />
Stock<br />
Number<br />
Description<br />
FSCM and Part Number<br />
(3)<br />
Usable<br />
On Code<br />
(4)<br />
U/M<br />
(5)<br />
Qty<br />
Rqr<br />
1<br />
Operator’s Manual For, Mask,<br />
Chemical - Biological, Aircraft,<br />
ABC-M24, and Mask, Chemical -<br />
Biological, Tank, M25A1<br />
EA<br />
1<br />
<strong>TM</strong> 3-<strong>4240</strong>-<strong>280</strong>-<strong>10</strong><br />
B-4
APPENDIX C<br />
ADDITIONAL AUTHORIZATION LIST<br />
<strong>TM</strong> 3-<strong>4240</strong>-<strong>280</strong>-<strong>10</strong><br />
C-1. SCOPE.<br />
Section l. INTRODUCTION<br />
This appendix lists additional items you are authorized for the support of the mask.<br />
C-2. GENERAL.<br />
This list identifies items that do not have to accompany the mask and that do not have to be<br />
turned in with it. These items are all authorized to you by CTA, MTOE, TDA, or JTA.<br />
C-1
C-3. EXPLANATION OF LISTING.<br />
National stock numbers, descriptions, and quantities are provided to help you identify and<br />
request the additional items you require to support this equipment. The items are listed in<br />
alphabetical sequence by item name under the type document (i.e., CTA, MTOE, TDA, OR JTA)<br />
which authorizes the item(s) to you. If the item required differs for different models of this<br />
equipment, the model is shown under the “Usable On Code” heading in the description column.<br />
These codes are identified as:<br />
CODE<br />
USED ON<br />
32A, 32B, 332 Model ABC-M24<br />
41A, 41B, 541 Model M25A1<br />
C-2
Section Il. ADDITIONAL AUTHORIZATION LIST<br />
<strong>TM</strong> 3-<strong>4240</strong>-<strong>280</strong>-<strong>10</strong><br />
(1)<br />
National<br />
.%xX<br />
Nlmm?f<br />
Desencxim<br />
FSC?U4 and<br />
Pal? Nlu-ncef<br />
(2)<br />
Usable On Code<br />
(3)<br />
U/M<br />
(4)<br />
aty<br />
Auth<br />
CTA AUTHORIZED ITEMS<br />
<strong>4240</strong>-00-848-6074<br />
ADAPTER MASK. AFlCRAt7, 32A, 325.332<br />
M8 (81361) C5-82-13<br />
EA<br />
1<br />
4230-01-<strong>10</strong>1-3984<br />
DECONT’AMINAITW3 KIT, 32A, 32B, 332<br />
SKIN, ?d258Al 41A, 418,541<br />
(81361) CM-77-2366<br />
EA<br />
1<br />
424MW21 -8695<br />
HOOD, MASK. Ah%TIAiW, 32A,320. 332<br />
M? (81 349)MLH512?0<br />
EA<br />
1<br />
.<br />
<strong>4240</strong>~0460d987<br />
HOOD, MASK. TANK A63C-M5 41A, 418,541<br />
[81349) MILH51 143<br />
G1<br />
1<br />
#<br />
C-3
(1)<br />
Nauonal<br />
Sfcd<br />
Numcer<br />
Descnpuon<br />
FSCM and<br />
Part Number<br />
(2)<br />
Usaole On Cede<br />
(3)<br />
U/M<br />
(4)<br />
a~<br />
Au(h<br />
CTA AUTHORIZED ITEMS<br />
OPTICAL INSERT” 32A, 323,332<br />
41A. 41B, 541<br />
PR<br />
1<br />
b<br />
<strong>4240</strong>-00-961-<strong>10</strong>62<br />
OUTSERT, EYELENS, 41A, 41B, 541<br />
ANTIGL4RE, M2<br />
(81361 )D5-2-1602<br />
EA<br />
1<br />
y<br />
6665-00-050-8529<br />
PAPER, CHEMICAL AGENT DETECTOR, M8<br />
(81361) 05-67-266<br />
BK<br />
1<br />
<strong>4240</strong>-00-066-0181<br />
WINTERIZATION KIT, 324.325,332<br />
CHEMICAL-BIOLOGICAL 41A, 4<strong>10</strong>,541<br />
MASK: h43<br />
:81361 )DL5-77-934<br />
EA<br />
1<br />
—-<br />
C-4<br />
“Issued by prescription only (AR 40-63).<br />
PIN : 031245-002<br />
,
APPENDIX D<br />
<strong>TM</strong> 3-<strong>4240</strong>-<strong>280</strong>-<strong>10</strong><br />
EXPENDABLE/DURABLE SUPPLIES AND MATERIALS LIST<br />
D-1.<br />
SCOPE.<br />
Section l. INTRODUCTION<br />
This listing is for informational purposes only and is not authority to requisition the listed items.<br />
These items are authorized to you by CTA 50-970, Expendable/Durable Items (Except Medical,<br />
Class V, Repair Parts, and Heraldic Items), or CTA 8-<strong>10</strong>0, Army Medical Department Expendable/Durable<br />
Items.<br />
D-2. EXPLANATION OF COLUMNS.<br />
a. Column 1 - Item Number. This number is assigned to the entry in the listing and is<br />
referenced in the narrative instructions to identify the material (e.g., “Use plastic polish, item 7,<br />
app D”).<br />
b. Column 2 - Level. This column identifies the lowest level of maintenance that requires the<br />
listed item.<br />
C-Operator/Crew<br />
D-1
D-2. EXPLANATION OF COLUMNS (CONT).<br />
c. Column 3 - National Stock Number. This is the National Stock Number assigned to the<br />
item; use it to request or requisition the item.<br />
d. Column 4 - Description. Indicates the Federal item name and, if required, a description to<br />
identify the item. The last line for each item indicates the Federal Supply Code for Manufacturer<br />
(FSCM) in parentheses followed by the part number.<br />
e. Column 5 - Unit of Measure (U/M). Indicates the measure used in performing the actual<br />
maintenance function. This measure is expressed by a two character alphabetical abbreviation<br />
(e.g., ea, in., pr). If the unit of measure differs from the unit of issue, requisition the lowest unit of<br />
issue that will satisfy your requirements.<br />
D-2
<strong>TM</strong> 3-<strong>4240</strong>-<strong>280</strong>-<strong>10</strong><br />
Section Il. EXPENDABLE/DURABLE SUPPLIES AND MATERIALS LIST<br />
(1)<br />
ITEM<br />
NUMBEF<br />
(2)<br />
LEVEL<br />
(3)<br />
NATIONAL<br />
STOCK NUMBER<br />
(4)<br />
DESCRIPTION<br />
1<br />
c<br />
<strong>10</strong>05-00-494-6602<br />
BRUSH, CLEANING SMALL<br />
(19204) 8448462<br />
EA<br />
2<br />
c<br />
7920-00-205-0565<br />
BRUSH, DUSTING, LENS AND<br />
PHOTOGRAPHIC NEGATIVE:<br />
camels hair, wood handle<br />
(81348) H-B-1654<br />
EA<br />
3<br />
4<br />
c<br />
c<br />
7920-00-061-0037<br />
8305-00-222-2423<br />
BRUSH, SCRUB: nylon bristle<br />
(81348) H-B-1490<br />
CLOTH, CHEESECLOTH: cotton,<br />
basic, type 1, class 1<br />
(81 348) CCC-C-440<br />
EA<br />
YD<br />
D-3
(1) (2) (3) (4) (5)<br />
NATIONAL<br />
ITEM<br />
STOCK<br />
NUMBER LEVEL NUMBER DESCRIPTION U/M<br />
5 C 6505-00-655-8366 ISOPROPVL RUBBING ALCOHOL PT<br />
bottle, plastic container<br />
(56287) PUREPAC<br />
6 C 7240-01-094305 PAIL, UTILITY: plank EA<br />
snap on id, 5.00<br />
gal (18.93 L)<br />
(5653s) A-332<br />
7 C 79s3-0 794 POUSH, PLASTIC: liquid PT<br />
type 1<br />
(81348) P-P560<br />
8 C 8520-00-2<strong>280</strong>598 SOAP, TOILET: nonmedicated GL<br />
liquid, type 1<br />
(81348) P-8-624 (or equivalent)<br />
9 C <strong>4240</strong>-01-372-3078 WIPES, RESPIRATOR: cleaning BX<br />
(50378) 504<br />
D-4 Change 3<br />
*U.S.. GOVERNMENT PRINTNG OFFICE: I1" - 545039/4005
<strong>TM</strong> 3-<strong>4240</strong>-<strong>280</strong>-<strong>10</strong>
WARNING - This document contains export-controlled technical data whose export is<br />
restricted by the Army Export Control Act (Title 22, U. S. C., Sec 2751 et seq) or Executive<br />
Order 12470. Violation of these export laws are subject to severe criminal penalties.<br />
DISTRIBUTION STATEMENT C: Distribution authorized to U. S. Government agencies<br />
and their contractors to protect technical or operational information. This determination<br />
was made on 30 July 1987. Other requests for this document will be referred to:<br />
Commander, US Army Armament, Munitions and Chemical Command, ATTN: AMSMC-<br />
MAR-T (A), Aberdeen Proving Ground, MD 2<strong>10</strong><strong>10</strong>-5423.<br />
DESTRUCTION NOTICE - Destroy by any method that will prevent disclosure of contents<br />
of reconstruction of the document.<br />
PIN: 031245-000