TM 3-4240-339-10 CHEMICAL-BIOLOGICAL MASK: FIELD, M40 ...
TM 3-4240-339-10 CHEMICAL-BIOLOGICAL MASK: FIELD, M40 ...
TM 3-4240-339-10 CHEMICAL-BIOLOGICAL MASK: FIELD, M40 ...

Create successful ePaper yourself
Turn your PDF publications into a flip-book with our unique Google optimized e-Paper software.
<strong>TM</strong> 3-<strong>4240</strong>-<strong>339</strong>-<strong>10</strong><br />
OPERATOR’S MANUAL<br />
FOR<br />
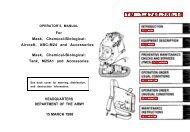
<strong>CHEMICAL</strong>-<strong>BIOLOGICAL</strong> <strong>MASK</strong>: <strong>FIELD</strong>, <strong>M40</strong><br />
(<strong>4240</strong>-01-258-0061 -- SMALL)<br />
(<strong>4240</strong>-01-258-0062 -- MEDIUM)<br />
(<strong>4240</strong>-01-258-0063 -- LARGE)<br />
<strong>CHEMICAL</strong>-<strong>BIOLOGICAL</strong> <strong>MASK</strong>: <strong>FIELD</strong>, <strong>M40</strong>A1<br />
(<strong>4240</strong>-01-370-3821 -- SMALL)<br />
(<strong>4240</strong>-01-370-3822 -- MEDIUM)<br />
(<strong>4240</strong>-01-370-3823 -- LARGE)<br />
This <strong>TM</strong> supersedes <strong>TM</strong> 3-<strong>4240</strong>-300-<strong>10</strong>-1, JUNE 1988<br />
Sea back cover for warning distribution statement, and destruction notice.<br />
HEADQUARTERS<br />
DEPAR<strong>TM</strong>ENT OF THE ARMY<br />
1 FEBRUARY 1994
WARNING<br />
The soldier’s safety depends on proper fitting facepiece. Injury or death can occur if the following<br />
warnings are not observed:<br />
The mask will not be fully effective in confined spaces when the oxygen content of the air is too low.<br />
The CB mask has only been tested and verified to protect against all known military agents.<br />
You must check you facepiece for leaks when fitted and each time facepiece is put on. A leaky<br />
facepiece will not protect you from toxic agents.<br />
Stop breathing and close your eyes when putting on your facepiece. Toxic agents may be in the<br />
surrounding air. Perform the step for putting on your facepiece quickly. You must put he facepiece<br />
on before you take another breath.<br />
In cold weather, do not clear facepiece by exhaling a large volume of air. Moist air will frost<br />
eyelenses and impair vision.<br />
If you become overheated in extremely cold weather, do not remove your facepiece outdoors until you<br />
your face and head have cooled and any sweat has dried. Frostbite may result if facepiece is<br />
removed while your face is still wet.<br />
In toxic atmosphere, do not break the seal between your facepiece and the side of your face when<br />
putting on your helmet. This could cause the facepiece to leak.<br />
a
Keep face clean shaven.<br />
and facepiece.<br />
WARNING - (Cont)<br />
An unshaven face could cause a bad seal between face<br />
Soldiers shall remove all hairpins, combs, hair knots, buns, or braids that will interfere with the<br />
facepiece seal.<br />
Check canister mating surface of the facepiece and areas between these surfaces<br />
for dirt or foreign material which could allow contaminated air into your<br />
facepiece.<br />
If the drinking system leaks, pinch the external drink tube where it connects<br />
to the outlet valve body to prevent inhalation of agent vapors until a replacement<br />
facepiece is obtained or wearing of the facepiece is no longer required.<br />
Do not connect the drink tube to your canteen until all resting surfaces have<br />
been checked and are free of contamination. Chemical agents could be swallowed,<br />
resulting in sickness and death.<br />
Care should be taken not to break the facepiece seal when pressing in the outlet<br />
valve disk.<br />
b
If you feel looseness in the fit of your facepiece during<br />
the performance of your mission, adjust your straps in<br />
accordance with para 2-14.<br />
Do not drink if resistance is not felt, your drinking<br />
system is leaking. Notify unit maintenance to replace<br />
facepiece as soon as possible.<br />
Do not use facepiece if outlet valve cover or outlet valve<br />
disk is missing or damaged. The facepiece will leak.<br />
Do not wear contact lenses with your facepiece.<br />
Any solid matter (even grass) under valve disks will cause<br />
fogged eyelenses, discomfort, and leakage.<br />
Foreign material (dirt or debris) in carrier may cause<br />
valves in facepiece to leak.<br />
Do not store food in waterproof bag because of possible<br />
toxic effects.<br />
FIRST AID<br />
For first aid refer to FM 21-11.<br />
c
WARNING<br />
HEALTH/ENVIRONMENTAL<br />
HAZARD<br />
Filter canisters use ASC Whetlerite Carbon which contains<br />
Chromium VI. Chromium VI is a known carcinogen if inhaled<br />
or swallowed. Damaged or unusable canisters are classified<br />
as hazardous waste:<br />
DO NOT throw away damaged or unusable canisters<br />
as ordinary trash.<br />
DO turn in damaged or unusable canisters to your<br />
hazardous waste management office or Defense<br />
Reutilization and Marketing Office (DRMO).<br />
Canisters are completely safe to handle and use if they are<br />
not damaged in such a way that carbon leaks from them.<br />
In unlikely event that carbon should leak, use protection<br />
such as a dust respirator to cover nose and mouth and put<br />
carbon in container such as self-sealing plastic bag; turn<br />
into hazardous waste management office or DRMO.<br />
Disposal of hazardous waste is restricted by the Resource<br />
Conservation and Recovery Act as amended (42 U.S.C.A<br />
sec 6901 et seq). Violation of these laws is subject<br />
to severe criminal penalties.<br />
d
TECHNICAL MANUAL<br />
NO. 3-<strong>4240</strong>-<strong>339</strong>-<strong>10</strong><br />
HEADQUARTERS<br />
DEPAR<strong>TM</strong>ENT OF THE ARMY<br />
WASHINGTON, D.C. 1 FEBRUARY 1994<br />
OPERATOR' S MANUAL<br />
FOR<br />
<strong>CHEMICAL</strong>-<strong>BIOLOGICAL</strong> <strong>MASK</strong>: <strong>FIELD</strong>, <strong>M40</strong><br />
(<strong>4240</strong>-01-258-0061 - SMALL)<br />
(<strong>4240</strong>-01-258-0062 - MEDIUM)<br />
(<strong>4240</strong>-01-258-0063 - LARGE)<br />
<strong>CHEMICAL</strong>-<strong>BIOLOGICAL</strong> <strong>MASK</strong> <strong>FIELD</strong>, <strong>M40</strong>A1<br />
(<strong>4240</strong>-01-370-3821 - SMALL)<br />
(<strong>4240</strong>-01-370-3822 - MEDIUM)<br />
(<strong>4240</strong>-01-370-3823 - LARGE)<br />
REPORTING ERRORS AND RECOMMENDING IMPROVEMENTS<br />
You can help improve this manual. If you find any mistakes or if you know of a way to improve the<br />
procedures, please let us know. Mail your letter or DA Form 2028 (Recommended Changes to<br />
Publlcations and Blank Forms) direct to: Technical Director, US Army Edgewood Research ,<br />
Development and Engineering Center, ATTN: SCBRD-ENL-V, Aberdeen Proving Cround, MD<br />
2<strong>10</strong><strong>10</strong>-5423. A reply will be furnished to you.<br />
i
PAGE<br />
CHAPTER 1.<br />
Section I.<br />
Section II.<br />
CHAPTER 2.<br />
Section I.<br />
Section II.<br />
Section III.<br />
Section IV.<br />
CHAPTER 3.<br />
Section I.<br />
Section II.<br />
Section III.<br />
INTRODUCTION<br />
General Information . . . . . . . . . . . . . . . . . . . .<br />
Equipment Description . . . . . . . . . . . . . . . . . . .<br />
OPERATING INSTRUCTIONS<br />
Description and Use of Operator’s Controls and Indicators .<br />
Preventive Maintenance Checks and Services (PMCS) . . . . .<br />
Operation Under Usual Conditions . . . . . . . . . . . . .<br />
Operation Under Unusual Conditions . . . . . . . . . . . .<br />
MAINTENANCE INSTRUCTIONS<br />
Lubrication Instructions . . . . . . . . . . . . . . . . .<br />
Troubleshooting . . . . . . . . . . . . . . . . . . . . . .<br />
Maintenance Procedures . . . . . . . . . . . . . . . . . .<br />
1-1<br />
1-3<br />
2-1<br />
2-11<br />
2-51<br />
2-<strong>10</strong>0<br />
3-1<br />
3-1<br />
3-1<br />
ii
PAGE<br />
APPENDIX A.<br />
APPENDIX B.<br />
Section I.<br />
Section II.<br />
Section III.<br />
APPENDIX C.<br />
Section I.<br />
Section II.<br />
APPENDIX D.<br />
Section I.<br />
Section II.<br />
REFERENCES . . . . . . . . . . . . . . . . . . . . . . . . A-1<br />
COMPONENTS OF END ITEM AND BASIC ISSUE ITEMS LIST<br />
Introduction . . . . . . . . . . . . . . . . . . . . . . . B-1<br />
Components of End Item . . . . . . . . . . . . . . . . . . B-3<br />
Basic Issue Items List . . . . . . . . . . . . . . . . . . B-4<br />
ADDITIONAL AUTHORIZATION LIST<br />
Introduction . . . . . . . . . . . . . . . . . . . . . . . C-1<br />
Additional Authorization List . . . . . . . . . . . . . . . C-2<br />
EXPENDABLE/DURABLE SUPPLIES AND MATERIALS LIST<br />
Introduction . . . . . . . . . . . . . . . . . . . . . . . D-1<br />
Expendable/Durable Supplies and Materials List . . . . . . D-3<br />
iii
1-0<br />
<strong>M40</strong>/<strong>M40</strong>A1 <strong>CHEMICAL</strong> <strong>BIOLOGICAL</strong> <strong>MASK</strong> (<strong>FIELD</strong>)
CHAPTER 1<br />
INTRODUCTION<br />
SECTION 1. GENERAL INFORMATION<br />
1-1. Scope<br />
1<br />
a. Type of Manual. Operator's Manual<br />
b. Model Number and Equipment Name. Chemical-biological mask: field, <strong>M40</strong>/<strong>M40</strong>A1<br />
c. Purpose of Equipment. To protect your face, eyes, and lungs from field concentrations of<br />
chemical-biological (CB) agents, toxins and radioactive fallout particles.<br />
d. Special Limitations on Equipment. Does not protect against ammonia or carbon monoxide gases.<br />
Does not protect you in closed spaces where there is not enough oxygen in the air.<br />
1-2. Maintenance Forms and Records<br />
Department of the Army forms and procedures used for equipment maintenance will be those<br />
prescribed by DA PAM 738-750, The Army Maintenance Management System (TAMMS).<br />
1-1
1-3. Reporting Equipment Improvement Recommendations (EIR’s)<br />
If your mask needs improvement, let us know. Send us an EIR. You, the user, are<br />
the only one who can tell us what you don’ t like about your equipment. Let us know<br />
why you don’ t like the design or performance. Put it on an SF 368 (Quality Deficiency<br />
Report). Mail it to us at Commander, US Army Armament, Munitions and Chemical<br />
Command, ATTN: AMSMC-QAD (R), Rock Island, IL 61299-6000. We’ ll send you a<br />
reply.<br />
1-4. Corrosion Prevention and Control<br />
Corrosion Prevention and Control (CPC) of Army materiel is a continuing concern.<br />
It is important that any corrosion problems with this item be reported so that the<br />
problem can be corrected and improvements can be made to prevent the problem in future<br />
items.<br />
While corrosion is typically associated with rusting of metals, it can also include<br />
deterioration of other materials such as rubber and plastic. Unusual cracking,<br />
softening, swelling, or breaking of these materials may be a corrosion problem.<br />
If a corrosion problem is identified, it can be reported using Standard Form 368,<br />
Quality Deficiency Report. Use of key words such as “corrosion”, “rust”, "cracking”<br />
or “deterioration” will assure that the information is identified as a CPC problem.<br />
The form should be submitted to Commander, U. S. Army Armament , Munitions and Chemical<br />
Command ATTN: AMSMC-QAD, Rock Island, IL 61299-6000.<br />
1-2
Section II. EQUIPMENT DESCRIPTION<br />
1-5. Equipment Characteristics, Capabilities, and Features<br />
a. Characteristics.<br />
Lightweight.<br />
Transported and stored in carrier<br />
Facepiece is made of silicone rubber with inturned sealing surface so it can form a seal on<br />
your face.<br />
Second skin for additional protection from liquid agents. (<strong>M40</strong>A1 only)<br />
Quick doff hood for easy donning/doffing operations. (<strong>M40</strong>A1 only)<br />
Includes both clear and neutral gray outserts.<br />
Canister quickly and easily replaced.<br />
1-3
. Capabilities. When worn with proper canister installed, the facepiece protects face, eyes, and<br />
lungs from concentrations of Chemical-Biological (CB) agents, toxins, and radioactive fallout particles.<br />
The canister may be installed on either side of the facepiece.<br />
c. Features. Major features of the mask are the silicone rubber facepiece which provides a seal<br />
against CB agents, a canister which filters particulate matter and agents from air, side and front<br />
voicemitters which transmit the user’s voice outside the facepiece, an outlet valve, and a drink tube<br />
which allows the soldier to drink while wearing the facepiece, and quick doff hood that facilitates easy<br />
donning/doffing operations (<strong>M40</strong>A1 only).<br />
1-6. Equipment Data<br />
a. Tabulated Data.<br />
Weight (with carrier) <strong>M40</strong> and <strong>M40</strong>A1 mask<br />
Dimensions (with carrier)<br />
3.8 lbs. (1.73kg)<br />
9 x 11 x 4.5 in. (22.9 x 28.0 x 11.4 cm)<br />
b. Shipping and Storage Data<br />
Number and type of pack . . . . . . . 8 masks in individual fiberboard boxes per fiberboard container<br />
Fiberboard box Dimensions . . .12.00 x 12.00 x 9.50 in. (30.48 x 30.48 x 24.13 cm)<br />
1-4
CHAPTER 2<br />
OPERATING INSTRUCTIONS<br />
Section l. DESCRIPTION AND USE OF OPERATOR’S CONTROLS AND INDICATORS<br />
2-1. General<br />
Before attempting to use the mask and additionally authorized items, make certain<br />
you are familiar with the location and operation of all parts.<br />
2-2. Description of Mask<br />
a. Facepiece Assembly.<br />
FACEBLANK (1) fits closely against<br />
your face to form a seal. It is<br />
made of silicone rubber.<br />
HEAD HARNESS (2) consists of a headpad,<br />
forehead straps, temple straps,<br />
cheek straps, and donning tab. Secures<br />
facepiece to your face.<br />
INLET VALVE DISK (3) allows filtered<br />
air to enter the facepiece and prevents<br />
moist exhaled air from entering<br />
the canister.<br />
2-1
2-2. Description of Mask - (Cont)<br />
2-2<br />
NOSECUP VALVE DISK<br />
(4) allows filtered<br />
air to enter<br />
nosecup and prevents<br />
moist exhaled<br />
air from fogging<br />
eyelenses in cold<br />
weather.<br />
OUTLET VALVE DISK<br />
(5) releases exhaled<br />
air and prevents<br />
unfiltered<br />
air from entering<br />
the facepiece.<br />
OUTLET VALVE COVER<br />
(6) protects the<br />
outlet valve from<br />
damage.<br />
FRONT AND SIDE<br />
VOICEMITTERS ( 7 )<br />
transmit your voice<br />
outside of the<br />
facepiece.
INTERNAL DRINK TUBE (8) allows the operator to drink while wearing the<br />
facepiece.<br />
EXTERNAL DRINK TUBE ( 9 ) has a quick disconnect coupling which connects the<br />
facepiece to the M1 canteen cap to allow the operator to drink.<br />
AIRFLOW DEFLECTOR (<strong>10</strong>) directs inhaled air over eyelenses to prevent<br />
fogging.<br />
2-3
2-2 Description of Mask - (Cont)<br />
2-4<br />
b. Canister.<br />
CANISTER (1) filters out CB agents and other particles from contaminated<br />
air.<br />
Screws on either left or right side of FACEPIECE ASSEMBLY.
c. Carrier.<br />
Provides for storage and carrying<br />
of mask and additionally authorized<br />
items.<br />
Consists of a SHOULDER STRAP (l),<br />
WAIST STRAP (2), SHORT STRAP (3)<br />
HORT ADJUSTABLE STRAP (4),<br />
and ID PLATE (5).<br />
QUICK-OPENING FLAP (6), with hook<br />
and pile fastener, provides for<br />
ready access to contents.<br />
2-5
2-2. Description of Mask - (Cont)<br />
d. Outserts.<br />
RUBBER RINGS (1) fit over facepiece<br />
eyelens rings to secure<br />
outserts to the facepiece.<br />
Clear and neutral gray outserts<br />
are provided.<br />
Clear plastic OUTSERTS (2) protect<br />
eyelenses from scratches<br />
and other damage.<br />
Neutral gray OUTSERTS (3) reduce<br />
sun glare.<br />
Prevent eyelenses from fogging<br />
in cold weather.<br />
Separate outserts for left and<br />
right eyelenses.<br />
2-6
e. M1 Waterproof Bag.<br />
WARNING<br />
Do not allow food to come in<br />
contact with the waterproof<br />
bag because of possible toxic<br />
effects.<br />
CAUTION<br />
Storage of mask in waterproof<br />
bag can degrade the protective<br />
capability of the facepiece.<br />
Remove facepiece from<br />
waterproof bag as soon as protection<br />
of mask is no longer<br />
required.<br />
Keeps mask dry when required by<br />
climate and mission.<br />
Stowed in left end pocket of<br />
carrier.<br />
Includes rubber bands for<br />
sealing.<br />
2-7
2-2. Description of Mask - (Cont)<br />
f. Hood.<br />
Made of rubber-coated fabric which<br />
protects neck and areas of head<br />
not covered by your mask against<br />
C-B agents.<br />
EYELENS OPENINGS (1) , FRONT VOICE-<br />
MITTER OPENING (2), SIDE VOICE-<br />
MITTER OPENING (3), INLET VALVE<br />
OPENING (4), and OUTLET VALVE<br />
OPENING (5) provide for unobstructed<br />
vision and breathing.<br />
CORD (6) draws hood close to neck<br />
by use of SLIDER (7).<br />
ZIPPER (8) permits opening of the<br />
hood for ventilation or closing<br />
for protection in accordance with<br />
Mission Oriented Protection<br />
Posture (MOPP) requirements.<br />
UNDERARM STRAPS (9) keep HOOD (<strong>10</strong>)<br />
down on shoulders and are fastened<br />
on HOOK AND PILE FASTENERS (11).<br />
2-8
g. Faceform.<br />
Holds facepiece in proper shape<br />
when stored longer than 30 days.<br />
2-9
2.2 Description of Mask - (Cont)<br />
h. Second Skin. (<strong>M40</strong>A1 only)<br />
Second Skin (1) is made of butyl rubber, and<br />
covers facepiece to protect from chemicalbiological<br />
(CB) agents, toxins, and radioactive<br />
fallout particles.<br />
RUBBER CATCHES (2) are used for retention<br />
of the quick doff hood and second skin on the<br />
facepiece; located at the top and bottom of the<br />
second skin.<br />
RIDGE (3) is used as a secondary source of<br />
retention for the quick doff hood.<br />
2-<strong>10</strong>
Section Il. PREVENTIVE MAINTENANCE CHECKS<br />
AND SERVICES (PMCS)<br />
2-4. General<br />
a. Before You Operate. Always keep in mind CAUTIONS and WARNINGS. Perform<br />
your before (B) PMCS on all missions.<br />
b. After You Operate. Be sure to perform your after (A) PMCS on all missions.<br />
c. Weekly (in Combat Situation). Be sure to perform your weekly (W) PMCS in<br />
combat situations only.<br />
2-5. PMCS Procedure<br />
a. Your preventive maintenance checks and services table lists the inspections<br />
and care of your equipment required to keep it in good operating condition.<br />
b. The Item No. column is used as a source of item numbers for the <strong>TM</strong> Number<br />
column on DA Form 2404 in recording results of PMCS.<br />
c. The interval column of your PMCS table tells you when to do a certain check<br />
or procedure.<br />
2-11
d. The Procedure column of your PMCS table tells you how to do the required<br />
checks and services. Carefully follow these instructions. If you do not<br />
have the tools, or if the procedure tells you to, have unit maintenance do<br />
the work.<br />
e. The Equipment Is Not Ready/Available If column tells you why your equipment<br />
cannot be used.<br />
NOTE<br />
The terms ready/available and mission capable refer to the same<br />
status: equipment is on hand and is able to perform its mission (see<br />
DA PAM 738-750).<br />
f. If your equipment does not perform as required, refer to chapter 3. Report<br />
any malfunctions or failures on the proper form DA 2404, or refer to DA PAM<br />
738-750.<br />
NOTE<br />
The checks in the following table are to be performed before and after each combat<br />
or training mission.<br />
2-12
TABLE 2–1. PREVENTIVE MAINTENANCE CHECKS<br />
AND SERVICES (PMCS)<br />
B-Before combat or A-After combat or W-Weekly in combat<br />
training mission<br />
training mission<br />
situations only<br />
para 2-6<br />
para 2-6<br />
2-13
2-5. PMCS Procedures - (Cont)<br />
B-Before combat or<br />
training mission<br />
A-After combat or<br />
training mission<br />
W-Weekly in combat<br />
situations only<br />
2-14
TABLE 2-1. PREVENTIVE MAINTENANCE CHECKS<br />
AND SERVICES (PMCS) - (Cont)<br />
B-Before combat or<br />
training mission<br />
A-After combat or<br />
training mission<br />
W-Weekly in combat<br />
situations only<br />
para 3-3a<br />
2-15
2-5. PMCS Procedures - (Cont)<br />
B-Before combat or<br />
training mission<br />
A-After combat or<br />
training mission<br />
W-Weekly in combat<br />
situations only<br />
2-16
TABLE 2-1. PREVENTIVE MAINTENANCE CHECKS<br />
AND SERVICES (PMCS) - (Cont)<br />
B-Before combat or<br />
training mission<br />
A-After combat or<br />
training mission<br />
W-Weekly in combat<br />
situations only<br />
para 2-21<br />
2-17
2-5. PMCS Procedures - (Cont)<br />
B-Before combat or<br />
training mission<br />
A-After combat or<br />
training mission<br />
W-Weekly in combat<br />
situations only<br />
2-18
TABLE 2-1. PREVENTIVE MAINTENANCE CHECKS<br />
AND SERVICES (PMCS) - (Cont)<br />
B-Before combat or<br />
training mission<br />
A-After combat or<br />
training mission<br />
W-Weekly in combat<br />
situations only<br />
2-19
2-5. PMCS Procedures - (Cont)<br />
B-Before combat or<br />
training mission<br />
A-After combat or<br />
training mission<br />
W-Weekly in combat<br />
situations only<br />
2-20
TABLE 2-1. PREVENTIVE MAINTENANCE CHECKS<br />
AND SERVICES (PMCS) - (Cont)<br />
B-Before combat or<br />
training mission<br />
A-After combat or<br />
training mission<br />
W–Weekly in combat<br />
situations only<br />
2-21
2-5. PMCS Procedures - (Cont)<br />
B-Before combat or<br />
training mission<br />
A-After combat or<br />
training mission<br />
W-Weeklv in combat<br />
situations only<br />
2-22
TABLE 2-1. PREVENTIVE MAINTENANCE CHECKS<br />
AND SERVICES (PMCS) - (Cont)<br />
B-Before combat or<br />
training mission<br />
A-After combat or<br />
training mission<br />
W-Weekly in combat<br />
situations only<br />
2-23
2-5. PMCS Procedures - (Cont)<br />
B-Before combat or<br />
training mission<br />
A-After combat or<br />
training mission<br />
W-Weekly in combat<br />
situations only<br />
2-24
TABLE 2- 1. PREVENTIVE MAINTENANCE CHECKS<br />
AND SERVICES (PMCS) - (Cont)<br />
B-Before combat or<br />
training mission<br />
A-After combat or<br />
training mission<br />
W-Weekly in combat<br />
situations only<br />
2-25
2-5. PMCS Procedures - (Cont)<br />
B-Before combat or<br />
training mission<br />
A-After combat or<br />
training mission<br />
W-Weekly in combat<br />
situations only<br />
2-26
TABLE 2-1. PREVENTIVE MAINTENANCE CHECKS<br />
AND SERVICES (PMCS) - (Cont)<br />
B-Before combat or<br />
training mission<br />
A-After combat or<br />
training mission<br />
W-Weekly in combat<br />
situations only<br />
2-27
2-5. PMCS Procedures - (Cont)<br />
B-Before combat or<br />
training mission<br />
A-After combat or<br />
training mission<br />
W-Weekly in combat<br />
situations only<br />
2-28<br />
App D
TABLE 2-1. PREVENTIVE MAINTENANCE CHECKS<br />
AND SERVICES (PMCS) – (Cont)<br />
B-Before combat or<br />
training mission<br />
A–After combat or<br />
training mission<br />
W-Weekly in combat<br />
situations only<br />
2-29
2-5. PMCS Procedures - (Cont)<br />
B-Before combat or<br />
training mission<br />
A-After combat or<br />
training mission<br />
W-Weekly in combat<br />
situations only<br />
2-30<br />
para 2-17
TABLE 2-1. PREVENTIVE MAINTENANCE CHECKS<br />
AND SERVICES (PMCS) - (Cont)<br />
B-Before combat or<br />
training mission<br />
A-After combat or<br />
training mission<br />
W-Weekly in combat<br />
situation only<br />
2-31
2-5. PMCS Procedures - (Cont)<br />
B-Before combat or<br />
training mission<br />
A-After combat or<br />
training mission<br />
W-Weekly in combat<br />
situations only<br />
2-32
TABLE 2-1. PREVENTIVE MAINTENANCE CHECKS<br />
AND SERVICES (PMCS) – (Cont)<br />
B-Before combat or<br />
training mission<br />
A–After combat or<br />
training mission<br />
W-Weekly in combat<br />
situations only<br />
2-33
2-5. PMCS Procedures - (Cont)<br />
B-Before combat or<br />
training mission<br />
A-After combat or<br />
training mission<br />
W-Weekly in combat<br />
situations only<br />
2-34
TABLE 2-1. PREVENTIVE MAINTENANCE CHECKS<br />
AND SERVICES (PMCS) - (Cont)<br />
B-Before combat or<br />
training mission<br />
A-After combat or<br />
training mission<br />
W-Weekly in combat<br />
situations only<br />
2-35
2-5. PMCS Procedures - (Cont)<br />
B-Before combat or A-After combat or<br />
training mission training mission<br />
W-Weekly in combat<br />
situations<br />
only<br />
2-36
TABLE 2-1. PREVENTIVE MAINTENANCE CHECKS<br />
AND SERVICES (PMCS) - (Cont)<br />
B-Before combat or<br />
training mission<br />
A-After combat or<br />
training mission<br />
W-Weekly in combat<br />
situations only<br />
2-37
2-5. PMCS Procedures - (Cont)<br />
B-Before combat or A-After combat or W-Weekly in combat<br />
training mission training mission situations only<br />
2-38
TABLE 2-1. PREVENTIVE MAINTENANCE CHECKS<br />
AND SERVICES (PMCS) - (Cont)<br />
B-Before combat or<br />
training mission<br />
A-After combat or<br />
training mission<br />
W-Weekly in combat<br />
situations only<br />
2-39
2-5. PMCS Procedures - (Cont)<br />
B-Before combat or<br />
training mission<br />
A-After combat or<br />
training mission<br />
W-Weeklv in combat<br />
situations only<br />
2-40
TABLE 2-1. PREVENTIVE MAINTENANCE CHECKS<br />
AND SERVICES (PMCS) - (Cont)<br />
B-Before combat or<br />
training mission<br />
A-After combat or<br />
training mission<br />
W-Weekly in combat<br />
situations only<br />
app D<br />
2-41
2-5. PMCS Procedures - (Cont)<br />
B-Before combat or<br />
training mission<br />
A-After combat or<br />
training mission<br />
W-Weekly in combat<br />
situations only<br />
2-42
TABLE 2-1. PREVENTIVE MAINTENANCE CHECKS<br />
AND SERVICES (PMCS) - (Cont)<br />
B-Before combat or<br />
training mission<br />
A-After combat or<br />
training mission<br />
W-Weekly in combat<br />
situations only<br />
2-43
2-5. PMCS Procedures - (Cont)<br />
B-Before combat or A-After combat or W-Weekly in combat<br />
training mission training mission situations only<br />
app C<br />
2-44
B-Before combat or A-After combat or W-Weekly in combat<br />
training mission training mission situations only<br />
para 2-22<br />
2-45
2-5 PMCS Procedures - (Cont)<br />
B-Before combat or A-After combat or W-Weekly in combat<br />
training mission training mission situations only<br />
para 2-<strong>10</strong><br />
2-46
B-Before combat or A-After combat or W-Weekly in combat<br />
training mission training mission situations only<br />
2-47
2-5 PMCS Procedures - (Cont)<br />
TABLE 2-1. PREVENTIVE MAINTENANCE CHECKS<br />
AND SERVICES (PMCS) - (Cont)<br />
B-Before combat or A-After combat or W-Weekly in combat<br />
training mission training mission situations only<br />
para 2-23<br />
2-48
B-Before combat or A-After combat or W-Weekly in combat<br />
training mission training mission situations only<br />
2-49
2-6. Canister Replacement Criteria<br />
See FM 3-4, NBC Protection, for proper canister replacement criteria.<br />
NOTE<br />
Dents, less than 1/4 inch deep, not on edge of<br />
seal will not impair performance of canister.<br />
In peacetime, turn in used canisters in accordance with local SOP.<br />
2-50
Section Ill. OPERATION UNDER USUAL CONDITIONS<br />
2-7. General<br />
a. This section contains operator’s instructions to put on put on and use the mask and<br />
additional authorized items under normal conditions. For operation under<br />
unusual conditions see para 2-26.<br />
b. For usual conditions, facepiece shall be worn with hood attached.<br />
2-8. Putting On Your Facepiece (Without Hood) To Verify Fit<br />
WARNING<br />
Keep face clean shaven. An unshaven face could cause a bad seal between<br />
face and facepiece.<br />
Soldiers shall remove all hairpins, combs, hair knots, buns, or braids that will interfere<br />
with the facepiece seal.<br />
2-51
2-8. Putting On Your Facepiece (Without Hood) To Verify Fit - (Cont)<br />
NOTE<br />
A trained unit NBC NCO<br />
will supervise size<br />
selection and initial<br />
fitting of your facepiece.<br />
However, it’s<br />
your responsibility to<br />
make sure your facepiece<br />
fits properly,<br />
has a good seal, and is<br />
as comfortable as<br />
possible.<br />
a.<br />
b.<br />
Put your chin in chin pocket.<br />
Cover openings at bottom of<br />
outlet valve (1) with palm of<br />
one hand. Breathe out hard so<br />
that air escapes around edges<br />
of facepiece (2).<br />
2-52
c.<br />
d.<br />
With palm of hand, cover inlet<br />
port of canister and breathe<br />
in. Facepiece (2) should collapse<br />
against your face , and<br />
remain so while you hold your<br />
breath. If it does , facepiece<br />
(2) is airtight. If facepiece<br />
(2) does not collapse, check<br />
for hair, clothing or other<br />
matter between facepiece (2)<br />
and your face.<br />
Grasp tab (3) and pull head<br />
harness (4) over your head.<br />
Be sure your ears are between<br />
the temple straps (5) and<br />
cheek straps (6).<br />
NOTE<br />
Temple and forehead<br />
straps have already<br />
been adjusted during<br />
fitting.<br />
2-53
2-8. Putting On Your Facepiece (Without Hood) To Verify Fit - (Cont)<br />
e. While holding facepiece to<br />
face with one hand, maintain<br />
seal. Using other hand<br />
tighten cheek straps (6) one<br />
at a time.<br />
f. Be sure headpad (7) is centered<br />
at the back of your head.<br />
g. Straps (5,6, and 8) should lie<br />
flat against your head.<br />
h. Clear your facepiece again<br />
(step b.) and recheck your<br />
facepiece for leaks (step c.).<br />
2-54
2-9. Checking the Fit of Your Facepiece<br />
Check for proper fit according to the following criteria:<br />
a. Edge (1) of facepiece comes well up on your<br />
forehead, but not into the hairline, and<br />
within 1 inch (2.5 cm) of your ear.<br />
b. Temple straps (2) and cheek straps (3) do not<br />
cut into your ears.<br />
c. Head harness straps are flat against head.<br />
d. Pupils of your<br />
lenses (4).<br />
eyes are near center of eye–<br />
e. Facepiece does not press flesh so tightly<br />
that eyes partly close.<br />
f. Facepiece does not leak around edges (para<br />
2-14).<br />
2-55
2-<strong>10</strong>. Installing Hood On Facepiece<br />
a. Unfold and unzip hood (1) and lay<br />
it flat. Loosen cord (2).<br />
b. Unfasten underarm straps (3).<br />
c. Remove outserts from facepiece<br />
(para 3-3a).<br />
d. Remove canister from facepiece<br />
(para 3-2a).<br />
2-56
e. Unfasten hook and pile fastners (4) on hood.<br />
f. Insert facepiece (5) inside hood (1) and position the outlet valve cover<br />
(6) in the hole (7) at the bottom of the facepiece portion of the hood<br />
(1).<br />
g. Aline front voicemitter (8) on facepiece with front voicemitter opening<br />
(9) on hood and stretch hood over front voicemitter.<br />
2-57
2-<strong>10</strong>. Installing Hood On Facepiece - (Cont)<br />
CAUTION<br />
Avoid over-stretching holes in the hood<br />
could tear.<br />
facepiece, or hood fabric<br />
h. Stretch openings in hood over<br />
sideport (11) and side voicemitter<br />
(12) on facepiece.<br />
i. Stretch eyelens openings (13)<br />
in hood over eyelenses on facepiece<br />
by pulling hood fabric<br />
along sewn seams, and bending<br />
facepiece at eyelenses.<br />
j. Install canister (para 3-2b).<br />
k. Fasten hook and pile fasteners.<br />
l. Install outserts (para 3-3c).<br />
2-58
2-11. Installing Second Skin on Facepiece <strong>M40</strong>A1 only<br />
a. Remove outserts from facepiece (para 3-3a).<br />
b. Remove canister from facepiece (para 3-2a).<br />
c. Remove outlet valve cover from facepiece (para 3-4b (4).<br />
d. Insure that ridge (1) and rubber catches (2) are facing outward.<br />
e. Feed the drink tube (3) through the outlet valve cover<br />
opening (4) on the second skin.<br />
CAUTION<br />
Avoid over-stretching holes in the second skin. To prevent tearing the outlet<br />
valve cover opening of second skin,, be careful pulling over flanges (5) on outlet valve.<br />
f. Stretch outlet valve opening (6) of the second skin, and position it over outlet valve of facepiece.<br />
g. Stretch front voicemitter opening (7) of the second skin, and position it over the front voicemitter of<br />
facepiece.<br />
2-59
2-11. Installing Second Skin on Facepiece <strong>M40</strong>A1 only (Cont)<br />
h. Stretch side voicemitter opening (8) of the second<br />
skin, position it over the side voicemitter of<br />
facepiece.<br />
i. Stretch eyelens opening (9) of the second skin, and<br />
position it over the eyelenses of facepiece.<br />
j. Install outlet valve cover (par a 3-4b (13).<br />
k. Install outserts (par a 3-3 b).<br />
l. Install canister (par a 3-2 b).<br />
2-60
2-12. Installing Ouick DOFF Hood on Facepiece (<strong>M40</strong>A1 only)<br />
a. Unfold quick doff hood (1) and lay it flat.<br />
b. Unfasten underarm straps (2).<br />
c. Insert face piece (3) inside quick doff<br />
hood into the elastic opening (4).<br />
d. Aline elastic opening (4) of quick doff<br />
hood with the ridge of the second skin.<br />
2-61
2-13. Putting On Your Facepiece<br />
WARNING<br />
If air is contaminated with CB agents, do not uncover outlet valve<br />
cover of facepiece. Positive pressure must be maintained when the<br />
facepiece and hood are being worn.<br />
Stop breathing and close your eyes. Toxic agents may be in the surrounding<br />
air. Perform the steps for putting on your mask quickly.<br />
You must put the facepiece on before you take another breath. Do not<br />
wear contact lenses when wearing optical inserts. Contact lenses will<br />
over correct vision while wearing optical inserts.<br />
CAUTION<br />
DS2 may damage the voicemitter of the facepiece. When exposed to DS2,<br />
remove canister and rinse your facepiece in clean water. Do not wet<br />
the canister.<br />
Care must be taken not to scratch the clear plastic eyelenses when<br />
handling the facepiece.<br />
2-62
a. Stop breathing and close your eyes.<br />
b. Remove your helmet. Put helmet between your legs (above the knees) or<br />
hold your rifle between your legs and put helmet on the muzzle. If you<br />
drop your helmet, keep on masking; you can pick up your helmet later.<br />
WARNING<br />
Do not wear contact lenses with your facepiece.<br />
c. Take off your glasses or contact lenses, if you are wearing them.<br />
2-63
2-13. Putting On Your Facepiece - (Cont)<br />
d.<br />
e.<br />
Open carrier (1) with your left<br />
hand and hold it open.<br />
With right hand, grasp facepiece<br />
(2) and remove from carrier (l).<br />
2-64
f.<br />
Put your chin in chin pocket.<br />
g.<br />
Cover openings at bottom of outlet<br />
valve (3) with palm of one hand.<br />
Breathe out hard so that air<br />
escapes around edges of facepiece<br />
(2).<br />
h.<br />
With palm of hand, cover inlet<br />
port of canister and breathe in.<br />
Facepiece (2) should collapse<br />
against your face, and remain so<br />
while you hold your breath. If it<br />
does, facepiece (2) is airtight.<br />
If facepiece (2) does not collapse,<br />
check for hair, clothing,<br />
or other matter between facepiece<br />
(2) and your face.<br />
2-65
2-13. Putting On Your Facepiece - (Cont.)<br />
i. Grasp tab (4) and pull head harness (5) over your head. Be sure your ears<br />
are between the temple straps (6) and cheek straps (7).<br />
NOTE<br />
Temple and forehead straps have already been adjusted during fitting.<br />
j. While holding facepiece to face with one hand, maintain seal. Using other<br />
hand, tighten cheek straps (7) one at a time.<br />
k. Be sure headpad (8) is centered at the back of your head.<br />
l. Straps (6,7, and 9) should lie flat against your head.<br />
m. Clear your facepiece again (step g.) and recheck your facepiece for leaks<br />
(step h.).<br />
n. Resume breathing.<br />
2-66
2-67
2-13. Putting On Your Facepiece - (Cont)<br />
CAUTION<br />
Be very careful when pulling on hood.<br />
buckles of the head harness and tear.<br />
The hood could snag on the<br />
o.<br />
Grasp back edge of hood skirt<br />
(<strong>10</strong>) and carefully pull hood<br />
over your head so that hood<br />
covers the head, neck, and<br />
shoulders.<br />
2-68
P.<br />
Pull slider (11)<br />
front closed.<br />
downward and zip<br />
q.<br />
Tighten cord (12).<br />
NOTE<br />
After you have adjusted the<br />
underarm straps on your hood,<br />
do not loosen them.<br />
r.<br />
Adjust the length of underarm straps (13)<br />
and attach hook and pile fasteners.<br />
2-69
2-13. Putting On Your Facepiece - (Cont)<br />
WARNING<br />
When putting on your helmet, be sure not to upset the seal<br />
between your facepiece and the side of your face. Toxic<br />
agents could leak into your facepiece.<br />
s. Put on helmet.<br />
t. Close carrier.<br />
u. Continue your mission.<br />
WARNING<br />
If you feel looseness in the fit<br />
of your facepiece during the<br />
performance of your mission,<br />
adjust your straps in accordance<br />
with para 2-14.<br />
2-14. Checking Your Facepiece for Leaks<br />
WARNING<br />
You must check your facepiece<br />
for leaks when fitted and each<br />
time facepiece is put on. A<br />
leaky facepiece will not protect<br />
you from toxic agents.<br />
2-70
NOTE<br />
Helmet should be removed before checking facepiece for leaks, and<br />
should be donned when check is completed.<br />
a. Make sure canister (1) is screwed tightly into facepiece (2).<br />
b. With palm of hand, cover inlet port of canister and breathe in lightly and<br />
hold your breath for a few seconds. If facepiece remains collapsed, facepiece<br />
is airtight and will protect you against toxic agents.<br />
NOTE<br />
Leaks around the edge of your facepiece are usually caused by bad<br />
fit. You may find a leak by feeling incoming air on your face, or<br />
you may feel a bulge at the edge of your facepiece with your finger,<br />
or a buddy may see a bulge.<br />
c. Check for leaks at edge of facepiece by feeling for incoming air on your<br />
face.<br />
d. Check for bulge by running finger around edge of your facepiece.<br />
2-71
2-14. Checking Your Facepiece for Leaks - (Cont)<br />
NOTE<br />
After each corrective action, retest.<br />
e. Get<br />
To<br />
rid of leaks by adjusting straps:<br />
stop leaks at forehead, adjust temple straps (3).<br />
To stop leaks at temple, adjust forehead straps (4) and temple straps (3).<br />
2-72
To stop leaks at cheek, adjust cheek straps (5)<br />
centered at the back of your head.<br />
and be sure headpad (6) is<br />
To stop leaks at the throat or under the chin,<br />
face, seating chin firmly. Adjusting forehead<br />
(5) may also help.<br />
lift facepiece higher on<br />
straps (4) and cheek straps<br />
An air leak may be caused by an outlet valve (7) that is faulty or held<br />
open by dirt. Do the following steps:<br />
Breathe out forcefully several times; this will usually remove the dirt.<br />
If breathing does not remove dirt, remove facepiece, pull up outlet valve<br />
cover (8), lift up outlet valve disk (9), and wipe underside of outlet<br />
valve disk (9) with a dry, lint-free cheesecloth (item 3, app D).<br />
If outlet valve disk (9) is sticking, massage lightly with one finger.<br />
NOTE<br />
If you have a bad seal and cannot stop leak, notify unit maintenance<br />
to replace mask.<br />
2-73
2-15. Connecting end Using the Drinking System<br />
WARNING<br />
Do not connect the drink tube to your canteen until all mating surfaces<br />
have been checked and are free of contamination. Chemical<br />
agents could be swallowed, resulting in sickness and death.<br />
NOTE<br />
To use the drink tube, your canteen must be equipped with an M1 canteen<br />
cap.<br />
a. Fill your plastic water canteen before entering contaminated area, or, if<br />
in a contaminated area, work inside a protective shelter.<br />
b. Use M8 chemical agent detector paper to check for contamination before using<br />
the drink tube.<br />
2-74<br />
WARNING<br />
Care should be taken not to break the facepiece seal while pressing<br />
in on the outlet valve body.
NOTE<br />
Water may leak into facepiece if mouth is taken off internal drink<br />
tube.<br />
c.<br />
d.<br />
e.<br />
f.<br />
Press in on top of outlet valve (1) until internal drink tube can be<br />
grasped between your teeth.<br />
Steady facepiece (2) and pull wick disconnect coupling (3) out of outlet<br />
valve cover (4).<br />
Remove canteen from canteen carrier.<br />
Flip open cover (5) on Ml canteen cap (6).<br />
2-75
2-15. Connecting and Using the Drinking System - (Cont)<br />
2-76<br />
g. Push quick disconnect coupling (3) into Ml canteen cap (6) so that pin (7)<br />
enters coupling (3).<br />
WARNING<br />
If resistance is not felt, your drinking system is leaking. Do not<br />
drink. Notify unit maintenance to replace mask as soon as possible.<br />
h. Blow to create positive pressure. You should feel some resistance.
NOTE<br />
Do not tilt head back while drinking.<br />
i. If system does not leak, raise and invert canteen (8) and drink water from<br />
canteen.<br />
j. After several swallows, stop sucking and lower canteen. Blow into internal<br />
drink tube to prevent canteen from collapsing. Repeat drinking procedure<br />
as required.<br />
k. Disconnect drinking system (para 2-16).<br />
2-16. Disconnecting the Drinking System<br />
WARNING<br />
To prevent possible leakage around facepiece, do not pull external<br />
drink tube when removing canteen.<br />
2-77
2-16. Disconnecting the Drinking System - (Cont)<br />
a.<br />
b.<br />
c.<br />
d.<br />
e.<br />
f.<br />
Turn canteen upright.<br />
Blow into internal drink tube.<br />
Firmly grasp quick disconnect coupling<br />
and pull canteen down and away<br />
to disconnect coupling.<br />
Check your facepiece for leaks<br />
(para 2-14).<br />
Remove internal drink tube from<br />
mouth.<br />
Push coupling (1) back into retainer<br />
on outlet valve cover.<br />
g.<br />
Flip down cover (2) on M1<br />
cap (3) before stowing.<br />
canteen<br />
2-78
2-17. Checking Drinking System for Leaks<br />
a. Pull quick disconnect coupling (1)<br />
out of retainer.<br />
b. Grasp internal drink tube between<br />
your teeth.<br />
WARNING<br />
If the drinking system leaks,<br />
pinch the external drink tube<br />
where it connects to the outlet<br />
valve body to prevent inhalation<br />
of agent vapors until<br />
a replacement mask is obtained<br />
or the wearing of the mask is<br />
no longer required.<br />
c. Blow into internal drink<br />
is leaking. Notify unit<br />
tube. If resistance is not felt, drinking system<br />
maintenance and exchange mask as soon as possible.<br />
2-79
2-17. Checking Drinking System for Leaks - (Cont)<br />
d. Grasp the internal drink tube between teeth and attempt to draw in air<br />
through drinking system.<br />
e. If you are able to draw in air, you have a faulty internal or external<br />
drink tube. Exchange mask as soon as possible.<br />
2-18. Removing Your Facepiece With Hood Attached<br />
a.<br />
Remove<br />
helmet.<br />
b.<br />
Unfasten underarm straps (1).<br />
2-80
CAUTION<br />
Be very careful when removing hood. The hood could snag on the<br />
buckles of the head harness and tear.<br />
c.<br />
d.<br />
e.<br />
f.<br />
g.<br />
h.<br />
Loosen cord (2).<br />
Unzip the zipper (3) by holding the lower part of the zipper and pulling<br />
the slider (4) upward.<br />
Place both hands on back edge of hood skirt (5) and raise the hood above<br />
your head and pull over front of facepiece.<br />
Loosen cheek straps.<br />
Place one hand on the front voicemitter to hold facepiece on face and with<br />
other hand grasp head harness tab and pull the head harness over the front<br />
of the facepiece and remove facepiece.<br />
Replace helmet.<br />
2-81
2-19. Removing Your Facepiece With Quick Doff Hood Attached (<strong>M40</strong>A1 only)<br />
a. Remove helment.<br />
b. Unfasten underarm Straps (1).<br />
CAUTION<br />
Be very careful when removing hood.<br />
The hood could snag on the buckles<br />
of the head harness and tear.<br />
c. Using both hands, grasp the elastic<br />
gathering around the neck (2) at the<br />
back of the hood, and raise the hood<br />
above your head and pull over front<br />
of facepiece.<br />
d. Loosen cheek straps (3).<br />
e. Place one hand on the front voicemitter to hold facepiece on face. With other hand grasp head<br />
harness tab (4) and pull head harness over front of facepiece.<br />
2-82
2-20. Stowing Your Mask and Additionally Authorized Items<br />
WARNING<br />
Any solid matter (even grass) under valve disks will cause fogged<br />
eyelenses, discomfort, and leakage.<br />
CAUTION<br />
Abrasives such as sand and grit will scratch eyelenses.<br />
outserts are installed on the facepiece.<br />
Be sure the<br />
NOTE<br />
Facepiece can be stowed with or without the hood attached.<br />
hood from facepiece, refer to para 2-21.<br />
To remove<br />
a. Check that outserts are installed on facepiece (para 3-3c).<br />
b. Check that your facepiece is dry and free of oil and solvents before<br />
stowing.<br />
c. Check that interior of carrier is free of dirt and trash or other unautho–<br />
rized items.<br />
2-83
2-20. Stowing Your Mask and Additionally Authorized Items - (Cont)<br />
d. Hold front of facepiece in a horizontal position and smooth the hood over<br />
it.<br />
e. Pull head harness (1) over front of facepiece.<br />
f. Fold the two edges of the hood over the outlet valve to create a “V” in the<br />
front of the hood. Store the underarm straps and cord in the “V”.<br />
2-84
g. Fold the “V” upward to cover the<br />
eyelenses. Do not let the hood<br />
cover the chin opening.<br />
h. Hold the facepiece upright and put<br />
it in the carrier (2) with the<br />
lenses facing away from your body.<br />
2-85
2-20.<br />
Stowing Your Mask and Additionally Authorized Items - (Cont)<br />
NOTE<br />
To stow facepiece after hood has been removed, fold hood as in steps<br />
e, f, and g. Place hood and facepiece in carrier as instructed in<br />
step h.<br />
i.<br />
j.<br />
k.<br />
1.<br />
Stow your other outserts, waterproof<br />
bag, and operator’s manual<br />
in inside pockets of carrier.<br />
Close carrier.<br />
Store your facepiece in closed carrier<br />
in a cool, dry, dark place.<br />
It is preferable to hang carrier<br />
(2) by hook (3) on short strap.<br />
CAUTION<br />
To avoid damage to facepiece,<br />
carrier.<br />
put only authorized items in your<br />
2-86
m. If issued the following items,<br />
stow as follows:<br />
Detector paper - stow in<br />
inside left pocket (4).<br />
M258A1 decontaminating kit -<br />
stow in outside bottom pocket<br />
of carrier.<br />
2-21. Removing Hood from Facepiece<br />
CAUTION<br />
Be very careful in removing hood.<br />
of head harness and tear.<br />
The hood could snag on the buckles<br />
NOTE (<strong>M40</strong> only)<br />
The hood can be detached from the facepiece only after the facepiece<br />
and hood have been removed from your head.<br />
2-87
2-21. Removing Hood From Facepiece (Cont)<br />
a. Remove canister (para 3-2a).<br />
b. Remove outserts (para 3-3a).<br />
c. Unfasten hook and pile fasteners<br />
(5) on hood.<br />
2-88
d.<br />
e.<br />
f.<br />
g.<br />
h.<br />
Starting with either eyelens,<br />
stretch the eyelens openings and<br />
remove from eyelenses (7).<br />
Stretch hood and pull away from<br />
side voicemitter (9).<br />
Gently remove hood from front<br />
voicemitter (8) on facepiece.<br />
Carefully remove facepiece from<br />
inside of hood.<br />
Reinstall outserts on facepiece<br />
(para 3-3c).<br />
2-89
2-22. Removing Quick DOFF Hood from Facepiece (<strong>M40</strong>A1 only)<br />
a. Remove helmet.<br />
b. Release underarm straps.<br />
CAUTION<br />
Be very careful in removing quick doff hood. The quick doff<br />
hood could snag on the buckles of the facepiece and tear.<br />
NOTE<br />
Quick doff hood can be removed from<br />
facepiece while still wearing facepiece.<br />
WARNING<br />
Insure hood clears canister and outlet valve cover<br />
when removing so seal of facepiece is not broken.<br />
c. Grasp elastic band around neck with both hands and carefully lift the hood over your<br />
head, allowing the hood to hang free in front of the mask.<br />
2-90
d.<br />
e.<br />
With one hand, support one side of the mask<br />
lens, pressing it against your face. With the<br />
other hand carefully stretch and lift the elastic<br />
over and around the eyelens. Repeat this<br />
procedure for the other lens.<br />
With one hand, hold mask around canister<br />
area firmly against your face. With the<br />
other hand, carefully work the elastic band<br />
over the canister and remove hood.<br />
2-91
2-23. Removing Second skin from Facepiece - (<strong>M40</strong>A1 only)<br />
CAUTION<br />
Use extreme caution when stretching second skin openings.<br />
a.<br />
Remove outserts if installed (para 3-3).<br />
b.<br />
Stretch eyelens opening (1) of second skin, and<br />
pull second skin from facepiece.<br />
c.<br />
d.<br />
Stretch side voicemitter opening (2) of second<br />
skin, and pullsecond skin from facepiece.<br />
Stretch front voicemitter opening (3) of the second<br />
skin, and pull the second skin from the facepiece.<br />
CAUTION<br />
Be careful not to tear outlet valve cover opening (4) of<br />
second skin when pulling over flanges (5) on outlet valve.<br />
2-92<br />
e. Stretch outlet valve cover opening (4) of the second skin, and pull the rest of the<br />
second skin from the facepiece.
2-24. Wearing Your Carrier (Three Ways)<br />
a. The shoulder carry method is as<br />
follows :<br />
Attach shoulder strap D-ring (1) to<br />
hook (2) on carrier and adjust.<br />
Hook waist strap (3) to round ring<br />
(4) and adjust.<br />
The leg carry method is as follows:<br />
Put shoulder a trap D-ring (1) around<br />
waist and attach to hook (2) on carrier.<br />
Adjust.<br />
Bring waist strap (3) from back and around inside of leg.<br />
Pass waist strap (3) through round ring (4), and hook to D-ring (l).<br />
Adjust.<br />
2-93
2-24. Wearing Your Carrier (Three Ways) - (Cont)<br />
The pistol belt method is as<br />
follows:<br />
Fold shoulder strap and tuck in<br />
waist strap pocket beneath ID<br />
plate.<br />
Bring waist strap hook (1) from<br />
back and around inside of leg.<br />
Pass through round ring and hook<br />
to short strap (2).<br />
Hook short strap hook (3) and<br />
short adjustable strap hook (4)<br />
into the holes on left hand side<br />
of pistol belt.<br />
2-94
2-25. Operation of Additionally Authorized Items (App C)<br />
a. Optical Inserts.<br />
WARNING<br />
Do not<br />
lenses<br />
piece.<br />
wear contact<br />
with your face-<br />
NOTE<br />
Ensure head harness is<br />
over front of facepiece.<br />
Remove optical inserts<br />
before turning in mask.<br />
(1) Place inserts in facepiece<br />
with tips of lower portion<br />
(1) of wire frame pointing<br />
toward you.<br />
2-95
2-25. Operation of Additionally Authorized Items (App C) - (Cont)<br />
(2) Insert lower portion (1)<br />
of wire frame into bottom<br />
of lens cavities.<br />
(3) Insert and guide upper<br />
portion (2) of wire<br />
frame into top of lens<br />
cavities, ensuring that<br />
wire frames are seated<br />
beneath the four retainers<br />
(3) in each lens<br />
opening.<br />
2-96<br />
b.<br />
c.<br />
M8 Chemical Agent Detector Paper. Refer to cover of book containing M8<br />
chemical agent detector paper for operating instructions.<br />
M258A1 Decontaminating Kit. Refer to <strong>TM</strong> 3-4230-216-<strong>10</strong> for operating instructions.
WARNING<br />
Do not wear contact lenses with your facepiece.<br />
lnstallation:<br />
1.<br />
2.<br />
3.<br />
4.<br />
Place the mount frame (1) into the mask.<br />
Position the center block (2) between the<br />
mask Ienses, and press into place on bridge<br />
of mask (3).<br />
Position mount hoops into the mask lens wells.<br />
Grasp the top and bottom hoops and pull outward<br />
until the ends of the hoops lock into place (A).<br />
2-97
2-25. Operation of Additionally Authorized Items (App C) - (Cont)<br />
NOTE<br />
Before attempting to install the prescription Iens carrier, loosen the<br />
set of until the points are flush with the surface of the mount block.<br />
5. The prescription lens carrier (5) is installed by alining the carrier's mounting<br />
block (6) with the groove of the mount frame and sliding the carrier into place.<br />
ADJUS<strong>TM</strong>ENT:<br />
1. Loosen set screws (7) prior to adjustment. The vertical height of the prescription lens<br />
carrier can be adjusted by sliding the carrier upward or downward.<br />
2-98
REMOVAL:<br />
1. For routine removal, loosen lens carrier<br />
set screws (7) until free of mount, and remove.<br />
2. For other than routine removal, grasp the<br />
prescription lens carrier and pull from the mask.<br />
If the lens carrier separates from the mount,<br />
grasp the mount at the center and pull to remove.<br />
2-99
2-26. Operation in Unusual Weather<br />
Section VI. OPERATION UNDER UNUSUAL CONDITIONS<br />
CAUTION<br />
Keep facepiece dry. Moisture could clog the canister or saturate<br />
absorbent material and make it useless.<br />
NOTE<br />
Always use facepiece with outserts installed when operating in cold<br />
climate to help prevent fogging.<br />
a. General Instructions You Must Follow In Cold Weather.<br />
(1) During periods between repeated uses, take facepiece out of carrier<br />
and shake or flex facepiece to remove ice and snow.<br />
CAUTION<br />
The sili-<br />
Do not warm up the facepiece near a heater or open flame.<br />
cone rubber parts of facepiece could melt.<br />
2-<strong>10</strong>0<br />
(2) Warm facepiece when you can.
(3) Dry facepiece with cheesecloth (item 3, app D), in a warm indoor area.<br />
Carefully dry outlet and nosecup valves.<br />
(4) Before entering a warm area from subzero temperature, remove frost<br />
and snow from facepiece.<br />
b. Putting on Your Facepiece in Cold Weather.<br />
(1) Perform the normal procedure for putting on your facepiece and hood<br />
(para 2-13), but keep in mind the following points in cold weather.<br />
(2) Remove helmet, mittens, and gloves and make other adjustments to your<br />
garments as necessary to put on your facepiece properly.<br />
WARNING<br />
In cold weather do not clear facepiece by exhaling a large volume of<br />
air. Moist air will frost eyelenses and impair vision.<br />
(3) Exhale slowly and lightly. If you feel resistance when exhaling, the<br />
outlet valve may be sticking.<br />
2-<strong>10</strong>1
2-26. Operation In Unusual Weather - (Cont)<br />
If outlet valve disk (1) sticks<br />
to outlet valve seat, do the<br />
following:<br />
Lift bottom of outlet valve<br />
cover (2).<br />
Massage outlet valve disk (1)<br />
with one finger, only when you<br />
exhale, until outlet valve<br />
disk (1) functions properly.<br />
Reseat bottom of outlet valve<br />
cover (2).<br />
Check your facepiece for leaks<br />
(para 2-14).<br />
Resume normal breathing.<br />
2-<strong>10</strong>2
WARNING<br />
In toxic atmosphere, do not break the seal between your facepiece and<br />
the side of your face when putting on your helmet. This could cause<br />
the facepiece to leak.<br />
(7) Put on gloves, mittens, and helmet as necessary.<br />
NOTE<br />
When wearing a facepiece in extremely cold weather, you will probably<br />
feel resistance to your breathing. This will lessen as you become<br />
accustomed to the facepiece. Resistance may increase while you are<br />
working and when you are tired.<br />
c. Removing Your Facepiece in Cold Weather.<br />
WARNING<br />
If you become overheated in extremely cold weather, do not remove<br />
your facepiece outdoors until your face and head have cooled and any<br />
sweat has dried. Frostbite may result if facepiece is removed while<br />
your face is still wet.<br />
2-<strong>10</strong>3
2-26. Operation In Unusual Weather - (Cont)<br />
(1) Remove mittens and gloves as necessary.<br />
(2) Unfasten outer garment at neck and remove helmet.<br />
(3) Unmask and shake ice accumulation from facepiece.<br />
(4) Stow mask (para 2-20).<br />
(5) Put on helmet and fasten outer garment.<br />
(6) Put on gloves and mittens if necessary.<br />
2-<strong>10</strong>4
CHAPTER 3<br />
MAINTENANCE INSTRUCTIONS<br />
No lubrication is required for the mask.<br />
Section I. LUBRICATION INSTRUCTIONS<br />
Perform PMCS procedures (table 2-l).<br />
Section Il. TROUBLESHOOTING<br />
3-1. General<br />
Section Ill. MAINTENANCE PROCEDURES<br />
a. This section contains step-by-step procedures for maintaining the mask.<br />
b. You the operator, are authorized to inspect and service the mask and additionally<br />
authorized items. It is your responsibility to notify your NBC NCO<br />
or officer of all defects and of maintenance requirements not authorized in<br />
this manual.<br />
3-1
3-2. Canister Servicing<br />
a. Removal.<br />
(1)<br />
(2)<br />
Remove the canister (1) by<br />
unscrewing counterclockwise<br />
from facepiece (2).<br />
Check the connectors of canister,<br />
mating surfaces of<br />
the facepiece and areas between<br />
these surfaces for dirt<br />
or other foreign material<br />
which could allow contaminated<br />
air into your facepiece.<br />
3-2
3-2. Canister Servicing - (Cont)<br />
b. Installation.<br />
(1) Insert canister (1) into side<br />
port of facepiece (2).<br />
(2)<br />
Tighten<br />
turning<br />
canister handtight by<br />
clockwise.<br />
3-3
3-3. Outserts Servicing<br />
a. Removal.<br />
(1) Lift rubber ring (1) of<br />
outsert (2) from behind<br />
eyering (3).<br />
(2) Pull outsert (2) from<br />
facepiece.<br />
(3) Repeat steps 1 and 2<br />
for other outsert.<br />
3-4
3-3. Outserts Servicing - (Cont)<br />
b. Cleaning. Clean and polish outserts with polish (item 6, app D).<br />
c. Installation.<br />
NOTE<br />
Be sure to install right outsert on right eyelens and left outsert on<br />
left eyelens.<br />
(1) Fold rubber ring (1) forward<br />
all around edge of outsert (2).<br />
(2) Lay outsert (2) over eyering<br />
(3) and turn rubber ring (1)<br />
down all around eyering (3).<br />
(3) Repeat steps 1 and 2 for other<br />
outsert.<br />
3-5
3-4. Mask Servicing<br />
a. Decontaminating.<br />
CAUTION<br />
DS2 may damage the voicemitters of the facepiece. When exposed to<br />
DS2, splash voicemitters with clean water. Do not wet the canister.<br />
(1) Use the M258A1 skin decontaminating kit according to instructions in<br />
<strong>TM</strong> 3-4230-216-<strong>10</strong>.<br />
(2) Refer to Unit SOP for complete decontamination procedures.<br />
b. Cleaning.<br />
NOTE<br />
When you clean your facepiece, use only potable water.<br />
NCO for supplies or assistance if needed.<br />
See your NBC<br />
You will need the following items to clean your facepiece:<br />
3-6<br />
Alcohol (item 4, app D)<br />
Brush (item 1, app D)<br />
Cheesecloth (item 3, app D)
3-4. Mask Servicing - (Cont)<br />
Pail (item 5, app D)<br />
Polish (item 6, app D)<br />
Soap (item 7 app D)<br />
(1)<br />
Remove canister (if installed) (para 3-2a), outserts (para 3-3a),<br />
hood (para 2-21 ) and quick doff hood (para 2-22).<br />
Do<br />
(2)<br />
(3)<br />
(4)<br />
CAUTION<br />
not allow canister to become wet.<br />
Set canister aside, away from<br />
cleaning operations.<br />
Pull quick disconnect coupling<br />
(1) out of retainer on side of<br />
outlet valve cover.<br />
Remove outlet valve cover as<br />
follows:<br />
A wet canister is useless.<br />
3-7
(5)<br />
Remove second skin (para 2-23) (<strong>M40</strong>A1 only).<br />
Grasp tab (2) at bottom of outlet valve cover and lift bottom portion<br />
of outlet valve cover from outlet valve (3).<br />
Pull sides of outlet valve cover away from groove around outlet valve<br />
(3).<br />
Disconnect outlet valve cover from flanges on top of outlet valve (3).<br />
(6)<br />
(7)<br />
(8)<br />
(9)<br />
If necessary, remove greasy or oily substances from your facepiece, second skin, and<br />
hood with alcohol (item 4, app D) and cheesecloth (item 3, app D).<br />
Clean your facepiece, hood, and outserts inside and out, using clean<br />
cheesecloth (item 3, app D), soap (item 7, app D), and a pail (item 5,<br />
app D). Dip the cheesecloth in warm, soapy water and wring cheesecloth<br />
almost dry. A soft brush (item 1, app D) may also be used.<br />
Rinse by wiping with a clean cheesecloth (item 3, app D) that has been<br />
dipped in warm, clear water and wrung almost dry.<br />
Dry facepiece, hood, and outserts with cheesecloth (item 3, app D) or<br />
allow to air dry.<br />
CAUTION<br />
Ensure all components are entirely dry before stowing.<br />
3-8
3-4. Mask Servicing (Cont)<br />
(<strong>10</strong>) To clean and polish eyelenses (4) and both sets of outserts (5), use<br />
polish (item 6, app D).<br />
3-9
(11) Install second skin (para 2-11) (<strong>M40</strong>A1 only).<br />
(12) Install outlet valve cover as follows:<br />
Install outlet valve cover (4) on flanges (5) on top of outlet valve (3).<br />
Using tab (2) on bottom of outlet valve cover (4),<br />
pull outlet valve cover over face of outlet valve (3),<br />
Make sure outlet valve cover snaps in place around<br />
outlet valve (3).<br />
Install quick disconnect coupling (1) securely in<br />
outlet valve cover retainer (7). Fasten external<br />
drink tube (6) to tab (2).<br />
3-<strong>10</strong>
3-4. Mask Servicing - (Cont)<br />
(13) Install canister (para 3-2b), outserts (para 3-3c).<br />
(14) Install hood (para 2-<strong>10</strong>), or quick doff hood (para 2-12) (<strong>M40</strong>A1 only).<br />
WARNING<br />
Do not allow dirt to remain in carrier. Foreign material<br />
in carrier may get into valves, causing them to leak.<br />
CAUTION<br />
Abrasive material in carrier will scratch lens.<br />
(15) Remove contents from carrier.<br />
(16) Shake carrier upside down to remove dirt and foriegn matter.<br />
3-11
(17) Soak brush (item 2, app D) in cold water.<br />
(18) Shake brush to remove excess water.<br />
(19) Clean carrier with brush.<br />
CAUTION<br />
Ensure carrier is entirely dry before stowing components.<br />
3-12
APPENDIX A<br />
REFERENCES<br />
A-1. SCOPE<br />
This appendix lists all forms, field manuals, technical manuals, and miscellaneous<br />
publications referenced in this manual.<br />
A-2. FORMS<br />
Equipment Inspection and Maintenance Worksheet . . . . . . . . . . . DA Form 2404<br />
Preventive Maintenance Schedule and Record . . . . . . . . . . . . . . DD Form 314<br />
Quality Deficiency Report . . . . . . . . . . . . . . . . . . . . . . . .. SF 368<br />
Recommended Changes to Publications and Blank Forms . . . . . . . . . DA Form 2028<br />
A-3. <strong>FIELD</strong> MANUALS<br />
First Aid For Soldiers. . . . . . . . . . . . . . . . . . . . . . . . . . FM 21-11<br />
NBC Protection . . . . . . . . . . .. . . . . . . . . . . . . . . . . . . . FM 3-4<br />
A-1
A-4. TECHNICAL MANUALS<br />
Operator’s Manual for Decontaminating Kit, Skin: M258A1 and<br />
Training Aid, Skin Decontaminating: M58A1 . . . . . . . . . . <strong>TM</strong> 3-4230-216-<strong>10</strong><br />
A-5. MISCELLANEOUS PUBLICATIONS<br />
Army Medical Department Expendable/Durable Items . . . . . . . . . . . . CTA 8-<strong>10</strong>0<br />
Expendable/Durable Items (Except Medical, Class V, Repair Parts,<br />
and Heraldic Items). . . . . . . . . . . . . . . . . . . . . . . . CTA 50-970<br />
Opthalmic Services . . . . . . . . . . . . . . . . . . . . . . . . . .. AR 40-63<br />
Research, Development, Test, and Evaluation of Materiel for Extreme<br />
Climatic Conditions . . . . . . . . . . . . . . . . . . . . . . . .. AR 70-38<br />
The Army Maintenance Management System (TAMMS) . . . . . . . . . . DA PAM 738-750<br />
Chemical-Biological Canister, Filter Elements Service<br />
List.. . . . . . . . . . . . . . . . . . . . . . . . . . .SB 3-30-2<br />
A-2
APPENDIX B<br />
COMPONENTS OF END ITEM AND BASIC ISSUE ITEMS LIST<br />
Section I. INTRODUCTION<br />
B-1. SCOPE<br />
This appendix lists components of end item and basic issue items for the <strong>M40</strong> mask<br />
to help you inventory items required for safe and efficient operation.<br />
B-2. GENERAL<br />
The Components<br />
ing sections:<br />
of End Item and Basic Issue Items Lists are divided into the follow-<br />
a. Section II. Components of End Item. This listing is for informational purposes<br />
only, and is not authority to requisition replacements. These items<br />
are part of the end item, but are removed and separately packaged for transportation<br />
or shipment. As part of the end item, these items must be with<br />
the end item whenever it is issued or transferred between property accounts.<br />
Illustrations are furnished to assist you in identifying the items.<br />
B-1
B-2. GENERAL - (Cont)<br />
b. Section III. Basic Issue Items. These are the minimum essential items required<br />
to place the <strong>M40</strong> mask in operation, to operate it, and to perform<br />
emergency repairs. Although shipped separately packaged, BII must be with<br />
the <strong>M40</strong> mask during operation and whenever it is transferred between property<br />
accounts. The illustrations will assist you with hard-to-identify<br />
items. This manual is your authority to request/requisition replacement<br />
BII, based on TOE/MTOE authorization of the end item.<br />
B-3. EXPLANATION OF COLUMNS<br />
The following provides an explanation of columns found in the tabular listings:<br />
a. Column (1) - Illustration Number (Illus Number). This column indicates the<br />
number of the illustration in which the item is shown.<br />
b. Column (2) - National Stock Number. Indicates the National stock number assigned<br />
to the item and will be used for requisitioning purposes.<br />
c. Column (3) - Description. Indicates the Federal item name and, if required,<br />
a minimum description to identify and locate the item. The last line for<br />
each item indicates the FSCM (in parentheses) followed by the part number.<br />
B-2
d. Column (4) - Unit of Measure (U/M). Indicates the measure used in performing<br />
the actual operational/maintenance function. This measure is expressed<br />
by a two-character alphabetical abbreviation (e.g., ea, in., pr).<br />
e. Column (5) - Quantity required (Qty rqr). Indicates the quantity of the<br />
item authorized to be used with/on the equipment.<br />
Section Il. COMPONENTS OF END ITEM<br />
There are no components of end item required.<br />
B-3
B-4<br />
Section Ill. BASIC ISSUE ITEMS LIST
APPENDIX C<br />
ADDITIONAL AUTHORIZATION LIST<br />
Section I. INTRODUCTION<br />
C-1. SCOPE<br />
This appendix<br />
mask.<br />
lists additional items you are authorized for the support of the <strong>M40</strong><br />
C-2. GENERAL<br />
This list identifies items that do not have to accompany the <strong>M40</strong> mask and that do<br />
not have to be turned in with it. These items are authorized to you by CTA, MTOE,<br />
TDA, or JTA.<br />
C-3. EXPLANATION OF LISTING<br />
National stock numbers, descriptions, and quantities are provided to help you identify<br />
and request the additional items you require to support this equipment. The<br />
items are listed in alphabetical sequence by item name under the type document<br />
(i.e., CTA, MTOE, TDA, or JTA) which authorizes the item(s) to you.<br />
C-1
C-2<br />
Section II. ADDITIONAL AUTHORIZATION LIST
APPENDIX D<br />
EXPENDABLE/DURABLE SUPPLIES AND<br />
MATERIALS LIST<br />
Section I. INTRODUCTION<br />
D-1. SCOPE<br />
This appendix lists expendable/durable supplies and materials you will need to operate<br />
and maintain the <strong>M40</strong> mask. This listing is for informational purposes only<br />
and is not authority to requisition the listed items. These items are authorized<br />
to you by CTA 50-970, Expendable/Durable Items (Except Medical, Class V, Repair<br />
Parts , and Heraldic Items), or CTA 8-<strong>10</strong>0, Army Medical Department Expendable/<br />
Durable Items.<br />
D-1
D-2. EXPLANATION OF COLUMNS<br />
a.<br />
b.<br />
c.<br />
d.<br />
e.<br />
Column (1) - Item number. This number is assigned to the entry in the listing<br />
and is referenced in the narrative instructions to identify the material<br />
(e.g., “Use cleaning compound (Item 5, App D).”).<br />
Column (2) - Level. This column identifies the lowest level of maintenance<br />
that requires the listed item.<br />
c . . . . . . . . . . . . . . . . . . . . . . . . . . . . . .<br />
Operator/Crew<br />
Column (3) - National Stock Number. This is the National stock number assigned<br />
to the item; use it to request or requisition the item.<br />
Column (4) - Description. Indicates the Federal item name and, if required,<br />
a description to identify the item. The last line for each item indicates<br />
the Federal Supply Code for Manufacturer (FSCM) in parentheses followed by<br />
the part number.<br />
Column (5) - Unit of Measure (U/M). Indicates the measure used in performing<br />
the actual maintenance function. This measure is expressed by a twocharacter<br />
alphabetical abbreviation (e.g., ea, in., pr). If the unit of<br />
measure differs from the unit of issue, requisition the lowest unit of issue<br />
that will satisfy your requirements.<br />
D-2
Section Il. EXPENDABLE/DURABLE SUPPLIES AND MATERIALS LIST<br />
D-3
D-4<br />
Section Il. EXPENDABLE/DURABLE SUPPLIES AND MATERIALS LlST - (Cont)
By Order of the Secretary of the Army:<br />
Offical:<br />
Milton H. Hamilton<br />
MILTON H, HAMILTON<br />
Adminstrative Assistant to the<br />
Secretary of the Army<br />
05979<br />
GORDON R. SULLl\/AN<br />
General, United States Army<br />
Chief of Staff<br />
DISTRIBUTION:<br />
To be distributed in accordance with DA Form 12-28-E, Block 433,<br />
requirements for <strong>TM</strong> 3-<strong>4240</strong>-<strong>339</strong>-<strong>10</strong>.<br />
U.S. G.P.O. 1995 399-714/40220
DID WE GOOF?<br />
DO YOU KNOW A BETTER WAY?<br />
DON’T KEEP THOSE GRIPES TO YOURSELF.<br />
WE’D LIKE TO HAVE YOUR IDEAS.<br />
U.S. DA FORM<br />
2028 OR WHATEVER<br />
YOU HAVE HANDY<br />
WRITE TO US:<br />
Technical Director, US Army Edgewood Research,<br />
Development and Engineering Center<br />
ATTN: SCBRD-ENL-V,<br />
ABERDEEN PROVING GROUND, MD 2<strong>10</strong><strong>10</strong>-5423
WARNING - This document contains export-controlled technical data whose export is<br />
restricted by the Army Export Control Act (Title 22, U.S.S.C., Sec 2751 et seq) or<br />
Executive Order 12470. Violation of these export laws are subject to severe criminal<br />
penalties.<br />
DISTRIBUTION STATEMENT - Distribution authorized to U.S. Government agencies and<br />
their contractor to protect technical or operational information. This determination<br />
was made on 24 June 1987. Other requests for this document will be referred<br />
to: Technical Director, US Army Edgewood Research, Development and Engineering Center,<br />
ATTN: SCBRD-ENL-V, Aberdeen Proving Cround, MD 2<strong>10</strong><strong>10</strong>-5423.<br />
DESTRUCTION NOTICE - Destroy by any method that will prevent disclosure of contents<br />
or reconstruction of the document.