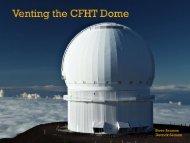
1 Overview 2 Details of the Model Construction - Canada France ...
1 Overview 2 Details of the Model Construction - Canada France ...
1 Overview 2 Details of the Model Construction - Canada France ...

Create successful ePaper yourself
Turn your PDF publications into a flip-book with our unique Google optimized e-Paper software.
6 Experimental methodology<br />
6.1 Dyes<br />
The dye was injected using electric micro-pumps provided by UWAL. Dyes were “Lucky” brand<br />
concentrated food colouring supplied by UWAL. The dye was sourced from a 1 liter container on <strong>the</strong><br />
input side <strong>of</strong> <strong>the</strong> pump and <strong>the</strong> dye flow was started/interrupted using a hose clamp on <strong>the</strong> output side.<br />
The 1.2 mm inner diameter stainless steel dye probe lines were connected to <strong>the</strong> dye source using an<br />
assortment <strong>of</strong> flexible hoses that were slipped on and <strong>of</strong>f <strong>the</strong> dye probes as necessary. For <strong>the</strong> tests<br />
where probes B1-B5 were alternately fired, aquarium air-line gang valves were used to redirect <strong>the</strong> dye<br />
to <strong>the</strong> individual probes.<br />
In a single day <strong>of</strong> testing it was unusual to use more than 1 litre <strong>of</strong> each <strong>of</strong> <strong>the</strong> red and blue food<br />
coloring dyes when only flushing tests were being performed. The dyes were diluted in ratios near<br />
50:1 to obtain a good balance between visibility and minimal use <strong>of</strong> <strong>the</strong> dye which would eventually<br />
cloud up <strong>the</strong> water. Change-out <strong>of</strong> <strong>the</strong> water was performed on a daily basis and required<br />
approximately 1.5-2 hours to complete. It was found necessary to flush <strong>the</strong> tunnel and <strong>the</strong>n<br />
immediately refill it in order to avoid getting air trapped in <strong>the</strong> plastic straws that make up <strong>the</strong> flow<br />
straightener. The trapped air in <strong>the</strong> flow straightener results in small bubbles being entrained in <strong>the</strong><br />
flow which significantly reduces <strong>the</strong> transparency <strong>of</strong> <strong>the</strong> water. The only solution when this happens is<br />
to flush out <strong>the</strong> straws using a hose. However, this results in large amounts <strong>of</strong> trapped sediment being<br />
flushed from <strong>the</strong> straws, which (at least in our one attempt at this procedure) muddies <strong>the</strong> water beyond<br />
usability for testing.<br />
Tests requiring relatively small amounts <strong>of</strong> dye (i.e. flushing time tests) were generally performed early<br />
in <strong>the</strong> day when <strong>the</strong> water was still clear. Flow visualization tests requiring continuous dye input over<br />
several seconds were performed at <strong>the</strong> end <strong>of</strong> <strong>the</strong> day when <strong>the</strong> dye had significantly clouded <strong>the</strong> water.<br />
The red and blue dyes were selected based on <strong>the</strong>ir better contrast in <strong>the</strong> water as suggested by Robert<br />
Gordon, with red being more visible than blue.<br />
The method used for initiating <strong>the</strong> dye injection was to first turn on <strong>the</strong> micro-pumps, wait a few<br />
seconds for <strong>the</strong> output pressure to build up and <strong>the</strong>n simultaneously open <strong>the</strong> hose clamps to begin <strong>the</strong><br />
dye injection (this was generally controlled by Karun). In this way, if more than one dye color was<br />
used, <strong>the</strong> dyes would be injected simultaneously to within a few 100 ms. It is important to note this as<br />
some <strong>of</strong> <strong>the</strong> video footage appears to indicate that <strong>the</strong> blue and red dyes (e.g. for <strong>the</strong> A3 & A5 probe<br />
flushing time tests) enter <strong>the</strong> chamber at very different times. This is an illusion caused by <strong>the</strong> strong<br />
flow along <strong>the</strong> dome floor in certain slit to wind orientations compounded by <strong>the</strong> mezzanine blocking<br />
<strong>the</strong> camera's view <strong>of</strong> <strong>the</strong> dome floor.<br />
6.2 Lighting<br />
The model was lit from one side with three 500 W halogen light fixtures. Two <strong>of</strong> <strong>the</strong> light fixtures<br />
were placed approximately 50 cm above floor level (~35 cm below <strong>the</strong> bottom <strong>of</strong> <strong>the</strong> tank) while <strong>the</strong><br />
third fixture (a spot light) was at tank level aimed towards <strong>the</strong> downstream tank direction. With this<br />
arrangement, reflections were avoided from <strong>the</strong> vantage point <strong>of</strong> <strong>the</strong> cameras. However, some<br />
shadowing is visible due to partial blocking <strong>of</strong> <strong>the</strong> spot light by <strong>the</strong> storyboard (this is particularly<br />
evident in <strong>the</strong> bottom camera views).<br />
A white fluorescent light panel (part <strong>of</strong> <strong>the</strong> UWAL water tunnel setup) was placed on <strong>the</strong> side <strong>of</strong> <strong>the</strong><br />
tunnel opposite <strong>the</strong> “side-view” camera.
![Documentation [PDF] - Canada France Hawaii Telescope ...](https://img.yumpu.com/26965302/1/190x245/documentation-pdf-canada-france-hawaii-telescope-.jpg?quality=85)