Hydronic 10 (Water Heater) - Parts Manuals
Hydronic 10 (Water Heater) - Parts Manuals
Hydronic 10 (Water Heater) - Parts Manuals

Create successful ePaper yourself
Turn your PDF publications into a flip-book with our unique Google optimized e-Paper software.
25<br />
Fuel Quantity Test<br />
The fuel Quantity should be tested if the heater has difficulty<br />
starting or maintaining a flame.<br />
Note:<br />
Preparation<br />
Measure the fuel quantity when the battery is<br />
sufficiently charged. At least 11V/22V and at<br />
most 13V/26V should be applied at the control<br />
unit during measurement.<br />
• Pull the fuel line from the heater and insert into a<br />
graduated measuring glass (size:50cm 3 )<br />
• Switch the heater on, when fuel delivery is uniform<br />
(approximately 63 seconds after switching on), the fuel<br />
line is full and bled.<br />
• Switch the heater off and empty the measuring glass.<br />
Measurement<br />
• Switch heater on<br />
• Fuel delivery stars automatically approximately 63<br />
seconds after switching on<br />
• After <strong>10</strong>5 seconds of fuel delivery, it will shut off<br />
a u t o m a t i c a l l y<br />
• Wait for restart.<br />
• Fuel pump is automatically switched off<br />
after another 75 seconds.<br />
• Switch off the heater.<br />
• Measure the fuel in the measuring glass<br />
Evaluation<br />
Nominal value: 19 ml± <strong>10</strong>%<br />
If the quantity is less than the tolerance, replace the fuel<br />
metering pump<br />
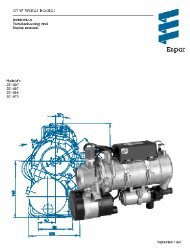
Repair Steps<br />
Disassembly / Assembly<br />
1 Control unit<br />
2 Glow pin cable<br />
3 Glow pin<br />
4 Overheat sensor / temperature sensor<br />
5 Cover Blower<br />
6 Flame sensor/heat exchanger fastening screws<br />
7 Housing including heat exchanger, dismantled<br />
8 Burner<br />
9 Burner dismantled<br />
<strong>10</strong> Heat exchanger<br />
11 Heat exchanger dismantled<br />
1 Control unit (on installation of control unit, grease the<br />
gasket with sealing paste<br />
2 Glow pin cable