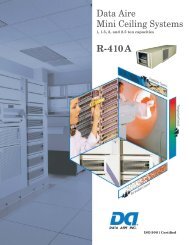
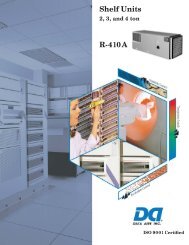
Installation, Operation and Maintenance Manual - Data Aire
Installation, Operation and Maintenance Manual - Data Aire
Installation, Operation and Maintenance Manual - Data Aire

Create successful ePaper yourself
Turn your PDF publications into a flip-book with our unique Google optimized e-Paper software.
Appropriate service access above the ceiling is required around all service <strong>and</strong> electrical access<br />
panels. There must unobstructed clearance below the unit allowing ladder access to enable routine<br />
maintenance <strong>and</strong> service.<br />
NOTE: There are many available unit confi gurations for Mini-Plus Ceiling systems.<br />
Be sure to identify the unit type <strong>and</strong> style before installing. There may be split condenser<br />
<strong>and</strong> condensing units that require separate or shared power.<br />
NOTE: Condensation formation <strong>and</strong> frequent humidifi er fl ushing (units with humidifi er)<br />
are normal functions of this equipment. Drain connections must be made to ensure<br />
proper water removal. Unit will require drain connections for condensate removal <strong>and</strong><br />
water connections for humidifi er make-up water, chilled water <strong>and</strong>/or hot water. <strong>Installation</strong><br />
above equipment that could sustain water damage should be avoided.<br />
1.3.1 Horizontal Airfl ow Units<br />
Mini-Plus ceiling units with horizontal airfl ow confi guration have a 24” evaporator section. Ductwork<br />
is connected to factory provided duct collars on the supply <strong>and</strong> return air openings.<br />
Four threaded support rods must be securely attached to the building structure. Raise the evaporator<br />
section with an appropriate lifting device. Attach washers, nuts <strong>and</strong> nut jams to each threaded<br />
rod. Tighten the nut so the weight is supported evenly by the four rods <strong>and</strong> the unit is level.<br />
1.3.2 Vertical Airfl ow Units<br />
The evaporator sections with optional vertical airfl ow (available on 2.5 <strong>and</strong> 3 ton units only) are<br />
28.5” high <strong>and</strong> are typically mounted over a st<strong>and</strong>ard 2’ x 4’ T-bar ceiling grid supported by four<br />
threaded rods.<br />
Four threaded support rods must be securely attached to the building structure. Raise the evaporator<br />
section with an appropriate lifting device. Attach washers, nuts <strong>and</strong> nut jams to each threaded<br />
rod. Tighten the nut so the weight is supported evenly by the four rods <strong>and</strong> the unit is level. Be<br />
certain to allow for the depth of the supply/return air plenum when fi guring the height of the unit in<br />
the ceiling space.<br />
The 5” tall vertical supply/return plenum assembly is attached to the bottom of the evaporator<br />
section once the evaporator section is installed. Six screws fasten the plenum to the evaporator<br />
section. The supply/return air grilles should be temporarily removed for access during installation.<br />
The plenum typically mounts fl ush to the ceiling grid (depending on available space above unit).<br />
1.3.3 Indoor Condensers <strong>and</strong> Condensing Units<br />
Air cooled units are available with either an indoor condenser section or an indoor condensing unit<br />
(units are also available with remote outdoor condenser or condensing units – outdoor sections<br />
have their own installation, operation <strong>and</strong> maintenance manuals). Air cooled condensers <strong>and</strong> con-<br />
7