Installation, Operation and Maintenance Manual - Data Aire
Installation, Operation and Maintenance Manual - Data Aire
Installation, Operation and Maintenance Manual - Data Aire

You also want an ePaper? Increase the reach of your titles
YUMPU automatically turns print PDFs into web optimized ePapers that Google loves.
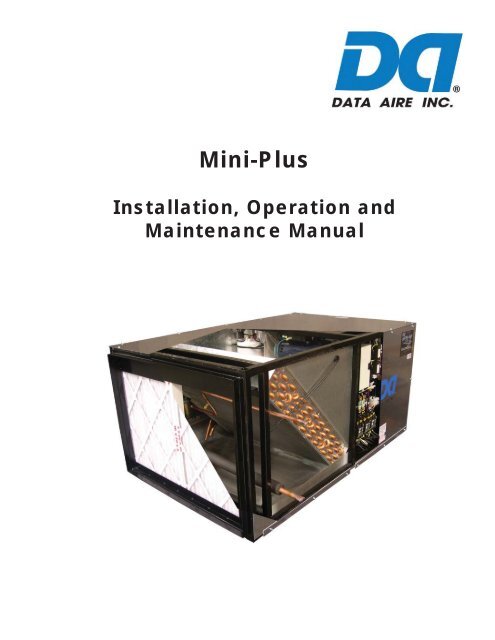
Mini-Plus<br />
<strong>Installation</strong>, <strong>Operation</strong> <strong>and</strong><br />
<strong>Maintenance</strong> <strong>Manual</strong>
Table of Contents<br />
1.0 <strong>Installation</strong>............................................................................................. 6<br />
1.1 Room Considerations ................................................................... 6<br />
1.2 Inspection ..................................................................................... 6<br />
1.3 Locating the Unit ........................................................................... 6<br />
1.3.1 Horizontal Airfl ow Units ...................................................... 7<br />
1.3.2 Vertical Airfl ow Units .......................................................... 7<br />
1.3.3 Indoor Condensers <strong>and</strong> Condensing Units........................ 7<br />
1.4 Paper work ................................................................................... 8<br />
1.5 Storage ......................................................................................... 8<br />
1.6 Model Identifi cation ....................................................................... 9<br />
2.0 Piping ................................................................................................. 10<br />
2.1 Split <strong>Aire</strong> Cooled Unit Piping ....................................................... 10<br />
2.1.1 Discharge Lines ............................................................... 10<br />
2.1.2 Liquid Lines ..................................................................... 10<br />
2.1.3 Suction Lines ................................................................... 11<br />
2.1.4 Connection Sizes, <strong>Aire</strong> Cooled Units ............................... 11<br />
2.1.5 Field Piping, Remote Condenser..................................... 11<br />
2.1.6 Field Piping, Remote Condensing Unit............................ 12<br />
2.2 Water/Glycol Unit Piping ............................................................. 12<br />
2.2.1 Field Piping, Water/Glycol System .................................. 13<br />
2.2.2 Connection Sizes, Water/Glycol Cooled Units ................ 13<br />
2.2.3 Connection Sizes, Fluid Coolers (Dry Coolers) ............... 13<br />
2.3 Auxiliary Chilled Water Coil Pipings ............................................ 13<br />
2.4 Condensate Drain Piping ............................................................ 14<br />
2.5 Humidifi er Piping ........................................................................ 14<br />
2.6 Leak Testing ............................................................................... 15<br />
2.7 Evacuation .................................................................................. 15<br />
3.0 Electrical Connections ........................................................................ 16<br />
3.1 Electrical Service ......................................................................... 16<br />
3.2 Nameplate Ratings ..................................................................... 16<br />
3.3 Grounding ................................................................................... 16<br />
3.4 Voltage Tolerance ....................................................................... 16<br />
3.5 Auxiliary Control Wiring .............................................................. 16<br />
3.6 Remote Shutdown ...................................................................... 17<br />
3.7 Remote Alarm Contacts .............................................................. 17<br />
3.7.1 Mini DAP II Unit ............................................................... 17<br />
3.7.2 Mini DAP III Unit ............................................................. 17<br />
3.8 Remote Sensors ......................................................................... 17<br />
3.8.1 Mini DAP II Unit ............................................................... 17<br />
3.8.2 Mini DAP III Unit .............................................................. 18<br />
3.9 Condensate Pumps .................................................................... 18<br />
3
4.0 <strong>Installation</strong> of Remote Outdoor Heat Exchanger ................................ 19<br />
4.1 Rigging ....................................................................................... 19<br />
4.2 Leg Assembly ............................................................................. 19<br />
4.3 Locating the Remote Heat Exchanger ........................................ 19<br />
4.4 Electrical Service ........................................................................ 20<br />
4.5 Air Cooled Condensers - Model DARC ...................................... 20<br />
4.5.1 Fan Speed Control .......................................................... 20<br />
4.5.2 Ambient Thermostat ........................................................ 20<br />
4.6 Fluid Coolers - Model DAFC ....................................................... 21<br />
4.6.1 Fluid-Sensing Thermostats .............................................. 21<br />
4.6.2 Energy Saver Cooling...................................................... 21<br />
5.0 Charging ............................................................................................. 22<br />
5.1 Voltage Phase Check ................................................................. 22<br />
5.1.1 Evaporator ....................................................................... 22<br />
5.1.2 Secondary Heat Exchanger............................................. 22<br />
5.2 Air Cooled Systems .................................................................... 22<br />
5.2.1 Packaged <strong>Aire</strong> Cooled Systems ...................................... 22<br />
5.2.2 Split Indoor Air Cooled Systems Charging ...................... 23<br />
5.2.3 Fan Speed Control System Charging .............................. 24<br />
5.2.4 Flooded System Charging ............................................... 25<br />
5.3 Water/Glycol Cooled Systems .................................................... 26<br />
5.3.1 Water/Glycol Cooled System Charging ........................... 26<br />
5.3.2 Factory Charge for Water/Glycol Cooled Systems .......... 26<br />
5.4 Refrigerant H<strong>and</strong>ling ................................................................... 27<br />
5.5 Important Refrigeration Components ......................................... 27<br />
5.5.1 Expansion Valve .............................................................. 27<br />
5.5.2 High Pressure Cutout Switch........................................... 27<br />
5.5.3 Low Pressure Cutout Switch ........................................... 27<br />
6.0 Glycol Systems ................................................................................... 28<br />
6.1 Glycol Concentration .................................................................. 28<br />
6.2 Internal (Fluid) Volume ............................................................... 28<br />
6.3 Fluid Cooler Internal Volume ...................................................... 28<br />
6.4 Copper Piping Internal Volume ................................................... 28<br />
6.5 Freezing Point of Aqueous Solutions .......................................... 29<br />
7.0 Controls .............................................................................................. 30<br />
7.1 Mini DAP II Microprocessor Control Panel ................................. 30<br />
7.2 Optional Mini DAP III .................................................................. 30<br />
7.3 Optional DAP III .......................................................................... 30<br />
7.4 Optional Thermostat ................................................................... 30<br />
7.5 Optional Programmable Thermostat .......................................... 30<br />
7.6 Wiring Diagrams ......................................................................... 31<br />
8.0 Regular <strong>Maintenance</strong> Items ................................................................ 32<br />
8.1 Air Filters ..................................................................................... 32<br />
8.2 Belts ............................................................................................ 32<br />
8.3 Bearings ..................................................................................... 32<br />
4
8.4 Humidifi er Canisters .................................................................... 32<br />
8.5 Fuses .......................................................................................... 33<br />
8.6 Heating Elements ....................................................................... 33<br />
8.7 Refrigerant Filter Drier ................................................................ 33<br />
9.0 Warranty Policy ................................................................................... 34<br />
10.0 Contact <strong>Data</strong> <strong>Aire</strong>................................................................................ 35<br />
Recommended Line Sizing for <strong>Aire</strong> Cooled Split Systems .......................... 36<br />
Temperature Pressure Chart ....................................................................... 37<br />
Superheat <strong>and</strong> Suction Pressure Troubleshooting Guide ........................... 38<br />
<strong>Maintenance</strong>/Inspection Check List............................................................. 39<br />
5
1.0 INSTALLATION<br />
WARNING: There is no intent on the part of <strong>Data</strong> <strong>Aire</strong>, Inc. to defi ne local codes <strong>and</strong><br />
statutes which may supercede common trade practices. The manufacturer assumes<br />
no responsibility for their interpretation. Consult local building codes <strong>and</strong> the National<br />
Electrical Code for special installation requirements.<br />
1.1 Room Considerations<br />
Precision air conditioning equipment is designed to control spaces within close tolerances of<br />
temperature <strong>and</strong> humidity. However, the room must be built with a proper vapor barrier. A fi lm of<br />
polyethylene is often used on walls <strong>and</strong> ceilings. Floors must be painted with vapor seal paint. All<br />
doors to the controlled space should be equipped with weather seals to prevent the infi ltration of<br />
non-neutral conditioned air from entering the space. Failure to provide a vapor barrier can compromise<br />
the ability to control space conditions.<br />
Introduction of outside air into the controlled space should be minimized. Outside air in excess of<br />
5% of the total circulated air volume can have a signifi cant effect on the overall space conditions<br />
<strong>and</strong> result in poor space control. All outside air that is introduced should be conditioned to the<br />
humidity <strong>and</strong> temperature parameters of the computer room air conditioned (CRAC) unit setpoints<br />
to maintain the room’s design conditions.<br />
1.2 Inspection<br />
This equipment has been factory run-tested <strong>and</strong> has gone through a comprehensive inspection<br />
prior to its packaging <strong>and</strong> shipment to ensure that it arrives in excellent condition. However, shipping<br />
damage can occur <strong>and</strong> a visual inspection of the outer crating immediately upon delivery<br />
should be performed.<br />
Note any external damage or other transportation damage on the freight carrier’s forms. Inspect<br />
the unit itself for internal damage. A claim should be fi led with the shipping company if the equipment<br />
is damaged or incomplete.<br />
Loose items such as a remote control panel, disconnect switch h<strong>and</strong>le <strong>and</strong> spare belts are packed<br />
inside the unit. Refer to the yellow shipping tag located on the electrical section panel.<br />
WARNING: Freight damage claims are the responsibility of the purchaser. Action to recover<br />
losses should be fi led immediately. Please notify <strong>Data</strong> <strong>Aire</strong> of any claims.<br />
1.3 Locating the Unit<br />
The unit is intended for above the ceiling installation <strong>and</strong> is typically suspended from structural<br />
members in the building above the ceiling. Add a 50% safety factor to the weight of the unit to<br />
determine the strength of the supporting structural members.<br />
6
Appropriate service access above the ceiling is required around all service <strong>and</strong> electrical access<br />
panels. There must unobstructed clearance below the unit allowing ladder access to enable routine<br />
maintenance <strong>and</strong> service.<br />
NOTE: There are many available unit confi gurations for Mini-Plus Ceiling systems.<br />
Be sure to identify the unit type <strong>and</strong> style before installing. There may be split condenser<br />
<strong>and</strong> condensing units that require separate or shared power.<br />
NOTE: Condensation formation <strong>and</strong> frequent humidifi er fl ushing (units with humidifi er)<br />
are normal functions of this equipment. Drain connections must be made to ensure<br />
proper water removal. Unit will require drain connections for condensate removal <strong>and</strong><br />
water connections for humidifi er make-up water, chilled water <strong>and</strong>/or hot water. <strong>Installation</strong><br />
above equipment that could sustain water damage should be avoided.<br />
1.3.1 Horizontal Airfl ow Units<br />
Mini-Plus ceiling units with horizontal airfl ow confi guration have a 24” evaporator section. Ductwork<br />
is connected to factory provided duct collars on the supply <strong>and</strong> return air openings.<br />
Four threaded support rods must be securely attached to the building structure. Raise the evaporator<br />
section with an appropriate lifting device. Attach washers, nuts <strong>and</strong> nut jams to each threaded<br />
rod. Tighten the nut so the weight is supported evenly by the four rods <strong>and</strong> the unit is level.<br />
1.3.2 Vertical Airfl ow Units<br />
The evaporator sections with optional vertical airfl ow (available on 2.5 <strong>and</strong> 3 ton units only) are<br />
28.5” high <strong>and</strong> are typically mounted over a st<strong>and</strong>ard 2’ x 4’ T-bar ceiling grid supported by four<br />
threaded rods.<br />
Four threaded support rods must be securely attached to the building structure. Raise the evaporator<br />
section with an appropriate lifting device. Attach washers, nuts <strong>and</strong> nut jams to each threaded<br />
rod. Tighten the nut so the weight is supported evenly by the four rods <strong>and</strong> the unit is level. Be<br />
certain to allow for the depth of the supply/return air plenum when fi guring the height of the unit in<br />
the ceiling space.<br />
The 5” tall vertical supply/return plenum assembly is attached to the bottom of the evaporator<br />
section once the evaporator section is installed. Six screws fasten the plenum to the evaporator<br />
section. The supply/return air grilles should be temporarily removed for access during installation.<br />
The plenum typically mounts fl ush to the ceiling grid (depending on available space above unit).<br />
1.3.3 Indoor Condensers <strong>and</strong> Condensing Units<br />
Air cooled units are available with either an indoor condenser section or an indoor condensing unit<br />
(units are also available with remote outdoor condenser or condensing units – outdoor sections<br />
have their own installation, operation <strong>and</strong> maintenance manuals). Air cooled condensers <strong>and</strong> con-<br />
7
densing units have factory provided duct collars on the supply <strong>and</strong> intake air openings (split water<br />
cooling condensing units do not have airfl ow connections).<br />
Four threaded support rods must be securely attached to the building structure. Raise the evaporator<br />
section with an appropriate lifting device. Attach washers, nuts <strong>and</strong> nut jams to each threaded<br />
rod. Tighten the nut so the weight is supported evenly by the four rods <strong>and</strong> the unit is level.<br />
Typical installations have the indoor condenser or indoor condensing unit near or adjacent to the<br />
evaporator section especially when shared electrical power is required. The same service <strong>and</strong><br />
maintenance requirements apply to these units as well.<br />
1.4 Paperwork<br />
Each <strong>Data</strong> <strong>Aire</strong> unit ships with start-up sheets that must completed. The start-up sheets are<br />
enclosed in a packet with the unit. The packet includes the warranty certificate, wiring diagrams,<br />
specifi c component literature, warranty registration card <strong>and</strong> a copy of the unit’s <strong>Installation</strong>/<strong>Operation</strong><br />
<strong>and</strong> <strong>Maintenance</strong> manual.<br />
A manila tag is attached to the outside panel to indicate articles that have been packaged <strong>and</strong><br />
shipped loose within the unit cabinet.<br />
NOTE: It is the responsibility of the start-up service company to return the start-up<br />
sheets <strong>and</strong> warranty registration card to <strong>Data</strong> <strong>Aire</strong> for activation of the unit warranty.<br />
Failure to do so may cause delays in warranty related services <strong>and</strong> in some cases void<br />
the warranty.<br />
1.5 Storage<br />
Your <strong>Data</strong> <strong>Aire</strong> equipment comes ready for immediate installation. In some instances it may be<br />
necessary to store the equipment for a period of time. If you must store the equipment it should<br />
be done in a dry area, out of the weather, protected from damage by other equipment in storage<br />
or transportation equipment, never stacked <strong>and</strong> avoid frequent relocation.<br />
If equipment is stored for longer than 30 days special precautions must be taken to avoid coil<br />
damage. All coils should be charged <strong>and</strong> sealed with a low pressure (less the 25 PSIG) inert gas,<br />
such nitrogen. This prevents contaminants from entering the coils. When the seal is broken at<br />
installation, the rush of escaping gas verifi es the coil is still leak free. If coils are not charged <strong>and</strong><br />
sealed, condensation mixes with air pollutants forming a weak acid <strong>and</strong> over time can cause pinhole<br />
leaks to develop in coil tubes.<br />
When equipment is installed after storage, caution should be taken to inspect <strong>and</strong> replace, if<br />
required, rubber hoses <strong>and</strong> belts. All moving parts, such as blowers <strong>and</strong> motors, should be h<strong>and</strong><br />
tested to ensure they are free <strong>and</strong> clear prior to start-up. Finally, verify that all lubrication is fresh<br />
<strong>and</strong> full.<br />
8
1.6 Model Identifi cation<br />
9
2.0 PIPING<br />
2.1 Split Air Cooled Unit Piping<br />
Refer to the attached line sizing chart on page 36 for a guideline for sizing refrigerant lines. The<br />
ultimate responsibility for line sizing selection is that of the installing contractor or the project engineer.<br />
<strong>Data</strong> <strong>Aire</strong> does not assume this responsibility. The chart covers distances up to 200 equivalent<br />
feet. For installations greater than this distance, consult ASHRAE or similar references.<br />
St<strong>and</strong>ard piping practices must be used to ensure proper oil return <strong>and</strong> effi cient operation. The<br />
interconnecting lines to the remote air cooled condenser or condensing unit must be installed by a<br />
qualifi ed refrigeration mechanic.<br />
2.1.1 Discharge Lines<br />
Discharge lines, also called hot gas lines, should be trapped at the top (inverted) <strong>and</strong> bottom, as<br />
well as every 15 to 20 feet of vertical rise. Discharge line check valves are recommended on all<br />
installations, especially those where there are long pipe runs or cold climate. Check valves should<br />
be installed 6 to 10 feet from the compressor. The discharge, suction <strong>and</strong> liquid lines need to<br />
be refrigerant grade copper <strong>and</strong> in accordance with local code. All refrigeration piping should be<br />
installed with high temperature brazed joints. When brazing, a supply of nitrogen gas needs to be<br />
fed through the refrigerant lines. Be sure to open the other end of the refrigerant line to allow the<br />
nitrogen to bleed off <strong>and</strong> not pressurize the piping. Prevailing good refrigeration practices should<br />
be employed for piping support, leak testing, dehydration <strong>and</strong> charging of the refrigerant circuits.<br />
During the installation the lines should be capped off <strong>and</strong> fi lled with dry nitrogen at the end of each<br />
day’s work or until the system is completed <strong>and</strong> sealed.<br />
<strong>Data</strong> <strong>Aire</strong> recommends a silver/phosphorus/copper alloy with 5 to 15% silver to be used to braze<br />
the refrigerant line sets to the indoor <strong>and</strong> outdoor units. Nitrogen needs to be fl owing through the<br />
lines to eliminate carbon deposit build-up of the joints. Carbon could contaminate the refrigerant<br />
<strong>and</strong> restrict the metering device.<br />
Piping must be supported within 18” of the inlet <strong>and</strong> outlet connections. The inlet connection is<br />
located on the top header of all units. The discharge outlet is located at the bottom of the header.<br />
The discharge line pressure drop should not exceed 6 PSIG for R-407C <strong>and</strong> 9 PSIG for R-410A.<br />
Recommended gas velocity for proper oil return is 1,000 FPM. Slope horizontal lines downward in<br />
the direction of refrigerant fl ow, 1/2” for every 10 feet of line length. Discharge lines do not require<br />
insulation but due to the high temperatures of the refrigerant inside the line, the pipes may be<br />
insulated to protect against burns to individuals near or around the lines.<br />
2.1.2 Liquid Lines<br />
Liquid lines are determined by pressure drop <strong>and</strong> velocity. The liquid line pressure drop for R-<br />
407C should not exceed 5 PSIG. For systems with R-410A, the pressure drop should not exceed<br />
9 PSIG. The recommended velocity should be between 200 <strong>and</strong> 300 FPM. To avoid excessive<br />
10
liquid line pressure drop, the air cooled condenser should be located above or at<br />
the same level as the evaporator. Condenser installations more than 10 feet below<br />
the evaporator are not recommended. Insulation of liquid lines is not required but<br />
can be useful in preventing condensation from forming in cold climates <strong>and</strong> to avoid<br />
fl ashing on long pipe runs.<br />
2.1.3 Suction Lines<br />
Some applications call for the compressor to be mounted as part of the condenser,<br />
more commonly referred to as a condensing unit. Such require field piping of liquid<br />
<strong>and</strong> suction lines. Suction lines are trapped similarly to discharge lines. Common<br />
practice for suction line selection <strong>and</strong> installation should be followed. Suction lines<br />
should always be insulated.<br />
2.1.4 Connection Sizes, Air Cooled Units<br />
MODEL HOT GAS LINE LIQUID LINE SUCTION LINE<br />
DAPA-2.5 1/2” 1/2” 3/4”<br />
DAPA-03 1/2” 1/2” 3/4”<br />
DAPA-04 1/2” 1/2” 3/4”<br />
DAPA-05 1/2” 1/2” 3/4”<br />
Note: Units will have a liquid line <strong>and</strong> either a hot gas or suction line<br />
Field connections at the indoor evaporator <strong>and</strong> remote condenser or condensing<br />
unit will not necessarily be the same as the field pipe size required. In some cases<br />
these sizes will vary significantly.<br />
2.1.5 Field Piping, Remote Condenser<br />
11
2.1.6 Field Piping, Remote Condensing Unit<br />
2.2 Water/Glycol Unit Piping<br />
The required fi eld installed condenser water pipe sizes may or may not be the same as the connection<br />
sizes at the evaporator section or fl uid cooler (refer to Sections 2.2.2 <strong>and</strong> 2.2.3 for connection<br />
sizes). Water pipe sizes will depend on the length of pipe required <strong>and</strong> the calculated<br />
pressure drop of peripheral components.<br />
Water cooled units may also be connected to building water or tower water sources. Pipe size will<br />
depend on length of run <strong>and</strong> the maximum water fl ow required.<br />
All water/glycol units are shipped with plate/fi n heat exchangers as st<strong>and</strong>ard equipment. A strainer<br />
is shipped loose <strong>and</strong> is to be fi eld installed in the supply line with shut-off valves (fi eld provided)<br />
before <strong>and</strong> after the strainer. The strainers <strong>and</strong> water/glycol piping must be cleaned on a periodic<br />
basis. If the unit is shipped with optional shell <strong>and</strong> tube condenser, strainers are not required nor<br />
shipped with the unit.<br />
All water pipes have a cap installed on the end of the pipe for pressure testing the system. These<br />
caps need to be removed before installing the water piping to the unit. Use a tube cutter for<br />
smaller pipes <strong>and</strong> a reciprocating saw with a metal cutting blade for larger pipe sizes or if there is<br />
a clearance problem. All connections need to be cleaned before connections are brazed together.<br />
NOTE: One of the most common problems in a water/glycol system is the presence of<br />
air in the condenser loop. Air vents must be installed in various locations in the piping<br />
system to purge the air.<br />
Water/Glycol system piping may include a centrifugal pump (or pumps for redundancy). Pumps<br />
must be primed before operating per the pump manufacturer’s guidelines.<br />
12
2.2.1 Field Piping, Water/Glycol System<br />
2.2.2 Connection Sizes, Water/Glycol Cooled Units<br />
EVAPORATOR MODEL WATER IN CONNECTION WATER OUT CONNECTION<br />
DAPW/G-2.5 3/4” O.D. 3/4” O.D.<br />
DAPW/G-03 3/4” O.D. 3/4” O.D.<br />
DAPW/G-04 1-1/8” O.D. 1-1/8” O.D.<br />
DAPW/G-05 1-1/8” O.D. 1-1/8” O.D.<br />
2.2.3 Connection Sizes, Fluid Coolers (Dry Coolers)<br />
EVAPORATOR MODEL WATER IN CONNECTION WATER OUT CONNECTION<br />
DAFC-06 1-5/8” O.D. 1-5/8” O.D.<br />
DAFC-07 1-5/8” O.D. 1-5/8” O.D.<br />
DAFC-09 1-5/8” O.D. 1-5/8” O.D.<br />
DAFC-11 2-1/8” O.D. 2-1/8” O.D.<br />
DAFC-15 2-1/8” O.D. 2-1/8” O.D.<br />
DAFC-17 2-5/8” O.D. 2-5/8” O.D.<br />
2.3 Auxiliary Chilled Water Coil Piping<br />
Units with an optional Auxiliary Chilled Water cooling coil require a separate source of chilled<br />
water. The chilled water connection sizes will be the same as those listed for the condenser water<br />
(see chart in Section 2.2.3). Units with optional Energy Saver coil typically have shared or common<br />
piping with the condenser supply <strong>and</strong> therefore do not require a separate cooling source.<br />
13
All chilled water pipes have a cap installed on the end of the pipe for pressure testing the system.<br />
These caps need to be removed before installing the water piping to the unit. Use a tube cutter for<br />
smaller pipes <strong>and</strong> a reciprocating saw with a metal cutting blade for larger pipe sizes or if there is<br />
a clearance problem. All connections need to be cleaned before connections are brazed together.<br />
NOTE: Mini-Plus ceiling units with optional Energy Saver or Auxiliary Chilled Water coils<br />
have a 28-1/2” frame height instead of the st<strong>and</strong>ard 24” height.<br />
2.4 Condensate Drain Piping<br />
The evaporator section is provided with a 3/4” FPT connection on the bottom for condensate removal.<br />
A union is recommended at the fi eld connection which will permit easy disconnection from<br />
the unit for cleaning.<br />
Units with optional vertical discharge air have the 5” plenum below the evaporator drain pan with<br />
knockouts that allow fi eld supplied <strong>and</strong> installed condensate lines to be routed out either side of<br />
the unit. As with the st<strong>and</strong>ard unit a union is recommended at the fi eld connection which will permit<br />
easy disconnection from the unit for cleaning.<br />
A trap should be built into the drain line to prevent air from backing up condensate into the unit.<br />
Drain lines should be pitched downward not less than 1/4” for each 10 feet of horizontal run. Do<br />
not reduce the size of the drain line. Where local codes permit, PVC pipe may be used.<br />
Some applications or installations have no convenient means of allowing a gravity drain. In this<br />
case a condensate pump can be used. An optional condensate pump can be factory mounted <strong>and</strong><br />
wired or shipped loose for fi eld installation. Factory mounted pumps do not require a separate<br />
power source.<br />
Condensate that are shipped loose (or fi eld provided) typically require a dedicated 110 volt power<br />
source. Field pipe connections must be made to the pump discharge connection. A check valve<br />
must be installed in the discharge line to prevent short cycling.<br />
2.5 Humidifi er Piping<br />
The optional humidifi er on Mini-Plus Ceiling systems is a steam generator type with disposable<br />
cylinder. The humidifi er make-up water should be brought to the humidifi er through the fi eld connection<br />
opening using 1/4” copper tubing. A compression fi tting is provided at the humidifi er. A<br />
shut-off valve should be provided outside the unit to allow disconnection of service. An in-line<br />
water pressure regulator <strong>and</strong> strainer should be installed. Water pressure should be set between<br />
30 <strong>and</strong> 80 PSI.<br />
The humidifi er has a drain at the bottom which is factory piped to the main condensate drain line.<br />
The dispersion tube also has a drain line. No additional fi eld piping is required.<br />
14
2.6 Leak Testing<br />
No installation is complete until the entire system has been thoroughly checked for leaks. This includes<br />
checking refrigerant tubing, fl are fi ttings, pressure controls, shraeder fi ttings <strong>and</strong> compressor<br />
rotolock service valves. Check both fi eld <strong>and</strong> factory connections.<br />
In addition to the refrigeration system, check all condenser water lines, humidifi er make-up lines,<br />
condensate lines, condensate pumps, chilled water lines, centrifugal pumps <strong>and</strong> fl uid coolers as<br />
applicable.<br />
When h<strong>and</strong>ling or recovering refrigerant it is not permissible to release refrigerant into the atmosphere.<br />
Many leak-test methods recommended in the past are no longer possible. Current st<strong>and</strong>ard<br />
practices must be used.<br />
Pressurize system circuit to 150 PSIG (1034 kPa) by using dry nitrogen with a trace of refrigerant.<br />
Check the entire system for leaks with suitable leak fi nder (per local code) including but limited to<br />
all braze joints, caps, fi ttings <strong>and</strong> fl are nuts on both fi eld <strong>and</strong> factory furnished components. After<br />
completion of leak testing, release test pressure <strong>and</strong> pull a vacuum on the system.<br />
NOTE: Tightening of fi ttings <strong>and</strong> valves is the responsibility of the installing contractor<br />
2.7 Evacuation<br />
Evacuate the refrigerant lines, condenser coil <strong>and</strong> evaporator coil to 250 microns or lower (a micron<br />
gauge <strong>and</strong> 2-stage vacuum pump are required). Valve off <strong>and</strong> turn off the vacuum pump <strong>and</strong><br />
wait for at least fi fteen minutes to make sure the micron gauge reading does not go back up above<br />
700 microns. If it does, re-start the vacuum pump <strong>and</strong> evacuate until the system reaches 250<br />
microns. If the system still does not hold the pressure below 700 microns the system needs to be<br />
rechecked for leaks.<br />
After the system has been satisfactorily evacuated the unit can be charged with refrigerant. Connect<br />
the pressure gauge manifold set to the high <strong>and</strong> low ports near the compressor, connect the<br />
charging line to the refrigerant tank <strong>and</strong> set it for liquid feed. Open the refrigerant tank valve <strong>and</strong><br />
purge the line at the manifold, then open the high side valve on the manifold only, <strong>and</strong> allow the<br />
refrigerant to fl ow until the system pressure equalizes. At this point the system will have 75 to<br />
80% of the total refrigerant charge. Start the blower <strong>and</strong> then the compressor checking the operating<br />
pressure <strong>and</strong> temperatures.<br />
WARNING: DO NOT APPLY POWER TO THE COMPRESSOR WHEN IN A VACUUM<br />
15
3.0 ELECTRICAL CONNECTIONS<br />
WARNING: Before proceeding with electrical connections, make certain that the volts,<br />
hertz <strong>and</strong> phase correspond to that specifi ed on the unit electrical nameplate. Use<br />
copper conductors only<br />
3.1 Electrical Service<br />
Check to be sure the service provided by the utility is suffi cient to h<strong>and</strong>le the additional load imposed<br />
by this equipment. Units with secondary heat exchangers will require a separate power<br />
source <strong>and</strong> fi eld provided interconnecting control wires as well. Indoor split units typically have a<br />
single power source but can also be provided with separate sources. Field provided interconnecting<br />
control wires are also required. See Section 3.5 Auxiliary Control Wiring.<br />
Remote outdoor condensers <strong>and</strong> condensing units require one power source. Glycol system with<br />
fl uid coolers <strong>and</strong> loose pump(s) typically require one power source for the fl uid cooler <strong>and</strong> will require<br />
one additional source for a single pump or two additional sources for dual pumps. Systems<br />
where the pumps are mounted <strong>and</strong> piped integral to the fl uid cooler will usually require a single<br />
power source.<br />
3.2 Nameplate Ratings<br />
Refer to the unit nameplate for equipment electrical requirements. Minimum Circuit Ampacity<br />
(MCA), also known as wire sizing amps, will dictate the minimum required wire gauge. Maximum<br />
Overcurrent Protection (MOP) Device amps will dictate circuit breaker or fuse size.<br />
3.3 Grounding<br />
The unit cabinet must have an uninterrupted true earth ground. An electrical ground wire of adequate<br />
size must be connected to the ground lug provided inside the main electrical box.<br />
3.4 Voltage Tolerance<br />
The supply voltage to the unit must be within tolerance: - 5% to + 10% for 208-230 voltage.<br />
+10% for 460 volts. Phase to phase imbalance must not exceed 3%. The local utility company<br />
should be contacted for correction if improper line voltage exists. Deviation from ratings can<br />
cause premature failures <strong>and</strong> possibly void unit warranty.<br />
3.5 Auxiliary Control Wiring<br />
For secondary heat exchangers (condensers <strong>and</strong> fl uid coolers) connect two 18 gauge wires (minimum<br />
size – good to 100 feet) from the electrical box of the indoor evaporator to the electrical box<br />
of the remote heat exchanger. Refer to the wiring diagrams located in the electrical control panel<br />
of each unit. Follow the wiring diagrams for each piece of equipment. On most remote heat<br />
16
exchangers the terminals will no. 39 <strong>and</strong> no .40. All control wiring on <strong>Data</strong> <strong>Aire</strong> equipment is 24<br />
VAC.<br />
Condensing units (compressors mounted in the condenser) typically require more wires. Refer to<br />
the wiring diagrams in the unit.<br />
WARNING: Check the wiring connections in the unit control panel to ensure they are<br />
tight. Screw terminals may become loose in transit. Tightening of wiring connections<br />
is the responsibility of the installing contractor.<br />
3.6 Remote Shutdown<br />
Every <strong>Data</strong> <strong>Aire</strong> evaporator has remote contact points available. These are intended for a fi eld<br />
supplied dry contact or switch to be wired across two terminals. When the contact or switch<br />
opens, the control circuit power is interrupted <strong>and</strong> the unit shuts down, including the control panel.<br />
The control circuit is 24 VAC <strong>and</strong> the fi eld provided contact or switch <strong>and</strong> wiring should have a<br />
minimum rating of 10 amps. A minimum of 18 gauge wire is recommended.<br />
The remote shutdown contacts are always terminals #1 <strong>and</strong> #2 on the terminal block designated<br />
TB1. The unit is shipped with a factory jumper bar that connects terminal #1 to terminal #2. Remove<br />
this bar prior to installing the fi eld wires.<br />
3.7 Remote Alarm Contacts<br />
3.7.1 Mini DAP-II Units<br />
Units with Mini DAP-II microprocessor control panel <strong>and</strong> optional summary alarm module, a remote<br />
output contact can be fi eld accessed on terminals #14 <strong>and</strong> #15 of terminal block TB1. This<br />
is a normally Open (Close on Alarm) dry contact intended to be used in a control circuit not exceeding<br />
5 amps at 24 VAC. This output contact will close on a failure <strong>and</strong> remain closed until the<br />
alarm is no longer present.<br />
3.7.2 Mini DAP-III Units<br />
If the optional Mini DAP-III microprocessor control panel is ordered with the optional summary<br />
alarm module, a remote alarm output contact can be fi eld accessed on terminal #11 (common)<br />
<strong>and</strong> #12 (normally closed) or #13 (normally open) of terminal block TB1. This is a normally open<br />
or normally closed contact that will reverse position upon alarm <strong>and</strong> is intended to be used in a<br />
control circuit not exceeding 5 amps at 24 VAC. This output contact will reverse position on a failure<br />
<strong>and</strong> remain reversed until the alarm is no longer present.<br />
3.8 Remote Sensors<br />
3.8.1 Mini DAP-II Units<br />
The st<strong>and</strong>ard Mini DAP-II microprocessor control panel normally comes with sensors mounted in<br />
17
the panel. Although these existing sensors can be removed for remote mounting, the remote sensor<br />
option provides a more convenient means of fi eld installation. When ordered, the remote sensors<br />
are shipped with a predetermined length of cable <strong>and</strong> come mounted in a plastic enclosure.<br />
The temperature <strong>and</strong> humidity sensors require a total of six wires. These wires should be twisted<br />
pair, shielded type (minimum of 18 gauge).<br />
3.8.2 Mini DAP-III Units<br />
The optional Mini DAP-III microprocessor control panel normally comes with the sensors mounted<br />
in the display module. Although these existing sensors can be removed for remote mounting, the<br />
remote sensor option provides a more convenient means of fi eld installation. When ordered, the<br />
remote sensors are shipped with a predetermined length of cable <strong>and</strong> come mounted in a plastic<br />
enclosure. The temperature <strong>and</strong> humidity sensors require a total of fi ve wires. These wires should<br />
be 18 gauge, twisted pair, shielded type.<br />
3.9 Condensate Pumps<br />
The optional condensate pump that’s shipped loose normally require a separate power source<br />
(110 volt). Always check the pump power requirements before connecting power. Condensate<br />
pumps are available in other voltages.<br />
Optional condensate pumps that are factory wired <strong>and</strong> mounted do not require any additional wiring<br />
or a separate power source. However, fi eld piping is still required.<br />
18
4.0 INSTALLATION OF REMOTE OUTDOOR HEAT EXCHANGER<br />
Air cooled condenser <strong>and</strong> fl uid coolers have individual <strong>Installation</strong>, <strong>Operation</strong> <strong>and</strong> <strong>Maintenance</strong><br />
manuals which should be referred to for more complete details<br />
4.1 Rigging<br />
The following covers outdoor condensers, condensing units <strong>and</strong> fl uid coolers. Outdoor heat exchangers<br />
should be moved to their mounting location using a crane or fork lift as applicable. Each<br />
fan section has supports with lifting holes at the top.<br />
Do not lift with a choke sling around the unit. Spreader bars are recommended for lifting multiple<br />
fan units. Under no circumstances should the coil headers or piping be used for lifting the unit.<br />
The unit should be kept in its shipping crate until it is ready to be set in place.<br />
4.2 Leg Assembly<br />
The legs of the remote heat exchanger are shipped with the unit in the “collapsed” position <strong>and</strong><br />
need to be lowered during the rigging process. The legs must be unbolted from their collapsed<br />
position <strong>and</strong> extended prior to placing the units on its pad. Each leg extends down 18 inches <strong>and</strong><br />
should be reattached using the same bolts. The bolts are placed through the lower set of holes on<br />
the bracket. Multiple fan units have leg supports between each section.<br />
Concrete pads or a rail system are often used to provide support for the heat exchanger. Bolt<br />
holes in the bottom of each leg can be used to anchor the unit.<br />
DARC-03 <strong>and</strong> DARC-05 units do not have legs <strong>and</strong> are ready for installation.<br />
WARNING: Failure to extend the legs will result in poor air distribution over the cooling<br />
coil resulting in signifi cant capacity reduction <strong>and</strong> potential high discharge pressure<br />
problems.<br />
4.3 Locating the Remote Heat Exchanger<br />
The remote heat exchanger must be located in an area that will ensure free air fl ow into <strong>and</strong> out<br />
of the heat exchanger plus adequate service access clearance. Short circuiting of the air fl ow or<br />
the intake of warmer air from another unit will seriously degrade the performance of the air cooled<br />
heat exchanger.<br />
19
Do not locate the heat exchanger in a location that is<br />
bordered by tall obstructions (i.e. higher than 10 feet)<br />
on no more than two sides. See fi gure at right for<br />
minimum clearance from obstructions <strong>and</strong> between<br />
units. With proper clearance on all sides, two units<br />
can be placed side by side. Additional units should<br />
be placed at least 48 inches apart.<br />
Noise factors should also be considered when locating<br />
an air cooled heat exchanger. Proximity to windows,<br />
walls <strong>and</strong> surrounding structures can cause<br />
objections by the occupants. An acoustical expert<br />
should be consulted when noise is of a particular<br />
concern.<br />
Air cooled heat exchangers should be placed at a level that is higher than the indoor evaporator.<br />
<strong>Installation</strong> of the remote heat exchanger (condenser or condensing unit) more than 10 feet below<br />
the evaporator is not recommended. Excessive liquid line pressure drop can cause poor evaporator<br />
performance.<br />
Piping must be supported within 18 inches of the inlet <strong>and</strong> outlet connections. The inlet connection<br />
is located on the top header on all remote heat exchangers <strong>and</strong> the outlet connection is located<br />
on the bottom header of all units.<br />
4.4. Electrical Service<br />
Refer to Sections 3.1 to 3.5 for information regarding line voltage <strong>and</strong> control voltage wiring details.<br />
4.5 Air Cooled Condensers – Model DARC<br />
4.5.1 Fan Speed Control<br />
St<strong>and</strong>ard outdoor air cooled condensers have a fan speed controller on the fi rst fan. On single<br />
fan condensers this is the only means of control. A variable speed controller modulates the motor<br />
speed based on system head pressure. The fan speed controller does not require fi eld adjustment<br />
or programming.<br />
4.5.2 Ambient Thermostats<br />
Additional motors (subsequent to the fan speed control operated motor) on multiple fan heat<br />
exchangers are cycled by ambient sensing thermostats. These thermostats have a capillary tube<br />
with remote sensing bulb. They function best with the sensing bulb mounted below the coil, away<br />
from exposure to direct sun light <strong>and</strong> the bulb in the vertical position. An instruction set comes as<br />
part of a mounting kit that includes a sheet metal bracket, mounting clamps <strong>and</strong> TEK screws. This<br />
includes directions for fi eld mounting <strong>and</strong> adjustment. Desired head pressure should be maintained<br />
at approximately 230-270 PSIG for R-407C <strong>and</strong> 340-400 PSIG for R-410A.<br />
20
Typical factory settings:<br />
Number of Fans Motor No.1 Motor No.2 Motor No.3 Motor No.4 Motor No. 5<br />
1 FSC N/A N/A N/A N/A<br />
2 FSC Pressure Control N/A N/A N/A<br />
3 FSC Pressure Control 75°F N/A N/A<br />
4 FSC Pressure Control 85°F 75°F N/A<br />
5 FSC Pressure Control 85°F 75°F 65°F<br />
4.6 Fluid Coolers – Model DAFC<br />
4.6.1 Fluid-Sensing Thermostats<br />
Fluid cooler fan motors are cycled on <strong>and</strong> off by individual water-sensing thermostats strapped to<br />
the leaving water header. The fi rst fan motor will only have a thermostat if the unit has an Energy<br />
Saver coil. Without the optional Energy Saver coil the fi rst fan motor runs whenever there is a call<br />
for cooling via an auxiliary signal sent by the indoor evaporator. See Section 3.5 – Auxiliary Control<br />
Wiring.<br />
The water-sensing thermostats have adjustable setpoints which are typically staggered to maintain<br />
water temperature in a range of 85 to 105°F. This is generally the desired range for glycol<br />
cooled systems.<br />
A surge tank is st<strong>and</strong>ard with all DAFC fl uid coolers. This is suffi cient for most applications. However,<br />
an expansion tank is recommended <strong>and</strong> should be installed at the highest point in the system<br />
<strong>and</strong> the point of least pressure.<br />
4.6.2 Energy Saver Cooling<br />
In colder ambient climates units may be equipped with an additional free cooling coil. When incoming<br />
fl uid temperature falls below the setpoint of a water-sensing thermostat in the evaporator<br />
(typically 50°F), Energy Saver or free cooling becomes available.<br />
Systems with an Energy Saver coil should have at least one fl uid-sensing thermostat on the fl uid<br />
cooler set lower to take advantage of the colder ambient temperatures. The desired fl uid temperature<br />
for Energy Saver cooling is 45°F. Field adjustment of fl uid sensing thermostats is not<br />
unusual.<br />
It is desirable to use the Energy Saver mode as much as possible to maximize the free cooling<br />
feature. However, fl uid temperature that is too cold can cause excessive dehumidifi cation <strong>and</strong> coil<br />
sweating. Fluid temperature that is too high can cause the indoor space temperature to rise. This<br />
could cause the evaporator’s microprocessor control to lock out the Energy Saver mode for one a<br />
fi xed period of time while it reverts back to compressor (mechanical) cooling. Adjust setpoints of<br />
the thermostats to allow the maximum free cooling time. Over cooling or under cooling the fl uid<br />
should be avoided.<br />
WARNING: Every application will have a different ambient temperature <strong>and</strong> indoor heat<br />
load/air distribution profile. It is not possible to dictate the exact water-sensing thermostat<br />
setpoints. Field adjustments are typical to allow fine tuning to specific conditions.<br />
21
5.0 CHARGING<br />
5.1 Voltage Phase Check<br />
5.1.1 Evaporator<br />
Prior to charging, the correct voltage phasing should be checked on the indoor evaporator. Check<br />
blower direction on the evaporator by momentarily energizing the fan motor. Reverse any two of<br />
the three line voltage wires at the line voltage fi eld connection point to change the blower rotation.<br />
Although the scroll compressor is phase dependent, units shipped from the factory are run tested<br />
ensuring compressor rotation is consistent with the evaporator fan motor. However, a fi eld<br />
change-out of the compressor may require checking proper phase. An out of phase compressor<br />
will draw relatively low amps <strong>and</strong> both suction <strong>and</strong> discharge pressures will remain nearly equal.<br />
5.1.2 Secondary Heat Exchanger<br />
The secondary heat exchanger may be ordered as three phase but the individual fan motors are<br />
single phase <strong>and</strong> will only run in one direction. Check operation by placing a momentary jumper<br />
across low voltage terminals #39 <strong>and</strong> #40 (disconnect pumps on glycol systems unless already<br />
fi lled with water/glycol solution). Placing a jumper across terminal #39 <strong>and</strong> #40 will energize the<br />
control circuit. Fans may not run because the thermostat is above the current ambient or the #1<br />
fan on air cooled condensers with fan speed control has not reacted to the head pressure. The<br />
fan will not run until the head pressure is well over 200 PSIG.<br />
5.2 Air Cooled Systems<br />
5.2.1 Package Air Cooled Systems<br />
Packaged air cooled units come factory charged because all of the refrigerant carrying components<br />
are self-contained with the evaporator <strong>and</strong> condenser sections.<br />
A properly charged system operating at typical parameters will have the following pressures:<br />
Units with R-407C Head pressure<br />
Suction Pressure<br />
240 – 295 PSIG<br />
58 PSIG or greater<br />
Units with R-410A Head pressure 340 – 415 PSIG<br />
Suction pressure 104 – 121 PSIG<br />
The superheat at the compressor suction line should be 8 – 15 degrees. Sub-cooling should be<br />
8 – 10 degrees.<br />
An air cooled package unit may require fi eld charging if a compressor is changed, if a leak develops<br />
or if non-condensable are in the system. Field charging should be done by referring to the<br />
unit electrical nameplate for the factory charge.<br />
22
Although this value represents the original factory charge, it is still necessary to measure <strong>and</strong> note<br />
proper unit operation including superheat, sub-cooling, head <strong>and</strong> suction pressure. Some adjustment<br />
to charge may be required.<br />
WARNING: Before starting a compressor, the crankcase heater should be energized<br />
for a minimum of 12 hours to reduce the possibility of liquid slugging on start-up. Failure<br />
to energize the crankcase heater could result in compressor damage.<br />
5.2.2 Split Indoor Air Cooled Systems Charging (Units with Indoor Condenser)<br />
After refrigerant piping is properly completed, connect the refrigerant drum to the low side <strong>and</strong><br />
charge with vapor. For systems with R-407C, charge with approximately 2.55 lbs. per nominal<br />
ton. Systems with R-410A require 3 lbs. per nominal ton.<br />
For example, a model DAPA-0312 is a nominal 3 ton unit. Charge with about 7.65 lbs. of refrigerant<br />
if R-407C. 9 lbs. if R-410A. It is likely that more refrigerant will be required to complete the<br />
charging procedure for additional piping between the evaporator <strong>and</strong> the condenser. Make sure<br />
all hoses are properly purged. From a vacuum, feed liquid refrigerant into the high side of the<br />
system until the pressures equalizes. At this point there will be about 70-80% of the total charge<br />
in the system.<br />
For units with either the Mini DAP-III or DAP-III, a quick <strong>and</strong> easy way to run the blower <strong>and</strong> compressor<br />
is by using the manual switches provided with the microprocessor (located in the control<br />
module). Switch the blower <strong>and</strong> compressor manual switches to the ON position. All automatic<br />
control is disabled but safety switches will remain functional.<br />
WARNING: Before starting a compressor, the crankcase heater should be energized<br />
for a minimum of 12 hours to reduce the possibility of liquid slugging on start-up. Failure<br />
to energize the crankcase heater could result in compressor damage. If the system<br />
is charged from a vacuum, the pre-heating of the compressor is not necessary.<br />
Start the evaporator fan <strong>and</strong> compressor. Check the liquid line sight-glass to get a feel for the approximate<br />
charge. Bubbles in the sight-glass are not unusual at this point <strong>and</strong> can be caused by<br />
fl ashing from liquid line pressure drop, low sub-cooling or low charge. It is likely more refrigerant<br />
will be required to complete the charging procedure.<br />
Adjust the refrigerant charge until the sub-cooling is 8 to 10° <strong>and</strong> has sparse bubbles. The unit<br />
should be allowed to stabilize for several minutes before meaningful measurements can be taken.<br />
A properly charged system operating at typical parameters will have the following pressures:<br />
Units with R-407C Head pressure<br />
Suction Pressure<br />
240 – 295 PSIG<br />
58 PSIG or greater<br />
Units with R-410A Head pressure 340 – 415 PSIG<br />
Suction pressure 104 – 121 PSIG<br />
The superheat at the compressor suction line should be 8 – 15 degrees. Sub-cooling should be<br />
8 – 10 degrees.<br />
23
NOTE: Charging to a full liquid line sight-glass should never be the sole means of determining<br />
the correct refrigerant charge. Other parameters such as superheat, suction<br />
pressure, head pressure, sub-cooling <strong>and</strong> ambient temperature are also important. A<br />
system charged to a clear sight-glass is often overcharged.<br />
5.2.3 Fan Speed Control System Charging (Units with Remote Outdoor Condenser)<br />
The st<strong>and</strong>ard outdoor air cooled condenser provided by <strong>Data</strong> <strong>Aire</strong> has fan speed control. The fan<br />
speed controller does not require fi eld adjustment or programming.<br />
After refrigerant piping is properly completed, connect the refrigerant drum to the low side <strong>and</strong><br />
charge with vapor. For systems with R-407C, charge with approximately 2.55 lbs. per nominal<br />
ton. Systems with R-410A require 3 lbs. per nominal ton.<br />
For example, a model DAPA-0312 is a nominal 3 ton unit. Charge with about 7.65 lbs. of refrigerant<br />
if R-407C. 9 lbs. if R-410A. It is likely that more refrigerant will be required to complete the<br />
charging procedure for additional piping between the evaporator <strong>and</strong> the condenser. Make sure<br />
all hoses are properly purged. From a vacuum, feed liquid refrigerant into the high side of the<br />
system until the pressures equalizes. At this point there will be about 70-80% of the total charge<br />
in the system.<br />
For units with either the Mini DAP-III or DAP-III, a quick <strong>and</strong> easy way to run the blower <strong>and</strong> compressor<br />
is by using the manual switches provided with the microprocessor (located in the control<br />
module). Switch the blower <strong>and</strong> compressor manual switches to the ON position. All automatic<br />
control is disabled but safety switches will remain functional.<br />
WARNING: Before starting a compressor, the crankcase heater should be energized<br />
for a minimum of 12 hours to reduce the possibility of liquid slugging on start-up. Failure<br />
to energize the crankcase heater could result in compressor damage. If the system<br />
is charged from a vacuum, the pre-heating of the compressor is not necessary.<br />
Start the evaporator fan <strong>and</strong> compressor. Check the liquid line sight-glass to get a feel for the approximate<br />
charge. Bubbles in the sight-glass are not unusual at this point <strong>and</strong> can be caused by<br />
fl ashing from liquid line pressure drop, low sub-cooling or low charge. It is likely more refrigerant<br />
will be required to complete the charging procedure.<br />
Adjust the refrigerant charge until to a sub-cooling of 8 to 10° <strong>and</strong> has sparse bubbles. The unit<br />
should be allowed to stabilize for several minutes before meaningful measurements can be taken.<br />
A properly charged system operating at typical parameters will have the following pressures:<br />
Units with R-407C Head pressure<br />
Suction Pressure<br />
240 – 295 PSIG<br />
58 PSIG or greater<br />
Units with R-410A Head pressure 340 – 415 PSIG<br />
Suction pressure 104 – 121 PSIG<br />
The superheat at the compressor suction line should be 8 – 15 degrees. Sub-cooling should be<br />
8 – 10 degrees.<br />
24
NOTE: Charging to a full liquid line sight-glass should never be the sole means of determining<br />
the correct refrigerant charge. Other parameters such as superheat, suction<br />
pressure, head pressure, sub-cooling <strong>and</strong> ambient temperature are also important. A<br />
system charged to a clear sight-glass is often overcharged.<br />
5.2.4 Flooded System Charging<br />
Flooded systems include an optional liquid receiver <strong>and</strong> head pressure control valve for use primarily<br />
in colder climates. When the ambient temperature falls during cold weather, the head pressure<br />
control valve will regulate the fl ow of refrigerant to ensure nearly constant receiver pressure.<br />
The receiver is partially fl ooded with liquid refrigerant in cold weather. In warm weather the extra<br />
refrigerant is stored in the receiver.<br />
Flooded systems require more refrigerant than units with fan speed control. Connect the pressure<br />
gauge manifold set to the high <strong>and</strong> low ports near the compressor. Connect the charging line to<br />
the refrigerant tank <strong>and</strong> set it for liquid feed. Open the refrigerant tank valve <strong>and</strong> purge the line at<br />
the manifold. Open the high side valve on the manifold only <strong>and</strong> allow the refrigerant to fl ow until<br />
the system pressure equalizes. At this point the system will have 75 to 85% of the total refrigerant<br />
charge. Start the evaporator blower. Start the compressor <strong>and</strong> check the operating pressures<br />
<strong>and</strong> temperatures.<br />
For units with either the Mini DAP-III or DAP-III, a quick <strong>and</strong> easy way to run the blower <strong>and</strong> compressor<br />
is by using the manual switches provided with the microprocessor (located in the control<br />
module). Switch the blower <strong>and</strong> compressor manual switches to the ON position. All automatic<br />
control is disabled but safety switches will remain functional.<br />
WARNING: Before starting a compressor, the crankcase heater should be energized<br />
for a minimum of 12 hours to reduce the possibility of liquid slugging on start-up. Failure<br />
to energize the crankcase heater could result in compressor damage. If the system<br />
is charged from a vacuum, the pre-heating of the compressor is not necessary.<br />
Start the evaporator fan <strong>and</strong> verify the fan rotation. Start the compressor. Check the liquid line<br />
sight-glass to get a feel for the approximate charge. Bubbles in the sight-glass are not unusual at<br />
this point <strong>and</strong> can be caused by fl ashing from liquid pressure drop, low sub-cooling or low charge.<br />
It is likely more refrigerant will be required to complete the charging procedure.<br />
If the receiver (head) pressure is below 230 PSIG, block part of the condenser coil surface until<br />
the pressures rises to 230 PSIG or greater. During extremely cold weather all the condenser fans<br />
may have to be de-energized to maintain 230 PSIG.<br />
Observe the sight-glass on the receiver. Add refrigerant through the suction line until the level of<br />
liquid in the receiver is approximately 1/3 from the bottom of the sight-glass (the leveling ball in the<br />
receiver will start to fl oat). At this point the charging is correct. Observing the receiver sight-glass<br />
becomes diffi cult when they are remotely mounted near the condenser. The unit should be allowed<br />
to stabilize for several minutes before meaningful measurements can be taken.<br />
After the system is allowed to stabilize, the superheat at the compressor suction line (reading from<br />
at least 6 inches from the compressor) should be 8 to 15°F. Units with remote condensing units<br />
25
(DRCU), the superheat should be 20 to 25°F at the compressor. Remove any block that may<br />
have been used on the condenser coil. If the ambient temperature while charging is below 70°F,<br />
some of the refrigerant will be backed up into the condenser coil causing the liquid level in the<br />
receiver to drop (this is normal).<br />
NOTE: Charging to a full liquid line sight-glass should never be the sole means of determining<br />
the correct refrigerant charge. Other parameters such as superheat, suction<br />
pressure, head pressure, sub-cooling <strong>and</strong> ambient temperature are also important. A<br />
system charged to a clear sight-glass is often overcharged.<br />
5.3 Water/Glycol Cooled Systems<br />
5.3.1 Water/Glycol Cooled System Charging<br />
All water/glycol cooled units are factory charged with refrigerant. The water regulating valve<br />
should be adjusted to maintain a condensing temperature of 105 to 119°F. Saturated suction<br />
temperature should be 33°F or higher. The superheat at the compressor suction line (measured<br />
at least 6 inches away from the compressor) should be 8 to 15°F.<br />
Field charging water/glycol systems (if required) should be done by referring to the unit’s electrical<br />
nameplate. The factory charge is indicated on the nameplate. Although this value represents<br />
the original factory charge, it is still necessary to measure <strong>and</strong> note proper unit operation including<br />
superheat, head <strong>and</strong> suction pressure. Some adjustment to the refrigerant may be required.<br />
Adjust the refrigerant charge until the sight-glass clears or has sparse bubbles. The unit should<br />
be allowed to stabilize for several minutes before meaningful measurements can be taken <strong>and</strong> the<br />
conditioned space should be at or near the temperature setpoint.<br />
All water/glycol cooled units have a water regulating valve. A head pressure sensing transducer is<br />
connected to a shrader fi tting on the discharge line <strong>and</strong> water is regulated into the condenser coil.<br />
St<strong>and</strong>ard condensers are plate fi n type.<br />
WARNING: Before starting a compressor, the crankcase heater should be energized<br />
for a minimum of 12 hours to reduce the possibility of liquid slugging on start-up. Failure<br />
to energize the crankcase heater could result in compressor damage. If the system<br />
is charged from a vacuum, the pre-heating of the compressor is not necessary.<br />
NOTE: Charging to a full liquid line sight-glass should never be the sole means of determining<br />
the correct refrigerant charge. Other parameters such as superheat, suction<br />
pressure, head pressure, sub-cooling <strong>and</strong> ambient temperature are also important. A<br />
system charged to a clear sight-glass is often overcharged.<br />
5.3.2 Factory Charge for Water/Glycol Cooled Systems<br />
Evaporator Model R-407C R-410A<br />
DAPW/G 2.5 Consult Factory Consult Factory<br />
DAPW/G 03 Consult Factory Consult Factory<br />
DAPW/G 04 Consult Factory Consult Factory<br />
DAPW/G 05 Consult Factory Consult Factory<br />
26
5.4 Refrigerant H<strong>and</strong>ling<br />
The use of recovery/recycling is required by the US Environmental Protection Agency (EPA) regulations.<br />
Technicians who service <strong>and</strong> dispose of air conditioning <strong>and</strong> refrigeration equipment must<br />
recover the refrigerant instead of venting to the atmosphere.<br />
Except for extremely small releases of refrigerant such as those that occur when disconnecting<br />
service hoses (diminutive release), a technician who knowing releases or vents refrigerant to the<br />
atmosphere is in violation of these regulations. Freon purchasers must be certifi ed technicians<br />
<strong>and</strong> have a valid EPA certifi cation card.<br />
Warning! Pressure relief lines(s) must be vented to the atmosphere per the latest edition<br />
of ASHRAE St<strong>and</strong>ard 15 <strong>and</strong>/or any local building, fire or mechanical codes.<br />
This applies to all units with either sell <strong>and</strong> tube condensers or high pressure relief valve<br />
options.<br />
5.5 Important Refrigeration Components<br />
5.5.1 Expansion Vale<br />
Each refrigerant circuit has an adjustable thermo-expansion valve (TXV). They are factory adjusted<br />
to their nominal rating. Any fi eld adjustment should be to “fi ne tune” a system that has been<br />
stabilized <strong>and</strong> already has acceptable operating parameters.<br />
5.5.2 High Pressure Cutout Switch<br />
Each refrigeration circuit is protected by a high head pressure cutout switch with a manual reset<br />
button. The switch is located near the compressor.<br />
The pressure rating for R-407C systems is 400 PSIG.<br />
The pressure rating for R-410A systems is 610 PSIG.<br />
5.5.3 Low Pressure Cutout Switch<br />
Each circuit includes a low pressure cutout switch with automatic reset. The switch is located near<br />
the compressor section.<br />
The pressure rating for R-407C systems is 28 PSIG.<br />
The pressure rating for R-410A systems is 50 PSIG.<br />
27
6.0 GLYCOL SYSTEMS<br />
6.1 Glycol Concentration<br />
The system must be fi lled with water <strong>and</strong> the appropriate amount of ethylene or propylene glycol<br />
to protect against winter freezing. To achieve the approximate glycol concentration, it is necessary<br />
to know the total system volume. The total system volume consists of the fl uid cooler volume, the<br />
evaporator unit volume <strong>and</strong> the volume of the inter-connecting piping.<br />
The following tables can be used for arriving at an approximate system volume. After installation,<br />
the glycol percentage should be checked. The glycol percentage should be checked at regular<br />
intervals to ensure against freeze protection.<br />
6.2 Internal (Fluid) Volume<br />
Evaporator Model<br />
Volume (gallons) - no Energy<br />
Saver Coil<br />
Volume (gallons) – with Energy<br />
Saver Coil<br />
DAPG 2.5 1.0 2.5<br />
DAPG 03 1.0 2.5<br />
DAPG 04 2.5 4.0<br />
DAPG 05 2.5 4.0<br />
6.3 Fluid Cooler Internal Volume<br />
Fluid Cooler Volume (gallons) Fluid Cooler Volume (gallons)<br />
DAFC 06 2.5 DAFC 17 6.6<br />
DAFC 07 3.4 DAFC 21 7.4<br />
DAFC 09 4.2 DAFC 24 9.8<br />
DAFC 11 3.3 DAFC 29 12.3<br />
DAFC 15 4.9<br />
6.4 Copper Piping Internal Volume<br />
Pipe Diameter Inches O.D.<br />
Volume per 100 feet of Pipe (gallons)<br />
5/8 1.2<br />
3/4 1.8<br />
7/8 2.5<br />
1-1/8 2.5<br />
1-5/8 4.3<br />
2-1/8 9.2<br />
28
6.5 Freezing Point of Aqueous Solutions<br />
Ethylene Glycol Percent<br />
by Volume Freezing Point °F<br />
Propylene Glycol Percent<br />
by Volume Freezing Point °F<br />
0 32 0 32<br />
10 24 10 27<br />
20 15 20 18<br />
30 4 30 8<br />
40 -13 40 -6<br />
50 -33 50 -26<br />
29
7.0 CONTROLS<br />
7.1 Mini DAP-II Microprocessor Control Panel<br />
The Mini DAP-II microprocessor control panel is st<strong>and</strong>ard on all Mini-Plus units. There is a separate<br />
manual with extensive detail regarding the functions, features, programming <strong>and</strong> troubleshooting.<br />
WARNING: The Mini DAP-II microprocessor control panel has an entire manual<br />
dedicated to its use <strong>and</strong> operation. The manual must be referenced to complete a<br />
thorough unit installation. Start-up is not complete until the Mini DAP-II control panel<br />
settings are established.<br />
7.2 Optional Mini DAP-III<br />
The Mini DAP-III is available as an option <strong>and</strong> offers additional features including remote communications<br />
(with additional communication card options). There is a separate manual with extensive<br />
detail regarding the functions, features, programming <strong>and</strong> troubleshooting.<br />
WARNING: The Mini DAP-III microprocessor control panel has an entire manual<br />
dedicated to its use <strong>and</strong> operation. The manual must be referenced to complete a<br />
thorough unit installation. Start-up is not complete until the Mini DAP-II control panel<br />
settings are established.<br />
7.3 Optional DAP-III<br />
The Remote Mount DAP-III is available as an option <strong>and</strong> offers additional features including remote<br />
communications (with additional communication card options) <strong>and</strong> analog inputs/outputs.<br />
There is a separate manual with extensive detail regarding the functions, features, programming<br />
<strong>and</strong> troubleshooting.<br />
WARNING: The Remote Mount DAP-III microprocessor control panel has an entire<br />
manual dedicated to its use <strong>and</strong> operation. The manual must be referenced to complete<br />
a thorough unit installation. Start-up is not complete until the Mini DAP-II control<br />
panel settings are established.<br />
7.4 Optional Thermostat<br />
For installations not requiring close environmental control, a single stage cooling thermostat is<br />
available. Units with either humidifi ers <strong>and</strong>/or electric reheat require the Mini DAP-II, the Mini<br />
DAP-III or the Remote Mount DAP-III.<br />
7.5 Optional Programmable Thermostat<br />
Thermostat allows simple programmable functions. Units with either humidifi ers <strong>and</strong>/or electric<br />
reheat require the Mini DAP-II, the Mini DAP-III or the Remote Mount DAP-III.<br />
30
7.6 Wiring Diagrams<br />
Every <strong>Data</strong> <strong>Aire</strong> evaporator, condenser, condensing unit or fl uid cooler comes with a wiring diagram.<br />
These diagrams are ladder type schematics intended for service personnel. The intent is<br />
to allow the technician to underst<strong>and</strong> the wiring details associated with the electrical components<br />
<strong>and</strong> how they interface with the controls as well as peripheral equipment (including secondary<br />
heat exchangers).<br />
The wiring diagram in the evaporator will indicate fi eld interface terminals to the secondary heat<br />
exchanger. The internal wiring of the heat exchanger is found on a separate diagram which can<br />
be found on the inside cover of the heat exchanger electrical box. Both diagram types are also<br />
placed inside the shipping/warranty packet secured in the evaporator section.<br />
Evaporator wiring diagrams will have a drawing number that starts with a three letter designation,<br />
“DAP”. An example of a typical diagram is DAP-S-778. Wiring diagrams for condensers or<br />
condensing units start with the three letter designation, “DRC”. A typical diagram example would<br />
be DRC-S-001. Fluid coolers begin with the three letter designation “DFC”. A typical fl uid cooler<br />
diagram would be DFC-S-001.<br />
31
8.0 REGULAR MAINTENANCE ITEMS<br />
8.1 Air Filters<br />
Air fi lters should be checked on a regular basis <strong>and</strong> changed when they become dirty. This will<br />
ensure effi cient operation of the unit. Spare air fi lters should be kept in stock as these tend to<br />
be a frequently replaced maintenance item. Air fi lters may require changing as often as monthly<br />
dependent on room or space conditions. New installations with construction dust will quickly clog<br />
fi lters requiring new fi lters.<br />
The Mini DAP-II or optional Mini DAP-III control panels monitor air fi lters. A dirty fi lter alarm will be<br />
enunciated on the controls display screen. Although the unit may display a dirty fi lter alarm, this<br />
should not be relied on as the only determinant for replacing air fi lters. A misadjusted air fi lter differential<br />
pressure switch may not give a proper indication of a clogged fi lter.<br />
To check the air filter pressure differential pressure switch for proper adjustment, temporarily cover<br />
approximately 75% of the return air opening using heavy cardboard or similar material. The alarm<br />
should energize when 75% of the air is blocked, simulating dirty fi lters. If the alarm energizes prematurely<br />
or does not energize at all, the pressure switch should be adjusted. Panels must remain<br />
closed when determining if an adjustment is necessary.<br />
WARNING: Air fi lters that require changing can restrict airfl ow <strong>and</strong> create problems such as<br />
coil icing or poor air distribution.<br />
8.2 Belts<br />
Belt tension should be checked on a regular basis (monthly) to ensure proper tension. If tightening<br />
is required, loosen the four mounting bolts. Turn the adjustment screw on the end of the motor<br />
mounting channel until the proper belt tension is attained. Retighten the four mounting bolts.<br />
Damage can occur from belts that over tightened. The amount of play in a typical drive set should<br />
be 1/2 inch. When tightening the belts make sure the pulley alignment is true. If the belts are over<br />
tightened or if the pulleys are misaligned, the bearing life <strong>and</strong> belt life are shortened considerably.<br />
8.3 Bearings<br />
Blower bearings used with Mini-Plus ceiling units are permanently lubricated <strong>and</strong> do not require<br />
maintenance.<br />
Some motors have Zirk type grease fi ttings on the bearings. If so, the motor should be greased<br />
at least annually. Use NLG1 grade 2 lithium or lithium complex grease. Care should be taken to<br />
avoid over-greasing the bearings. Only one or two pumps from a manual gun are required.<br />
8.4 Humidifi er Canisters<br />
The optional steam generator type humidifi er does not require maintenance other than to replace<br />
the canister as required. The frequency of change will depend on usage <strong>and</strong> water type. A set<br />
of the humidifi er manufacturer’s instructions is included with the paperwork placed inside the unit<br />
when it ships.<br />
32
8.5 Fuses<br />
Fuses may occasionally require changing especially with installations where the voltage is not<br />
consistent. Drops in voltage can create brief periods of high amp draw, causing fuses to blow.<br />
Always replace fuses with those of the equivalent rating with regard to: 1) amperage, 2) voltage<br />
<strong>and</strong> 3) speed. For instance – compressors are <strong>and</strong> motors are inductive loads which require time<br />
delay fuses where electric reheat <strong>and</strong> humidifi ers are resistive loads requiring fast acting fuses.<br />
8.6 Heating Elements<br />
Heating elements do not normally require maintenance. However, they may accumulate a fi lm of<br />
dust or dirt when unused for extended periods of time. When energized, the burning debris can<br />
create smoke or an unpleasant odor. To help avoid a problem, periodic cleaning is recommended.<br />
8.7 Refrigerant Filter Drier<br />
Factory installed refrigerant fi lter driers do not require maintenance or replacement unless the system<br />
has been opened. When replacing compressors or other repairs that open the refrigeration<br />
system to the atmosphere, it is always advisable to replace the fi lter drier. The equivalent type<br />
<strong>and</strong> size should be used.<br />
33
9.0 WARRANTY POLICY<br />
Seller warrants its equipment to Buyer to be free from defects in material <strong>and</strong> workmanship for<br />
a period of eighteen (18) months from date of shipment, as long as equipment is utilized under<br />
normal conditions <strong>and</strong> service <strong>and</strong> is properly installed; however, the warranty shall not be applicable<br />
to any of the following items: refrigerant, belts, fi lters, humidifi er, heaters not regularly<br />
cleaned, light bulbs, <strong>and</strong> any other items either consumed or worn out by normal wear <strong>and</strong> tear,<br />
or by conditions beyond Seller’s control, including (without limitation as to generally) polluted or<br />
contaminated air or water.<br />
The Seller’s obligation under this warranty is limited solely to the repair or replacement, at Seller’s<br />
options, of any part or parts thereof which shall, within eighteen (18) months from date of shipment<br />
of the equipment to the original purchaser be returned to the factory, transportation charges<br />
repaid, which upon examination shall disclose to the Seller’s satisfaction to have been defective<br />
under normal use <strong>and</strong> service. This agreement to repair or replace defective parts is expressly in<br />
lieu of all other warranties, expressed or implied <strong>and</strong> all other obligations or liabilities on the part of<br />
the Seller <strong>and</strong> Seller neither assumes nor authorizes any other person to assume for it any liability<br />
or obligation in connection with the sales or service of its equipment, except said repair or replacement<br />
of defective parts set forth above.<br />
This warranty does not include any labor charges for work done outside the factory for replacement<br />
of parts, adjustments, repairs, or any other work. Seller’s liability does not include any<br />
resulting damage to persons, property, equipment, goods or merch<strong>and</strong>ise arising out of any defect<br />
in or failure of any equipment of its manufacture <strong>and</strong> Buyer hereby waives any claim against Seller<br />
arising out of such claim. This warranty shall not cover the repair or replacement of any equipment<br />
which has been repaired or altered outside the factory in any way or which has been subject<br />
to negligence, misuse, or abuse, or to pressures in excess of stated limits.<br />
This warranty applies only to the original purchaser of the equipment <strong>and</strong> does not extend, expressly<br />
or by implication, to the third parties or others without specifi c written approval <strong>and</strong> acknowledgment<br />
of Seller. Buyer’s exclusive remedy <strong>and</strong> Seller’s maximum liability for any <strong>and</strong> all<br />
loss, injury, damage, costs, or expense arising from any defect covered by this warranty shall be<br />
limited to the repair or replacement, but not the installation of any defective material, F.O.B., Seller’s<br />
plant; provided however, that Seller shall not be required to replace any part or component (a)<br />
which can be repaired, or (b) unless Buyer has given Seller immediate written notice that replacement<br />
or repair. In addition, Seller shall not be liable for any cost or expense of replacement or<br />
repair contracted for by Buyer with any third person, unless, <strong>and</strong> then only to the extent that Seller<br />
authorizes in writing, such costs or expense.<br />
Seller shall not be liable for any direct, indirect incidental, consequential, or other form of loss,<br />
injury, damage, cost, or expense, whether caused by delay, failure, or performance, breach of warranty,<br />
or by any cause whatsoever.<br />
Seller’s obligation under this warranty shall be void if Buyer fails: (a) without legal justifi cation to<br />
pay Seller, when due, the full purchase price for the equipment sold hereunder, or (b) to have the<br />
equipment sold hereunder installed, maintained, <strong>and</strong> serviced by competent personnel <strong>and</strong> in accordance<br />
with Seller’s instructions.<br />
34
10.0 CONTACT DATA AIRE<br />
Address:<br />
<strong>Data</strong> <strong>Aire</strong>, Inc.<br />
230 West Blueridge Avenue<br />
Orange, CA 92865<br />
Telephone:<br />
714-921-6000<br />
800-347-AIRE (2473)<br />
Toll Free<br />
E-mail:<br />
Fax:<br />
Web Site:<br />
Service@dataaire.com<br />
Tech_Support@dataaire.com<br />
Engineering@dataaire.com<br />
Sales@dataaire.com<br />
714-921-6010 Main<br />
714-921-6011 Engineering<br />
714-921-6022 Parts Sales<br />
www.dataaire.com<br />
Job/Unit Information:<br />
<strong>Data</strong> <strong>Aire</strong> Job Number: ___________________________________<br />
Evaporator Serial Number: ________________________________<br />
Evaporator Model Number: ________________________________<br />
Condenser/Fluid Cooler Serial Number: ______________________<br />
Condenser/Fluid Cooler Model Number: ______________________<br />
35
RECOMMENDED LINE SIZING for AIR COOLED SPLIT SYSTEMS<br />
HOT GAS LINES – SINGLE CIRCUIT UNITS (Up To 200 Equivalent Feet)<br />
Tonnage Tons/Circuit 50 feet 100 feet 150 feet 200 feet<br />
2.5 2.5 5/8 7/8 7/8 7/8<br />
3 3 7/8 7/8 7/8 7/8<br />
4 4 7/8 7/8 7/8 1-1/8<br />
5 5 7/8 1-1/8 1-1/8 1-1/8<br />
LIQUID LINES – SINGLE CIRCUIT UNITS (Up to 200 Equivalent Feet)<br />
Tonnage Tons/Circuit 50 feet 100 feet 150 feet 200 feet<br />
2.5 2.5 3/8 1/2 1/2 1/2<br />
3 3 1/2 1/2 1/2 1/2<br />
4 4 1/2 5/8 5/8 5/8<br />
5 5 1/2 5/8 5/8 5/8<br />
SUCTION LINES – SINGLE CIRCUIT UNITS (Up to 200 Equivalent Feet)<br />
Tonnage<br />
Tons per<br />
Circuit<br />
50 feet<br />
HOR VER<br />
100 feet<br />
HOR VER<br />
150 feet<br />
HOR VER<br />
200 feet<br />
HOR VER<br />
2.5 2.5 7/8 7/8 7/8 7/8 7/8 7/8 1-1/8 7/8<br />
3 3 7/8 7/8 1-1/8 7/8 1-1/8 7/8 1-1/8 7/8<br />
4 4 1-1/8 1-1/8 1-1/8 1-1/8 1-1/8 1-1/8 1-3/8 1-1/8<br />
5 5 1-1/8 1-1/8 1-1/8 1-1/8 1-3/8 1-1/8 1-3/8 1-1/8<br />
HOR = HORIZONTAL<br />
VER = VERTICAL<br />
36
TEMPERATURE-PRESSURE CHART<br />
R-407C<br />
R-410A<br />
TEMPERATURE (°F) PRESSURE (PSIG) PRESSURE (PSIG)<br />
26 43.6 89.7<br />
27 44.7 91.6<br />
28 45.9 93.5<br />
29 47.1 95.5<br />
30 48.4 97.5<br />
31 49.6 99.5<br />
32 50.9 101.6<br />
33 52.1 103.6<br />
34 53.4 105.7<br />
35 54.8 107.9<br />
36 56.2 110.0<br />
37 57.5 112.2<br />
38 58.9 114.4<br />
39 60.3 116.7<br />
40 61.7 118.9<br />
41 63.1 121.2<br />
42 64.6 123.6<br />
43 66.1 125.9<br />
44 67.6 128.3<br />
45 69.1 130.7<br />
46 70.6 133.2<br />
47 72.2 135.6<br />
48 73.8 138.2<br />
49 75.4 140.7<br />
50 77.1 143.3<br />
55 106.0 156.6<br />
60 116.2 170.7<br />
65 127.0 185.7<br />
70 138.5 201.5<br />
75 150.6 218.2<br />
80 163.5 235.9<br />
85 177.0 254.6<br />
90 191.3 274.3<br />
95 206.4 295.0<br />
100 222.3 316.9<br />
105 239.0 339.9<br />
110 256.5 364.1<br />
115 274.9 389.6<br />
120 294.2 416.4<br />
125 314.5 444.5<br />
130 335.7 474.0<br />
135 357.8 505.0<br />
140 380.9 537.6<br />
145 405.1 571.7<br />
150 430.3 607.6<br />
37
Superheat <strong>and</strong> Suction Pressure Troubleshooting Guide<br />
Low Suction Pressure <strong>and</strong> High Superheat<br />
1. Moisture, wax, dirt in system<br />
2. Undersized valve<br />
3. High superheat adjustment<br />
4. Gas charge condensation<br />
5. Dead thermostatic element charge<br />
6. Wrong thermostatic charge<br />
7. Evaporator pressure drop – no external equalizer<br />
8. External equalizer location<br />
9. Restricted or capped external equalizer<br />
10. Low refrigerant charge<br />
11. Liquid line vapor<br />
a. Vertical lift<br />
b. High friction loss<br />
c. Long or small line<br />
d. Plugged drier or strainer<br />
12. Low pressure across valve<br />
a. Vertical lift<br />
b. Undersized distributor nozzle or circuits<br />
c. Low condensing temperature<br />
High Suction Pressure <strong>and</strong> Low Superheat<br />
1. Oversized valve<br />
2. TEV seat leak<br />
3. Low superheat adjustment<br />
4. Bulb installation<br />
a. Poor thermal contact<br />
b. Warm location<br />
5. Wrong thermostatic charge<br />
6. Bad compressor – low capacity<br />
7. Moisture, wax, dirt in system<br />
8. Incorrectly located external equalizer<br />
Low Suction Pressure <strong>and</strong> Low Superheat<br />
1. Low load<br />
a. Insuffi cient air fl ow<br />
b. Dirty air fi lters<br />
c. Coil icing<br />
2. Poor air distribution<br />
3. Poor refrigerant distribution<br />
4. Improper compressor/evaporator balance<br />
5. Evaporator oil logged<br />
38
MAINTENANCE/INSPECTION CHECKLIST<br />
Evaporator Model # ________________ Evaporator Serial # ____________<br />
Technician: _______________________<br />
Date: _________________<br />
Electrical Section<br />
___ Inspect fuses<br />
___ Inspect wire connections<br />
___ Inspect contactors<br />
Controls<br />
___ Circle control type: Mini DAP-II Mini DAP-III DAP-III<br />
___ Check unit control operation<br />
Check operation of the following:<br />
___ High water alarm<br />
___ Pressure differential switch<br />
___ Air fl ow switch<br />
Air Filters<br />
___ Inspect <strong>and</strong> replace (if required)<br />
___ Inspect grille area <strong>and</strong> ensure unrestricted<br />
Blower Section<br />
___ Check blower wheel movement to be free <strong>and</strong> clear of any debris<br />
___ Check belt tension <strong>and</strong> condition (replace if required)<br />
___ Check bearings<br />
___ Check sheave/pulley alignment<br />
___ Check motor mount/alignment<br />
___ Record motor amp (draw) L1 ____ L2 ____ L3 ____<br />
Humidifi er (steam generator)<br />
___ Inspect drain valve/trap/drain line<br />
___ Check for leaks (make-up water/hoses)<br />
___ Check humidifi er canister (replace if needed)<br />
___ Check <strong>and</strong> clean fi ll strainer<br />
___ Check operation<br />
___ Record humidifi er amp draw L1____ L2 ____ L3 ____<br />
Reheat<br />
___ Inspect element (<strong>and</strong> clean if required)<br />
___ Check wiring<br />
___ Record amps ____<br />
Refrigeration Piping<br />
___ Check for lines (leaks/lines secure)<br />
___ Check capillary lines<br />
39
Condensers (Water-Cooled)<br />
___ Check for leaks<br />
___ Entering/leaving water temperatures ENT ____° LVG ____°<br />
Compressor<br />
___ Check for oil leaks<br />
___ Check compressor mounting<br />
___ Inspect wire connection<br />
___ Record suction pressure<br />
____ PSIG<br />
___ Record discharge pressure ____ PSIG<br />
___ Record superheat ____ °<br />
___ Record sub-cooling ____ °<br />
___ Check high pressure cut-out ____ PSIG<br />
___ Check low pressure cut-in ____ PSIG<br />
___ Check low pressure cut-out ____ PSIG<br />
___ Record compressor amp draw L1 ____ L2 ____ L3 ____<br />
Condensate Pan<br />
___ Check for debris<br />
___ Inspect/check fl oat operation<br />
___ Check pump operation<br />
Air Cooled Condenser (if applicable)<br />
___ Inspect coil/clean if required<br />
___ Inspect motor/motor mounts<br />
___ Inspect fan blade(s)<br />
___ Check wiring<br />
___ Inspect piping for leaks<br />
Dry Cooler (if applicable)<br />
___ Inspect coil/clean if required<br />
___ Inspect motor/motor mounts<br />
___ Inspect fan blade(s)<br />
___ Check wiring<br />
___ Inspect piping for leaks<br />
Glycol Pump (if applicable)<br />
___ Glycol leaks<br />
___ Pump operation<br />
40
Notes<br />
___________________________________________________________________<br />
___________________________________________________________________<br />
___________________________________________________________________<br />
___________________________________________________________________<br />
___________________________________________________________________<br />
___________________________________________________________________<br />
___________________________________________________________________<br />
___________________________________________________________________<br />
___________________________________________________________________<br />
___________________________________________________________________<br />
___________________________________________________________________<br />
___________________________________________________________________<br />
___________________________________________________________________<br />
___________________________________________________________________<br />
___________________________________________________________________<br />
___________________________________________________________________<br />
___________________________________________________________________<br />
___________________________________________________________________<br />
___________________________________________________________________<br />
___________________________________________________________________<br />
___________________________________________________________________<br />
41
Notes<br />
___________________________________________________________________<br />
___________________________________________________________________<br />
___________________________________________________________________<br />
___________________________________________________________________<br />
___________________________________________________________________<br />
___________________________________________________________________<br />
___________________________________________________________________<br />
___________________________________________________________________<br />
___________________________________________________________________<br />
___________________________________________________________________<br />
___________________________________________________________________<br />
___________________________________________________________________<br />
___________________________________________________________________<br />
___________________________________________________________________<br />
___________________________________________________________________<br />
___________________________________________________________________<br />
___________________________________________________________________<br />
___________________________________________________________________<br />
___________________________________________________________________<br />
___________________________________________________________________<br />
___________________________________________________________________<br />
42
230 W. BlueRidge Avenue<br />
Orange, CA 92865<br />
800-347-2473<br />
www.dataaire.com<br />
e-mail: sales@dataaire.com<br />
A Member of the CS Group of Companies<br />
© 2011 <strong>Data</strong> <strong>Aire</strong>, Inc.<br />
<strong>Data</strong> <strong>Aire</strong>, Inc. reserves the right to make design changes for the purpose of product improvement or to withdraw any design without notice.<br />
DAPA-IOM-1010 Rev A