Mach 120F/120 - Dr. Mach
Mach 120F/120 - Dr. Mach
Mach 120F/120 - Dr. Mach

Create successful ePaper yourself
Turn your PDF publications into a flip-book with our unique Google optimized e-Paper software.
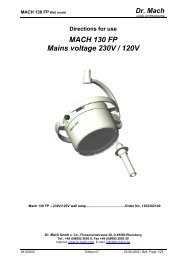
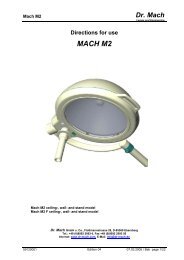
MACH <strong><strong>120</strong>F</strong>/<strong>120</strong> Ceiling, Wall, Stand model<br />
Instructions for use<br />
<strong>Dr</strong>. <strong>Mach</strong><br />
Lamps and Engineering<br />
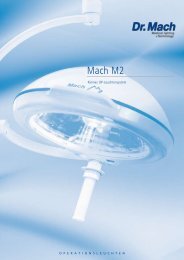
MACH <strong><strong>120</strong>F</strong>/<strong>120</strong><br />
Ceiling, Wall, new-type stand model<br />
<strong>Mach</strong> <strong><strong>120</strong>F</strong> ceiling lamp ____________________________ Order No. <strong>120</strong>2 2033 30<br />
<strong>Mach</strong> <strong>120</strong> ceiling lamp _____________________________ Order No. <strong>120</strong>1 1033 30<br />
<strong>Mach</strong> <strong><strong>120</strong>F</strong> wall lamp ______________________________ Order No. <strong>120</strong>2 2022 02<br />
<strong>Mach</strong> <strong>120</strong> wall lamp _______________________________ Order No. <strong>120</strong>1 1022 02<br />
<strong>Mach</strong> <strong><strong>120</strong>F</strong>, new-type stand model ___________________ Order No. <strong>120</strong>2 2013 00<br />
<strong>Mach</strong> <strong>120</strong>, new-type stand model ____________________ Order No. <strong>120</strong>1 1013 00<br />
<strong>Dr</strong>. <strong>Mach</strong> GmbH u. Co., Flossmannstrasse 28, D-85560 Ebersberg<br />
Tel.: +49 (0)8092 2093 0, Fax +49 (0)8092 2093 50<br />
Internet: www.dr-mach.com, E-mail: info@dr-mach.de<br />
59080001 Edition 04 09.10.2003 / Bak Page 1/16
MACH <strong><strong>120</strong>F</strong>/<strong>120</strong> Ceiling, Wall, Stand model<br />
List of contents<br />
<strong>Dr</strong>. <strong>Mach</strong><br />
Lamps and Engineering<br />
1. Safety instructions .......................................................................................... Page 3<br />
2. Operating the lamp <strong>Mach</strong> <strong><strong>120</strong>F</strong>/<strong>120</strong> ............................................................... Page 4<br />
2.1 ON/OFF switch ......................................................................................... Page 4<br />
2.2 Positioning ................................................................................................ Page 4<br />
2.3 Light field adjustment (focusing)............................................................... Page 4<br />
3. Cleaning.......................................................................................................... Page 5<br />
3.1 Sterilisable handle .................................................................................... Page 5<br />
3.2 Lamp head, protective disk....................................................................... Page 5<br />
4. Maintenance ................................................................................................... Page 6<br />
4.1 Adjustments at the ceiling/wall attachment and new-type stand .............. Page 6<br />
4.2 Adjustments at the lamp head .................................................................. Page 6<br />
4.3 Changing of spare parts ........................................................................... Page 7<br />
4.3.1 Changing the halogen bulbs................................................................ Page 7<br />
4.3.2 Changing the fuses ............................................................................. Page 7<br />
4.3.3 Changing the protective disk ............................................................... Page 8<br />
4.3.4 Changing the filter disk........................................................................ Page 9<br />
4.3.5 Conversion to sterilisable handle ........................................................ Page 10<br />
5. Data ................................................................................................................ Page 11<br />
5.1 Technical data .......................................................................................... Page 11<br />
5.2 Environmental conditions.......................................................................... Page 11<br />
6. Characteristics................................................................................................ Page 11<br />
6.1 Specification of bulb ................................................................................. Page 11<br />
6.2 Specification of fuse ................................................................................. Page 12<br />
6.3 CE-mark.................................................................................................... Page 12<br />
7. Disposal.......................................................................................................... Page 12<br />
8. Spare parts ..................................................................................................... Page 13<br />
8.1 <strong>Mach</strong> <strong><strong>120</strong>F</strong> ceiling/wall/stand model......................................................... Page 13<br />
8.2 <strong>Mach</strong> <strong>120</strong> ceiling/wall/stand model........................................................... Page 14<br />
8.3 Spare parts list.......................................................................................... Page 15<br />
59080001 Edition 04 09.10.2003 / Bak Page 2/16
MACH <strong><strong>120</strong>F</strong>/<strong>120</strong> Ceiling, Wall, Stand model<br />
1. Safety instructions<br />
Please pay attention to the directions for use when handling the lamp.<br />
Attention:<br />
<strong>Dr</strong>. <strong>Mach</strong><br />
Lamps and Engineering<br />
This device is not suitable for use in hazardous locations. The lamp is classified<br />
As a Group 1 device according to the MedGV (Medical Ordinance).<br />
Repairs to the lamp and special installation work on the reflector or plug-in socket should<br />
only be carried out by ourselves or a company expressly authorised by ourselves.<br />
The manufacturer is only responsible for the safety of the lamp if repairs and alterations have<br />
been carried out by themselves or a company who can guarantee that the safety regulations<br />
have been observed.<br />
The manufacturer is not liable for personal or material damages if the lamp is misappropriately<br />
or incorrectly operated or misused.<br />
The lamp body may only be dismantled from the swivel arm in reverse order of its assembly.<br />
Make sure that the lamp is in perfect working order before every use.<br />
59080001 Edition 04 09.10.2003 / Bak Page 3/16
MACH <strong><strong>120</strong>F</strong>/<strong>120</strong> Ceiling, Wall, Stand model<br />
GL<br />
08<br />
2. Operating the lamp <strong>Mach</strong> <strong><strong>120</strong>F</strong>/<strong>120</strong><br />
17<br />
50<br />
37<br />
16<br />
49<br />
<strong>Dr</strong>. <strong>Mach</strong><br />
Lamps and Engineering<br />
There are two types of <strong>Mach</strong> <strong><strong>120</strong>F</strong>/<strong>120</strong> -lamps<br />
available:<br />
• <strong>Mach</strong> <strong><strong>120</strong>F</strong> with focusable light field and dielectric<br />
light system Ra=93<br />
• <strong>Mach</strong> <strong>120</strong> with fix-focus and standard light system<br />
Ra=86<br />
The lamp types are equipped with an external<br />
transformer:<br />
• <strong>Mach</strong> <strong><strong>120</strong>F</strong>/<strong>120</strong>, voltage 22,8V / external transformer.<br />
2.1 ON/OFF switch<br />
The switch 37 with signal lamp at the lamp bow<br />
turns the lamp on and off.<br />
Because of the external transformer of the lamps,<br />
in addition to the switch 37 a two-pole switch<br />
ON/OFF must be provided by the customer.<br />
2.2 Positioning<br />
Use the handle 17/50 or the handle rail GL to position<br />
the lamp.<br />
There are two handle types available:<br />
• Handle 17<br />
The handle 17 is fixed to the handle bar 16 and<br />
can be removed.<br />
• Sterilizable handle 50<br />
The sterilizable handle can be removed for sterilisation.<br />
It is fixed by the couple to the handle<br />
bar 16.<br />
2.3 Light field adjustment<br />
- focusing (<strong>Mach</strong><strong><strong>120</strong>F</strong> only)<br />
The lamp models <strong>Mach</strong> <strong><strong>120</strong>F</strong> have a focusing<br />
function. That means, you can either enlarge the<br />
diameter of the light field or bundle the light to a<br />
smaller area, depending on the circumstances.<br />
To activate the focusing function, move lever 08 at<br />
the lamp head up and down (see figure).<br />
59080001 Edition 04 09.10.2003 / Bak Page 4/16
MACH <strong><strong>120</strong>F</strong>/<strong>120</strong> Ceiling, Wall, Stand model<br />
15<br />
Alc. ≤ 20 %<br />
50<br />
3. Cleaning<br />
3.1 Sterilisable handle<br />
<strong>Dr</strong>. <strong>Mach</strong><br />
Lamps and Engineering<br />
The lamps <strong>Mach</strong> <strong><strong>120</strong>F</strong>/<strong>120</strong> can be equipped as an<br />
option with a sterilisable handle 50.<br />
The sterilisable handle 50 can be removed and<br />
sterilised at temperatures up to a max. of 134°C.<br />
No other parts may touch the handle during sterilisation.<br />
The handle should be placed in a vertical<br />
position during sterilisation.<br />
3.2 Lamp head, protective disk<br />
The lamp has a high-quality surface, which can be<br />
cleaned with conventional cleaning agents.<br />
The protective disk 15 is made of an high-quality<br />
plastic. Pay attention to the following during cleaning:<br />
- Wipe over the disk 15 with a wet cloth (never<br />
use a dry cloth!).<br />
- Only use disinfectant with less then 20% alcohol.<br />
Wipe the disk 15 after cleaning with an antistatic,<br />
non-fluffy cloth.<br />
59080001 Edition 04 09.10.2003 / Bak Page 5/16
MACH <strong><strong>120</strong>F</strong>/<strong>120</strong> Ceiling, Wall, Stand model<br />
4. Maintenance<br />
<strong>Dr</strong>. <strong>Mach</strong><br />
Lamps and Engineering<br />
The lamp has been designed and built so that regular maintenance intervals are not necessary.<br />
In order to keep the system easy running throughout its life span we recommend that the hinges be<br />
greased once a year with an acid-free grease.<br />
20°<br />
B<br />
32<br />
A<br />
4.1 Adjustments at the ceiling/wall<br />
attachment and new-type stand<br />
♦ Adjusting the spring arm<br />
(new-type attachment)<br />
To adjust the spring force proceed as follows:<br />
a) The spring arm moves down on its own:<br />
• Pull the lamp head approx. 20° downwards until<br />
drilled hole B lies on the upper side of the joint<br />
between spring arm and horizontal arm and a<br />
screw is visible in the hole.<br />
• Insert a slotted screw driver into drilled hole B.<br />
• Turn adjusting screw to the left (anticlockwise),<br />
the spring force increases.<br />
b) The spring arm moves up on its own:<br />
• Pull the lamp head approx. 20° downwards until<br />
drilled hole B lies on the upper side of the joint<br />
between spring arm and horizontal arm and a<br />
screw is visible in the hole.<br />
• Insert a slotted screw driver into drilled hole B.<br />
Turn adjusting screw to the right (clockwise),<br />
the spring force decreases.<br />
4.2 Adjustments at the lamp head<br />
♦ Manipulating the lamp<br />
The lamp bow 32 enables a perfect movability and<br />
positioning of the lamps <strong>Mach</strong> <strong><strong>120</strong>F</strong>/<strong>120</strong>.<br />
The brake force in the axis A is set. It is usually not<br />
necessary to adjust it.<br />
59080001 Edition 04 09.10.2003 / Bak Page 6/16
MACH <strong><strong>120</strong>F</strong>/<strong>120</strong> Ceiling, Wall, Stand model<br />
01<br />
27<br />
11<br />
02<br />
<strong>Dr</strong>. <strong>Mach</strong><br />
Lamps and Engineering<br />
4.3 Changing of spare parts<br />
4.3.1 Changing the halogen bulbs<br />
<strong>Dr</strong>. <strong>Mach</strong> uses special halogen bulbs as illuminants.<br />
Only original <strong>Dr</strong>. <strong>Mach</strong> replacement bulbs may<br />
be used.<br />
The use of other bulbs can lead to a considerable<br />
reduction of the light power and increase in the<br />
thermal load.<br />
To change the bulbs proceed as follows:<br />
• Attention!! Turn off the lamp!<br />
• Loosen three screws 27 at the base frame 01.<br />
• Remove housing lower part 02 by pulling it<br />
downwards.<br />
Attention! If the bulb is changed immediately<br />
after operating the lamp, some parts of the lamp<br />
may be hot.<br />
Do not touch the halogen bulb with naked<br />
hands.<br />
• <strong>Dr</strong>aw halogen bulb 11 (22,8-24V/40W) carefully<br />
from its socket.<br />
• Put in the new halogen bulb.<br />
• Mount the housing lower part 02 in reverse order<br />
of dismounting it.<br />
Remark:<br />
The halogen bulbs have a service life of approx.<br />
1000 hours without any deterioration in their<br />
luminosity.<br />
4.3.2 Changing the fuses<br />
Because of the external transformer of the <strong>Mach</strong><br />
<strong>120</strong> lamps, the necessary fuses must be provided<br />
by the customer.<br />
Pay attention to the instructions from the local<br />
installer.<br />
59080001 Edition 04 09.10.2003 / Bak Page 7/16
MACH <strong><strong>120</strong>F</strong>/<strong>120</strong> Ceiling, Wall, Stand model<br />
27<br />
02<br />
54a<br />
54<br />
I.<br />
I.<br />
II.<br />
55<br />
II.<br />
55<br />
54b<br />
4.3.3 Changing the filter disk<br />
<strong>Dr</strong>. <strong>Mach</strong><br />
Lamps and Engineering<br />
The filter disk between reflector and protective disk<br />
(<strong>Mach</strong> <strong><strong>120</strong>F</strong> only) prevents a damaging heating of<br />
the illuminated area.<br />
ATTENTION!<br />
The lamps may not be used without this filter.<br />
To change the filter disk 55 proceed as follows:<br />
• Attention!! Turn off the lamp!<br />
• Remove housing lower part 02 as described at<br />
point 4.3.1.<br />
The filter disk 55 is held by the 4 springs (holders)<br />
54.<br />
• Press the filter disk 55 carefully against 2<br />
springs 54a (I.) and lift it off the other 2 springs<br />
54b (II.).<br />
• Insert the new filter disk in reverse order.<br />
Only use filter disks that have been cleaned<br />
properly.<br />
• Fix the housing lower part 02 as described at<br />
point 4.3.1.<br />
59080001 Edition 04 09.10.2003 / Bak Page 8/16
MACH <strong><strong>120</strong>F</strong>/<strong>120</strong> Ceiling, Wall, Stand model<br />
27<br />
02<br />
13 15<br />
13a 13b<br />
I.<br />
I.<br />
15<br />
II.<br />
II.<br />
<strong>Dr</strong>. <strong>Mach</strong><br />
Lamps and Engineering<br />
4.3.4 Changing the protective disk<br />
In case you notice a impediment of the light quality<br />
because of a dull protective disk, it may be necessary<br />
to change the disk.<br />
To change the disk proceed as follows:<br />
• Attention!! Turn off the lamp!<br />
• Remove housing lower part 02 as described at<br />
point 4.3.1.<br />
The protective disk 15 is held by the four springs<br />
(holders) 13.<br />
• Press the protective disk 15 against 2 springs<br />
13a ( I. ) and lift it off the other two springs 13b (<br />
II. ).<br />
• Insert the new protective disk in reverse order.<br />
Attention: Only use protective disks, that<br />
have been cleaned properly.<br />
• Fix the housing lower part 02 as described at<br />
point 4.3.1.<br />
59080001 Edition 04 09.10.2003 / Bak Page 9/16
MACH <strong><strong>120</strong>F</strong>/<strong>120</strong> Ceiling, Wall, Stand model<br />
Plastic hammer<br />
16<br />
ZS<br />
S<br />
17<br />
18<br />
16<br />
DK<br />
49<br />
S1<br />
<strong>Dr</strong>. <strong>Mach</strong><br />
Lamps and Engineering<br />
4.3.5 Conversion to sterilisable handle<br />
Extent of supply:<br />
− sterilisable handle sleeve<br />
− couple<br />
− one screw M4x35 DIN 912:A2 with safety lake<br />
• Turn off the lamp.<br />
• Remove covering cap 18 with a screw driver.<br />
• Loosen the screw S M4x6 DIN 7985 with a<br />
cross screw driver.<br />
• Remove screw S M4x6 DIN 7985 and lock<br />
washer ZS ∅4,3 DIN 6797.<br />
• Hold the handle, while removing the screw and<br />
the lock washer, to ensure no damaging in the<br />
lamp housing.<br />
• Remove handle 17 by using a plastic hammer<br />
(see arrow in figure).<br />
• Put couple 49 on the handle bar 16.<br />
• Fix couple 49 with the screw S1 M4x35 DIN<br />
912:A2 with safety lake.<br />
• Push the sterilizable handle sleeve on the couple<br />
49, so that it is secured by push-button DK.<br />
59080001 Edition 04 09.10.2003 / Bak Page 10/16
MACH <strong><strong>120</strong>F</strong>/<strong>120</strong> Ceiling, Wall, Stand model<br />
5.1 Technical data<br />
5. Data<br />
<strong>Mach</strong> <strong><strong>120</strong>F</strong>/<strong>120</strong> design with 22,8 Volt<br />
~ Wechselstrom alternating current<br />
Pr Primärseitig 230V / 0,22A primary side<br />
Sek Sekundärseitig 22,8V / 1,65A secondary side<br />
Leistungsaufnahme 40VA power consumption<br />
Hz Hertz-Frequenz 50 / 60Hz frequency Hertz<br />
Sicherung fuse<br />
Schutzgrad Type „B“ class of protection<br />
5.2 Environmental conditions<br />
Operation<br />
Min. Max.<br />
Temperature +10°C +40°C<br />
Relative atmospheric humidity 30% 75%<br />
Air pressure 700 hPa 1060 hPa<br />
Transport / storage<br />
Min. Max.<br />
Temperature -10°C +50°C<br />
Relative atmospheric humidity 20% 90%<br />
Air pressure 700 hPa 1060 hPa<br />
6.1 Specification of bulb<br />
22,8V 40W<br />
G 6,35<br />
HALOGEN<br />
6. Characteristics<br />
voltage, power<br />
socket<br />
mode of operation<br />
<strong>Dr</strong>. <strong>Mach</strong><br />
Lamps and Engineering<br />
59080001 Edition 04 09.10.2003 / Bak Page 11/16
MACH <strong><strong>120</strong>F</strong>/<strong>120</strong> Ceiling, Wall, Stand model<br />
6.2 Specification of fuse<br />
Design with 22,8 Volt<br />
<strong>Dr</strong>. <strong>Mach</strong><br />
Lamps and Engineering<br />
Because of the external transformer there are no fuses in the lamp head. When installing the lamp, the<br />
fuses must be provided by the customer.<br />
6.3 CE-mark<br />
The products <strong>Mach</strong> <strong><strong>120</strong>F</strong>/<strong>120</strong> comply to the standards 93/42/EEC for medical products of<br />
the European Community’s Council.<br />
7. Disposal<br />
The components of the lamp should be properly disposed at the end of its shelf-life.<br />
Make sure, that the materials are carefully separated.<br />
The lamp does not contain any danger goods. The components should be disposed according to the contained<br />
materials.<br />
59080001 Edition 04 09.10.2003 / Bak Page 12/16
MACH <strong><strong>120</strong>F</strong>/<strong>120</strong> Ceiling, Wall, Stand model<br />
10<br />
11 12<br />
54,14 15 55<br />
8. Spare parts<br />
8.1 <strong>Mach</strong> <strong><strong>120</strong>F</strong> ceiling/wall model<br />
08<br />
07<br />
27<br />
06<br />
02<br />
01<br />
04<br />
03<br />
33,34,39<br />
05 09<br />
54 12 55 15 20,21<br />
17<br />
38<br />
19<br />
50<br />
<strong>Dr</strong>. <strong>Mach</strong><br />
Lamps and Engineering<br />
32<br />
22<br />
23,24,25,26<br />
35,36<br />
37<br />
28,29<br />
59080001 Edition 04 09.10.2003 / Bak Page 13/16<br />
16<br />
49
MACH <strong><strong>120</strong>F</strong>/<strong>120</strong> Ceiling, Wall, Stand model<br />
10<br />
11 51<br />
54,14 15 56<br />
8.2 <strong>Mach</strong> <strong>120</strong> ceiling/wall model<br />
01<br />
53<br />
27<br />
02<br />
54<br />
03<br />
04 52 05<br />
51 56 15<br />
33,34,39<br />
20,21<br />
17<br />
38<br />
19<br />
50<br />
<strong>Dr</strong>. <strong>Mach</strong><br />
Lamps and Engineering<br />
32<br />
22<br />
23,24,25,26<br />
35,36<br />
37<br />
28,29<br />
59080001 Edition 04 09.10.2003 / Bak Page 14/16<br />
16<br />
49
MACH <strong><strong>120</strong>F</strong>/<strong>120</strong> Ceiling, Wall, Stand model<br />
8.3 Spare parts list<br />
<strong>Dr</strong>. <strong>Mach</strong><br />
Lamps and Engineering<br />
Item Qty. Name EDVNO Remarks<br />
01 1 Base frame 08030201<br />
02 1 Bottom part of lamp housing 080<strong>120</strong>03<br />
03 1 Cover 08030304<br />
04 4 Spacer sleeve 08062201<br />
05 8 Self-tapping screw M2,9x9,5 DIN 7981 65132005<br />
06 1 Saddle 0805<strong>120</strong>2 <strong>Mach</strong> <strong><strong>120</strong>F</strong> only<br />
07 1 Adjusting lever for focusing 0805<strong>120</strong>1 <strong>Mach</strong> <strong><strong>120</strong>F</strong> only<br />
08 1 Lever cap 740<strong>120</strong>12 <strong>Mach</strong> <strong><strong>120</strong>F</strong> only<br />
09 1 Socket for reflector 0805<strong>120</strong>3 <strong>Mach</strong> <strong><strong>120</strong>F</strong> only<br />
10 1 Lamp holder 67320001<br />
11 1 Halogen bulb 22,8V/40W 67100202<br />
12 1 Reflector unit <strong>Mach</strong> <strong><strong>120</strong>F</strong> (glass reflector) 08060002 <strong>Mach</strong> <strong><strong>120</strong>F</strong> only<br />
13 4 Holder 08012204<br />
14 4 Nut M3 DIN 934 65332002<br />
15 1 Protective disk 07200201<br />
16 1 Handle bar 08000204<br />
17 1 Handle 08030305<br />
18 1 Covering cap 08030306<br />
19 2 Screw M3x6 ULF with safety lake 65902003<br />
20 1 Holding plate 08000205<br />
21 4 Self-tapping screw M3,5x13 DIN 7981 65132007<br />
22 1 Brake disk 08000202<br />
23 1 Washer 10030210<br />
24 1 Plate spring DIN 2093 25x12,2x1 65982006<br />
25 1 Rotation block 08000203<br />
26 1 Nut M12x1 67900002<br />
27 3 Screw M3x6 ULF 65902001<br />
28 1 Line clamp 2-pole 07053202<br />
29 2 Self-tapping screw M2,9x16 DIN 7981 65132008<br />
30<br />
31<br />
32 1 Lamp bow 08100001<br />
33 1 Cover 07100201<br />
34 2 Screw M3x8 DIN 966 651<strong>120</strong>13<br />
35 1 Cover 08100201<br />
36 2 Screw M2,5x6 DIN 966 651<strong>120</strong>01<br />
37 1 2-pole ON/OFF switch (illuminated) 67340002<br />
38 1 Sliding contact with cable 08102001<br />
39 1 Insulating washer 740<strong>120</strong>01<br />
40<br />
41<br />
42<br />
43<br />
44<br />
45<br />
46<br />
47<br />
48<br />
49 1 Couple for sterilizable handle sleeve 10152001<br />
50 1 Sterilizable handle sleeve 21150002<br />
51 1 Reflector unit <strong>Mach</strong> <strong>120</strong> (metal sheet reflector) 08060001 <strong>Mach</strong> <strong>120</strong> only<br />
52 1 Holding plate 08062002 <strong>Mach</strong> <strong>120</strong> only<br />
59080001 Edition 04 09.10.2003 / Bak Page 15/16
MACH <strong><strong>120</strong>F</strong>/<strong>120</strong> Ceiling, Wall, Stand model<br />
<strong>Dr</strong>. <strong>Mach</strong><br />
Lamps and Engineering<br />
Pos. Stck Benennung EDVNR Bemerkung<br />
53 1 Cover 08030303 <strong>Mach</strong> <strong>120</strong> only<br />
54 4 Holder (spring) 08012202 <strong>Mach</strong> <strong><strong>120</strong>F</strong> only<br />
55 1 Conversion filter D130 Borofloat 67390202 <strong>Mach</strong> <strong><strong>120</strong>F</strong> only<br />
56 1 Heat protection filter 07250201 <strong>Mach</strong> <strong>120</strong> only<br />
59080001 Edition 04 09.10.2003 / Bak Page 16/16