36599-DFU - CooperSurgical
36599-DFU - CooperSurgical
36599-DFU - CooperSurgical

Create successful ePaper yourself
Turn your PDF publications into a flip-book with our unique Google optimized e-Paper software.
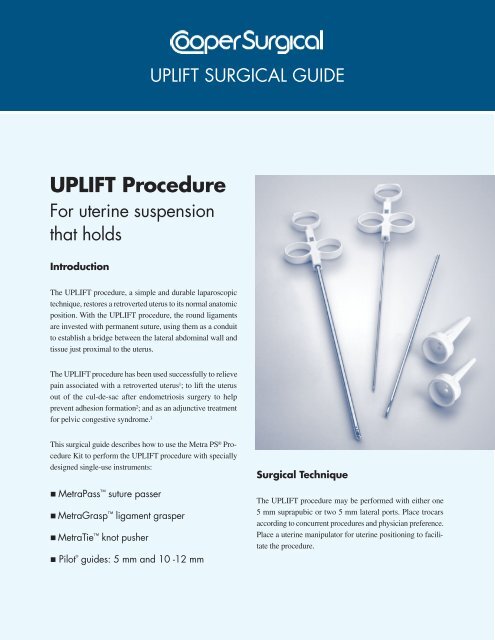
UPLIFT SURGICAL GUIDE<br />
UPLIFT Procedure<br />
For uterine suspension<br />
that holds<br />
Introduction<br />
The UPLIFT procedure, a simple and durable laparoscopic<br />
technique, restores a retroverted uterus to its normal anatomic<br />
position. With the UPLIFT procedure, the round ligaments<br />
are invested with permanent suture, using them as a conduit<br />
to establish a bridge between the lateral abdominal wall and<br />
tissue just proximal to the uterus.<br />
The UPLIFT procedure has been used successfully to relieve<br />
pain associated with a retroverted uterus 1 ; to lift the uterus<br />
out of the cul-de-sac after endometriosis surgery to help<br />
prevent adhesion formation 2 ; and as an adjunctive treatment<br />
for pelvic congestive syndrome. 3<br />
This surgical guide describes how to use the Metra PS ® Procedure<br />
Kit to perform the UPLIFT procedure with specially<br />
designed single-use instruments:<br />
MetraPass suture passer<br />
MetraGrasp ligament grasper<br />
MetraTie knot pusher<br />
Pilot ®<br />
guides: 5 mm and 10 -12 mm<br />
Surgical Technique<br />
The UPLIFT procedure may be performed with either one<br />
5 mm suprapubic or two 5 mm lateral ports. Place trocars<br />
according to concurrent procedures and physician preference.<br />
Place a uterine manipulator for uterine positioning to facilitate<br />
the procedure.
Locate the Skin Nicks<br />
1. Under laparoscopic visualization, externally palpate<br />
the abdominal wall to identify the superior point where<br />
the round ligament attaches to the lateral abdominal<br />
wall. This location will be used to position the skin<br />
nick lateral and superior to the entry point of the round<br />
ligament to the inguinal canal.<br />
Imagine a straight line from the skin nick to the uterus<br />
that passes through the round ligament (Figure A).<br />
Figure B<br />
3. Ensure that the suture rests fully within the recessed<br />
portion of the MetraPass suture passer (Figure C). The<br />
MetraPass suture passer is designed to hold suture<br />
securely within a recessed notch and closes to a needle<br />
point to facilitate passage through tissue.<br />
Figure A<br />
As a general rule, measure two finger breadths up from<br />
the pubic symphysis and two finger breadths over.<br />
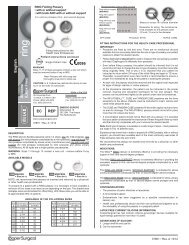
2. To locate the suture passer path and guide placement of<br />
the skin nicks, puncture the skin with a 20-22 gauge<br />
spinal needle filled with 10 cc of 1% lidocaine or 0.5%<br />
bupivacaine and insert it along the proposed path of the<br />
suture passer. Inject the local anesthetic while withdrawing<br />
the needle after assuring a non-vascular location.<br />
Local anesthetic injection assists with post-operative pain<br />
management. It also enhances the volume of the round<br />
ligament for easier identification and navigation.<br />
Use a scalpel tip to make a 2-3 mm skin nick. Repeat the<br />
process on the other side.<br />
Figure C<br />
4. Position the MetraGrasp ligament grasper through a<br />
trocar port. Hold the round ligament as the suture<br />
passer traverses within the ligament, exerting counter<br />
pressure as necessary to facilitate passage (Figure D).<br />
The MetraGrasp ligament grasper features an indentation<br />
designed to prevent trauma to the round ligament.<br />
Use the uterine manipulator to move the uterus to the<br />
contralateral side to stretch the round ligament to<br />
facilitate suture passage. Some resistance may be<br />
encountered.<br />
Invest the Round Ligaments<br />
1. Use the MetraPass suture passer to grasp the suture.<br />
We suggest a size 0 non-absorbable, monofilament<br />
surgical suture in a 30” (75 cm) length. If the suture has<br />
a needle, it should be removed by the physician prior<br />
to use.<br />
2. Insert the suture passer tip in line with the round<br />
ligament. Pass through the fascia and muscle (Figure B).<br />
The suture passer tip should be positioned preperitoneally<br />
at the entrance to the round ligament.<br />
Figure D
5. Traverse the length of the round ligament with the<br />
suture passer and exit about 1 cm proximal to the<br />
attachment point with the uterus. The suture is then<br />
dropped, leaving an approximately 6-inch tail. (Figure E).<br />
Figure F<br />
Figure E<br />
It is not necessary to remain within the round ligament as<br />
it is traversed. If the MetraPass suture passer pushes<br />
through the round ligament, withdraw the suture passer<br />
until it is back within the round ligament and continue the<br />
traverse. If the round ligament becomes friable as it is<br />
traversed, weave in and out with the MetraPass suture<br />
passer to obtain bites of tissue along the round ligament<br />
to create a secure suspension.<br />
To facilitate exit of the suture passer from the round<br />
ligament and avoid puncture of the uterus, use the<br />
MetraGrasp ligament grasper to exert counter pressure<br />
on the ligament.<br />
8. Place a clamp on the suture ends to temporarily hold<br />
the suture in place while the other round ligament is<br />
invested.<br />
9. Repeat steps 1-7 on the opposite side of the uterus.<br />
Reposition the Uterus<br />
1. Once both sides have been invested with suture, remove<br />
the uterine manipulator so a correct anatomic position can<br />
be approximated. Pull on the ends of the suture until the<br />
round ligaments are shortened appropriately, gently lifting<br />
the uterus into a slightly anteverted position on the<br />
midline. Tie the suture (Figure G).<br />
Suture<br />
After dropping the suture in the abdominal cavity, grasp<br />
the suture with the MetraGrasp ligament grasper. Hold<br />
the suture in place while removing the MetraPass suture<br />
passer from the ligament and abdominal wall.<br />
6. For the second pass, insert the MetraPass suture<br />
passer through the same skin nick, so that the tip is positioned<br />
preperitoneally at the entrance to the round ligament<br />
(Figure E). Leave a 0.5 cm space between the first<br />
insertion and second insertion at the fascial level to<br />
create a fascial bridge to support the tied suture.<br />
When creating the fascial bridge, the second entry<br />
point should be made across the fibers of the fascia<br />
from cephalad to caudad. Entering along the fibers<br />
may cause the suture to pull out.<br />
7. Traverse the round ligament with the MetraPass,<br />
exiting the ligament about 1 cm proximal to the initial<br />
exit point (Figure F). Grasp the free end of the suture with<br />
the MetraPass. Retrieve the suture through the round<br />
ligament and abdominal wall.<br />
Figure G<br />
2. Use the MetraTie knot pusher to position the knot<br />
below the skin and above the fascia (Figure H). Do not<br />
over tighten. Over tightening may cause post-operative<br />
pain. The MetraTie knot pusher is designed with a slot<br />
which will allow approximately 0.25 inches of slack<br />
when tying sutures.<br />
Figure H<br />
3. Close the skin nick sites according to physician preference.
Close the trocar Wounds<br />
Perform full-thickness closure of all trocar sites as<br />
described below:<br />
1. Insert the Pilot guide with<br />
the holes aligned cephalad to<br />
caudad. Use the MetraPass<br />
suture passer to push suture<br />
material through the Pilot<br />
guide, fascia, muscle and<br />
peritoneum into the abdomen.<br />
Drop the suture, and remove<br />
the suture passer.<br />
2. Push the suture passer<br />
through the opposite side<br />
of the Pilot guide and pick<br />
up the suture.<br />
1<br />
Skin<br />
Fat<br />
Fascia<br />
Peritoneum<br />
resolution following the procedure may take 1-3 days while<br />
any swelling decreases. Referred or radiating pain in the labia<br />
or upper thigh may be indicative of nerve entrapment. In this<br />
case, the suture should be cut on the painful side to relieve<br />
tension on the nerve. Unilateral suture release may resolve<br />
the pain and still maintain uterine position.<br />
Minimizing the Possibility<br />
of Nerve Entrapment<br />
To help minimize the possibility of nerve entrapment, locate<br />
the skin nick lateral and superior to the origination of the<br />
round ligament at its most superior attachment to the abdominal<br />
wall (the exit point of the round ligament from the<br />
inguinal canal). Locating the nicks at this level will allow for<br />
suspension of the uterus without entrapment of the iliohypogastric,<br />
ilioinguinal and genitofemoral nerves (Figure 1).<br />
2 3 4<br />
Ilioinguinal<br />
3. Pull the suture up through the peritoneum, muscle,<br />
fascia and guide.<br />
4. Remove the Pilot guide and tie.<br />
Surgical Tips<br />
TIP: Managing post-operative pain<br />
To help prevent post-operative pain, a local anesthetic may<br />
be injected percutaneously through the course of the round<br />
ligaments.<br />
To help prevent irritation at the skin nick sites, bury the<br />
suture tails.<br />
<br />
<br />
Leave approximately 0.25 inches of suture material<br />
after the final throw.<br />
Grasp the tail with the MetraPass suture passer and bury<br />
it between the skin and fascia.<br />
In case of post-operative pain, the patient may require injection<br />
of a local anesthetic such as 0.5% bupivacaine. Pain<br />
TIP: Concurrent procedures<br />
When the uplift procedure is performed in conjunction with<br />
other laparoscopic procedures, it is best to perform it last. Removal<br />
of the uterine manipulator allows the uterus to be lifted<br />
gently into a slightly anteverted position on the midline.<br />
TIP: Define the round ligaments<br />
To increase the tissue volume of the round ligaments for easier<br />
traverse, gently squeeze along the length with the Metra-<br />
Grasp ligament grasper.<br />
REFERENCES<br />
Figure 1<br />
1<br />
Carter JE. Carter-Thomason uterine suspension and positioning by ligament<br />
investment, fixation and truncation. J Reprod Med 1999;44:417-422.<br />
2<br />
Ivey JL. Laparascopic uterine suspension as an adjunctive procedure at the time<br />
of laser laparoscopy for the treatment of endometriosis. J. ReprodMed 1992;37:<br />
757-765.<br />
3<br />
Perry CP. Current concepts of pelvic congestion and chronic pelvic pain. JSLS<br />
2001;5:105-110.<br />
95 Corporate Drive, Trumbull, CT 06611 • 203.601.5200 • 800.243.2974 • Fax 800.262.0105 <strong>36599</strong> • Rev. B • 06/10<br />
www.coopersurgical.com<br />
©<br />
2010 <strong>CooperSurgical</strong>, Inc.<br />
The marks bearing the symbol TM are trademarks of <strong>CooperSurgical</strong>.<br />
The marks bearing the symbol ® are registered trademarks of <strong>CooperSurgical</strong>.