Elevest® Procedure Document - CooperSurgical
Elevest® Procedure Document - CooperSurgical
Elevest® Procedure Document - CooperSurgical

You also want an ePaper? Increase the reach of your titles
YUMPU automatically turns print PDFs into web optimized ePapers that Google loves.
References<br />
Epidemiology<br />
Hendrix SL, Clark AC, Nygaard I, et al. Pelvic organ<br />
prolapse in the Women’s Health Initiative: gravity and<br />
gravidity. Am L Obstet Gynecol 2002; 186: 1160-1166<br />
Of the 16,616 women studied, 14.2% had uterine prolapse.<br />
Hispanic women had the highest risk. Parity and obesity<br />
were strongly associated with increased risk.<br />
Olsen AL, Smith VJ, Bergstrom JO, et al. epidemiology of<br />
surgically managed pelvic organ prolapse and urinary<br />
incontinence. Obstet Gynecol 1997; 89:501-506.<br />
A retrospective study of 149,554 women age 20 or older<br />
found an 11.1% lifetime risk of undergoing a single surgery<br />
for pelvic organ prolapse or incontinence. Most patients<br />
were older, post menopausal, parous, and overweight.<br />
Re-operation was common (29.2% of cases), and the time<br />
between repeat procedures decreased with successive<br />
repairs.<br />
Repair of Prolapse with the<br />
Uterosacral Ligaments<br />
Buller JL, Thompson JR, Cundiff GW, et all. Uterosacral<br />
ligament: description of anatomic relationships to optimize<br />
surgical safety. Obstet Gynecol 2001;97:873-879.<br />
A cadaver evaluating the optimum site in the uterosacral<br />
ligament for suspension with regard to adjacent anatomy<br />
and suspension strength found that the optimal fixation site<br />
is the intermediate portion of the uterosacral ligament 1 cm<br />
posterior to its most anterior palpable margin.<br />
Yen CF, Wang CJ, Lin SL, et al. Combined laparoscopic<br />
uterosacral and round ligament procedures for treatment<br />
of symptomatic uterine retroversion and mild uterine decensus.<br />
J Am Assoc Gynecol Laparosc 2002;9:355-362.<br />
A prospective study of 31 women with an average of follow-up<br />
of 3.3 years demonstrated the laparascopic shortening<br />
of the uterosacral ligaments combined with uterine<br />
suspension achieved long-lasting results in repositioning<br />
the uterus and relieving symptoms.<br />
Barber MD, Visco AG, Weidner AC, et al Bilateral<br />
uterosacral ligament vaginal vault suspension with<br />
site-specific endopelvic fascia defect repair for treatment<br />
of pelvic organ prolapse. Am J Obstet Gynecol<br />
2000;183:1402-1411.<br />
A study of 46 women demonstrated that suspension of the<br />
vaginal cuff of the vaginal cuff to the uterosacral ligaments<br />
combined with site specific repair of the endopelvic fascia<br />
defects provided excellent anatomic and functional correction<br />
of pelvic organ prolapse in most women.<br />
McKinney TB, Rogers R, Shraga J. Laparoscopic vaginal<br />
vault suspension utilizing uterosacral ligament fixation for<br />
uterine and vaginal vault prolapse. Obstet Gynecol<br />
1999;93(supple):S62.<br />
A study of 60 women with stage II or greater uterine or<br />
vault prolapse found that laparoscopic repair using the<br />
uterosacral ligaments resulted in successful correction with<br />
no failures in up to four year follow-up.<br />
Lin LL, Phelps JY, Liu CY. Laparoscopic vaginal vault<br />
suspension using uterosacral ligaments: A review of 133<br />
cases. J Min Inv Gyn 2005;12:216-220.<br />
A retrospective analysis of 133 women with vaginal vault<br />
or uterovaginal prolapse who underwent laparoscopic<br />
uterosacral ligament suspension with post-operative follow-up<br />
of 2.0-7.3 years showed 87.2% without recurrence.<br />
Ordering Information<br />
E-Z Pass suture passer<br />
MetraPass suture passer<br />
DuoGrasp grasper<br />
DuoTie knot pusher<br />
Pilot ® guides - 5mm, 10/12 mm<br />
Investa ® suture<br />
To order, contact your <strong>CooperSurgical</strong> representative.<br />
95 Corporate Drive, Trumbull, CT 06611 • 203.601.5200 • 800.243.2974 • Fax 800.262.0105 Form # 81265 07/07<br />
www.coopersurgical.com • © 2007 <strong>CooperSurgical</strong>, Inc.
COOPERSURGICAL CLINICAL COMMENTARY<br />
CLINICAL INFORMATION FOR PHYSICIANS AND CLINICAL STAFF<br />
AUGUST 2007 ■ ISSUE #3<br />
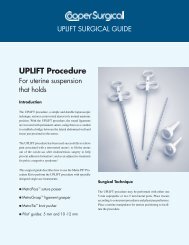
Elevest ® <strong>Procedure</strong><br />
First choice in uterine<br />
prolapse repair<br />
The ELEVEST procedure, an elegant solution for uterine<br />
prolapse repair, shortens and strengthens the uterosacral and<br />
round ligaments to restore the uterus to its normal anatomic<br />
position.<br />
Physicians now have the option to treat uterine prolapse in the<br />
most modern way - with laparascopic techniques using the<br />
patient’s own support structures.<br />
This surgical guide describes how to perform the ELEVEST<br />
procedure using the specially designed instruments in the<br />
ELEVEST <strong>Procedure</strong> Kit:<br />
<br />
<br />
<br />
<br />
E-Z Pass suture passer<br />
Curved needle designed for easy entry<br />
into the uterosacral ligaments<br />
MetraPass suture passer<br />
Curved needle designed to traverse the<br />
round ligaments<br />
DuoGrasp grasper<br />
Dual surfaces designed to hold the<br />
uterosacral ligaments securely and to<br />
manipulate the round ligaments<br />
atraumatically<br />
DuoTie knot pusher<br />
Open ended design for fast and secure<br />
extracorporeal knot tying<br />
<br />
<br />
Pilot ® guides<br />
Assure quick and consistent full-thickness<br />
closure of all port sites<br />
INVESTA ® suture<br />
Permanent suture designed to pass through tissue<br />
easily and maintain strenght under tension<br />
Elevest provides patients with an alternative to hyserectomy,<br />
expands the surgeon’s treatment options and enhances the<br />
physician’s practice.
Uterosacral Ligaments<br />
Properly support the uterus by shortening and strengthening<br />
the uterosacral ligaments as described below.<br />
1. Place trocars according to procedure demands and physician<br />
preference.<br />
5. For increase control, use the DuoGrasp grasper to apply<br />
counter traction by pressing the uterosacral ligament over<br />
the E-Z Pass suture passer. Using pressure, angle the sut<br />
u r e<br />
passer to pass through the uterosacral ligament. Release<br />
the suture, and remove the suture passer (Figure C).<br />
2. Insert a uterine manipulater and lift the uterus into an<br />
anteverted position. Under laparoscopic visualization,<br />
identify the uterosacral ligaments and the ureters. If<br />
necessary, release the ureters bilaterally by incising the<br />
peritoneum lateral to the uterosacral ligaments to prevent<br />
kinking.<br />
3. Load the E-Z Pass suture passer with a 36 inch length of<br />
braided permanent Size 0 suture and insert through the<br />
ipsilateral trocar port. an e-PTFE suture may also be used.<br />
Note: Ensure that the suture rests within the recessed<br />
portion of the suture passer (Figure A).<br />
Figure C<br />
6. Grasp the suture again with the E-Z Pass suture passer.<br />
Place a second suture through the midpoint of the<br />
uterosacral ligament using the technique described in<br />
Step 4 (Figure D).<br />
Note: For best results, use the DuoGrasp grasper to hold<br />
the uterosacral ligament away from the bowel and other<br />
pelvic structures.<br />
Figure A<br />
4. Grasp the uterosacral ligament from the contra,lateral side<br />
with the DuoGrasp grasper and use traction to hold it<br />
taut. Place the first suture in the posterior 1/3 of the<br />
uterosacral ligament as close to the ischial spine as<br />
possible for maximum uterine support (Figure B).<br />
Figure D<br />
Figure B
7. With the suture in the jaw of the suture passer, use the<br />
same technique to place a total of 3 or 4 sutures in the<br />
uterosacral ligament. The last suture should be placed ≤<br />
1 cm from the cervix (Figure E).<br />
Other Suturing Options<br />
Option 1: Using the unloaded suture passer through the<br />
uterosacral ligament (Figure H).<br />
<br />
<br />
<br />
Grasp the suture, and pull the suture passer back<br />
through the ligament (Figure I).<br />
Pass the unloaded suture passer through the uterosacral<br />
ligament (Figure H).<br />
Graspe the suture, and pull the suture passer back<br />
through the ligament (Figure I).<br />
Figure E<br />
8. After the uterosacral ligament has been invested with<br />
the suture, grasp the ends of the suture and pull it<br />
through the trocar. Tie an extracorporeal knot, and use<br />
the DuoTie knot pusher to push it down to the level of<br />
the ligament, thereby shortening the ligament. tie additional<br />
knots to secure suture (Figure F).<br />
Figure H<br />
Figure I<br />
Figure F<br />
9. Repeat steps 3-8 on the other side (Figure G).<br />
Option 2: Using running sutures<br />
Running sutures may also be used when investigating the<br />
uterosacral ligaments (Figure J).<br />
Figure G<br />
Figure J
Uterosacral ligaments<br />
TIP: Managing a wide cul-de-sac<br />
In cases of a wide cul-de-sac, provide additional support by<br />
plicating the uterosacral ligaments together after they have<br />
been invested with suture (Figure K).<br />
Pass the loaded E-Z Pass suture passer through each of<br />
the invested uterosacral ligaments. Tie a series of extracorporeal<br />
knots and tighten them down to the plication.<br />
Properly position the uterus by shortening and strengthening<br />
the round ligaments as described below.<br />
Locate the Skin Nicks<br />
1. Under laparascopic visualization, externally palpate the<br />
the abdominal wall to identify the superior point where<br />
the round ligament attaches to the lateral abdominal<br />
wall. this location will be used to position the skin nick<br />
lateral and superior to the entry point of the round<br />
ligament to the inguinal canal.<br />
2. Imagine a straight line from the skin nick to the uterus<br />
that passes through the round ligament (Figure L). As a<br />
general rule, measure two finger breadths up from the<br />
public symphsis and two finger breadths over.<br />
Figure K<br />
Tip: Invest the uterosacral ligaments first<br />
It is easier to achieve correct uterine position after the uterine<br />
manipulator is removed. Therefore, it is preferable to<br />
invest the uterosacral ligaments first followed by the round<br />
ligaments.<br />
However, the Elevest® procedure has also been performed<br />
successfully by investing the round ligaments first.<br />
Figure L<br />
3. To locate the suture passer path and guide placement of<br />
the skin nicks, puncture the skin with a 20-22 gauge<br />
spinal needle filled with 10 cc of 1% lidocaine or 0.5%<br />
bupivacaine and insert it along the proposed path of the<br />
suture passer. Inject the local anesthetic injection assists<br />
with post-operative pain management. It also enhances<br />
the volume of the round ligament for easier identification<br />
and navigation.<br />
4. Use a scalpel tip to make a 2-3 mm skin nick. Repeat<br />
the process on the other side.
Invest the Round Ligaments<br />
1. Use the MetraPass suture passer to grasp the<br />
INVESTA ® suture. Leave an approximately 6 inch tail.<br />
INVESTA suture is size 0 monofilament, polybutester<br />
suture. It is lubricious, designed to pass through tissue<br />
easily, and maintains strength under tension.<br />
Note: Insure that the suture rests within the recessed<br />
portion of the suture passer (Figure M).<br />
3. Position the DuoGrasp grasper through the contralateral<br />
trocar port. Hold the round ligament as the suture<br />
passer traverses within the ligament , exerting counter<br />
pressure as necessary to facilitate passage (Figure O).<br />
The DuoGrasp grasper features an indentation designed<br />
to prevent trauma to the round ligament. Use the uterine<br />
manipulator to move the uterus to the contralateral side<br />
to stretch the round ligament to facilitate suture<br />
pas-sage. Some resistance may be encountered.<br />
Figure M<br />
2. Insert the suture passer tip in line with the round<br />
ligament. Pass through the fascia and muscle (Figure<br />
N). the suture passer tip should be positioned preperitoneally<br />
at the entrance to the round ligament.<br />
Figure O<br />
4. Traverse the length of the round ligament with the<br />
suture passer and exit about 1 cm proximal to the<br />
attachment point with the uterus. Release the<br />
INVESTA suture , leaving approximately a 6 inch tail<br />
(Figure P).<br />
To facilitate exit of suture passer from the round<br />
ligament and avoid puncture of the uterus, use the<br />
DuoGrasp grasper to exert counter pressure on the<br />
ligament.<br />
Figure N<br />
Figure P
Round Ligaments<br />
Tip: Traversing the round ligaments<br />
It is not necessary to remain within the round ligament as<br />
it is traversed. If the MetraPass suture passer pushes<br />
through the round ligament, withdraw the suture passer<br />
until it is back within the round ligament and continue the<br />
traverse. If the round ligament becomes friable as it is traversed,<br />
weave in and out with the MetraPass suture passer<br />
to obtain bites of tissue along the round ligament to create<br />
a secure suspension.<br />
Reposition the Uterus<br />
1. Once both sides have been invested with suture, remove<br />
the uterine manipulator so a correct anatomic position<br />
can be approximated. Pull on the ends of the sutures<br />
until the round ligaments are shortened appropriately,<br />
gently lifting the uterus into a slightly anteverted<br />
position on the midline mimicking the patient’s normal<br />
anatomy. Tie the suture with 3-4 knots (Figure R).<br />
5. Grasp the INVESTA® suture with the DuoGrasp <br />
grasper. Hold the suture in place and completely withdraw<br />
the MetraPass suture passer.<br />
6. For the second pass, insert the MetraPass suture passer<br />
through the same skin nick, so that the tip is positioned<br />
preperitoneally at the entrance to the round ligament<br />
(Figure P). Leave a 0.5 - 1.0 cm space between the first<br />
insertion and second insertion at the fascial level to<br />
create a fascial bridge to support the tied suture.<br />
Note: When creating the fascial bridge, the second entry<br />
point should be made across the fibers of the fascia<br />
from cephalad to caudad. Entering along the fibersmay<br />
cause the suture to pull out.<br />
INVESTA<br />
Figure R<br />
2. Use the metraTie knot pusher to position each knot<br />
below the skin and above the fascia (Figure S). Do not<br />
over-tighten the sutures as it may cause post-operative<br />
pelvic pain. the MetraTie knot pusher is designed with<br />
a slot which will allow approximately 0.25 inches of<br />
slack when tying sutures.<br />
7. Traverse the round ligament with the MetraPass suture<br />
passer, exiting the ligament about 1 cm proximal to the<br />
initial exit point (Figure Q). Grasp the free end of the<br />
suture with the MetraPass suture passer. Retrieve the<br />
suture through the round ligament and abdominal wall.<br />
Figure S<br />
3. To minimize post-operative irritation at the skin nicks,<br />
grasp the suture tails with the MetraPass suture Passer<br />
and embed them in the fascia.<br />
Figure Q<br />
4. Close the skin nicks according to physician preference.<br />
8. Place a clamp on the suture ends to temporarily hold<br />
the suture in place while the other round ligament is<br />
invested.<br />
9. Repeat steps 1-8 on the oppositie side.
Tip: Managing post-operative pain<br />
To help prevent post-operative pain, a local anesthetic may<br />
be injected percutaneously through the course of the round<br />
ligaments.<br />
In case of post-operative pain, the patient may require<br />
injection of a local anesthetic such as 0.5% bupivacaine.<br />
Pain may take 1-3 days to resolve as any swelling decreases.<br />
Referred or radiating pain in the labia or upper thigh may<br />
indicate nerve entrapment. Cut the suture on the painful side<br />
to relieve tension on the nerve. Unilateral suture release may<br />
resolve the pain and still maintain uterine position.<br />
Tip: Minimize the possibility of<br />
nerve entrapment<br />
Perform full-thickness closure of all port sites (Figure<br />
U).<br />
1. Insert the Pilot® guide with the holes aligned perpendicular<br />
to the abdominal wall defect. use the suture passer<br />
to push suture through the pilot guide, fascia, muscle,<br />
and peritoneum into the abdomen. Drop the suture and<br />
remove the suture passer.<br />
2. Push the suture passer through the oppositie side of the<br />
Pilot guide and pick up the suture.<br />
3. Pull the suture up through the peritoneum, muscle,<br />
fascia, and guide.<br />
4. Remove the Pilo guide and tie.<br />
Nerve entrapment occurs rarely. To help minimize this<br />
possibility, locate the skin nick lateral and superior to the<br />
origination of the round ligament at its most superior<br />
attachment to the abdominal wall (the exit point of the round<br />
ligament from the inguinal canal). Locating the nicks at this<br />
level will allow for suspension of the uterus without entrapment<br />
of the illioinguinal, iliohypogastric and genitofemoral<br />
nerves (figure T).<br />
1 2<br />
3 4<br />
Figure T