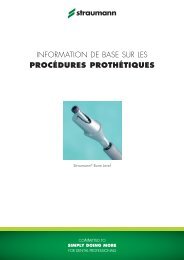
Basic information on the surgical procedures - Straumann
Basic information on the surgical procedures - Straumann
Basic information on the surgical procedures - Straumann

Create successful ePaper yourself
Turn your PDF publications into a flip-book with our unique Google optimized e-Paper software.
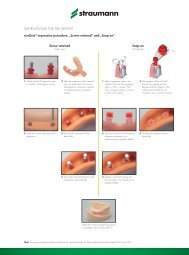
4.2 Opening <strong>the</strong> implant package<br />
<strong>Straumann</strong> ® SLActive<br />
1<br />
Step 1 – Open <strong>the</strong> blister and remove <strong>the</strong> vial<br />
Note<br />
The blister ensures <strong>the</strong> sterility of <strong>the</strong> implant. Do not open<br />
<strong>the</strong> blister until immediately prior to implant placement.<br />
2<br />
Step 2 – Open <strong>the</strong> vial<br />
Turn <strong>the</strong> lid in counterclockwise directi<strong>on</strong>. Keep <strong>the</strong> vial<br />
upright to prevent <strong>the</strong> liquid from flowing out.<br />
Note<br />
If <strong>the</strong> implant carrier is not firmly attached to <strong>the</strong> lid, screw<br />
in <strong>the</strong> lid <strong>on</strong>ce again.<br />
3<br />
Step 3 – Detach <strong>the</strong> implant carrier<br />
Detach <strong>the</strong> implant carrier from <strong>the</strong> lid by pulling it off<br />
manually.<br />
Note<br />
After removing <strong>the</strong> implant from <strong>the</strong> soluti<strong>on</strong>, <strong>the</strong> chemical<br />
activity of SLActive ® is ensured for 15 minutes.<br />
44<br />
4. Surgical <strong>procedures</strong> 4.2 Opening <strong>the</strong> implant package