Chip Blaster manual - Salvex
Chip Blaster manual - Salvex
Chip Blaster manual - Salvex

Create successful ePaper yourself
Turn your PDF publications into a flip-book with our unique Google optimized e-Paper software.
<strong>Chip</strong>BLASTER, Inc. 108<br />
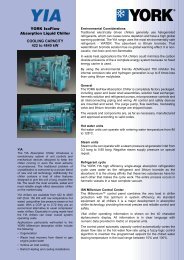
27.0. OPTIONAL EQUIPMENT (Cont.):<br />
27.21. OPTIONAL DROP IN CHILLER (Cont.):<br />
WARNING<br />
DO NOT ATTEMPT TO START UP THIS COOLER UNTIL YOU HAVE READ THROUGH THE<br />
INSTRUCTIONS COMPLETELY. IMPROPER START-UP WILL VOID THE COOLER<br />
WARRANTY AND DAMAGE THE MACHINE.<br />
27.21.1. UNCRATING & INSPECTION<br />
27.21.1.1. Rough handling during shipment may cause obvious and / or concealed<br />
damage. Upon arrival, the cooler should be inspected carefully and<br />
claims for damage must be filed immediately with the trucker.<br />
27.21.1.2. When uncrating the cooler, inspect it thoroughly for signs of concealed<br />
damage. Coolers that have been dropped or shipped on their side may<br />
not show external damage. If damages are found, a claim must be filed<br />
with the carrier within thirty days of delivery.<br />
27.21.2. COOLER PLACEMENT<br />
27.21.2.1.The cooler is designed to be mounted on top of a tank with the stainless<br />
steel evaporator coils fully immersed. Tank liquid level should be<br />
maintained within 8” of the top of the tank. Lower liquid level will<br />
reduce the cooling capacity or damage the compressor. The cooler<br />
should never be operated without the stainless steel evaporator coils<br />
completely immersed in liquid.<br />
27.21.2.2. The cooler is provided with an air intake filter that must be kept clean.<br />
The cooler will draw air in through the air filter on the front panel and<br />
exhale air through the top. It is imperative that these vents remain open<br />
to permit the free movement of air. Lack of adequate cool air will cause<br />
a reduction in cooling capacity and/or completely shutdown the<br />
refrigeration compressor.<br />
(Two feet of open space on air intake and discharge).<br />
27.21.2.3. The cooler is provided with two lifting eyebolts. Use these two<br />
eyebolts to lift the cooler and place it in position on the sump tank.<br />
The cooler cabinet should be securely fastened to the sump top.<br />
27.21.3. ELECTRICAL HOOK-UP<br />
27.21.3.1. See Electrical diagram attached. The cooler is wired for 230 Volt /60<br />
Hertz /1 Phase. Check name plate to verify the proper voltage, hertz<br />
and phase. The supply voltage must be within 10% of the rated voltage<br />
on the tag. Make ground connection to the grounding screw provided.<br />
Check for loose wires. The power connection should be made to the<br />
terminals tagged L1 and L2 on the terminal strip in the junction box on<br />
the right side panel.<br />
27.21.3.2. Terminals #10 and #11 are wired to a HIGH TEMPERATURE<br />
interlock switch. This switch opens when coolant temperature exceeds<br />
a high temperature setting (See attached temperature controller<br />
instructions on adjusting this setting).<br />
27.21