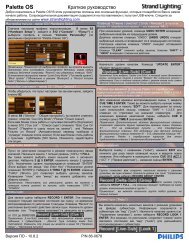
All markets - Selecon
All markets - Selecon
All markets - Selecon

You also want an ePaper? Increase the reach of your titles
YUMPU automatically turns print PDFs into web optimized ePapers that Google loves.
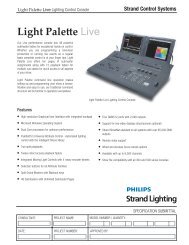
PL1 LED Luminaires<br />
Installation & User’s Manual<br />
PL1 LED LUMINAIRE OVERVIEW<br />
1. PL1 LED Luminaire Components<br />
Luminaire Components<br />
5<br />
1<br />
6<br />
8<br />
2<br />
3<br />
4<br />
1) LCD Display Menu (see "LCD Display / Menu"<br />
on page 5 for more information)<br />
2) Tilt Axis Point (see detail)<br />
3) Lens Barrel<br />
4) Locking Focus / Zoom Knob<br />
5) Mounting Point<br />
6) DMX512 In/Out Connections - both ports are In /<br />
Out (see detail)<br />
7) Diffuser / Accessory Holder<br />
8) IR Programming window<br />
9) <strong>All</strong>en Wrench Tool (part number ARLAKTOOL,<br />
included with luminaire) contains 2.5mm, 3mm,<br />
4mm & 5mm <strong>All</strong>en hex keys for locking pan or<br />
tilt.<br />
DMX512 In / Out Connections<br />
7<br />
9<br />
Tilt Axis Label<br />
6<br />
2<br />
30<br />
60<br />
90<br />
0<br />
330<br />
120<br />
150<br />
Note:<br />
Some components not<br />
shown for clarity.<br />
LCD Display / Menu<br />
1<br />
1) LCD Display (Menu System)<br />
2) Preset / Intensity / Menu Access Buttons<br />
3) Function (Menu System) Select Push<br />
Buttons<br />
2<br />
ESC<br />
PRESET INTENSITY MENU<br />
3<br />
OK<br />
Note: For Menu operation and<br />
programming details, refer to "LCD<br />
Menu Operation" on page 10.<br />
PL1 LED Luminaire Components 5