100 Series Console - The Strand Archive
100 Series Console - The Strand Archive
100 Series Console - The Strand Archive
Create successful ePaper yourself
Turn your PDF publications into a flip-book with our unique Google optimized e-Paper software.
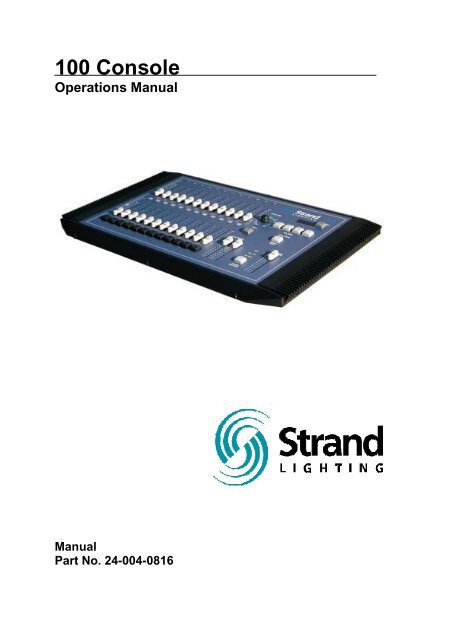
<strong>100</strong> <strong>Console</strong><br />
Operations Manual<br />
Manual<br />
Part No. 24-004-0816
Welcome<br />
Thank you for buying <strong>Strand</strong> Lighting control equipment. We hope<br />
that you will find that your lighting needs are met by your new<br />
system and that you will enjoy exploring the new facilities that your<br />
new system offers. You are provided with essential information to<br />
help you install and operate your system. Please look through all<br />
the documents and keep them safely for future use. If you have<br />
any difficulties, please do not hesitate to contact <strong>Strand</strong> Lighting or<br />
any authorized <strong>Strand</strong> service center for advice.<br />
This equipment is designed to operate from the mains electrical<br />
supply and contains voltages, which, if touched, may cause death<br />
or injury. It should only be operated in accordance with the<br />
instructions provided and for the purpose of a lighting control<br />
system.<br />
Do not open the console. <strong>The</strong>re are no user serviceable parts<br />
inside.<br />
Avoid spilling liquid on the equipment If this should happen, switch<br />
the equipment off immediately at the mains. To reduce the risk of<br />
fire or electric shock, do not expose the equipment to rain or<br />
moisture.<br />
For indoor use only.<br />
This equipment is designed and manufactured to comply with<br />
international safety standards 1EC950, UL1950, CS950 and is<br />
intended for use as part of a lighting control system. It must not be<br />
used for other purposes where there is a risk of safety to persons.<br />
<strong>The</strong> equipment contains power voltages, socket outlets shall be<br />
installed near to the equipment and be easily accessible.<br />
• Working Voltage/Current <strong>100</strong>-120 (2A) 220-240 (1A)<br />
• Frequency 50/60 Hz<br />
• Max Ambient Temp 35 0 C<br />
• Do not restrict ventilation<br />
This manual describes the installation and operational procedures<br />
for <strong>Strand</strong> Lighting’s <strong>100</strong> Control <strong>Console</strong>.<br />
Page 2<br />
<strong>Strand</strong> <strong>100</strong> <strong>Console</strong> Manual
Offices and Service Centers<br />
Phone numbers do not include country code or other international access data.<br />
World Wide Web:<br />
http://www.strandlighting.com/<br />
Berlin<br />
<strong>Strand</strong> Lighting GMBH<br />
Ullsteinstrasse. 114-142, HAUS C<br />
D-12109<br />
Berlin, Germany<br />
Tel. +49-30-707-9510 Fax +49-30-707-95199<br />
Hong Kong<br />
<strong>Strand</strong> Lighting Asia LTD<br />
20/F., Delta House<br />
3 On Yiu Street<br />
Shatin, N.T.<br />
Hong Kong<br />
Tel. +852-2757-3033 Fax +852-2757-1767<br />
London<br />
<strong>Strand</strong> Lighting Limited<br />
Unit 3 Hammersmith Studios<br />
Yeldham Road<br />
Hammersmith<br />
London, England W6 8JF<br />
Tel. +44-20-8735-9790 Fax +44-20-8735-9799<br />
Los Angeles<br />
<strong>Strand</strong> Lighting Inc<br />
6603 Darin Way<br />
Cypress, CA 90630<br />
U.S.A.<br />
Tel. +1 714-230-8200 Fax +1 714-230-8173<br />
Moscow<br />
<strong>Strand</strong> Lighting<br />
Novinsky Boulevard 20A Building 3-6<br />
12069 Moscow, Russia<br />
Tel. +7 095-234-42-20 Fax. +7 095-234 42-21<br />
Rome<br />
<strong>Strand</strong> Lighting Italia<br />
Via Delle Gardenie S.N.C.<br />
Pontina Vecchia KM 33,400<br />
00040 Pomezia, Italy<br />
Tel. +39-0691-9631 Fax +39-0691-47138<br />
Toronto<br />
<strong>Strand</strong> Lighting (Canada) Inc<br />
2430 Lucknow Drive #15,<br />
Mississauga, Ontario, L5S 1V3<br />
Canada<br />
Tel. +1 905-677-7130 Fax. +1 905-677-6859<br />
<strong>Strand</strong> <strong>100</strong> <strong>Console</strong> Manual Page 3
Table of Contents<br />
Welcome .................................................................................................................... 2<br />
Offices and Service Centers....................................................................................... 3<br />
Table of Contents....................................................................................................... 4<br />
Getting Started ........................................................................................................... 5<br />
Concept .................................................................................................................. 5<br />
Ordering Information............................................................................................... 5<br />
Mechanical & Environmental Data.......................................................................... 5<br />
Standards Compliance ........................................................................................... 5<br />
Unpack the <strong>Console</strong> ............................................................................................... 5<br />
Face Plate .............................................................................................................. 6<br />
Back Plate .............................................................................................................. 6<br />
Connect Power ....................................................................................................... 7<br />
Connect DMX ......................................................................................................... 7<br />
Rack Mounting........................................................................................................ 8<br />
Turning the <strong>Console</strong> On.......................................................................................... 8<br />
Layout ........................................................................................................................ 9<br />
Quick Guide ............................................................................................................. 10<br />
Operation ................................................................................................................. 12<br />
Two Scene Operation ........................................................................................... 12<br />
Manual Crossfades............................................................................................... 12<br />
Timed Crossfades................................................................................................. 12<br />
Single Scene Operation........................................................................................ 13<br />
Hold ...................................................................................................................... 14<br />
Effect – Single Scene Mode ................................................................................. 15<br />
Effect – Two Scene Mode..................................................................................... 16<br />
Conclusion ............................................................................................................... 16<br />
Appendix A............................................................................................................... 17<br />
Control Input ......................................................................................................... 17<br />
Index ........................................................................................................................ 18<br />
Page 4<br />
<strong>Strand</strong> <strong>100</strong> <strong>Console</strong> Manual
Getting Started<br />
Concept<br />
Ordering Information<br />
<strong>The</strong> <strong>Strand</strong> <strong>100</strong> series console is a small, simple to use, preset lighting<br />
desk. It can either control 24 channels in 1 scene or 12 channels in 2<br />
scenes with the ability to expand scenes with the Hold feature. <strong>The</strong><br />
console also has the ability to run a single effect. This console can be<br />
rack mounted.<br />
Mechanical & Environmental Data<br />
Catalog # 61312 – <strong>100</strong> series 12/24 console 120 volt<br />
Catalog # 61313 – <strong>100</strong> series 12/24 console 230/240 volt<br />
Catalog # 24-004-0816 - <strong>100</strong> series manual<br />
Weight: 2kg/4.5lb<br />
Finish: Blue powder coat epoxy paint<br />
Construction: Rigid folded sheet steel<br />
Temperature: 0 – 35°C<br />
Humidity Range: 0-90% non-condensing<br />
Ingress Protection: IP20<br />
Standards Compliance<br />
Unpack the <strong>Console</strong><br />
All units are CE marked. 120 volt consoles include UL, cUL power<br />
supplies.<br />
Unpack the console from the packaging and check that the following<br />
components are contained within. If any parts are missing, or damaged,<br />
please contact the carrier and your nearest <strong>Strand</strong> Lighting office.<br />
List of Parts for North America…<br />
<strong>100</strong> series console<br />
Power cable with UL power supply cable with US 2 pin connector.<br />
Manual<br />
List of Parts for Europe and Asia…<br />
<strong>100</strong> series console<br />
Power cable with cUL power supply cable with<br />
UK 2 pin connector and EU 2 pin connector<br />
Manual<br />
<strong>Strand</strong> <strong>100</strong> <strong>Console</strong> Manual Page 5
Face Plate<br />
<strong>100</strong><br />
Back Plate<br />
Page 6<br />
<strong>Strand</strong> <strong>100</strong> <strong>Console</strong> Manual
Connect Power<br />
Connect the appropriate power cable to the power<br />
adapter and into the console. Connect the male<br />
end to the electrical service.<br />
Connect DMX<br />
Connect the DMX cable from the dimmer rack<br />
input to the DMX output of the console.<br />
(See Appendix A for complete DMX512<br />
connector information.)<br />
<strong>Strand</strong> <strong>100</strong> <strong>Console</strong> Manual Page 7
Rack Mounting<br />
Below is a drawing that illustrates the removal of the edge pieces for rack mounting.<br />
Turning the <strong>Console</strong> On<br />
Switch the rocker switch to the ON position.<br />
Page 8<br />
<strong>Strand</strong> <strong>100</strong> <strong>Console</strong> Manual
Layout<br />
CHANNEL FADER<br />
FADER FLASH BUTTON<br />
LED<br />
<strong>100</strong><br />
FADE TIME / FX SPEEDROTARY<br />
LEDDISPLAY<br />
BLACK OUT BUTTON<br />
EFFECT RANDOM<br />
EFFECT BOUNCE<br />
EFFECT REVERSE<br />
EFFECT FORWARD<br />
SCENE MODE BUTTON<br />
HOLDBUTTON<br />
GRANDMAS TER<br />
FLASH MODE BUTTON<br />
SCENE MASTER (B) / EFFECT MASTER<br />
SCENE MASTER (A)<br />
<strong>Strand</strong> <strong>100</strong> <strong>Console</strong> Manual Page 9
Quick Guide<br />
Grand Master – an inhibitive fader that proportionately controls all other faders.<br />
This determines maximum output of all faders at all times. <strong>The</strong> grand master is<br />
always active.<br />
Playback A – an inhibitive fader that proportionately controls all faders for the A<br />
scene.<br />
Playback B / Effect Master – when not running the effect, an inhibitive fader that<br />
proportionately controls all faders for the B scene. When running the effect, the<br />
fader is a inhibitive master for the effect.<br />
Channel Faders – a fader that controls the output of the corresponding dimmer<br />
number.<br />
Fader Flash Buttons – a momentary button that flashes the level of the<br />
corresponding fader to full. Which fader is corresponding depends on the setting of<br />
the FLASH BUTTON. See below.<br />
Mode Button – toggles between the two modes of operation of the console. 1<br />
scene 24 channel mode or 2 scene 12 channel mode. <strong>The</strong> default is two scene<br />
mode.<br />
Hold Button – this button will freeze the output of the faders so that the operator can<br />
reset the channel faders for a different look. This is only available in single scene<br />
mode.<br />
Flash Button Mode Button – there are only 12 fader flash buttons and this button<br />
toggles the fader flash buttons between OFF, faders 1 – 12 and faders 13 – 24.<br />
Fade Time / Effect Speed Dial – when not running the effect, this will allow the<br />
operator to set the fade time of the scene masters. When running the effect, this will<br />
allow the operator to set the rate at which the effect is running. See the LED display<br />
for time / speed readout.<br />
Page 10<br />
<strong>Strand</strong> <strong>100</strong> <strong>Console</strong> Manual
Effect Options Buttons – these will allow the operator to change the stepping<br />
options of the effect.<br />
Forward – this will allow the faders that have a level to step through their<br />
appropriate levels from the lowest number fader number to the highest.<br />
Reverse – this will allow the faders that have a level to step through their<br />
appropriate levels from the highest number fader number to the lowest.<br />
Random - this will allow the faders that have a level to step through their<br />
appropriate levels in a randomly generated order.<br />
Bounce - this will allow the faders that have a level to step through their<br />
appropriate levels from the lowest number fader number to the highest then<br />
back to the lowest number fader.<br />
LED Display – this will show alpha / numeric information about the console. Such<br />
as fade time, effect step rate and whether the black out button is active.<br />
LED Lights – all channel faders have LEDs that mimic the output level of each<br />
fader. LEDs also are indicators of the channel mode as well as when all features are<br />
activated. All LEDs are green.<br />
Black Out Button – this will allow the operator to instantly stop all fader output.<br />
Press again to restore fader output.<br />
<strong>Strand</strong> <strong>100</strong> <strong>Console</strong> Manual Page 11
Operation<br />
Two Scene Operation<br />
<strong>The</strong> first time you power up the console, it will default to two<br />
scene mode. <strong>The</strong> corresponding light will confirm that the<br />
console is in two scene mode.<br />
Now playback A will be the scene master for the top bank of<br />
channel faders and playback B will be the scene master for<br />
the bottom bank of channel faders. <strong>The</strong>se two banks of<br />
faders both correspond to dimmers 1 – 12.<br />
Manual Crossfades<br />
Playback A is at full when the fader is in the UP position and at 0 when the fader is in<br />
the DOWN position. Playback B is just the opposite of playback A. (Refer to the<br />
vertical numbering beside the playbacks). This allows for proportional crossfades by<br />
moving both faders simultaneously in the same direction.<br />
Individual channel fader control works the same in two scene mode as it does in one<br />
scene mode.<br />
Timed Crossfades<br />
For timed crossfades – use the same procedure as the manual<br />
crossfade but with the fade timer set to the preferred fade time.<br />
<strong>The</strong> LED display will show the fade time that is set. Timed<br />
crossfades can vary from 0 (Manual) to 15 minutes.<br />
Page 12<br />
<strong>Strand</strong> <strong>100</strong> <strong>Console</strong> Manual
Single Scene Operation<br />
Make sure the channel mode button has the console in the<br />
single scene mode. Change the mode by pressing the channel<br />
mode button. (<strong>The</strong> corresponding light will be on)<br />
Make sure the grand master is at full or at the desired level.<br />
Make sure the playback A master is at full or at the desired level.<br />
Once the above are set, simply set the faders (1 – 24)<br />
to the appropriate levels. At this point, the dimmers<br />
should correspond to the level of the faders. <strong>The</strong> fader<br />
output of the fader that is being adjusted will be shown<br />
in the LED display on a scale from 0 to <strong>100</strong>.<br />
Refer to the HOLD section for crossfade information.<br />
<strong>Strand</strong> <strong>100</strong> <strong>Console</strong> Manual Page 13
Hold<br />
In single scene mode only, using hold allows the operator to<br />
freeze all dimmer output and manually reset the levels for all 24<br />
faders to create a different look on stage. Here’s how it works…<br />
Select current settings with channel faders. Make sure playback A master is at 10<br />
and playback B master is at 0. (That’s both playbacks in the UP position). <strong>The</strong> hold<br />
feature can only be activated and deactivated with playbacks in these positions.<br />
Press the hold key (<strong>The</strong> hold LED will now be on), move playback A’s master to 0<br />
while moving playback B’s master to 10. During the crossfade, the hold LED will be<br />
flashing.<br />
<strong>The</strong> current fader settings will now be recorded into hold’s memory. (<strong>The</strong> hold LED<br />
will stop flashing but remain on indicating the activation of the hold feature. <strong>The</strong><br />
operator is now free to reset all channel faders to the levels for the next cue. Once<br />
the channel faders are set, crossfade playback A’s master back to 10 and playback<br />
B’s master back to 0. (During crossfade the hold LED will flash) After a crossfade is<br />
completed, the second cue will now be outputting live. (<strong>The</strong> hold LED should still be<br />
on) Repeat the above step for the next crossfade or press hold again to release the<br />
hold function. After pressing hold, the hold LED should turn off.<br />
Also note, that playback B is now the master for the held scene. So if playback B is<br />
moved to 0 (UP) then the held state fades out.<br />
For timed crossfades – use the same procedure as the manual<br />
crossfade but with the fade timer set to the preferred fade time.<br />
<strong>The</strong> LED display will show the fade time that is set.<br />
Remember: Hold can only be accomplished with both<br />
faders in this position.<br />
Page 14<br />
<strong>Strand</strong> <strong>100</strong> <strong>Console</strong> Manual
Effect – Single Scene Mode<br />
An effect is a way to get fast changing output of dimmer levels in<br />
a specific order. <strong>The</strong> effect capability of this console is limited<br />
but simple to do. <strong>The</strong> console can run one effect.<br />
Set the console to single scene mode. Set playback A to 0<br />
(Down) and playback B to 0 (Up). Playback B will become the<br />
effect master. (See the colored information beside the Playback<br />
B). Set current fader levels to include only the faders that will be<br />
in the effect. Set them to any level from 1 to <strong>100</strong>.<br />
Press one of the effect buttons (Forward, Reverse, Random,<br />
Bounce).<br />
Forward will allow the active faders to chase in<br />
order from the lowest number to the highest<br />
number. (1 – 24).<br />
Reverse will allow the active faders to chase in<br />
order from the highest number to the lowest<br />
number (24 – 1)<br />
Random will allow the active faders to chase in a randomly generated order.<br />
Bounce will allow the active faders to chase, first, in order from the lowest number to<br />
the highest and then, from the highest number to the lowest.<br />
<strong>The</strong> lights will now be chasing in one of the 4 directional modes. <strong>The</strong> effect master<br />
will inhibit the levels of all effect channels. <strong>The</strong> fade time rotary becomes the<br />
SPEED dial. Set the speed of the effect appropriately. Check the LED display for<br />
your rate.<br />
<strong>The</strong> effect can be faded in rather than the effect starting abruptly by pulling down the<br />
effect Master and fading it up at the appropriate time.<br />
<strong>Strand</strong> <strong>100</strong> <strong>Console</strong> Manual Page 15
Effect – Two Scene Mode<br />
To run the effect in two scene mode, just switch the channel mode to two scene.<br />
(Check the LED for indication of the appropriate mode setting). Now all of the fader<br />
levels from the bottom fader bank will become the faders in the effect. With both<br />
playbacks in the up position, just press any of the effect directional keys and the<br />
effect will start immediately.<br />
Once the effect is running, adding new fader levels will add those faders into the<br />
effect.<br />
Conclusion<br />
This concludes the instructional manual for <strong>Strand</strong>’s <strong>100</strong> series console.<br />
Page 16<br />
<strong>Strand</strong> <strong>100</strong> <strong>Console</strong> Manual
Appendix A<br />
Control Input<br />
<strong>The</strong> DMX512 input will accept a multiplexed digital control signal which conforms to<br />
USITT specification DMX512 (1990). Details of this specification are available from<br />
USITT on request.<br />
<strong>The</strong> control input is via a five-pin male XLR type connector. Pin connections are<br />
shown in Figure 9. A five-pin female XLR connector is also fitted to allow a series of<br />
SD 6 packs (or other DMX equipment) to be connected together in ‘daisy chain’<br />
fashion.<br />
It is recommended that Control connections are not plugged or unplugged when power is applied to<br />
the dimmer pack as this may cause any connected loads to flash up momentarily.<br />
<strong>Strand</strong> <strong>100</strong> <strong>Console</strong> Manual Page 17
Index<br />
B<br />
Back Plate .................................................6<br />
Black Out Button<br />
Quick Guide........................................11<br />
Bounce ....................................................15<br />
Quick Guide See Effect Options Buttons<br />
C<br />
Channel Faders<br />
Quick Guide........................................10<br />
Conclusion ..............................................16<br />
Connect DMX...........................................7<br />
Connect Power..........................................7<br />
Control Input...........................................17<br />
D<br />
DMX output..............................................7<br />
DMX512 .................................................17<br />
E<br />
Effect – Single Scene Mode....................15<br />
Effect – Two Scene Mode.......................16<br />
Effect Options Buttons<br />
Quick Guide........................................11<br />
F<br />
Face Plate..................................................6<br />
Fade Time / Effect Speed Dial<br />
Quick Guide........................................10<br />
Fader Flash Buttons<br />
Quick Guide........................................10<br />
Flash Button Mode Button<br />
Quick Guide........................................10<br />
Forward...................................................15<br />
Quick Guide See Effect Options Buttons<br />
G<br />
Getting Started..........................................5<br />
Grand Master<br />
Quick Guide........................................10<br />
H<br />
Hold ........................................................14<br />
Hold Button<br />
Quick Guide........................................10<br />
L<br />
Layout.......................................................9<br />
LED Display<br />
Quick Guide........................................11<br />
LED Lights<br />
Quick Guide........................................11<br />
M<br />
Manual Crossfades .................................12<br />
Mode Button<br />
Quick Guide........................................10<br />
O<br />
Operation ................................................12<br />
P<br />
Playback A<br />
Quick Guide........................................10<br />
Playback B / Effect Master<br />
Quick Guide........................................10<br />
Q<br />
Quick Guide............................................10<br />
Page 18<br />
<strong>Strand</strong> <strong>100</strong> <strong>Console</strong> Manual
R<br />
Rack Mounting..........................................8<br />
Random...................................................15<br />
Quick Guide See Effect Options Buttons<br />
Reverse....................................................15<br />
Quick Guide See Effect Options Buttons<br />
S<br />
Single Scene Operation...........................13<br />
T<br />
Timed Crossfades ...................................12<br />
Turning the <strong>Console</strong> On ...........................8<br />
Two Scene Operation .............................12<br />
<strong>Strand</strong> <strong>100</strong> <strong>Console</strong> Manual Page 19


