You also want an ePaper? Increase the reach of your titles
YUMPU automatically turns print PDFs into web optimized ePapers that Google loves.
CRANEAGE: SLINGING - INTRODUCTION 4<br />
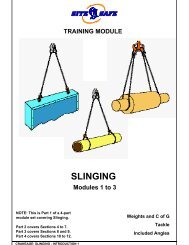
TRAINING MODULE<br />
SLINGING<br />
Modules 10 to 12<br />
NOTE: This is Part 4 of a 4-part<br />
module set covering Slinging.<br />
Part 1 covers Sections 1 to 3.<br />
Part 2 covers Sections 4 to 7.<br />
Part 3 covers Sections 8 and 9.<br />
Ropes and Knots<br />
Communications<br />
<strong>Safe</strong>ty
CRANEAGE: SLINGING - INTRODUCTION 4<br />
SLINGING<br />
Modules 10 to 12<br />
This Training Module comes to you courtesy of:<br />
<strong>Site</strong> <strong>Safe</strong> would like to acknowledge Fletcher Construction’s on-going support
CRANEAGE - SLINGING: BASICS PAGE 1<br />
CRANEAGE - SLINGING BASICS<br />
SECTION 10:<br />
KNOW YOUR ROPES<br />
10.1 Know your Knots<br />
10.2 Efficiency of Knots<br />
10.3 Knots ... 1<br />
10.4 Knots ... 2<br />
10.5 Knots ... 3<br />
10.6 Knots ... 4<br />
10.7 Knots ... 5<br />
10.8 Knots ... 6<br />
10.9 Knots ... 7
CRANEAGE - SLINGING: BASICS<br />
PAGE 2<br />
GOOD SLINGING PRACTICE<br />
BASIC RULES ... 10<br />
10.1. KNOW YOUR ROPES.<br />
While natural fibre ropes are never used these days for <strong>slinging</strong>, they do have their<br />
uses for tying down loads, for tag lines, and other similar applications (Because they<br />
are not used for <strong>slinging</strong>, we do not include any load charts for fibre ropes).<br />
The fibre rope is however a versatile and useful tool on site, PROVIDED it is used with<br />
care and a little respect.<br />
In this section, we show some basic knots which can be used with fibre ropes.<br />
Note that any form of knot, splice, bend or joint reduces the overall strength of any fibre<br />
rope.<br />
Special attention is drawn to the "reef knot", which is often - and mistakenly - used to<br />
join two ropes together in the belief that it is a secure and thus safe knot.<br />
It is not.<br />
THE REEF KNOT IS ALSO KNOWN AS THE "KILLER KNOT" .
CRANEAGE - SLINGING: BASICS<br />
PAGE 3<br />
GOOD SLINGING PRACTICE<br />
BASIC RULES ... 10<br />
10.2. KNOW YOUR ROPES.<br />
ROPE STRENGTHS WITH BENDS AND HITCHES<br />
A rope without any knots or splices will carry 100% of its rated strength.<br />
When a knot is tied in a rope, it loses<br />
50% of its original capacity.<br />
Knot = 50% efficiency<br />
When a bend is tied in a rope, it loses<br />
50% of its original strength.<br />
Bend = 50% efficiency<br />
When a hitch is tied in a rope, it loses<br />
25% of its original strength.<br />
Hitch = 75% efficiency<br />
When an eye splice or short splice is<br />
tied in a rope, it loses 15% of its<br />
original strength.<br />
Splice = 85% efficiency
CRANEAGE - SLINGING: BASICS<br />
PAGE 4<br />
GOOD SLINGING PRACTICE<br />
BASIC RULES ... 10<br />
10.3. KNOW YOUR ROPES.<br />
One of the rigger's most popular knots is BOWLINE. the<br />
This easy-to-tie knot never slips, and is easily untied.<br />
It has a 50% efficiency.<br />
A B C<br />
A more complex but very effective variation on the bowline, is<br />
the BOWLINE ON THE BIGHT.<br />
This is used to form a non-slipping eye in the middle of a rope.<br />
It also has a 50% efficiency.<br />
A B C<br />
The CLOVE HITCH is a handy knot for tying a rope to a pipe or post.<br />
It can be tied in position or slipped over the end, as shown.
CRANEAGE - SLINGING: BASICS<br />
PAGE 5<br />
GOOD SLINGING PRACTICE<br />
BASIC RULES ... 10<br />
10.4. KNOW YOUR ROPES.<br />
THE SHEET BEND<br />
This quick and efficient bend is<br />
used to join two ropes of different<br />
diameter together.<br />
Because the ropes are tightly bent<br />
around each other, it is not used<br />
on large diameter ropes.<br />
Diagrams 'A' to 'C' show how the<br />
basic bend is formed.<br />
A<br />
B<br />
Illustration 'D' shows a variation<br />
on the simple knot which provides<br />
greater strength.<br />
C<br />
D<br />
THE REEF KNOT<br />
The reef knot, also known as the square knot,<br />
or the deadman's knot, has another name:<br />
the "killer knot".<br />
It MUST ONLY be used to tie two ends of<br />
a rope together. It is NOT a bend for<br />
joining two ropes together.<br />
A<br />
This knot can often be tied incorrectly, by<br />
reversing the way the top knot is tied. This<br />
version, commonly known as the "Granny<br />
knot", is very difficult to undo, and is the<br />
unfortunate mark of an amateur.<br />
B<br />
The finished knot will resemble two loops<br />
threaded through each other, as shown.<br />
This knot is NOT for taking any loads. It<br />
is ONLY for tying bundles and the like.<br />
C
CRANEAGE - SLINGING: BASICS<br />
PAGE 6<br />
GOOD SLINGING PRACTICE<br />
BASIC RULES ... 10<br />
10.5. KNOW YOUR ROPES.<br />
SHEEPSHANK<br />
This bend is used to shorten a<br />
rope, or to remove the tension from<br />
a weak point in the rope.<br />
CATSPAW<br />
This bend is useful for attaching<br />
a load to a suspension point,<br />
especially if the centre of the<br />
rope is used.<br />
This bend is formed by<br />
twisting each loop around<br />
your hand. Three twists in<br />
each loop will form a pair of<br />
loops which will not slip or<br />
slide on a crane hook.
CRANEAGE - SLINGING: BASICS<br />
PAGE 7<br />
GOOD SLINGING PRACTICE<br />
BASIC RULES ... 10<br />
10.6. KNOW YOUR ROPES.<br />
SELF-CENTREING BOWLINE<br />
This versatile knot is used where a knot must be tied in the centre of a load and an equal<br />
leg stress is required. It is an integral part of the Barrel Hitch, as shown below, and further<br />
on Sheet 10.8.<br />
A<br />
B<br />
C<br />
D<br />
This diagram shows the Self-Centreing Bowline used<br />
to finish off a Barrel Hitch, ensuring that the load<br />
(shown as a barrel) will be lifted vertically.
GOOD SLINGING PRACTICE<br />
BASIC RULES ... 10<br />
10.7. KNOW YOUR ROPES.<br />
BECKET HITCH<br />
This hitch is used to secure the end of<br />
a rope to the becket, or ring, on a<br />
block. A load on the hitch will serve to<br />
tighten it, but regardless the hitch will<br />
reduce the rope's capacity by 25%.<br />
This is similar to a clove<br />
hitch tied around the<br />
standing part.<br />
TIMBER HITCH<br />
This hitch is used for moving planks, pipes, logs and the like. The load must have a steady<br />
applied pull, because any slackening of the pull will release the hitch. It must be used with<br />
at least two half-hitches as shown.<br />
STOP HITCH<br />
This hitch is used mainly to keep the<br />
pull on a line - either wire or fibre -<br />
when the end of the line needs to be<br />
loosened and repositioned.<br />
Load line<br />
CRANEAGE - SLINGING: BASICS<br />
Load line<br />
PAGE 8
CRANEAGE - SLINGING: BASICS<br />
PAGE 9<br />
GOOD SLINGING PRACTICE<br />
BASIC RULES ... 10<br />
10.8. KNOW YOUR ROPES.<br />
CARRICK BEND<br />
This quite simple knot (despite its appearance) is<br />
used to tie larger diameter ropes together. The knot<br />
will draw up tightly, but will not jam.<br />
A B C<br />
D<br />
E<br />
BARREL HITCH<br />
This handy hitch was originally developed to lift barrels vertically, but has since been used<br />
for any similar shape. The hitch is finished with a self-centreing bowline, as shown.<br />
A<br />
B<br />
C
CRANEAGE - SLINGING: BASICS<br />
PAGE 10<br />
GOOD SLINGING PRACTICE<br />
BASIC RULES ... 10<br />
10.9. KNOW YOUR ROPES.<br />
RUNNING BOWLINE<br />
The running bowline is used to provide a choker type sling at the end of a single line. The<br />
knot is made around the standing part of the line, and runs freely. It has 50% efficiency.<br />
SPANISH BOWLINE<br />
The Spanish bowline can be tied at any point in a line where it is doubled up. It is an ideal<br />
rescue knot, as the loops are adjustable. Like all bowlines, it will not slip and is easily untied.<br />
A<br />
B C D<br />
This diagram shows how the<br />
Spanish bowline can be used<br />
in a rescue situation.<br />
E
CRANEAGE - SLINGING: BASICS<br />
PAGE 11<br />
CRANEAGE - SLINGING BASICS<br />
SECTION 11:<br />
KNOW YOUR COMMUNICATION SYSTEMS<br />
11.1 Know the Communication Systems<br />
11.2 Crane Signals ... 1<br />
11.3 Crane Signals ... 2<br />
11.4 Crane Signals ... 3<br />
11.5 Crane Signals ... 4<br />
11.6 The "Constant Communication" Practice<br />
11.7 Only One Signaller
CRANEAGE - SLINGING: BASICS<br />
PAGE 12<br />
GOOD SLINGING PRACTICE<br />
BASIC RULES ... 11<br />
11.1 KNOW THE COMMUNICATIONS SYSTEMS.<br />
Fletcher Construction uses two systems of communication between the<br />
crane operator and the dogman or slinger.<br />
One system is the standard set of hand signals, which are included on following<br />
sheets.<br />
These signals are the onlyones to be used.<br />
A series of "individual" signals will only confuse and create the potential for hazards,<br />
especially when teams are split up on to separate jobs and a new team is formed.<br />
The standard set of signals means that any dogger or slinger can work with any crane<br />
operator, and there is immediate understanding of what those signals mean.<br />
The other system is that of radio communication.<br />
There are no "standard" phrases to be used - common sense and the specific needs of<br />
the job will dictate what is said.<br />
Whenever radios are in use, however, there is a system called "Constant<br />
Communication" which is to be used.<br />
This is also covered later on in this section, but basically means that, if the slinger or<br />
dogger stops talking for any reason, the crane operator immediately stops the crane,<br />
and does not start the operation until the slinger or dogger demonstrates that all is<br />
well.<br />
These two systems are designed to offer the greatest safety to<br />
everyone on the job.<br />
Note: As noted elsewhere within these Training Modules, we use<br />
both terms "dogman" and "slinger". They have the same meaning.<br />
Usage may vary depending on custom or circumstance.
CRANEAGE - SLINGING: BASICS<br />
PAGE 13<br />
GOOD SLINGING PRACTICE<br />
BASIC RULES ... 11<br />
11.2 KNOW THE STANDARD CRANE SIGNALS ... 1.<br />
EMERGENCY<br />
STOP<br />
STOP<br />
LOWER HOOK<br />
RAISE HOOK<br />
SLEW RIGHT<br />
SLEW LEFT
CRANEAGE - SLINGING: BASICS<br />
PAGE 14<br />
GOOD SLINGING PRACTICE<br />
BASIC RULES ... 11<br />
11.3 KNOW THE STANDARD CRANE SIGNALS ... 2.<br />
HOLD<br />
EVERYTHING<br />
RAISE BOOM,<br />
RAISE LOAD<br />
USE<br />
MAIN<br />
HOIST<br />
LOWER BOOM,<br />
RAISE LOAD<br />
RAISE<br />
BOOM<br />
(Luff Up)<br />
LOWER<br />
BOOM<br />
(Luff Down)
CRANEAGE - SLINGING: BASICS<br />
PAGE 15<br />
GOOD SLINGING PRACTICE<br />
BASIC RULES ... 11<br />
11.4 KNOW THE STANDARD CRANE SIGNALS ... 3.<br />
LOWER BOOM,<br />
LOWER LOAD<br />
USE<br />
AUXILIARY<br />
HOIST<br />
RAISE BOOM,<br />
LOWER LOAD<br />
TRAVEL<br />
CRANE<br />
TROLLEY IN<br />
(RETRACT MOBILE BOOM)<br />
TROLLEY OUT<br />
(EXTEND MOBILE BOOM)
CRANEAGE - SLINGING: BASICS<br />
PAGE 16<br />
GOOD SLINGING PRACTICE<br />
BASIC RULES ... 11<br />
11.5 KNOW THE STANDARD CRANE SIGNALS ... 4.<br />
NOTE:<br />
These two signals are NOT as yet officially recognised, but are used<br />
on some jobs. The dogman stands side-on facing the crane operator,<br />
and signals as shown for trolleying in and out.<br />
(If these signals are to be used on any particular site, they must be<br />
prior discussed and included in the <strong>Site</strong> Management Plan.)<br />
TROLLEY<br />
OUT<br />
TROLLEY IN<br />
(Points AWAY from crane)<br />
(Points TOWARDS crane)<br />
These last signals are official (well, one of them is, anyway). When the<br />
lift is over, and the crane is released for other lifting duties, the<br />
dogman will signal accordingly:<br />
THERE'S A<br />
SHOUT ON,<br />
AND YOU'RE<br />
TOO LATE!<br />
FINISHED<br />
WITH CRANE<br />
(Just<br />
kidding.....)
CRANEAGE - SLINGING: BASICS<br />
PAGE 17<br />
GOOD SLINGING PRACTICE<br />
BASIC RULES ... 11<br />
11.6 KNOW THE "CONSTANT COMMUNICATION" SYSTEM.<br />
One vital part of communication which is common to all Fletcher Construction sites, is the use of<br />
"Constant Radio Contact" between dogman and crane operator.<br />
During a lifting operation, the dogman will be continously<br />
talking to the crane operator.<br />
The theory is, that should the radio contact cease - for<br />
any reason - the crane operator will immediately stop all<br />
operations, and wait for EITHER:<br />
radio contact to be re-established<br />
a visual indication as to why the radio contact was<br />
broken (e.g; flat battery, dropped or damaged radio)<br />
a clear indication from the dogger that the lift can<br />
proceed under hand signals only.<br />
This greatly reduces the possibility of accident, especially where the crane<br />
operator is unsighted during the lift and is relying on the dogman's instructions<br />
to land the load safely.<br />
Example:<br />
The dogman becomes trapped between the<br />
load and a structural wall. By radio contact,<br />
the dogmanr can call the crane operator to<br />
halt the lift immediately, allowing the dogman<br />
to take up a safer position.<br />
Without this ongoing "talking down", the<br />
crane operator could otherwise assume all<br />
was well and cause a nasty accident.<br />
STOP!!<br />
Another example:<br />
A load is being lifted into an opening in a<br />
building, down three floors. The crane<br />
operator is entirely reliant on voice contact<br />
from the dogman to get the load down<br />
safely and accurately. For a while, the<br />
dogman cannot be seen by the crane<br />
operator. A steady stream of directions,<br />
and with <strong>good</strong> teamwork even the tone of<br />
voice, will guide the crane operator<br />
throughout.<br />
Down a whisker ... slew left<br />
a touch ... down a shade<br />
more ... left a touch more ...<br />
down a whisker ... Beauty!
CRANEAGE - SLINGING: BASICS<br />
PAGE 18<br />
GOOD SLINGING PRACTICE<br />
BASIC RULES ... 11<br />
11.7 ONLY ONE COMMUNICATOR.<br />
The slinger or dogman is the ONLY one to control the lifting operation.<br />
WHY?<br />
Imagine a crane operator receiving a wide variety of signals from everyone at the same time.<br />
Which ones are correct?<br />
What is meant by that vague wave?<br />
When he's shouting "down a bit", how much is a "bit"?<br />
For safety reasons, the slinger or dogman must be the ONLY one providing<br />
signals to the crane operator.<br />
?<br />
THE ONLY EXCEPTION IS IN THE CASE OF AN EMERGENCY,<br />
WHEN ANYONE CAN GIVE THE "EMERGENCY STOP" SIGNAL.
CRANEAGE - SLINGING: BASICS<br />
PAGE 19<br />
CRANEAGE - SLINGING BASICS<br />
SECTION 12:<br />
KNOW HOW TO WORK SAFELY<br />
12.1 Never Work Under Loads<br />
12.2 Watch for Swinging Loads<br />
12.3 Self-Protection<br />
12.4 One Job At A Time
CRANEAGE - SLINGING: BASICS<br />
PAGE 20<br />
GOOD SLINGING PRACTICE<br />
BASIC RULES ... 12<br />
12.1 NEVER WORK UNDER LOADS.<br />
The risks in working - or even walking - under suspended loads. are huge.<br />
Crane operators are trained well, to avoid areas where people are working, but the "loose<br />
cannon" on any site is the worker who decides that "the rope will never break", and<br />
decides to either work, or walk, under a load being craned in.<br />
The slinger or dogman has a part to play in this as well, by never allowing a load to travel<br />
over persons.<br />
There is never a reason for any load to travel over people.<br />
"Nahh, not a problem.<br />
I've got my hard hat on..."
CRANEAGE - SLINGING: BASICS<br />
PAGE 21<br />
GOOD SLINGING PRACTICE<br />
BASIC RULES ... 12<br />
12.2 WATCH FOR SWINGING LOADS.<br />
Loads can swing with a gust of wind, and if you happen to be in the wrong place,<br />
you may have little chance of avoiding a nasty accident.<br />
Also, beware of<br />
loads which could<br />
swing in and crush<br />
you.<br />
Make sure at all<br />
times, that you are<br />
out of the way!
CRANEAGE - SLINGING: BASICS<br />
PAGE 22<br />
GOOD SLINGING PRACTICE<br />
BASIC RULES ... 12<br />
12.3 THE DOGMAN HAS A DUTY OF SELF-PROTECTION.<br />
ALWAYS think safety.<br />
Assume nothing, and look after yourself.<br />
Apart from the obvious reason of preventing an accident, this Rule reminds you to look<br />
out for the subtle traps which can trap the unwary or the untrained. Such as:<br />
Keep your hands and feet clear of<br />
the slings as the load comes on.<br />
Watch for a load that may roll, fall,<br />
swing or slide as it is lifted or lowered.<br />
NEVER take a short-cut to unhook<br />
a load that has landed. Always use<br />
a ladder or similar to get to the<br />
hooks, shackles or lifting eyes.<br />
You set an example that others will follow. You do not tolerate unsafe actions.
CRANEAGE - SLINGING: BASICS<br />
PAGE 23<br />
GOOD SLINGING PRACTICE<br />
BASIC RULES ... 12<br />
12.4 ONE JOB ONLY.<br />
The slinger or dogger is the one link with the crane operator. Never try to do this job and<br />
something else at the same time.<br />
Distraction can lead to mistakes, and the price to pay for a mistake is too high.<br />
A slinger or dogger should never have to become physically involved in restraining or<br />
controlling the load, either by hand or by tag lines, UNLESS there is an emergency.<br />
"If that's for me, tell him I'm busy..."<br />
(Refer also to the notes on "Constant Communication" between slinger or dogman and<br />
the crane operator.)
TRAINING<br />
SUBJECT: SLINGING<br />
PURPOSE:<br />
To provide employees involved in any form of <strong>slinging</strong>, with a <strong>good</strong><br />
basic understanding of the safety rules and correct techniques of <strong>slinging</strong>.<br />
NUMBERS: Up to 20 persons, dividing them into groups of four to six as may be required.<br />
METHOD:<br />
First - A brief introductory session on the different types of lifting equipment likely<br />
to be encountered, and their special requirements for safe use.<br />
Second - A session on the critical elements of <strong>slinging</strong>:<br />
the included angle<br />
estimating weights<br />
correct techniques<br />
Third - Practical exercises involving as much of the equipment as possible,<br />
using a "hands-on" method of training.<br />
Fourth - A brief evaluation will conclude the session to indicate how well the participant<br />
has absorbed the points discussed. This will comprise a simple multiple-choice<br />
questionnaire which will be identified and passed to the Trainer for marking.<br />
MATERIALS: Hand-outs.<br />
OHP’s of <strong>slinging</strong> operations and hazards.<br />
Whiteboard<br />
Pens and paper for participants<br />
Copies of assessment<br />
Ideally, examples of all lifting equipment covered in the Notes.<br />
DURATION: One hour maximum.<br />
DEVELOPMENT: No further development is seen as necessary.<br />
NOTES: This session only covers the basics of <strong>slinging</strong>. The material will however<br />
serve as a basis for a much more detailed (say half-day or even full day)<br />
training session for intending slingers, with more time spent on each sheet.<br />
While not necessary, access to some for of craneage would be a definite advantage.<br />
SLINGING - TRAINING DETAILS<br />
PAGE 24
HOW WELL DID YOU DO?<br />
This quick test has been designed to show you how well you have<br />
remembered the points covered in this session.<br />
Tick the answer which you believe is the correct one for each question.<br />
1. What is an "included angle"?<br />
The angle between the legs of a sling.<br />
A piece of steelwork being used as dunnage.<br />
A tricky bit of calculating best left to the engineers.<br />
2. What is the maximum safe included angle?<br />
120 0 .<br />
180 0 .<br />
The width of a slingers' extended arms.<br />
3. How many legs in a multi-leg sling are assumed to carry all the weight?<br />
All of them take an equal weight.<br />
Only two. The other(s) will merely balance the load.<br />
Only the shortest one. The others will stretch.<br />
4. What special precautions are needed when using polyester slings?<br />
Protect the edges from sharp materials and damage.<br />
Make sure they are clean - thinners do the job nicely.<br />
Knot the sling around the load.<br />
5. What is "crowding the hook"?<br />
Bringing the hook too close to the crane's main jib.<br />
Standing too close to the hook and upsetting it.<br />
Putting too many links on the hook and creating a hazard.<br />
6. Who can provide signals to the crane operator?<br />
Anyone in the area.<br />
Only the slinger/dogman, exceptin an emergency.<br />
Only the Foreman.<br />
7. What is "constant communication" between an operator and slinger?<br />
Leaving the tranny radio on all the time.<br />
When the slinger is a <strong>good</strong> talker and can't be shut up.<br />
Continuous talk between operator and slinger/dogman.<br />
8. What effect does knotting a chain sling have?<br />
It safely shortens the sling.<br />
It is a dangerous <strong>practice</strong> due to stressing the sides of chain links.<br />
It makes the sling hard to carry.<br />
SLINGING - QUESTIONNAIRE<br />
PAGE 25
9. What is the main hazard in using cast-in stressing strands for lifting?<br />
Their SWL is unknown.<br />
They have to be hammered into shape every time.<br />
Wires can fracture where the strand is bent sharply over a hook.<br />
10. Why should hooks on a sling set be pointed outwards?<br />
To prevent them rolling and possibly slipping the sling.<br />
It looks neater that way.<br />
So the load is taken on the bowl of the hook.<br />
11. What is the best way to sling loose bundles?<br />
Wrap the sling around the load twice.<br />
Get someone to tack weld everything together.<br />
Put everything in a cargo net.<br />
12. When can a slinger work under a suspended load?<br />
Never.<br />
Never.<br />
Never.<br />
Now check your answers with the correct answers which are on the next<br />
sheet.<br />
Name: ...............................................................<br />
Current job: ...............................................................<br />
Score: ..................<br />
SLINGING - QUESTIONNAIRE PAGE 26
THANK YOU FOR YOUR CO-OPERATION.<br />
Now let’s find out how you did.<br />
Question: Correct Answer<br />
1 The angle between the legs of a sling.<br />
2. 120 0<br />
.<br />
3. Only two. The other(s) will merely balance the load.<br />
4. Protect the edges from sharp materials and damage.<br />
5. Putting too many links on the hook and creating a hazard.<br />
6. Only the slinger/dogman, exceptin an emergency.<br />
7. Continous talk between operator and slinger/dogman.<br />
8. It is a dangerous <strong>practice</strong> due to stressing the sides of the chain links.<br />
9. Wires can fracture where the strand is bent sharply over a hook<br />
OR (both are correct)<br />
Their SWL is unknown.<br />
10. To prevent them rolling and possibly slipping the sling<br />
OR (both are correct)<br />
. So the load is taken on the bowl of the hook.<br />
11. Wrap the sling around the load twice.<br />
12. Never.<br />
If you got all answers correct, you’re not just a clever cookie - you’re also a safe<br />
operator. Well done!<br />
If you got 10 correct, you have done pretty well, but need to pay attention to those<br />
areas where your answer was not correct. It’s your life we’re trying to protect here!<br />
If you got five right, you haven’t been trying. Come on you - can do better, and will<br />
need to if you want to keep safe.<br />
SLINGING - QUESTIONNAIRE ANSWERS<br />
PAGE 27
THE TEN COMMANDMENTS OF<br />
SLINGING<br />
1. Included angle never more than 120<br />
0 .<br />
2. Check tackle for test tags before use.<br />
3. Know the weight load.<br />
4. Use the right gear for the job.<br />
5. Only the dogman or slinger signals the operator.<br />
6. Never knot chains.<br />
7. Make sure the load is taken on the hook bowl.<br />
8. Remember that reeving reduces sling capacity.<br />
9. Keep out of harm's way at all timnes.<br />
10. IF IN DOUBT - ASK.<br />
THE TEN POINTS ARE:<br />
INCLUDED ANGLE UNDER 120 0<br />
TEST TAGS ON TACKLE<br />
KNOW LOAD WEIGHT<br />
RIGHT GEAR FOR THE JOB<br />
DOGMAN SIGNALS ONLY<br />
NEVER KNOT CHAINS<br />
LOAD ON HOOK BOWL<br />
SLING REEVING - LOWER CAPACITY<br />
OUT OF HARM'S WAY<br />
IF IN DOUBT - ASK.<br />
SLINGING - 10 COMMANDMENTS<br />
PAGE 28