
You also want an ePaper? Increase the reach of your titles
YUMPU automatically turns print PDFs into web optimized ePapers that Google loves.
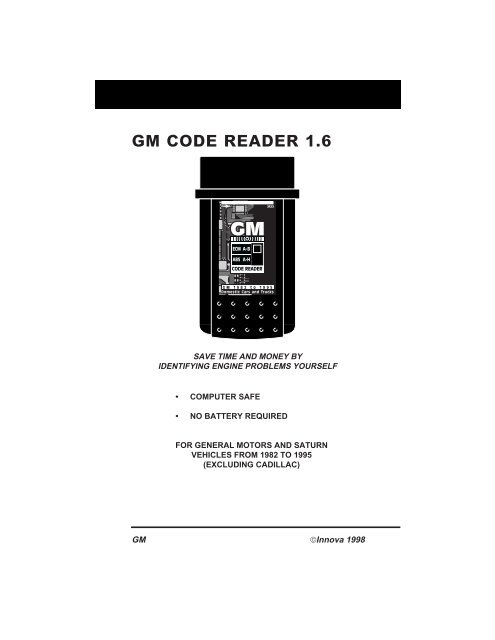
<strong>GM</strong> <strong>CODE</strong> <strong>READER</strong> <strong>1.6</strong><br />
SAVE TIME AND MONEY BY<br />
IDENTIFYING ENGINE PROBLEMS YOURSELF<br />
• COMPUTER SAFE<br />
• NO BATTERY REQUIRED<br />
FOR GENERAL MOTORS AND SATURN<br />
VEHICLES FROM 1982 TO 1995<br />
(EXCLUDING CADILLAC)<br />
<strong>GM</strong> ©Innova 1998
Table of Contents<br />
Paragraph Title Page No.<br />
YOU CAN DO IT! ........................................................ ii<br />
GENERAL INFORMATION<br />
1.1 YOUR VEHICLE'S COMPUTER SYSTEM ............... 1-1<br />
1.2 ABOUT YOUR <strong>CODE</strong> <strong>READER</strong>................................. 1-2<br />
1.3 TEST CONNECTOR LOCATIONS ............................ 1-2<br />
1.4 SAFETY PRECAUTIONS........................................... 1-3<br />
1.5 VEHICLE SERVICE MANUALS ............................... 1-3<br />
<strong>1.6</strong> PRELIMINARY VEHICLE DIAGNOSIS .................. 1-4<br />
WORKSHEET<br />
RETRIEVING ECM <strong>CODE</strong>S<br />
2.1 VEHICLES COVERED ............................................... 2-1<br />
2.2 BEFORE YOU BEGIN ............................................... 2-2<br />
2.3 RETRIEVING SERVICE <strong>CODE</strong>S ............................. 2-3<br />
2.4 ERASING SERVICE <strong>CODE</strong>S ..................................... 2-6<br />
2.5 ECM SERVICE <strong>CODE</strong>S.............................................. 2-6<br />
RETRIEVING ABS <strong>CODE</strong>S<br />
3.1 ANTI-LOCK BRAKE SYSTEMS ................................ 3-1<br />
3.2 APPLICATIONS ......................................................... 3-1<br />
3.3 RETRIEVING SERVICE <strong>CODE</strong>S ............................. 3-2<br />
3.4 ERASING SERVICE <strong>CODE</strong>S ..................................... 3-7<br />
3.5 ABS SERVICE <strong>CODE</strong>S ............................................... 3-9<br />
4.1<br />
GLOSSARY<br />
INTRODUCTION ........................................................ 4-1<br />
4.2 GLOSSARY OF TERMS AND ...................................<br />
ABBREVIATIONS<br />
WARRANTY AND SERVICE<br />
4-1<br />
5.1 LIMITED ONE YEAR WARRANTY .......................... 5-1<br />
5.2 SERVICE PROCEDURES .......................................... 5-1<br />
i <strong>GM</strong>
1<br />
2<br />
3<br />
Plug It In<br />
• Test connector usually found<br />
under the left side of the<br />
dashboard.<br />
• Set Selector switch to ECM A-B<br />
position.<br />
• Make sure ignition is off. Plug<br />
Code Reader into test connector.<br />
Read Fault Codes<br />
• Turn on ignition. DO NOT<br />
START ENGINE.<br />
• Read codes from flashing<br />
"Check Engine" or "Service<br />
Engine Soon" light.<br />
Pinpoint Problems<br />
• Locate fault code(s) in the<br />
appropriate Service Codes List.<br />
You Can Do It!<br />
CHECK ENGINE<br />
triev<br />
SERVICE<br />
ENGINE<br />
SOON<br />
<strong>CODE</strong> DEFINITION<br />
haft or Crankshaft sensor - cir<br />
el Injector circuit is not working p<br />
possible blown fuel injector fuse<br />
Ignition system fault - Intermittent 7X sign<br />
loss of 58X signal or 6X signal (Saturn)<br />
1 Throttle position sensor (TPS) - signal voltag<br />
high during engine idle or deceleration<br />
22 Throttle position sensor (TPS) - signal<br />
low during engine idle<br />
Fuel cutoff relay circuit - open<br />
ground<br />
23 Manifold air temperature (M<br />
voltage is low or high<br />
Throttle position senso<br />
Mixture Control (M<br />
circuit problems<br />
Intake Air T<br />
Vehicle sp<br />
problem<br />
Ma<br />
Read manual for a complete description of the Code Reader and<br />
it's proper use and operation.<br />
<strong>GM</strong> ii
1<br />
1.1 YOUR VEHICLE'S COMPUTER SYSTEM<br />
Today's vehicles are equipped with computer self-testing<br />
abilities that can locate problems in your vehicle and store<br />
them as service codes in the vehicle's onboard computer. The<br />
Code Reader allows you access to the computer's memory and<br />
recalls the service codes.<br />
1.1.1 Instrument Panel Indicator Lights<br />
Your vehicle's Instrument panel has several indicator lights, such<br />
as the "Check Engine", "Service Engine Soon", "ABS", "Shift to<br />
D2" and "Temperature" indicator lights. These lights do more<br />
than tell you to check for engine, brake, or other component<br />
malfunctions. They can also transmit the service codes in the<br />
computer memory by blinking on and off.<br />
NOTE:<br />
1.1.2 Service Codes<br />
If your instrument panel indicator lights do not come<br />
on when you turn on the ignition, please refer to your<br />
vehicle's service manual. You may have problems in<br />
the car's circuitry. You must fix these problems before<br />
you can obtain service codes from the vehicle's<br />
onboard computer.<br />
The service codes are also called "fault codes", "diagnostic<br />
codes" or "trouble codes". These codes can be used to identify<br />
systems or components which are malfunctioning.<br />
The computer records codes for two types of problems:<br />
■<br />
CHECK ENGINE<br />
SERVICE<br />
ENGINE<br />
SOON<br />
"Hard" Codes. "Hard" codes are stored for problems<br />
which are happening now. The instrument panel indicator<br />
light will stay on when the engine is running.<br />
■ "Intermittent" Codes or "Continuous Memory" Codes.<br />
Intermittent service codes are stored in the computer's<br />
memory for problems which occur intermittently, or for<br />
problems which happened in the past but are not currently<br />
present. Intermittent problems may cause the panel<br />
indicator light to flicker or to turn on intermittently.<br />
Intermittent codes are stored in the computer's memory for<br />
a set period of time (usually 50 start cycles). If an<br />
intermittent problem does not recur within this time<br />
period, the computer automatically erases the related<br />
intermittent fault code from it's memory.<br />
1-1 <strong>GM</strong>
General Information<br />
NOTE : For Saturn vehicles, either the "Shift to D2" light or<br />
the "Temperature" indicator light is used to transmit<br />
Saturn Electronic Transmission codes.<br />
1.2 ABOUT YOUR <strong>CODE</strong> <strong>READER</strong><br />
The Code Reader is a device which connects to your vehicle's<br />
computer self-test connector. It allows the computer to output<br />
the service codes through the vehicle's instrument panel<br />
indicator lights. The Code Reader can be used to retrieve:<br />
■ Engine/Electronic Transmission codes (ECM/PCM)<br />
NOTE: Unless otherwise indicated, any reference to ECM<br />
throughout this manual also applies to PCM.<br />
■ Anti-Lock Brake System codes (ABS)<br />
1.2.1 Controls and Indicators<br />
Selector Switch – Selects<br />
operating mode for Code Reader:<br />
■ ECM A-B – Use to retrieve ECM<br />
codes<br />
■ ABS A-H – Use to retrieve ABS<br />
service codes<br />
1.3 TEST CONNECTOR LOCATIONS<br />
• The gateway to your vehicle's onboard computer.<br />
Your vehicle test connector also<br />
known as the Assembly Line Data<br />
Link (ALDL) connector or Assembly<br />
Line Communication Link (ALCL)<br />
connector is usually black in color<br />
and is most likely found under the left side of the dashboard.<br />
Some connectors can be found on the right kick panel, under<br />
the center of the dashboard, on the side of the fuse block or<br />
under the ashtray in the center console. The connector might<br />
have a plastic cover on it labeled "Diagnostic Connector". If<br />
you have any questions about the connector's location, please<br />
refer to your vehicle's service manual for detailed information.<br />
<strong>GM</strong> 1-2
1<br />
1.4 SAFETY PRECAUTIONS<br />
• Always observe safety precautions whenever working on a<br />
vehicle.<br />
a. Always wear safety eye protection.<br />
b. Only work on your vehicle in a well-ventilated area.<br />
c. Put transmission in “park” (for automatic) or “neutral” (for<br />
manual). Set parking brake.<br />
d. Put blocks on drive wheels.<br />
e. Avoid moving fan blades or any potentially moving parts.<br />
f. Avoid hot engine parts.<br />
g. Turn off ignition before connecting (or disconnecting) any<br />
testing equipment.<br />
h. Please read your vehicle’s service manual and follow it’s<br />
safety procedure.<br />
1.5 VEHICLE SERVICE MANUALS<br />
It is recommended that you consult<br />
the manufacturer’s instructions and<br />
specifications in these service manuals<br />
before any test or tune-up<br />
procedures are performed.<br />
IMPORTANT: You MUST use the<br />
wiring diagrams in your vehicle's<br />
service manual to ensure proper<br />
connections during testing.<br />
PNK-BLK PNK-BLK<br />
F8<br />
DK GRN-WHT<br />
BLK-WHT<br />
F/P FUSE<br />
Contact your local car dealership, auto parts store, bookstore<br />
or public library for availability of these manuals. The<br />
following companies publish valuable repair manuals:<br />
■ General Motors Publications, Helm, Inc., 14310 Hamilton<br />
Ave., Highland Park, MI 48203, Phone: (800) 782-4356<br />
■ Haynes Publications, 861 Lawrence Drive, Newbury Park,<br />
California 91320, Phone: (805) 498-6703, Fax: (805) 498-<br />
2867<br />
■ Mitchell International, 14145 Danielson St., Poway,<br />
California 92064, Phone: (888) 724-6742<br />
■ Motor Publications, 5600 Crooks Road, Troy, Michigan<br />
48098, Phone: (800) 426-6867, Fax: (313) 828-0215<br />
1-3 <strong>GM</strong><br />
6<br />
2<br />
PNK-BLK<br />
4<br />
GRY<br />
1<br />
RED<br />
3<br />
FUEL PUMP<br />
PRIME CONN<br />
FUEL PUMP<br />
TYPICAL WIRING<br />
DIAGRAM
General Information<br />
<strong>1.6</strong> PRELIMINARY VEHICLE DIAGNOSIS WORKSHEET<br />
The purpose of this form is to help you gather preliminary information<br />
on your vehicle before you retrieve codes. By having a complete<br />
account of your vehicle's current problem(s), you will be able to<br />
systematically pinpoint the problem(s) by comparing your answers to<br />
the fault codes you retrieve. You can also provide this information to<br />
your mechanic to assist in diagnosis and help avoid costly and<br />
unnecessary repairs. It is important for you to complete this form to help<br />
you and/or your mechanic have a clear understanding of your vehicle's<br />
problems.<br />
NAME:<br />
DATE:<br />
VIN*:<br />
YEAR:<br />
MAKE:<br />
MODEL:<br />
ENGINE SIZE:<br />
VEHICLE MILEAGE:<br />
*VIN: Vehicle Identification Number, found at the base of the<br />
windshield on a metallic plate, or at the driver door latch area (consult<br />
your vehicle owner's manual for location).<br />
TRANSMISSION:<br />
❑ Automatic<br />
❑ Manual<br />
Please check all applicable items in each category.<br />
DESCRIBE THE PROBLEM:<br />
<strong>GM</strong> 1-4
1<br />
WHEN DID YOU FIRST NOTICE THE PROBLEM:<br />
❑ Just Started<br />
❑ Started Last Week<br />
❑ Started Last Month<br />
❑ Other:<br />
LIST ANY REPAIRS DONE IN THE PAST SIX MONTHS:<br />
PROBLEMS STARTING<br />
❑ No symptoms<br />
❑ Will not crank<br />
ENGINE QUITS OR STALLS<br />
❑ No symptoms<br />
❑ Right after starting<br />
❑ When shifting into gear<br />
❑ During steady-speed driving<br />
IDLING CONDITIONS<br />
❑ No symptoms<br />
❑ Is too slow at all times<br />
❑ Is too fast<br />
RUNNING CONDITIONS<br />
❑ No symptoms<br />
❑ Runs rough<br />
❑ Lacks power<br />
❑ Bucks and jerks<br />
❑ Poor fuel economy<br />
❑ Hesitates or stumbles on<br />
accelerations<br />
❑ Cranks, but will not start<br />
❑ Starts, but takes a long time<br />
❑ Right after vehicle comes to a stop<br />
❑ While idling<br />
❑ During acceleration<br />
❑ When parking<br />
❑ Is sometimes too fast or too slow<br />
❑ Is rough or uneven<br />
❑ Fluctuates up and down<br />
❑ Backfires<br />
❑ Misfires or cuts out<br />
❑ Engine knocks, pings or rattles<br />
❑ Surges<br />
❑ Dieseling or run-on<br />
1-5 <strong>GM</strong>
PROBLEM OCCURS<br />
General Information<br />
AUTOMATIC TRANSMISSION PROBLEMS (if applicable)<br />
❑ No symptoms<br />
❑ Vehicle does not move when in<br />
❑ Shifts too early or too late<br />
gear<br />
❑ Changes gear incorrectly ❑ Jerks or bucks<br />
❑ Morning ❑ Afternoon ❑ Anytime<br />
ENGINE TEMPERATURE WHEN PROBLEM OCCURS<br />
❑ Cold ❑ Warm ❑ Hot<br />
DRIVING CONDITIONS WHEN PROBLEM OCCURS<br />
❑ Short - less than 2 miles<br />
❑ 2 ~ 10 miles<br />
❑ Long - more than 10 miles<br />
❑ Stop and go<br />
❑ While turning<br />
❑ While braking<br />
❑ At gear engagement<br />
❑ With A/C operating<br />
DRIVING HABITS<br />
❑ Mostly city driving<br />
❑ Highway<br />
❑ Park vehicle inside<br />
❑ Park vehicle outside<br />
GASOLINE USED<br />
❑ 87 Octane<br />
❑ 89 Octane<br />
WEATHER CONDITIONS WHEN PROBLEM OCCURS<br />
❑ 32 ~ 55° F (0 ~ 13° C)<br />
❑ Above 55° F (13° C)<br />
❑ Below freezing (32° F / 0° C)<br />
CHECK ENGINE LIGHT / DASH WARNING LIGHT<br />
❑ Sometimes ON ❑ Always ON ❑ Never ON<br />
PECULIAR SMELLS<br />
❑ "Hot"<br />
❑ Sulfur ("rotten egg")<br />
❑ Burning rubber<br />
STRANGE NOISES<br />
❑ Rattle<br />
❑ Knock<br />
❑ With headlights on<br />
❑ During acceleration<br />
❑ Mostly driving downhill<br />
❑ Mostly driving uphill<br />
❑ Mostly driving level<br />
❑ Mostly driving curvy roads<br />
❑ Mostly driving rough roads<br />
❑ Drive less than 10 miles per day<br />
❑ Drive 10 to 50 miles per day<br />
❑ Drive more than 50 miles per day<br />
❑ 91 Octane<br />
❑ More than 91 Octane<br />
❑ Gasoline<br />
❑ Burning oil<br />
❑ Electrical<br />
❑ Squeak<br />
❑ Other<br />
<strong>GM</strong> 1-6
2<br />
2.1 VEHICLES COVERED<br />
This Code Reader may be used to retrieve engine service codes<br />
from most General Motors (<strong>GM</strong>) and Saturn domestic cars and<br />
trucks (EXCEPT Geo, Nova, and Sprint). Includes all models<br />
EXCEPT Cadillacs and diesel vehicles. Specific makes and<br />
models are listed below.<br />
Model<br />
Year Make Model<br />
1982-93 Buick Century, Electra, Electra Wagon, Estate<br />
Wagon, Le Sabre, Le Sabre Wagon, Park<br />
Avenue, Reatta*, Regal, Grand National,<br />
Riviera*, Roadmaster, Skyhawk, Skylark,<br />
Somerset<br />
Chevrolet Berreta, Camaro, Caprice, Cavalier, Celebrity,<br />
Chevette, Citation, Corisca, Corvette,<br />
El Camino, Impala, Lumina, Monte Carlo<br />
Oldsmobile Achieva, Calais, Custom Cruiser, Cutlass<br />
Calais, Ciera, Cutlass Cruiser, Cruiser<br />
Wagon, Cutlass Supreme, Supreme Classic,<br />
Delta 88, Eighty-eight, Firenze, Ninetyeight,<br />
Omega, Toronado*, Touring Sedan,<br />
Trofeo*<br />
Pontiac 6000, 6000 STE, Bonneville, Fiero, Firebird,<br />
Grand Am, Grand Prix, J 2000, Lemans,<br />
J Parisienne, Phoenix, Safari, Safari Wagon,<br />
Sunbird, T 1000<br />
Saturn All models<br />
Trucks All one ton capacity or less with gas<br />
and Vans engines<br />
1994 Buick Roadmaster 5.7 liter<br />
Chevrolet Camaro 3.4 liter/5.7 liter, Caprice 5.7 liter,<br />
Caprice 5.7 liter, Cavalier 3.1 liter,<br />
Lumina 3.1 liter<br />
Pontiac Firebird 3.4 liter/5.7 liter, Sunbird 2.0 liter/<br />
3.1 liter<br />
Saturn All models<br />
Trucks All one ton capacity or less with gas<br />
and Vans engines<br />
2-1 <strong>GM</strong>
Retrieving ECM Codes<br />
Model<br />
Year Make Model<br />
1995 Chevrolet Caprice 4.3 liter<br />
Saturn All models<br />
Trucks All one ton capacity or less with gas<br />
and Vans engines (EXCEPT S/T Series vehicles)<br />
* Not applicable to models equipped with climate control<br />
computers<br />
NOTE:<br />
For 1994 and 1995 vehicles, only the models listed<br />
above are compatible with the Code Reader.<br />
The Code Reader is not compatible with 1996 and<br />
later model year vehicles.<br />
2.1.1 Vehicle Test Connector<br />
<strong>GM</strong> and Saturn vehicles use one of two types of test<br />
connectors: 12-pin or 16-pin.<br />
■<br />
12-Pin Connector: The 12-pin<br />
connector was phased out<br />
completely in 1996. Some 1994<br />
and 1995 vehicles still use the<br />
12-pin connector, but because of changes in the ECM, the<br />
Code Reader is not compatible with some of these systems<br />
(see paragraph 2.1).<br />
■ 16-Pin Connector: The new<br />
16-pin connector was introduced<br />
on some 1994 and 1995 models,<br />
and was made standard<br />
equipment on all 1996 and<br />
subsequent model year vehicles. The Code Reader will<br />
not work on vehicles equipped with the 16-pin<br />
connector.<br />
2.2 BEFORE YOU BEGIN<br />
1 2 3 4 5 6 7 8<br />
9 10111213141516<br />
• Fix any known mechanical problems before performing<br />
any test.<br />
Make a thorough check before starting any test procedure.<br />
Loose or damaged hoses, wiring, or electrical connectors are<br />
often responsible for poor engine performance, and in some<br />
cases they may cause a “false” fault code.<br />
<strong>GM</strong> 2-2
2<br />
Please read your vehicle’s service manual for proper<br />
connection of vacuum hoses, electrical wiring, and wiring<br />
harness connectors. Check the following areas:<br />
a. All fluid levels<br />
b. Air cleaner and ducts<br />
c. Belts<br />
d. Mechanical linkage associated with sensor<br />
e. Vacuum hoses<br />
f. Spark plugs and wires<br />
g. Electrical wiring<br />
h. Electrical connectors<br />
i. Proper battery voltage<br />
j. Fuel system components<br />
2.3 RETRIEVING SERVICE <strong>CODE</strong>S<br />
• Always observe safety precautions before and during the<br />
testing process.<br />
• Fix any known mechanical problems before this test.<br />
• Have pencil and paper handy.<br />
1. Turn off ignition.<br />
2. Connect the Code Reader to the vehicle test connector.<br />
NOTE: The Code Reader only fits into the connector one way.<br />
3. Set Selector Switch to ECM A-B<br />
position.<br />
4. Turn on ignition. DO NOT<br />
START THE ENGINE.<br />
5. Read codes from the "Check Engine" or "Service Engine<br />
Soon" light (from the "Shift to D2" light - 1991 and 1992<br />
models or the "Temperature" indicator light - 1993 and<br />
subsequent - for Saturn Electronic Transmission codes) on<br />
your vehicle's instrument panel. Be sure to write the codes<br />
down.<br />
NOTE: If the light does not blink, refer to your vehicle's<br />
service manual for information on checking the<br />
circuitry.<br />
• All codes are two digits.<br />
2-3 <strong>GM</strong>
Retrieving ECM Codes<br />
• Each code is transmitted three times before the next code<br />
is sent.<br />
• Code sets will begin with Code 12 ("System Pass") even if<br />
fault codes are present.<br />
• The codes will continue to be sent as long as the ignition is<br />
on and the Code Reader is connected.<br />
• Count blinks to get the service codes:<br />
• Code 12 looks like:<br />
BLINK<br />
NOTE: Code 12 is not a fault code. Code 12 indicates the<br />
computer's self-diagnostic system is functioning<br />
properly (SYSTEM PASS). If code 12 is the only code<br />
which displays when you perform the diagnostic test,<br />
this means there are no fault codes stored in the<br />
vehicle's computer. Consult your vehicle's repair<br />
manual for "no codes" problems.<br />
• Code 22 looks like:<br />
BLINK BLINK<br />
IMPORTANT: Any code that ends in zero ("0") is transmitted<br />
as follows:<br />
• Code 30 looks like:<br />
BLINK BLINK<br />
PAUSE = Code 12<br />
BLINK<br />
PAUSE<br />
BLINK BLINK<br />
BLINK BLINK<br />
ABNORMALLY LONG PAUSE<br />
= Code 22<br />
= Code 30<br />
6. Next, erase service codes (see paragraph 2.4). This will<br />
help you determine which codes are "hard" faults and<br />
which codes are "intermittent" faults.<br />
7. Turn on ignition, start engine, and observe "Service<br />
Engine Soon" light; light should turn off. Run engine for<br />
several minutes (to allow engine to reach normal<br />
operating temperature), then observe "Service Engine<br />
Soon" light:<br />
■ If "Service Engine Soon" light turns on, turn off ignition<br />
and repeat steps 2 through 5. This reveals "hard" fault<br />
codes.<br />
<strong>GM</strong> 2-4
2<br />
NOTE: It may be necessary to test drive the vehicle to<br />
reset "hard" fault codes 13, 15, 24, 44, 45, and 55<br />
after they have been erased.<br />
■ If "Service Engine Soon" light does not turn on, the initial<br />
stored fault codes were all "intermittent" fault codes.<br />
(Refer to the "Diagnostic Procedures" section in the<br />
manufacturer's service manual for your vehicle.)<br />
8. Follow the testing and repair procedures outlined in the<br />
manufacturer's service manual for your vehicle to correct<br />
"hard" faults. Codes should be addressed and eliminated<br />
in the order they were received, erasing and retesting<br />
after each repair is made to be sure the fault was<br />
eliminated. Code 12 will appear alone when no other fault<br />
codes are present.<br />
NOTE: Whenever codes 51, 52, 54, or 55 are displayed with<br />
other codes, troubleshoot and eliminate the "50<br />
Series" codes first, then proceed with the lowernumbered<br />
codes.<br />
9. Turn off ignition and remove the Code Reader.<br />
2.3.1 Servicing Fault Codes<br />
Diagnostic trouble codes indicate a problem in a circuit, not<br />
necessarily a faulty component. DO NOT replace components<br />
based only on trouble codes without first following the service<br />
procedures described in your vehicle's repair manual. Most<br />
faults (including those that set trouble codes) are caused by<br />
damaged, shorted or open wiring, damaged or corroded<br />
connections, improper voltages or grounds, or other<br />
mechanical problems.<br />
Sometimes a fault in one circuit or system will cause the<br />
computer to set a fault code for a different circuit or system.<br />
Example:<br />
A defective spark plug wire can cause a "rich condition" fault<br />
code to be set on the oxygen sensor circuit. In this case,<br />
replacing any component in the oxygen sensor circuit will not<br />
correct the fault, because the problem is caused by the<br />
defective spark plug wire and not by the oxygen sensor circuit.<br />
This is called a "false" code.<br />
For this reason, it is IMPORTANT that you make a thorough<br />
inspection of all systems: wiring, hoses, vacuum, engine<br />
mechanical, charging, ignition, power, ground, fuel, (some of<br />
these systems are not connected to the computer system, but<br />
2-5 <strong>GM</strong>
Retrieving ECM Codes<br />
will still affect it) before retrieving trouble codes. Refer to your<br />
vehicle's service/repair manual for specifications and system<br />
testing procedures which apply to your particular vehicle.<br />
2.4 ERASING SERVICE <strong>CODE</strong>S<br />
• Always observe safety precautions before and during<br />
testing process.<br />
1. Turn off ignition.<br />
2. Remove ECM fuse from the fuse block or disconnect the<br />
negative battery cable to disconnect power to the vehicle's<br />
computer.<br />
3. Wait fifteen seconds for codes to be erased from the<br />
computer's memory.<br />
4. Reconnect ECM fuse or reconnect negative battery cable.<br />
NOTE: Once the computer's memory has been erased your<br />
vehicle may run rough for up to 40 miles while new<br />
information is being saved in the vehicle's computer.<br />
If the battery cable is removed, you will have to<br />
reprogram your radio, clock and memory seat<br />
position.<br />
2.5 ECM SERVICE <strong>CODE</strong>S<br />
• Consult your vehicle's service manual for detailed<br />
meanings or definitions related to your vehicle.<br />
Refer to the appropriate service codes table for your vehicle:<br />
2.5.1 <strong>GM</strong> Engine/Electronic Transmission Service Codes;<br />
Saturn Engine Service Codes<br />
2.5.2 Saturn Electronic Transmission Service Codes<br />
Refer to the "Diagnostic Charts" and "Diagnostic Aids" in your<br />
vehicle's service manual to further assist in the fault isolation<br />
and elimination process.<br />
<strong>GM</strong> 2-6
2<br />
2.5.1 <strong>GM</strong> Engine/Electronic Transmission Service Codes; Saturn<br />
Engine Service Codes<br />
<strong>CODE</strong> SERVICE <strong>CODE</strong> DEFINITION<br />
11 (Saturn vehicles ONLY): Indicates transmission service<br />
codes will be displayed next on the "Shift to D2" light<br />
(1991-92 models) or "Temperature" indicator light (1993<br />
and later models)<br />
12 Diagnostic mode; no distributor signal to Electronic<br />
Control Module; System PASS<br />
13 Oxygen sensor signal fault - signal too low / open left<br />
oxygen sensor circuit (Dual sensor models)<br />
14 Coolant sensor or circuit fault - signal voltage low or<br />
shorted<br />
15 Coolant temperature sensor or circuit fault - signal<br />
voltage high<br />
16 Battery or alternator problem - voltage too high or low<br />
Direct ignition system (DIS) fault line open or shorted to<br />
ground<br />
Ignition system fault - loss of 2X or Low Resolution<br />
Pulse signal<br />
Transmission speed error<br />
17 RPM signal problem<br />
Camshaft sensor - circuit problems<br />
Electronic Control Module (ECM) computer circuit<br />
problem - Pull-up resistor (Saturn)<br />
18 Camshaft or Crankshaft sensor - circuit problems<br />
Fuel Injector circuit is not working properly - possible<br />
blown fuel injector fuse<br />
19 Ignition system fault - Intermittent 7X signal or loss of<br />
58X signal or 6X signal (Saturn)<br />
21 Throttle position sensor (TPS) - signal voltage is high<br />
22 Throttle position sensor (TPS) - signal voltage is low<br />
Fuel cutoff relay circuit - open or shorted to ground<br />
23 Manifold air temperature (MAT) sensor - signal voltage<br />
is low or high<br />
Throttle position sensor (TPS) error<br />
Mixture Control (M/C) solenoid - open or short circuit<br />
problems<br />
Intake Air Temperature Sensor (IAT) low<br />
2-7 <strong>GM</strong>
Retrieving ECM Codes<br />
<strong>CODE</strong> SERVICE <strong>CODE</strong> DEFINITION<br />
24 Vehicle speed sensor (VSS) - open or short circuit<br />
problems or park/neutral switch circuit problem<br />
25 Manifold air temperature (MAT) sensor - signal voltage<br />
is low or high<br />
Vacuum switching valve circuit open or shorted to<br />
ground<br />
ATS sensor - signal voltage is high or low<br />
26 Quad-Driver module or Quad-driver No. 1 error<br />
27 2nd gear switch problem<br />
Quad-Driver module or Quad-driver No. 2 error<br />
28 3rd gear switch<br />
Quad-Driver module or Quad-driver No. 3 error<br />
(Corvette)<br />
(Transmission) Fluid pressure switch assembly - open or<br />
short circuit problems<br />
29 4th gear switch<br />
Quad-Driver module or Quad-driver No. 3 error<br />
Secondary air injection system - circuit problems<br />
31 Manifold absolute pressure (MAP) sensor - signal<br />
voltage is low<br />
Fuel injector<br />
Park/Neutral switch - circuit problems<br />
CAM sensor - circuit problems<br />
Engine speed control governor malfunction (Van)<br />
Turbocharger wastegate overboost<br />
Wastegate electrical signal - open or shorted to ground<br />
Purge solenoid voltage high (carburetor engines)<br />
32 Barometric pressure (BARO) sensor circuit failure<br />
Exhaust gas recirculation (EGR) valve diagnostic switch -<br />
closed during engine start-up or open when EGR flow<br />
requested by ECM<br />
Electronic vacuum regulator valve (EVRV) error (EVRV<br />
controls EGR vacuum)<br />
<strong>GM</strong> 2-8
2<br />
<strong>CODE</strong> SERVICE <strong>CODE</strong> DEFINITION<br />
33 Mass air flow (MAF) sensor - signal voltage or frequency<br />
is high during engine idle<br />
Manifold absolute pressure (MAP) sensor - signal<br />
voltage is high during engine idle (Note: Engine misfire<br />
or unstable idle may cause this code)<br />
34 Mass air flow (MAF) sensor - signal voltage or frequency<br />
is low during engine cruise<br />
Manifold absolute pressure (MAP) sensor - signal<br />
voltage is low during ignition on<br />
Pressure sensor circuit - signal voltage too high or low<br />
(carburetor engines)<br />
35 Idle air control (IAC) system problem - can not set<br />
desired RPM or idle speed actuator (ISA) carbureted<br />
system problems<br />
36 Mass air flow (MAF) sensor - burn-off circuit problem<br />
Transmission shift problem (electronically controlled<br />
transmissions only)<br />
Direct ignition system (DIS) fault - loss of 24X signal or<br />
extra or missing pulses in electronic spark timing (EST)<br />
signal<br />
Ignition system fault - loss of High Resolution Pulse<br />
signal<br />
37 Brake switch stuck"on"<br />
38 Brake switch circuit fault<br />
Knock sensor (KS) - open circuit problem<br />
39 Torque converter clutch (TCC circuit fault)<br />
Clutch switch circuit problems<br />
Knock sensor (KS) - short circuit problem<br />
41 Cam sensor (CAM) failure<br />
Cylinder select error<br />
Tach input error - no reference pulses during engine run<br />
Electronic spark timing (EST) circuit - open or shorted<br />
to ground during engine run<br />
Direct ignition system (DIS) fault - bypass circuit open<br />
or shorted to ground during engine run<br />
Ignition system fault - loss of 1X Reference Pulse signal<br />
2-9 <strong>GM</strong>
Retrieving ECM Codes<br />
<strong>CODE</strong> SERVICE <strong>CODE</strong> DEFINITION<br />
42 Electronic spark timing (EST) circuit - open or shorted<br />
Direct ignition system (DIS) fault - bypass circuit open<br />
or shorted to ground during engine run<br />
Fuel cutoff relay circuit - open or shorted to ground<br />
43 Electronic spark timing (EST) circuit - low voltage<br />
detected<br />
Electronic spark control (ESC) - circuit problems<br />
44 Lean exhaust indicated (Left side on dual oxygen models)<br />
45 Rich exhaust indicated (Left side on dual oxygen<br />
models)<br />
46 Vehicle anti-theft system (VATS) failure<br />
Power steering pressure switch failure<br />
47 Circuit or component problem in ECM/PCM (communication<br />
error)<br />
Knock sensor module error (inside computer)<br />
48 Misfire symptom<br />
Mass air flow (MAF) sensor - circuit error<br />
49 RPM is high at idle (possible vacuum leak)<br />
50 System voltage is low<br />
51 Computer problem; faulty, wrong or incorrectly installed<br />
PROM circuit; or ECM/PCM failure<br />
52 Calibration Package Chip or ECM fault or oil temperature<br />
sensor fault/low engine temperature<br />
(Corvette); faulty or missing PROM/Calibration Package<br />
Chip; ECM problem<br />
System voltage high for a long period of time<br />
53 System voltage too high (over 17.7 volts to ECM) or<br />
EGR system fault or alternator voltage not normal or<br />
Vehicle Anti-Theft System fault<br />
54 Fuel pump circuit fault or Mixture Control (M/C)<br />
solenoid fault or Electronic Control Module (ECM)<br />
fault/EGR solenoid #2 failure (3.8L VIN1)<br />
Fuel pump relay<br />
55 Electronic Control Module (ECM) fault or oxygen sensor<br />
circuit fault or EGR solenoid #3 failure (3.8L VIN1) or<br />
fuel lean monitor (Corvette)<br />
<strong>GM</strong> 2-10
2<br />
<strong>CODE</strong> SERVICE <strong>CODE</strong> DEFINITION<br />
56 Vacuum sensor circuit fault or quad driver "B" fault<br />
(3.8L VIN1)<br />
Corrosivity/add coolant<br />
57 Boost control problem (3.8L VIN1)<br />
58 Vehicle Anti-Theft System fault (3.8L)<br />
Transmission Temperature Sensor (TTS) - short circuit<br />
Transmission fluid temp high<br />
59 Transmission Temp Sensor (TTS) - open<br />
Transmission fluid temp low<br />
60 Transmission not in drive<br />
61 Oxygen sensor signal fault or port throttle system fault<br />
or on-board cruise control fault (vent solenoid circuit)<br />
Air Conditioner (A/C) system performance problems<br />
62 Engine oil temperature sensor fault or gear switch<br />
signal circuit fault or on-board cruise control fault<br />
(vacuum solenoid circuit)<br />
63 EGR flow problem or on-board cruise control problem<br />
Servo Position Sensor (SPS) circuit fault or Manifold<br />
Absolute Pressure (MAP) sensor fault or oxygen sensor<br />
fault<br />
64 EGR flow problem or on-board cruise control problem or<br />
Manifold Absolute Pressure (MAP) sensor fault or<br />
oxygen sensor fault<br />
65 EGR flow problem or on-board cruise control problem<br />
Servo Position Sensor (SPS) circuit fault or Manifold<br />
Absolute Pressure (MAP) sensor fault or oxygen sensor<br />
fault or fuel injector current low<br />
66 Electronic Control Module (ECM) computer circuit fault<br />
or air conditioning pressure sensor circuit fault or low<br />
air conditioning refrigerant charge<br />
(Transmission) 3-2 shift control solenoid - circuit<br />
problems<br />
67 Cruise control - switch circuit problems<br />
Air Conditioner (A/C) pressure sensor - circuit problems<br />
Torque Converter Clutch (TCC) solenoid - circuit<br />
problems<br />
Cruise control switches - circuit problems<br />
2-11 <strong>GM</strong>
Retrieving ECM Codes<br />
<strong>CODE</strong> SERVICE <strong>CODE</strong> DEFINITION<br />
68 On-board cruise control switch circuit problems Servo<br />
Position Sensor (SPS) circuit fault or shorted A/C clutch<br />
relay circuit (Corvette) or overdrive ratio error<br />
69 Air conditioning head pressure switch circuit fault or air<br />
conditioning pressure switch problem<br />
Torque converter clutch stuck "on"<br />
70 Air conditioning refrigerant pressure sensor circuit fault<br />
(high pressure) or quad driver module error<br />
71 Air conditioning evaporator temperature sensor circuit<br />
fault (low temp.)<br />
72 Gear select switch circuit fault - Corvette only<br />
Vehicle Speed Sensor (VSS) - loss of signal<br />
73 Air conditioning evaporator temperature sensor circuit<br />
fault (high temp.)<br />
(Transmission) Pressure control solenoid - circuit<br />
problems<br />
74 Traction control circuit voltage low<br />
75 Digital EGR fault - #1 solenoid or system voltage low<br />
(charging system problem)<br />
Transmission voltage low<br />
76 Digital EGR fault - #2 solenoid<br />
77 Digital EGR fault - #3 solenoid<br />
Primary cooling fan relay driver circuit - circuit<br />
problems<br />
78 Secondary cooling fan relay driver circuit - circuit<br />
problems<br />
79 Vehicle Speed Sensor (VSS) - signal voltage too high<br />
Transmission Temperature Sensor (TTS) - high<br />
temperature<br />
80 Vehicle Speed Sensor (VSS) - signal voltage too low;<br />
transmission component fault<br />
81 QDM Solenoid "B" monitored voltage differs from<br />
commanded<br />
Anti-Lock Brake System (ABS) message fault (Saturn)<br />
Brake switch circuit problems<br />
<strong>GM</strong> 2-12
2<br />
<strong>CODE</strong> SERVICE <strong>CODE</strong> DEFINITION<br />
82 Internal PCM communication fault (Saturn) or QDM<br />
Solenoid "A" monitored voltage differs from commanded<br />
Ignition system fault - 3X signal problem<br />
83 Torque Converter Clutch (TCC) solenoid - circuit<br />
problems<br />
Reverse Inhibit - open or short circuit in reverse inhibit<br />
solenoid<br />
84 3-2 Control solenoid - open or short circuit problems<br />
Skip shift solenoid - open or short circuit problems<br />
85 Programmable Read Only Memory error or undefined<br />
gear ratio (input or output sensor failure)<br />
Torque converter clutch (TCC) - TCC is mechanically<br />
stuck on<br />
86 Analogue/Digital Electronic Control Module (ECM)<br />
error or shift Solenoid "B" stuck on<br />
87 Electrically Erasable Programmable Read Only Memory<br />
(EEPROM) error or shift Solenoid "B" stuck off or high<br />
gear ratio error<br />
88 Electronic Control Module (ECM) computer circuit fault<br />
89 Power Management fault<br />
90 TCC error<br />
91 Skip shift light - open or short circuit problems in skip<br />
shift light circuit<br />
93 Pressure control solenoid - transmission line pressure<br />
not at desired level<br />
95 Change oil light - wrong voltage is present in light<br />
circuit for more than 26 seconds<br />
96 Transmission voltage low - low system voltage possibly<br />
caused by generator voltage supply circuit or power<br />
train control module<br />
Low oil light - wrong voltage is present in light circuit<br />
for more than 26 seconds<br />
97 Vehicle speed sensor (VSS) - output circuit problems<br />
99 Tachometer output circuit problems<br />
2-13 <strong>GM</strong>
Retrieving ECM Codes<br />
2.5.2 Saturn Electronic Transmission Service Codes<br />
• Transmission codes will be transmitted (if present) after<br />
all engine codes are transmitted and code 11 has been<br />
sent. Code 11 indicates that transmission codes are<br />
present and will be transmitted on the "Shift to D2" light<br />
(1991-92 models) or the "Temperature" indicator light<br />
(1993 and later models).<br />
<strong>CODE</strong> SERVICE <strong>CODE</strong> DEFINITION<br />
13 Line pressure high<br />
14 Line pressure low<br />
15 Hot light<br />
16 No 1st gear<br />
Electrical variable orifice (EVO) fault<br />
17, 18 No gears available<br />
21 2nd gear stuck "on"<br />
22 No 2nd gear<br />
23 No 3rd gear<br />
24 No 4th gear<br />
25 No torque converter clutch<br />
26 Torque converter clutch stuck "on"<br />
27 Quick quad-driver output fault<br />
31 Transaxle temperature circuit open<br />
32 Transaxle temperature circuit grounded<br />
34 Powertrain Control Module (PCM) - communication<br />
failure<br />
35 No turbine speed signal<br />
36 Turbine speed signal noise<br />
41 Vehicle Speed Sensor (VSS) circuit - no signal<br />
42 Vehicle Speed Sensor (VSS) circuit - signal noise<br />
43 Master relay - open or grounded<br />
44 Master relay - shorted<br />
45 Gear selector switch circuit problem - no signal<br />
46 Gear selector switch circuit problem - invalid signal<br />
47 Powertrain Control Module (PCM) computer circuit<br />
problem - communication interrupt failure<br />
<strong>GM</strong> 2-14
2<br />
<strong>CODE</strong> SERVICE <strong>CODE</strong> DEFINITION<br />
48 Hold mode voltage is too low<br />
Reference input intermittent<br />
49 Gear selector error signal<br />
51 Powertrain Control Module (PCM) computer circuit<br />
problem<br />
52 Hold mode stuck "on"<br />
Battery voltage out of range<br />
53 Hold mode stuck "off"<br />
ESC (Knock present)<br />
54 Powertrain Control Module (PCM) computer circuit<br />
problem<br />
5-volt reference ground<br />
55 Transaxle temperature sensor failure<br />
56 Generic Field-Effect Transistor (FET) driver failure<br />
57 Powertrain Control Module (PCM)<br />
58 Battery voltage unstable<br />
61 Possible open or intermittent in DIS module harness 6X<br />
Signal fault<br />
Powertrain Control Module (PCM)<br />
62 Powertrain Control Module (PCM)<br />
63 Powertrain Control Module (PCM)<br />
Option check sum error (set if tire size and options do<br />
not compare with those stored)<br />
64 Powertrain Control Module (PCM)<br />
65 Ignition voltage problem<br />
66 Clamp shorted<br />
67 Clamp open<br />
Handwheel sensor circuit fault<br />
68 Line circuit grounded or open<br />
69 Line circuit shorted<br />
71 2nd line circuit - grounded or open<br />
Cooling system high temperature<br />
72 2nd line circuit - shorted<br />
Cooling system low temperature<br />
2-15 <strong>GM</strong>
Retrieving ECM Codes<br />
<strong>CODE</strong> SERVICE <strong>CODE</strong> DEFINITION<br />
73 3rd line circuit - grounded or open<br />
Coolant sensor signal unstable<br />
74 Coolant/Transmission temperature sensor ratio error<br />
3rd line circuit - shorted<br />
75 3rd gear stuck "on"<br />
Air temperature sensor signal<br />
76 4th line circuit - grounded or open<br />
Throttle position sensor (TPS) to manifold absolute<br />
pressure (MAP) sensor voltage out of range<br />
77 4th line circuit - shorted<br />
78 4th gear stuck "on"<br />
79 Torque Converter Clutch (TCC) circuit - grounded or<br />
open<br />
81 Torque Converter Clutch (TCC) circuit - shorted<br />
82 Transaxle temperature unstable<br />
83 Transaxle temperature low<br />
Low coolant<br />
84 Brake switch stuck open<br />
85 Brake switch stuck closed<br />
86 Engine speed invalid<br />
87 Torque Converter Clutch (TCC) hold circuit - grounded<br />
or open<br />
88 Torque Converter Clutch (TCC) hold circuit - shorted<br />
89 Master relay stuck "on"<br />
91 Assembly Line Diagnostic Link (ALDL)<br />
92 Clamp circuit - intermittent fault<br />
93 Torque Converter Clutch (TCC) hold circuit -<br />
intermittent fault<br />
94 Master enable relay circuit intermittent fault<br />
95 Line circuit - intermittent fault<br />
96 Torque Converter Clutch (TCC) circuit - intermittent<br />
fault<br />
97 2nd gear circuit - intermittent fault<br />
98 3rd gear circuit - intermittent fault<br />
99 4th gear circuit - intermittent fault<br />
<strong>GM</strong> 2-16
3<br />
3.1 ANTILOCK BRAKE SYSTEMS (ABS)<br />
3.1.1 What is ABS?<br />
The ABS system utilizes several mechanical, hydraulic, and<br />
electric/electronic components to automatically control<br />
hydraulic brake pressure to the rear, or front and rear wheels<br />
(depending on the brake system) to prevent wheel lock-up<br />
during hard braking.<br />
3.1.2 What are the benefits of ABS?<br />
By preventing wheel lock-up during hard braking, ABS helps<br />
maintain vehicle directional stability, as well as driver control,<br />
ensuring a safer and more controlled stop in the shortest<br />
distance.<br />
3.1.3 How does the ABS system work?<br />
The ABS system utilizes a computer called an Electronic<br />
Brake Control Module (EBCM). The system also employs<br />
several sensors and switches which monitor and control wheel<br />
speed and hydraulic brake pressure when hard braking is<br />
applied. When the wheel speed sensor(s) detect a potential<br />
lock-up condition, a signal is sent to the EBCM. The EBCM, in<br />
turn, sends a signal to the hydraulic system to relieve brake<br />
pressure at the affected wheels, preventing the lock-up<br />
condition.<br />
3.1.4 What is the purpose of the Code Reader?<br />
Most ABS systems generate diagnostic service codes when a<br />
fault in the system is detected. These service codes are stored<br />
in the EBCM. The Code Reader allows you to access the<br />
EBCM's memory and recalls the service codes. The EBCM<br />
outputs the service codes through the "Anti-Lock" light on the<br />
vehicle's instrument panel.<br />
3.2 APPLICATIONS<br />
<strong>GM</strong> vehicles use a variety of Anti-Lock Brake Systems. This<br />
Code Reader may be used to retrieve ABS service codes from<br />
the following vehicle models:<br />
3-1 <strong>GM</strong>
Retrieving ABS Codes<br />
Year Model ABS Type<br />
1989-93 Astro, "G" Series Van, "R" and "V" Series Kelsey-Hayes<br />
Trucks, Safari, Suburban RWAL<br />
1987-94 Blazer, "C" and "K" Series Pickup, Sierra, Kelsey-Hayes<br />
"S" and "T" Series Pickup (EXCEPT<br />
93-94 4.3L M/T)<br />
RWAL<br />
1989-90 Eldorado, Reatta, Riviera, Seville, Toronado,<br />
Delta 88, Bonneville, DeVille,<br />
Electra, Le Sabre, Ninety-Eight, Fleetwood,<br />
Park Avenue, Touring Sedan<br />
(EXCEPT 1988 Eldorado, Reatta, Riviera,<br />
Seville, Toronado)<br />
Teves II<br />
1990-91 Corvette Bosch 2S<br />
1990-92 Brougham Bosch 2U<br />
1990-94 Astro, Bravada, Jimmy, Safari, Sierra, Kelsey-Hayes<br />
Sonoma, Suburban, Cyclone, Typhoon,<br />
Yukon, "C" and "K" Series Blazer and<br />
Pickup, "S" and "T" Series Blazer and<br />
Pickup, "G" Series Van<br />
4WAL<br />
1995 Astro, "C" and "K" Series Pickup, "G" Kelsey-Hayes<br />
Series Van, Safari, Sierra, Suburban,<br />
Tahoe, Yukon<br />
4WAL<br />
1991-92 Custom Cruiser, Eldorado, Seville,<br />
Reatta, Toronado, Trofeo<br />
Bosch 2U<br />
1991-93 Riviera, Roadmaster, Caprice Bosch 2U<br />
1993 Eldorado, Seville Bosch 2U<br />
ABS/TCS<br />
3.3 RETRIEVING SERVICE <strong>CODE</strong>S<br />
• Always observe safety precautions before and during<br />
testing process.<br />
• Fix any known mechanical problems before this test.<br />
• Have pencil and paper handy.<br />
1. Determine your vehicle's ABS Type (paragraph 3.1) and<br />
retrieve codes using the appropriate procedures:<br />
Teves II Paragraph 3.3.1<br />
Kelsey-Hayes RWAL Paragraph 3.3.2<br />
Kelsey-Hayes 4WAL Paragraph 3.3.3<br />
Bosch 2S Paragraph 3.3.4<br />
Bosch 2U Paragraph 3.3.4<br />
Be sure to write codes down.<br />
<strong>GM</strong> 3-2
3<br />
2. After retrieving ABS fault codes, erase codes using the<br />
appropriate procedures for your vehicle and ABS system<br />
(paragraph 3.4).<br />
3. Repeat the procedure to retrieve ABS fault codes (step 1,<br />
above).<br />
NOTE:<br />
It may be necessary to perform a thorough test drive<br />
to reset some fault codes.<br />
4. In most cases, codes which reappear indicate "hard"<br />
faults. Codes which DO NOT reappear are usually<br />
"intermittent" faults.<br />
5. Follow the testing and repair procedures outlined in the<br />
manufacturer's service manual for your vehicle to correct<br />
"hard" faults. Codes should be addressed and eliminated<br />
in the order they were received, erasing and retesting<br />
after each repair is made to be sure the fault was<br />
eliminated.<br />
3.3.1 Retrieving Service Codes for Teves II Systems<br />
1. Turn on ignition. DO NOT START THE ENGINE.<br />
Observe "Anti-Lock" light:<br />
■ If "Anti-Lock" light turns off within 30 seconds, no<br />
ABS service codes have been stored.<br />
■ If "Anti-Lock" light remains on longer than 30<br />
seconds, continue to step 2 to retrieve ABS service<br />
codes.<br />
2. Turn off ignition.<br />
3. Connect the Code Reader to the vehicle test connector.<br />
NOTE: The Code Reader only fits into the connector one way.<br />
4. Set Selector Switch to ABS A-H<br />
position.<br />
5. Turn on ignition. DO NOT<br />
START THE ENGINE.<br />
6. Read codes from the "Anti-Lock"light on your vehicle's<br />
instrument panel. Be sure to write the codes down.<br />
NOTE: If the light does not blink, refer to your vehicle's<br />
service manual for information on checking the<br />
circuitry.<br />
3-3 <strong>GM</strong>
Retrieving ABS Codes<br />
• All codes are two digits.<br />
• Count blinks to get the service codes:<br />
• First and second digits of code are separated by a 3 second<br />
pause.<br />
• Second digit of service code is followed by a termination<br />
code ("Anti-Lock" light remains steady on).<br />
NOTE:<br />
DO NOT count termination code as part of second<br />
digit.<br />
• Code 13 looks like:<br />
BLINK<br />
PAUSE<br />
BLINK BLINK<br />
7. Up to seven codes can be stored by the EBCM. To check<br />
for additional codes: with ignition still on, disconnect and<br />
then reconnect Code Reader. Repeat this procedure until<br />
all codes have been retrieved.<br />
NOTE: Service codes cannot be erased until all stored service<br />
codes have been retrieved.<br />
8. Turn off ignition and remove the Code Reader.<br />
3.3.2 Retrieving Service Codes for Kelsey-Hayes RWAL Systems<br />
1. Turn off ignition.<br />
STEADY ON<br />
BLINK TERMINATION<br />
<strong>CODE</strong><br />
2. Connect the Code Reader to the vehicle test connector.<br />
NOTE: The Code Reader only fits into the connector one way.<br />
3. Set Selector Switch to ABS A-H<br />
position.<br />
4. Turn on ignition. DO NOT<br />
START THE ENGINE.<br />
= Code 13<br />
NOTE: There is a 20 second pause before service codes begin<br />
to display.<br />
5. Read codes from the "Brake" light on your vehicle's<br />
instrument panel. Be sure to write the codes down.<br />
NOTE: If the light does not blink, refer to your vehicle's<br />
service manual for information on checking the<br />
circuitry.<br />
<strong>GM</strong> 3-4
3<br />
• Count blinks to get the service codes.<br />
• Codes may be one or two digits.<br />
• Codes are displayed as a pattern of one long blink followed<br />
by one or more short blinks. Count ALL blinks to get code.<br />
• Code 3 looks like:<br />
LONG<br />
BLINK<br />
• The EBCM stores only one service code at a a time, even<br />
though it may detect more than one fault condition. The<br />
first fault detected results in a stored service code. The<br />
detected fault must be corrected, and the service code<br />
must be erased from the computer's memory before<br />
additional codes can be stored.<br />
• After the first fault is corrected and the service code is<br />
erased, drive the vehicle at a speed greater than 35 mph<br />
to set any additional service codes.<br />
3.3.3 Retrieving Service Codes for Kelsey-Hayes 4WAL Systems<br />
1. Turn off ignition.<br />
SHORT<br />
BLINK<br />
SHORT<br />
BLINK<br />
2. Connect the Code Reader to the vehicle test connector.<br />
NOTE: The Code Reader only fits into the connector one way.<br />
3. Set Selector Switch to ABS A-H<br />
position.<br />
4. Turn on ignition. DO NOT<br />
START THE ENGINE.<br />
= Code 3<br />
5. Read codes from the "Anti-Lock" light on your vehicle's<br />
instrument panel. Be sure to write the codes down.<br />
NOTE: If the light does not blink, refer to your vehicle's<br />
service manual for information on checking the<br />
circuitry.<br />
• All codes are two digits.<br />
• Count blinks to get the service codes:<br />
• First and second digits of code are separated by a pause.<br />
3-5 <strong>GM</strong>
Retrieving ABS Codes<br />
• Code 21 looks like:<br />
BLINK<br />
NOTE: Service codes will repeat as long as Code Reader is<br />
connected.<br />
6. Turn off ignition and remove the Code Reader.<br />
3.3.4 Retrieving Service Codes for Bosch 2S and 2U Systems<br />
1. Turn off ignition.<br />
2. Connect the Code Reader to the vehicle test connector.<br />
NOTE: The Code Reader only fits into the connector one way.<br />
3. Set Selector Switch to ABS A-H<br />
position.<br />
4. Turn on ignition. DO NOT<br />
START THE ENGINE.<br />
5. Read codes from the "Service ABS" or "Anti-Lock" light on<br />
your vehicle's instrument panel. Be sure to write the codes<br />
down.<br />
NOTE: If the light does not blink, refer to your vehicle's<br />
service manual for information on checking the<br />
circuitry.<br />
• All codes are two digits.<br />
• Count blinks to get the service codes:<br />
• First and second digits of code are separated by a pause.<br />
• Code sequence will start with Code 12:<br />
BLINK<br />
BLINK<br />
PAUSE = Code 21<br />
BLINK<br />
PAUSE = Code 12<br />
BLINK BLINK<br />
NOTE: Code 12 is not a fault code. Code 12 indicates the<br />
self-diagnostic system is functioning properly<br />
(system pass).<br />
• Each code is repeated three times. After all codes have<br />
been displayed, the entire code sequence is repeated.<br />
NOTE: Service codes will repeat as long as Code Reader is<br />
connected.<br />
6. Turn off ignition and remove the Code Reader.<br />
<strong>GM</strong> 3-6
3<br />
3.4 ERASING SERVICE <strong>CODE</strong>S<br />
• Always observe safety precautions before and during<br />
testing process.<br />
• Erase codes only when all repairs have been completed.<br />
Determine your vehicle's ABS Type (paragraph 3.2) and erase<br />
codes using the appropriate procedures:<br />
3.4.1 Teves II<br />
3.4.2 Kelsey-Hayes RWAL<br />
3.4.3 Kelsey-Hayes 4WAL<br />
3.4.4 Bosch 2S<br />
3.4.5 Bosch 2U<br />
3.4.1 Erasing Service Codes for Teves II Systems<br />
1. Drive vehicle at a speed greater than 20 MPH. Service<br />
codes will automatically be cleared.<br />
2. Repeat procedure for retrieving service codes (paragraph<br />
3.3.1) to make sure codes have been erased and no new<br />
codes have been recorded.<br />
3.4.2 Erasing Service Codes for Kelsey-Hayes RWAL Systems<br />
A. For all vehicle models EXCEPT "C" and "K" 3500 Series<br />
Heavy Duty (HD) (1992-93):<br />
1. Turn off ignition.<br />
2. Remove STOP/HAZARD fuse from fuse block.<br />
3. Wait 20 seconds, then reinstall STOP/HAZARD fuse.<br />
4. Repeat steps 2 and 3 for each code stored. For example: if<br />
four codes were retrieved, remove and install<br />
STOP/HAZARD fuse four times.<br />
5. Repeat procedure for retrieving service codes (paragraph<br />
3.3.2) to make sure codes have been erased.<br />
B. For "C" and "K" 3500 Series Heavy Duty (HD) (1992-93)<br />
vehicles ONLY:<br />
1. Turn off ignition.<br />
2. Remove STOP/HAZARD fuse from fuse block.<br />
3. Turn on ignition and observe<br />
"Brake" light. If "Brake" light is<br />
on, a code(s) is stored.<br />
4. Set Selector Switch to ABS A-H<br />
position.<br />
3-7 <strong>GM</strong>
Retrieving ABS Codes<br />
5. Connect the Code Reader to the vehicle test connector for<br />
one second, remove the Code Reader for one second,<br />
reconnect the Code Reader for one second, then remove<br />
the Code Reader.<br />
6. Turn off ignition.<br />
7. Reinstall STOP/HAZARD fuse in fuse block.<br />
8. Repeat procedure for retrieving service codes (paragraph<br />
3.3.2) to make sure codes have been erased.<br />
3.4.3 Erasing Service Codes for Kelsey-Hayes 4WAL Systems<br />
1. Turn on ignition.<br />
2. Set Selector Switch to ABS A-H<br />
position.<br />
3. Connect the Code Reader to the vehicle test connector for<br />
two seconds, remove the Code Reader for one second,<br />
reconnect the Code Reader for two seconds, then remove<br />
the Code Reader.<br />
4. The "Anti-Lock" and "Brake" light should BOTH light,<br />
then turn off. This indicates service codes have been<br />
erased.<br />
5. Turn off ignition.<br />
6. Repeat procedure for retrieving service codes (paragraph<br />
3.3.3) to make sure codes have been erased.<br />
3.4.4 Erasing Service Codes for Bosch 2S Systems<br />
1. Turn off ignition.<br />
2. Set Selector Switch to ABS A-H<br />
position.<br />
3. Connect the Code Reader to the<br />
vehicle test connector.<br />
4. Turn on ignition. "Service ABS" light will begin displaying<br />
service codes.<br />
5. Remove the Code Reader for one second, then reconnect<br />
the Code Reader for at least one second.<br />
6. Repeat step 5 three more times (a total of four times)<br />
within a ten second period. LEAVE THE <strong>CODE</strong><br />
<strong>READER</strong> CONNECTED AFTER THE FOURTH<br />
TIME.<br />
<strong>GM</strong> 3-8
3<br />
7. The ""Service ABS" light should display code 12<br />
continuously. If any other codes are displayed, repeat<br />
steps 1 through 6.<br />
8. Turn off ignition.<br />
3.4.5 Erasing Service Codes for Bosch 2U Systems<br />
1. Turn on ignition and observe "Anti-Lock" light. "Anti-<br />
Lock" light should turn off within 3 to 4 seconds. If "Anti-<br />
Lock" light remains on, a fault is still present.<br />
NOTE: Service codes cannot be erased until all stored service<br />
codes have been retrieved.<br />
2. Set Selector Switch to ABS A-H<br />
position.<br />
3. Connect the Code Reader to the<br />
vehicle test connector and<br />
observe "Anti-Lock" light.<br />
4. When "Anti-Lock" light turns on, disconnect Code Reader.<br />
5. When "Anti-Lock" light turns off, reconnect Code Reader<br />
and observe "Anti-Lock" light. When "Anti-Lock" light<br />
turns on, disconnect Code Reader.<br />
6. Repeat step 5.<br />
7. When "Anti-Lock" light turns off, reconnect Code Reader.<br />
"Anti-Lock" light will turn on. Disconnect Code Reader.<br />
All service codes are now cleared.<br />
8. Turn off ignition.<br />
9. Repeat procedure for retrieving service codes (paragraph<br />
3.3.4) to make sure codes have been erased.<br />
3.5 ABS SERVICE <strong>CODE</strong>S<br />
• Consult your vehicle's service manual for detailed<br />
meaning related to your vehicle.<br />
Determine your vehicle's ABS Type (paragraph 3.2) and refer<br />
to the appropriate service codes table:<br />
Teves II Paragraph 3.5.1<br />
Kelsey-Hayes RWAL Paragraph 3.5.2<br />
Kelsey-Hayes 4WAL Paragraph 3.5.3<br />
Bosch 2S Paragraph 3.5.4<br />
Bosch 2U Paragraph 3.5.5<br />
3-9 <strong>GM</strong>
Retrieving ABS Codes<br />
3.5.1 Teves II System Service Codes<br />
Code Service Code Definition<br />
11 Electronic Brake Control Module (EBCM) fault<br />
12 Electronic Brake Control Module (EBCM) fault<br />
21 Main valve fault<br />
22 Left front inlet valve fault<br />
23 Left front outlet valve fault<br />
24 Right front inlet valve<br />
25 Right front outlet valve<br />
26 Rear inlet valve<br />
27 Rear outlet valve<br />
31 Left front Wheel Speed Sensor (WSS)<br />
32 Right front Wheel Speed Sensor<br />
33 Right rear Wheel Speed Sensor<br />
34 Left rear Wheel Speed Sensor<br />
35 Left front Wheel Speed Sensor<br />
36 Right front Wheel Speed Sensor<br />
37 Right rear Wheel Speed Sensor<br />
38 Left rear Wheel Speed Sensor<br />
41 Left front Wheel Speed Sensor<br />
42 Right front Wheel Speed Sensor<br />
43 Right rear Wheel Speed Sensor<br />
44 Left rear Wheel Speed Sensor<br />
45 Left front sensors (2)<br />
46 Right front sensors (2)<br />
47 Rear sensors (2)<br />
48 sensors (3)<br />
51 Left front outlet valve<br />
52 Right front outlet valve<br />
53 Rear outlet valve<br />
54 Rear outlet valve<br />
55 Left front Wheel Speed Sensor<br />
56 Right front Wheel Speed Sensor<br />
57 Right rear Wheel Speed Sensor<br />
58 Left rear Wheel Speed Sensor<br />
<strong>GM</strong> 3-10
3<br />
Code Service Code Definition<br />
61 Electronic Brake Control Module loop circuit<br />
71 Left front outlet valve<br />
72 Right front outlet valve<br />
73 Rear outlet valve<br />
74 Rear outlet valve<br />
75 Left front Wheel Speed Sensor<br />
76 Right front Wheel Speed Sensor<br />
77 Right rear Wheel Speed Sensor<br />
78 Left rear Wheel Speed Sensor<br />
3.5.2 Kelsey-Hayes RWAL System Service Codes<br />
Code Service Code Definition<br />
1 Rear Wheel Anti-Lock (RWAL) Electronic Control Unit<br />
(ECU) malfunction or improper voltage<br />
2 Open isolation valve or faulty ECU<br />
3 Open dump valve or faulty ECU<br />
4 Grounded anti-lock valve reset switch circuit<br />
5 Excessive actuation of the dump valve during an anti-lock<br />
stop<br />
6 Erratic speed signal<br />
7 Shorted isolation valve circuit or faulty ECU<br />
8 Shorted dump valve circuit or faulty ECU<br />
9 Open or grounded circuit to the vehicle speed sensor<br />
10 Brake lamp switch circuit fault<br />
11 Rear Wheel Anti-Lock (RWAL) Electronic Control Unit<br />
(ECU) malfunction or improper voltage<br />
12 Rear Wheel Anti-Lock (RWAL) Electronic Control Unit<br />
(ECU) malfunction or improper voltage<br />
13 Rear Wheel Anti-Lock (RWAL) Electronic Control Unit<br />
(ECU) malfunction<br />
14 Rear Wheel Anti-Lock (RWAL) Electronic Control Unit<br />
(ECU) malfunction<br />
15 Rear Wheel Anti-Lock (RWAL) Electronic Control Unit<br />
(ECU) malfunction<br />
3-11 <strong>GM</strong>
Retrieving ABS Codes<br />
3.5.3 Kelsey-Hayes 4WAL System Service Codes<br />
Code Service Code Definition<br />
12 System Normal<br />
13 System Normal (2WD)<br />
14 System Normal (4WD/AWD)<br />
15 System Normal (4WD/AWD)<br />
21 Right front wheel sensor fault<br />
22 Missing right front wheel sensor signal<br />
23 Erratic right front speed sensor<br />
25 Left front speed sensor fault<br />
26 Missing left front speed signal<br />
27 Erratic left front speed sensor<br />
28 Simultaneous loss of both front sensor signals<br />
29 Simultaneous drop out of all 4 sensors<br />
31 Right rear speed sensor fault<br />
32 Missing right rear speed signal<br />
33 Erratic right rear speed sensor<br />
35 Left rear speed sensor fault or VSS circuit open (1993)<br />
36 Missing left rear speed signal or VSS signal missing (1993)<br />
37 Erratic left rear speed signal or erratic VSS signal (1993)<br />
38 Wheel speed error<br />
41 4 Wheel Anti-Lock (4WAL) control unit fault<br />
42 4 Wheel Anti-Lock (4WAL) control unit fault<br />
43 4 Wheel Anti-Lock (4WAL) control unit fault<br />
44 4 Wheel Anti-Lock (4WAL) control unit fault<br />
45 4 Wheel Anti-Lock (4WAL) control unit fault<br />
46 4 Wheel Anti-Lock (4WAL) control unit fault<br />
47 4 Wheel Anti-Lock (4WAL) control unit fault<br />
48 4 Wheel Anti-Lock (4WAL) control unit fault<br />
49 4 Wheel Anti-Lock (4WAL) control unit fault<br />
50 4 Wheel Anti-Lock (4WAL) control unit fault<br />
51 4 Wheel Anti-Lock (4WAL) control unit fault<br />
52 4 Wheel Anti-Lock (4WAL) control unit fault<br />
53 4 Wheel Anti-Lock (4WAL) control unit fault<br />
54 4 Wheel Anti-Lock (4WAL) control unit fault<br />
<strong>GM</strong> 3-12
3<br />
Code Service Code Definition<br />
55 4 Wheel Anti-Lock (4WAL) control unit fault<br />
56 4 Wheel Anti-Lock (4WAL) control unit fault<br />
57 4 Wheel Anti-Lock (4WAL) control unit fault<br />
58 4 Wheel Anti-Lock (4WAL) control unit fault<br />
59 4 Wheel Anti-Lock (4WAL) control unit fault<br />
60 4 Wheel Anti-Lock (4WAL) control unit fault<br />
61 4 Wheel Anti-Lock (4WAL) control unit fault<br />
62 4 Wheel Anti-Lock (4WAL) control unit fault<br />
63 4 Wheel Anti-Lock (4WAL) control unit fault<br />
64 4 Wheel Anti-Lock (4WAL) control unit fault<br />
65 4 Wheel Anti-Lock (4WAL) control unit fault<br />
66 4 Wheel Anti-Lock (4WAL) control unit fault<br />
67 Open motor circuit or shorted ECU output<br />
68 Locked motor or shorted motor circuit<br />
71 4 Wheel Anti-Lock (4WAL) control unit fault<br />
72 4 Wheel Anti-Lock (4WAL) control unit fault<br />
73 4 Wheel Anti-Lock (4WAL) control unit fault<br />
74 4 Wheel Anti-Lock (4WAL) control unit fault<br />
81 Brake switch circuit shorted or open<br />
85 Open anti-lock warning lamp<br />
86 Shorted anti-lock warning lamp<br />
88 Shorted brake warning lamp<br />
3.5.4 Bosch 2S System Service Codes<br />
Code Service Code Definition<br />
12 Diagnostic system operational<br />
21 Right front speed sensor fault<br />
22 Right front toothed wheel frequency error<br />
25 Left front speed sensor fault<br />
26 Left front toothed wheel frequency error<br />
31 Right rear speed sensor fault<br />
32 Right rear toothed wheel frequency error<br />
35 Left rear speed sensor fault<br />
36 Left rear toothed wheel frequency error<br />
3-13 <strong>GM</strong>
Retrieving ABS Codes<br />
Code Service Code Definition<br />
41 Right front solenoid valve fault<br />
45 Left front solenoid valve fault<br />
55 Rear solenoid valve fault<br />
61 Pump motor or motor relay fault<br />
63 Solenoid valve relay fault<br />
71 Electronic Brake Control Module (EBCM) fault<br />
72 Serial data link fault<br />
75 Lateral accelerometer fault; short to battery, ground or<br />
open circuit<br />
76 Lateral accelerometer fault, signal out of range or incorrect<br />
3.5.5 Bosch 2U System Service Codes<br />
Code Service Code Definition<br />
12 Normal<br />
21 Right front wheel sensor fault<br />
22 Right front toothed wheel frequency error<br />
25 Left front wheel sensor fault<br />
26 Left front toothed wheel frequency error<br />
35 Rear axle speed sensor fault<br />
36 Rear axle toothed wheel frequency error<br />
41 Right front solenoid valve fault<br />
45 Left front solenoid valve fault<br />
55 Rear wheels solenoid valve fault<br />
61 Pump motor or motor relay fault<br />
63 Solenoid valve relay fault<br />
71 Electronic brake control module fault<br />
72 Serial data line fault<br />
<strong>GM</strong> 3-14
4<br />
4.1 INTRODUCTION<br />
The Society of Automotive Engineers has issued a Standard<br />
(SAE J1930) for Electrical/Electronic Systems Diagnostic<br />
Terms, Definitions, Abbreviations, and Acronyms. However, at<br />
the present time, this Standard is not in wide use by vehicle<br />
manufacturers.<br />
This Glossary contains definitions for abbreviations and terms<br />
you may find in this manual or in your vehicle service manual.<br />
These definitions may not agree with those contained in SAE<br />
J1930.<br />
4.2 GLOSSARY OF TERMS AND ABBREVIATIONS<br />
A/C – Air Conditioning.<br />
AAC – Auxiliary Air Control Valve.<br />
ABS – Anti-Lock Brake System.<br />
ACC – Air Conditioning Clutch compressor signal input to<br />
computer relating status of air conditioning clutch.<br />
ACCS – Air Conditioning Cycling Switch.<br />
ACD – Air Conditioner Demand switch.<br />
ACT – Air Charge Temperature sensor or signal circuit.<br />
ACV – Thermactor Air Control Valve.<br />
AIR – Air Injector Reaction system, airflow from pump is<br />
directed into engine reduce exhaust emissions.<br />
AIR BPV – Thermactor Air Bypass Valve.<br />
AIS – Automatic Idle Speed circuit and/or motor.<br />
ALDL – Assembly Line Data Link. Diagnostic connector<br />
under dash. Same as ALCL.<br />
AM1 – Thermactor Air Management (TAB).<br />
AM2 – Thermactor Air Management (TAD).<br />
AMBIENT TEMPERATURE – Temperature of air<br />
surrounding vehicle being serviced.<br />
ANTI-BFV – Anti-Backfire Valve.<br />
AOD – Automatic Over Drive transmission.<br />
ATDC – After Top Dead Center.<br />
AVOM – Analog Volt/Ohm Meter.<br />
AWD – All Wheel Drive.<br />
AXOD – Automatic Overdrive transaxle.<br />
AXOD-E – Electronic Automatic Overdrive transaxle.<br />
4-1 <strong>GM</strong>
BAC – Bypass Air Control valve.<br />
BARO – Barometric Pressure.<br />
Glossary<br />
BASE IDLE – Idle rpm determined by throttle switch with<br />
idle speed control fully retracted.<br />
BCM – Body Computer Module.<br />
BOO – Brake On-Off input to the computer.<br />
BOOST – Turbo charger boost solenoid or its control circuit.<br />
BP – Barometric Pressure sensor. Used to compensate for<br />
altitude variations.<br />
BPMV – Brake Pressure Modulator Valve.<br />
BTDC – Before Top Dead Center.<br />
BVT – Back-pressure Variable Transducer.<br />
CALPAC – A device used with fuel injection to allow fuel<br />
delivery in the event of a PROM or PCM malfunction.<br />
CANISTER – A container, in an evaporative emission system,<br />
that contains charcoal to trap fuel vapors from the fuel system.<br />
CANISTER PURGE SOLENOID – Electrical solenoid or its<br />
control line. Solenoid opens a valve from fuel vapor canister<br />
line to intake manifold when energized. Controls flow of<br />
vapors between carburetor bowl vent and carbon canister.<br />
CANP – Canister Purge solenoid.<br />
CATALYTIC CONVERTER – Muffler like assembly placed<br />
in exhaust system that contains a catalyst to change<br />
hydrocarbons and carbon monoxide into water vapor and<br />
carbon dioxide.<br />
CCC – Climate Control Center.<br />
CCC – Computer Command Control.<br />
CCC – Converter Clutch Control solenoid or its circuit.<br />
CCDIC – Climate Control/Driver Information Center.<br />
CCO – Converter Clutch Override output from the computer<br />
processor to the transmission.<br />
CCS – Coast Clutch Solenoid or its circuit.<br />
CEC – Computerized Emission Control.<br />
CER – Cold Enrichment Rod.<br />
CES – Clutch Engage Switch.<br />
CFI – Central Fuel Injection.<br />
CHECK ENGINE LIGHT – Dash panel light used either to<br />
aid in identification and diagnosis of a system problems or to<br />
indicate that maintenance is required.<br />
<strong>GM</strong> 4-2
4<br />
CHECK VALVE – Valve that operates like a one-way gate.<br />
CID – Cylinder Identification sensor or its circuit.<br />
CKT – Circuit.<br />
CL – Closed Loop.<br />
CLC – Converter Lock-up Clutch.<br />
CO – Carbon Monoxide.<br />
COC – Conventional Oxidation Catalyst.<br />
COMPUTER TIMING –Total spark advance in degrees<br />
before top dead center.<br />
CPS – Crankshaft Position Sensor. Provides the ECU with<br />
engine speed and crankshaft angle (position).<br />
CRT – Cathode Ray Tube. A device for displaying video<br />
signals, similar to a television picture tube. Similar devices<br />
used on General Motors vehicles are referred to as DID or VIC.<br />
CTS – Coolant Temperature Sensor.<br />
CURB IDLE – Computer controlled idle rpm.<br />
CVR – Control Vacuum Regulator.<br />
CWM – Cold Weather Modulator.<br />
CYLINDER IDENTIFICATION SIGNAL (CID) – A signal<br />
generated by crankshaft timing sensor, used to synchronize<br />
ignition coils, due to the fact that some models use a 2 ignition<br />
coil pack DIS system.<br />
C 3 I – Computer Controlled Coil Ignition. Produces ignition<br />
spark without aid of an ignition distributor.<br />
DCL – Data Communications Link.<br />
DERM – Diagnostic Energy Reserve Module and air bag (SIR)<br />
controller.<br />
DFS – Decel Fuel Shut-off.<br />
DIC – Driver Information Center.<br />
DID – Driver Information Display.<br />
DIS – Direct Ignition System. Produces ignition spark without<br />
aid of an ignition distributor. (Similar to C3I). DLC – Data Link Connector.<br />
DRA – Digital Ratio Adapter.<br />
DRAB – Digital Ratio Adapter Buffer.<br />
DRAC – Digital Ratio Adapter Calibrator.<br />
DTC – Diagnostic Trouble Code.<br />
4-3 <strong>GM</strong>
Glossary<br />
DUAL CATALYTIC CONVERTER – Combines 2 converters<br />
in one shell. Controls NOx, HC and CO. Also called TWC.<br />
DV TW – Delay Valve, 2 Way.<br />
DVM (10 MEG) – Digital voltmeter with a minimum of 10<br />
million ohms resistance. Allows measurement in circuit<br />
without affecting the circuit operation.<br />
DWELL – Amount of time (recorded on a dwell meter in<br />
degrees) that current passes through a closed switch.<br />
EAS – Electronic Air Switching, directs airflow to catalytic<br />
converter or exhaust ports of the engine.<br />
EBCM – Electronic Brake Control Module.<br />
ECM – Engine Control Module properly call a Powertrain<br />
Control Module.<br />
ECT – Engine Coolant Temperature sensor or circuit.<br />
ECU – Electronic Control Unit. To process input information<br />
to trigger ignition control module.<br />
EDF – Electro-Drive Fan relay or its circuit.<br />
EECS – Evaporative Emission Control System.<br />
EEGR – Electronic Exhaust Gas Recirculation valve (Sonic).<br />
EEPROM – Electronically Erasable Programmable Read Only<br />
Memory.<br />
EET – Electronic Exhaust Gas Recirculation Transducer.<br />
EFC – Electronic Feedback Carburetor. Utilizes an electronic<br />
signal, generated by an exhaust gas oxygen sensor to precisely<br />
control air/fuel mixture ratio in the carburetor.<br />
EFI – Electronic Fuel Injection. Computer controlled fuel<br />
injection system.<br />
EGO – Exhaust Gas Oxygen sensor.<br />
EGR – Exhaust Gas Recirculation system is designed to allow<br />
flow of inert exhaust gases into combustion chamber to cool<br />
combustion and reduce nitrous oxides in exhaust.<br />
EHC – Exhaust Heat Control vacuum solenoid or its circuit.<br />
EHCU - Electro-Hydraulic Control Unit.<br />
EIC – Electronic Instrument Cluster.<br />
ELECTRONIC SPARK CONTROL – Used to retard spark<br />
advance if detonation occurs.<br />
ELECTRONIC SPARK TIMING – PCM controlled timing of<br />
the ignition spark.<br />
EMI - Electro-Magnetic Interference.<br />
<strong>GM</strong> 4-4
4<br />
EMR – Electronic Module Retard, controls spark retard.<br />
ENGINE CONTROL MODULE – A microprocessor based<br />
device which contains electronic circuitry to control and<br />
monitor air/fuel and emission systems, and aid in diagnostics.<br />
EPC – Electronic Pressure Control solenoid.<br />
EPROM – Erasable Programmable Read Only Memory.<br />
ERS – Engine RPM Sensor.<br />
ESA – Electronic Spark Advance.<br />
ESC – Electronic Spark Control.<br />
EST – Electronic Spark Timing.<br />
EVP – EGR Valve Position sensor or its circuit.<br />
EVR – EGR Vacuum Regulator or its circuit.<br />
EVRV – Electronic Vacuum Regulator Valve. Controls EGR<br />
vacuum.<br />
EXHAUST GAS OXYGEN SENSOR – Sensor that changes<br />
its voltage output as exhaust gas oxygen content changes as<br />
compared to oxygen content of the atmosphere. The constantly<br />
changing electrical signal is used to control fuel mixture.<br />
EXHAUST GAS RECIRCULATION – Procedure where a<br />
small amount of exhaust gas is re-admitted to combustion<br />
chamber to reduce peak combustion temperatures, thus<br />
reducing NOx.<br />
FAIL SAFE – or Fail Soft: any attempt by a computer to<br />
compensate for a fault or lost signal, usually by substituting<br />
fixed replacement valves.<br />
FEEDBACK CARBURETOR (FBC) – System of fuel control<br />
employing a computer controlled solenoid that varies the<br />
carburetors air/fuel mixture.<br />
FMEM – Failure Mode Effects Management. Sometimes<br />
referred to limp-in mode.<br />
GND, GRD or GRND – Ground. Common line leading to the<br />
negative side of the battery.<br />
HALL EFFECT – Process where current is passed through a<br />
small slice of semi-conductor material at the same time as a<br />
magnetic field to produce a small voltage in the semiconductor.<br />
HARD FAULT – Fault present during current engine<br />
operating cycle. Opposite of an intermittent fault which does<br />
not stay present.<br />
HEDF – High-speed Electro-Drive Fan relay or its circuit.<br />
HEGO – Heated Oxygen Sensor or its circuit.<br />
HIC – Hot Idle Compensator.<br />
4-5 <strong>GM</strong>
HPA - High Pressure Accumulator.<br />
IAC – Idle Air Control.<br />
IAS – Inlet Air Solenoid valve or its circuit.<br />
Glossary<br />
IAT – Intake air temperature sensor, performs same function<br />
as MAT sensor.<br />
ICM – Integrated Control Module.<br />
IDLE TRACKING SWITCH – An input device that sends a<br />
signal to the computer to indicate a closed throttle condition.<br />
IGN – Ignition.<br />
INTERMITTENT FAULT – Fault which occurred during a<br />
previous engine operating cycle. Intermittent fault may have<br />
set a fault code which is still present in PCM memory.<br />
ISA – Idle Speed Actuator. Extends or retracts to control<br />
engine idle speed and to set throttle stop angle during<br />
deceleration.<br />
ISC – Idle Speed Control, either computer control motor, air<br />
bypass valve, or any device used to control idle rpm.<br />
ISO VALVE - Isolation Valve.<br />
ITS – Idle Tracking Switch.<br />
KAM – Keep Alive Memory. Battery power memory locations<br />
in computer used to store failure codes and some diagnostic<br />
parameters.<br />
KAPWR – Keep Alive Power, used to power KAM circuit of<br />
the processor.<br />
KNOCK SENSOR (KS) – Input device that responds to spark<br />
knock, caused by over advanced ignition timing.<br />
LEAN MIXTURE – Air/fuel mixture that has excessive<br />
oxygen left after all fuel in combustion chamber has burned, 1<br />
part fuel to 15 or more parts air.<br />
LED – Light Emitting Diode.<br />
LOCK UP TORQUE CONVERTER – Converter with<br />
internal mechanism that locks turbine to impeller when<br />
engaged.<br />
LPA - Low Pressure Accumulator.<br />
LUS – Lock-Up Solenoid.<br />
M/C – Mixture control or mixture control solenoid.<br />
MAF – Mass Air Flow sensor, used to measure amount of<br />
airflow through the throttle body.<br />
MAP – Manifold Absolute Pressure sensor or its circuit.<br />
MAT – Manifold Air Temperature.<br />
<strong>GM</strong> 4-6
4<br />
MFI – Multi-port Fuel Injection.<br />
MIL – Malfunction Indicator Light. Check engine light.<br />
MIXTURE CONTROL SOLENOID – Device installed on<br />
carburetor, that regulates the air/fuel ratio.<br />
MLP – Manual (shift) Lever Position sensor or its circuit.<br />
MPFI – Multi-Port Fuel Injection.<br />
MULTI-PORT FUEL INJECTION – Individual injectors for<br />
each cylinder mounted in intake manifold. Injectors are pulsed<br />
in groups rather than individually.<br />
NDS – Neutral Drive Switch.<br />
NGS – Neutral Gear Switch or its circuit.<br />
NON-VOLATILE MEMORY – Memory retained in block<br />
learn cells (not affected by turning the ignition ON or OFF).<br />
NOx – Nitrous Oxides.<br />
NPS – Neutral Pressure Switch or its circuit.<br />
OCT ADJ – Octane Adjust device which modifies ignition<br />
spark.<br />
OXYGEN SENSOR – Sensor that changes its voltage output<br />
as exhaust gas oxygen content changes as compared to the<br />
oxygen content of the atmosphere. The constantly changing<br />
electrical signal is used to control fuel mixture.<br />
PCM – Powertrain Control Module. Computer that controls<br />
engine fuel, ignition and emission related functions.<br />
PCV – Positive Crankcase Ventilation. System that controls<br />
flow of crankshaft vapors into engine intake manifold where<br />
they are burned in combustion rather then being discharged<br />
into the atmosphere.<br />
PFE – Pressure Feedback EGR sensor or its circuit.<br />
PFI – Port Fuel Injection.<br />
PORTED VACUUM SWITCH – Temperature actuated<br />
switch that changes vacuum connections when the coolant<br />
temperature changes.<br />
POT – Potentiometer.<br />
POWERTRAIN CONTROL MODULE – Same as ECM, but<br />
also controls electronically controlled automatic transmission.<br />
PROM – Programmable Read Only Memory.<br />
PSPS – Power Steering Pressure Switch. Signal is used by<br />
computer to compensate for power steering loads.<br />
PVS – Ported Vacuum Switch.<br />
PWM - Pulse Width Modulation.<br />
4-7 <strong>GM</strong>
Glossary<br />
QUAD-DRIVER (QDM) – Computer chip, in the PCM,<br />
capable of operating four separate outputs. Some have digital<br />
and some have pulse width modulated outputs.<br />
RAP – Retained Accessory Power.<br />
RELAY – Switching device operated by a low current circuit,<br />
which controls opening and closing of another higher current<br />
circuit.<br />
RELIEF VALVE – Pressure limiting valve located in exhaust<br />
chamber of thermactor air pump. Relieves part of exhaust<br />
airflow if pressure exceeds a calibrated value.<br />
RICH MIXTURE – Air/fuel mixture that has more fuel than<br />
can burn completely, 1 part fuel to 14 or less parts air.<br />
SAW – Spark Advance Word, and also Spark Angle Word.<br />
SCC – Spark Control Computer.<br />
SES – Service Engine Soon light.<br />
SEFI, SFI – Sequential Fuel Injection, type of MFI with<br />
injectors pulsed individually based on engine firing order.<br />
SIG RTN – Signal Return circuit for all sensors except HEGO.<br />
SIL – Shift Indicator Light. Indicates to driver optimum time<br />
to shift gears.<br />
SIR – Supplemental Inflatable Restraint (SIR) system; air<br />
bag.<br />
SIS – Solenoid Idle Stop.<br />
SOLENOID – Wire coil with a movable core which changes<br />
position by means of electromagnetism when current flows<br />
through the coil.<br />
SPARK RETARD SOLENOID – Output device that receives<br />
an output signal to bleed distributor’s vacuum advance when<br />
spark knock occurs.<br />
SSI – Solid State Ignition system.<br />
T.V. – Throttle Valve.<br />
TAB – Thermactor Air Bypass solenoid.<br />
TACH INPUT – Engine rpm signal sent to computer from<br />
ignition coil primary circuit.<br />
TAD – Thermactor Air Diverter solenoid.<br />
TBI – Throttle Body Injection (Fuel).<br />
TCC – Torque Converter Clutch.<br />
TCP – Temperature Compensating Pump.<br />
<strong>GM</strong> 4-8
4<br />
TDC – Top Dead Center.<br />
THERMACTOR AIR CONTROL VALVE – Combines<br />
function of a normally closed air bypass valve and an air<br />
diverter valve in one integral valve.<br />
THERMACTOR AIR SYSTEM – Efficiency of catalytic<br />
converter is dependent upon temperature and chemical<br />
makeup of exhaust gases. These requirements are met by the<br />
thermactor air supply system.<br />
THREE-WAY CATALYST – Combines 2 converters in 1<br />
shell. Controls NOx, HC and CO. Also called dual catalytic<br />
converter.<br />
TIMING – Relationship between spark plug firing and piston<br />
position.<br />
TKS – Throttle Kicker Solenoid, when energized, supplies<br />
manifold vacuum to throttle kicker actuator as directed by<br />
computer to compensate for engine loads. Also called idle-up<br />
system.<br />
TOT – Transmission Oil Temperature sensor.<br />
TP or TPS – Throttle Position Sensor or its circuit. Used to<br />
signal computer the position of the throttle plates.<br />
TPI – Tuned Port Injection, a type of MFI with intake tubes<br />
designed to be tuned for performance. Most TPI engines are<br />
also SFI.<br />
TTS – Transmission Temperature Switch.<br />
TVS – Temperature Vacuum Switch.<br />
TVV – Thermal Vent Valve.<br />
TWC – Three-Way Catalyst.<br />
VACUUM – A term to describe a pressure that is less than<br />
atmospheric pressure.<br />
VACUUM ADVANCE – Advances ignition timing with<br />
relation to engine load or computer signals.<br />
VAF – Vane Air-Flow sensor or its circuit.<br />
VAT – Vane Air-Flow Temperature sensor.<br />
VATS – Vehicle Anti-theft System.<br />
VCM - Vehicle Control Module.<br />
VM – Vane Meter or air flow meter.<br />
VSS – Vehicle Speed Sensor.<br />
WOT – Wide Open Throttle or Wide Open Throttle switch.<br />
WSS - Wheel Speed Sensor.<br />
4-9 <strong>GM</strong>
Glossary<br />
<strong>GM</strong> 4-10
5<br />
5.1 LIMITED ONE YEAR WARRANTY<br />
The Manufacturer warrants to the original purchaser that this<br />
unit is free of defects in materials and workmanship under<br />
normal use and maintenance for a period of one (1) year from<br />
the date of original purchase.<br />
If the unit fails within the one (1) year period, it will be<br />
repaired or replaced, at the Manufacturer's option, at no<br />
charge, when returned prepaid to the Service Center with<br />
Proof of Purchase. The sales receipt may be used for this<br />
purpose. All replacement parts, whether new or remanufactured,<br />
assume as their warranty period only the<br />
remaining time of this warranty.<br />
This warranty does not apply to damage caused by improper<br />
use, accident, abuse, improper voltage, service, fire, flood,<br />
lightning, or other acts of God, or if the product was altered or<br />
repaired by anyone other than the Manufacturer's Service.<br />
The Manufacturer, under no circumstances shall be liable for<br />
any consequential damages for breach of any written warranty<br />
of this unit.<br />
This warranty gives you specific legal rights, and you may also<br />
have rights which vary from state to state.<br />
This manual is copyrighted with all rights reserved. No<br />
portion of this document may be copied or reproduced by any<br />
means without the express written permission of the<br />
Manufacturer. THIS WARRANTY IS NOT TRANSFERABLE.<br />
For service, send via U.P.S. (if possible) prepaid to<br />
manufacturer.<br />
Allow 3-4 weeks service time<br />
5.2 SERVICE PROCEDURES<br />
If you have any questions, please contact your local store,<br />
distributor or the Manufacturer's Service Department.<br />
USA & Canada:<br />
(800) 544-4124 (9:00-4:00, Monday-Friday PST)<br />
All others:<br />
(714) 241-6802 (9:00-4:00, Monday-Friday PST)<br />
FAX:<br />
(714) 432-7910 (24 hr.)<br />
5-1 <strong>GM</strong>
Warranty and Service<br />
<strong>GM</strong> 5-2
#3123<br />
INNOVA ELECTRONICS CORPORATION<br />
17287 Mt. Herrmann Street<br />
Fountain Valley, CA 92708<br />
USA<br />
© Innova 1998 <strong>GM</strong>