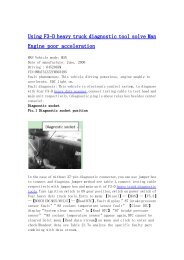
How take FCAR F3-D heavy duty diagnostic scanner and Different types of diagnostic socket connect
F3-D car diagnostic tool is configured with various kinds of diagnostic connectors for different vehicle scanner sockets. Standard OBD-II Interface Connection.
F3-D car diagnostic tool is configured with various kinds of diagnostic connectors for different vehicle scanner sockets.
Standard OBD-II Interface Connection.

Create successful ePaper yourself
Turn your PDF publications into a flip-book with our unique Google optimized e-Paper software.
<strong>How</strong> <strong>take</strong> <strong>FCAR</strong> <strong>F3</strong>-D <strong>heavy</strong> <strong>duty</strong> <strong>diagnostic</strong> <strong>scanner</strong> <strong>and</strong><br />
<strong>Different</strong> <strong>types</strong> <strong>of</strong> <strong>diagnostic</strong> <strong>socket</strong> <strong>connect</strong><br />
<strong>F3</strong>-D car <strong>diagnostic</strong> tool is configured with various kinds <strong>of</strong> <strong>diagnostic</strong><br />
<strong>connect</strong>ors for different vehicle <strong>scanner</strong> <strong>socket</strong>s.<br />
St<strong>and</strong>ard OBD-II Interface Connection<br />
According to the diagnose interface <strong>of</strong> the to-be-detected vehicle, select<br />
suitable <strong>connect</strong>or for <strong>diagnostic</strong> vehicle, if the <strong>diagnostic</strong> vehicle<br />
configured with st<strong>and</strong>ard OBD-II diagnose interface, you need to <strong>connect</strong><br />
both ends <strong>of</strong> the main testing line to the main unit <strong>and</strong> OBD-II interface<br />
respectively, <strong>and</strong> lock the fixed bolts, then insert the auto computer<br />
<strong>diagnostic</strong>s <strong>connect</strong>or into <strong>diagnostic</strong> <strong>socket</strong> <strong>of</strong> vehicle terminal, as<br />
shown in Figure 4.2.1.<br />
Figure 4.2.1<br />
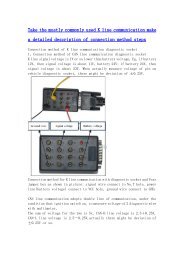
Non-OBD-II Interface Connection<br />
If the currently testing interface is not the st<strong>and</strong>ard OBD-II interface,<br />
first need to confirm what shape <strong>of</strong> the current vehicle <strong>diagnostic</strong><br />
interface, <strong>and</strong> then find currently suitable interface in <strong>F3</strong>-D auto<br />
computer <strong>diagnostic</strong>s <strong>scanner</strong>configured interface, <strong>and</strong> then <strong>connect</strong>. In<br />
Connection, first <strong>connect</strong> the main testing line to the main unit <strong>and</strong> the<br />
OBD-II interface respectively, then <strong>connect</strong> the appropriate interface to<br />
OBD-II.If the current vehicle interface is the DENSO-12 <strong>diagnostic</strong> <strong>socket</strong>,<br />
you can <strong>connect</strong> OBD-II female <strong>connect</strong>or <strong>of</strong> DENSO-12 to OBDII, insert the<br />
other end <strong>of</strong> the DENSO-12 into vehicle , <strong>and</strong> then you can carry out related<br />
diagnosis, as shown in Figure 4.2.2.
Figure 4.2.2<br />
Connection Between Jump Box <strong>and</strong> Vehicle Diagnose Interface<br />
During the car <strong>diagnostic</strong> , <strong>of</strong>ten encounter the the situation that vehicle<br />
<strong>diagnostic</strong> <strong>socket</strong> considered damaged, modified, or was <strong>take</strong>n wrong, whch<br />
could result in the situation that using the appropriate <strong>diagnostic</strong><br />
<strong>connect</strong>or can not <strong>connect</strong>. At this time you could use the jump box to<br />
conduct jumper <strong>connect</strong>ion. Jumper box is specially confugured by Fcar<br />
auto computer <strong>diagnostic</strong>s <strong>scanner</strong>.As shown in Figure 4.2.3A<br />
Figure 4.2.3A