OWNER'S MANUAL SUPPLEMENT 2011 LEFTY
OWNER'S MANUAL SUPPLEMENT 2011 LEFTY
OWNER'S MANUAL SUPPLEMENT 2011 LEFTY

Create successful ePaper yourself
Turn your PDF publications into a flip-book with our unique Google optimized e-Paper software.
126564.PDF<br />
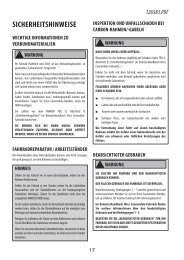
IMPORTANT INFORMATION ABOUT<br />
RIDING IN WET, HUMID, OR COASTAL CONDITIONS<br />
Before and after rides, frequently, inspect and renew grease under fork boot and service the air filter. Inspect the boot<br />
for rips and tears. Check the folds. If the boot is damaged or not attached securely by the clamps/zip ties , water or<br />
contaminants can enter. The boot should be removed and the fork should be immediately dried and re-greased to stop<br />
any damage occurring due to moisture.<br />
ANYTIME THE FORK BECOMES SUBMERGED<br />
Stop riding it. The fork is not water tight. A moving submerged fork can accumulate water inside. If your fork has been<br />
submerged, you should perform checks immediately.<br />
DO NOT STORE YOUR <strong>LEFTY</strong> FOLLOWING A WET RIDE WITHOUT FIRST PERFORMING THE CHECKS ABOVE.<br />
SERIOUS DAMAGE CAN OCCUR.<br />
Cleaning<br />
Clean using only a mild soap and water solution. Clean water and common liquid dish washing soap will work best. Be sure to<br />
cover the adjusters with a clean plastic bag secured with a rubber band or masking tape. Spray off heavy dirt before wiping. Spray<br />
indirectly.<br />
NOTICE<br />
■ DO NOT USE A PRESSURE WASHER. Use a low pressure garden hose. Power washing will force contaminants into the fork<br />
promoting corrosion, immediately damaging, or result in accelerated wear.<br />
■ DON’T DRY WITH COMPRESSED AIR FOR THE SAME REASON.<br />
Frame Bumper<br />
The Lefty frame bumper is located on the outer tube<br />
between the clamps. The bumper cushions the frame<br />
from contact with the fork. Replace it with a new one if<br />
it ever becomes damaged, torn, or missing.<br />
REPLACEMENT: Before replacement, gently clean the<br />
Lefty outer tube with warm soapy water and wipe dry.<br />
Remove the backing from the new bumper, position<br />
and affix by pressing firmly against the outer tube.<br />
IMPORTANT: Be sure to position the bumper so that<br />
when the handlebar is rotated to the left, the bumper<br />
prevents fork contact with the the frame. Frame<br />
damage can result from using the wrong bumper or<br />
positioning a bumper incorrectly. Ask your Cannondale<br />
Dealer for help.<br />
17<br />
ORDER NO.<br />
HD215/<br />
KH074/<br />
KIT DESCRIPTION<br />
KIT,FRAME BUMPER, <strong>LEFTY</strong> STD<br />
(for standard clamp width Lefty)<br />
KIT,FRAME BUMPER, <strong>LEFTY</strong> XL (for tall<br />
clamp width Lefty)