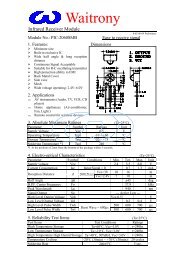
DIY KIT 109 STEPPER MOTOR DRIVER - Kitsrus
DIY KIT 109 STEPPER MOTOR DRIVER - Kitsrus
DIY KIT 109 STEPPER MOTOR DRIVER - Kitsrus

Create successful ePaper yourself
Turn your PDF publications into a flip-book with our unique Google optimized e-Paper software.
<strong>DIY</strong> <strong>KIT</strong> <strong>109</strong> <strong>STEPPER</strong> <strong>MOTOR</strong> <strong>DRIVER</strong><br />
Stepper motors can be used in a wide variety of hobby<br />
applications: searchlights on small boats & cars, video<br />
camera positioning, radio antenna control, controls<br />
operating through waterproof housing, telescope control<br />
where the azimuth, elevation & focus must be varied<br />
independently, moving table positioning. In these<br />
applications what is required is one or both of a<br />
continuous stepping at varying speeds and a single<br />
stepping, fine control to get the final position.<br />
This kit is a stepper motor driver for 5, 6 & 8 lead<br />
unipolar stepper motors. These are the most common<br />
types today on the surplus market. The older four lead<br />
bipolar stepper motors are not supported by this kit.<br />
Visual indication that a pulse has gone to the stepper<br />
motor is provided by 4 LED’s, one connected to each of<br />
the four coils in the motor. (This may be very useful if<br />
you cannot see the motor and want to be sure that it has<br />
stepped.) The direction of stepping can be changed by a<br />
switch. Three stepping modes are possible.<br />
The kit uses an IC especially designed to drive 6 lead<br />
unipolar stepper motors, the UCN5804B. As will be<br />
shown the 5 and 8 lead steppers can be configured into a<br />
6 lead pattern. Download the data sheet for this IC from<br />
the Allegro website given below. The various features of<br />
this IC are brought out to 5 SPDT switches on the PCB.<br />
This kit was designed using Protel for DOS.<br />
ASSEMBLY<br />
Check the components against the Component listing.<br />
Make sure you identify C1, the 474 monoblok. It looks<br />
just the same as C2 C4 & C6 which are 104 monobloks<br />
with the same pitch. Note there are four links to go on the<br />
board. One of the links goes under an IC socket. Make<br />
sure the flat on the four LED’s corresponds to the bar<br />
shown on the overlay. They all face right. It is generally<br />
best to solder the lowest height components into the board<br />
first. We have included a 6-pin header to make the<br />
connection of the stepper motor to the PCB easier.<br />
Motor Identification.<br />
This is straight forward because the number of wires<br />
coming out of the motor identifies it. Bipolar motors<br />
have 4 leads coming out of them. One winding is on each<br />
stator pole. These motors are not supported by this kit.<br />
They were common in the late 1980’s and many kits using<br />
discrete components were built to support them.<br />
Unipolar motors may have 5 leads but generally have 6<br />
or 8 wires. In all the motors we have seen, the wires for<br />
the 6 & 8 types come out in two bundles of 3 or 4 wires<br />
resp. Unipole steppers have two coils per stator pole. In<br />
the 8 lead motors the 2 leads from the 2 coils from both<br />
stators emerge from the motor. In the 6 lead motors the<br />
two coils on each stator pole are joined (opposite sense)<br />
together before they emerge from the motor. In the 5 lead<br />
motors each of the two joined wires are themselves joined<br />
before they leave the motor.<br />
In the 6 wire version a multimeter (set it to 200ohm<br />
resistance range) will show which is the centre lead within<br />
each group of 3 leads. Typically the resistance between<br />
the centre lead to the other two will be about 40 ohms<br />
while the resistance between the outer two leads will be<br />
twice that. Call the outer two leads in each of the two<br />
bunches of wires A & B,<br />
C & D. Solder them into<br />
those positions on the<br />
PCB. The centre lead in<br />
each bunch is the power<br />
lead & goes into the pad<br />
marked +. Note that it<br />
does not matter which<br />
way around the A/B, C/D<br />
leads go onto the pads.<br />
5 wire version. Note that<br />
both + pads on the PCB are connected together. In the 5<br />
wire motor these centre<br />
leads are connected<br />
internally. So to power a 5<br />
lead stepper just connect<br />
the common centre tap<br />
lead from both phases to<br />
one of the + pads. The<br />
A/B, C/D leads are<br />
connected just as in the 6<br />
lead motors.<br />
8 wire version. In each bunch of 4 leads find the 2 pairs<br />
of wires connected to each phase of the motor. Take one<br />
of each and join them together. This is now the common<br />
lead to connect to the + pad just as in the 6 lead case. The<br />
remaining leads are A & B and C & D to the PCB..<br />
Now there are 1, possibly<br />
2, complications. First the<br />
common connection must<br />
join the coils in the<br />
opposite sense. This refers<br />
to the way in which they<br />
are wound. This means<br />
that the dot on one coil is<br />
joined to the no-dot end<br />
on the other coil in the<br />
diagram. There is no way to tell the sense of the coils<br />
unless you have the motor winding colour specification<br />
which for surplus motors is generally missing. So you just<br />
have to try it. Now if the wires are colour coded the same<br />
in both bundles this is just a matter of two possibilities to<br />
try. If the wires are not colour coded then there are four<br />
possibilities. You will not damage the motor during this<br />
testing if connections are wrong. The motor will either not<br />
work or oscillate to and fro when the power is connected.<br />
CIRCUIT DESCRIPTION<br />
We have designed the kit so that the stepper motor can be<br />
run continuously at a fast or low stepping rate then, when<br />
it nears the desired position, it can be switched to
<strong>DIY</strong> <strong>KIT</strong> <strong>109</strong> <strong>STEPPER</strong> <strong>MOTOR</strong> <strong>DRIVER</strong><br />
PARTS LIST - K<strong>109</strong><br />
Resistors 1/4W, 5%:<br />
180R brown grey brown ..... R1 ................................. 1<br />
1K brown black red ............ R2 R3............................ 2<br />
1M brown black green........ R4 ................................. 1<br />
1M potentiometer ............... POT .............................. 1<br />
1000uF/35V electrolytic capacitor C3...................... 1<br />
0.47uF 474 monoblok capacitor C1.......................... 1<br />
0.1uF 104 monoblok capacitor C2 C4 C5 C6........... 4<br />
UCN5804B ........................ IC2................................ 1<br />
LM/NE555 nmos ................ IC1................................ 1<br />
7805 voltage regulator........ IC3................................ 1<br />
2 pole terminal block .......... ...................................... 1<br />
8 pin IC socket.................... ...................................... 1<br />
16 pin IC socket.................. ...................................... 1<br />
SPDT PCB-mounted switch ...................................... 5<br />
6 pin header ........................ ...................................... 1<br />
3mm red LED ..................... ...................................... 4<br />
4 leg tact switch .................. ...................................... 1<br />
K<strong>109</strong> PCB........................... ...................................... 1<br />
single step mode and manually pulsed into final position.<br />
Another switch controls the direction. A third switch can<br />
turn the IC off and any power to the motor is removed.<br />
Two other switches bring out halfstep and one phase<br />
control modes supported by the IC.<br />
A 555 IC is configured to deliver a continuous stream of<br />
pulses to pin 11 of the 5804. The frequency is determined<br />
by the values of the potentiometer and C1. Alternatively,<br />
the single step switch allows individual pulses to be<br />
delivered manually to the 5804 using a tact switch. A<br />
switch debounce circuit is present using R4 & C5. LED’s<br />
are included on the output of the 5804 to show which<br />
phases of the motor are powered.<br />
The Driver. The 5804 stepper driver is one of those<br />
marvellous devices that replaces a handful of discrete<br />
components. The driver will operate motors at up to 35V<br />
and 1.25A. The step input is to pin 11 and direction goes<br />
to pin 14. Pins 9 and 10 control one phase and half step<br />
operation, respectively. Ref. 6 shows how to drive the IC<br />
direct from a computer.<br />
Motor Movement.<br />
To make the motor step, power is applied to each coil in<br />
turn. The 4 windings have to be energised in the right<br />
sequence. Steppers have three different stepping methods:<br />
wave, two phase & half-step. This is because there are<br />
three basic patterns of energising the coils to make them<br />
move. The last two are the most efficient. These patterns<br />
are given in the data sheet on the 5804. No more than 2<br />
coils are on at any one time.<br />
In wave drive (or one phase operation) only one coil is<br />
on at any time. In two phase drive two coils are always<br />
on. In halfstep drive the number of coils energised cycles<br />
between 1 & 2. We will not go into the details here since<br />
they are given every year or so in the hobby electronics<br />
magazines and in text books. Two of the best write-ups<br />
starting from basics are references 2, 4 and 5 below. You<br />
can see the pattern of coils being turned on/off by looking<br />
at the LED’s as the motor steps.<br />
As the motor is spinning, try varying the supply voltage.<br />
This will make the motor run more roughly or smoothly.<br />
Stepping motors are very sensitive to supply voltage<br />
variations.<br />
If you want the RUN stepping rate to be slower then<br />
replace the 1M potentiometer by a 5M or even 10M pot.<br />
What to do if it does not work<br />
If there are more than 2 LED’s on then there is a short<br />
circuit on the output of the 5804. Check that all the 4 links<br />
are added to the board. Check the 555 IC is in the correct<br />
way.<br />
Ballast or Forcing Resistor<br />
For two reasons a low value (typically 20 to 60 ohm), 5W<br />
or 10W cement resistor is sometimes included in both the<br />
+ lines between the 5804 and the stepper motor.<br />
Lenz’s Law. Voltage driving gets into a time constant<br />
problem (L/R) which limits speed & power. If R is<br />
increased then the time constant is reduced. However, for<br />
hobby applications it does not matter if the time constant<br />
is 50msec or 10 msec.<br />
Current Limiting. The resistor helps to limit current to<br />
the motor. This is to help reduce overheating when it is<br />
stopped (not stepping) but the power is still connected to<br />
it to maintain its position.<br />
External Diodes. These are mentioned in the data sheet<br />
on the 5804 as possibly being necessary. However, for the<br />
hobby stepper motors we are discussing here they are not<br />
required.<br />
Data Sheet. Download the data sheet for the UCN5804<br />
from the Allegro website at:<br />
www.allegromicro.com/control/pn1frame.htm<br />
REFERENCES.<br />
1. Control Stepper Motors with your PC, by Marque<br />
Crozman. Silicon Chip, january, 1994, p80.<br />
2. Stepper Motors and how they work, by Peter Phillips.<br />
Electronics Australia, October & November, 1994.<br />
3. A PC-Based Stepper-Motor Controller, by Larry<br />
Antonuk. Popular Electronics, June 1992, p41.<br />
4. Computer Controlled Stepper Motors, by Jim Spence.<br />
ETI, august, 1994, p18.<br />
5. Stepping Motor Driver/Interface, by Mark Stuart.<br />
Everyday Electronics, january, 1992, p34.<br />
6. Linear Motion Table, by John Iovine. Nut’s ‘n Volts,<br />
august, 1995, p76.<br />
- - - - - - - - - - - - - - - - - -
<strong>DIY</strong> <strong>KIT</strong> <strong>109</strong> <strong>STEPPER</strong> <strong>MOTOR</strong> <strong>DRIVER</strong>