Operator Manual - Iris Sample Processing (StatSpin)
Operator Manual - Iris Sample Processing (StatSpin)
Operator Manual - Iris Sample Processing (StatSpin)

Create successful ePaper yourself
Turn your PDF publications into a flip-book with our unique Google optimized e-Paper software.
®<br />
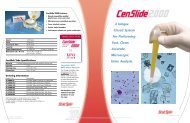
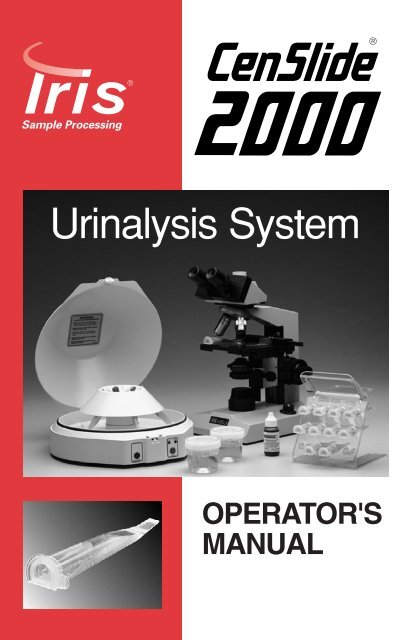
Urinalysis System<br />
OPERATOR'S<br />
MANUAL
Table of Contents<br />
OPERATOR’S MANUAL<br />
Please read the entire <strong>Operator</strong>’s <strong>Manual</strong> prior to operating<br />
the CenSlide Centrifuge.<br />
This manual includes easy-to-follow instructions, technical<br />
information about the CenSlide 2000 Urinalysis System,<br />
maintenance instructions, and a simple trouble shooting<br />
guide.<br />
TABLE OF CONTENTS<br />
Product Overview<br />
1.0 General . . . . . . . . . . . . . . . . . . . . . . . . . . . . . . . . . .1-1<br />
1.1 CenSlide 2000 Centrifuge . . . . . . . . . . . . . . . . . . . .1-2<br />
1.2 CenSlide Tubes . . . . . . . . . . . . . . . . . . . . . . . . . . . .1-3<br />
1.3 CenSlide 2000 Centrifuge Specifications . . . . . . . . .1-4<br />
1.4 CenSlide Tube Specifications . . . . . . . . . . . . . . . . .1-5<br />
General Operation<br />
2.0 Installing the CenSlide 2000 Centrifuge . . . . . . . . . .2-1<br />
2.1 Safety Features . . . . . . . . . . . . . . . . . . . . . . . . . . . .2-1<br />
2.2 Precautions . . . . . . . . . . . . . . . . . . . . . . . . . . . . . . .2-2<br />
2.3 Hazards . . . . . . . . . . . . . . . . . . . . . . . . . . . . . . . . . .2-2<br />
2.4 Preparing the Centrifuge for Use . . . . . . . . . . . . . . .2-2<br />
2.5 Preparing CenSlide Tubes for Centrifugation . . . . . .2-2<br />
2.6 Centrifuge Operation . . . . . . . . . . . . . . . . . . . . . . . .2-4<br />
2.7 <strong>Sample</strong> Analysis . . . . . . . . . . . . . . . . . . . . . . . . . . .2-5<br />
2.8 Quality Control . . . . . . . . . . . . . . . . . . . . . . . . . . . . .2-6<br />
Special Topics<br />
3.0 Staining . . . . . . . . . . . . . . . . . . . . . . . . . . . . . . . . . .3-1<br />
3.0.1 Preparing CenSlide Tubes for Centrifugation . . .3-1<br />
CenSlide 2000 Urinalysis System Page i - 1
Table of Contents<br />
OPERATOR’S MANUAL<br />
Special Topics - Continued<br />
3.0.2 Staining Characteristics . . . . . . . . . . . . . . . . . . .3-2<br />
3.1 Confirmatory Protein Assay . . . . . . . . . . . . . . . . . . .3-4<br />
3.2 Differentiating red blood cells<br />
from white blood cells . . . . . . . . . . . . . . . . . . . . . . .3-5<br />
3.3 Microscope Objectives . . . . . . . . . . . . . . . . . . . . . . .3-6<br />
3.3.1 Background . . . . . . . . . . . . . . . . . . . . . . . . . . . .3-6<br />
3.3.2 Non American Optical (Non-AO) Microscopes . .3-7<br />
3.3.3 American Optical (AO) Microscopes . . . . . . . . .3-7<br />
3.3.4 Microscopes manufactured Prior to 1979 . . . . . .3-8<br />
3.4 References . . . . . . . . . . . . . . . . . . . . . . . . . . . . . . .3-8<br />
Maintenance<br />
4.0 Cleaning the CenSlide 2000 Centrifuge . . . . . . . . . .4-1<br />
4.1 Cleaning the CenSlide Tubes . . . . . . . . . . . . . . . .4-1<br />
4.2 CenSlide 2000 Centrifuge Calibration . . . . . . . . . .4-2<br />
TroubleShooting<br />
5.0 TroubleShooting . . . . . . . . . . . . . . . . . . . . . . . . . . .5-1<br />
After Sale Support<br />
6.0 <strong>StatSpin</strong> CenSlide 2000<br />
Urinalysis System Warranty . . . . . . . . . . . . . . . . . . . . . .6-1<br />
6.1 <strong>StatSpin</strong> Maintenance Agreement . . . . . . . . . . . . .6-1<br />
6.2 Technical Assistance . . . . . . . . . . . . . . . . . . . . . . .6-1<br />
CenSlide 2000 Urinalysis System Page i - 2
Product Overview<br />
OPERATOR’S MANUAL<br />
The CenSlide 2000 Urinalysis System is a closed system<br />
used in performing microscopic examinations of urine.<br />
For In vitro diagnostic use.<br />
1.0 General<br />
The CenSlide 2000 Urinalysis System reduces exposure<br />
to biohazardous materials and helps laboratories control<br />
inherent variations in conventional microscopic analysis by<br />
standardizing urine sediment volume, centrifuge conditions,<br />
and technician technique. Unique in its simplicity, this<br />
advanced system is easy to use yet can dramatically<br />
reduce the number of steps and time required to process<br />
and review a specimen.<br />
The CenSlide 2000 Urinalysis System includes the<br />
CenSlide 2000 Centrifuge and CenSlide tubes (Figure 1.1).<br />
Figure 1.1<br />
The patented CenSlide tube is both a centrifuge tube and<br />
microscope slide, eliminating the need for slides, coverslips<br />
and specimen transfer. Once a urine sample is dispensed<br />
into a CenSlide tube and the cap is put in place, you never<br />
need to open the tube again; greatly reducing the possibility<br />
of spills and contamination.<br />
CenSlide 2000 Urinalysis System Page 1 - 1
Product Overview<br />
OPERATOR’S MANUAL<br />
The CenSlide 2000 Centrifuge is microprocessor-controlled<br />
to automatically spin CenSlide tubes for a preprogrammed<br />
time and speed. At the end of the centrifuge cycle, the urine<br />
sediment is redistributed evenly across the viewing area of<br />
the CenSlide tube, completely ready for microscopic analysis.<br />
The CenSlide tube inserts directly into a CenSlide Tube<br />
Holder which is located on the microscope platform. The<br />
CenSlide Tube Holder positions each CenSlide tube in the<br />
same place on the microscope. Once you focus on the<br />
first CenSlide tube each succeeding tube will automatically<br />
be in focus.<br />
The urine sediment is easily visualized and counted through<br />
its patented transparent tip, and correlates exceptionally well<br />
with conventional methods.<br />
1.1 CenSlide 2000 Centrifuge<br />
The CenSlide 2000 Centrifuge (Figure 1.2) is used<br />
exclusively with the CenSlide tubes to provide a rapid and<br />
accurate urinalysis. It automatically spins to the appropriate<br />
g-force, shuts off, and<br />
flicks the CenSlide tubes<br />
Figure 1.2<br />
viewing area to ensure<br />
even distribution of the<br />
sediment.<br />
Rotor And<br />
CenSlide Slots<br />
“Open/Abort”<br />
Button<br />
Lid<br />
Latch<br />
“Start”<br />
Button<br />
CenSlide 2000 Urinalysis System Page 1 - 2
Product Overview<br />
OPERATOR’S MANUAL<br />
1.2 CenSlide Tubes<br />
The patented CenSlide<br />
tube (Figure 1.3) is a<br />
combination tube and<br />
microscope slide.<br />
The CenSlide tube reduces<br />
processing time, and<br />
eliminates errors associated<br />
with decanting the supernatant<br />
and resuspending<br />
the microscopic particles<br />
thereby increasing precision<br />
and accuracy.<br />
Cap<br />
Viewing Area<br />
Figure 1.3<br />
The CenSlide tube holds 5 mL of urine, which is centrifuged<br />
and the resulting sediment is automatically resuspended in<br />
its built-in viewing area for microscopic examination.<br />
The CenSlide 2000 Urinalysis System has been clinically<br />
tested and shown to correlate favorably with tests performed<br />
by the standard microscope slide and KOVA ® methods.<br />
CenSlide 2000 Urinalysis System Page 1 - 3
Product Overview<br />
OPERATOR’S MANUAL<br />
1.3 CenSlide 2000 Centrifuge Specifications<br />
Power Requirements<br />
Model<br />
Power Supply Mains<br />
M401-12 . . . . . . . . . . . . . . .120 VAC, 60 Hz, 26 W<br />
(Product No. 2C-9000-001)<br />
M401-22 . . . . . . . . . . . . . . .90-240 VAC, 50/60 Hz, 26 W<br />
(Product No. 2C-9000-22)<br />
Centrifuge Motor . . . . . . . .24 VDC, Brush Type,<br />
Solid State Microprocessor<br />
Controlled<br />
Lid and Bowl . . . . . . . . . . .One piece molded Nylon plastic<br />
Centrifuge Cycle<br />
Ramp to 1350 rpm ±10% . .≈ 15 seconds<br />
Hold 1350 rpm . . . . . . . . . .≈ 15 seconds<br />
Ramp down to 400 rpm . . .≈ 15 seconds<br />
Flick tube . . . . . . . . . . . . . .≈ 2 seconds<br />
Centrifugal Force . . . . . . .97 xg<br />
Power Consumption . . . . .20 W<br />
Physical Dimensions<br />
Height: . . . . . . . . . . . . . . . .5.6" (14.2 cm)<br />
Width: . . . . . . . . . . . . . . . . .11.4" (29.0 cm)<br />
Depth: . . . . . . . . . . . . . . . . .12.9" (32.8 cm)<br />
Weight: . . . . . . . . . . . . . . . .9 lbs. (4.1 Kg)<br />
Environmental Conditions<br />
Indoor Use • Altitude up to 2000m • Temperature 5°C to 40°C<br />
Maximum relative humidity 80% for temperatures up to 31°C<br />
decresasing linearly to 50% relative humidity at 40°C<br />
Main supply voltage fluctuations not to exceed ± 10%<br />
of the nominal voltage<br />
Transient overvoltages according to installation category II<br />
Pollution degree 2<br />
Rotor . . . . . . . . . . . . . . . . .6 Position, fixed 45° angle,<br />
Nylon plastic<br />
Switches . . . . . . . . . . . . . .Pressure sensitive membrane<br />
CenSlide 2000 Urinalysis System Page 1 - 4
Product Overview<br />
OPERATOR’S MANUAL<br />
1.4 CenSlide Tube Specifications<br />
Description<br />
Disposable, non-sterile, shatterproof, polypropylene plastic<br />
molded tube with clear viewing area incorporated. Tubes are<br />
packaged with recessive leak-resistant caps in shrinkwrapped<br />
boxes.<br />
Dimensions<br />
“D” shaped taper, 110mm long x 21mm wide<br />
Viewing Area Dimensions<br />
7.9mm (w) x 10.7mm (l) x 0.25mm (h)<br />
Total Volume<br />
5.0 mL<br />
Storage Conditions<br />
Store at room temperature (20°C to 30°C)<br />
CenSlide is a registered trademark and the CenSlide tube is a patented<br />
(5,260,032) product of International Remote Imaging Systems, Inc.<br />
CenSlide Power Supply<br />
Statspin Part No. Description Mfg. Model No.<br />
01-3553-001 AC Power Adapter APS AD-740U-1240<br />
(For use with all CenSlide 2000 centrifuges)<br />
01-3581-001 AC Transformer Leader A48240800<br />
(For use with 2C-9000-001 only)<br />
CenSlide 2000 Urinalysis System Page 1 - 5
Operation<br />
OPERATOR’S MANUAL<br />
This chapter covers the installation and general operation<br />
of the CenSlide 2000 Urinalysis System.<br />
2.0 Installing the Censlide 2000 Centrifuge<br />
After removing the CenSlide<br />
2000 Centrifuge from its box,<br />
place it on a level working<br />
surface close to an electrical<br />
outlet. The CenSlide 2000<br />
Centrifuge operates on 24 volts,<br />
supplied by an external power<br />
supply module. Plug the power<br />
Figure 2.1<br />
supply module into the electrical<br />
outlet, and its power cord into the centrifuge’s power<br />
receptacle located at the back of the centrifuge (Figure 2.1).<br />
Mark a 300 mm clearance boundary around the centrifuge<br />
to allow adequate ventilation and safety.<br />
Please use only the power supply provided with the<br />
equipment. To turn unit completely off, disconnect power<br />
plug-in located at the rear of the instrument.<br />
2.1 Safety Features<br />
The CenSlide 2000 Centrifuge uses an electronically<br />
controlled locking mechanism to prevent the centrifuge<br />
from being:<br />
1. Operated, except when the lid is completely closed<br />
and latched; or,<br />
2. Opened, while the centrifuge is in operation.<br />
!<br />
IMPORTANT: Do not attempt to defeat any safety<br />
features of this equipment. If the equipment is not<br />
used correctly, protection provided by the equipment<br />
will be impaired.<br />
To reduce the risk of injury -<br />
• Do not operate with an unbalanced load.<br />
• Inspect rotor for fatigue.<br />
CAUTION: Incorrect tubes may damage rotor.<br />
NO USER SERVICABLE PARTS -<br />
Refer all service to qualified service personnal.<br />
CenSlide 2000 Urinalysis System Page 2 - 1
Operation<br />
OPERATOR’S MANUAL<br />
2.2 Precautions<br />
The CenSlide 2000 Centrifuge is designed to concentrate<br />
urine sediment in CenSlide tubes for diagnostic testing.<br />
Therefore, use of the CenSlide 2000 Centrifuge places a<br />
responsibility upon administrative personnel to ensure<br />
adequate training of operators as to the safe and<br />
effective use of the centrifuge.<br />
2.3 Hazards<br />
The CenSlide 2000 Centrifuge is not explosion-proof and<br />
should not be used in a potentially explosive atmosphere.<br />
2.4 Preparing the Centrifuge for Use<br />
When the CenSlide 2000 Centrifuge is plugged in, a tone<br />
will sound, its lid will open about one-eighth of an inch and<br />
the green “READY” light on the right side of the control panel<br />
will flash. Open the lid fully, by manually lifting it until it rests<br />
on its back support.<br />
2.5 Preparing Censlide Tubes for Centrifugation<br />
At this time, remove, complete and mail the CenSlide 2000 Centrifuge<br />
Warranty Card. This will activate the warranty on your centrifuge and<br />
assure your receipt of pertinent follow-up product information.<br />
1. Label a CenSlide tube with the appropriate patient information.<br />
2. A first morning specimen with an acid pH is recommended<br />
because it is concentrated and more likely to contain<br />
casts than a dilute alkaline afternoon specimen.<br />
Dispense a sample for analysis as follows:<br />
a. Shake the urine collection container sufficiently to<br />
resuspend the particles uniformly in the urine.<br />
b. Remove the lid from the urine collection container and<br />
pour the urine into the open end of a CenSlide tube<br />
up to the line directly above the arrow (5 mL).<br />
3. If requested, insert a chemistry urinalysis test strip into the<br />
CenSlide tube and tilt the tube slightly to ensure that<br />
urine completely covers the uppermost pad.<br />
CenSlide 2000 Urinalysis System Page 2 - 2
Operation<br />
OPERATOR’S MANUAL<br />
4. If stain is required, add it to the<br />
sample after the chemistry test<br />
strip has been removed and<br />
read (Figure 2.2).<br />
5. Place the cap on the CenSlide<br />
tube and push down firmly until it<br />
clicks and/or its rim is flush with<br />
the top of the CenSlide tube.<br />
6. Holding the CenSlide tube just<br />
below the cap, align it so that the<br />
flat side of the CenSlide tube<br />
conforms to the flat side of the<br />
slot in the rotor head (Figure 2.3).<br />
One to six CenSlide tubes can<br />
be placed into the rotor with<br />
appropriate counter-balancing.<br />
7. For appropriate counterbalancing,<br />
simply place a<br />
CenSlide tube with equal volume<br />
of urine or water opposite each<br />
CenSlide tube placed in the rotor.<br />
Figure 2.2<br />
Figure 2.3<br />
8. Seat the CenSlide tube firmly into<br />
the rotor slot, pushing down on the cap until the CenSlide<br />
tube can go no further. Close the lid.<br />
The lid must be "completely” closed, or the CenSlide 2000<br />
Centrifuge will not operate.<br />
When the lid is properly closed, the green “READY” light on<br />
the control panel will stop flashing.<br />
CenSlide 2000 Urinalysis System Page 2 - 3
Operation<br />
OPERATOR’S MANUAL<br />
2.6 Centrifuge Operation<br />
1.Press the green “START”<br />
button on the control panel<br />
of the CenSlide 2000<br />
Centrifuge (Figure 2.4).<br />
The amber “CYCLE” light<br />
will flash, indicating that the<br />
centrifuge is currently in<br />
operation.<br />
Figure 2.4<br />
For safety purposes, the lid will not open<br />
while the rotor is turning.<br />
Microprocessor technology is used to monitor the speed and<br />
time to assure accuracy. Near the end of the cycle, a flicking<br />
process (clicking sound) will automatically occur to evenly<br />
disperse the sediment in the CenSlide tube.<br />
Note: If the "OPEN/ABORT" button is pressed during<br />
operation, the centrifuge will stop. The amber "CYCLE" light<br />
will flash slowly and a beep will sound to indicate interruption<br />
of the cycle. When the rotor stops, the lid will automatically<br />
open. It is recommended that the samples be discarded.<br />
2. At the end of the cycle, an audible beep will sound, the<br />
amber “CYCLE” light will go out, the green “READY” light<br />
will begin blinking and when the rotor stops, the lid will<br />
automatically open.<br />
CenSlide 2000 Urinalysis System Page 2 - 4
Operation<br />
OPERATOR’S MANUAL<br />
2.7 <strong>Sample</strong> Analysis<br />
1. Open the lid and remove<br />
the CenSlide tubes.<br />
2. Place the CenSlide tubes<br />
into the StakRak<br />
horizontally (Figure 2.5).<br />
Allow the urine sediment in<br />
the tubes to settle for at least<br />
one minute prior to viewing.<br />
Figure 2.5<br />
3. Place a CenSlide Holder<br />
onto the microscope<br />
stage.<br />
4. Place a CenSlide tube<br />
into the CenSlide Holder<br />
and position its viewing<br />
area under the microscope<br />
objective<br />
(Figure 2.6).<br />
Figure 2.6<br />
5. Focus on the viewing area using the microscope’s low<br />
power (10x) objective and proceed with the microscopic<br />
examination.<br />
Note: Occasionally, uneven distribution of the sediment may<br />
occur due to aggregates or clumps of debris (mucous, cells,<br />
etc.) forming around the edges of the CenSlide tube’s viewing<br />
area. When this occurs, count only the fields where elements<br />
are evenly dispersed. Avoid counting areas inside the clumps.<br />
CenSlide 2000 Urinalysis System Page 2 - 5
Operation<br />
OPERATOR’S MANUAL<br />
2.8 Quality Control<br />
There are a number of commercially available urine controls<br />
that contain white blood cells, red blood cells, and crystals<br />
that may be used for daily verification of the CenSlide<br />
Urinalysis System. The quality control procedures<br />
established for your laboratory should be followed.<br />
CenSlide 2000 Urinalysis System Page 2 - 6
Special Topics<br />
OPERATOR’S MANUAL<br />
This chapter covers special procedures, technical<br />
specifications, and references.<br />
3.0 Staining<br />
The recommended stain for use with the CenSlide 2000 is a<br />
modified Sternheimer-Malbin stain. This stain is commercially<br />
available, call <strong>StatSpin</strong> for source (800-782-8774).<br />
This stain, when used properly, provides increased contrast<br />
and specific staining of urinary sediment. This makes<br />
recognition of some formed particles, especially casts, easier.<br />
3.0.1 Preparing Censlide Tubes for Centrifugation<br />
1. Label a CenSlide tube with the appropriate patient information.<br />
2. A first morning specimen with an acid pH is recommended<br />
because it is concentrated and more likely to contain<br />
casts than a dilute alkaline afternoon specimen.<br />
Dispense a sample for analysis as follows:<br />
a. Shake the urine collection container sufficiently to<br />
resuspend the particles uniformly in the urine.<br />
b. Remove the lid from the urine collection container and<br />
pour the urine into the open end of a CenSlide tube up to<br />
the line directly above the arrow (5 mL).<br />
3. If requested, insert a chemistry<br />
urinalysis test strip into the CenSlide<br />
tube prior to adding stain, and tilt it<br />
slightly to assure that urine completely<br />
covers the uppermost pad.<br />
4. Shake the stain bottle before<br />
dispensing. Add five to eight drops<br />
of the stain to the CenSlide tube<br />
(Figure 3.1).<br />
Figure 3.1<br />
CenSlide 2000 Urinalysis System Page 3 - 1
Special Topics<br />
OPERATOR’S MANUAL<br />
Warning: This product will stain fabrics.<br />
Use caution when dispensing.<br />
5. Place the cap on the CenSlide tube and push down firmly<br />
until it clicks and/or its rim is flush with the top of the<br />
CenSlide tube. Invert two to three times to evenly mix<br />
the specimen with the stain.<br />
6. Refer to Chapter 2, pages 2-3 through 2-5 for instruction<br />
on completing the preparation and reading of CenSlide<br />
tubes.<br />
3.0.2 Staining Characteristics<br />
Red Blood Cells:<br />
White Blood Cells:<br />
Glitter Cells:<br />
Renal Epithelial<br />
Cells:<br />
In acid or neutral urine, the red cells<br />
often remain intact and colorless or<br />
stain slightly purple. In alkaline urine,<br />
the red cells are usually lysed and<br />
alkaline hematin forms, which stains<br />
dark purple.<br />
The nuclei of ordinary leukocytes<br />
usually stain a dark orange-purple,<br />
and the granularity of the cytoplasm<br />
is distinguishable. There is variability<br />
between light and dark forms.<br />
These are large polymorphonuclear<br />
leukocytes, frequently seen in<br />
pyelonephritis, that appear pale light<br />
blue to almost colorless. The cells are<br />
larger than dark-staining cells.<br />
Cytoplasmic granules with or without<br />
Brownian movement may be noted.<br />
The nucleus stains dark purple with<br />
small rim of orange-purple cytoplasm.<br />
CenSlide 2000 Urinalysis System Page 3 - 2
Special Topics<br />
OPERATOR’S MANUAL<br />
Bladder Epithelial<br />
Cells:<br />
Squamous Vaginal /<br />
Urethral Cells:<br />
Hyaline Casts:<br />
RBC Casts:<br />
Hemoglobin Casts:<br />
WBC Casts:<br />
Renal Epithelial<br />
Casts:<br />
Bacterial Casts:<br />
Round cells with a blue nucleus and<br />
a large encircling border of pale blue<br />
cytoplasm.<br />
These are ragged and irregularly<br />
shaped cells with orange-to-purple<br />
nuclei and extensive blue or purple<br />
cytoplasm.<br />
Hyaline casts appear pink to light<br />
purple with uniform matrices.<br />
They appear pale pink with unstained<br />
or pale lavender red blood cells<br />
enmeshed within their matrix.<br />
They are deep purple and coarsely<br />
granular with mixtures of hemoglobin,<br />
red blood cells and fibrin.<br />
They appear pale pink with purple to<br />
orange white blood cells enmeshed<br />
within their hyaline matrix. With “glitter<br />
cell” casts, the cells are pale blue with<br />
a granular cytoplasm surrounded by<br />
the pink hyaline matrix.<br />
They appear pale pink with small cells<br />
with purple nuclei enmeshed within<br />
their hyaline matrix.<br />
They appear pale pink with visible<br />
purple stained bacteria enmeshed<br />
within their hyaline matrix.<br />
CenSlide 2000 Urinalysis System Page 3 - 3
Special Topics<br />
Granular casts:<br />
Fatty Casts:<br />
Trichomonas<br />
Vaginalis:<br />
Budding Yeast:<br />
Mucous:<br />
Bacteria:<br />
They appear pale pink with granules<br />
staining light purple (fine granular)<br />
or dark purple (coarse granular)<br />
enmeshed within their hyaline matrix.<br />
They appear pale pink with highly<br />
refractile unstained globules within<br />
their hyaline matrix.<br />
A dark purple nucleus with a large<br />
encircling border of light purple<br />
matrix.<br />
Stain a light to medium purple.<br />
Stain a light to medium purple.<br />
Stain purple.<br />
OPERATOR’S MANUAL<br />
Mycelia Spores -<br />
Fungi:<br />
3.1 Confirmatory Protein Assay<br />
Stain purple.<br />
Note: Do not perform a sulfosalicylic acid test until after the<br />
standard CenSlide microscopic analysis has been completed.<br />
1. Take the CenSlide tube used in performing the<br />
microscopic analysis and place it in a standard<br />
centrifuge.<br />
2. Centrifuge the CenSlide tube at 400 xg for five minutes.<br />
CenSlide 2000 Urinalysis System Page 3 - 4
Special Topics<br />
OPERATOR’S MANUAL<br />
3.1 Confirmatory Protein Assay (cont.)<br />
3. After centrifugation, remove the CenSlide tube from the<br />
centrifuge and decant the supernatant into a clean, clear<br />
tube. Be very careful when decanting the supernatant not<br />
to disturb the sediment at the bottom of the CenSlide tube.<br />
4. Add an equal volume of sulfosalicylic acid (Exton’s<br />
Reagent) to the decanted supernatant and mix.<br />
5. Grade for cloudiness.<br />
3.2 Differentiating Red from White Blood Cells<br />
One of the most common methods of differentiating red blood<br />
cells from white blood cells is by the addition of a few drops<br />
of 2% acetic acid. The acetic acid will lyse only the red blood<br />
cells leaving the white blood cells intact.<br />
Red blood cells are effectively lysed in the CenSlide tube with<br />
the addition of 6 drops of 2% acetic acid. However, because<br />
acetic acid is a weak acid, basic urine specimens may<br />
require a greater number of drops of 2% acetic acid in order<br />
to lyse the red blood cells.<br />
To lyse red blood cells using 2% acetic acid:<br />
1. Process the CenSlide tube as you normally would<br />
(see Sections 2.5 thru 2.7).<br />
2. After the microscopic analysis has been performed,<br />
uncap the CenSlide tube and decant the supernatant.<br />
3. Add 6 drops of 2% acetic acid to the CenSlide tube.<br />
CenSlide 2000 Urinalysis System Page 3 - 5
Special Topics<br />
OPERATOR’S MANUAL<br />
4. Mix the acetic acid into the CenSlide tube’s viewing area<br />
by bending it five times, hand flicking it five times, and<br />
then bending it five more times.<br />
5. Place the CenSlide tube in the StakRak horizontally<br />
and allow the urine sediment to settle for two minutes<br />
prior to microscopic examination.<br />
Note: Bending and hand flicking the viewing area causes an<br />
increase in the number of cellular elements in the viewing area.<br />
Due to this increase, quantitative analysis will not be valid as<br />
cellular element levels will be falsely elevated.<br />
3.3 Microscope Objectives<br />
3.3.1 Background<br />
Examination of urine is normally done with a 10x objective for<br />
an overview evaluation, followed by closer examination with a<br />
40x objective.<br />
Over the years, it has become standard to use a 1.0 mm<br />
thick microscope slide, with a glass coverslip of 0.17 mm<br />
thickness for the examination of urine under the microscope.<br />
The optics in the objectives are ground to exacting tolerances<br />
which take into account the refractive index of glass, which<br />
determines how much light rays are bent by a specific<br />
thickness.<br />
With the advent of procedures such as tissue culture, where<br />
the containers are usually of plastic and may be thicker than<br />
a glass coverslip, it was found that the optics had to be<br />
modified so they were able to focus through the increased<br />
thickness and also deal with the refractive index problem of<br />
the various plastics being used. These special objectives<br />
were more costly and did not find their way into the world<br />
of “routine” microscopes.<br />
CenSlide 2000 Urinalysis System Page 3 - 6
Special Topics<br />
OPERATOR’S MANUAL<br />
3.3.2 Non American Optical (Non-AO) Microscopes<br />
After 1979, the Deutsche Industrial Norm (DIN Standard) was<br />
accepted by most microscope manufacturers. This standardization<br />
of objective lengths solves the problem of the focusing<br />
distance when DIN Standard High Resolution Long Working<br />
Distance objectives are used.<br />
Microscopes equipped with 40x DIN Standard objectives<br />
may hit the CenSlide tube’s viewing area when it is rotated<br />
from the 10x objective to the 40x objective. <strong>StatSpin</strong> inventories<br />
a replacement 40x high resolution long working distance<br />
objective that produces excellent images at 40x without<br />
interference. It can be used with all DIN Standard microscopes.<br />
Use <strong>StatSpin</strong> product number 2C-4950-001,<br />
Microscope Objective, 40x, Long, to order this objective.<br />
3.3.3 American Optical (AO) Microscopes<br />
American Optical microscopes equipped with a 40x “infinity<br />
corrected” objective do not have enough working distance<br />
to focus on urine microscopic elements without hitting the<br />
CenSlide tube’s viewing area.<br />
<strong>StatSpin</strong> inventories a replacement 40x high quality, flat field,<br />
long working distance objective that produces excellent<br />
images with all American Optical “infinity corrected”<br />
microscopes. Use <strong>StatSpin</strong> product number 2C-4940-001,<br />
Microscope Objective, 40x, Short, to order this objective.<br />
If an American Optical microscope’s 40x objective is<br />
“Not Parfocal” with the 10x objective, it requires the<br />
operator to refocus excessively between the 10x and the<br />
40x objective. To eliminate this, <strong>StatSpin</strong> supplies with each<br />
American Optical “infinity corrected” replacement objective,<br />
a set of “shims” (washers of different thickness) that can be<br />
installed between the 40x objective and the turret to eliminate<br />
“non-parfocal” situations. Exact combinations of these shims<br />
provide the ability to “fine-tune” the parfocal situation.<br />
CenSlide 2000 Urinalysis System Page 3 - 7
Special Topics<br />
OPERATOR’S MANUAL<br />
On an unmodified American Optical model 110 series<br />
microscope, all shims will be required. For a modified<br />
American Optical model 110 series microscope, it may be<br />
necessary to remove some of the shims. Remove the shims,<br />
one at a time, starting with the thinnest, until it is possible to<br />
go back and forth between the 10x and 40x with minimal<br />
amount of refocusing. Contact <strong>StatSpin</strong> Technical Service<br />
if assistance is required.<br />
3.3.4 Microscopes Manufactured Prior to 1979<br />
Microscopes manufactured prior to 1979 have objectives<br />
that conformed to no standard. Contact <strong>StatSpin</strong> Technical<br />
Service for assistance with these non-standardized<br />
microscopes.<br />
3.4 References<br />
1. Sternheimer, R., and Malbin, B., Clinical Recognition of<br />
Pyelonephritis with a New Strain for Urinary Sediment,<br />
American Journal of Medicine, 1:312, 1951.<br />
2. Freeman, J.A., and Beeler, M.F., Laboratory Medicine/<br />
Urinalysis and Medical Microscopy, 2nd Edition,<br />
Lea & Febiger, Philadelphia, 1983.<br />
3. Tipper, P. L., MS, MT (ASCP), Yang, G., MS, MT (ASCP),<br />
Nichols, L. MT (ASC), and Settineri, R., MS, Comparison<br />
of CenSlide and Standard Methodology for Microscopic<br />
Urinalysis, Diagnostic & Clinical Testings, Vol. 28, No. 2,<br />
pages 38-39, 1990.<br />
4. NCCLS Document GP16-T, Routine Urinalysis and<br />
Collection, Transportation, and Preservation of Urine<br />
Specimens, Tentative Guideline, December 1992.<br />
CenSlide 2000 Urinalysis System Page 3 - 8
Maintenance<br />
OPERATOR’S MANUAL<br />
This chapter explains how to take care of your CenSlide<br />
tubes and CenSlide 2000 Centrifuge. If you have any<br />
questions on how to use your CenSlide Urinalysis System,<br />
simply call the <strong>StatSpin</strong> Hotline at: 800-782-8774. A <strong>StatSpin</strong><br />
representative will gladly answer your questions, or talk you<br />
through any procedures.<br />
4.0 Cleaning the Censlide 2000 Centrifuge<br />
For Urine Spills<br />
Clean up urine spills inside the<br />
CenSlide Centrifuge bowl with a<br />
cloth dampened with 5% bleach.<br />
For Grease, Makeup,<br />
Fingerprints or Stains<br />
Clean the centrifuge with a damp<br />
cloth and mild detergent.<br />
Note: The bowl interior has not been designed to be fluid tight,<br />
therefore, disinfecting solutions should not be poured into the<br />
bowl.<br />
4.1 Cleaning the Censlide Tubes<br />
Wipe the viewing area surface lightly with clean gauze or<br />
lens cleaning paper. Do not use disinfecting alcohol or water<br />
to clean the viewing area surface, as these can cause water<br />
spots on the surface.<br />
Note: Be careful not to rub too strongly on the viewing area<br />
surface, as this can scratch the viewing area.<br />
CenSlide 2000 Urinalysis System Page 4 - 1
Maintenance<br />
OPERATOR’S MANUAL<br />
4.2 Censlide 2000 Centrifuge Calibration<br />
The CenSlide 2000 Centrifuge uses microprocessor<br />
technology to monitor the speed (rpm) and timing to<br />
ensure the accuracy of each test. No initial rpm calibration<br />
is required. The rpm can be independently checked with<br />
a photoelectric tachometer available from many sources.<br />
To check the rpm:<br />
1. Insert six (6) water-filled CenSlide tubes into the rotor.<br />
2. Position the tachometer beam so it shines through the<br />
sight hole located at the top of the centrifuge cover.<br />
3. Turn the tachometer on.<br />
4. Press the start button, wait 15 seconds<br />
and record the rpm.<br />
CenSlide 2000 Urinalysis System Page 4 - 2
Trouble Shooting Guide<br />
OPERATOR’S MANUAL<br />
5.0 Trouble Shooting<br />
OBSERVATIONS<br />
The CenSlide 2000 Centrifuge<br />
does not appear to have power.<br />
ACTIONS<br />
Check that the power transformer<br />
is securely plugged into both the AC wall<br />
outlet and the back of the centrifuge.<br />
Try a different AC outlet to verify that<br />
AC current is being supplied to the<br />
power supply module.<br />
Make sure the lid is securely closed and<br />
locked in place.<br />
Reset the CenSlide 2000 Centrifuge by<br />
disconnecting and reconnecting the power<br />
supply cord's plug to the centrifuge.<br />
The CenSlide 2000<br />
Centrifuge appears to<br />
vibrate when operating.<br />
It does not appear that<br />
the flicking mechanism<br />
is functioning.<br />
Balance appropriately by placing equally<br />
filled CenSlide tubes opposite each<br />
other.<br />
Seat CenSlide tubes firmly and securely<br />
within the CenSlide 2000 Centrifuge<br />
rotor.<br />
Check that you are using the correct<br />
power supply module. Use only the power<br />
supply provided with the instrument.<br />
Clean and dry the flicker button with alcohol<br />
and a tissue or swab.<br />
CenSlide 2000 Urinalysis System Page 5 - 1
Trouble Shooting Guide<br />
OPERATOR’S MANUAL<br />
5.0 Trouble Shooting<br />
OBSERVATIONS<br />
Sediment appears to pack along<br />
the sides of the viewing area.<br />
ACTIONS<br />
Seat CenSlide tubes firmly and securely<br />
within the CenSlide 2000 Centrifuge<br />
rotor.<br />
If the specimen is extremely thick or turbid,<br />
dilute the sample with saline.<br />
CenSlide tubes leak.<br />
Verify that the caps are firmly and securely in<br />
place on the CenSlide tubes.<br />
The CenSlide tubes are not made for multiple<br />
use. Use a non–liquid filler to match the<br />
weight of 5 mL of fluid when using as a<br />
balance tube.<br />
The lid latch is stuck in the<br />
closed position.<br />
If the "OPEN / ABORT" button does not release<br />
the lid after the cycle end alert, disconnect the<br />
power cord at the back of the unit and then<br />
reconnect it to do a "RESET".<br />
Retry the "OPEN / ABORT" button.<br />
Place the bottom end of a Cen-Slide tube<br />
into the slot in the lid latch and press against<br />
the latch.<br />
Carefully clean and dry the latch assembly.<br />
If the lid O–ring is causing the lid to stick,<br />
clean it and the underside of the lid with mild<br />
soap and water.<br />
CenSlide 2000 Urinalysis System Page 5 - 2
Trouble Shooting Guide<br />
OPERATOR’S MANUAL<br />
5.0 Trouble Shooting<br />
OBSERVATIONS<br />
The lid to the centrifuge is open<br />
but the green light is not flashing.<br />
The yellow light will not go on<br />
when the start button is pressed.<br />
ACTIONS<br />
Disconnect the power cord at the<br />
back of the unit and then reconnect it.<br />
This will cause a power "RESET".<br />
Check that there is power to the<br />
centrifuge by observing the green light.<br />
Check that the lid is securely latched.<br />
Microscopic observation<br />
and focus difficulty.<br />
Make sure the CenSlide tubes have at least<br />
a one minute settling time in the horizontal<br />
position after centrifugation.<br />
Assure that the CenSlide tubes are properly<br />
placed in the CenSlide Holder.<br />
Using the 10x Objective, focus the<br />
microscope on the top or bottom of the<br />
CenSlide tube surface and then slowly<br />
adjust up or down until you find the<br />
observation plane. Then switch to your 40x<br />
objective. If it comes in contact with the<br />
CenSlide tube, you will need to obtain a<br />
long working distance objective through<br />
your local distributor or directly through<br />
<strong>StatSpin</strong>.<br />
If you have any questions, or require customer assistance,<br />
please call 1-800-782-8774 from 8:00 am to 6:00 pm EST.<br />
CenSlide 2000 Urinalysis System Page 5 - 3
After Sale Support<br />
OPERATOR’S MANUAL<br />
6.0 <strong>StatSpin</strong> CenSlide Urinalysis System Warranty<br />
<strong>StatSpin</strong> warrants the CenSlide 2000 Centrifuge and<br />
CenSlide tubes to be free from defects in material and<br />
workmanship for one year. During the first year, <strong>StatSpin</strong><br />
will repair or replace your CenSlide 2000 Centrifuge at<br />
no charge if it fails to perform as specified.<br />
If the instrument has been modified without <strong>StatSpin</strong>’s<br />
consent or if the failure is the result of misuse or abuse,<br />
<strong>StatSpin</strong> has no obligation to repair or replace the failed<br />
centrifuge.<br />
6.1 <strong>StatSpin</strong> Maintenance Agreement<br />
After the first year, a <strong>StatSpin</strong> Maintenance Agreement can<br />
be purchased to extend warranty coverage an additional<br />
year. Under this agreement, <strong>StatSpin</strong> will replace your<br />
centrifuge with a refurbished centrifuge at no charge, if it<br />
fails to perform as specified. If the <strong>StatSpin</strong> Maintenance<br />
Agreement is not purchased, your centrifuge can be repaired<br />
or replaced at a fee to be determined at time of the repair or<br />
replacement.<br />
6.2 Technical Assistance<br />
For technical assistance, call <strong>StatSpin</strong> at 1-800-782-8774.<br />
CenSlide 2000 Urinalysis System Page 6 - 1
Visit our home page on the internet at…<br />
http://www.proiris.com<br />
60 Glacier Drive • Westwood, MA 02090<br />
800-782-8774 • 781-551-0100<br />
FAX: 781-551-0036<br />
REV. D 55-3313-001