View Stanton SCS.3M Manual
View Stanton SCS.3M Manual View Stanton SCS.3M Manual
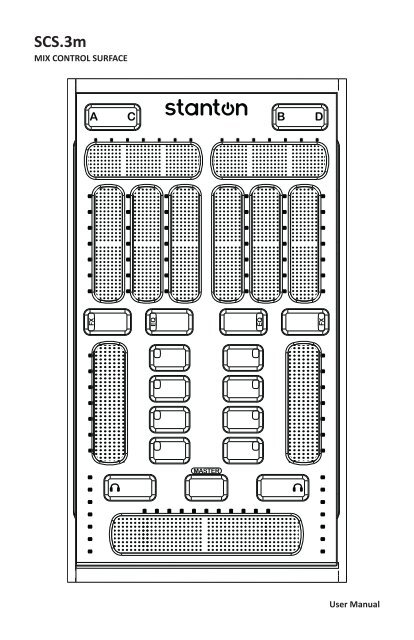
SCS.3m MIX CONTROL SURFACE FX EQ EQ FX MASTER User Manual
- Page 2 and 3: Important Safety Instructions • R
- Page 4 and 5: Contents 5. Using the SCS.3m with T
- Page 6 and 7: Unpacking 1.3 Unpacking Please chec
- Page 8 and 9: Connect Other Devices 2.3 Connect O
- Page 10 and 11: max 1O max max 1O 1O O SCS.3m Descr
- Page 12 and 13: Top Panel Functional groups 3.2 Top
- Page 14 and 15: FX Slider Section 3.2.2 Slider Sect
- Page 16 and 17: Button Section 3.2.5 Button Section
- Page 18 and 19: Channel Level Meter 3.2.9 Channel L
- Page 20 and 21: Inner Rear Panel 3.3.1 Inner Rear P
- Page 22 and 23: Installing DaRouter on Windows 3. T
- Page 24 and 25: Installing DaRouter on Windows 9. C
- Page 26 and 27: Installing Traktor LE on Windows 4.
- Page 28 and 29: Installing Traktor LE on Windows 7.
- Page 30 and 31: Activating Traktor LE on Windows 4.
- Page 32 and 33: 4. Read the License Agreement and c
- Page 34 and 35: Installing Traktor LE on Mac 4.3.2
- Page 36 and 37: Activating Traktor LE on Mac 4.3.3
- Page 38 and 39: Configuring DaRouter The Preset Sec
- Page 40 and 41: Configuring Traktor LE 4.5 Configur
- Page 42 and 43: Mixer 9. Key-Lock: Activates or dea
- Page 44 and 45: Browser 6. Browser Tree: • Track
- Page 46 and 47: Mixer Section 5.3 Mixer Section 5.3
- Page 48 and 49: EQ Mode 5.4.1 EQ Mode Pressing the
- Page 50 and 51: Your First DJ Mix 6. Your First DJ
SCS.3m<br />
MIX CONTROL SURFACE<br />
FX<br />
EQ<br />
EQ<br />
FX<br />
MASTER<br />
User <strong>Manual</strong>
Important Safety Instructions<br />
• Read and follow the provided instructions before operating this unit.<br />
• Adhere to all warnings and security advices, and retain this document for future reference.<br />
Installation: Install the unit in accordance with the provided instructions<br />
Power Supply:<br />
• The unit should be connected to a power supply outlet only of the voltage and frequency marked on its rear<br />
panel and/or its AC adapter.<br />
• The power supply cord should be routed so that it is not likely to be walked on or pinched.<br />
• The power supply cord of the unit should be unplugged from the wall outlet when it is to be unused for a long<br />
period of time, or during electrical storms.<br />
Placement and Environment:<br />
• Locate the unit away from direct sunlight and any equipment that produces heat such as power supplies,<br />
amplifiers, and heaters.<br />
• Place your SCS.3m on stable surfaces, away from sources that generate hum or noise, such as transformers, or<br />
electric motors.<br />
• The location and position of the unit should not interfere with its proper ventilation.<br />
• Do not use this unit near water. For example, near a bathtub, washbowl, kitchen sink, laundry tub, in a wet<br />
basement, or near a swimming pool.<br />
• To reduce the risk of fire or electric shock do not expose the equipment to rain or moisture or use it in damp or<br />
wet conditions.<br />
• Protect the unit from excessive dirt and dust.<br />
• Avoid drinks spillage, tobacco ash, and other contaminants that may affect the performance of the touch surface.<br />
• Do not place heavy objects on the unit surface.<br />
Cleaning: Unplug the unit from the wall outlet before cleaning. Never use benzine, thinner, or other solvents for<br />
cleaning. Use only a soft damp cloth.<br />
Service:<br />
• The unit contains no user-serviceable parts.<br />
• The manufacturer is not responsible for any damage or personal injury resulting from unauthorized user<br />
servicing or modifications. Please read the warranty.<br />
• The warranty will be void if any unauthorized service by the user is detected.<br />
• If service is required, please contact <strong>Stanton</strong> Tech at +1 954.316.1500 (Option 3)<br />
WARNINg<br />
To reduce the risk of electric shock, do not expose this apparatus to rain or moisture. Ensure that the apparatus<br />
is not exposed to splashing and that no objects filled with liquids, such as vases, are placed on the apparatus.<br />
CAUTION<br />
DO NOT OPEN<br />
RISK OF ELECTRIC SHOCK<br />
CAUTION: To reduce the risk of electric shock, do not remove any cover.<br />
No user serviceable parts inside. Refer servicing to qualified personnel only.<br />
The lighting flash with arrowhead symbol within the equilateral triangle is intended to alert the user to<br />
the presence of un-insulated “dangerous voltage” within the product enclosure that may be significant<br />
enough to constitute a risk of electric shock.<br />
The exclamation point within the equilateral triangle is intended to alert the user to the presence of<br />
important operation and maintenance (servicing) instructions in the literature accompanying this<br />
appliance.<br />
CAUTION<br />
To prevent electric shock, do not use this polarized plug with an extension cord, receptacle or other outlet<br />
unless the blades can be fully inserted to prevent blade exposure.<br />
ii
Contents<br />
Contents<br />
1. Introduction ................................................................................................................. 1<br />
1.1. Welcome to the SCS.3m ............................................................................................ 1<br />
1.2. Overview ..................................................................................................................... 1<br />
1.3. Unpacking ................................................................................................................... 2<br />
2. Connecting the SCS.3m ................................................................................................ 3<br />
2.1. Connect USB ............................................................................................................... 3<br />
2.2. Connect Power ........................................................................................................... 3<br />
2.3. Connect Other Devices ............................................................................................... 4<br />
2.4. SCS.3m Setups ............................................................................................................ 5<br />
3. SCS.3m Description ...................................................................................................... 6<br />
3.1. SCS.3m – Traditional Mixer Comparisons ................................................................... 6<br />
3.1.1. Channel Gain ................................................................................................... 6<br />
3.1.2. EQ Section ....................................................................................................... 6<br />
3.1.3. Channel Fader ................................................................................................. 7<br />
3.1.4. Crossfader ....................................................................................................... 7<br />
3.2. Top Panel Functional Groups ...................................................................................... 8<br />
3.2.1. Deck Switch ..................................................................................................... 9<br />
3.2.2. Slider Section ................................................................................................. 10<br />
3.2.3. EQ/FX Mode Switches ................................................................................... 11<br />
3.2.4. Channel Fader ................................................................................................ 11<br />
3.2.5. Button Section ............................................................................................... 12<br />
3.2.6. Monitor Button .............................................................................................. 12<br />
3.2.7. Master/Monitor Mode Button ...................................................................... 13<br />
3.2.8. Crossfader ...................................................................................................... 13<br />
3.2.9. Channel Level Meter ..................................................................................... 14<br />
3.2.10. Channel Strip ................................................................................................. 14<br />
3.3. Rear Panel ................................................................................................................. 15<br />
3.3.1. Inner Rear Panel ............................................................................................ 16<br />
4. Installing and Configuring DaRouter® and Traktor LE .................................................. 17<br />
4.1. Downloading DaRouter and Traktor LE ..................................................................... 17<br />
4.2. Installing on Windows® ............................................................................................. 17<br />
4.2.1. Installing DaRouter ........................................................................................ 17<br />
4.2.2. Installing Traktor LE ....................................................................................... 22<br />
4.2.3. Activating Traktor LE ...................................................................................... 25<br />
4.3. Installing on Mac® ..................................................................................................... 27<br />
4.3.1. Installing DaRouter ........................................................................................ 27<br />
4.3.2. Installing Traktor LE ....................................................................................... 30<br />
4.3.3. Activating Traktor LE ...................................................................................... 32<br />
4.4. Configuring DaRouter ................................................................................................ 33<br />
4.5. Configuring Traktor LE ............................................................................................... 36<br />
iii
Contents<br />
5. Using the SCS.3m with Traktor LE ................................................................................ 37<br />
5.1. A Traktor Tour ............................................................................................................ 37<br />
5.1.1. Decks ............................................................................................................. 37<br />
5.1.2. Mixer ............................................................................................................. 38<br />
5.1.3. Browser ......................................................................................................... 39<br />
5.2. Controller Overview .................................................................................................. 41<br />
5.3. Mixer Section ............................................................................................................ 42<br />
5.3.1. Faders ............................................................................................................ 42<br />
5.3.2. Cue Buttons ................................................................................................... 42<br />
5.4. Mode Buttons ........................................................................................................... 43<br />
5.4.1. EQ Mode ....................................................................................................... 44<br />
5.4.2. FX Mode ........................................................................................................ 45<br />
6. Your First DJ Mix ......................................................................................................... 46<br />
6.1. A Quick Mix ............................................................................................................... 46<br />
6.1.1. Loading a Song into a Deck ........................................................................... 46<br />
6.1.2. Setting a Cue Point ........................................................................................ 46<br />
6.1.3. Using a Cue Point .......................................................................................... 47<br />
6.1.4. Sync’ing Two Decks ....................................................................................... 47<br />
6.1.5. Fading between Two Decks ........................................................................... 49<br />
6.1.6. Using the EQs ................................................................................................ 50<br />
6.1.7. Using the Effects (FX) .................................................................................... 51<br />
6.2 Next Steps ................................................................................................................. 55<br />
7. Using the SCS.3m with other MIDI Applications .......................................................... 56<br />
7.1 Selecting MIDI Channel ............................................................................................. 56<br />
7.2 Selecting Built-in Preset ............................................................................................ 56<br />
7.3 MIDI Learn ................................................................................................................ 58<br />
7.4 Advanced Control of Built-in Presets ........................................................................ 58<br />
8. Troubleshooting ......................................................................................................... 59<br />
9. Specifications ............................................................................................................. 60<br />
Appendix<br />
Audio Interface Configuration ..................................................................................... 61<br />
- Configuring Your Audio Interface .................................................................................. 61<br />
- Setting Up a Native Instrument’s Audio Interface ......................................................... 61<br />
- Setting Up a Different Audio Interface .......................................................................... 62<br />
- Setting Your Outputs ..................................................................................................... 63<br />
Traktor LE MIDI Interface Configuration ...................................................................... 63<br />
Registration Card ............................................................................................................... 65<br />
<strong>Stanton</strong> Warranty .............................................................................................................. 66<br />
iv
Introduction<br />
1. Introduction<br />
1.1 Welcome to the SCS.3m!<br />
Thank you for purchasing the SCS.3m. The SCS.3m (<strong>Stanton</strong> Control System 3mixer) is an innovative<br />
multi-touch controller that provides real-time performance controls.<br />
The SCS.3m allows you to control any software mixer in a DJ, VJ, or DAW application, and has been<br />
specifically designed to integrate with the included Traktor LE software to allow you to start mixing in<br />
a matter of minutes.<br />
Before we begin, please register your SCS.3m. Just go to http://www.enterthesystem.com and click<br />
on the Product Update Registration link located on the bottom right of the page. We look forward to<br />
keeping you informed about the latest presets, firmware updates, new releases, and more…<br />
1.2 Overview<br />
The SCS.3m is an exciting performance mix controller that allows you to interact with your music<br />
software by sliding, tapping, pressing, and switching on its surface… This is possible thanks to<br />
StanTouch® (<strong>Stanton</strong>’s touch-sensitive technology) and DaRouter® (software that essentially “talks”<br />
with your DJ, DAW, or audio application and morphs the SCS.3m functionality).<br />
The SCS.3m not only allows you to control up to 4 virtual decks, change parameters, control effects,<br />
change volume and EQ’s, but also allows you to engage an FX in one deck while EQ is running on the<br />
other. Also, the SCS.3m is extremely portable and features an integrated powered USB hub,<br />
(plus the ability to be bus powered), meter indicators, instantaneous led feedback, and much more…<br />
So let’s summarize the main SCS.3m features:<br />
• StanTouch controller - it offers a simple tactile way to control sliders and change data or control<br />
effects automation<br />
• Multi-touch sliders - it allows you to make fast transitions and develop new performance<br />
techniques<br />
• Inspired on a traditional mixer layout, enabling 3-band EQ, cross fading, level setting, FX control<br />
and master/cue functions<br />
• 4-deck support - it controls up to 4 unique decks or tracks in a DJ software<br />
• Traktor LE serial number included! - Traktor LE is based on the award-winning Traktor PRO DJ<br />
software and offers everything you need to mix inspired sets.<br />
• The SCS.3m can be used as standalone or as the perfect SCS.3d companion<br />
• USB class-compliant - no driver required for Mac® or PC computers<br />
• Standard MIDI messages - the SCS.3m can be easily integrated with most DJ, DAW, and audio<br />
applications such as Ableton Live, PCDJ®, MixVibes®, and Traktor PRO. (Mac and PC<br />
compatible). DaRouter compatibility adds provisions for additional application specific logic.<br />
• Integrated powered USB hub - up to 4 USB devices can be plugged in<br />
• Ability to be bus powered<br />
• Small footprint - the SCS.3m easily blends into your actual setup, thanks to its small size and<br />
flexible routing capabilities<br />
• Portability - the SCS.3m is easy to carry and can be used hand-held, if desired<br />
Before you start hooking up your new unit, let’s check what is in the box!<br />
1
Unpacking<br />
1.3 Unpacking<br />
Please check that you have received the following items:<br />
1. (1) SCS.3m unit<br />
2. (1) Power supply (12 VDC)<br />
3. (1) USB cable<br />
4. (1) SCS.3m Quick Start Guide<br />
5. (1) SCS.3m User <strong>Manual</strong><br />
6. (1) Traktor LE Serial Number Card<br />
In addition to the above items, remember that to take advantage of the SCS.3m full potential you will<br />
need a Mac or PC computer (with Internet connection) to run Native Instruments’ Traktor LE and<br />
<strong>Stanton</strong>’s DaRouter software, and preferably an audio interface. Let’s get started by hooking up the<br />
SCS.3m into your setup.<br />
2
Connecting the SCS.3m<br />
2. Connecting the SCS.3m<br />
Before you connect power, you will need to remove the SCS.3m Back Panel:<br />
To open back, first look for 2 knobs and turn them so that they are<br />
oriented vertically. When booth knobs are turned, remove the back<br />
by pulling the bottom of the panel up. (Figure 2.1)<br />
When the Back Panel is off, you will see the following sockets:<br />
(2) USB type “A” sockets<br />
(1) USB type “B” socket<br />
(1) 8 mm 12 VDC power supply socket<br />
Figure 2.1<br />
2.1 Connect USB<br />
Connect the USB type “B” connector to the SCS.3m USB<br />
“B” socket and the other end of the USB cable to your<br />
computer’s USB port. No drivers are required so your<br />
computer should automatically install the SCS.3m.<br />
(Figure 2.2)<br />
Figure 2.2<br />
2.2 Connect Power<br />
Before connecting other devices, connect the SCS.3m to<br />
power using the included wall adaptor. It is important to<br />
always use the wall adaptor when plugging additional<br />
devices to the USB hub. (Figure 2.3)<br />
Figure 2.3<br />
3
Connect Other Devices<br />
2.3 Connect Other Devices<br />
Thanks to the SCS.3m integrated USB hub and the wire management options, you are able to easily<br />
connect up to 4 peripheral devices. These can be additional SCS.3d controllers, other USB controllers,<br />
flash storage, or any other USB peripheral. (Figure 2.4)<br />
SCS.3d<br />
SCS.3m<br />
SCS.3d<br />
Figure 2.4<br />
4
SCS.3m Setups<br />
2.4 SCS.3m Setups<br />
SCS.3m<br />
The SCS.3m can be used on its own for basic transport and DJ mixing<br />
controls for playing songs in any mobile environment. (Figure 2.5)<br />
Figure 2.5<br />
Multiple SCS.3m’s<br />
Multiple SCS.3m’s can be used to gain more<br />
channel control for applications such as Ableton<br />
Live, for example. (Figure 2.6)<br />
Figure 2.6<br />
SCS.3m + SCS.3d<br />
The SCS.3m and SCS.3d<br />
can be used for extended<br />
control of decks in<br />
software.<br />
A single SCS.3d can be<br />
used to toggle between<br />
virtual decks or multiple<br />
SCS.3d’s can be used for<br />
direct control of each deck<br />
while the SCS.3m remains<br />
fixed to controlling the<br />
software mixer functions.<br />
(Figure 2.7)<br />
Figure 2.7<br />
5
max<br />
1O<br />
max<br />
max<br />
1O<br />
1O<br />
O<br />
SCS.3m Description<br />
3. SCS.3m Description<br />
3.1 SCS.3m – Traditional Mixer Comparisons<br />
The SCS.3m was created to give you control of most common mixer functionality. You can see that<br />
the layout on the SCS.3m is symmetrical and that we are emulating a 2-channel mixer, similar to a<br />
typical 10” “Battle mixer.” Keeping this comparison in mind will help you to understand the different<br />
features of the SCS.3m.<br />
Let’s begin by comparing the different control groups on the SCS.3m to their counterparts on a<br />
traditional mixer.<br />
3.1.1 Channel gain<br />
SESSION<br />
GAIN<br />
GAIN<br />
MASTER<br />
Channel gains typically adjust the input level before the<br />
signal gets to the Channel Fader. In a digital environment,<br />
where software is able to handle input level adjustment,<br />
the Channel Gain is typically used to calibrate the Channel<br />
Faders (so that each track has the same basic loudness at<br />
the same point on the Channel Fader). (Figure 3.1)<br />
LOW MID HIGH LOW MID HIGH<br />
Figure 3.1<br />
3.1.2 EQ Section<br />
An EQ allows you to manipulate different frequencies.<br />
On the SCS.3m, the EQ section is separated into 3 sliders.<br />
LOW MID HIGH LOW MID HIGH<br />
Each corresponds to a frequency range (Low, Mid, and<br />
High). You can use this to make subtle adjustments to a<br />
track to “match” it to your other track (for instance, if the<br />
bass is too boomy). Many DJs will mix tracks together not<br />
just with the volume, but will also lower the bass of the<br />
incoming track so it blends smoothly with the playing<br />
track. You can also use the EQs as effects, radically<br />
changing the sound of a playing track. (Figure 3.2)<br />
Figure 3.2<br />
6
1O<br />
O<br />
1O<br />
O<br />
1O<br />
O<br />
1O<br />
O<br />
Channel Fader<br />
3.1.3 Channel Fader<br />
The Channel Faders (also called line faders, upfaders, etc.)<br />
control the volume of their associated channel before the<br />
signal gets to the Crossfader. The touch sensitive strips on<br />
the SCS.3m act just like the Channel Faders on a traditional<br />
mixer, allowing you to adjust the volume of the channel.<br />
Like the Crossfader, the Channel Fader on the SCS.3m has<br />
a row of LEDs next to it that will indicate its position.<br />
(Figure 3.3)<br />
Figure 3.3<br />
3.1.4 Crossfader<br />
At the bottom of the SCS.3m or a traditional mixer, you<br />
will usually find a Crossfader.<br />
The Crossfader is used to mix between sources of your<br />
mixer. Typically, moving the crossfader to the left<br />
transitions the audio to channel 1, and full right to channel<br />
2. Anywhere in the middle is a mix of both channels.<br />
As you can see, on the SCS.3m there is not a traditional<br />
fader there to let you know the position of your crossfader.<br />
Instead, the SCS.3m has a row of LEDs above the<br />
crossfader that will indicate its position. (Figure 3.4)<br />
MASTER<br />
Figure 3.4<br />
7
Top Panel Functional groups<br />
3.2 Top Panel Functional groups<br />
The SCS.3m has 10 functional groups. (Figure 3.5)<br />
FX<br />
EQ<br />
EQ<br />
FX<br />
MASTER<br />
6<br />
Figure 3.5<br />
Let’s read a brief description of each of them.<br />
8
Deck Switch<br />
3.2.1 Deck Switch<br />
The Deck Switch button allows for each side of the SCS.3m to be<br />
switched between 2 virtual decks. Each side can be toggled<br />
independently, thus allowing 4 channels to be controlled in a<br />
conventional 2-channel design. (Figure 3.6)<br />
FX<br />
EQ<br />
EQ<br />
FX<br />
In each Deck Switcher, there is a backlit letter (either A and C, or B<br />
and D) to indicate which virtual channel that side of the SCS.3m is<br />
controlling. When you switch channels, the SCS.3m will remember<br />
the way you left all your controls on the other channel and restore<br />
those settings when you switch back.<br />
MASTER<br />
If you’re using a program like Traktor PRO (which gives you the ability<br />
to DJ using 4 decks), then this button switches what channel is being<br />
controlled by the strip underneath it. In the following illustration,<br />
we’re switching between decks A and C. (Figure 3.7)<br />
Figure 3.6<br />
Figure 3.7<br />
In some cases, you might also see the Deck Switching buttons used for things like alternative layouts.<br />
It really depends on the mapping and the application. In any situation, the Deck Switch buttons allow<br />
the SCS.3m to effectively double its number of controls while maintaining the same small form factor.<br />
9
FX<br />
Slider Section<br />
3.2.2 Slider Section<br />
The slider section features 4 virtual sliders, which can be toggled to<br />
control EQ or FX (or any other MIDI assignable control). (Figure 3.8)<br />
The value of each slider is shown on the LEDs next to it. If you switch<br />
the Slider Section to a different mode (for instance, from EQ to FX<br />
mode), the SCS.3m will remember your settings and restore them<br />
when you switch back.<br />
FX<br />
EQ<br />
EQ<br />
FX<br />
MASTER<br />
Figure 3.8<br />
The sliders on the SCS.3m are touch sensitive “virtual faders.” Moving your finger across one is like<br />
moving a fader, or turning a knob. Sounds pretty simple, and it is. However, there is another aspect<br />
to the sliders that is not obvious, and that is their “multi-touch” capability.<br />
Note: Throughout the manual we will use the HOLD<br />
icon understand the multi-touch feature.<br />
and the TAP icon<br />
to help you<br />
To do a multi-touch, press and hold one point on a slider, and then tap a different location.<br />
(Figure 3.9).<br />
TAP<br />
HOLD<br />
MASTER<br />
Figure 3.9<br />
Using multi-touch on different sliders can produce some very interesting results. The faders can also<br />
be used as relative controls, allowing for very fine control of parameters with a total range greater<br />
than the length of the slider.<br />
10
EQ/FX Mode Switches<br />
3.2.3 EQ/FX Mode Switches<br />
These buttons will toggle the Slider Section and Button Section<br />
between EQ controls and FX controls. Allows for 4 buttons and 4<br />
sliders per channel. When switching modes the Button and Slider<br />
section automatically update to their last setting. (Figure 3.10)<br />
FX<br />
EQ<br />
EQ<br />
FX<br />
MASTER<br />
Figure 3.10<br />
3.2.4 Channel Fader<br />
The Channel Fader is always assigned to control each channel’s<br />
volume (even when you are in EQ/FX mode). With StanTouch<br />
technology, it is easy to do quick kills or gradual fades using this<br />
touch strip.<br />
FX<br />
EQ<br />
EQ<br />
FX<br />
Like the other SCS.3m sliders, the Channel Fader lets you know its<br />
value with the LED strip next to it, and it will remember and recall<br />
its value when you switch channels. It is also multi-touch capable.<br />
Do you want to do a transform but don’t have a LINE/PHONO<br />
switch? Try holding one finger at the bottom of the fader while<br />
tapping the top of the fader with another. This is easy to pull off with<br />
one hand, and accomplishes the same kind of effect. (Figure 3.11)<br />
MASTER<br />
Figure 3.11<br />
11
Button Section<br />
3.2.5 Button Section<br />
The Button Section consists of four buttons with multicolor feedback<br />
for control of on screen buttons or triggers. These can be assigned<br />
to EQ kills, FX engage, or other MIDI assignable features.<br />
(Figure 3.12)<br />
FX<br />
EQ<br />
EQ<br />
FX<br />
The buttons next to each Channel Fader can be assigned to anything<br />
you want. You might see them controlling the effects in Native<br />
Instrument’s Traktor, triggering clips in Ableton Live, or samples and<br />
loops in Serato Scratch Live.<br />
MASTER<br />
Figure 3.12<br />
3.2.6 Monitor Button<br />
The Monitor Button allows for quick and easy toggling of the current<br />
channel for previewing a song before dropping it into a mix.<br />
(Figure 3.13)<br />
FX<br />
EQ<br />
EQ<br />
FX<br />
MASTER<br />
Figure 3.13<br />
12
Master/Monitor Mode Button<br />
3.2.7 Master/Monitor Mode Button<br />
When the Master Button is engaged, the Channel Faders and<br />
Crossfader temporarily become controls for monitor volume,<br />
master volume, and monitor mix. The VU meters also display the<br />
master levels for checking a clean output signal from your computer.<br />
FX<br />
EQ<br />
EQ<br />
FX<br />
To enter “Master” mode, press and hold the Master button.<br />
The SCS.3m will remain in Master mode as long as you hold your<br />
finger on the Master button. (Figure 3.14)<br />
MASTER<br />
Figure 3.14<br />
3.2.8 Crossfader<br />
The extended length Crossfader gives extra fine control of blending<br />
between channels and more surface to perform multi-touch effects<br />
with two fingers for quickly cutting in and out of channels.<br />
(Figure 3.15)<br />
FX<br />
EQ<br />
EQ<br />
FX<br />
MASTER<br />
Let’s say you wanted to emulate the sound of a crab scratch or flares<br />
using the SCS.3m crossfader. While there is not a back stop to<br />
bounce against, we can take advantage of multi-touch here and get<br />
something very similar. Try holding your index finger at the furthest<br />
end of the crossfader, and then drumming your other fingers<br />
(middle to pinky) on the surface next to it. (Figure 3.16)<br />
Figure 3.15<br />
MASTER<br />
Figure 3.16<br />
HOLD TAP TAP TAP<br />
13
Channel Level Meter<br />
3.2.9 Channel Level Meter<br />
The Channel Level Meter indicates the volume of each channel like<br />
a traditional DJ mixer. (Figure 3.17)<br />
FX<br />
EQ<br />
EQ<br />
FX<br />
MASTER<br />
Figure 3.17<br />
3.2.10 Channel Strip<br />
The Slider, Button, Mode Switchers, Channel Fader, Level Meter, and<br />
Monitor Button all constitute a traditional channel strip. The Channel<br />
Strip can be switched between decks A/C on the left side and B/D<br />
on the right side of the SCS.3m to control up to 4 software channels.<br />
(Figure 3.18)<br />
FX<br />
EQ<br />
EQ<br />
FX<br />
MASTER<br />
Figure 3.18<br />
14
Rear Panel<br />
3.3 Rear Panel<br />
The SCS.3m has 4 USB type “A” sockets. Two of them are located in the Rear Panel (Figure 3.19),<br />
USB TYPE A<br />
USB TYPE A<br />
Figure 3.19<br />
The other 2 are located in the Inner Rear Panel. (Figure 3.20)<br />
USB TYPE A<br />
Figure 3.20<br />
These USB jacks can be used to connect additional SCS.3 controllers, mass storage devices<br />
(such as flash drives), external computer mouse, or any other USB components. Please keep in mind<br />
that the USB hub on the SCS.3m is a full speed hub, NOT a high-speed hub, so devices designed to<br />
take advantage of high speed USB will run a little slower than expected.<br />
15
Inner Rear Panel<br />
3.3.1 Inner Rear Panel<br />
When the back panel is off, you will see the following sockets within the Inner Rear Panel (Figure 3.21):<br />
(2) USB type “A” sockets<br />
(1) USB type “B” socket<br />
(1) 8 mm 12 VDC power supply socket<br />
USB TYPE A<br />
USB TYPE B<br />
8mm 12 VDC<br />
Figure 3.21<br />
16
4. Installing and Configuring DaRouter and Traktor LE<br />
4.1 Downloading DaRouter and Traktor LE<br />
Installing and Configuring DaRouter and Traktor LE<br />
Go to www.stantondj.com/scs3m/install - and follow the instructions to download the Traktor LE<br />
software and DaRouter software. Then, just follow the installation instructions provided in their related<br />
wizards. If you already have Traktor LE (or another DJ application) previously installed in your<br />
computer, just check for their related presets.<br />
4.2 Installing on Windows®<br />
In this section, we will cover how to install DaRouter and Traktor LE in your Windows machine.<br />
4.2.1 Installing DaRouter<br />
1. Double click the SCS.3 DaRouter installer. (Figure 4.1)<br />
Figure 4.1<br />
2. If the following Security Warning message appears, click Run. (Figure 4.2)<br />
Figure 4.2<br />
17
Installing DaRouter on Windows<br />
3. To install SCS.3 DaRouter click Next. (Figure 4.3)<br />
Figure 4.3<br />
4. Choose the Installation Type (Figure 4.4)<br />
Figure 4.4<br />
5. Select I accept the agreement and click Next. (Figure 4.5)<br />
Figure 4.5<br />
18
Installing DaRouter on Windows<br />
6. The following messages will appear. Read the SCS.3 DaRouter Warning and click OK.<br />
(Figure 4.6)<br />
Figure 4.6<br />
7. Select No, not this time and click Next. (Figure 4.7)<br />
Figure 4.7<br />
8. Select Install the software automatically and click Next. (Figure 4.8)<br />
Figure 4.8<br />
19
Installing DaRouter on Windows<br />
9. Click Continue Anyway. (Figure 4.9)<br />
Figure 4.9<br />
10. Click Finish to close Bome’s Virtual MIDI Port wizard. (Figure 4.10)<br />
Figure 4.10<br />
20
Installing DaRouter on Windows<br />
11. Click Next. (Figure 4.11)<br />
Figure 4.11<br />
12. Click Finish to exit DaRouter Setup Wizard. (Figure 4.12)<br />
Figure 4.12<br />
21
Installing Traktor LE on Windows<br />
4.2.2 Installing Traktor LE<br />
1. Double click the Traktor folder. (Figure 4.13)<br />
Figure 4.13<br />
2. Double click the Traktor Setup file. (Figure 4.14)<br />
Figure 4.14<br />
3. If the following Security Warning message appears, click Run. (Figure 4.15)<br />
Figure 4.15<br />
22
4. To start Traktor installation, click Next. (Figure 4.16)<br />
Installing Traktor LE on Windows<br />
Figure 4.16<br />
5. Read the License Agreement, check its related box, and click Next. (Figure 4.17)<br />
Figure 4.17<br />
6. Select a Setup Type and click Next. (Figure 4.18)<br />
Figure 4.18<br />
23
Installing Traktor LE on Windows<br />
7. If you are using the Audio 8 DJ or Audio 4 DJ audio interfaces, select the proper options,<br />
and click Next. If you are using any other audio interface just click Next. (Figure 4.19)<br />
Figure 4.19<br />
8. Click Next to begin Traktor configuration. (Figure 4.20)<br />
Figure 4.20<br />
9. You have completed the Traktor Setup. Click Finish. (Figure 4.21)<br />
Figure 4.21<br />
24
Activating Traktor LE on Windows<br />
4.2.3 Activating Traktor LE<br />
To launch Traktor LE, double click the icon located in your desktop or go to Start\Programs\Native<br />
Instruments\Traktor\ and double click the Traktor icon.<br />
1. After launching Traktor LE, the following window will appear. Click Activate. (Figure 4.22)<br />
Figure 4.22<br />
2. If the following message appears, click OK. (Figure 4.23)<br />
Figure 4.23<br />
3. Please log in using your e-mail address and password and click Log in. (Figure 4.24)<br />
Figure 4.24<br />
25
Activating Traktor LE on Windows<br />
4. Please provide information about your musical profile and click OK. (Figure 4.25)<br />
Figure 4.25<br />
5. Enter the serial number from the enclosed Traktor LE Serial Number Card and click<br />
Activate. (Figure 4.26)<br />
Figure 4.26<br />
6. All selected products have been activated. Click Exit. (Figure 4.27)<br />
Figure 4.27<br />
You have successfully installed and activated Traktor LE in your Windows computer.<br />
26
Installing DaRouter on Mac<br />
4.3 Installing on Mac<br />
Now we will briefly describe how to install DaRouter and Traktor LE in your Macintosh® computer.<br />
4.3.1 Installing DaRouter<br />
1. Double click the DaRouter compressed file. (Figure 4.28)<br />
Figure 4.28<br />
2. Double click DaRouter installer. (Figure 4.29)<br />
Figure 4.29<br />
3. To begin the SCS.3 DaRouter installation process, click Continue. (Figure 4.30)<br />
Figure 4.30<br />
27
4. Read the License Agreement and click Continue. (Figure 4.31)<br />
Installing DaRouter on Mac<br />
Figure 4.31<br />
If the following message appears click Agree. (Figure 4.32)<br />
Figure 4.32<br />
5. Click Install. (Figure 4.33)<br />
Figure 4.33<br />
28
6. The software was successfully installed. Click Close. (Figure 4.34)<br />
Installing DaRouter on Mac<br />
Figure 4.34<br />
To launch <strong>Stanton</strong> SCS.3m DaRouter, double click the icon located in your desktop or go to your<br />
Applications folder and double click the <strong>Stanton</strong> SCS.3m DaRouter’s icon.<br />
29
Installing Traktor LE on Mac<br />
4.3.2 Installing Traktor LE<br />
1. Double click the Traktor folder. (Figure 4.35)<br />
Figure 4.35<br />
2. Double click the Traktor installer. (Figure 4.36)<br />
Figure 4.36<br />
3. To start Traktor installation click Continue. (Figure 4.37)<br />
Figure 4.37<br />
4. Read the License Agreement and click Continue. (Figure 4.38)<br />
Figure 4.38<br />
30
If the following message appears click Agree. (Figure 4.39)<br />
Installing Traktor LE on Mac<br />
Figure 4.39<br />
5. Click Install to perform a standard installation. (Figure 4.40)<br />
Figure 4.40<br />
6. Click Restart to finish installing this software. (Figure 4.41)<br />
Figure 4.41<br />
31
Activating Traktor LE on Mac<br />
4.3.3 Activating Traktor LE<br />
To launch Traktor, double click the icon located in your desktop or go to your Applications folder and<br />
double click the Traktor’s icon.<br />
1. To activate Traktor, click Activate. (Figure 4.42)<br />
Figure 4.42<br />
2. Please log in using your e-mail address and password. Click Log in. (Figure 4.43)<br />
Figure 4.43<br />
3. Enter the serial number from the enclosed Traktor LE Serial Number Card and click<br />
Activate. (Figure 4.44)<br />
Figure 4.44<br />
32
Configuring DaRouter<br />
4. All selected products have been activated. Click Exit. (Figure 4.45)<br />
Figure 4.45<br />
4.4 Configuring DaRouter<br />
When you run the SCS.3 DaRouter, you will get the following screen…(Figure 4.46)<br />
To use DaRouter with your SCS.3m and Traktor LE, select the “SCS.3m LE” preset from the Active Preset<br />
drop-down.<br />
Figure 4.46<br />
DaRouter can be broken down into 3 different sections going from top to bottom.<br />
33
Configuring DaRouter<br />
The Preset Section (Figure 4.47)<br />
• Active Preset – tells you the currently selected preset.<br />
This is a drop-down box that can be used to select any presets<br />
that are either loaded by default, or have been manually<br />
loaded by the user. For the SCS.3m with Traktor LE<br />
functionality described in this manual, select “SCS.3m LE”<br />
from the drop-down.<br />
• Reload button – This button reloads the currently selected<br />
preset.<br />
• “?” button – Loads the help file associated with the<br />
currently selected preset. It is always important to click this<br />
button to learn about functionality with the currently loaded<br />
preset.<br />
Figure 4.47<br />
The Device Section (Figure 4.48)<br />
This section tells you what devices are connected and active.<br />
When an SCS.3 controller is connected, you will see it “light<br />
up” with a blue outline to let you know it is active. Also, you<br />
will see the box underneath each connected device will tell<br />
you its serial number. If you want to change the device order,<br />
you can click the serial number drop-down box and swap<br />
positions with any of the other devices.<br />
Figure 4.48<br />
34
Configuring DaRouter<br />
The Activity Monitor (Figure 4.49)<br />
The Activity Monitor lets you know what is happening with<br />
DaRouter. There are 3 symbols here, an arrow, a square, and<br />
another arrow. The first arrow lights up blue to let you know<br />
when DaRouter is receiving MIDI data from your controllers.<br />
The square lights up to let you know that DaRouter is<br />
processing rules. The last arrow lets you know when DaRouter<br />
is sending MIDI out to your application.<br />
To configure DaRouter initially, make sure your SCS.3m is<br />
connected, run it, and make sure that the Traktor LE preset<br />
(SCS.3m LE) is selected. If you use another application, select<br />
it from the Active Preset drop-down.<br />
Figure 4.49<br />
You are also able to manually load presets into DaRouter. Just take the preset file you have downloaded<br />
and drag & dropping it on top of the DaRouter application so it is loaded as the active preset.<br />
Important: if you want to know how the preset you have selected works, press the “?” button.<br />
35
Configuring Traktor LE<br />
4.5 Configuring Traktor LE<br />
Because Traktor LE comes bundled with the SCS.3m, it has support built-in and is easy to configure.<br />
When you run Traktor LE for the first time, you should see the Setup Wizard open. It will look<br />
something like this… (Figure 4.50)<br />
Figure 4.50<br />
If you run Traktor LE and do not see this window, you can run the Setup Wizard manually by going to<br />
Help > Start Setup Wizard.<br />
Now that we have the window open, you will have 2 options available – your setup and device.<br />
For your setup, select <strong>Stanton</strong>. For the device, select SCS.3m LE. Once you have done that, click Apply.<br />
The configuration should at this point automatically place the SCS.3m into a Traktor LE specific mode.<br />
If the unit does not appear to function properly, please restart Traktor and check the troubleshooting<br />
guide in this manual. It is possible that you will have to configure your audio interface for Traktor LE.<br />
Please refer to the Appendix “Audio Interface Configuration.”<br />
If you are using the SCS.3m with one or two SCS.3d’s, select “SCS.3 System” from the drop-down list.<br />
Full system functionality is not described in this manual. Please consult the preset documentation in<br />
DaRouter for System 3 functionality with all 3 components.<br />
36
Using the SCS.3m with Traktor LE<br />
5. Using the SCS.3m with Traktor LE<br />
5.1 A Traktor Tour<br />
In this quick tour, we will briefly describe Traktor LE’s Decks, Mixer, and Browser sections.<br />
5.1.1 Decks (Figure 5.1)<br />
Figure 5.1<br />
1. Track Cover Icon: Displays the cover art of the loaded track.<br />
2. Track-Info: Displays information about the loaded track. Customize displayed information<br />
in Preferences > Layout Manager > Deck Details > Deck Header.<br />
3. Sync-Controls:<br />
• Sync button: synchronizes the playing track to the current tempo source (another Deck<br />
or the Master Clock).<br />
• Master button: defines this Deck as Master for sync’ing.<br />
• Phase Meter: shows the offset of the beats in the playing track to either the beats in<br />
the Master Deck or the Master Clock ticks. The Phase Meter has to be centered to match<br />
the beats.<br />
• Pitch Bend buttons: temporarily slows down or speeds up the playing track.<br />
4. Waveform: visually represents a portion of the playing track. The lighter color shade<br />
represents high frequencies while the darker color shade represents low frequencies.<br />
5. Skip to Start: Moves the play position to the beginning of the loaded track.<br />
Note: This screenshot shows nearly all Deck-elements. Depending on the layout, some of them may<br />
be hidden or can be shown additionally, e.g., the Scratch Panels in Traktor Scratch Pro.<br />
6. Stripe:<br />
• Displays the complete waveform of the loaded track including Cue Points and Loops.<br />
• The cached part of the track required for seamless jumps are displayed as yellow<br />
lines above and below the Stripe.<br />
7. Input Selector: Selects the Input Mode for the engaged Deck. Use to switch between<br />
Internal Playback, Scratch Control, or External Input. For using the SCS.3m with Traktor LE,<br />
the Input Selector will always have to stay in “Internal Playback” mode.<br />
8. Pitch Fader: Move the fader up or down to decrease or increase the tempo of the track<br />
currently playing.<br />
37
Mixer<br />
9. Key-Lock: Activates or deactivates the Key Lock feature.<br />
10. Pitch Adjust: Increases and decreases the tempo of the playing track incrementally.<br />
11. Transport Controls: Playback and Current Cue Point control. Play and Cue functionality are<br />
explained later in this manual.<br />
12. Loop Controls: Sets automatic and manual Loops.<br />
13. Open/Close Advanced Panel: Opens or closes the Advanced Control Panels. With Traktor<br />
LE the Advanced panel allows you to adjust the beat grid of the song. The beat grid is what<br />
the synchronization engine in Traktor uses to reference where the beats are. If the beat grid<br />
is off (or BPM is not correct) the songs you are mixing will not match when pressing the<br />
SYNC button. For more information on setting beat grids read the Traktor manual.<br />
5.1.2 Mixer (Figure 5.2)<br />
Figure 5.2<br />
1. Equalizer:<br />
• Provides a 3-band-EQ (default) for adjusting the frequency content of the playing track.<br />
• Clicking the small buttons next to the knobs kills the related frequencies.<br />
2. Channel Fader:<br />
• Controls the channel volume.<br />
• The Channel Level Meters show the pre-fader level of the Deck’s signal and can be<br />
adjusted with the Gain Knob.<br />
3. Filter:<br />
• This knob provides control over the bipolar Channel Filter.<br />
• Enable the filter by clicking the small button next to the knob.<br />
• Center position is neutral. Turn left for a low-pass filter and right for a high-pass filter.<br />
4. Key Lock:<br />
• Key Lock allows you to change the speed of the track playing without it’s key being<br />
adjusted you can enable Key Lock by clicking the small button next to the knob.<br />
5. Effect Assignment Indicators: FX 1 affects channel A, FX 2 affects channel B.<br />
6. gain: Adjusts the gain of a track. Adjust to match the track levels before mixing them with<br />
the faders.<br />
38
Notes:<br />
Browser<br />
7. Cue button:<br />
• Pre-listen to a track over the internal Traktor Mixer.<br />
• If Tick is activated, click the Cue button to make the beat-tick audible on that deck.<br />
8. Pan button: Controls the channel balance between the left and the right stereo channels.<br />
9. Automatic Crossfade Buttons:<br />
• Clicking on these buttons automatically moves the Crossfader left or right.<br />
• Click again to stop transition.<br />
10 Incremental Crossfade Buttons: Each click on these buttons steps moves the Crossfader left<br />
or right.<br />
11. Deck Assign Buttons: Assigns the Decks to the Crossfader. The buttons for the assigned<br />
Deck(s) are lit (not available in Traktor LE).<br />
12. Crossfader: Move the Crossfader to the left or right to perform transitions between the<br />
Decks.<br />
- The Key is not adjustable in Traktor LE.<br />
- The Channels are not cross-assignable to Effect Slots in Traktor Duo and Traktor LE.<br />
5.1.3 Browser (Figure 5.3)<br />
Figure 5.3<br />
1. Preview Player: Click the Preview Player Icon in the Browser List to load a track into the<br />
Preview Player. Alternatively, you can also drag-and-drop a track upon it.<br />
2. Favorites: Favorites provides direct access to Playlists or folders. Drag-and-drop a folder or<br />
Playlist onto one o the 10 Favorites slots to map them.<br />
3. Browser List:<br />
• Shows tracks depending on the source that is selected (folder, playlist, search results, or<br />
tag-based).<br />
• Right-/Ctrl-Click on the header to switch columns On and Off.<br />
• Drag-and-drop columns to the left or to the right to re-arrange the order.<br />
4. Track Info: Displays the title and the artist of the currently chosen track.<br />
5. Search Field: Provides a live search based on the tags of the tracks in the Collection.<br />
39
Browser<br />
6. Browser Tree:<br />
• Track Collection: contains all Tracks imported to your Collection. They are automatically<br />
sorted by Artist, Release, Label, or Genre.<br />
• Playlists: contains all your Traktor Playlists.<br />
• Explorer: browse your hard drive for music tracks. This can be useful in finding tracks<br />
that have not been imported.<br />
• iTunes: provides direct access to your iTunes Library, including all playlists.<br />
• History: contains the history playlist. These are stored Traktor automatically stores after<br />
every session. You can find History Playlists from former sessions in MyDocuments\Native<br />
Instruments\Traktor\History.<br />
7 & 8 Cover <strong>View</strong>: Displays the cover of the track currently selected within the Browser List.<br />
9. Status Bar/Error Messages: Displays the progress of analyzing, error messages, and the<br />
overall status of Traktor.<br />
Note: The History function is not available in Traktor LE.<br />
Now that we have an idea about Traktor LE’s main sections, let’s take a look at the SCS.3m.<br />
40
Controller Overview<br />
5.2 Controller Overview<br />
The SCS.3m has two basic operational modes called EQ and FX modes. Therefore, when you press the<br />
EQ or the FX button, the functionality of the sliders above them and the buttons located in the middle<br />
of the mixer section will change accordingly.<br />
The following graphic will help you to understand how the SCS.3m will work in each mode.<br />
For example, if you press the EQ Mode button, you will be able to control the parameters listed in the<br />
EQ callouts (Hi, Mid, Low frequencies, etc) or make the actions briefly described (Jog Scratch,<br />
BPM Tap, etc). On the other hand, if you press the FX Mode button, you will be able to control the<br />
FX Wet, FX Control, Filter Control, etc. (Figure 5.4).<br />
MASTER<br />
Figure 5.4<br />
41
Mixer Section<br />
5.3 Mixer Section<br />
5.3.1 Faders<br />
The faders on the SCS.3m are dual use, depending on whether the<br />
MASTER button is activated or not. When the MASTER button is<br />
blue, the SCS.3m is running in what we will call “normal mode”<br />
meaning that the faders control what you would expect them to<br />
(the channel volumes and crossfader). When the MASTER button<br />
is pressed and held, these 3 faders change to control the monitor<br />
(cue or headphones) volume and mix, and the master output<br />
volume. (Figure 5.5)<br />
FX<br />
EQ<br />
EQ<br />
FX<br />
MASTER<br />
Figure 5.5<br />
5.3.2 Cue Buttons<br />
These buttons trigger the CUE function in Traktor, sending the cued deck’s audio to the headphones.<br />
(Figure 5.6)<br />
FX<br />
EQ<br />
EQ<br />
FX<br />
MASTER<br />
Figure 5.6<br />
42
Mode Buttons<br />
5.4 Mode Buttons<br />
In the middle of the SCS.3m, there are 2 “Mode Buttons” per side (4 buttons total). They are labeled<br />
EQ and FX. (Figure 5.7)<br />
FX<br />
EQ<br />
EQ<br />
FX<br />
MASTER<br />
Figure 5.7<br />
These Mode Buttons not only affect the performance of the sliders above them, but also the buttons<br />
in the middle of the Mixer Section. (Figure 5.8)<br />
FX<br />
EQ<br />
EQ<br />
FX<br />
FX<br />
EQ<br />
EQ<br />
FX<br />
MASTER<br />
MASTER<br />
Figure 5.8<br />
Let’s outline the function of each preset individually.<br />
43
EQ Mode<br />
5.4.1 EQ Mode<br />
Pressing the EQ button puts the channel into EQ mode, and lights the EQ button red so you know<br />
what mode it is in. As you would expect, this mode allows you to adjust the EQ on the selected deck.<br />
But EQ mode also gives you access to “Transport” controls (PLAY, CUE, etc).<br />
DECK JOG /<br />
TEMPO BEND<br />
When the deck is paused, the top slider allows you to move the<br />
waveform of the deck and cue the track. When it is playing, it can<br />
be “nudged” to temporarily slow down or speed up the track<br />
(like a pitch bend).<br />
LOW EQ<br />
MID EQ<br />
HIGH EQ<br />
If you hold the EQ preset button and use the top slider you can<br />
coarsely move through the song and pitch bend.<br />
FX<br />
EQ<br />
EQ<br />
FX<br />
The 3 sliders under the top slider are for adjusting the 3 band EQ<br />
on the selected deck. (Figure 5.9)<br />
MASTER<br />
If you hold the EQ preset button and touch an EQ slider, it will reset<br />
that slider to center. This is useful if you want to quickly set your<br />
EQs back to their “zero” position.<br />
Figure 5.9<br />
MIXER Section buttons in EQ mode (Figure 5.10)<br />
A – BPM TAP. This button can be tapped in time with the track to<br />
set a BPM manually.<br />
B – SYNC. Pressing this button adjusts the tempo of the selected<br />
deck to match the tempo of the “master” deck.<br />
FX<br />
EQ<br />
EQ<br />
FX<br />
C – PLAY. Starts playback on the selected deck.<br />
D – CUE. Moves the play position to the active CUE marker.<br />
MASTER<br />
Figure 5.10<br />
44
FX Mode<br />
5.4.2 FX Mode<br />
In Traktor LE, there are 3 built-in effects available to you, and a separate FX send on each channel<br />
(FX 1 and 2). You enter FX mode by pressing the FX Preset button. It will light red to let you know the<br />
channel is in FX mode. Let’s take a look at what the different controls do in FX mode.<br />
FX Select – This slider allows you to select which built-in Traktor<br />
effect is being controlled. (Figure 5.11)<br />
SELECT EFFECT<br />
FILTER WET / DRY<br />
EFFECT CONTROL<br />
FILTER CONTROL<br />
FX Wet Dry – This controls the Wet/Dry mix of the FX.<br />
When turned up (wet), more of the effect is heard where as when<br />
turned down (dry) only the original music is heard without the<br />
effect.<br />
FX<br />
EQ<br />
EQ<br />
FX<br />
FX Amount – This controls the parameter for the effect.<br />
This will have a different outcome for each effect. For instance with<br />
Delay this will control the length of the delay or echo.<br />
Figure 5.11<br />
MASTER<br />
Filter – The filter slider controls the filter frequency.<br />
When turned all the way up the filter will remove the lower<br />
frequencies (bass) and allow the high frequencies to pass (treble).<br />
When turned down the high frequencies will be removed and the<br />
low frequencies will be heard.<br />
MIXER Section buttons in FX mode (Figure 5.12)<br />
A – FX ON/OFF TEMP. Pressing this momentarily turns the FX on<br />
and keeps them on as long as you HOLD the button.<br />
B – FX ON/OFF TOGGLE. Toggles the FX On and Off.<br />
C – KEY LOCK TOGGLE. Turns the key lock On or Off.<br />
FX<br />
EQ<br />
EQ<br />
FX<br />
D – FILTER ON/OF TOGGLE. Turns the channel filter On and Off.<br />
This works with slider 3, which controls the AMOUNT of filter.<br />
MASTER<br />
Figure 5.12<br />
45
Your First DJ Mix<br />
6. Your First DJ Mix<br />
6.1 A Quick Mix<br />
This section will walk you through doing your first mix. It can be followed step by step, but it might be<br />
a good idea to read through it once first so you can get your head around the process.<br />
6.1.1 Loading a Song into a Deck<br />
There are many ways to load a song into a specific deck in Traktor LE.<br />
To load a track into a Deck:<br />
1. Select the track in the Browser List with the up/down arrow keys<br />
2. Press Ctrl + Arrow Left/Right to load the selected track into Deck A or Deck B, or<br />
3. Use the mouse to drag & drop a track from the Browser List into the Deck you want, or<br />
4. Right-/Ctrl-click on the track and choose Load Track in Deck A/B/C/D.<br />
Go ahead and load Decks A and B with songs. If you just installed Traktor LE and have not added any<br />
music of your own, you will find that there are a couple or tracks that come with Traktor LE that you<br />
can use for practice. Part of what a DJ looks at when selecting songs to mix is their speed, or BPM<br />
(Beats Per Minute). It is important at first that you select songs that are close to each other’s BPM.<br />
There is a column in Traktor’s music library that lists the BPM of the songs. Once you have loaded<br />
your 2 songs, let’s learn how to cue those songs.<br />
6.1.2 Setting a Cue Point<br />
The most basic way to set a cue point in Traktor LE is to scrub the play marker to the position you<br />
want to set the cue point, and then press the CUE button (either in Traktor LE or on your SCS.3m).<br />
You will see a white triangle appear in the song’s waveform to indicate a cue has been set.<br />
(Figure 6.1)<br />
SELECT EFFECT<br />
FX<br />
EQ<br />
EQ<br />
FX<br />
FILTER WET / DRY<br />
EFFECT CONTROL<br />
FILTER CONTROL<br />
MASTER<br />
Figure 6.1<br />
46
Using a Cue Point<br />
Using the top slider in EQ mode, move the red play marker to the first beat in the song, then press<br />
the CUE button to lock in that cue point. (Figure 6.2)<br />
Figure 6.2<br />
Once the cue point is set, do the same thing with the song in Deck B.<br />
6.1.3 Using a Cue Point<br />
Now that the cue point has been set, there are different behaviors you might see depending on how<br />
the CUE button is used.<br />
• On a paused deck, clicking cue sets a new current cue point at the current play position.<br />
In Snap Mode, this cue point will snap to the beat nearest the play position.<br />
• When the track is paused and cued up to the current cue point, click and hold the cue button<br />
to pre-listen to the cue placement. Release cue to return to the current cue point or press<br />
PLAY to resume playback without returning to the cue point.<br />
• Clicking cue during playback jumps the current play position back to the previously set<br />
current cue point and stops playback.<br />
Play with the cue button on both decks. Once you feel comfortable, we will mix these 2 songs together!<br />
6.1.4 Sync’ing Two Decks<br />
Before you can mix, you have to have something to mix into,<br />
so let’s hit PLAY on Deck A. Also, let’s make sure that the mixer is<br />
ready for us to mix on. Use your finger to turn the channel volumes<br />
up to the top, and then move the crossfader all the way to the left.<br />
(Figure 6.3)<br />
FX<br />
EQ<br />
EQ<br />
FX<br />
MASTER<br />
Figure 6.3<br />
47
Sync’ing Two Decks<br />
You should now hear the song that is playing in Deck A. Now, let’s look for a place to bring in the song<br />
in Deck B. Typically, there are 3 points in a song that are “mix friendly.” These are commonly at the<br />
beginning, middle, and end of the song. You can see them labeled in the picture below. (Figure 6.4)<br />
Figure 6.4<br />
That’s not to say that you can’t mix anywhere you want. Sometimes, putting 2 songs together sounds<br />
great (like in a Mash-Up). But these areas in a song are usually easier to mix with because they don’t<br />
have as much going on.<br />
Make sure the song in Deck B is cued to the beginning of the beat (you should already have the cue<br />
set from earlier). When you are ready to start your mix, press PLAY on Deck B. (Figure 6.5)<br />
FX<br />
EQ<br />
EQ<br />
FX<br />
MASTER<br />
Figure 6.5<br />
Now that the song is playing, we are going to take advantage of a feature in Traktor LE called SYNC.<br />
SYNC allows you to match the tempo of 2 songs automatically.<br />
48
Fading between Two Decks<br />
So reach over and press the SYNC button, and these 2 songs should align to the same tempo.<br />
You can do this by either pressing the 2nd button next to the Deck B channel fader on the SCS.3m, or<br />
you can use the mouse and click the button in Traktor LE. (Figure 6.6)<br />
FX<br />
EQ<br />
EQ<br />
FX<br />
MASTER<br />
6.1.5 Fading between Two Decks<br />
Figure 6.6<br />
Take your finger and slowly move it from left to right, just like you were pushing a fader. As you move<br />
it across you should hear the song playing in Deck B getting louder. Now you’re mixing! (Figure 6.7)<br />
FX<br />
EQ<br />
EQ<br />
FX<br />
MASTER<br />
Figure 6.7<br />
Continue until the crossfader reaches the right edge. That’s it! To continue mixing, stop the song in<br />
Deck A, load a new song in that deck, and repeat the process we just went through (set cue, SYNC<br />
tracks, move crossfader).<br />
Once you have done a couple of mixes and understand how the crossfader works, let’s explore the<br />
multi-touch capabilities of the SCS.3m.<br />
49
Using the EQs<br />
With the song in Deck B playing and Deck A stopped, try holding one finger on the right edge of the<br />
crossfader, and tap the other on the left end. (Figure 6.8)<br />
When you do this, you will hear the song in Deck B quickly cut in and out when you tap on the<br />
crossfader. This technique is good for quick cuts, and can even be modified to accomplish what sounds<br />
like transforms and crabs! When you realize that all of the sliders on the SCS.3m have the same ability,<br />
a new level of creativity is open to you.<br />
FX<br />
EQ<br />
EQ<br />
FX<br />
MASTER<br />
TAP<br />
HOLD<br />
Figure 6.8<br />
6.1.6 Using the EQs<br />
Make sure the EQ controls on the SCS.3m are activated by using the EQ button above the channel<br />
strip. (Figure 6.9)<br />
FX<br />
EQ<br />
EQ<br />
FX<br />
MASTER<br />
Figure 6.9<br />
50
Using the Effects (FX)<br />
The EQ is broken down into 3 frequency ranges – Low, Mid, and High. The sliders above the EQ button<br />
are laid out like this… (Figure 6.10)<br />
FX<br />
EQ<br />
EQ<br />
FX<br />
LOW EQ<br />
MID EQ<br />
HIGH EQ<br />
MASTER<br />
Figure 6.10<br />
Make sure that the channel you are using is set to EQ by pressing the EQ button and making sure it<br />
lights up red. Now, play a song in that deck and change the EQ settings. Listen to how each slider<br />
changes the sound. Sometimes, you will want to use the EQs to “sweeten” the sound (like a little bass<br />
boost to add some thump, or maybe boosting the midrange to make a vocal cut through).<br />
But sometimes, you will use the EQs like an effect, making radical changes to the sound.<br />
Another common use for EQ is to help you mix. Often, DJs will lower the bass frequencies of the song<br />
they are bringing into a mix. This makes it easier to blend with the track that is playing.<br />
6.1.7 Using the Effects (FX)<br />
Just like in EQ mode, the first thing you want to do is to put the channel strip into FX mode by pressing<br />
the FX button above the channel strip.<br />
The effects sections in Traktor LE<br />
are located above each deck.<br />
As you can see, there are 2<br />
different effects you can use at<br />
any given time. (Figure 6.11)<br />
Figure 6.11<br />
51
Using the Effects (FX)<br />
Now that you’ve learned how to mix 2 songs together, try adding effects to your mix! Effects can add<br />
a lot to a song when used properly. Along with the FX modules in Traktor, you can also use filter as a<br />
dedicated effect. Let’s use the effects now to spice up your mix.<br />
First we will need to select an effect. Traktor LE comes with 3 built-in effects:<br />
Delay – This is just what it sounds like – a “delay” in the audio. Think of it as a long echo. Imagine<br />
shouting into a canyon and hearing yourself back seconds later. THAT’s delay. What is better, the delay<br />
in Traktor LE is synced to the tempo of the song that is playing, so the echoes are always in time.<br />
You can create some interesting effects with delay, ranging from the typical long delay to syncopated<br />
effects and even beat juggles.<br />
Reverb – This is a shorter kind of delay. You know when you are in the shower and you sing, your<br />
voice sounds more professional? That is the sound bouncing off the walls and coming back to your<br />
ears. As the room gets bigger, those reflections in sound take longer to get back to you. In very big<br />
rooms (like big churches) your voice can bounce all around the room and linger a long time after you<br />
make a sound. That is what reverb is. It is used in recording to (among other things) smooth out vocal<br />
tracks. DJs might use reverb when scratching over the top of another track to make the scratches<br />
smoother sounding. It can also be used to make the sound feel like it’s coming from a much bigger<br />
room.<br />
Flanger – This is a little harder to explain, but you hear flangers all the time. Technically, it’s another<br />
delay effect, but the delay is so short you don’t hear it as a delay. Instead, it sounds more like someone<br />
is “sweeping” the EQ or a filter. Once you play with it, you’ll know it instantly, because it’s one of the<br />
most used effects for DJs. Flangers are great temporary effects to drop over parts of a song – especially<br />
the parts that build up to something big. They’re great for creating energy. A good slow flange sounds<br />
great on one of the songs during a mix – especially right before the new song drops. This is a go-to<br />
effect in the DJ toolkit.<br />
To select which effect is loaded into FX 1 or FX 2, move your finger across the top slider. You will see<br />
the effect change in the program as you do this. Remember that if you are using FX on deck A you will<br />
need to use FX 1, which is controlled by selecting “FX” on deck A on the SCS.3m. Scroll left and right<br />
using the top slider to select an effect, in this example we will use Reverb. (Figure 6.12)<br />
FX<br />
EQ<br />
EQ<br />
FX<br />
MASTER<br />
Figure 6.12<br />
52
Using the Effects (FX)<br />
Now that we have an effect selected let’s engage it by pressing the FX On/Off Toggle button.<br />
(Figure 6.13)<br />
FX<br />
EQ<br />
EQ<br />
FX<br />
FX<br />
EQ<br />
EQ<br />
FX<br />
MASTER<br />
Figure 6.13<br />
With the effect engaged, we can now control its intensity by modifying the Wet/Dry amount.<br />
Use a more “Wet” signal for a strong effect over the song or a more “Dry” signal for slightly changing<br />
the sound of the song. The first vertical fader adjusts the Wet/Dry amount of the selected effect.<br />
(Figure 6.14)<br />
MASTER<br />
Figure 6.14<br />
53
Using the Effects (FX)<br />
The second fader changes FX control. This will modify the main parameter for the effect.<br />
For delay the parameter controls the length of the delay, shorter delays will create more of a stuttering<br />
effect where as a long delay will create a sound more like a large room echo. Use the second slider to<br />
play with the FX parameter. (Figure 6.15)<br />
FX<br />
EQ<br />
EQ<br />
FX<br />
Now you can play with the other effects in Traktor by<br />
using the top slider.<br />
Figure 6.15<br />
MASTER<br />
In parallel to the FX 1 and FX 2 modules, there are also<br />
dedicated filters for each deck in Traktor. The filter<br />
control allows only certain frequencies to be passed<br />
into the mix while other frequencies are removed<br />
(or filtered). The filter control can be used either as an<br />
effect for drastic changes to a song or as a tool when<br />
mixing to remove certain parts of a song while mixing<br />
it in.<br />
The last fader in the group allows you to sweep the filter for the associated deck. To play with the<br />
filter first make sure it is engaged by pressing the Filter On/Off button and then use the fader to filter<br />
the sound. When the slider is set to center position, no effect is heard because neither hi frequencies<br />
or low frequencies are being filtered out. (Figure 6.16)<br />
FX<br />
EQ<br />
EQ<br />
FX<br />
MASTER<br />
Figure 6.16<br />
54
Next Steps<br />
6.2 Next Steps<br />
Now that you have mastered…<br />
1) Build your playlist library by importing songs/playlists from your hard drive, iTunes®, or<br />
iPod®. Once you have added songs to your library you can analyze and beat grid them to<br />
make sure Traktor’s synchronization engine automatically beat matches them in a mix.<br />
For more information on importing, managing a collection and beat grids read the Traktor<br />
manual on your hard drive.<br />
2) Go to the <strong>Stanton</strong> website to check for new mappings for the SCS.3m and check the forums<br />
for user created mappings at http://forums.stantondj.com<br />
3) Add a SCS.3d to your setup for more advance and expanded control over Traktor LE or<br />
Traktor PRO.<br />
55
7. Using the SCS.3m with other MIDI Applications<br />
Using the SCS.3m with other MIDI Applications<br />
In addition to the Traktor LE specific mode, the SCS.3m can also be used as a powerful MIDI controller<br />
for any MIDI compatible application. The SCS.3m works in three modes, Automatic mode for standard<br />
MIDI use cases, Application feedback mode for applications with MIDI output and complete flat mode<br />
for running DaRouter presets. In Automatic/Application feedback modes all the deck/mode switching<br />
is handled by the SCS.3m for easy MIDI learning in a matter of minutes. In Automatic mode, SCS.3m<br />
controls all of its own LEDs. In Application feedback mode, SCS.3m processes MIDI output from your<br />
application to keep LEDs in sync between the application and one or more controllers.<br />
For full documentation of the modes and MIDI messages, reference the MIDI spec online at the web<br />
link provided in 7.4.<br />
The sections below outline how to select which MIDI channel the SCS.3m uses and selecting between<br />
the built-in presets.<br />
7.1 Selecting MIDI Channel<br />
The SCS.3m can be reconfigured to broadcast and receive on different MIDI channels to allow multiple<br />
SCS.3m units to be connected to the same computer without control interference or for use with<br />
other controllers with fixed MIDI channels. To change the MIDI channel on the SCS.3m follow the<br />
instructions below:<br />
1. Cover the entire top right slider with your fingers and press the lower right headphone<br />
button.<br />
2. The center section of the SCS.3m will light red to indicate that the unit is now ready to<br />
change its MIDI channel.<br />
3. You can change the MIDI channel by pressing any of the center buttons to select the channel.<br />
The top left button is MIDI channel 1 and the channels cascade from left to right so the top<br />
right button would be MIDI channel 2. Select any button to change the MIDI channel from<br />
1-8 and the unit will update to broadcast and receive on that channel.<br />
7.2 Selecting Built-in Preset<br />
The SCS.3m comes with built-in intelligent firmware presets for different mapping configurations of<br />
the sliders and buttons. For instance, the default functionality of the SCS.3m shows sliders as<br />
boost/ kill for “EQ mode” but these can actually be sweep feedback or even used as incremental sliders<br />
depending on what your MIDI application accepts as an incoming message. To access the built-in<br />
firmware presets follow the instructions below:<br />
1. Cover the entire top left slider and press the lower right headphone button.<br />
2. The center section of the SCS.3m will light red to indicate that built-in preset select mode is<br />
activated. The preset numbers start with the top left button and go from left to right, so for<br />
instance “Preset 2” is the top right button.<br />
3. You can select a built-in preset at this time to change the configuration of the SCS.3m sliders<br />
and buttons.<br />
4. Make sure that the unit is not in Application feedback mode if you are using it with an<br />
application that does not support MIDI output (most applications do not). If you are not<br />
seeing feedback on the sliders and buttons, toggle between Automatic and Application<br />
feedback by covering the top left slider and pressing the lower left headphone button.<br />
56
Selecting Built-in Preset<br />
Depending on your application, different presets will be desired. For instance if you are using<br />
Ableton Live, all sliders with sweep feedback might be desired such as the configuration for preset 3.<br />
Below is a table of all the built-in presets and their functionality:<br />
Button Preset # Button State Absolute Sliders Relative Sliders Slider Pattern<br />
1 Preset 1 Trigger S3 – S11<br />
S1, S2 and S9, S10<br />
(Master only)<br />
default<br />
2 Preset 2 Trigger All<br />
S9, S10<br />
(Master only)<br />
default<br />
3 Preset 3 Toggle All<br />
S9, S10<br />
(Master only)<br />
All bottom-top<br />
4 Preset 4 Toggle S9 – S11 S1 – S8 n/a<br />
5 Preset 5 Trigger All None All bottom-top<br />
6 Preset 6 Trigger S9 – S11 S1 – S8 n/a<br />
7 Preset 7 Toggle None All n/a<br />
8 Preset 8 Trigger None All n/a<br />
To help choose the right preset, first review the table above to determine which interaction type you<br />
desire. Below are definitions of the terms used in the table:<br />
Button States<br />
Trigger – Trigger means the LED for the button will only illuminate when a finger is placed on the<br />
button. Good for triggering samples.<br />
Toggle – Toggle means the LED will change from blue to red when a finger is pressed and then will<br />
change back to blue when pressed again. This is good for functions which turn On and Off.<br />
Absolute Sliders<br />
Absolute sliders exactly follow your fingers position on the surface and feature multiple touches.<br />
These are good for controls like volume or effect settings. For instance, all absolute sliders could be<br />
mapped towards controls of a digital audio workstation.<br />
Relative Sliders<br />
Relative sliders follow the gestures of your finger but do not send absolute position. These are good<br />
for controls that might want to be fine-tuned as opposed to quickly moved from top to bottom quickly.<br />
For instance, a pitch control would be good for relative control. Note: Not all MIDI applications support<br />
relative mode. Please consult the owner’s manual of your software to be sure. Sometimes relative is<br />
referred to “Relative Bin Offset.”<br />
Slider Pattern<br />
This controls the feedback of the slider’s LEDs on the control surface. The default pattern is “boost/kill”<br />
feedback for EQ and “bottom to top” (or sweep) feedback for FX and volume sliders. When sliders are<br />
relative, no feedback is given other than “finger trace” which follows your hand movement while<br />
touching the sliders.<br />
57
MIDI Learn<br />
7.3 MIDI Learn<br />
Now that you have configured the SCS.3m, you can use MIDI learn to assign any of the controls into<br />
your software application. Almost all audio applications support MIDI learn now, for more information<br />
on MIDI learn in your favorite application consult its user manual.<br />
7.4 Advanced Control of Built-in Presets<br />
The built-in presets can be completely reconfigured and saved through MIDI messages.<br />
The SCS.3m also can be run in “Application feedback mode” where the button and slider states are<br />
completely driven from the application. This is how the SCS.3m works with Traktor LE and with Traktor<br />
PRO you have the option to reconfigure the buttons and sliders to however you like by changing the<br />
MIDI messages.<br />
To learn more about the SCS.3m’s advance MIDI modes please visit www.stantondj.com/SCS3m/MIDI/<br />
for the complete MIDI specification and guides on reprogramming the built-in presets and using<br />
application feedback mode with Traktor to create your own unique controls and mappings.<br />
58
Troubleshooting<br />
8. Troubleshooting<br />
1) When I connect the SCS.3m, it seems to work normally, but nothing connected to its USB ports<br />
works properly.<br />
This usually happens when the SCS.3m is not getting power. Verify that your SCS.3m is plugged<br />
into mains power via the included adapter. If it is, verify that the outlet you are plugged into is<br />
working properly.<br />
2) It is very difficult to turn the knobs on the back of the unit (when removing the rear cover).<br />
Especially when SCS.3m is new, those knobs can be hard to turn with just your fingers. On the<br />
top of each knob is a slot in which the edge of a coin can be placed to make turning them easier.<br />
3) The SCS.3m works, but sometimes the controls are sluggish and do not respond quickly to my<br />
touch.<br />
This can happen when your hand or the SCS.3m gets moist. If this is the case (like if you’re working<br />
in a hot club and sweating), dry off your hands and/or the SCS.3m as much as possible.<br />
4) The SCS.3m does not work with Traktor as described or at all?<br />
First confirm that you have loaded the correct settings for the SCS.3m by running the hardware<br />
setup wizard. Next check that you have DaRouter running and finally check the MIDI IN/OUT<br />
settings in the preferences of Traktor. “From SCS.3 DaRouter” and “To SCS.3 DaRouter” should<br />
be selected NOT “SCS.3m” (Mac) or “Generic Audio Device” (Windows)<br />
5) When I try to connect SCS.3m to the computer, it is not recognized and/or the LEDs on the unit<br />
light in an irregular pattern.<br />
Check that the USB cable is securely connected to both the computer and SCS.3m. This can also<br />
be caused by an underpowered USB port. Make sure that SCS.3m is not connected to a<br />
non-powered hub. If it is plugged directly into the computer, try using a different USB port.<br />
6) I do not have an internet connection and am unable to download any software associated with<br />
SCS.3m.<br />
If you are unable to connect to the Internet, <strong>Stanton</strong> will provide you with the needed software<br />
and documentation free of charge. Call <strong>Stanton</strong> Support at +1 954.316.1500 (Option 3) and it<br />
will be shipped out to you.<br />
7) My problem is not covered here.<br />
Please go to www.stantondj.com/SCS.3m for more in depth troubleshooting information.<br />
59
Specifications<br />
9. Specifications<br />
Control Specifications (physical):<br />
17 Buttons<br />
11 Sliders<br />
2 Level Meters<br />
Control Specifications (banked in firmware):<br />
39 Sliders<br />
36 Buttons<br />
6 Level Meters<br />
MIDI Specifications:<br />
Standard note messages for each control<br />
Relative control change movement message for each slider<br />
Absolute position control change messages for each slider<br />
Multiple feedback modes for LED chains (single LED, sweep, boost/cut, spread)<br />
Multicolor (blue, red, purple) control and dim control for LEDs<br />
USB Specifications:<br />
USB 1.1 class compliant MIDI controller<br />
Built-in USB 1.1 four-port USB Hub<br />
Operates from USB bus power or from included AC adaptor*<br />
*Hub can only power downstream USB devices when powered from the AC Adaptor.<br />
Power Specifications:<br />
12V DC/1500mA<br />
System Requirements:<br />
Mac:<br />
Power PC G5 or multicore Intel® processor<br />
Mac OS® X (v10.4 or later)<br />
Windows:<br />
PC running Windows XP or Windows Vista®<br />
Form Factor:<br />
Dimensions (H x W x D): 8.52 in. x 4.72 in. x 1.38 in. / 216.5 mm x 120 mm x 35.25 mm<br />
Shipping Weight: 2.64 lbs (1.2 kg)<br />
*USB hub/port must meet USB power specification, when internal USB hub is used additional<br />
power must be supplied to unit.<br />
60
APPENDIX Audio Interface Configuration<br />
APPENDIX<br />
Audio Interface Configuration<br />
The content of this Appendix is organized in four brief sections:<br />
• Configuring your audio interface<br />
• Setting up a Native Instrument’s audio interface<br />
• Setting up a different audio interface<br />
• Setting your outputs<br />
Configuring Your Audio Interface<br />
Setting up the audio in Traktor is easy, but considering that there is not any “standard” hardware,<br />
there are many variables. (Figure A.1)<br />
• If you have an external audio interface of any<br />
kind, connect it now and make sure that it is<br />
working properly.<br />
• Connect the main outputs of your audio<br />
interface to your powered speakers or the amp<br />
driving your speakers.<br />
• Connect the secondary output to your<br />
headphones.<br />
Figure A.1<br />
Setting Up a Native Instrument’s Audio Interface<br />
The easiest way to set up a supported NI interface (like the Audio8DJ or the Audio Kontrol 1 for<br />
example), is to use the built-in Setup Wizard. This is a new and welcome feature in Traktor PRO.<br />
Click on Help and open the Setup Wizard by selecting it from the drop-down menu. (Figure A.2)<br />
Figure A.2<br />
61
APPENDIX Audio Interface Configuration<br />
In the Please choose your setup drop-down, you will find a list of manufacturers. If you have an A8DJ<br />
or A4DJ, leave the -No or Other Controllers-option. In the Please choose your device drop-down you<br />
will find configurations for both of those audio interfaces. Since we are using the SCS.3m as a mixer,<br />
be sure to select the Internal Mixer option that is appropriate for your NI interface. When you are<br />
done, click Apply.<br />
Setting Up a Different Audio Interface<br />
To setup a different audio interface we need to open Traktor LE Preferences. Click the Preferences<br />
button (located in the top right corner of the program) and then click Audio Setup. (Figure A.3)<br />
Figure A.3<br />
In the Audio Device drop-down, select the audio interface you want to use. If you have an external<br />
interface, it should be included here (if not, be sure that your drivers are properly installed). If you do<br />
not have an external interface and want to use the built-in audio card, select that instead. On Apple<br />
computers, it will most likely be named “Built-in Soundcard.” On a PC, it will likely be called by the<br />
brand of your card (SigmaTel® and Realtek® are very common laptop audio cards for example). At this<br />
point, if the selected audio card is properly installed, your computer should fill in the Sample Rate<br />
and Audio Latency fields automatically. If you select an audio device and these fields do not update,<br />
then most likely either your device is not properly connected or the driver is not installed.<br />
It is likely that you will be in good shape regarding latency at this point, but lower latency is always<br />
better. If you are using an external card, you want to start at a low number and see how it performs.<br />
If you start at something like 5ms and get pops and clicks in the playback, move the slider to the right<br />
a little and test again. Every interface (and driver) is different, so you will need to dial it in. If you have<br />
a built-in audio card (like when using a laptop), you are going to start at a higher setting. I suggest<br />
beginning at 10-15ms to start. If you are on Windows and not using an ASIO driver, your latency will<br />
likely be much higher before you get good clean playback (30-50ms). If obtaining a better performing<br />
external audio interface is not possible, you might want to look into a 3rd party ASIO driver such as<br />
ASIO4ALL (www.asio4all.com). Be sure to check to see if your soundcard is compatible before installing<br />
any 3rd party driver, and remember that <strong>Stanton</strong> or Native Instruments does not support these drivers<br />
(you’ll have to contact the driver publishers for support).<br />
62
APPENDIX Audio Interface Configuration<br />
Setting Your Outputs<br />
Figure A.4<br />
Go to Preferences\Output Routing.<br />
• Mixing Mode: select Internal.<br />
• Output Monitor: is the output for your headphones.<br />
• Output Master: is the main left and right stereo output that goes to your speakers.<br />
• Output Record: is an additional output that can be assigned to an external recorder, booth<br />
monitor, etc.<br />
If your outputs are not labeled like the ones displayed above and you are not sure which is which,<br />
here is a good rule of thumb. On a Mac, audio outputs are generally labeled starting with 0, and on a<br />
PC, they normally start with a 1. Therefore, if you had a 4-channel soundcard, the main outs would<br />
usually be 0 & 1 on a Mac and 1 & 2 on a PC.<br />
If you have a desktop computer with support for more than 2 channels of audio, you can use one of<br />
the output sets to drive your headphones and not need to buy an external audio interface. In many<br />
cases, you will not even need to buy a cable adapter, since most internal audio card outputs are stereo<br />
miniplug.<br />
Traktor LE MIDI Interface Configuration<br />
It is possible that the SCS.3m will not be seen as the default MIDI device even though it is connected<br />
properly. If you go through the Traktor LE Setup Wizard, but afterwards find that the SCS.3m does not<br />
seem to be controlling either of the decks, please follow the instructions provided in the next pages.<br />
63
APPENDIX Traktor LE MIDI Interface Configuration<br />
Click the Preferences button (located in the top right corner of the program) and then click MIDI<br />
Setup. Figure A.5<br />
Figure A.5<br />
On this page, you will see MIDI input and output devices. Your MIDI device will show up differently<br />
depending on what operating system you are using. If you are using a single SCS.3m MIDI controller,<br />
it would be identified like this…<br />
Operating System<br />
In Windows XP<br />
In Windows Vista®<br />
In OS X<br />
SCS.3m Identified as…<br />
USB Audio Device [Emulated]<br />
SCS.3m [Emulated]<br />
SCS.3m<br />
If you are using the SCS.3m along with one or more SCS.3d's and our DaRouter software, instead of<br />
selecting each piece of hardware individually, you simply select the SCS.3 DaRouter interface instead.<br />
Operating System<br />
In Windows XP<br />
In Windows Vista<br />
In OS X<br />
SCS.3 DaRouter Identified as…<br />
To/From SCS.3 DaRouter [Emulated]<br />
To/From SCS.3 DaRouter [Emulated]<br />
SCS.3 DaRouter<br />
In either case, you would select the appropriate interface by double clicking next to it in the Active<br />
column. Clicking once will highlight the row yellow, and the second click should put an “X” in the Active<br />
column, indicating that the highlighted interface is now active. Be sure that only one interface is active<br />
in both the Input and Output Devices areas. So, if you had a single SCS.3m connected to a computer<br />
running Windows XP, then in the Input and Output areas the ONLY thing highlighted and active would<br />
be “USB Audio Device [Emulated]” (like in the picture above). Once you have selected the correct<br />
input and output interface, click Close in the bottom right corner of the Preferences window, and<br />
verify that your MIDI device is now working properly.<br />
64
Registration Card<br />
Thank you for choosing <strong>Stanton</strong>!<br />
Your satisfaction is extremely important to us. We proudly stand behind the quality of our work and<br />
appreciate that you put your trust in us. Registering your product will help us guarantee that you are<br />
kept up to date on our latest advances.<br />
Warranty Service in the United States:<br />
Please contact <strong>Stanton</strong> Tech Support BEFORE sending your product. In some cases, our Tech Support<br />
team can resolve your problem immediately, avoiding down time due to shipping delays. However, if<br />
Tech Support determines that a repair is needed; please call us at +1 954.316.1500 (Option 3) to obtain<br />
a Return Authorization Number (RA#) PRIOR to shipping your product to us.<br />
Warranty Service outside the United States:<br />
To initiate a warranty repair, please contact the authorized <strong>Stanton</strong> dealer from whom you purchased<br />
your product, and follow the dealer’s return policy.<br />
Save your shipping boxes and all packaging materials!<br />
For the fastest and safest product return to <strong>Stanton</strong>, please use the original shipping carton and<br />
packaging materials. <strong>Stanton</strong> cannot be responsible for any damages incurred during the shipping<br />
process due to poor or inadequate packing. Please remember to insure your shipment!<br />
65
<strong>Stanton</strong> Warranty<br />
<strong>Stanton</strong> Warranty<br />
Through <strong>Stanton</strong>'s authorized dealers around the World, <strong>Stanton</strong>, or one of <strong>Stanton</strong>'s authorized distributors outside the U.S., will,<br />
without charge, repair or replace, at the sole discretion of the entity responsible for making the repair or providing the replacement,<br />
any <strong>Stanton</strong> merchandise proved defective in material or workmanship for a period of one (1) year following the date of original<br />
purchase. Exceptions to this warranty are as noted below:<br />
The warranty for mechanical parts which are subject to wear and tear are limited to either the earlier of thirty (30) days following<br />
the date of original purchase or for 10,000 cycles for switches.<br />
<strong>Stanton</strong> will warrant all replacement parts and repairs for ninety (90) days from the date of original shipment. Repairs made<br />
necessary by reason of misuse, alteration, normal wear, or accident are not covered under this warranty.<br />
Returns<br />
Authorized <strong>Stanton</strong> dealers are only authorized to sell and distribute merchandise within a specific country. All goods requiring<br />
warranty repair or replacement must be returned (freight prepaid if not hand-delivered) to the authorized <strong>Stanton</strong> dealer from<br />
whom the merchandise was purchased and in the same country where the merchandise was purchased. For purposes of purchases<br />
made via the Internet, the merchandise must be returned to the authorized <strong>Stanton</strong> dealer in the country where the authorized<br />
<strong>Stanton</strong> dealer which sold the merchandise to purchaser is located and not the authorized <strong>Stanton</strong> dealer in the country where<br />
the purchaser is located or the country in which the merchandise was received. Any returns to a non-authorized dealer or to an<br />
authorized <strong>Stanton</strong> dealer not in the same country as the merchandise was intended to be sold or as set forth above will void this<br />
warranty.<br />
To initiate a warranty repair, you must contact the authorized <strong>Stanton</strong> dealer from whom you purchased the merchandise, and<br />
follow such authorized <strong>Stanton</strong> dealer's return policy.<br />
<strong>Stanton</strong> assumes no risk and shall be subject to no liability for damages or loss resulting from the specific use or application made<br />
of the merchandise. <strong>Stanton</strong>'s liability for any claim, whether based on breach of contract, negligence, infringement of any rights<br />
of any party, or product liability, and relating to the merchandise shall not exceed the price received by <strong>Stanton</strong> from your purchase<br />
of such merchandise. In no event will <strong>Stanton</strong> be liable for any special, incidental or consequential damages (including loss of use,<br />
loss of profit and claims of third parties) however caused, whether by the negligence of <strong>Stanton</strong> or otherwise. To the extent<br />
permitted by law and except as otherwise provided above, <strong>Stanton</strong> disclaims any express or implied warranties of merchantability<br />
or fitness for a particular purpose.<br />
The above warranty provides you with specific legal rights. You may also have additional rights, which are subject to variation from<br />
state to state and country to country.<br />
If there is a dispute regarding the warranty of merchandise that does not fall under the warranty conditions stated above, please<br />
include a written explanation with the merchandise when returned pursuant to the terms and conditions set forth herein.<br />
66
Notes<br />
.............................................................................................................<br />
.............................................................................................................<br />
.............................................................................................................<br />
.............................................................................................................<br />
.............................................................................................................<br />
.............................................................................................................<br />
.............................................................................................................<br />
.............................................................................................................<br />
.............................................................................................................<br />
.............................................................................................................<br />
.............................................................................................................<br />
.............................................................................................................<br />
.............................................................................................................<br />
.............................................................................................................<br />
.............................................................................................................<br />
.............................................................................................................<br />
.............................................................................................................<br />
.............................................................................................................<br />
.............................................................................................................<br />
.............................................................................................................<br />
.............................................................................................................<br />
.............................................................................................................<br />
.............................................................................................................<br />
.............................................................................................................<br />
.............................................................................................................<br />
67
Copyright © 2009 <strong>Stanton</strong> Magnetics, Inc.<br />
SCS, SC System, DaScratch, DaRouter, and StanTouch are registered trademarks of the <strong>Stanton</strong> Group.<br />
All other trademarks are property of their respective owners, who are in no way affiliated with <strong>Stanton</strong> DJ or<br />
SC System products. All information included in the User <strong>Manual</strong> is subject to change without notice.<br />
(+1.877.578. 6866)<br />
LITS00034 5/18/2009


