Success - Stampin' Up!
Success - Stampin' Up!
Success - Stampin' Up!

Create successful ePaper yourself
Turn your PDF publications into a flip-book with our unique Google optimized e-Paper software.
sharing creativity & caring for your business june stampin’category<br />
2008<br />
stampin’<br />
success®<br />
june 2008 1
shareamomentwithshelli<br />
many of you may know<br />
that Stampin’ <strong>Up</strong>! has eight<br />
principles; you can find them<br />
on the Demonstrator Web Site<br />
under My Business>My Business<br />
Resources>Printing Place.<br />
One of our eight principles<br />
is change, and that principle<br />
reads: “We believe in exercising<br />
imagination and wisdom, in<br />
taking responsible risk, and<br />
in embracing change. We<br />
set challenging goals, always<br />
striving to ‘better our best.’”<br />
We selected this principle<br />
because we feel strongly that,<br />
in order to improve, we must<br />
always be changing—both<br />
personally and professionally.<br />
Newton’s first law states, in<br />
part, that an object in motion<br />
tends to stay in motion and an<br />
object at rest tends to stay at<br />
rest. If we are moving, always<br />
working toward bettering our<br />
best, we’ll be in motion and it<br />
will be easier for us to make<br />
changes that improve both our<br />
products and our opportunity<br />
for you and your customers.<br />
Of course, that doesn’t mean<br />
we move happily toward change<br />
simply for the sake of change! In<br />
a world where change is actually<br />
one of the few constants, we<br />
want to ensure that the changes<br />
we’re making are, indeed, ones<br />
that will improve us in some way.<br />
We have changed dramatically<br />
over the past two decades! This<br />
year, we mark our twentieth<br />
anniversary in the United<br />
States, and as I look back, I am<br />
amazed. Thank heavens we’ve<br />
changed! Our first catalogs were<br />
small and amateur. We initially<br />
filled orders out of our living<br />
room. And our demonstrator<br />
support staff answered phones<br />
as well as taking care of myriad<br />
other jobs.<br />
Another significant change<br />
we’ve noticed is that modern<br />
technology has changed almost<br />
every aspect of what we do,<br />
speeding up entire processes<br />
and decreasing the likelihood of<br />
errors and mistakes. Technology<br />
has also created a few challenges<br />
for us, but that is to be expected.<br />
In this issue, there is a full<br />
article about adapting to change<br />
that we hope you’ll find helpful<br />
(see “The Process of Change” on<br />
page 16). I thank you for your<br />
patience and support as we work<br />
to change in good ways, looking<br />
for ways to better our best!<br />
contact information<br />
(800) stamp up<br />
Hours: 7:00 am–7:00 pm (mt), Monday–Friday<br />
Demonstrator Support / Phone Orders<br />
(MC, Visa, Discover, Electronic Funds Transfer)<br />
(801) 257-5476<br />
Demonstrator Support / Phone Orders for<br />
Guam and APO/FPO<br />
(801) 257-5338<br />
Correspondence fax<br />
www.stampinup.com<br />
Stampin’ <strong>Up</strong>! Web Site address<br />
ds@stampinup.com<br />
Demonstrator Support e-mail address<br />
Send Starter Kit and<br />
Tax-Exempt Mail Orders to:<br />
Stampin’ <strong>Up</strong>!® Order Entry<br />
PO Box 550<br />
Riverton, UT 84065-0550<br />
(All other mail orders will be returned.)<br />
Send Exchange Orders to:<br />
Stampin’ <strong>Up</strong>! Order Exchanges<br />
12907 South 3600 West<br />
Riverton, UT 84065<br />
Send Contest Entries to:<br />
Contest: [Category Name]<br />
Stampin’ <strong>Up</strong>!<br />
12907 South 3600 West<br />
Riverton, UT 84065<br />
Send Written Correspondence to:<br />
Stampin’ <strong>Up</strong>!<br />
PO Box 550<br />
Riverton, UT 84065-0550<br />
please note<br />
If you try to submit your orders or new recruit<br />
Starter Kit Order Forms on the last day of a<br />
commission, incentive, or sales period, you risk<br />
not getting your order in before the deadline due<br />
to heavy order volumes.<br />
All materials that are mailed to Stampin’ <strong>Up</strong>!,<br />
such as kit orders, contest entries, etc., must be<br />
received in the office by the date specified. Please<br />
plan accordingly and send this date-sensitive<br />
material several days earlier than the deadline<br />
given or use a delivery service with a guaranteed<br />
delivery date.<br />
limited copy permission<br />
Stampin’ <strong>Up</strong>! publications and original artwork<br />
are trademark and copyright protected.<br />
Nevertheless, Stampin’ <strong>Up</strong>!® hereby grants<br />
permission to active demonstrators of the<br />
company to copy pages of Stampin’ <strong>Success</strong>® or<br />
the Stampin’ <strong>Up</strong>! Demonstrator Web Site for<br />
personal use (such as copying revised policy<br />
statements from the Demonstrator Manual<br />
or enlarging patterns); for training purposes<br />
(for Stampin’ <strong>Up</strong>! recruits only); and for<br />
business purposes (as in the distribution of<br />
sales promotion flyers). Pages may not be sold,<br />
licensed or copied for distribution to customers<br />
or others without specific permission.<br />
© 2008 Stampin’ <strong>Up</strong>! All rights reserved.<br />
2 www.stampinup.com
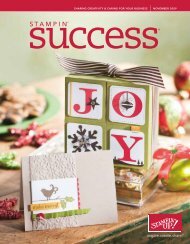
stampin’contents<br />
s ta m p i n’<br />
success®<br />
june 2008<br />
Features<br />
10 book to build<br />
12 the elegant art of gratitude<br />
14 Easy booking activities<br />
15 coach your customers<br />
16 the process of change<br />
17 available for a limited<br />
time only<br />
departments<br />
2 Share a Moment with Shelli<br />
The Principle of Change<br />
4 Stampin’ Calendar<br />
5 art show<br />
Celebrate Dad<br />
6 stampin’ technique<br />
Iris Folding<br />
8 Stampin’ memories®<br />
Scrapbooking Made Simple<br />
18 Stampin’ occasions<br />
A Little Something Blue<br />
20 à la card<br />
Scrap Happy<br />
20 FYI<br />
21 Making Business Sense<br />
Recruiting with the Online IDA<br />
22 Workshop Wow<br />
Emerging Color<br />
23 Make It Happen<br />
5<br />
12<br />
7<br />
19<br />
Demo It!<br />
Watch for projects marked with this logo. These<br />
are excellent choices for workshop demonstrations.<br />
Cards marked with this logo can be completed in<br />
5–8 minutes. Scrapbook pages marked with this<br />
logo can be completed in under 15 minutes. You can<br />
demonstrate these pages even faster by preparing<br />
some elements of the page before the workshop.<br />
online extras<br />
You’ll find all of the Online Extras mentioned in<br />
this issue on the Demonstrator Web Site under My<br />
Business>My Business Resources>Stampin’ <strong>Up</strong>!<br />
Publications>Stampin’ <strong>Success</strong>>2008>June.<br />
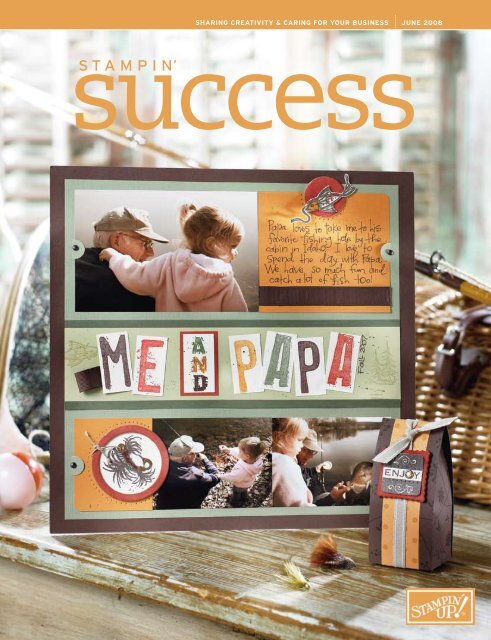
Cover Creations<br />
Our June cover showcases the special<br />
relationship between fathers and daughters . . .<br />
or grandfathers and granddaughters. With a<br />
wonderfully masculine color scheme that<br />
enhances Allyson Cheney’s contest-winning<br />
photography, our Me and Papa scrapbook page<br />
is just right for Father’s Day. You’ll find<br />
complete instructions for both of our cover<br />
projects in this month’s Online Extras.<br />
Cards shown throughout are<br />
4-1/4" x 5-1/2" unless otherwise noted.<br />
june 2008 3
stampin’calendar<br />
june2008<br />
sunday monday tuesday wednesday thursday friday saturday<br />
1 2 3 4 5 6 7<br />
Teleconference<br />
now available for<br />
download: Twenty<br />
Years of Best<br />
Business Tips<br />
July 2008 Stampin’<br />
<strong>Success</strong> now online<br />
On Stage Volume 9,<br />
Issue 1 now online<br />
8 9 10 11 12 13 14<br />
Father’s Day<br />
Convention 2008<br />
registration, transfer,<br />
and cancellation<br />
deadline<br />
15 16 17 18 19 20 21<br />
Begin preparing for<br />
July workshops<br />
22 23 24 25 26 27 28<br />
29 30<br />
Occasions Mini<br />
Collection 2008 sales<br />
period ends<br />
Last business day<br />
of the month<br />
July Contest<br />
entries due<br />
all month long<br />
Spring-Summer Collection 2008 sales period<br />
Last business day<br />
Occasions Mini Collection 2008 of sales the period month; May<br />
Holiday 2008 Mini Catalog performance Contest entries perioddue<br />
to do<br />
View the Who Is Not Meeting Quarterly Sales Minimums? report and follow<br />
up with your first-level downline members who are listed on the report.<br />
may<br />
Spring-Summer Collection 2008 sales period<br />
Occasions Mini Collection 2008 sales period<br />
Holiday 2008 Mini Catalog performance period<br />
National Scrapbooking Month<br />
Get On Board with Chipboard promotion<br />
Convention 2008 registration (begins May 6)<br />
15 Who Is Not Meeting Quarterly Sales<br />
Minimums? report now available<br />
26 Memorial Day holiday: Stampin’ <strong>Up</strong>!<br />
offices closed<br />
31 Last business day of the month; June<br />
Contest entries due<br />
4 www.stampinup.com<br />
july<br />
Spring-Summer Collection 2008 sales period<br />
Holiday 2008 Mini Catalog performance period<br />
July 30—August 2: Convention 2008<br />
1 Spring-Summer Collection 2008 retired list now<br />
online; Fall-Winter 2008 Idea Book & Catalog<br />
hostess set and sneak peek preorders begin<br />
4 Fourth of July holiday: Stampin’ <strong>Up</strong>!<br />
offices closed<br />
7 Fall-Winter 2008 Idea Book & Catalog catalog<br />
preorder begins<br />
14 August 2008 Stampin’ <strong>Success</strong> now online<br />
15 Sale-A-Bration redemption period ends<br />
16 Who Is in Pending? report now available<br />
July continued . . .<br />
27 Last day to preorder catalogs for arrival by August 11<br />
31 Fall-Winter 2008 Idea Book & Catalog mails to<br />
demonstrators; last business day of the month;<br />
August Contest entries due<br />
august<br />
July 30—August 2: Convention 2008<br />
Spring-Summer Collection 2008 sales period (ends August 10)<br />
Fall-Winter 2008 Idea Book & Catalog sales period (begins<br />
August 11 at noon.)<br />
10 Spring-Summer Collection 2008 sales period ends<br />
11 Fall-Winter 2008 Idea Book & Catalog sales period<br />
begins at noon (mt)<br />
12 September 2008 Stampin’ <strong>Success</strong> now online
artshow<br />
artshow<br />
Celebrate Dad<br />
pop, dad, old man, daddy, father—all names we give to one of the most important men in our<br />
lives. Whether we’re still blessed to enjoy his presence or reminisce over cherished memories of the<br />
past, we can all find reason to celebrate our dads this Father’s Day.<br />
Let him know you think of him fondly with this very masculine mini album. With colors just for him<br />
that pop (pun intended!) from the page, he’ll truly know you care. Carefully placed photos let him<br />
see those he loves most of all at a quick glance. By adding a pocket we’ve made this more than just an<br />
album—it’s now a way for each child to share their personal feelings on uniquely designed bookmarks<br />
that tuck neatly into the pocket.<br />
Dad will be thrilled this Father’s Day to receive a mini album from you. Simply add your own unique<br />
colors, photos, and design—he’ll definitely feel celebrated!<br />
For a complete list of Stampin’ Supplies and step-by-step instructions, visit our June Online Extras.<br />
june 2008 5
stampin’technique<br />
Iris folding<br />
Use this unique paper craft to add an “iris-istible” new look to your projects<br />
Supplies You’ll Need<br />
• Card stock<br />
• Designer Series paper<br />
• Sticky Strip or 2-Way Glue Pen<br />
• Bone folder<br />
• Paper cutter<br />
• Paper snips<br />
figure 1<br />
one of the neatest things<br />
about paper crafts is the<br />
inexhaustible possibilities they<br />
present—but it’s not always easy<br />
to come up with new ideas on<br />
our own! Like you, we’re always<br />
thrilled to find a fantastic new<br />
technique that can jump-start<br />
our creative engines and get us<br />
cruising at a fun speed again.<br />
This paper craft involves<br />
arranging strips of folded papers<br />
in a pattern to create alluring<br />
layers and designs. It’s called iris<br />
folding because the focal point<br />
of the finished design resembles<br />
the iris of an eye or camera—and<br />
indeed, it’s hard to take your<br />
eyes off of these pieces.<br />
Our Thanks for All You Do and<br />
For You cards illustrate basic<br />
square and circle patterns for<br />
iris folding using a single color<br />
of printed paper. But, even at<br />
its simplest, iris folding gives<br />
these cards striking texture<br />
and dimension.<br />
3 Trim colored or printed paper<br />
into approximately 32 strips,<br />
1" x 3". The number of paper<br />
strips you’ll need depends on<br />
how many layers you want in<br />
your iris. Fold each strip in<br />
half lengthwise.<br />
4 Position the first strip over<br />
the #1 space at the bottom of<br />
the pattern. The folded edge<br />
should face the inside of the<br />
pattern, and line up exactly<br />
with the top diagonal line<br />
(see figure 1).<br />
5 Adhere the bottom of the<br />
strip to the edge of the frame.<br />
(Adhere your strips to the<br />
frame or to another strip, not<br />
to the pattern.)<br />
6 Continue positioning and<br />
adhering strips in numerical<br />
order counterclockwise<br />
around the pattern (see<br />
figure 2).<br />
Tip: You may want to trim the<br />
length of your paper strips as<br />
the square becomes smaller.<br />
event for it? It will trigger new<br />
interest and creativity in your<br />
events. Customers will keep<br />
turning to you for fresh ideas—<br />
and that means increased sales.<br />
Teaching iris folding provides<br />
the opportunity to upsell<br />
any of the following products,<br />
all of which we used on projects<br />
in this article:<br />
• Greetings stamp sets<br />
• On Board chipboard<br />
• Rub-Ons<br />
• Coluzzle® Cutting System<br />
• Large punches<br />
How you use your creation<br />
on a card or scrapbook<br />
page—and the accents<br />
or embellishments you<br />
choose—will enhance its<br />
originality and make your<br />
project worthy of the<br />
highest praise. For example,<br />
our For You card showcases<br />
figure 2<br />
figure 3<br />
Here’s how you do it<br />
1 Trace or photocopy the square<br />
or circle pattern provided (see<br />
page 7) onto a piece of paper.<br />
2 Create a frame from a separate<br />
piece of paper or card stock by<br />
cutting a square or circle the<br />
same size as your pattern out<br />
of the center. Lay this frame<br />
over the pattern and secure<br />
lightly with tape.<br />
Occasionally lift your frame<br />
off the pattern and turn over<br />
to see how your iris is coming<br />
along. You’ll be amazed that this<br />
simple process can produce such<br />
stunning results!<br />
Make It Your Business<br />
You’ll definitely want to try<br />
out this fun paper craft—and<br />
introduce it to your customers.<br />
Why not even plan a class or<br />
an On Board Lots of Letters<br />
monogram—a small detail<br />
that makes a big difference.<br />
Likewise, the scallop<br />
edging on the frame for<br />
our Thanks for All You Do<br />
card complements the iris<br />
folding (see figure 3) and<br />
adds a certain feminine<br />
charm to the card that<br />
would be missing without it.<br />
6 www.stampinup.com
stampin’technique<br />
thanks for all you do card<br />
Absolutely Fabulous set; Certainly Celery, Rose Red, Whisper White, and<br />
Wild Wasabi textured card stock; Bali Breeze Designer Series paper; On<br />
Board Ginormous Pieces; Wild Wasabi Classic Stampin’ Pad®; Pretties Kit;<br />
5-Petal Flower punch<br />
live every moment framed photo<br />
Garden Whimsy set; Whisper White card stock; Whisper White and Wild<br />
Wasabi textured card stock; Certainly Celery Classic Stampin’ Pad; Certainly<br />
Celery wide grosgrain ribbon; Fresh Favorites II buttons; Anchored Rub-<br />
Ons; Stampin’ Dimensionals®<br />
for you card (3" x 3")<br />
Happy Everything set; Whisper White card stock; Rose Red, Whisper<br />
White, and Wild Wasabi textured card stock; Certainly Celery Prints<br />
Designer Series paper; On Board Lots of Letters; Wild Wasabi Classic<br />
Stampin’ Pad; Coluzzle Cutting System; Crafters’ Tool Kit; sanding blocks<br />
#1<br />
Our super cute Live Every Moment framed photo uses<br />
a rather captivating variation of iris folding called photo<br />
folding. Using a similar technique as iris folding, photo<br />
folding gives dimension and life to favorite memories<br />
on scrapbook pages, birth announcements, and in<br />
frames alike! Check out our Online Extras to learn how<br />
to do it.<br />
Enlarge 60% to recreate our For You card<br />
or use any size you want.<br />
Enlarge 100% to recreate our Thanks for<br />
All You Do card or use any size you want.<br />
june 2008 7
stampin'memories<br />
Scrapboo√ing<br />
Show your customers how they can create<br />
beautiful pages in minutes with Stampin’ <strong>Up</strong>!’s<br />
exclusive Simply Scrappin’ kits<br />
made simple<br />
in a perfect world, stamping<br />
scrapbookers would have hours of free time<br />
to pull out their stamps, inks, and card<br />
stock, organize their accessories, and create<br />
masterful pages that generations to come<br />
would treasure forever. We don’t live in a<br />
perfect world, however, so you and your<br />
customers have to squeeze scrapbooking in<br />
between cooking and cleaning, chauffeuring<br />
and chaperoning, managing and juggling.<br />
Thank heaven for our Simply Scrappin’®<br />
kits, which make it possible to spend only<br />
a few minutes scrapbooking and still create<br />
beautiful pages that become family treasures.<br />
You can share the many benefits of Simply<br />
Scrappin’ kits with your customers in a<br />
variety of ways—one is to demonstrate a<br />
page during a workshop, so your guests can<br />
see for themselves how quickly they can<br />
create darling pages.<br />
Before you begin your demonstration, direct<br />
your guests to pages 172–175 in the Spring-<br />
Summer Collection 2008 so they can check out<br />
the available kits. That way, they can envision<br />
which kits they would most likely use as they<br />
watch you create your page. If possible, pass<br />
around a complete Simply Scrappin’ kit, so<br />
guests can see and feel the contents of the<br />
kit. This will help spark their creative ideas.<br />
Our larger Where There Is Love page makes<br />
the most of the card stock, Designer Series<br />
papers, and self-adhesive die cuts included<br />
in each kit. And we included a stamped<br />
background so you can point out during<br />
Wild<br />
Wasabi<br />
Real<br />
Red<br />
Pumpkin<br />
Pie<br />
Bashful<br />
Blue<br />
110587 Summer Days $19.95<br />
See Spring-Summer Collection 2008 page 175 for this kit.<br />
8 www.stampinup.com
stampin'memories<br />
Visit the Tempƒate Library this month for all the ƒayouts featured here!<br />
your demonstration that each kit has a<br />
coordinating stamp set, which offers a<br />
scrapbooker more creative possibilities.<br />
Also as you demonstrate, point out that<br />
each element in a kit coordinates with the<br />
others, so regardless of which die cut or<br />
strip of Designer Series paper they choose to<br />
accent which sheet of card stock, it will look<br />
great! This means those who are in a creative<br />
quandary can combine elements without<br />
having to worry, and those who are feeling<br />
creatively ambitious have plenty of options.<br />
Another way to share Simply Scrappin’ kits<br />
with your customers is in scrapbooking classes<br />
or camps. Everyone loves the wonderful feeling<br />
of finishing an entire album!<br />
With Simply Scrappin’ kits, you can plan<br />
a stamp camp where your guests can<br />
complete at least a dozen pages for a 6" x 6"<br />
album—that’s a fantastic start on a project<br />
that they’ll be excited to continue once they<br />
return home. The 8 sheets of textured card<br />
stock can be cut down into 32 total album<br />
pages. The Designer Series paper and die<br />
cuts can be used as accents on each page. By<br />
making a few simple adjustments (moving<br />
an accent from one corner to another or<br />
substituting one Designer Series paper for<br />
another), you can come up with different<br />
layouts for each page of your album. You<br />
might also want to check out our scrap<br />
maps in the Template Library on the<br />
Demonstrator Web Site under Show & Tell<br />
for even more page layout ideas.<br />
Whether you choose to demonstrate Simply<br />
Scrappin’ kits during a workshop or plan a<br />
stamp camp around them—or both—the<br />
most important thing is that you’ll show<br />
your customers how simple and stress-free<br />
scrapbooking can be. If they can complete<br />
a dozen pages in a couple of hours, they’ll<br />
return home eager to do more. Encourage<br />
them to add additional pages to the albums<br />
they create during your stamp camp, or<br />
show them how they can use the same basic<br />
layouts for larger (8-1/2" x 11" or 12" x 12")<br />
pages. The secret is to get a Simply Scrappin’<br />
kit in their hands—their own creativity and<br />
love for scrapbooking will do the rest!<br />
where there is love page (12" x 12")<br />
Stitched Exotics set; Summer Days Simply Scrappin’;<br />
VersaMark® pad; Basic Black Stampin’ Write® journaler;<br />
Urban West Rub-Ons; Stampin’ Dimensionals<br />
where there is love page (6" x 6")<br />
Summer Days Simply Scrappin’; Stampin’ Dimensionals<br />
lazy summer days page (6" x 6")<br />
Summer Days Simply Scrappin’; Stampin’ Dimensionals<br />
flower page (6" x 6")<br />
Summer Days Simply Scrappin’; Stampin’ Dimensionals<br />
Scrapbooking kits are increasingly<br />
popular in today’s world, primarily<br />
because they save busy crafters<br />
significant amounts of time and stress.<br />
When coordinating scrapbooking<br />
products are sold in a package, people<br />
can sit down and create terrific-looking<br />
pages in mere minutes, making<br />
scrapbooking both enjoyable and<br />
incredibly rewarding.<br />
Each Simply Scrappin’ kit contains<br />
the following:<br />
• eight sheets of textured 12" x 12"<br />
card stock<br />
• six sheets of coordinating Designer<br />
Series paper<br />
• six 6" x 12" sheets of self-adhesive<br />
die cuts<br />
That’s plenty of paper to create at least<br />
eight full 12" x 12" pages, and many<br />
more if you cut them down to<br />
8-1/2" x 11" or 6" x 6" pages.<br />
june 2008 9
3 4 5 6 7<br />
stampin’sales<br />
10 11 12 13 14<br />
6 17 18 19 20 21<br />
bookto<br />
3 24 25 26 27<br />
build<br />
28<br />
0 30<br />
Increase bookings and build your Stampin’ <strong>Up</strong>! business<br />
you probably know that workshops are fundamental to your Stampin’ <strong>Up</strong>! business because they provide<br />
an ideal format for you to build relationships with new customers, potential hostesses, and prospective<br />
recruits. Consistently holding workshops and sharing your excitement about Stampin’ <strong>Up</strong>! products and the<br />
business opportunity at those workshops is the best way to build a successful, profitable business. Luckily,<br />
there are many things you can say and do during your workshops to increase booking opportunities.<br />
Use Timing to Your Advantage<br />
With all of the excellent<br />
promotions Stampin’ <strong>Up</strong>!<br />
offers, timing is your friend.<br />
Use Stampin’ <strong>Up</strong>! promotions<br />
to get bookings within a certain<br />
time period. When a customer<br />
is interested in a promotion,<br />
encourage her to book a<br />
workshop before the promotion<br />
ends. Remind her that the<br />
promotion can motivate her<br />
friends to come to her workshop<br />
and increase sales.<br />
Incentives and Hostess<br />
Coaching If you are having a<br />
hard time getting bookings,<br />
consider offering a small<br />
incentive. If you choose to give<br />
your hostess the projects you<br />
demonstrate at the workshop,<br />
present them to her during<br />
your workshop as a thank-you<br />
gift. As you do so, consider<br />
saying something along these<br />
lines: “We’d like to thank Mary<br />
for hosting our party tonight.<br />
As a small thank-you, Mary gets<br />
to keep all of the cute projects<br />
I’ve demonstrated.” This shows<br />
customers just one more benefit<br />
of hosting a workshop.<br />
You might also consider giving<br />
customers who book a workshop<br />
a coupon or promise of an<br />
incentive they can redeem when<br />
they hold their workshop.<br />
Incentive stamps or small<br />
handmade gifts are great for this.<br />
Another way to increase<br />
bookings is to coach your<br />
hostess to get bookings for you<br />
and offer incentives for doing so.<br />
For example, tell your hostess<br />
if she gets a friend to book a<br />
workshop with you, you’ll give<br />
her a ten percent discount at her<br />
friend’s workshop. Your hostess<br />
receives an incentive, and her<br />
friend already has a guest for<br />
her workshop!<br />
Use Booking Statements<br />
Booking statements are easy<br />
to fit into your workshop and<br />
can really pay off. Below are<br />
some suggested times to use<br />
booking statements.<br />
Take a moment to go over the<br />
hostess benefits. Be sure to<br />
point out the exclusive hostess<br />
products. As you share, say<br />
something like, “Our hostess,<br />
10<br />
www.stampinup.com
stampin’sales<br />
Thank-You card<br />
Purchase our On Board Hearts &<br />
Stars bulk assortment (item<br />
112036) and make hand-stamped<br />
thank-you cards for all of your<br />
hostesses. This card is also a great<br />
Make & Take for your workshops.<br />
Thank-You box<br />
Put a treat or incentive stamp<br />
inside this box and present it to<br />
customers when they book or<br />
to a hostess at her workshop.<br />
For more creative thank-you ideas,<br />
see “The Elegant Art of Gratitude”<br />
on page 12.<br />
BOOK TO BUILD<br />
CHECKLIST<br />
Use the helpful ideas in this<br />
article to get bookings during<br />
your next workshop!<br />
Point out Stampin’ <strong>Up</strong>!<br />
promotions and encourage<br />
workshop attendees<br />
to book their own<br />
workshop during the<br />
promotion period.<br />
Give small thank-you gifts,<br />
such as the projects you<br />
make, to your hostess<br />
throughout the workshop.<br />
Offer an incentive to your<br />
hostess if one of her<br />
workshop guests books<br />
their own workshop.<br />
Take a moment during your<br />
workshop to review the<br />
hostess benefits table.<br />
Michelle, receives some excellent<br />
hostess benefits, including a free<br />
catalog, free merchandise based on<br />
tonight’s sales, and free exclusive<br />
hostess products shown at the front<br />
of the catalog. The only way you can<br />
earn them is by hosting a workshop,<br />
and these particular products are<br />
only available through the current<br />
catalog period, and then they’re<br />
gone forever. If you see something<br />
you can’t resist or just want to earn<br />
free products, talk to me after the<br />
workshop and we’ll set a date for<br />
you to host your own workshop.”<br />
Another prime moment to<br />
encourage bookings is when<br />
customers ask questions about<br />
specific stamping techniques or<br />
products. Turn these questions<br />
into booking opportunities.<br />
For example, if a customer<br />
asks about watercoloring or<br />
a watercolor product, say<br />
something like, “Watercoloring is<br />
so simple and fun! Book a special<br />
watercoloring workshop, and I’ll<br />
be able to spend some one-on-one<br />
time watercoloring with you and<br />
your guests.”<br />
Finally, as guests fill out their<br />
order forms, invite each one<br />
to host a workshop. This is<br />
a wonderful time to tailor<br />
your message to individual<br />
customers. One example might<br />
be a guest who has a large wish<br />
list. Present the opportunity to<br />
her by saying, “I notice you’ve got<br />
your eye on a lot of products. If you<br />
host your own workshop, you can<br />
earn some of them for free. If that’s<br />
something you’re interested in, I<br />
have the following dates available.”<br />
Remind each customer that her<br />
night of stamping with friends<br />
will be just as fun as the one she<br />
just experienced!<br />
When you present the idea of<br />
hosting a workshop in a variety<br />
of ways, guests are more likely<br />
to consider the opportunity. Set<br />
a goal to leave every workshop<br />
with at least two bookings—one<br />
to keep your business consistent<br />
and one to build it.<br />
thank-you box<br />
Perfect Timing set; Bashful Blue, Old<br />
Olive, So Saffron, and Very Vanilla card<br />
stock; On Board Blossoms & Basics;<br />
Bashful Blue and Old Olive Stampin’<br />
Write markers; linen thread; Clear<br />
buttons; Stampin’ Dimensionals; 1/16”<br />
Circle, 1-1/4” Circle, and 1-3/8” Circle<br />
punches; sanding blocks; chipboard box<br />
thank-you card<br />
Block Party set; Bashful Blue, Old<br />
Olive, So Saffron, and Very Vanilla card<br />
stock; On Board Simon <strong>Up</strong>per; Old<br />
Olive Classic Stampin’ Pad; Apricot<br />
Appeal narrow grosgrain ribbon; Earth<br />
Elements® & Neutrals buttons; Stampin’<br />
Dimensionals; Crafters’ Tool Kit; sanding<br />
blocks; crochet thread<br />
Find two opportunities<br />
to make bookings<br />
statements during your<br />
workshop based on<br />
customers’ interests.<br />
Don’t forget about the<br />
Hostess Brochure—<br />
what an easy way to let<br />
all your customers know<br />
about the fun of hosting<br />
their own workshops.<br />
june 2008 11
stampin’style<br />
T¬e Eƒegant Art<br />
of Gratitude<br />
“Appreciation can make a day, even change a life. Your<br />
willingness to put it into words is all that is necessary.”<br />
--Margaret Cousins<br />
Written by<br />
Lara Penrod<br />
Art by<br />
Nicole McCraley<br />
i recently received in the mail a<br />
thank-you for attending a wedding. It was<br />
a preprinted postcard with a computer<br />
generated address on the front and a fillin-the-blank<br />
for the present I’d given on<br />
the back. I give the sender full points for<br />
knowing the importance of thanking her<br />
guests and for sending a thank-you note in a<br />
timely fashion. But I couldn’t help but think<br />
of the futility that has become Emily Post’s<br />
life work. (Or wonder what would have been<br />
written in that blank space if I’d failed to<br />
produce the expected gift!)<br />
In this age of e-mail, instant messaging,<br />
and texting, it seems the act of expressing<br />
gratitude is becoming a lost art. We have<br />
more and more ways to communicate with<br />
each other, yet more and more women report<br />
feeling less and less connected with each other.<br />
Now don’t get me wrong—I like all of my<br />
modern conveniences just as well as the<br />
next gal. I believe in living the Rachael Ray<br />
motto: “Take the help where you can get<br />
it.” Salad out of a sack? You bet! Shopping<br />
for clothes online? The only way to go! But<br />
when it comes to expressing gratitude, a<br />
text message with half the letters missing<br />
and punctuation for a smiley face just isn’t<br />
very elegant. And I can’t help but believe<br />
that our need for connection seems greater<br />
now because, as a society, we’re moving<br />
further and further away from formal<br />
communication.<br />
In the early 1900s, it was the custom to write<br />
a short thank-you note to anyone who had you<br />
over for dinner or for a short visit. These short<br />
thank-you notes became known as bread and<br />
butter notes. Many believed these notes should<br />
be written before you went to bed that night!<br />
12 www.stampinup.com
stampin’style<br />
Visit this month’s Online Extras for project instructions<br />
alacard<br />
template<br />
I’m not advocating the strict enforcement<br />
of writing thank-you notes before you turn<br />
in for the night (I’d be the first penalized for<br />
failure to comply). But a written expression of<br />
thanks still means so much to the recipient.<br />
A quick note to friends thanking them for<br />
a great meal, a fun night you had together,<br />
or just for being the people in your life is as<br />
unexpected these days as it is appreciated.<br />
An expression of gratitude can be quick. It<br />
will take a few more minutes than a text<br />
message, but not so much more that you’ll<br />
lose an entire day writing it. Notice that<br />
part of the definition of a bread and butter<br />
note is that it’s short! I like to picture bread<br />
and butter notes looking something like our<br />
3"x 3" cards pictured here. It wouldn’t take<br />
long to fill up this card with a short thank<br />
you! And what a charming card to get. The<br />
recipient is going to think you spent far more<br />
time on it than you did.<br />
And that’s my point: You don’t have to spend<br />
a lot of time to get a big result. We all love<br />
to get flowers—even if they come from the<br />
supermarket. Hey, nothing wrong with that!<br />
It’s quick, it’s affordable, and it’s on our way<br />
home. With the addition of a quick note of<br />
thanks directly on the vase itself (courtesy<br />
of a Rub-On), you don’t even have to include<br />
a card.<br />
But if no gift can leave your hands without<br />
a card, that can be just as quick and just as<br />
easy, and just as elegant. It’s amazing how<br />
just a couple of well-placed pieces of paper<br />
can look so amazing.<br />
I’d never discourage anyone from going the<br />
extra mile, even if the situation doesn’t<br />
demand it. Especially if the situation doesn’t<br />
demand it! A friend recently wowed me<br />
with a box of chocolate frogs. Now that’s<br />
unexpected—and far more exciting to<br />
receive for an invitation to dinner than the<br />
everyday bottle of wine! (And since I know<br />
you’re wondering, we bought our chocolate<br />
frogs at V Chocolate in Salt Lake City, Utah.)<br />
There are times when a quick “thanks” via<br />
e-mail, instant messaging, or text message<br />
does the job. But there is something far<br />
more elegant in a hand-written expression<br />
of gratitude. But you already know that. You<br />
know the importance of a heartfelt thank<br />
you, and you believe in the power of a card,<br />
a personalized vase, or an elegantly wrapped<br />
box of chocolates. That’s why you spend so<br />
much time sharing the things you love with<br />
those around you. Thank you for keeping the<br />
art of gratitude alive.<br />
pretties thank-you card<br />
Lovely Labels set; Always Artichoke, So Saffron, and<br />
Very Vanilla card stock; Le Jardin Designer Series paper;<br />
Bashful Blue Classic Stampin’ Pad; Pretties Kit; Stampin’<br />
Dimensionals; 1-1/4” Circle and 1-3/8” Circle punches<br />
le jardin chocolate box<br />
Lovely Labels set; Very Vanilla card stock; Le Jardin<br />
Designer Series paper; So Saffron Classic Stampin’ Pad;<br />
Very Vanilla wide grosgrain ribbon; Natural hemp twine;<br />
Scallop Circle, 1/8” Circle, and 1-3/8” Circle punches<br />
i’m glad there is you vase<br />
Cherished Memories Rub-Ons; vase<br />
elegant thank-you notecard (3" x 3")<br />
Elegante Notes set; River Rock, So Saffron, and Very<br />
Vanilla card stock; Le Jardin Designer Series paper;<br />
River Rock Classic Stampin’ Pad; Beachfront Ribbon<br />
Originals®; Pretties Kit; Stampin’ Dimensionals; 1-3/8"<br />
Circle punch<br />
elegant notecard box<br />
Beachfront Ribbon Originals; Pretties Kit; papiermâché<br />
box<br />
classy thank-you card (3-5/8" x 5-1/2")<br />
Bursting with Joy set; River Rock and Very Vanilla card<br />
stock; River Rock Classic Stampin’ Pad; Beachfront<br />
Ribbon Originals; Stampin’ Dimensionals; Crafters’ Tool<br />
Kit; 3/16" Corner Rounder punch<br />
june 2008 13
stampin’business<br />
Easy<br />
Booking<br />
Activities<br />
Four simple things you can<br />
do now to get customers<br />
to host workshops<br />
lack of workshops got you down? We all have periods of ups and downs. Sometimes getting a<br />
customer to be a hostess is super easy . . . and other times it’s harder than we’d like. We’ve compiled<br />
four of our favorite ‘get up and go’ activities for giving customers a nudge toward hosting workshops.<br />
1 Host Your Own Workshop You<br />
love earning free product too, so<br />
why not be the hostess? Invite your<br />
friends, family, past customers, and<br />
previous hostesses over for a night<br />
of snacks and Make & Takes. Let<br />
them try out some stamp sets they<br />
may not have seen yet. Pass around<br />
copies of the catalog for them to look<br />
at and point out your favorite projects that they might want to see<br />
demonstrated. By the end of the night, there’s a good chance you’ll<br />
have booked a follow-up workshop.<br />
2 Reconnect with Past Hostesses<br />
and Customers Dust off that<br />
address book or boot up your<br />
computer and send a hand-stamped<br />
invitation to your past hostesses!<br />
You may also want to send<br />
invitations to customers who have<br />
made multiple or large purchases<br />
in the past. Invite the recipient<br />
to host a workshop and let her know about some new techniques<br />
you’ve learned or projects you’d love to show her. Encourage her to<br />
give you a call and remind her that summer is a great time to get<br />
back into a hobby that you know she enjoys. Don’t forget that you<br />
can save some valuable time by printing address labels using the<br />
Customer Manager.<br />
Give your customers an added incentive to book with<br />
our June promotion! Find out more on page 20.<br />
3 Download the Latest Promotion<br />
Flyer or Send an E-card E-mail<br />
is the fastest way to get in touch<br />
with your customer base. Take<br />
15 minutes and e-mail the latest<br />
promotion flyer to your customer<br />
base, or pull together an e-card on<br />
your DBWS. Invite them to host a<br />
workshop during the promotional<br />
period. For more ideas on using limited time offers in your business,<br />
read the “Available for a Limited Time Only” article in this issue of<br />
Stampin’ <strong>Success</strong> (page 17).<br />
4 Hold a Themed Event Step away<br />
from the ordinary workshop and<br />
invite your customers to a themed<br />
event! We recommend charging a<br />
registration fee for these events;<br />
you might even want to include the<br />
cost of a stamp set that you’ll be<br />
using. Here are two ideas to get your<br />
imagination running:<br />
• Stamping Slumber Party: Whether everyone sleeps over or not,<br />
late night stamping in one’s pajamas is always a giggly good time.<br />
Consider making your own pizzas for a healthier take on traditional<br />
slumber party food. Pick a funny set to keep the giggles going, such<br />
as those from pages 61-66 of our Spring-Summer Collection 2008.<br />
• Stamping & Tea Party: Invite the ladies over for an elegant<br />
afternoon of sandwiches and stamping. Stamp a stack of bread<br />
and butter notes to help your customers express their gratitude<br />
with ladylike style (see “The Elegant Art of Gratitude” on page 12<br />
for project ideas). Consider including Bursting with Joy or Lovely<br />
Labels (both on page 152) in the registration fee.<br />
14 www.stampinup.com
stampin’business<br />
coach<br />
workshopsCustomers<br />
your<br />
how to counter common excuses<br />
for not booking<br />
Look for more great advice on bookings from the<br />
Advisory Board, including a script from Lynsay<br />
Mahon, in this month’s Online Extras!<br />
still hearing excuses not<br />
to book from your potential<br />
hostesses? We asked a few of<br />
our Advisory Board members to<br />
share with us the excuses they<br />
hear most often and how they<br />
respond to their customers.<br />
Meg Loven: The most common<br />
excuse I hear at a workshop<br />
is that the potential hostess<br />
doesn’t have her calendar so<br />
she can’t pick a date. I find<br />
though that a potential hostess<br />
is much more likely to actually<br />
book if she sets a date before<br />
leaving the party. If I have to<br />
call her later, she’ll have already<br />
forgotten how much fun she<br />
was having and why she wanted<br />
to book. So to be sure that I<br />
have the booking before<br />
leaving my workshop, I tell<br />
the potential hostess, “That’s<br />
okay—why don’t we look at<br />
what dates I have free and we<br />
can pencil something in?<br />
Then I’ll call you tomorrow<br />
and confirm the date. Does<br />
that sound good?” Usually she<br />
is happy to pick a possible date<br />
and usually it fits her schedule.<br />
Cheryl Flynn: One of the<br />
excuses I hear most often is<br />
“My house is too small.” When<br />
a customer tells me this, I let<br />
them know they can have the<br />
workshop at my house. I also<br />
ask them if they have a family<br />
member that may have a bigger<br />
place to have the workshop.<br />
Tami White: One common excuse<br />
is that the potential hostess<br />
doesn’t think she knows anyone<br />
who would come to her party. If<br />
we are in a workshop, we can get<br />
the crowd excited to support the<br />
potential hostess. Next, I’ll go<br />
over the 40 Guests in 4 Minutes<br />
worksheet with her. Hostesses<br />
are often surprised when they<br />
start remembering people they<br />
didn’t think to invite.<br />
New stampers are often nervous<br />
that their friends won’t show up,<br />
or be interested. This is where<br />
hostess coaching is important.<br />
When a hostess shares her<br />
excitement and extends a<br />
personal invitation (either in<br />
person or over the phone), it's<br />
really tough to say no. It’s much<br />
easier to say no to an e-mail<br />
or a postcard. I make sure to<br />
really stress the importance of<br />
that personal touch and what<br />
a difference it will make in not<br />
only the guest’s interest but also<br />
her attendance.<br />
Barb Brimhall: I have found<br />
that my biggest challenge for<br />
bookings is overcoming my<br />
potential hostess’ fear that<br />
none of her friends will attend.<br />
To help combat this fear, when<br />
talking about bookings I assure a<br />
potential hostess that it doesn’t<br />
matter how many friends she<br />
has attend—we’ll have fun no<br />
matter what!<br />
I’ve found it easier to get<br />
bookings if I understand the<br />
lifestyle of my hostess and then<br />
we work as a team to offer an<br />
event that will entice her friends<br />
to attend. For about 90 percent<br />
of my hostesses, that means<br />
offering a quick, fun, and easy<br />
stamping opportunity for her<br />
friends (something they can fit<br />
easily into their busy lives).<br />
For example, if my hostess<br />
works during the day, but wants<br />
to invite friends from different<br />
areas of her life, I encourage<br />
her to have a workshop as soon<br />
as possible after work—if they<br />
go home, we’ll lose at least<br />
half of them.<br />
During the hostess coaching, I<br />
work with her on the following:<br />
• Let her friends know that<br />
we will start stamping right<br />
on time.<br />
• We will work as a team to<br />
make sure the workshop only<br />
lasts 90 minutes from start<br />
to finish—and let her friends<br />
know that too.<br />
• There's no need for a meal, just<br />
light refreshments. If she feels<br />
she has to do a meal, then have it<br />
from 5:30 to 6:30 pm; we'll start<br />
stamping right after they eat.<br />
june 2008 15
stampin’business<br />
change<br />
ThE Process of<br />
Apply it to your life!<br />
as you know, at Stampin’ <strong>Up</strong>!,<br />
one of our guiding principles<br />
is change. We understand that<br />
changes, even small ones, can<br />
help cultivate personal and<br />
professional growth. Setting<br />
goals and embracing change can<br />
also be instrumental to a healthy<br />
and thriving business.<br />
Any time is a good time for<br />
looking at what is working<br />
well in your life, eliminating<br />
what’s not, and evaluating<br />
what changes you would like to<br />
make in the future. The start<br />
of a new Stampin’ <strong>Up</strong>! year is a<br />
particularly good time to look<br />
at your business and determine<br />
where implementing change may<br />
be beneficial. Change stimulates<br />
progress, creativity, innovation,<br />
and empowerment, and is a key<br />
to improvement and success, no<br />
matter how you define success.<br />
Change can be both exciting and<br />
stressful, and introducing change<br />
into our lives can be challenging<br />
even when we know the benefits<br />
may be great. When we view<br />
change as an opportunity, rather<br />
than a threat to our everyday<br />
lives, it becomes a valuable way<br />
to achieve new goals.<br />
Change is a process that involves<br />
taking steps and setting goals.<br />
Review, reflect, and evaluate.<br />
Look at what you are currently<br />
doing and what you have done<br />
in the past year. Identify things<br />
that worked well and things that<br />
you can improve.<br />
Determine what you would<br />
like to accomplish this<br />
year. Ask yourself, “What do<br />
I want to accomplish during<br />
the next Stampin’ <strong>Up</strong>! year?”<br />
For example, if you are a<br />
hobbyist, perhaps you would<br />
like more financial support<br />
from customers to help you<br />
stay active. If you are a business<br />
builder, perhaps you would like<br />
to increase your volume rebate.<br />
Formalize your goals and<br />
record them. Remember<br />
to make sure your goals are<br />
personal, based on what works<br />
for your life. Write down your<br />
goals and keep them where<br />
you will see them frequently.<br />
Make sure to give yourself<br />
a specific timeframe for<br />
completing them so you can<br />
monitor your progress.<br />
Create a plan of action.<br />
<strong>Success</strong> requires a strategy.<br />
Determine what you want to<br />
accomplish, and plan a way<br />
to do it! If you are a hobbyist<br />
who would like to increase your<br />
income, consider enhancing<br />
your current efforts by adding<br />
one more workshop per month<br />
or quarter to your calendar.<br />
You might also consider staying<br />
in closer contact with your<br />
customers and telling them<br />
about upcoming promotions<br />
that you or Stampin’ <strong>Up</strong>! may be<br />
offering. Or you can implement<br />
a new event, like a stamp camp<br />
or club, during the quarter.<br />
If you are a business builder<br />
who would like to increase<br />
your volume rebate, invest<br />
more time in coaching your<br />
hostesses. Help your hostesses<br />
increase their outside sales<br />
or draw more people to their<br />
workshops. Spend more time<br />
upselling at your events, and<br />
tailor unique promotions of<br />
your own to the specific<br />
interests of your customers.<br />
Put your action plan into<br />
place. Once you have defined<br />
your goals and a strategy for<br />
achieving them, put your plan<br />
into action and go for it! Be sure<br />
to tell someone about your goals<br />
(your downline, upline, friend,<br />
or spouse are all great choices),<br />
and ask them to check up on you<br />
and offer encouragement. This<br />
will help you to be accountable<br />
for accomplishing your goals.<br />
Evaluate your efforts. You<br />
can do this daily, weekly, or<br />
monthly. As you evaluate your<br />
efforts, ask yourself if you are<br />
well on your way to meeting<br />
your goal. Be sure to assess<br />
whether changing your action<br />
plan might produce better<br />
results. This will keep the<br />
process of change flowing, and<br />
also help you to succeed.<br />
Sometimes, initial attempts<br />
to change or improve our lives<br />
don’t work out in the given<br />
timeframe or the way we<br />
anticipate they will. If a goal<br />
does not appear to be paying off<br />
immediately, it may mean you<br />
need additional time to achieve<br />
it, so re-evaluating your goal<br />
regularly is vital.<br />
At Stampin’ <strong>Up</strong>!, our principles<br />
are the foundation from which<br />
we make all business decisions.<br />
We will continue to change,<br />
improve, and grow our business<br />
with the goal of helping you to<br />
grow yours, and we invite you<br />
to do the same. We encourage<br />
you to evaluate your business<br />
and determine areas in which<br />
you can enhance what you are<br />
currently doing. Make goals<br />
and set realistic timeframes to<br />
achieve them, and let us know<br />
about your successes!<br />
Spring-Summer Collection 2008 page 98 • A Tree For All Seasons • 102744 • $12.95<br />
16 www.stampinup.com
marketplace<br />
Available for a<br />
Limited-time product offers are an easy<br />
way to increase your sales<br />
LIMITED<br />
TIME<br />
only<br />
there’s something about not<br />
wanting to miss an opportunity<br />
that makes people act. For<br />
example, if you love Hallmark®<br />
Christmas ornaments, you know<br />
that there are only certain times<br />
that you can buy them, so when<br />
you see one you want, you don’t<br />
wait—you buy it before the<br />
opportunity is gone. Or if you’re<br />
a fan of classic Disney® animated<br />
movies, you know that they<br />
“disappear” every few years, so<br />
if you want a copy of The Jungle<br />
Book, you buy it when you see it.<br />
Limited-time offers are great<br />
sales boosters. They motivate<br />
customers to purchase products<br />
that they’ve been waiting to buy.<br />
And in some cases, the customers<br />
may not even realize how much<br />
they want a product until they<br />
realize it will be gone soon.<br />
long to help you motivate your<br />
customers to act quickly.<br />
Mini catalogs. Not all of<br />
the products from the mini<br />
catalogs make their way into<br />
the semiannual catalogs, so if<br />
your customers are interested<br />
in a particular product, you<br />
can encourage them to buy it<br />
during the mini sales period.<br />
Also, many of the stamps<br />
and accessories in the mini<br />
catalogs are seasonal products,<br />
which present another timely<br />
opportunity for sales. The<br />
Occasions Mini offers products<br />
and colors that are perfect<br />
for springtime and summer<br />
projects, and the Holiday Mini<br />
offers products for creating<br />
winter holiday projects. Seasonal<br />
products put customers in the<br />
mood to create—and buy.<br />
time products? You can design<br />
workshops, classes, or stamp<br />
camps around those products.<br />
Make a few projects that use the<br />
limited-time products and show<br />
them to your hostesses and<br />
customers at your workshops,<br />
display them on your DBWS, or<br />
put them in your newsletter.<br />
“If you’d like to make any of these<br />
projects,” you can tell them,<br />
“you’ll want to schedule a<br />
workshop soon. These products are<br />
available only until , and<br />
after that it will be too late.”<br />
Make sure your customers are<br />
aware of limited-time product<br />
offers. They’ll thank you for<br />
giving them a chance to act<br />
before it’s too late. And you’ll<br />
love your increased sales.<br />
As a Stampin’ <strong>Up</strong>! demonstrator,<br />
you can use limited-time product<br />
offers to increase your sales.<br />
When you think of limited-time<br />
or limited-product offers, the<br />
first thing that comes to mind<br />
is probably Sale-A-Bration.<br />
Customers know that Sale-A-<br />
Bration products are available<br />
only for a short time, and they’re<br />
eager to get their hands on these<br />
sets. So, you have a wonderful<br />
opportunity for increased sales<br />
during Sale-A-Bration because<br />
customers make purchases<br />
during that time period in order<br />
to earn the free stamp sets.<br />
But Sale-A-Bration isn’t the<br />
only time you can use limitedtime<br />
or limited-product offers<br />
to increase your sales. Stampin’<br />
<strong>Up</strong>! has different offers all year<br />
Promotions. Some promotions<br />
offer special products (such<br />
as last year’s Palette O’ Prints<br />
promotion) that aren’t available<br />
in any catalog. Other promotions<br />
bundle products in a special<br />
way that offer an excellent<br />
value. These unique products<br />
and one-time-only product<br />
combinations can persuade<br />
customers to make a purchase.<br />
Retired list. You know how it<br />
works: stamp sets on the retired<br />
list are destined to disappear.<br />
When the retired list comes<br />
out, make sure your customers<br />
understand that it’s their last<br />
chance to buy those retiring sets<br />
before they are gone forever.<br />
How can you make sure your<br />
customers know about limited-<br />
Offer your customers a limited-time opportunity<br />
to get their hands on a fresh new product!<br />
Turn to page 20.<br />
june 2008 17
stampin’occasions<br />
Ssomething a little<br />
B<br />
blue<br />
Ah, June . . . the traditional month of weddings approaches like a kid on<br />
a waterslide—fast and more than a little bit out of control. Luckily for us, many<br />
of today’s brides eschew tradition and get married year-round. This means that<br />
there’s still plenty of time to pull together handmade projects for those oftenoverlooked<br />
(but much appreciated) details! Here’s how to get those details right.<br />
Save the Date Cute Save the Date cards can help a bride ensure<br />
that all her loved ones are at her wedding! These helpful cards are simple,<br />
informal announcements to let wedding guests know to keep the ceremony<br />
date open on their calendars. Brides send these cards typically 4-6 months<br />
in advance of the wedding. But if she’s having a destination wedding, one<br />
year advance notice is appropriate so her guests will have ample time to<br />
make travel arrangements.<br />
save the date notecard<br />
Pick a Petal and Please Come sets; Whisper White card stock; Bashful Blue textured card<br />
stock; White vellum paper; Chocolate Chip and More Mustard Classic Stampin’ Pads;<br />
Chocolate Chip and Old Olive Stampin’ Write markers; Silver brads; Coluzzle Cutting<br />
System; Three for You Punch Box; sewing machine and thread<br />
Because Save the Date cards are a fairly new phenomenon, there are a couple of points you’ll want to keep in mind when<br />
recommending these to your customers.<br />
• Let wedding guests know that the official invitation will follow.<br />
• Send Save the Date cards only to those guests you absolutely want to attend.<br />
• Not everyone who receives an invitation must receive a Save the Date card, but everyone who receives a Save the Date<br />
card must receive an invitation.<br />
• If you’re holding a destination wedding, let guests know your travel recommendations to help facilitate their planning.<br />
18<br />
www.stampinup.com
stampin’occasions<br />
Wedding Showers Helping the maid of honor plan the<br />
perfect wedding shower? Delightful invitations (done right) will set<br />
the tone. Wedding shower invitations should typically be sent six<br />
weeks before the shower, so that all her guests have enough notice<br />
to attend and bring a gift. In addition to the what, the who, and the<br />
where, your customer may also want to include R.S.V.P. information<br />
on her invitations.<br />
celebrate wedding shower invitation<br />
Pick a Petal and Please Come sets; More Mustard and Whisper White card stock;<br />
Bashful Blue and Old Olive textured card stock; Chocolate Chip and More Mustard<br />
Classic Stampin’ Pads; VersaMark pad; Chocolate Chip Stampin’ Write marker; Clear<br />
Stampin’ Emboss® powder; Earth Elements buttons; Stampin’ Dimensionals; 3/16"<br />
Corner Rounder punch; crochet thread<br />
A few etiquette notes can help your customer ensure that her<br />
shower is a success!<br />
• It’s traditionally polite only to invite those to the shower who<br />
are invited to the wedding or the wedding reception, aside from<br />
special circumstances such as a destination wedding or a shower<br />
specifically for coworkers.<br />
• Never invite the same guest to more than one shower.<br />
• The bridal shower invitation is the proper place to put wedding<br />
registry information, not on the wedding invitation itself.<br />
• A potential guest (such as the groom’s mother) may live too far<br />
away to attend the shower, but she should still be acknowledged<br />
with an invitation and a quick note. She’ll appreciate the thought!<br />
Thank You There are many times during the course of a<br />
wedding that require thank-you notes, and, as any bride can tell<br />
you, it’s a big deal! Stationery or handmade cards are essential when<br />
writing wedding thank-you notes—preprinted cards, form letters,<br />
and e-mail are all considered uncouth. She would consider your help<br />
in stamping lovely, handmade thank-you cards a welcome treat.<br />
much love thank-you card<br />
All in a Row set; Whisper White card stock; Bashful Blue and Old Olive textured card<br />
stock; Bashful Blue Classic Stampin’ Pad; Chocolate Chip and More Mustard Stampin’<br />
Write markers; Chocolate Chip wide grosgrain ribbon; Three for You Punch Box<br />
Here are a few tips to help the bride thank everyone on her long list.<br />
• Be sure to send notes and small gifts to anyone who hosted a party<br />
for you, ideally within two days of the party.<br />
• Personalize each note, and send individual notes to friends who<br />
contributed to a group gift.<br />
• Promptly acknowledge that you received shipped gifts with a phone<br />
call or an e-mail, and follow up with a written note.<br />
• Remember, anyone who hosted a party for you, such as a wedding<br />
shower, should receive a small gift in addition to a thank-you note.<br />
june 2008 19
Àlacard<br />
scrap<br />
happy<br />
for your<br />
FYI<br />
information<br />
It’s the freshest idea around: our brand-new Fresh Cut Notes<br />
and coordinating Fresh Cuts stamp set! From June 1–30, 2008, we’re<br />
having a special advance-purchase promotion on these fantastic<br />
products from our Fall-Winter 2008 Idea Book & Catalog. Even better:<br />
your hostesses can earn both brand-new products for free!<br />
Go online today for all of the details and projects you’ll need to use<br />
this promotion in your workshops and other events this month.<br />
You’ll find everything under Specials & Promotions.<br />
have you ever looked at your pile of card stock scraps and<br />
wondered what you were going to do with them? Let your scraps<br />
inspire you! We’ve come up with three fun exercises or ideas for<br />
using your scraps. Try one or all of them, and see how far your<br />
scraps go!<br />
1 Make messes. Take all of your scraps, shuffle them together,<br />
and dump them on the table. Before you touch anything,<br />
what do you see? Look at the pile for interesting color<br />
combinations and shapes. Write down anything you love, and<br />
try using one of these combinations in your next project. You<br />
could even use a few of those scraps!<br />
2 Pick a piece. Pick one scrap from your pile, and build a card<br />
around that piece. Don’t worry about creating a masterpiece;<br />
just concentrate on expressing your creativity. Once you get<br />
good at this exercise, try creating a card using only scraps.<br />
3 Build bundles. Organize your scraps into stacks by size or<br />
color. Once you’re organized, create small bundles you could<br />
give to customers as door prizes or incentives. What about<br />
creating precut pieces for projects from your scraps?<br />
So go ahead—make something exciting from your leftover card<br />
stock. It’s time to get scrap happy!<br />
just because card<br />
Text & Texture set; Not Quite Navy, Regal Rose, and Very Vanilla card stock; Not<br />
Quite Navy Classic Stampin’ Pad; Certainly Celery and Not Quite Navy Stampin’<br />
Write markers; Certainly Celery wide grosgrain ribbon; Silver brads; Stampin’<br />
Dimensionals; Boho Blossoms punch; staples<br />
Stamp Sets Available for One Year<br />
Many of you heard Shelli’s recent announcement on stamp set<br />
availability, and we want to make sure that all of you have the correct<br />
information. All semiannual catalog stamp sets (excluding hostess<br />
sets) will be available either in a catalog or on our dormant list for<br />
one year from their debut, which means you have at least one year<br />
to demonstrate new stamp sets. The retired list released at the end<br />
of each semiannual catalog period will only contain stamp sets that<br />
have been available for one year or longer. Please note: this does not<br />
include hostess sets or sets from mini catalogs, which will continue to<br />
be limited-time offers in order to help you encourage your customers<br />
to host workshops.<br />
So, for example, if you purchase a new stamp set from our Fall-<br />
Winter 2008 Idea Book & Catalog to demonstrate, you’ll be able to use<br />
that set in your workshops (and sell it to your customers) at the<br />
very least until the Fall 2009 catalog is released. It will not retire in<br />
January when the catalog sales period ends, regardless of whether or<br />
not it appears in the Spring-Summer 2009 Idea Book & Catalog.<br />
We hope this small change makes it easier for you to run your<br />
businesses and offer your customers all the creative ideas they’ve<br />
come to expect from you!<br />
Thanks for Your Comments<br />
Thanks to all of you who wrote in to tell us how much you enjoyed the<br />
April 2008 issue of Stampin’ <strong>Success</strong>. We love receiving your feedback<br />
and take it into consideration when we put together each issue of<br />
the magazine. We want to ensure that we’re providing you not only<br />
a valuable resource for your business, but also an entertaining and<br />
inspirational publication that you’ll have fun reading!<br />
Here is just one of the wonderful e-mails we’ve received about the<br />
April issue.<br />
You’ll find two other cards<br />
using our basic template on<br />
pages 12 and 22.<br />
I just had to send you guys a quick note to say how wonderful your<br />
April Stampin <strong>Success</strong> is! I love every issue, but this one has to be<br />
the best I've seen since I started as a hobby-demonstrator. The<br />
article on storage ideas was fabulous. I'm always curious about how<br />
others store their stamping supplies. Kelly had some wonderful<br />
ideas that I know I'll be copying.<br />
20 www.stampinup.com
makingbusinesssense<br />
And the scrapbook section was also great! Until this article, I was<br />
rather intimidated when thinking about scrapbooks. But now, with<br />
your article, I think I have enough confidence to try it.<br />
And the information about using the pastels has spurred me on<br />
too. I always forget about those little guys and all their possibilities.<br />
Thanks again for a great issue,<br />
Charlie Massey<br />
Rockwell, Texas<br />
Workshop of the Month<br />
june is full of traditional occasions to celebrate—and<br />
reasons for your customers to stamp! Between Father’s Day,<br />
summer vacations, weddings, and the ongoing art of simply<br />
saying “thanks” there are plenty of projects to keep them<br />
stamping all summer long. Encourage your customers to book a<br />
workshop this month with these fun, easy-to-create ideas from<br />
this month’s issue.<br />
Say Thanks Get your customers<br />
hooked on sending thank-you cards!<br />
Our Thank-You card features a bulk buy<br />
chipboard heart, so it’s super easy to<br />
demonstrate in a workshop or use as a<br />
Make & Take. Your customers are sure<br />
to love this summery card!<br />
Get Set for Summer Our Lazy<br />
Summer Days page is ideal for any<br />
summer-themed scrapbook party.<br />
Include the cost of our Summer<br />
Days Simply Scrappin’ kit in the<br />
cost of the stamp camp and your<br />
customers will be set to scrapbook<br />
their vacations! Don’t forget to point<br />
out the coordinating stamp set,<br />
Stitched Exotics.<br />
Use Every Piece Teach your<br />
customers an easy way to find<br />
creative inspiration: using scraps!<br />
This month’s À la Card template<br />
and Just Because card are perfect<br />
for those customers who love to save card stock scraps but don’t<br />
know what to do with them. Take them through the exercises on<br />
page 20, and then stamp this card!<br />
recruiting with<br />
the online IDA<br />
by now, you’ve probably heard quite a bit of buzz about<br />
the updated Demonstrator Business Web Site (DBWS).<br />
Between the e-cards and all of the fabulous project ideas,<br />
there’s no easier way to create an online presence for your<br />
business and connect with customers and hostesses. And<br />
with the online Independent Demonstrator Application<br />
(IDA), there’s no easier way to build your downline!<br />
If you have a DBWS, the online IDA is an easy way to sign up<br />
new recruits using the web. When a potential recruit visits<br />
your DBWS, all she has to do is click on Join Stampin’ <strong>Up</strong>! in<br />
the top navigation, and she’ll be taken to a page explaining<br />
the Stampin’ <strong>Up</strong>! opportunity. Then, if she’s interested, she<br />
can sign up right then by clicking on the link to the IDA.<br />
Of course, people can’t just sign up without your knowledge<br />
or input. You want to have a relationship with those<br />
customers wanting to become members of your downline.<br />
This is one of the reasons we’ve implemented a Recruiter<br />
Authorization password, which you can easily set up<br />
through the Demonstrator Web Site under My Business>My<br />
Profile>Edit My Profile. This password not only tells us that<br />
you’ve authorized a person to be in your downline, it lets our<br />
systems know to automatically populate your demonstrator<br />
information into your recruit’s IDA.<br />
When a potential recruit expresses interest in signing up,<br />
either at one of your events or during a one-on-one meeting<br />
between the two of you, you can simply give her your<br />
authorization and let her sign up at her convenience! So she’ll<br />
know what to expect, let your recruit know that the online<br />
IDA will take about 30 minutes to complete and that she’ll<br />
need to have a credit card handy to purchase her Starter Kit.<br />
“My new recruits loved that they could fill it out on their<br />
own,” says senior manager Dawn Rapsas from West Caldwell,<br />
New Jersey. “I believe for new recruits, the online form is<br />
much less intimidating than the actual hard copy of the IDA.<br />
I also pointed out the added benefit of quick access to the<br />
<strong>Stampin'</strong> <strong>Up</strong>! demonstrator area of the web site; that was<br />
very exciting for the girls.”<br />
Your new downline member will receive her demonstrator<br />
ID and a temporary password via e-mail shortly after she<br />
completes the online IDA. And, as Dawn mentioned, she’ll be<br />
able to jump right in and explore the Demonstrator Web Site.<br />
Remind her to change her password while she’s online! What’s<br />
more, you’ll receive credit for your new recruit that same day<br />
as long as the online IDA is submitted before 11:50 PM (MT).<br />
Take advantage of the ease and convenience the online IDA<br />
provides both you and your new recruits. You’ll love how<br />
simple it is to grow your Stampin’ <strong>Up</strong>! family!<br />
june 2008 21
workshopwow<br />
emerging color<br />
just like a butterfly emerging from a cocoon, color and creativity can emerge from our<br />
crafting projects in interesting ways.<br />
For your next workshop demonstration, consider using the emerging color technique<br />
to wow even your most hard-to-please guests. Emerging color uses the ever-popular<br />
embossing technique and a variety of Stampin’ <strong>Up</strong>! products, which can lead to not only<br />
increased sales, but bookings as well.<br />
Here’s how the emerging color technique works:<br />
1 Stamp an image repeatedly on a piece of smooth card stock. On our Butterfly card, we<br />
stamped the butterfly images using Ruby Red ink on Very Vanilla card stock.<br />
2 Heat emboss another larger image (like the large dot we used on our Butterfly card) on<br />
the card stock using VersaMark ink and Clear Stampin’ Emboss powder. Make sure to set<br />
the image over a few of the images you stamped in Step 1.<br />
3 Using a brayer, ink the entire piece of card stock in a lighter color of ink. On our<br />
Butterfly card, we used Cameo Coral.<br />
4 Wipe any excess ink from the embossed image.<br />
See how the rich color emerges from your embossed image!<br />
A Springboard for Additional Workshops You can use the multiple techniques in<br />
emerging color to book additional workshops. As you demonstrate, let your guests know<br />
how much you love the techniques you’re using. You might say, “Emerging color is so fun<br />
because it involves two of my favorite techniques—heat embossing and using the brayer. There’s<br />
much more you can do with heat embossing and a brayer than just emerging color. I would love to<br />
have a workshop with any of you on either of these, or both! Let’s talk after the workshop to set up<br />
a time when I can show you and your friends how to do some of those techniques.”<br />
For your next workshop, share the rainbow of colors and products that emerging color<br />
offers your workshop guests—and you may just see your business take flight!<br />
butterfly card<br />
A Little Birthday Cheer, Dots Are Hot, and Garden Whimsy sets; More Mustard, Old Olive, Ruby Red, and Very<br />
Vanilla card stock; Cameo Coral, Old Olive, and Ruby Red Classic Stampin’ Pads; VersaMark pad; Clear Stampin’<br />
Emboss powder; More Mustard narrow grosgrain ribbon; Stampin’ Dimensionals; brayer<br />
alacard<br />
template<br />
contestwinners june<br />
april<br />
heading back<br />
a<br />
to<br />
grand<br />
class<br />
occasion<br />
Linda<br />
Angela<br />
Keal<br />
Sylvester<br />
:<br />
: APO Military Base<br />
Downers Grove, Illinois<br />
pieces background of the checks past No Denise entries Gollaher received :<br />
Hopkinton, Massachussettes<br />
dear ol' dad Mary Beth West : San Diego, California<br />
the great white Mary Beth West : San Diego, California<br />
wow! art file Deborah Sutton : Chandler, Arizona<br />
wow! art file Abby Cousineau : South Jordan, Utah<br />
contestcategories august july<br />
sticky just a situation note Cards Projects created using with Sticky our new Cuts Letters<br />
Notes products<br />
shades<br />
of a trick september and treat Pages Projects created featuring with a fall Halloween colors theme<br />
eye ribbon fashion originality Samples Cards featuring created using any one our of new our Style<br />
Ribbon Watch Originals collections<br />
wow! art file<br />
All All other other entries entries<br />
monthly contest deadlines<br />
• Contests run for a single month at a time, with the<br />
deadline falling on the last day of the month. This July<br />
Contest runs June 1–30.<br />
• Entries for the July Contest must be received in our<br />
office on or before June 30, 2008.<br />
• Please pack all entries carefully and label the box or<br />
envelope with the contest month and category. (See<br />
address below.) Contest entries will not be returned.<br />
monthly contest rules<br />
and information<br />
• Winning projects often share the following features:<br />
They use only one set along with a greeting set, plus<br />
backgrounds, borders, or frames. Use of the Write Me a<br />
Memory® Journaling Fonts CDs is limited to journaling<br />
only (not titles). Scrapbook pages include photos and<br />
journaling. We receive more entries in the Wow! Art File<br />
because there are no subject limitations, so your chances<br />
of winning are better in the other categories.<br />
• Include a list of Stampin’ Supplies used to make<br />
your entry: Specify stamp set or wheel names; the<br />
types and colors of papers, card stock, markers, pens,<br />
pads; and any accessories or tools used. Stamps and<br />
accessories used must be in the current catalog. Give<br />
clear directions, if necessary. Also write your name,<br />
demonstrator number, the month of the contest, and<br />
the category you are entering. Write this information<br />
directly on the back of the card or item, if possible.<br />
• All scrapbook layouts must contain photos. When<br />
submitting photos of you or members of your<br />
immediate family, you grant Stampin’ <strong>Up</strong>! the right to<br />
publish those photos. However, if you’d like to submit a<br />
project with photos of individuals other than immediate<br />
family members, please have all main subjects in the<br />
photo fill out a photo waiver form, which can be found<br />
on the Demonstrator Web Site under My Business>My<br />
Business Resources>Copyright. Make sure those photo<br />
waivers are included with any projects you submit to<br />
Stampin’ <strong>Up</strong>! Do not send photos taken by professional<br />
photographers unless you have obtained a release of the<br />
copyright in writing. Please include that release with<br />
your submission.<br />
• Mail to: Stampin’ <strong>Up</strong>! Contest: [Category Name]<br />
12907 South 3600 West<br />
Riverton, UT 84065<br />
• Submission of artwork to Stampin’ <strong>Up</strong>! constitutes<br />
agreement with Stampin’ <strong>Up</strong>!’s payment policy and<br />
acknowledgment that the artwork becomes the property<br />
of Stampin’ <strong>Up</strong>! to be used by the company as desired.<br />
• Submit as many entries per category as you wish. Do not<br />
submit projects made with patterns or images known<br />
to be copyrighted. Contest winners in each category<br />
may select any three stamp sets (excluding hostess<br />
sets) from the current catalog and/or mini catalog.<br />
(Demonstrator Support will call winners and take<br />
their free stamp orders within 10 business days of<br />
the contest deadline.)<br />
• Stampin’ <strong>Up</strong>! cannot answer inquiries about<br />
whether or not contest entries arrived in the<br />
office. If you want proof of delivery, please send by<br />
registered mail or a similar option.<br />
22 www.stampinup.com
makeithappen<br />
on your own<br />
Whether you’re looking to build your<br />
business or find creative inspiration,<br />
our June issue’s right up your alley.<br />
with your<br />
downline<br />
Gather your group<br />
and start the summer<br />
right with a variety<br />
of cool ideas from<br />
this month’s issue!<br />
June is the halfway mark for all those New Year’s<br />
resolutions you made in January. How are you doing<br />
on them? Take the time to read the “The Process of<br />
Change” article on page 16 and follow the steps<br />
provided to review your goals and to set new ones.<br />
The “Available for a Limited Time” article on page 17<br />
provides suggestions of you how can use limited-time<br />
product offers to increase your sales. Review this article<br />
and commit to applying some of these suggestions to<br />
your business efforts.<br />
This month’s Stampin’ Technique, iris folding, is a<br />
wonderful idea for using Designer Series paper and<br />
giving your creativity a boost. Try it for yourself this<br />
month, and then search through our Stampin’ Succss<br />
Techniques archive on the Demonstrator Web Site for<br />
another technique you’ve never tried before!<br />
Shelli’s message this month focuses on one of<br />
Stampin’ <strong>Up</strong>!’s eight principles: change. Do you know<br />
what the other seven principles are? Does your group?<br />
During this month’s group meeting, take time to refresh<br />
everyone’s memory on these principles. Use them as a<br />
springboard for discussion.<br />
How’s your group doing on getting bookings? Do<br />
they need more training on how to book workshops?<br />
You can use the “Book to Build” article on page 10 to<br />
provide valuable training to your group on this topic.<br />
Saying “thank you” is one of the best reasons in the<br />
world to stamp! With your group, brainstorm ways<br />
to incorporate the art of gratitude into your events<br />
this month. Our “The Elegant Art of Gratitude” and<br />
Stampin’ Occasions articles (pages 12 and 18) are great<br />
places to start.<br />
june 2008 23
12907 South 3600 West<br />
Riverton, UT 84065<br />
we’ve<br />
got<br />
the<br />
freshest<br />
ideas around<br />
From June 1–30, your<br />
customers can get their<br />
hands on our Fresh Cuts<br />
stamp set and Fresh<br />
Cut Notes before<br />
they’re available in<br />
the Fall-Winter 2008<br />
Idea Book & Catalog.<br />
visit the demonstrator web site under specials<br />
& promotions for all the information you need.<br />
portland, or<br />
permit nº 2917<br />
PRESORTED<br />
s t a n d a r d<br />
us postage paid