Create successful ePaper yourself
Turn your PDF publications into a flip-book with our unique Google optimized e-Paper software.
website : http://www.LGEservice.com<br />
e-mail : http://LGEservice.com/techsup.html<br />
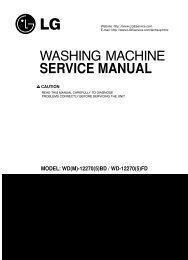
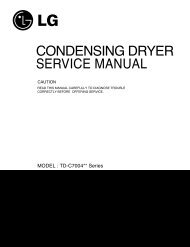
WASHING MACHINE<br />
<strong>SERVICE</strong> <strong>MANUAL</strong><br />
CAUTION<br />
READ THIS <strong>MANUAL</strong> CAREFULLY TO DIAGNOSE TROUBLE<br />
CORRECTLY BEFORE OFFERING <strong>SERVICE</strong>.<br />
MODEL : WD-14360(5)TD / WD-14361(6)TD<br />
WD-12360(5)TD / WD-12361(6)TD<br />
WD-10360(5)TD / WD-10361(6)TD<br />
WD-14360(5)FDN<br />
WD-12360(5)FDN<br />
WD-14360(5)FDB<br />
WD-12360(5)FDB<br />
WD-12361FD / WD-10361FD
MAY. 2004 PRINTED IN KOREA<br />
P/No.:3828ER3027L
CONTENTS<br />
1. SPECIFICATIONS .........................................................................................................................3<br />
2. FEATURES & TECHNICAL EXPLANATION ................................................................................ 4<br />
3. PARTS IDENTIFICATION ............................................................................................................ 6<br />
4. INSTALLATION............................................................................................................................. 7<br />
5. OPERATION ................................................................................................................................10<br />
6. WIRING DIAGRAM/PROGRAM CHART.....................................................................................12<br />
7. TROUBLESHOOTING.................................................................................................................13<br />
7-1.BEFORE <strong>SERVICE</strong>..............................................................................................................13<br />
7-2.TEST MODE ........................................................................................................................13<br />
7-3.HOW TO KNOW THE WATER LEVEL FREQUENCY.........................................................13<br />
7-4.ERROR DISPLAY ................................................................................................................14<br />
8. ERROR DIAGNOSIS AND CHECK LIST ....................................................................................15<br />
8-1. DIAGNOSIS AND ANSWER FOR ABNORMAL OPERATION ...........................................15<br />
8-2. FAULT DIAGNOSIS AND TROUBLESHOOTING ..............................................................18<br />
9. DISASSEMBLY INSTRUCTIONS ...............................................................................................24<br />
10. EXPLODED VIEW .....................................................................................................................31<br />
10-1. THE EXPLODED VIEW OF CABINET ASSEMBLY .........................................................31<br />
10-2. THE EXPLODED VIEW OF CONTROL PANEL & DISPENSER ASSEMBLY..................32<br />
10-3. THE EXPLODED VIEW OF DRUM & TUB ASSEMBLY...................................................33<br />
✽APPENDIX (Replacement parts list).........................................................................................34<br />
2
1. SPECIFICATIONS<br />
ITEM<br />
POWER SUPPLY<br />
PRODUCT WEIGHT<br />
ELECTRICITY<br />
CONSUMPTION<br />
REVOLUTION<br />
SPEED<br />
WASHING<br />
SPIN (1400rpm)<br />
DRAIN MOTOR<br />
WASH HEATER<br />
WASH<br />
OPERATION WATER PRESSURE<br />
CONTROL TYPE<br />
DIMENSION<br />
WASH PROGRAM<br />
OPTION<br />
DOOR SWITCH TYPE<br />
WATER LEVEL<br />
RESERVATION<br />
SENSING OF THE LAUNDRY AMOUNT<br />
FUZZY LOGIC<br />
DISPLAY OF THE REMAINING TIME<br />
ERROR DIAGNOSIS<br />
POWER AUTO OFF<br />
CHILD LOCK<br />
AUTO RESTART<br />
SPIN<br />
WASH CAPACITY<br />
WD-14360(5)TD / WD-14361(6)TD / WD-12360(5)TD / WD-12361(6)TD<br />
WD-14360(5)FDN / WD-12360(5)FDN / WD-14360(5)FDB / WD-12360(5)FDB / WD-12361FD / WD-10361FD<br />
220-240V~, 50Hz<br />
58kg<br />
135W<br />
530W<br />
32W<br />
2000W<br />
50rpm<br />
WD-14360(5)TD/WD-14361(6)TD/WD-14360(5)FDN/WD-14360(5)FDB<br />
WD-12360(5)TD/WD-12361(6)TD/WD-12360(5)FDN/WD-12360(5)FDB/WD-12361FD<br />
WD-10360(5)TD/WD-10361(6)TD/WD-10361FD<br />
0.3-10kgf/cm 2 (30-1000kPa)<br />
Electronic<br />
7.0kg<br />
Synthetic(3.5kg), Delicate(3.0kg)<br />
Wool(2.0kg), Hand Wash(2.0kg)<br />
Quick 30(2.0kg)<br />
No Spin/Rinse Hold400/600/800/1000/1400rpm<br />
No Spin/Rinse Hold400/600/800/1000/1200rpm<br />
No Spin/Rinse Hold400/600/800/900/1000rpm<br />
600mm(W)×550mm(D)×850mm(H)<br />
Cotton, Eco, Synthetic, Delicate, Wool, Hand Wash, Quick 30, Drain, Rinse+Spin<br />
Bio, Intensive, Rinse +, Pre-Wash, Crease Care<br />
Bi-Metal type<br />
9 steps (by sensor)<br />
From 3 hours to 19 hours<br />
Available<br />
Available<br />
Available<br />
10 items<br />
Available<br />
Available<br />
Available<br />
3
2. FEATURES & TECHNICAL EXPLANATION<br />
2-1.FEATURES<br />
■ More economical by Fuzzy Logic System<br />
FUZZY Logic System detects the amount of load and water<br />
temperature, and then determines the optimum water level and<br />
washing time to minimize energy and water consumption.<br />
■ Child-Lock<br />
The Child-Lock system has been developed to prevent children<br />
from pressing any button (except Power button) to change the<br />
programme during operation.<br />
■ Low noise speed control system<br />
By sensing the amount of load and balance, this system<br />
automatically distributes load evenly to minimize the spinning<br />
noise level.<br />
■ Auto Restart<br />
Auto Restart allows the program to restart all by itself in case of<br />
power failure. It does from the stage where it stopped. It will be<br />
also the same when washer is plugged-in after unplugging.<br />
■ Direct Drive System<br />
The advanced Brushless DC motor rotates the drum directly<br />
without a belt and a pulley.<br />
■ Safety device (Aqua lock) - WD-14360(5)TD/12360(5)TD<br />
Aqua lock System is designed for detecting water leak during<br />
operation to prevent water from flooding over the floor.<br />
4
2-2.DETERMINE WASHING TIME BY FUZZY LOGIC<br />
To get the best washing performance optimal time is determined by sensing of water temperature,<br />
selected washing temperature and laundry amount.<br />
water<br />
temperature<br />
washing time<br />
selected<br />
washing<br />
temperature<br />
FUZZY<br />
LOGIC<br />
rinse time<br />
the best<br />
washing<br />
performance<br />
laundry<br />
amount<br />
spin rhythm, time<br />
SENSING PROCESSING DETERMINATION EFFECT<br />
2-3.WATER LEVEL CONTROL<br />
● This model adopts a pressure sensor which can sense the water level in the tub.<br />
● When the water level reaches to the preset level the water supply is stopped, then the washing program proceeds.<br />
● Spinning does not proceed until the water in the tub reduces a certain level.<br />
2-4.THE DOOR CAN NOT BE OPENED<br />
• While program is operating.<br />
• While Door Lock light turns on.<br />
5
600<br />
400<br />
800<br />
1000<br />
1400<br />
Bio<br />
3. PARTS IDENTIFICATION<br />
Synthetic<br />
Wool<br />
Hand Wash<br />
Drain<br />
Co ton<br />
Eco<br />
Delicate<br />
C<br />
Quick30<br />
Rinse+Spin Start Pause<br />
Rinse Hold<br />
No Spin<br />
Time Left<br />
Spin rpm<br />
Intensive<br />
Rinse+<br />
Pre Wash<br />
Crease Care<br />
Power<br />
■ACCESSORIES<br />
6
4. INSTALLATION<br />
Before servicing ask the customer what the trouble is.<br />
Check the adjustments. (Power supply :220~240V, Removal of transit bolts etc..)<br />
Check the troubles referring to the troubleshooting.<br />
Decide service steps referring to disassembly instructions.<br />
Then, service and repair.<br />
After servicing, operate the appliance to see whether it works O·K or NOT.<br />
■ STANDARD INSTALLATION<br />
The appliance should be installed as follows.<br />
REMOVE THE TRANSIT INSTALL THE APPLIANCE ADJUST THE<br />
BOLTS ON FLAT AND FIRM SURFACE HORIZONTAL<br />
• Remove the transit bolts<br />
(4EA:1) with supplied wrench.<br />
• Turn the adjustable feet to<br />
set the appliance horizontally.<br />
• Keep the transit bolts and<br />
wrench for future use.<br />
• Insert the 4 caps provided<br />
into the hole.<br />
Low<br />
High<br />
• The appliance goes up by<br />
rotating the feet clockwise.<br />
1<br />
• The appliance comes down by<br />
rotating the feet counterclockwise.<br />
7
■ HOW TO CONNECT INLET HOSE<br />
• Check that the rubber is inside the valve connector.<br />
• Connect inlet hoses firmly to prevent leak.<br />
■ CONNECT DRAIN HOSE<br />
· Make sure that the hose is not twisted.<br />
· Avoid submerging the end of the hose.<br />
※ The drain hose should be placed under 100cm from the floor.<br />
■ CONNECT POWER PLUG<br />
· Connect the power plug to the wall outlet.<br />
· Avoid connecting several electric devices,<br />
It may be the cause of a fire.<br />
8
TEST OPERATION<br />
Preparation for Press the power button. Press the START/PAUSE<br />
washing.<br />
button.<br />
•Connect the power plug to<br />
the outlet.<br />
•Connect the inlet hose.<br />
•In case of cotton program.<br />
Check the water heating. Check automatic reverse Check the water supply.<br />
turn.<br />
·Press both Time Delay and<br />
Pre Wash buttons simultaneously<br />
the present temperature will be<br />
displayed.<br />
·Check if the drum rotates clockwise<br />
and counterclockwise.<br />
·Check if water is supplied through<br />
the detergent dispenser.<br />
Check drain and spin Power off and open the Water removal<br />
door<br />
·Power off and then power on.<br />
Turn on Spin lamps after<br />
pressing the Start/Pause button<br />
and Start the machine again.<br />
·Check drain and spin.<br />
·Power off and then power on.<br />
·Check if the door can be<br />
opened after Door Lock lamp<br />
turns off.<br />
·If SVC is needed during<br />
check, remove<br />
the remaining water by pulling<br />
out the hose cap.<br />
9
5. OPERATION<br />
Eco<br />
•It is possible in cotton<br />
course when 60 C<br />
LED display<br />
•Display the estimated remaining time (Hour : Minute)<br />
to finish.<br />
•In case of abnormal operation, error indications are<br />
displayed.<br />
( )<br />
•See troubleshooting guide.<br />
Wash program selector<br />
•9 programs can be set<br />
depending on the type of the<br />
laundry.<br />
•If the power button is pressed,<br />
all lamps are on<br />
•By turning the dial, [Cotton<br />
→ Eco → Delicate → Quick 30<br />
→ Rinse + Spin → Drain<br />
→ Hand Wash → Wool<br />
→ Synthetic] can be selected.<br />
(The opposite is possible)<br />
Start/Pause button<br />
•Use the button to start or pause wash<br />
cycle.<br />
•The power turns off automatically 4 minutes<br />
after the pause button is pressed.<br />
Spin<br />
•WD-14360(5)TD / WD-14361(6)TD /<br />
WD-14360(5)FDN / WD-14360(5)FDB →<br />
No spin/Rinse Hold/400/600/800/1000/1400<br />
•WD-12360(5)TD / WD-12361(6)TD /<br />
WD-12360(5)FDN / WD-12360(5)FDB / WD-12361FD→<br />
No spin/Rinse Hold/400/600/800/1000/1200<br />
•WD-10360(5)TD / WD-10361(6)TD /<br />
WD-10361FD →<br />
No spin/Rinse Hold/400/600/800/900/1000<br />
10
Time Delay<br />
•Press the button when delayed washing is needed.<br />
•When the button is pressed, [ ] is displayed,<br />
maximum delay of [ ] hours can be set.<br />
•Each press advances time delay by the hour.<br />
•Use [Power] button to cancel [Time Delay]<br />
•[Time Delay] means the time required from the<br />
present to the completion of washing.<br />
Child - Lock<br />
•Child Lock system can be set and canceled by pressing<br />
and holding both Rinse + button and Pre Wash button<br />
simultaneously more than 3 seconds.<br />
•Once Child Lock is set, all buttons are inoperable except<br />
power button.<br />
•Child Lock system can be set anytime even during<br />
Power-off and operation.<br />
•It is automatically cancelled when an operational error occur.<br />
Power button<br />
•Press the button to turn<br />
power on and off.<br />
•Press the button to cancel<br />
the time delay.<br />
Option<br />
•Bio : If you want to eliminate protein stains(milk, blood, chocolate...), you may select Bio by pressing the<br />
option button. [You can select Bio when temperature is higher than 60。C in Cotton and Synthetic.]<br />
•Intensive : • If the laundry is heavily soiled “Intensive” option is effective.<br />
• By selecting the Intensive option, the wash time may be extended, depending on the program selected.<br />
•Rinse + : If you wish to rinse more, the Rinse+ option will remove any trace of detergents.<br />
•Pre Wash : If the laundry is heavily soiled, “Pre Wash” course is effective.<br />
Pre Wash is available in Cotton and Synthetic Program.<br />
•Crease Care : If you want to prevent crease, select this button with spin<br />
11
6. WIRING DIAGRAM / PROGRAM CHART<br />
360 180 360 180 360 180 360 180 780<br />
49<br />
34<br />
23<br />
20<br />
11<br />
12<br />
780<br />
540<br />
360<br />
540<br />
360<br />
160<br />
780<br />
About 1:31<br />
About 1:26<br />
About 58<br />
About 56<br />
About 49<br />
About 30<br />
About 24<br />
About 1<br />
❋ Bio : If you want to eliminate protein stains(milk, blood, chocolate...), you may select Bio by pressing the option<br />
button. [You can select Bio when temperature is higher than 60。C in Cotton and Synthetic.]<br />
❋ Intensive : • If the laundry is heavily soiled “Intensive” option is effective.<br />
• By selecting the Intensive option, the wash time may be extended, depending on the program selected.<br />
❋ Rinse + : If you wish to rinse more, the Rinse+ option will remove any trace of detergents.<br />
❋ Pre Wash : If the laundry is heavily soiled, “Pre Wash” course is effective.<br />
Pre Wash is available in Cotton and Synthetic Program.<br />
❋ Crease Care : If you want to prevent crease, select this button with spin<br />
12
7. TROUBLESHOOTING<br />
7-1.BEFORE PERFORMING <strong>SERVICE</strong><br />
■ Be careful of electric shock or disconnecting the parts while trouble shooting.<br />
■ Voltage of each terminal in 220-240V and DC while applying an electric current.<br />
7-2.QC TEST MODE.<br />
1 Press Bio and Rinse + buttons simultaneously.<br />
2 Press Power with above two buttons pressed and then buzzer will sound.<br />
3 Press the START/PAUSE button as follows.<br />
[Press the START/PAUSE button more 4 times until stop spinning]<br />
Pressing number of<br />
[START/PAUSE]button Checking Point Display Status<br />
None<br />
All lamps turn on<br />
1 time Clockwise spin (right) Motor rpm (About 47)<br />
2 times Low speed Spin Motor rpm (About 590~650)<br />
3 times High speed Spin Motor rpm (About 1100~1200) : WD-12360(5)TD / WD-12361(6)TD<br />
Motor rpm (About 1300~1400) : WD-14360(5)TD / WD-14361(6)TD<br />
4 times Inlet valve for pre-wash operation Water level frequency (225~265)<br />
5 times<br />
Inlet valve for main-wash operation<br />
Hot inlet valve in case of hot water fill<br />
Water level frequency (225~265)<br />
6 times Inlet valve for main-wash operation Water level frequency (225~265)<br />
7 times Counterclockwise spin (left) Motor rpm (About 47)<br />
8 times A Heater is in operation for 3 sec. Water Temperature<br />
9 times Draining pump operation Water level frequency<br />
10 times Auto off operation<br />
7-3.HOW TO KNOW THE WATER LEVEL FREQUENCY<br />
✽ Press the Bio button and Time delay button simultaneously.<br />
The digits means water level frequency (10 -1 kHz)<br />
ex) 241 : Water level frequency = 241× 10 -1 kHz<br />
= 24.1kHz<br />
13
7-4.ERROR DISPLAY.<br />
•If you press the [Start/Pause] button when an error in displayed, any error except S/W ERROR will<br />
disappear and the machine will change into pause status.<br />
•In case of 『 』, 『 』, 『 』, if the error is not resolved within 15 sec. In case of other errors, if the<br />
error is not resolved within 4 min. Power will be turned off automatically and the error only will be<br />
blinked. But in the case of 『 』, power will not be turned off.<br />
ERROR SYMPTOM CAUSE<br />
1<br />
2<br />
WATER INLET<br />
ERROR<br />
IMBALANCE<br />
ERROR<br />
◦ Water has not reached to the pre-set level within<br />
4 min. since inlet valve operated, or water has not<br />
reached to the normal level within 25 min.<br />
◦ If water leakage occured in the inlet hose,<br />
indicator “A” will be changed red color.<br />
◦ The appliance is tilted.<br />
◦ Laundry is gathered to one side.<br />
◦ Non distributable things are put into the drum.<br />
3 DRAIN ERROR ◦ Water has not drained enough within 8 min.<br />
4<br />
OVERFLOW<br />
ERROR<br />
◦ Water is automatically being pumped out because too much<br />
water is in the tub.<br />
5 SENSOR PRESSURE<br />
S/W ERROR<br />
DOOR OPEN<br />
6<br />
ERROR<br />
◦ The sensor pressure switch is out of order.<br />
◦ The [Start/Pause]button is pressed with the door open.<br />
◦ The door switch is out of order.<br />
7<br />
8<br />
9<br />
HEATING<br />
ERROR<br />
CURRENT<br />
ERROR<br />
LOCK<br />
ERROR<br />
◦ The thermistor is out of order.<br />
◦ PWB ASSEMBLY (Main) is out of order<br />
☞ Replace the PWB ASSEMBLY (Main)<br />
◦Winding in the MOTOR is short-circuited.<br />
☞ Replace the MOTOR<br />
◦The Connector (3-pin, male, white) in the wire harness is not<br />
connected to the Connector (3-pin, female, white) of MOTOR.<br />
☞ Reconnect or repair the connector<br />
◦The electric contact between the connectors [3-pin, male, white in<br />
the wire harness and 6-pin, female, white in the PWB ASSEMBLY<br />
(Main)]is bad or unstable.<br />
☞ Reconnect or repair the contact in the connector<br />
◦The wire harness between the MOTOR and PWB ASSEMBLY<br />
(Main) is cut (open circuited).<br />
◦The hall sensor is out of order/defective.<br />
☞ Replace the PWB ASSEMBLY (Main)<br />
10 Aqua lock<br />
Water leaks.<br />
14
8. ERROR DIAGNOSIS AND CHECK LIST<br />
8-1.DIAGNOSIS AND ANSWER FOR ABNORMAL OPERATION<br />
SYMPTOM<br />
GUIDE FOR <strong>SERVICE</strong> CALL<br />
NO POWER<br />
Is the power plug connected firmly to<br />
220-240V~ outlet?<br />
YES<br />
Power failure? or Breaker opened?<br />
Is the outlet controlled by a switch.<br />
NO<br />
Visit to check<br />
Water inlet trouble<br />
Is<br />
displayed?<br />
YES<br />
Is the tap opened?<br />
YES<br />
Is the tap frozen?<br />
NO<br />
Is the water supply shut-off?<br />
NO<br />
Is the Inlet hose “A” part to<br />
be seen red color?<br />
YES<br />
Visit to check<br />
NO<br />
Is filter in the inlet valve<br />
clogged with foreign material?<br />
NO<br />
Visit to check<br />
YES<br />
Clean the filter of<br />
inlet valve<br />
15
SYMPTOM<br />
GUIDE FOR <strong>SERVICE</strong> CALL<br />
。DOOR OPEN ERROR<br />
Refer to<br />
7-4 ERROR DISPLAY<br />
Did you press the Start/Pause button when<br />
the door is open?<br />
YES<br />
Close the door<br />
NO<br />
Visit to check<br />
Check if the door switch is O.K<br />
。Drain Trouble<br />
Is<br />
displayed?<br />
YES<br />
Is the debris filter clogged with foreign<br />
material such as pins, coins, etc.?<br />
NO<br />
Is the drain hose frozen with water, kinked, or<br />
crushed?<br />
NO<br />
YES<br />
Clean up<br />
the filter.<br />
Visit to check<br />
16
SYMPTOM<br />
。Suds overflow from the<br />
appliance.<br />
(In this condition, wash and<br />
spin do not operate<br />
normally)<br />
GUIDE FOR <strong>SERVICE</strong> CALL<br />
Is low-sudsing detergent for the durm<br />
washing machine used?<br />
YES<br />
Is the proper amount of detergent used<br />
as recommended?<br />
YES<br />
Recommend to reduce the amount<br />
of detergent.<br />
LOW SUDSING<br />
DETERGENT<br />
This appliance has the automatic suds sensing function which<br />
operates under much suds condition for good rinse and preventing<br />
overflow.<br />
When much suds are sensed, the suds removing function such as<br />
drain, water input, and pause will operate without rotating the<br />
drum.<br />
。No effect of softener<br />
Is softener put in the correct compartment of<br />
drawer?<br />
YES<br />
Is the drawer closed during wash?<br />
YES<br />
Compartment for<br />
softener<br />
Is the softener cap clogged?<br />
YES<br />
Explain how to use softener<br />
Clean the compartment for softener<br />
Visit to check<br />
17
8-2.FAULT DIAGNOSIS AND TROUBLESHOOTING<br />
CAUTION<br />
1. Be careful of electric shock or disconnecting the parts while troubleshooting.<br />
2. First of all, check the connection of each part terminal with wiring diagram.<br />
3. If you replace the PWB assembly (Main), put in the connectors correctly.<br />
NO POWER<br />
When measuring the voltage of the outlet,<br />
is the voltage AC 220-240V?<br />
NO<br />
Check the fuse<br />
YES<br />
(RED) (WHITE)<br />
(WHITE) (BLUE)<br />
When measuring the voltage of White(3pin)<br />
connector of the PWB assy, is the voltage<br />
AC 220-240V?<br />
NO<br />
Check the harness<br />
Assembly.<br />
<br />
YES<br />
Replace PWB assembly.<br />
ALL BUTTONS ARE INOPERABLE EXCEPT POWER BUTTON<br />
Is Child Lock set?<br />
YES<br />
Cancle the<br />
Child-Lock by pressing<br />
both Rinse + Button and<br />
Pre Wash Button<br />
simultaneously for 3<br />
seconds.<br />
NO<br />
First, unplug the power cord and plug again.<br />
Check the buttons are working.<br />
NO<br />
YES<br />
Normal<br />
Visit to check<br />
18
NO WATER SUPPLY<br />
Is the water supply shut-off?<br />
NO<br />
Is the tap opened?<br />
NO<br />
Open the tap.<br />
YES<br />
Is the Inlet hose “A” part to be seen red color?<br />
NO<br />
YES<br />
Visit to check<br />
(Change the inlet hose)<br />
When you press both Bio button and Time Delay<br />
button simultaneously, is the water level frequency<br />
below 240?<br />
NO<br />
YES<br />
Check the chamber (Air)<br />
and the tube clogged<br />
with impurity.<br />
Is the inlet valve filter clogged with impurity?<br />
YES<br />
Clean the filter.<br />
NO<br />
option (HOT)<br />
Is resistance of the inlet valve connector<br />
between the 2 to 8 kΩ?<br />
NO<br />
Replace the inlet valve.<br />
YES<br />
Check the voltage between each terminals of<br />
inlet Valve is 220 - 240V~.<br />
(Refer to 7-2 TEST MODE)<br />
NO<br />
Replace PWB assembly<br />
DETERGENT DOES NOT FLOW IN<br />
option (HOT)<br />
Is water supplied?<br />
YES<br />
NO<br />
Refer to solution<br />
「NO INLET」<br />
Are receptacles correctly connected to the<br />
terminals of inlet valve?<br />
YES<br />
NO<br />
Check the wiring on the<br />
dispenser.<br />
SOFTENER<br />
MAIN PRE -<br />
WASH WASH<br />
Is detergent put in the correct compartment of<br />
the drawer?<br />
YES<br />
NO<br />
Put the detergent in the<br />
correct position<br />
PRE+MAIN<br />
MAIN WASH<br />
: Detergent<br />
Is the detergent caked or hardened?<br />
YES<br />
Clean the drawer.<br />
19
SOFTENER DOES NOT FLOW IN<br />
option (HOT)<br />
Is water supplied?<br />
YES<br />
NO<br />
Refer to<br />
「NO WATER SUPPLY」<br />
Are receptacles correctly connected to the<br />
terminals of inlet valve?<br />
YES<br />
Is softener put in the correct compartment of<br />
drawer?<br />
YES<br />
NO<br />
NO<br />
Check the wiring on the<br />
dispenser.<br />
Put it in the correct<br />
compartment.<br />
Is the softner cap clogged?<br />
YES<br />
Clean the cap and<br />
drawer.<br />
ABNORMAL SOUND<br />
Is the motor bolt loosened?<br />
NO<br />
YES<br />
Fix the bolt tightly.<br />
Is there friction noise from the motor?<br />
YES<br />
Replace the STATOR<br />
ASSEMBLY or ROTOR<br />
ASSEMBLY.<br />
20
HEATING WITHOUT WATER<br />
Bio<br />
Intensive<br />
When pressing [Bio] button and [Time Delay]<br />
button at the same time after draining,<br />
is the water level frequency 252 or more?<br />
When pressing [Bio] button and [Time Delay]<br />
button at the same time while wash,<br />
is the water level frequency between 230~245~?<br />
NO<br />
Replace the sensor<br />
(pressure)<br />
PWB ASSEMBLY (MAIN)<br />
YES<br />
Checking voltage between two pins<br />
as press the power button is the voltage<br />
220 - 240V~ ?<br />
NO<br />
Replace the PWB<br />
assembly<br />
AC 220-240V<br />
DRAIN MALFUNCTIONING<br />
Is the drain hose twisted or frozen?<br />
YES<br />
Repair drain hose<br />
NO<br />
Is the impeller of the drain pump clogged?<br />
YES<br />
Remove foreign<br />
material.<br />
NO<br />
Is the connector disconnected,<br />
disassembled?<br />
YES<br />
Reconnect or repair the<br />
connector<br />
NO<br />
Is the coil of drain pump cut-off?<br />
(resistance of coil is 90~160 )<br />
YES<br />
Replace the pump<br />
assembly<br />
NO<br />
When checking voltage between connectors<br />
( , ) on spinning, is the voltage<br />
220 - 240V~ as the figure?<br />
NO<br />
Replace the PWB<br />
assembly (Main)<br />
PWB ASSEMBLY (MAIN)<br />
21
WASH HEATER TROUBLE<br />
PWB ASSEMBLY (MAIN)<br />
220 - 240V~<br />
When checking the voltage between<br />
connector the PWB assembly (Main)<br />
during whites washing ,Is the voltage<br />
220 - 240V ~ ?<br />
YES<br />
NO<br />
Replace the PWB<br />
assembly (Main)<br />
RED<br />
YELLOW<br />
After power off,is the resistance of wire<br />
(RED-YELLOW) connectors between<br />
10 to 30 ?<br />
1 2 3<br />
YES<br />
Normal<br />
NO<br />
After power off and the heater terminal is<br />
disconnected, is the resistance 10 to 30 ?<br />
NO<br />
Replace the heater<br />
assembly<br />
HEATING CONTINUOUSLY ABOVE<br />
THE SETTING WATER TEMPERATURE<br />
NO<br />
Replace the thermistor<br />
(6322FR2046C)<br />
YES<br />
When checking thermistor on the tub,<br />
is the thermistor loosened above 2mm from<br />
the rubber?<br />
YES<br />
Push the thermistor<br />
tightly to the rubber.<br />
22
SPIN TROUBLE<br />
Bio<br />
Intensive<br />
While spinning, is the frequency of the<br />
water level 248 or more? The frequency can be<br />
checked by pressing the Bio button<br />
and Time Delay button at the same time<br />
on the program.<br />
YES<br />
NO<br />
Check the sensor<br />
(Pressure) or hose<br />
(Sensor).<br />
If the problem is on the<br />
sensor or the hose, replace<br />
the sensor or the hose.<br />
Bio<br />
Rinse+<br />
Pre Wash<br />
Crease Care<br />
Power<br />
When pressing Bio button and Rinse + button<br />
and POWER button at the same time after<br />
power off, press the START/PAUSE button 2 times,<br />
is the drum low speed spin?<br />
NO<br />
YES<br />
Normal<br />
Is it disconnected, or disassembled?<br />
[White : 3pin ( ), Red:3pin ( ),<br />
Red:3pin ( ), National:4pin ( )]<br />
NO<br />
YES<br />
Correct the connector.<br />
Is it disconnected, or disassembled?<br />
White : 3pin( ), White:4pin( )]<br />
YES<br />
Correct the connector.<br />
NO<br />
(1)<br />
(2)<br />
Check the motor connector, Is the resistance of<br />
the terminal same as the figure?<br />
MOTOR TERMINAL (1)<br />
NO<br />
Replace the STATOR<br />
ASSEMBLY<br />
(4417EA1002D)<br />
Resistance of terminal:<br />
~ ~ ~<br />
/ /<br />
YES<br />
Replace the PWB assembly.<br />
23
9. DISASSEMBLY INSTRUCTIONS<br />
✽ Be sure to unplug the machine out of the outlet before disassembling and repairing the parts.<br />
CONTROL PANEL<br />
PLATE ASSEMBLY (TOP)<br />
Unscrew 2 screws on the back of the top plate.<br />
Pull the top plate backward and upward as shown.<br />
Hook<br />
Disconnect the PWB Assembly connector from Main<br />
lead wire Assembly.<br />
Pull out the drawer and unscrew 2 screws.<br />
Push upper hooks down on the top and pull the control<br />
panel.<br />
PANEL ASSEMBLY<br />
(CONTROL)<br />
Disconnect the PWB assembly (Main & Display) from<br />
the control panel by unscrewing 7 screws.<br />
24
DISPENSER ASSEMBLY<br />
Disassemble the top plate assembly.<br />
Pull out the drawer to arrow direction.<br />
Unscrew 2 screws.<br />
PUSH<br />
DRAWER<br />
Option<br />
The hose clamps and the hose are disassembled.<br />
DISPENSER ASSEMBLY<br />
The ventilation bellows and the water inlet bellows are<br />
disassembled on the tub.<br />
25
INLET VALVE<br />
Disconnect the wiring receptacle.<br />
Unscrew 2 screws from the back.<br />
When reconnecting the connector<br />
VALVE #1 (MAIN)<br />
VALVE #2 (PRE)<br />
VALVE #3 (HOT)<br />
White / Black - Black<br />
Gray / White - Black<br />
Blue / Red - Black<br />
LOWER COVER<br />
Open the lower cover cap by using coin and pull out the<br />
lower cover to the arrow direction after a screw is<br />
unscrewed.<br />
DOOR<br />
Open the door completely.<br />
Remove the two screws from the hinge.<br />
When removing the door assembly, it is necessary to<br />
hold the bracket that is inner of the cabinet cover.<br />
26
GASKET ASSEMBLY<br />
Take apart the cabinet gasket clamp.<br />
Unscrew 2 screws from the cabinet cover.<br />
Open the lower cover cap and unscrew 1 screw inside.<br />
Take apart the lower cover.<br />
Disassemble the control panel. (page 24)<br />
Unscrew all the screws on the upper and lower sides<br />
of the cabinet cover.<br />
Take apart the tub gasket clamp.<br />
Make sure that the drain hole of the gasket is put<br />
beneath when reassembling the gasket.<br />
Refer to the arrow mark on the tub cover.<br />
27
ROTOR ASSEMBLY, STATOR ASSEMBLY, FRICTION DAMPER ASSEMBLY<br />
Rotor<br />
Remove the BACK COVER.<br />
Unscrew the bolt to pull out the ROTOR ASSEMBLY.<br />
Bolt<br />
(ROTOR ASSEMBLY)<br />
Disconnect the wiring connector.<br />
Unscrew 6 bolts from the STATOR.<br />
Remove the STATOR.<br />
Note : Hook of connector (1) is on the backside<br />
(1)<br />
Hinge,<br />
Damper<br />
(STATOR ASSEMBLY)<br />
Damper<br />
Pull out the hinge, pressing its snap.<br />
Do not use the pulled-out hinge again. It may be taken<br />
off during operation.<br />
Clean the drain pump filter<br />
(DAMPER)<br />
100<br />
3<br />
Open the lower cover cap ( ) by<br />
using a coin. Turn the drain plug<br />
( ) to pull out the hose.<br />
1<br />
2 3<br />
Unplug the drain plug ( ) , then<br />
the water flows out,<br />
At this time use a vessel<br />
to prevent water from flowing on the<br />
floor. If the water does not flow any<br />
more, turn the pump filter ( )<br />
open to the left.<br />
28<br />
2<br />
Take out any foreign material<br />
from the pump filter ( ). After<br />
cleaning, turn the pump filter( )<br />
clockwise and insert the<br />
drain plug ( ) to the original<br />
place. close the lower cover cap.
PUMP<br />
Pump Outlet Hose<br />
Remove pump outlet hose.<br />
Remove tub pump bellows.<br />
Remove cap (Remaining Hose.)<br />
Disconnect the wiring.<br />
Unscrew 2 screws.<br />
Remove the pump.<br />
Tub Pump<br />
Bellows<br />
HEATER<br />
Loosen the M6 heater nut to pull out the heater.<br />
CAUTION<br />
When mounting the heater, be sure to insert the heater<br />
into the heater clip on the bottom of the tub.<br />
THERMISTOR<br />
Pull it out by holding the thermistor bracket.<br />
If it is pulled by the wire, it may be broken.<br />
When mounting the thermistor again, make sure that it<br />
is got back tight to the bushing.<br />
29
SWITCH ASSEMBLY, DOOR LOCK<br />
Take apart the cabinet cover clamp and release<br />
the gasket.<br />
Unscrew 2 screws holding the door lock.<br />
Disconnect the door lock from the wiring connector.<br />
WHEN FOREIGN MATERIAL IS STUCK BETWEEN DRUM AND TUB<br />
Remove the heater.<br />
Remove the foreign material (wire, coin and others) by<br />
inserting a long bar through the hole.<br />
SWITCH ASSEMBLY, SAFETY<br />
1 Unscrew 4 screws from the back cover.<br />
2 Disconnect the wiring connector.<br />
3 Turn and press hook of switch assembly safety.<br />
30
10. EXPLODED VIEW<br />
10-1.THE EXPLODED VIEW OF CABINET ASSEMBLY<br />
31
10-2 THE EXPLODED VIEW OF CONTROL PANEL & DISPENSER ASSEMBLY<br />
F324<br />
F321<br />
F215<br />
A450<br />
F216<br />
F110<br />
32
10-3 THE EXPLODED VIEW OF DRUM & TUB ASSEMBLY<br />
33