Vigor2850 Series Quick Start Guide - FTP - Draytek
Vigor2850 Series Quick Start Guide - FTP - Draytek
Vigor2850 Series Quick Start Guide - FTP - Draytek

You also want an ePaper? Increase the reach of your titles
YUMPU automatically turns print PDFs into web optimized ePapers that Google loves.
i<br />
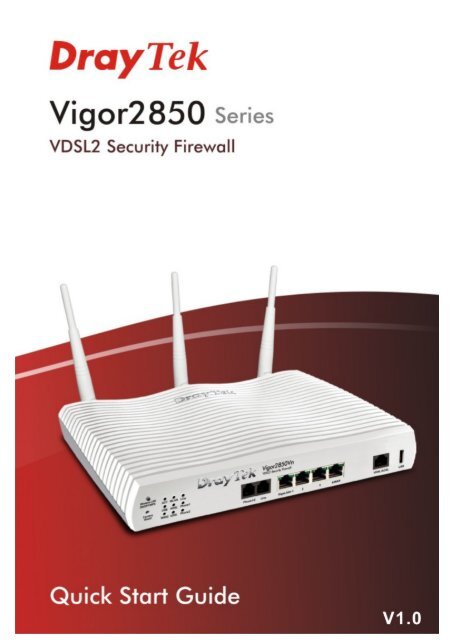
<strong>Vigor2850</strong> <strong>Series</strong> <strong>Quick</strong> <strong>Start</strong> <strong>Guide</strong>
<strong>Vigor2850</strong> <strong>Series</strong> <strong>Quick</strong> <strong>Start</strong> <strong>Guide</strong><br />
ii
<strong>Vigor2850</strong> <strong>Series</strong><br />
VDSL2 Security Firewall<br />
<strong>Quick</strong> <strong>Start</strong> <strong>Guide</strong><br />
Version: 1.0<br />
Firmware Version: V3.3.6_RC4<br />
Date: 23/05/2011<br />
iii<br />
<strong>Vigor2850</strong> <strong>Series</strong> <strong>Quick</strong> <strong>Start</strong> <strong>Guide</strong>
Copyright Information<br />
Copyright<br />
Declarations<br />
Trademarks<br />
Safety Instructions and Approval<br />
Safety<br />
Instructions<br />
Warranty<br />
Be a Registered<br />
Owner<br />
Firmware & Tools<br />
Updates<br />
Copyright 2011 All rights reserved. This publication contains information that is<br />
protected by copyright. No part may be reproduced, transmitted, transcribed,<br />
stored in a retrieval system, or translated into any language without written<br />
permission from the copyright holders.<br />
The following trademarks are used in this document:<br />
• Microsoft is a registered trademark of Microsoft Corp.<br />
• Windows, Windows 95, 98, Me, NT, 2000, XP, 7 and Explorer are<br />
trademarks of Microsoft Corp.<br />
• Apple and Mac OS are registered trademarks of Apple Computer Inc.<br />
• Other products may be trademarks or registered trademarks of their<br />
respective manufacturers.<br />
• Read the installation guide thoroughly before you set up the router.<br />
• The router is a complicated electronic unit that may be repaired only be<br />
authorized and qualified personnel. Do not try to open or repair the router<br />
yourself.<br />
• Do not place the router in a damp or humid place, e.g. a bathroom.<br />
• Do not stack the routers.<br />
• The router should be used in a sheltered area, within a temperature range<br />
of +5 to +40 Celsius.<br />
• Do not expose the router to direct sunlight or other heat sources. The<br />
housing and electronic components may be damaged by direct sunlight or<br />
heat sources.<br />
• Do not deploy the cable for LAN connection outdoor to prevent electronic<br />
shock hazards.<br />
• Keep the package out of reach of children.<br />
• When you want to dispose of the router, please follow local regulations on<br />
conservation of the environment.<br />
We warrant to the original end user (purchaser) that the router will be free from<br />
any defects in workmanship or materials for a period of two (2) years from the<br />
date of purchase from the dealer. Please keep your purchase receipt in a safe<br />
place as it serves as proof of date of purchase. During the warranty period, and<br />
upon proof of purchase, should the product have indications of failure due to<br />
faulty workmanship and/or materials, we will, at our discretion, repair or replace<br />
the defective products or components, without charge for either parts or labor, to<br />
whatever extent we deem necessary tore-store the product to proper operating<br />
condition. Any replacement will consist of a new or re-manufactured<br />
functionally equivalent product of equal value, and will be offered solely at our<br />
discretion. This warranty will not apply if the product is modified, misused,<br />
tampered with, damaged by an act of God, or subjected to abnormal working<br />
conditions. The warranty does not cover the bundled or licensed software of<br />
other vendors. Defects which do not significantly affect the usability of the<br />
product will not be covered by the warranty. We reserve the right to revise the<br />
manual and online documentation and to make changes from time to time in the<br />
contents hereof without obligation to notify any person of such revision or<br />
changes.<br />
Web registration is preferred. You can register your Vigor router via<br />
http://www.draytek.com.<br />
Due to the continuous evolution of DrayTek technology, all routers will be<br />
regularly upgraded. Please consult the DrayTek web site for more information on<br />
newest firmware, tools and documents.<br />
http://www.draytek.com<br />
<strong>Vigor2850</strong> <strong>Series</strong> <strong>Quick</strong> <strong>Start</strong> <strong>Guide</strong><br />
iv
European Community Declarations<br />
Manufacturer: DrayTek Corp.<br />
Address: No. 26, Fu Shing Road, Hukou Township, Hsinchu Industrial Park, Hsinchu County,<br />
Taiwan 303<br />
Product: <strong>Vigor2850</strong> <strong>Series</strong> Router<br />
DrayTek Corp. declares that <strong>Vigor2850</strong> <strong>Series</strong> of routers are in compliance with the following essential<br />
requirements and other relevant provisions of R&TTE Directive 1999/5/EEC.<br />
The product conforms to the requirements of Electro-Magnetic Compatibility (EMC) Directive<br />
2004/108/EEC by complying with the requirements set forth in EN55022/Class B and EN55024/Class B.<br />
The product conforms to the requirements of Low Voltage (LVD) Directive 2006/95/EEC by complying<br />
with the requirements set forth in EN60950-1.<br />
Regulatory Information<br />
Federal Communication Commission Interference Statement<br />
This equipment has been tested and found to comply with the limits for a Class B digital device, pursuant<br />
to Part 15 of the FCC Rules. These limits are designed to provide reasonable protection against harmful<br />
interference in a residential installation. This equipment generates, uses and can radiate radio frequency<br />
energy and, if not installed and used in accordance with the instructions, may cause harmful interference to<br />
radio communications. However, there is no guarantee that interference will not occur in a particular<br />
installation. If this equipment does cause harmful interference to radio or television reception, which can<br />
be determined by turning the equipment off and on, the user is encouraged to try to correct the interference<br />
by one of the following measures:<br />
• Reorient or relocate the receiving antenna.<br />
• Increase the separation between the equipment and receiver.<br />
• Connect the equipment into an outlet on a circuit different from that to which the receiver is<br />
connected.<br />
• Consult the dealer or an experienced radio/TV technician for help.<br />
This device complies with Part 15 of the FCC Rules. Operation is subject to the following two conditions:<br />
(1) This device may not cause harmful interference, and<br />
(2) This device may accept any interference received, including interference that may cause undesired<br />
operation.<br />
http://www.draytek.com/user/AboutRegulatory.php<br />
This product is designed for the DSL, POTS, and 2.4GHz/5GHz WLAN network throughout the EC region<br />
and Switzerland with restrictions in France. Please see the user manual for the applicable networks on your<br />
product.<br />
v<br />
<strong>Vigor2850</strong> <strong>Series</strong> <strong>Quick</strong> <strong>Start</strong> <strong>Guide</strong>
<strong>Vigor2850</strong> <strong>Series</strong> <strong>Quick</strong> <strong>Start</strong> <strong>Guide</strong><br />
vi
Table of Contents<br />
1. Introduction........................................................................................................... 1<br />
1.1 Panel Explanation ...................................................................................................................... 2<br />
1.1.1 For <strong>Vigor2850</strong> ........................................................................................................................ 2<br />
1.1.2 For <strong>Vigor2850</strong>n ...................................................................................................................... 4<br />
1.1.3 For <strong>Vigor2850</strong>Vn.................................................................................................................... 6<br />
1.2 Package Content........................................................................................................................ 8<br />
2. Installing Your Router........................................................................................... 9<br />
2.1 Hardware Installation.................................................................................................................. 9<br />
2.2 Printer Installation..................................................................................................................... 10<br />
3. Configuring Web Pages ..................................................................................... 15<br />
3.1 Accessing Web Page ............................................................................................................... 15<br />
3.2 Basic Configuration .................................................................................................................. 16<br />
3.3 Wireless Configuration ............................................................................................................. 26<br />
3.3.1 Basic Wireless LAN Concept............................................................................................... 26<br />
3.3.2 General Setup...................................................................................................................... 27<br />
3.3.3 Security Settings.................................................................................................................. 28<br />
4. Trouble Shooting ................................................................................................ 31<br />
4.1 Checking If the Hardware Status Is OK or Not......................................................................... 31<br />
4.2 Checking If the Network Connection Settings on Your Computer Is OK or Not ...................... 32<br />
4.3 Pinging the Router from Your Computer .................................................................................. 34<br />
4.4 Checking If the ISP Settings are OK or Not ............................................................................. 35<br />
4.5 Backing to Factory Default Setting If Necessary...................................................................... 35<br />
4.6 Contacting Your Dealer ............................................................................................................ 36<br />
vii<br />
<strong>Vigor2850</strong> <strong>Series</strong> <strong>Quick</strong> <strong>Start</strong> <strong>Guide</strong>
<strong>Vigor2850</strong> <strong>Series</strong> <strong>Quick</strong> <strong>Start</strong> <strong>Guide</strong><br />
viii
1. Introduction<br />
<strong>Vigor2850</strong> series is a VDSL2 router with multi-subnet for secure and efficient workgroup<br />
management. It integrates IP layer QoS, NAT session/bandwidth management to help<br />
users control works well with large bandwidth.<br />
By adopting hardware-based VPN platform and hardware encryption of AES/DES/3DES,<br />
and hardware key hash of SHA-1/MD5, the router increases the performance of VPN<br />
greatly and offers several protocols (such as IPSec/PPTP/L2TP) with up to 32 VPN<br />
tunnels.<br />
The object-based design used in SPI (Stateful Packet Inspection) firewall allows users to<br />
set firewall policy with ease. CSM (Content Security Management) provides users control<br />
and management in IM (Instant Messenger) and P2P (Peer to Peer) more efficiency than<br />
before. In addition, DoS/DDoS prevention and URL/Web content filter strengthen the<br />
security outside and control inside.<br />
<strong>Vigor2850</strong> series supports USB interface for connecting USB printer to share printing<br />
function, 3G USB modem for network connection, or connectivity for network <strong>FTP</strong><br />
service.<br />
1<br />
<strong>Vigor2850</strong> <strong>Series</strong> <strong>Quick</strong> <strong>Start</strong> <strong>Guide</strong>
1.1 Panel Explanation<br />
1.1.1 For <strong>Vigor2850</strong><br />
LED Status Explanation<br />
ACT (Activity)<br />
Blinking The router is powered on and running normally.<br />
Off The router is powered off.<br />
USB<br />
On<br />
USB device is connected and ready for use.<br />
Blinking The data is transmitting.<br />
WAN2<br />
On<br />
Internet connection is ready.<br />
Off Internet connection is not ready.<br />
Blinking The data is transmitting.<br />
WCF On The Web Content Filter is active. (It is enabled from<br />
Firewall >> General Setup).<br />
ADSL<br />
On<br />
The router is ready to access Internet through ADSL<br />
link.<br />
Blinking Slowly: The ADSL connection is ready.<br />
<strong>Quick</strong>ly: The connection is training.<br />
VDSL<br />
On<br />
The router is ready to access Internet through VDSL<br />
link.<br />
Blinking Slowly: The VDSL connection is ready.<br />
<strong>Quick</strong>ly: The connection is training.<br />
DoS<br />
On<br />
The DoS/DDoS function is active.<br />
Blinking It will blink while detecting an attack.<br />
VPN On The VPN tunnel is active.<br />
QoS On The QoS function is active.<br />
LED on Connector<br />
GigaLAN<br />
1/2/3<br />
GigaLAN<br />
4/WAN<br />
(Giga)<br />
Left LED On<br />
The port is connected.<br />
(Green) Off The port is disconnected.<br />
Blinking The data is transmitting.<br />
Right LED On<br />
The port is connected with 1000Mbps.<br />
(Green) Off The port is connected with 10/100Mbps<br />
Left LED On<br />
The port is connected.<br />
(Green) Off The port is disconnected.<br />
Blinking The data is transmitting.<br />
Right LED On<br />
The port is connected with 1000Mbps.<br />
(Green) Off The port is connected with 10/100Mbps<br />
<strong>Vigor2850</strong> <strong>Series</strong> <strong>Quick</strong> <strong>Start</strong> <strong>Guide</strong> 2
Interface<br />
Factory Reset<br />
GigaLAN (1-3)<br />
4/WAN<br />
VDSL/ADSL<br />
USB<br />
PWR<br />
ON/OFF<br />
Description<br />
Restore the default settings. Usage: Turn on the router (ACT LED is<br />
blinking). Press the hole and keep for more than 5 seconds. When you<br />
see the ACT LED begins to blink rapidly than usual, release the button.<br />
Then the router will restart with the factory default configuration.<br />
Connecters for local network devices.<br />
Connecter for local network devices or modem for accessing Internet.<br />
Connecter for accessing the Internet.<br />
Connecter for a USB device (for 3G USB Modem or printer).<br />
Connecter for a power adapter.<br />
Power Switch.<br />
3<br />
<strong>Vigor2850</strong> <strong>Series</strong> <strong>Quick</strong> <strong>Start</strong> <strong>Guide</strong>
1.1.2 For <strong>Vigor2850</strong>n<br />
LED Status Explanation<br />
ACT (Activity)<br />
Blinking The router is powered on and running normally.<br />
Off The router is powered off.<br />
USB<br />
On<br />
USB device is connected and ready for use.<br />
Blinking The data is transmitting.<br />
WAN2<br />
On<br />
Internet connection is ready.<br />
Off Internet connection is not ready.<br />
Blinking The data is transmitting.<br />
WLAN<br />
On<br />
Wireless access point is ready.<br />
Blinking It will blink slowly while wireless traffic goes through.<br />
ACT and WLAN LEDs blink quickly and<br />
simultaneously when WPS is working, and will return to<br />
normal condition after two minutes. (You need to setup<br />
WPS within 2 minutes.)<br />
ADSL<br />
On<br />
The router is ready to access Internet through ADSL<br />
link.<br />
Blinking Slowly: The ADSL connection is ready.<br />
<strong>Quick</strong>ly: The connection is training.<br />
VDSL<br />
On<br />
The router is ready to access Internet through VDSL<br />
link.<br />
Blinking Slowly: The VDSL connection is ready.<br />
<strong>Quick</strong>ly: The connection is training.<br />
DoS<br />
On<br />
The DoS/DDoS function is active.<br />
Blinking It will blink while detecting an attack.<br />
VPN On The VPN tunnel is active.<br />
QoS On The QoS function is active.<br />
LED on Connector<br />
GigaLAN<br />
1/2/3<br />
GigaLAN<br />
4/WAN<br />
(Giga)<br />
Left LED On<br />
The port is connected.<br />
(Green) Off The port is disconnected.<br />
Blinking The data is transmitting.<br />
Right LED On<br />
The port is connected with 1000Mbps.<br />
(Green) Off The port is connected with 10/100Mbps<br />
Left LED On<br />
The port is connected.<br />
(Green) Off The port is disconnected.<br />
Blinking The data is transmitting.<br />
Right LED On<br />
The port is connected with 1000Mbps.<br />
(Green) Off The port is connected with 10/100Mbps<br />
<strong>Vigor2850</strong> <strong>Series</strong> <strong>Quick</strong> <strong>Start</strong> <strong>Guide</strong> 4
Interface<br />
Wireless LAN<br />
ON/OFF/WPS<br />
Factory Reset<br />
GigaLAN (1-3)<br />
4/WAN<br />
VDSL/ADSL<br />
USB<br />
PWR<br />
ON/OFF<br />
Description<br />
Press "Wireless LAN ON/OFF/WPS" button once to wait for client<br />
device making network connection through WPS.<br />
Press "Wireless LAN ON/OFF/WPS" button twice to enable (WLAN<br />
LED on) or disable (WLAN LED off) wireless connection.<br />
Restore the default settings. Usage: Turn on the router (ACT LED is<br />
blinking). Press the hole and keep for more than 5 seconds. When you<br />
see the ACT LED begins to blink rapidly than usual, release the button.<br />
Then the router will restart with the factory default configuration.<br />
Connecters for local network devices.<br />
Connecter for local network devices or modem for accessing Internet.<br />
Connecter for accessing the Internet.<br />
Connecter for a USB device (for 3G USB Modem or printer).<br />
Connecter for a power adapter.<br />
Power Switch.<br />
5<br />
<strong>Vigor2850</strong> <strong>Series</strong> <strong>Quick</strong> <strong>Start</strong> <strong>Guide</strong>
1.1.3 For <strong>Vigor2850</strong>Vn<br />
LED Status Explanation<br />
ACT (Activity)<br />
Blinking The router is powered on and running normally.<br />
Off The router is powered off.<br />
USB<br />
On<br />
USB device is connected and ready for use.<br />
Blinking The data is transmitting.<br />
WAN2<br />
On<br />
Internet connection is ready.<br />
Off Internet connection is not ready.<br />
Blinking The data is transmitting.<br />
WLAN<br />
On<br />
Wireless access point is ready.<br />
Blinking It will blink slowly while wireless traffic goes through.<br />
ACT and WLAN LEDs blink quickly and<br />
simultaneously when WPS is working, and will return to<br />
normal condition after two minutes. (You need to setup<br />
WPS within 2 minutes.)<br />
ADSL<br />
On<br />
The router is ready to access Internet through ADSL<br />
link.<br />
Blinking Slowly: The ADSL connection is ready.<br />
<strong>Quick</strong>ly: The connection is training.<br />
VDSL<br />
On<br />
The router is ready to access Internet through VDSL<br />
link.<br />
Blinking Slowly: The VDSL connection is ready.<br />
<strong>Quick</strong>ly: The connection is training.<br />
Line<br />
On<br />
A PSTN phone call comes (in and out). However, when<br />
the phone call is disconnected, the LED will be off.<br />
Off There is no PSTN phone call.<br />
Phone 1/2<br />
On<br />
The phone connected to this port is off-hook.<br />
Off The phone connected to this port is on-hook.<br />
Blinking A phone call comes.<br />
LED on Connector<br />
Left LED On<br />
The port is connected.<br />
GigaLAN (Green) Off The port is disconnected.<br />
1/2/3<br />
Blinking The data is transmitting.<br />
Right LED On<br />
The port is connected with 1000Mbps.<br />
(Green) Off The port is connected with 10/100Mbps<br />
Left LED On<br />
The port is connected.<br />
GigaLAN (Green) Off The port is disconnected.<br />
4/WAN<br />
Blinking The data is transmitting.<br />
(Giga)<br />
Right LED On<br />
The port is connected with 1000Mbps.<br />
(Green) Off The port is connected with 10/100Mbps<br />
<strong>Vigor2850</strong> <strong>Series</strong> <strong>Quick</strong> <strong>Start</strong> <strong>Guide</strong> 6
Interface<br />
Wireless LAN<br />
ON/OFF/WPS<br />
Factory Reset<br />
Phone 1/2<br />
Line<br />
GigaLAN (1-3)<br />
4/WAN<br />
VDSL/ADSL<br />
USB<br />
PWR<br />
ON/OFF<br />
Description<br />
Press "Wireless LAN ON/OFF/WPS" button once to wait for client<br />
device making network connection through WPS.<br />
Press "Wireless LAN ON/OFF/WPS" button twice to enable (WLAN<br />
LED on) or disable (WLAN LED off) wireless connection.<br />
Restore the default settings. Usage: Turn on the router (ACT LED is<br />
blinking). Press the hole and keep for more than 5 seconds. When you<br />
see the ACT LED begins to blink rapidly than usual, release the button.<br />
Then the router will restart with the factory default configuration.<br />
Connecter for analog phone(s).<br />
Connector for PSTN life line.<br />
Connecters for local network devices.<br />
Connecter for local network devices or modem for accessing Internet.<br />
Connecter for accessing the Internet.<br />
Connecter for a USB device (for 3G USB Modem or printer).<br />
Connecter for a power adapter.<br />
Power Switch.<br />
7<br />
<strong>Vigor2850</strong> <strong>Series</strong> <strong>Quick</strong> <strong>Start</strong> <strong>Guide</strong>
1.2 Package Content<br />
<strong>Quick</strong> <strong>Start</strong> <strong>Guide</strong><br />
CD<br />
RJ-45 Cable (Ethernet)<br />
Antenna (n models)<br />
Analog phone adapter (V models)<br />
The type of the power adapter depends on the country that the router will be<br />
installed:<br />
UK-type Power Adapter<br />
EU-type Power Adapter<br />
USA/Taiwan-type Power Adapter<br />
AU/NZ-type Power Adapter<br />
* The maximum power consumption is 24 Watt.<br />
<strong>Vigor2850</strong> <strong>Series</strong> <strong>Quick</strong> <strong>Start</strong> <strong>Guide</strong> 8
2. Installing Your Router<br />
This section will guide you to install the router through hardware connection and<br />
configure the router’s settings through web browser.<br />
2.1 Hardware Installation<br />
Before starting to configure the router, you have to connect your devices correctly.<br />
1. Connect the XDSL interface to the external XDSL splitter with an XDSL line cable<br />
for all models. For <strong>Vigor2850</strong>Vn, also connect Line interface to external XDSL<br />
splitter.<br />
2. Connect one end of an Ethernet cable (RJ-45) to one of the LAN ports of the router<br />
and the other end of the cable (RJ-45) into the Ethernet port on your computer.<br />
3. Connect the telephone set with phone lines (for using VoIP function). For the model<br />
without phone ports, skip this step.<br />
4. Connect one end of the power adapter to the router’s power port on the rear panel,<br />
and the other side into a wall outlet.<br />
5. Power on the device by pressing down the power switch on the rear panel.<br />
6. The system starts to initiate. After completing the system test, the ACT LED will<br />
light up and start blinking.<br />
(For the hardware connection, we take “Vn” model as an example.)<br />
9<br />
<strong>Vigor2850</strong> <strong>Series</strong> <strong>Quick</strong> <strong>Start</strong> <strong>Guide</strong>
2.2 Printer Installation<br />
You can install a printer onto the router for sharing printing. All the PCs connected this<br />
router can print documents via the router. The example provided here is made based on<br />
Windows XP/2000. For Windows 98/SE/Vista, please visit www.draytek.com.<br />
Before using it, please follow the steps below to configure settings for connected<br />
computers (or wireless clients).<br />
1. Connect the printer with the router through USB port.<br />
2. Open <strong>Start</strong>->Settings-> Printers and Faxes.<br />
<strong>Vigor2850</strong> <strong>Series</strong> <strong>Quick</strong> <strong>Start</strong> <strong>Guide</strong> 10
3. Open File->Add a New Computer. A welcome dialog will appear. Please click<br />
Next.<br />
4. Click Local printer attached to this computer and click Next.<br />
5. In this dialog, choose Create a new port Type of port and use the drop down list to<br />
select Standard TCP/IP Port. Click Next.<br />
11<br />
<strong>Vigor2850</strong> <strong>Series</strong> <strong>Quick</strong> <strong>Start</strong> <strong>Guide</strong>
6. In the following dialog, type 192.168.1.1 (router’s LAN IP) in the field of Printer<br />
Name or IP Address and type IP_192.168.1.1 as the port name. Then, click Next.<br />
7. Click Standard and choose Generic Network Card.<br />
8. Then, in the following dialog, click Finish.<br />
<strong>Vigor2850</strong> <strong>Series</strong> <strong>Quick</strong> <strong>Start</strong> <strong>Guide</strong> 12
9. Now, your system will ask you to choose right name of the printer that you installed<br />
onto the router. Such step can make correct driver loaded onto your PC. When you<br />
finish the selection, click Next.<br />
10. For the final stage, you need to go back to Control Panel-> Printers and edit the<br />
property of the new printer you have added.<br />
11. Select "LPR" on Protocol, type p1 (number 1) as Queue Name. Then click OK.<br />
Next please refer to the red rectangle for choosing the correct protocol and LPR<br />
name.<br />
13<br />
<strong>Vigor2850</strong> <strong>Series</strong> <strong>Quick</strong> <strong>Start</strong> <strong>Guide</strong>
The printer can be used for printing now. Most of the printers with different<br />
manufacturers are compatible with vigor router.<br />
Note 1: Some printers with the fax/scanning or other additional functions are not<br />
supported. If you do not know whether your printer is supported or not, please<br />
visit www.draytek.com to find out the printer list. Open Support >FAQ; find out<br />
the link of Printer Server and click it; then click the What types of printers are<br />
compatible with Vigor router? link.<br />
Note 2: Vigor router supports printing request from computers via LAN ports but<br />
not WAN port.<br />
<strong>Vigor2850</strong> <strong>Series</strong> <strong>Quick</strong> <strong>Start</strong> <strong>Guide</strong> 14
3. Configuring Web Pages<br />
To access Internet, please finish basic configuration after completing the hardware<br />
installation.<br />
3.1 Accessing Web Page<br />
1. Make sure your PC connects to the router correctly.<br />
Notice: You may either simply set up your computer to get IP dynamically<br />
from the router or set up the IP address of the computer to be the same<br />
subnet as the default IP address of Vigor router 192.168.1.1. For the<br />
detailed information, please refer to the later section - Trouble Shooting of<br />
the guide.<br />
2. Open a web browser on your PC and type http://192.168.1.1. The following window<br />
will be open to ask for username and password.<br />
For user mode operation, do not type any word on the window and<br />
click Login for the simple web pages for configuration.<br />
Yet, for admin mode operation, please type “admin/admin” on<br />
Username/Password and click Login for full configuration.<br />
Notice: If you fail to access to the web configuration, please go to “Trouble<br />
Shooting” for detecting and solving your problem.<br />
15<br />
<strong>Vigor2850</strong> <strong>Series</strong> <strong>Quick</strong> <strong>Start</strong> <strong>Guide</strong>
3. The web page can be logged out according to the chosen condition. The default<br />
setting is Auto Logout, which means the web configuration system will logout after<br />
five minutes without any operation. Change the setting for your necessity.<br />
4. Now, the Main Screen will pop up.<br />
3.2 Basic Configuration<br />
The <strong>Quick</strong> <strong>Start</strong> Wizard is designed for you to easily set up your router for Internet<br />
access. You can directly access the <strong>Quick</strong> <strong>Start</strong> Wizard via Web Configurator.<br />
1. Open a web browser on your PC and type http://192.168.1.1. The system will ask<br />
you to type username/password. The displayed web pages will change according to<br />
the username and password typed. Here we take simple web pages for example. So,<br />
do not type any word on the window and click Login.<br />
Notice: For advanced configuration (admin mode), please refer to User’s<br />
<strong>Guide</strong> for more detailed information.<br />
2. Now, the Main Screen for user operation will appear. Click <strong>Quick</strong> <strong>Start</strong> Wizard.<br />
The home page will change slightly in accordance with the router model you have.<br />
<strong>Vigor2850</strong> <strong>Series</strong> <strong>Quick</strong> <strong>Start</strong> <strong>Guide</strong> 16
3. Enter the login password on the field of New Password and retype it on the field of<br />
Confirm Password. Then click Next to continue.<br />
4. On the next page as shown below, please select the WAN interface that you use. If<br />
ADSL/VDSL interface is used, please choose WAN1; if Ethernet interface is used,<br />
please choose WAN2; if 3G USB modem is used, please choose WAN3. Then click<br />
Next for next step.<br />
WAN1, WAN2 and WAN3 will bring up different configuration page. Refer to<br />
the following for detailed information.<br />
17<br />
<strong>Vigor2850</strong> <strong>Series</strong> <strong>Quick</strong> <strong>Start</strong> <strong>Guide</strong>
For WAN1<br />
WAN1 is specified for ADSL or VDSL connection. If you do not specify Fallback<br />
Mode first, the router will detect whether the network is built by ADSL or VDSL<br />
automatically.<br />
Please click Next to open the following page. Select the appropriate Internet access<br />
type according to the information from your ISP. For example, you should select<br />
PPPoE mode if the ISP provides you PPPoE interface. In addition, the field of For<br />
ADSL Only will be available only when ADSL is detected. Then click Next for next<br />
step.<br />
<strong>Vigor2850</strong> <strong>Series</strong> <strong>Quick</strong> <strong>Start</strong> <strong>Guide</strong> 18
PPPoE/PPPoA: if you click PPPoE or PPPoA as the protocol, simply click Next to<br />
enter next setting page as shown below. Please manually enter the<br />
Username/Password provided by your ISP. Then click Next.<br />
MPoA / Static or Dynamic IP: if you choose MPoA / Static or Dynamic IP as the<br />
protocol, please type in the IP address/mask/gateway information originally provided<br />
by your ISP. Then click Next for next step.<br />
19<br />
<strong>Vigor2850</strong> <strong>Series</strong> <strong>Quick</strong> <strong>Start</strong> <strong>Guide</strong>
Now you can see the following screen. It indicates that the setup is completed.<br />
Different types of connection modes will have different summary. Click Finish and<br />
then restart the router. Afterward, you will enjoy surfing on the Internet.<br />
<strong>Vigor2850</strong> <strong>Series</strong> <strong>Quick</strong> <strong>Start</strong> <strong>Guide</strong> 20
For WAN2<br />
If you choose WAN2, you have to choose physical mode and specify physical type.<br />
Then, click Next.<br />
On the next page as shown below, please select the appropriate Internet access type<br />
according to the information from your ISP. For example, you should select PPPoE<br />
mode if the ISP provides you PPPoE interface. Then click Next for next step.<br />
21<br />
<strong>Vigor2850</strong> <strong>Series</strong> <strong>Quick</strong> <strong>Start</strong> <strong>Guide</strong>
PPPoE: if you click PPPoE as the protocol, please manually enter the<br />
Username/Password provided by your ISP. Then click Next.<br />
PPTP/L2TP: if you click PPTP/L2TP, you will get the following page. Please type<br />
in all the information originally provided by your ISP. Then click Next for next step.<br />
<strong>Vigor2850</strong> <strong>Series</strong> <strong>Quick</strong> <strong>Start</strong> <strong>Guide</strong> 22
Static IP: if you click Static IP, you will get the following page. Please type in the IP<br />
address information originally provided by your ISP. Then click Next for next step.<br />
DHCP: if you click DHCP, you will get the following page. Simply click Next to<br />
continue.<br />
23<br />
<strong>Vigor2850</strong> <strong>Series</strong> <strong>Quick</strong> <strong>Start</strong> <strong>Guide</strong>
Now you can see the following screen. It indicates that the setup is complete.<br />
Different types of connection modes will have different summary. Click Finish and<br />
then restart the router. Afterward, you will enjoy surfing on the Internet.<br />
<strong>Vigor2850</strong> <strong>Series</strong> <strong>Quick</strong> <strong>Start</strong> <strong>Guide</strong> 24
For WAN3<br />
If you choose WAN3 for 3G USB modem connection, you don’t need to configure<br />
additional setting(s). Simply click Next to continue.<br />
Now you can see the following screen. It indicates that the setup is complete.<br />
Different types of connection modes will have different summary. Click Finish and<br />
then restart the router. Afterward, you will enjoy surfing on the Internet.<br />
25<br />
<strong>Vigor2850</strong> <strong>Series</strong> <strong>Quick</strong> <strong>Start</strong> <strong>Guide</strong>
3.3 Wireless Configuration<br />
<br />
For the user of <strong>Vigor2850</strong>/<strong>Vigor2850</strong>V, please skip this section.<br />
For operating <strong>Vigor2850</strong>n well, it is necessary for you to set the wireless LAN settings<br />
for using wireless function. Please read the following section carefully for configuring the<br />
settings for this router.<br />
(The default value of Frequency Domain was set by factory depends on the reselling<br />
region.)<br />
3.3.1 Basic Wireless LAN Concept<br />
In an Infrastructure Mode of wireless network, Vigor wireless router plays a role as an<br />
Access Point (AP) connecting to lots of wireless clients or Stations (STA). All the STAs<br />
(clients) will share the same Internet connection with other wired hosts via Vigor wireless<br />
router.<br />
<strong>Vigor2850</strong> <strong>Series</strong> <strong>Quick</strong> <strong>Start</strong> <strong>Guide</strong> 26
3.3.2 General Setup<br />
1. On the Wireless LAN group, select General Setup. The following page will be<br />
shown.<br />
2. Check Enable Wireless LAN to enable the wireless function.<br />
3. At present, the router can connect to IEEE802.11b, IEEE802.11g and IEEE802.11n<br />
stations simultaneously. Simply choose Mixed (11b+11g+11n) mode.<br />
4. Type in the name of the SSID. The default name for SSID is DrayTek. We suggest<br />
you to change it with a particular name.<br />
SSID (service set<br />
identifier)<br />
It is used to name the wireless LAN for this router, and it must<br />
have the same content in client PC/notebook wireless card(s).<br />
SSID can be any text numbers or various special characters.<br />
Channel It is a wireless channel for the router. The default channel is 6.<br />
You can change it to an appropriate one if the selected channel<br />
is under serious interference.<br />
5. Click OK to save the configuration.<br />
27<br />
<strong>Vigor2850</strong> <strong>Series</strong> <strong>Quick</strong> <strong>Start</strong> <strong>Guide</strong>
3.3.3 Security Settings<br />
1. On the Wireless LAN group, select Security.<br />
2. The default security mode is Mixed (WPA+WPA2)/PSK.<br />
Default Pre-Shared Key (PSK) with 13 ASCII characters is provided and stated<br />
on the label pasted on the bottom of the router.<br />
For the wireless client who wants to access into Internet through such router, please<br />
input the default PSK value for connection.<br />
Disable<br />
WEP<br />
WPA/PSK<br />
WPA2/PSK<br />
Mixed (WPA+WPA2)/<br />
PSK<br />
Turn off the encryption mechanism. For the security of<br />
your router, please select any one of the encryption<br />
mode here.<br />
Accepts only WEP clients and the encryption key<br />
should be entered in WEP Key.<br />
Accepts only WPA clients and the encryption key<br />
should be entered in PSK.<br />
Accepts only WPA2 clients and the encryption key<br />
should be entered in PSK.<br />
Accepts WPA and WPA2 clients, and the encryption<br />
key should be entered in PSK.<br />
<strong>Vigor2850</strong> <strong>Series</strong> <strong>Quick</strong> <strong>Start</strong> <strong>Guide</strong> 28
3. For WPA encryption, type in 8~63 ASCII characters or 64 Hexadecimal digits<br />
leading by 0x, for example "0123456789ABCD...." or "0x321253abcde....." on the<br />
field of Pre-Shared Key (PSK). WPA encrypts each frame transmitted from the<br />
radio using the Pre-Shared Key (PSK) which entered from this panel.<br />
4. As to WEP encryption, select 64-bit or 128-bit as the encryption mode. For 64bits<br />
WEP key, type in 5 ASCII characters or 10 hexadecimal digitals leading by 0x, for<br />
example, ABCDE or 0x4142434445. And for 128bits WEP key, type in 13 ASCII<br />
characters or 26 hexadecimal digits leading by 0x, for example, ABCDEFGHIJKLM<br />
or 0x4142434445464748494A4B4C4D. Only one WEP key can be selected and<br />
allows user to type in the characters.<br />
5. Click OK to save settings.<br />
Be aware that for the communication, all wireless devices must support the same<br />
encryption bit length and share the same key. If WEP mode is selected, only one of four<br />
preset keys can be selected at one time.<br />
29<br />
<strong>Vigor2850</strong> <strong>Series</strong> <strong>Quick</strong> <strong>Start</strong> <strong>Guide</strong>
This page is left blank.<br />
<strong>Vigor2850</strong> <strong>Series</strong> <strong>Quick</strong> <strong>Start</strong> <strong>Guide</strong> 30
4. Trouble Shooting<br />
This section will guide you to solve abnormal situations if you cannot access into the<br />
Internet after installing the router and finishing the web configuration. Please follow<br />
sections below to check your basic installation status stage by stage.<br />
‣ Checking if the hardware status is OK or not.<br />
‣ Checking if the network connection settings on your computer are OK or not.<br />
‣ Pinging the router from your computer.<br />
‣ Checking if the ISP settings are OK or not.<br />
‣ Backing to factory default setting if necessary.<br />
If all above stages are done and the router still cannot run normally, it is the time for you<br />
to contact your dealer for advanced help.<br />
4.1 Checking If the Hardware Status Is OK or Not<br />
Follow the steps below to verify the hardware status.<br />
1. Check the power line and LAN cable connections. Refer to “2.1 Hardware<br />
Installation” for details.<br />
2. Turn on the router. Make sure the ACT LED blink once per second and the<br />
correspondent LAN LED is bright.<br />
3. If not, it means that there is something wrong with the hardware status. Simply back<br />
to “2.1 Hardware Installation” to execute the hardware installation again. And<br />
then, try again.<br />
31<br />
<strong>Vigor2850</strong> <strong>Series</strong> <strong>Quick</strong> <strong>Start</strong> <strong>Guide</strong>
4.2 Checking If the Network Connection Settings on Your<br />
Computer Is OK or Not<br />
Sometimes the link failure occurs due to the wrong network connection settings. After<br />
trying the above section, if the link is stilled failed, please do the steps listed below to<br />
make sure the network connection settings is OK.<br />
For Windows<br />
<br />
The example is based on Windows XP. As to the examples for other<br />
operation systems, please refer to the similar steps or find support notes in<br />
www.draytek.com.<br />
1. Go to Control Panel and then double-click on Network Connections.<br />
2. Right-click on Local Area Connection and click on Properties.<br />
3. Select Internet Protocol (TCP/IP) and then click Properties.<br />
<strong>Vigor2850</strong> <strong>Series</strong> <strong>Quick</strong> <strong>Start</strong> <strong>Guide</strong> 32
4. Select Obtain an IP address automatically and Obtain DNS server address<br />
automatically.<br />
For Mac OS<br />
1. Double click on the current used Mac OS on the desktop.<br />
2. Open the Application folder and get into Network.<br />
3. On the Network screen, select Using DHCP from the drop down list of Configure<br />
IPv4.<br />
33<br />
<strong>Vigor2850</strong> <strong>Series</strong> <strong>Quick</strong> <strong>Start</strong> <strong>Guide</strong>
4.3 Pinging the Router from Your Computer<br />
The default gateway IP address of the router is 192.168.1.1. For some reason, you might<br />
need to use “ping” command to check the link status of the router. The most important<br />
thing is that the computer will receive a reply from 192.168.1.1. If not, please check<br />
the IP address of your computer. We suggest you setting the network connection as get IP<br />
automatically. (Please refer to the section 4.2)<br />
Please follow the steps below to ping the router correctly.<br />
For Windows<br />
1. Open the Command Prompt window (from <strong>Start</strong> menu> Run).<br />
2. Type command (for Windows 95/98/ME) or cmd (for Windows NT/<br />
2000/XP/Vista/7). The DOS command dialog will appear.<br />
3. Type ping 192.168.1.1 and press [Enter]. If the link is OK, the line of “Reply from<br />
192.168.1.1:bytes=32 time
4.4 Checking If the ISP Settings are OK or Not<br />
Open WAN >> Internet Access page and then check whether the ISP settings are set<br />
correctly. Click Details Page of WAN1/WAN2/WAN3 to review the settings that you<br />
configured previously.<br />
4.5 Backing to Factory Default Setting If Necessary<br />
Sometimes, a wrong connection can be improved by returning to the default settings. Try<br />
to reset the router by software or hardware..<br />
Warning: After pressing factory default setting, you will loose all settings<br />
you did before. Make sure you have recorded all useful settings before you<br />
pressing. The password of factory default is null.<br />
Software Reset<br />
You can reset the router to factory default via Web page. Such function is available in<br />
Admin Mode only.<br />
Go to System Maintenance and choose Reboot System on the web page. The following<br />
screen will appear. Choose Using factory default configuration and click OK. After few<br />
seconds, the router will return all the settings to the factory settings.<br />
35<br />
<strong>Vigor2850</strong> <strong>Series</strong> <strong>Quick</strong> <strong>Start</strong> <strong>Guide</strong>
Hardware Reset<br />
While the router is running (ACT LED blinking), press the RST button and hold for more<br />
than 5 seconds. When you see the ACT LED blinks rapidly, please release the button.<br />
Then, the router will restart with the default configuration.<br />
After restore the factory default setting, you can configure the settings for the router again<br />
to fit your personal request.<br />
4.6 Contacting Your Dealer<br />
If the router still cannot work correctly after trying many efforts, please contact your<br />
dealer for further help right away. For any questions, please feel free to send e-mail to<br />
support@draytek.com.<br />
<strong>Vigor2850</strong> <strong>Series</strong> <strong>Quick</strong> <strong>Start</strong> <strong>Guide</strong> 36