Create successful ePaper yourself
Turn your PDF publications into a flip-book with our unique Google optimized e-Paper software.
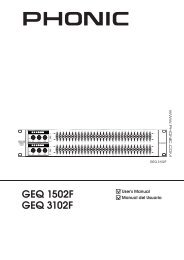
<strong>Firefly</strong> <strong>808</strong> <strong>Universal</strong><br />
FIREWIRE & USB INTERFACE
IMPORTANT SAFETY INSTRUCTIONS<br />
The apparatus shall not be exposed to dripping or splashing and that no objects with liquids, such as vases,<br />
shall be placed on the apparatus. The MAINS plug is used as the disconnect device, the disconnect device shall<br />
remain readily operable.<br />
Warning: the user shall not place this apparatus in the<br />
can be easily accessible.<br />
area during the operation so that the mains switch<br />
1. Read these instructions before operating this<br />
apparatus.<br />
2. Keep these instructions for future reference.<br />
3. Heed all warnings to ensure safe operation.<br />
4. Follow all instructions provided in this document.<br />
. Do not use this apparatus near water or in locations<br />
where condensation may occur.<br />
6. Clean only with dry cloth. Do not use aerosol or liquid<br />
cleaners. Unplug this apparatus before cleaning.<br />
7. Do not block any of the ventilation openings. Install<br />
in accordance with the manufacturer’s instructions.<br />
8. Do not install near any heat sources such as radiators,<br />
heat registers, stoves, or other apparatus (including<br />
.<br />
9. Do not defeat the safety purpose of the polarized or<br />
grounding-type plug. A polarized plug has two blades<br />
with one wider than the other. A grounding type plug<br />
has two blades and a third grounding prong. The wide<br />
blade or the third prong is provided for your safety. If<br />
the provided plug does not into your outlet, consult<br />
an electrician for replacement of the obsolete outlet.<br />
10. Protect the power cord from being walked on or<br />
pinched particularly at plug, convenience receptacles,<br />
and the point where they exit from the apparatus.<br />
11. Only use attachments/accessories by the<br />
manufacturer.<br />
CAUTION: TO REDUCE THE RISK OF ELECTRIC SHOCK,<br />
DO NOT REMOVE COVER (OR BACK)<br />
NO USER SERVICEABLE PARTS INSIDE<br />
REFER SERVICING TO QUALIFIED PERSONNEL<br />
The lightning flash with arrowhead symbol, within an<br />
equilateral triangle, is intended to alert the user to the<br />
presence of uninsulated “dangerous voltage” within the<br />
product’<br />
CAUTION<br />
RISK OF ELECTRIC SHOCK<br />
DO NOT OPEN<br />
magnitude to constitute a risk of electric shock to persons.<br />
The exclamation point within an equilateral triangle is intended<br />
to alert the user to the presence of important operating<br />
and maintenance (servicing) instructions in the literature<br />
accompanying the appliance.<br />
WARNING: To reduce the risk of<br />
not expose this apparatus to rain or moisture.<br />
or electric shock, do<br />
CAUTION: Use of controls or adjustments or performance<br />
of procedures other than those<br />
hazardous radiation exposure.<br />
may result in<br />
12. Use only with a cart, stand, tripod, bracket, or<br />
table<br />
by the manufacturer, or sold with<br />
the apparatus. When a cart is used, use caution<br />
when moving the cart/apparatus<br />
combination to avoid injury from tipover.<br />
13. Unplug this apparatus during lighting<br />
storms or when unused for long<br />
periods of time.<br />
14. Refer all servicing to service personnel.<br />
Servicing is required when the apparatus has been<br />
damaged in any way, such as power-supply cord or<br />
plug is damaged, liquid has been spilled or objects<br />
have fallen into the apparatus, the apparatus has<br />
been exposed to rain or moisture, does not operate<br />
normally, or has been dropped.
FIREFLY <strong>808</strong> UNIVERSAL<br />
FIREWIRE & USB INTERFACE<br />
INTRODUCTION .....................................................................................................................4<br />
FEATURES..............................................................................................................................4<br />
QUICK START / SET UP...........................................................................................................5<br />
FRONT PANEL DESCRIPTION...............................................................................................6<br />
REAR PANEL DESCRIPTION.................................................................................................7<br />
FIREWIRE / USB INTERFACE...............................................................................................9<br />
SYSTEM REQUIREMENTS..........................................................................................9<br />
DRIVER INSTALLATION...............................................................................................9<br />
CHANNEL ASSIGNMENT............................................................................................13<br />
CUBASE LE 4...............................................................................................................13<br />
PHONIC CONTROL PANEL SOFTWARE...................................................................14<br />
FIREFLY MIXER SOFTWARE.....................................................................................16<br />
STAND ALONE MODE...........................................................................................................18<br />
APPLICATION ........................................................................................................................19<br />
DIMENSIONS........................................................................................................................22<br />
SPECIFICATIONS ..................................................................................................................23<br />
BLOCK DIAGRAM.......................................................................................................................24<br />
APPENDIX ......................................................................................................................................25<br />
Phonic preserves the right to improve or alter any information within this document without prior notice.<br />
V1.0 MAY 27th,2008
INTRODUCTION<br />
Congratulations on your purchase of one of the newest<br />
members of the <strong>Firefly</strong> series from Phonic, the <strong>Firefly</strong><br />
<strong>808</strong> <strong>Universal</strong>. We know how to make the best audio<br />
gear for you and we know your need to create great<br />
recordings and productions. The <strong>Firefly</strong> <strong>808</strong> <strong>Universal</strong><br />
features a eight mic/line inputs (with +48V phantom<br />
power), digital AES/EBU I/O and word sync, ADAT I/O,<br />
MIDI I/O, S/PDIF I/O, and all of these with FireWire and<br />
USB interfaces for digitally transferring your audio to<br />
your computer in high resolution audio (up to 192kHz)<br />
that meets today modern productions standards.<br />
We know how eager you are to get started – wanting<br />
to get the <strong>Firefly</strong> out and hook it all up is probably<br />
your number one priority right now – but before you<br />
do, we strongly urge you to take a look through this<br />
manual. Inside, you will find important facts and figures<br />
on the set up, use and applications of your <strong>Firefly</strong> <strong>808</strong><br />
<strong>Universal</strong>. If you do happen to be one of the many<br />
people who refuse to read user manuals, then we just<br />
urge you to at least glance at the Instant Setup section.<br />
After glancing at or reading through the manual (we<br />
applaud you if you do read the entire manual), please<br />
store it in a place that is easy for you to find, because<br />
chances are there’s something you missed the first<br />
time around.<br />
FEATURES<br />
• FireWire (IEEE 1394) & USB 2.0 audio interface<br />
• 24-bit resolution, up to 192k Hz sampling rate<br />
• 18 simultaneous inputs and outputs FireWire audio<br />
interface<br />
• 8 microphone preamps with trim controls and<br />
individual phantom power switches<br />
• 8 analog line Inputs including 2 Instrument Inputs<br />
• 8 channels of optical ADAT I/O (4 ch. via 96k dual<br />
SMUX)<br />
• S/PDIF I/O, AES/EBU I/O, MIDI I/O and word clock<br />
I/O<br />
• Headphone output and Main output with volume<br />
control for monitoring purpose<br />
• Channel meters on channel 1 to 8 for input or<br />
output<br />
• Synchronization, sampling rate, digit I/O and MIDI<br />
in/out indicators<br />
• Dual FireWire ports for daisy chaining and direct<br />
connection to Mac or PC<br />
• Stand-alone mixer functionality for field and studio<br />
use without computer<br />
• Instrument input, pad switch, balanced TRS send<br />
jacks on Inputs 1 and 2<br />
• Compatible with Windows XP, Windows Vista and<br />
Mac OSX<br />
• Steinberg Cubase LE 4 software included<br />
<br />
FIREFLY <strong>808</strong> UNIVERSAL
INSTANT SETUP<br />
Quick Start<br />
1. Install the USB or FireWire driver and mixer<br />
software included with your <strong>Firefly</strong> onto your<br />
computer. More detailed instructions can be found<br />
in the "Driver Installation" section of this manual.<br />
Mac users do not need to install the drivers,<br />
however have their own mixer software that can<br />
ben installed to allow for adjustment of signal<br />
levels, sampling rates and so forth.<br />
2. During the driver installation process, you will be<br />
instructed to connect the <strong>Firefly</strong> to the computer<br />
and turn it on. Connect the <strong>Firefly</strong> to the computer<br />
using the FireWire or USB cables included along<br />
with the unit.<br />
3. Connect the supplied AC power cable into the<br />
power inlet connector at the rear back of the <strong>Firefly</strong><br />
<strong>808</strong>. Turn the unit on using the power switch on the<br />
front of the unit.<br />
4. Connect a microphone to the XLR input connector<br />
on the front of the unit. You can take a look at the<br />
mic LED meter and adjust the level control so it<br />
sits at a good level for recording. Do the same<br />
with the various mic and line inputs on the rear<br />
of the <strong>Firefly</strong>. It's advisable to keep the unit off<br />
when plugging in or unplugging microphones,<br />
instruments and such.<br />
5. Open the Phonic Control Panel software and<br />
check that the <strong>Firefly</strong>'s inputs and outputs are all<br />
shown in the appropriate windows. In this section<br />
you are also able to change the size of the buffer,<br />
sampling rate and a few other properties.<br />
6. You can use your headphones with the Phones<br />
output to monitor your input and output audio on<br />
the <strong>Firefly</strong>.<br />
7. Now you are ready to start designing high<br />
resolution audio productions and ready to find out<br />
all the advantages of your brand new <strong>Firefly</strong>.<br />
Setup<br />
1. If you have experience connecting our FireWire<br />
products you’ll find this setup familiar and easy.<br />
2. Turn on your computer and be sure to have a<br />
FireWire or USB port available.<br />
3. Connect your <strong>Firefly</strong> to an AC power outlet through<br />
the provided AC power cable.<br />
4. Connect the supplied FireWire or USB cable to a<br />
port on the back of your <strong>Firefly</strong>, and connect the<br />
other end to your computer. You only need to<br />
connect a single FireWire cord to your computer<br />
– the second port on the <strong>Firefly</strong> is to allow you to<br />
daisy chain the <strong>Firefly</strong> with additional <strong>Firefly</strong> <strong>808</strong><br />
<strong>Universal</strong>s.<br />
5. Turn the unit on using the switch located on the<br />
back panel.<br />
6. Your computer will automatically recognize the<br />
<strong>Firefly</strong> provided you have installed the appropriate<br />
drivers (see the Quick Start section). You should<br />
be able to view and edit your <strong>Firefly</strong>’s channel<br />
properties in the Phonic FireWire Control Panel<br />
software.<br />
7. Your next and final step would be to activate the<br />
<strong>Firefly</strong> in your DAW software. Most programs will<br />
make you open a project before you do so. Then<br />
all you need to do is go to the “devices”, “tools”<br />
or “properties” pull-down menu (depending on<br />
your software of choice) - here you should find an<br />
option that allows you to view and change your<br />
desired inputs and outputs and assign them to<br />
your project's channels. Activate the <strong>Firefly</strong> and<br />
you're done!<br />
FIREFLY <strong>808</strong> UNIVERSAL
Front Panel Description<br />
1. Power Button<br />
Push this button in to turn the <strong>Firefly</strong> <strong>808</strong> <strong>Universal</strong> on.<br />
When the unit is on, the button will light up.<br />
2. FireWire LED<br />
This LED will light up when a connection to the computer<br />
is established through the FireWire interface.<br />
1<br />
2<br />
7. Headphone Output Jack and Gain Control<br />
All the audio signals that are mixed inside the <strong>Firefly</strong><br />
<strong>808</strong> <strong>Universal</strong> can be monitored with headphones<br />
through this jack. You can also use the corresponding<br />
control to adjust the signal level.<br />
8. Main Level Control<br />
This control adjusts the final level of the audio sent<br />
through the main left and right outputs, the signal of<br />
which is taken either from the FireWire return signal<br />
or the various analog and digital inputs (depending on<br />
your software settings).<br />
7 8<br />
3. Channel 1 and 2 Inputs<br />
These two combo jacks allow users to connect either<br />
balanced XLR 3-pin connectors, for dynamic or<br />
condenser microphones, or ¼” TRS phone jacks for<br />
instruments such as electric or bass guitars.<br />
NOTE: When plugging line-level signals into the<br />
combo jacks, disengage the PAD button to lower the<br />
signal level to an acceptable degree.<br />
4. Input Gain Controls 1 - 8<br />
Turn these knobs clockwise to increase the microphone/<br />
line input gain for the corresponding channels. You<br />
have 50dB of gain to work with, but be sure not to<br />
adjust it to a level that will make the input meter hit<br />
the “clip” point. A good region to be in is about -6dB<br />
– this will give you a greater signal level with enough<br />
headroom to avoid clipping.<br />
5. PAD selector<br />
This button controls the input sensitivity for channels 1<br />
and 2. Pushing this button in will attenuate the input<br />
signal by 20dB, allowing you to connect a microphone<br />
or instrument to the combo input jack.<br />
6. +48V Phantom Power<br />
Pushing one of these buttons will activate the +48V<br />
phantom power for the corresponding channel,<br />
allowing you to use condenser or ribbon microphones<br />
(or other devices that require +48V) to work properly.<br />
Activation of phantom power will be accompanied by<br />
an illuminated LED. If you are not sure if your mic uses<br />
phantom power, please refer to the microphone user’s<br />
manual.<br />
9. LED Level Meter<br />
This stereo 6-segment LED meter displays the signal<br />
level of sum of all 8 analog input channels. User’s<br />
are advised to keep this meter sitting around the -6dB<br />
mark to make the best use of audio possible without<br />
causing any unnecessary clipping.<br />
10. Channel LED Level Meters<br />
The input/output signal levels from analog inputs/<br />
outputs 1 to 8 are shown in these 4-segment LED<br />
meters. Whether these meters display the input or<br />
output level is dependant on the input/output select<br />
button. Users are advised to try and keep their signal<br />
level around the -20, -10 marks, as to avoid distortion<br />
and clipping.<br />
11. Input/Output Select Switch and Indicator<br />
This button determines whether the LED level meter<br />
will display the input or output signal of the <strong>Firefly</strong><br />
<strong>808</strong>’s input/output channels. This button is an easy<br />
way to compare input and output levels. Depending<br />
which setting is currently active, an LED will light up<br />
next to the corresponding setting (“analog input” or<br />
“analog output”).<br />
9<br />
6<br />
<br />
3 4<br />
10<br />
11<br />
FIREFLY <strong>808</strong> UNIVERSAL
12. Synchronization Indicators<br />
<strong>Firefly</strong> <strong>808</strong> <strong>Universal</strong> can be synchronized with any<br />
WCLK sync device, enabling you to use it for your<br />
audio/video recording studios as well as cinema and<br />
video production that requires high resolution audio.<br />
When the <strong>Firefly</strong> <strong>808</strong> is synchronized, one of these<br />
LEDs will light up to indicate which device the <strong>Firefly</strong> is<br />
currently synced with. If you try to sync with a device<br />
not connected to the <strong>Firefly</strong>, the corresponding light will<br />
flash briefly and return back to the previous setting.<br />
12<br />
Rear Panel Description<br />
17. Line Input Channel 1 and 2<br />
These input jacks allow users to connect line-level<br />
devices, the signal of which is fed through the FireWire<br />
interface, and sent directly out the channel 1 and 2<br />
sends.<br />
18. Channel 1 and 2 Sends<br />
These outputs act as direct sends of the channel 1<br />
and 2 inputs, allowing the signal to be used in other<br />
devices.<br />
17<br />
13. Sampling Rate Indicator<br />
When <strong>Firefly</strong> <strong>808</strong> is synchronized, one of these LEDs<br />
will light up to show the sampling rate of the device<br />
the <strong>Firefly</strong> is synchronized with. The <strong>Firefly</strong> will<br />
automatically be set to that rate.<br />
14. AES/SPDIF LED Indicator<br />
These input and output LEDs will light up when the<br />
AES/EBU or S/PDIF interface is in use.<br />
15. ADAT LED Indicator<br />
You can use your optical devices in conjunction with<br />
the <strong>Firefly</strong> <strong>808</strong>. When the ADAT optical connection is<br />
in use, the input and output LEDs will activate to let<br />
you know the connection is successful.<br />
16. MIDI Indicator<br />
13<br />
When using the MIDI interface, these input and output<br />
LEDs will light up.<br />
19. Input Channels 3 to 8<br />
Each of these channels features a balanced ¼” TRS<br />
Line Inputs and can be used to connect any line level<br />
device like CD players, DAT recorders. You can even<br />
connect an analog mixer that does not have FireWire<br />
interface to allow you to send that signal to the computer.<br />
Also present are 3-pin XLR mic input connectors for<br />
use with condenser or dynamic microphones.<br />
20. Main Outputs<br />
18<br />
These ¼” TRS outputs will allow users to send the main<br />
stereo mix of the <strong>Firefly</strong> <strong>808</strong>’s return signal to external<br />
devices. The signals from analog channels 1, 3, 5 and<br />
7 are sent through the left output, whereas the 2, 4, 6<br />
and 8 signals are sent through the right output. When<br />
the FireWire or USB interface is in use, users are able<br />
to use the Mixer software's crossfader to select the<br />
degree of the FireWire return signal and the analog<br />
input signal that is sent to these outputs. The Main<br />
outputs can be connected to active speakers, studio<br />
monitors, or other mixers, depending on your needs.<br />
14 1 16<br />
20 19<br />
FIREFLY <strong>808</strong> UNIVERSAL
21 26 2<br />
21. Analog Outputs<br />
These are balanced ¼" TRS line outputs with line<br />
(+4dBu) level signals. Users are able to use these<br />
outputs to get a stereo output channel from each pair<br />
of odd and even numbered outputs, or even a surround<br />
mix (5.2 or 6.2). Analog outputs 1 and 2 can be used<br />
to send a stereo mix of your analog inputs or FireWire/<br />
USB return signal, which is ideal for use with studio<br />
monitors or subwoofers (if making a surround mix).<br />
22. AES/EBU In/Out<br />
This is a standard XLR AES/EBU digital interface that<br />
lets you connect your digital AES-enabled devices to<br />
your <strong>Firefly</strong>. The IN or OUT LED on the front of the<br />
<strong>Firefly</strong> will light up when the inputs and outputs are in<br />
use.<br />
23. S/PDIF / AES IN Switch<br />
This switch determines which of these digital inputs<br />
will be used.<br />
24. S/PDIF In/Out<br />
This is a standard RCA S/PDIF Digital Audio Input/<br />
Output that can be used with digital mixers, DAT<br />
recorders, or any external device that uses the RCA<br />
digital interface format. Please use a 75 ohm coaxial<br />
cable with RCA plug when using S/PDIF. The most<br />
common problems or glitches incorporated with S/<br />
PDIF transfer are due to use of improper analog<br />
cables. Users may also use these inputs for "High-<br />
Speed" S/PDIF devices when that option is selected in<br />
the computer's <strong>Firefly</strong> mixer software.<br />
24 23 22<br />
S/PDIF<br />
IN<br />
AES IN<br />
25. FireWire / USB Ports and Select Switch<br />
These connections are digital USB and FireWire (aka<br />
IEEE 1394) ports that you can use to connect the<br />
<strong>Firefly</strong> <strong>808</strong> <strong>Universal</strong> to your computer. Doing so will<br />
enable you to use your computer for high quality multitrack<br />
recording, as well as editing, mixing, and so forth,<br />
in your favorite Digital Audio Workstation Software.<br />
The switch that accompanies these ports is used to<br />
determine which of the ports you will be using.<br />
You have two FireWire ports at your disposal; however<br />
you need only connect one to your computer. The<br />
second port will allow you to connect a second <strong>Firefly</strong><br />
<strong>808</strong> <strong>Universal</strong>, allowing twice the number of inputs!<br />
26. MIDI In/Out<br />
These inputs will allow you to send 16 MIDI channels<br />
through the FireWire or USB interface to your<br />
computer, as well as receive 16 back. These channels<br />
will be present within the <strong>Firefly</strong> Control Software, and<br />
available for use in most MIDI-enabled programs.<br />
27. ADAT In/Out<br />
This is a standard TOSlink ADAT optical interface that<br />
you can use in the same way as you would use your<br />
typical ADAT devices. This input can also be used<br />
for SMUX inputs when this option is selected in the<br />
computer's <strong>Firefly</strong> mixer software.<br />
28. WCLK IN/OUT<br />
These are BNC input/output connectors for standard<br />
Word Clock Syncs, as are used in DVTRs and other<br />
digital devices.<br />
29. AC Power Input and Fuse Holder<br />
Connect the supplied AC power cord to this connector.<br />
The other end should be connected to a suitable<br />
power supply. The power supply’s fuse is located just<br />
below this connector. If your fuse blows, remove the<br />
fuse holder’s cover and replace the fuse with another<br />
suitable fuse (as indicated on the fuse-holder’s<br />
cover).<br />
28 27<br />
29<br />
<br />
FIREFLY <strong>808</strong> UNIVERSAL
FireWire / USB Interface<br />
System Requirements<br />
The following are the minimum required specifications for use with the <strong>Firefly</strong> <strong>808</strong> <strong>Universal</strong>. If your computer does not<br />
meet these requirements, you will experience lagging of audio and possible freezing of your computer when attempting to<br />
operate the device.<br />
Windows<br />
• Microsoft® Windows® XP SP1 and SP2 / Vista®<br />
• Available USB 2.0 or FireWire port (suggested FireWire Interface: ADS Pyro 64 FireWire card with TI chip)<br />
• Intel Pentium® 4 processor or equivalent AMD Athlon processor<br />
• Motherboard with Intel or VIA chipset<br />
• 5400 RPM or faster hard disk drive (7200 RPM or faster with 8 MB cache recommended)<br />
• 512 MB or more of RAM (1 GB or more recommended)<br />
Macintosh<br />
• OS X 10.3.5 or later with native FireWire support<br />
• G4 or newer processor<br />
• 512 MB or more of RAM<br />
Driver Installation<br />
To use the <strong>Firefly</strong> <strong>808</strong> on a PC, it is important to install all the necessary drivers from the included CD (ASIO and WDM drivers).<br />
It is important that users read all instructions carefully before continuing on to the each step of installation, as users<br />
will be required to unplug and plug in their FireWire device. These drivers are not necessary for Mac users, however Mac<br />
users may wish to install our Mixer software from the included CD. It’s important to remember that the driver you install will<br />
depend on whether you are using FireWire or USB, so make sure you install the right one!<br />
Windows XP (with Service Pack 1 or 2) / Vista<br />
1. It is recommended that you quit all applications before starting the installation process.<br />
2. Ensure the <strong>Firefly</strong> is not yet connected to your Computer’s FireWire or USB input.<br />
3. Insert the installation CD included with your <strong>Firefly</strong> into the CD-ROM drive of your computer. If the CD does not automatically<br />
start the installation process within a few moments, then navigate to “My Computer” g your CD-ROM drive g<br />
“FireWire Drivers and Control Panel” or "USB Drivers and Control Panel" g run “setup.exe” to begin the installation manually.<br />
The Phonic Control Panel software and the <strong>Firefly</strong> <strong>808</strong> <strong>Universal</strong> Mixer software will also be installed at this time.<br />
4. Follow the installation instructions. The following applies to the USB driver installation, however the FireWire installation<br />
is almost identical.<br />
Make sure no other programs are running on your PC and that the<br />
<strong>Firefly</strong> <strong>808</strong> <strong>Universal</strong> is not connected to your PC, then click “Next”.<br />
FIREFLY <strong>808</strong> UNIVERSAL
Read and accept the terms of the License Agreement, and click “Next” to continue.<br />
Select a new destination for the installation, or else click “Install” to accept the default directory.<br />
10 FIREFLY <strong>808</strong> UNIVERSAL
Connect the <strong>Firefly</strong> to the Computer and turn the power on or, if<br />
the <strong>Firefly</strong> is already connected, turn it off and then on again.<br />
If a message is displayed indicating that the software has not passed Windows Logo test,<br />
click “Continue Anyway.” On Vista, you may receive a similar message regarding Signed Drivers.<br />
After installation is complete, the Phonic Control Panel software will be visible<br />
in the taskbar and you are free to use the device as they wish.<br />
FIREFLY <strong>808</strong> UNIVERSAL<br />
11
Macintosh OS X (10.3.5 or later)<br />
The <strong>Firefly</strong> <strong>808</strong> <strong>Universal</strong> works with the primary audio drivers of Macintosh OS X 10.3.5 and later. First verify that you<br />
are running Macintosh OS X 10.3.5 or above, then connect the <strong>Firefly</strong> to a FireWire port to the computer. To ensure your<br />
<strong>Firefly</strong> is working, enter the Utilities folder and double-click the Audio MIDI Setup icon.<br />
Enter the Audio Device’s section. From the “Properties for” pull-down tab, select <strong>Firefly</strong> <strong>808</strong>. At the bottom of the window,<br />
users can edit the setup of the <strong>Firefly</strong> <strong>808</strong>. Properties such as sampling rate and clock source can be altered and users<br />
may also opt to make the <strong>Firefly</strong> their default input and/or output device.<br />
Mac users are able to use GarageBand, Logic Pro, as well as a host of other programs, in conjunction with the <strong>Firefly</strong> <strong>808</strong><br />
<strong>Universal</strong>.<br />
12 FIREFLY <strong>808</strong> UNIVERSAL
Channel Assignment<br />
When using a Digital Audio Workstation on a PC, and<br />
within the included Phonic FireWire control panel software,<br />
the following names have been attributed to the input<br />
channels of the FireWire device. They can be altered<br />
through the Phonic Control Panel software.<br />
FireWire Input Channel Name Device Channel<br />
Line[1] I L Analog Input 1<br />
Line[1] I R Analog Input 2<br />
Line[2] I L Analog Input 3<br />
Line[2] I R Analog Input 4<br />
Line[3] I L Analog Input 5<br />
Line[3] I R Analog Input 6<br />
Line[4] I L Analog Input 7<br />
Line[4] I R Analog Input 8<br />
SPDIF[1] I L<br />
S/PDIF or AES In<br />
SPDIF[1] I R<br />
S/PDIF or AES In<br />
TOS[1] I L<br />
ADAT or SMUX In<br />
TOS[2] I R<br />
ADAT or SMUX In<br />
MIDI I 1<br />
MIDI In<br />
FireWire Output Channel Name Device Channel<br />
Line[1] O L Analog Output 1<br />
Line[1] O R Analog Output 2<br />
Line[2] O L Analog Output 3<br />
Line[2] O R Analog Output 4<br />
Line[3] O L Analog Output 5<br />
Line[3] O R Analog Output 6<br />
Line[4] O L Analog Output 7<br />
Line[4] O R Analog Output 8<br />
SPDIF[1] O L<br />
S/PDIF or AES Out<br />
SPDIF[1] O R<br />
S/PDIF or AES Out<br />
TOS[1] O L<br />
ADAT or SMUX Out<br />
TOS[2] O R<br />
ADAT or SMUX Out<br />
MIDI O 1<br />
MIDI Out<br />
To alter an input channel’s name on your computer, open<br />
the Phonic Control Panel software. On the left hand side<br />
of the control panel, users will find the settings categories.<br />
By clicking “Input Channels”, the main window will display<br />
the titles input channels. You can then highlight the channel<br />
names and press the “Edit Channel Name” button on the<br />
bottom of the control window. A new window will appear<br />
that will allow users to enter a new name for the channel.<br />
If you would like to use the <strong>Firefly</strong> as your default audio<br />
output device on your PC, simply go into the Windows control<br />
panel and select “Sound and Audio Devices.” Click on<br />
the Audio tab and use the pull-down menu to select the<br />
<strong>Firefly</strong> <strong>808</strong> <strong>Universal</strong> from the list of available devices. The<br />
<strong>Firefly</strong> can also be selected as the default output device<br />
for individual programs by editing said programs’ settings<br />
/ options.<br />
Cubase LE 4<br />
Cubase LE is a fairly powerful program provided along<br />
with the <strong>Firefly</strong> interface that allows users to record, mix,<br />
edit, delete, and alter their tracks. Please note that only<br />
8 tracks can be recorded at once with the version of Cubase<br />
included, and users must upgrade to Cubase SX, or<br />
find other suitable DAW software, if they choose to record<br />
more tracks.<br />
Installation<br />
Insert the Cubase LE 4 installation CD that came with<br />
your <strong>Firefly</strong> into the CD-ROM drive of your computer. Run<br />
the installer. You must install Steinberg’s registration software<br />
to be able to use the software successfully.<br />
Setup<br />
After successfully completing the installation process, the<br />
following process must be followed to work efficiently with<br />
the Friefly.<br />
1. Open the Cubase LE 4 program and start a new Project.<br />
Add a track or two to this project.<br />
2. Go to the ‘Devices’ pull-down menu and select ‘Device<br />
Setup’. On the left, select ‘VST Multitrack’.<br />
3. From the ASIO Driver drop-down list select the “Phonic<br />
ASIO Driver.” A pop-up box will ask you if you want to<br />
switch the ASIO driver. Click ‘Switch.’ This completes<br />
the basic installation and setup.<br />
4. Activating audio tracks received from the <strong>Firefly</strong>.<br />
a. Go to the “devices” pull-down menu and select ‘VST<br />
Inputs’. This will display the various inputs (“Phonic<br />
FF<strong>808</strong>U Ch 1”, “Phonic FF<strong>808</strong>U Ch 2”, etc.)<br />
b. Activate 8 of these channels by clicking the “Active”<br />
button located next to each channel name. Please<br />
note, only 8 input channels can be activated at any<br />
one time in this version of Cubase. This is a limitation<br />
of Cubase LE 4. If more input channels are<br />
needed, we suggest upgrading to a higher version<br />
of Cubase, or use other DAW software.<br />
5. For further instructions on the operation of Cubase,<br />
please consult the user manual by pressing F1 while<br />
the program is open.<br />
If you wish to reset the Phonic ASIO driver, simply go to<br />
the ‘devices’ pull-down menu and select ‘device setup’.<br />
Simply click “reset” and select the “Phonic ASIO Driver”.<br />
Click ‘ok’ to continue and the <strong>Firefly</strong> <strong>808</strong> should once<br />
again become functional.<br />
FIREFLY <strong>808</strong> UNIVERSAL<br />
13
FireWire Device Control Panel<br />
The FireWire control panel can be accessed at any time<br />
by entering choosing the shortcut from your Programs<br />
menu. This program will not only allow users to alter their<br />
device and channel names and properties, but will also let<br />
them correct for latency issues, change sampling rates,<br />
and so forth. When opening the software, a number of<br />
options will be available for users to select from, allowing<br />
them to adjust the available properties.<br />
Devices<br />
In the Devices section, users are able to view and edit the<br />
name of the Phonic FireWire or USB Devices currently<br />
connected to their computer.<br />
Output Channels<br />
By entering the Output Channels section, users can view<br />
and edit the names of the various output channels from<br />
the computer to the <strong>Firefly</strong> <strong>808</strong> <strong>Universal</strong>.<br />
Synchronization<br />
In the Synchronization section, users can adjust the sampling<br />
rate and other synchronization properties. Many of<br />
these adjustable properties, as they are, are set for optimum<br />
performance and, unless you are sure of what you<br />
need to change, are probably best left alone.<br />
Input Channels<br />
The Input Channels section allows users to view and edit<br />
the name of the various input channels received from the<br />
FireWire or USB interface. For a list of default channel<br />
names, please consult the table on page 13.<br />
First off, the sync mode can be altered, though making<br />
this alteration is not recommended for novice users. The<br />
sync mode is basically the way the computer determines<br />
what the ‘clock source’ (ie. device that your computer will<br />
use to determine the timing of all digital signals received)<br />
will be. The default setting for this feature is “CSP,” meaning<br />
the <strong>Firefly</strong> is the “master” clock source of the device.<br />
The other options allow users to make the FireWire follow<br />
the “timing” of whichever device is the clock source.<br />
Having two clock sources has the potential to create very<br />
undesireable results, so it is best avoided. If the <strong>Firefly</strong><br />
is the only piece of digital audio equipment attached to<br />
the computer, there is no reason this option should be<br />
changed.<br />
14 FIREFLY <strong>808</strong> UNIVERSAL
Users are also able to change between automatic and<br />
manual sampling rate settings. When the sampling rate is<br />
manually set, users can select between sampling rates of<br />
44.1, 48.0, 88.2, 96.0 and 128 kHz per second for analog<br />
inputs and 176.4 and 192.0 kHz per second for some digital<br />
devices. Many devices have sampling rates that do<br />
not surpass 44.1 kHz per second, therefore, when using<br />
multiple digital devices, users are advised not to exceed<br />
this level unless they are sure the secondary device’s<br />
sampling rate can.<br />
Settings<br />
Users are able to adjust various buffer times in the Settings<br />
section.<br />
The Stream Buffer Depth is adjustable between 0.5 and<br />
20 milliseconds. It adjusts the buffer used when streaming<br />
a signal from the <strong>Firefly</strong>. If the depth is set too high,<br />
an obvious latency will become evident. If the depth is<br />
too low, various clicks and pops may become obvious. It<br />
is best to set the Stream Buffer Depth to a level that allows<br />
users to get the lowest latency, while still maintaining<br />
an optimal performance. The default settings are ideal for<br />
most computers.<br />
The ASIO Buffer Depth is adjustable between 4 and 40<br />
milliseconds. This allows users to adjust the latency of<br />
the stream received by ASIO driver-based software (including<br />
Steinberg Cubase LE 4).<br />
The WDM (Windows Driver Model) Sound Buffer Depth<br />
is adjustable between 4 and 40 milliseconds. This allows<br />
users to adjust the latency of the stream received by<br />
WDM based programs.<br />
Also in this section, users are able to view their “drop out<br />
statistics”, where the number of times the FireWire connection<br />
has been interrupted can be viewed.<br />
Streams<br />
In the Streams section, the <strong>Firefly</strong> device properties can<br />
be viewed. Each input and output stream can be scrutinized,<br />
and the isochronous stream number and its supported<br />
sampling rates can be viewed.<br />
FIREFLY <strong>808</strong> UNIVERSAL<br />
15
<strong>Firefly</strong> <strong>808</strong> Mixer Software<br />
Outputs<br />
Master 1/2<br />
1<br />
4<br />
5<br />
Input Monitor Mixer<br />
Line1 Line2<br />
M<br />
M<br />
Link<br />
S<br />
S<br />
2<br />
3<br />
8<br />
9<br />
6<br />
0.0 dB<br />
0.0 dB<br />
Disconnected<br />
When there is no digital audio workstation software is in<br />
use, the <strong>Firefly</strong> <strong>808</strong> <strong>Universal</strong> can be controlled using this<br />
basic mixer which is included along with the driver and<br />
control panel software. The signal from this mixing panel<br />
is able to be fed back to the <strong>Firefly</strong> <strong>808</strong> <strong>Universal</strong> as a<br />
stereo signal, routed to analog outputs 1 and 2 and the<br />
headphones output.<br />
Channel Inputs<br />
1. Mute Button<br />
Pushing this button will mute the corresponding channel,<br />
stopping it from being sent back to the <strong>Firefly</strong>.<br />
2. Solo Button<br />
Use this button to solo the corresponding channel back to<br />
the <strong>Firefly</strong> allowing users to monitor the signal. The soloed<br />
channels will be sent to analog outputs 1 and 2 and<br />
the headphones output on the <strong>Firefly</strong> <strong>808</strong>.<br />
3. Link Button<br />
Pushing this button will enable a link function, allowing<br />
users to control two channels as if they were one with the<br />
fader, mute and solo buttons being ‘linked’ to two inputs.<br />
4. Pan<br />
Each of the <strong>Firefly</strong>’s inputs are set to either left or right by<br />
default, with odd channels being set to the left, and even<br />
channels being set to the right.<br />
5. Fader<br />
Click and hold the mouse button on the fader to adjust the<br />
volume of the signal coming into the computer through<br />
the FireWire/USB connection for each channel. When in<br />
link mode, a single fader will control 2 channels simultaneously.<br />
7<br />
10<br />
0.0 dB<br />
6. Level Meter<br />
These two parts of the PC-based mixer give users an idea<br />
of the input levels received through the FireWire/USB interface.<br />
The graphic bar will give visual representation of<br />
the level and users are able to read the exact input level<br />
in decibels underneath the fader.<br />
7. Channel Status (digital channels only)<br />
This display window will show whether a digital device is<br />
connected to or disconnected from the <strong>Firefly</strong> unit. The<br />
status will be updated automatically when a digital device<br />
is connected to the correct inputs.<br />
Output Channel<br />
8. Balance<br />
The balance control for the master output is set to the<br />
center by default. Moving it to the left will attenuate the<br />
right signal and intensify the left signal accordingly; moving<br />
it to the right will do the opposite.<br />
9. Fader<br />
Click and hold the mouse button on the fader to adjust<br />
the volume of the stereo output signal being sent through<br />
the FireWire/USB connection to the <strong>Firefly</strong>. The signal<br />
controlled by these controls is sent through the <strong>Firefly</strong>’s<br />
analog outputs 1 and 2.<br />
10. Level Meter<br />
This gives users an idea of the output levels of both<br />
channels sent through the FireWire/USB interface. The<br />
graphic bar will give visual representation of the level and<br />
users are able to read the exact input level in decibels<br />
underneath the fader.<br />
Host Connection<br />
11. USB / 1394a Selection<br />
This indicator will light up in red to show whether the<br />
USB 2.0 or FireWire interface is being used to access the<br />
<strong>Firefly</strong> <strong>808</strong> <strong>Universal</strong>.<br />
16 FIREFLY <strong>808</strong> UNIVERSAL
11<br />
12<br />
13<br />
14<br />
15<br />
16<br />
17<br />
18<br />
19<br />
20<br />
21<br />
Sync Source<br />
- Host Connection -<br />
USB 2.0<br />
- Sync Source -<br />
Device<br />
Coax SPDIF<br />
Opt. SPDIF<br />
Word Clock<br />
PC<br />
- Digital I/O Selection -<br />
SPDIF<br />
- ADAT -<br />
ADAT<br />
- Sample Rate -<br />
12. Device<br />
Pushing this will allow you to use the <strong>Firefly</strong> <strong>808</strong> <strong>Universal</strong><br />
as the sync source for all your digital gear.<br />
13. Coaxial S/PDIF<br />
Selecting this option will activate any coaxial S/PDIF device<br />
as the sync source for your digital gear. If no device<br />
is connected to the S/PDIF input on the <strong>Firefly</strong> <strong>808</strong>, the<br />
corresponding sync source LED on the face of the device<br />
will flash briefly then return back to the previously<br />
selected sync source.<br />
14. Optical S/PDIF<br />
Selecting this option will activate any optical S/PDIF device<br />
as the sync source for your digital gear. If no optical<br />
S/PDIF device is connected to the TOSlink ADAT input on<br />
the rear of the <strong>Firefly</strong> <strong>808</strong> <strong>Universal</strong>, the corresponding<br />
sync source LED on the face of the device will flash briefly<br />
then return back to the previously selected sync source.<br />
15. Word Clock<br />
This option will allow you to use a<br />
word clock as your sync source.<br />
If no word clock device is connected<br />
to the BNC word clock input<br />
on the rear of the <strong>Firefly</strong>, then<br />
the corresponding sync source<br />
LED on the face of the mixer will<br />
flash briefly and then return back<br />
to the previously selected sync<br />
source. Please see the diagram<br />
below for information on hooking<br />
up a world clock as your sync<br />
source.<br />
( 44.1 / 48 kHz)<br />
SMUX ( 88.2 / 96 kHz)<br />
96.0 kHz<br />
1394a<br />
HS-SPDIF<br />
BNC T-Adapter<br />
SET<br />
Word Clock to Other Slave s<br />
16. PC<br />
This is the default option, and allows you to use the PC<br />
as the sync source. When set to PC, the corresponding<br />
sync source LED on the front of the <strong>Firefly</strong> <strong>808</strong> <strong>Universal</strong><br />
will light up.<br />
Note: If ADAT and S/PDIF devices are not set to the same sync source,<br />
the user will be prompted to correct the problem.<br />
Digital I/O Select<br />
17. S/PDIF<br />
Selecting this option will allow you to use a S/PDIF or AES<br />
enabled digital device with the <strong>Firefly</strong>.<br />
18. High Speed S/PDIF<br />
If you connect a high speed S/PDIF product to the S/PDIF<br />
connector on the rear of the <strong>Firefly</strong> <strong>808</strong> <strong>Universal</strong>, clicking<br />
this option will allow you to use the output signal from<br />
this device.<br />
19. ADAT<br />
Select this option to use the TOSlink ADAT inputs on the<br />
rear of the <strong>Firefly</strong> <strong>808</strong> <strong>Universal</strong>.<br />
20. SMUX<br />
By selecting SMUX as your digital input/output device,<br />
you are able to connect a SMUX enabled product to the<br />
“ADAT” TOSlink inputs of the <strong>Firefly</strong>. The SMUX output<br />
signal is typically 8 channel, however if you set the sampling<br />
rate to 96 kHz, this is reduced to 4 channels.<br />
Other Features<br />
21. Sampling Rate Selection<br />
Here you can select the sampling rate of the signal sent<br />
to the computer. For most applications, you will be able to<br />
select between 44.1, 48, 88.2 and 96 kHz. If you choose<br />
ADAT as your digital input selection, you are then able<br />
to select 44.1 kHz or 48 kHz. When using high speed S/<br />
PDIF devices, you are able to select between 176.4 and<br />
192 kHz sampling rates. If the 192 kHz sampling rate is<br />
set, the <strong>Firefly</strong>’s level meter will be disabled.<br />
22. Crossfader<br />
The mixing software’s crossfader allows users to adjust<br />
the signal returned to the computer’s analog 1 and 2 outputs.<br />
When centered, the signal will be a 50-50 mix of<br />
the pure signal received by the <strong>Firefly</strong> <strong>808</strong> <strong>Universal</strong> and<br />
the signal returned to the <strong>808</strong> from the computer. When<br />
pulled to the left, the monitor signal from the <strong>808</strong> gradually<br />
becomes more dominant; when pulled all the way to<br />
the left, this signal is the only signal audible. If this control<br />
is pulled to the right, however, the stereo signal from the<br />
mixing panel software will become more dominant.<br />
World Cloc k<br />
IN<br />
22<br />
Cross Fader<br />
Input Monitor Mixer<br />
Main 1/2 - from PC<br />
World Clock from Maste r<br />
FIREFLY <strong>808</strong> UNIVERSAL<br />
17
Stand-Alone Mode<br />
The <strong>Firefly</strong> <strong>808</strong> <strong>Universal</strong> can work independently, without<br />
any FireWire connection being established. The following<br />
is just a couple of points of interest that you may need to<br />
know to use the <strong>Firefly</strong> in stand-alone mode.<br />
Firstly, whatever settings you have made in regards to<br />
digital inputs, outputs, and sampling rates while using the<br />
<strong>Firefly</strong> <strong>808</strong>’s mixer software will be kept even after you<br />
restart the device and/or disconnect the FireWire /USB<br />
cable. This means whatever inputs and outputs you have<br />
set will be activated/deactived as per your previous settings.<br />
The default sampling rate is 44.1 kHz, and the default<br />
digital input/output is S/PDIF.<br />
Also, the analog inputs are routed to their corresponding<br />
analog outputs, as well as a mix of these inputs being<br />
sent through any digital outputs that have been set<br />
(ADAT, S/PDIF, etcetera).<br />
18 FIREFLY <strong>808</strong> UNIVERSAL
APPLICATION<br />
Recording vocals (multi-part harmonies, choirs, etc.) or speeches<br />
HEADPHONE<br />
MICROPHONE<br />
MICROPHONE<br />
COMPUTER<br />
DIGITAL MIXER<br />
MULTI-TRACK RECORDER<br />
8 in, 8 out<br />
STUDIO MONITORS MICROPHONE MICROPHONE MICROPHONE MICROPHONE MICROPHONE MICROPHONE<br />
FIREFLY <strong>808</strong> UNIVERSAL<br />
19
Making studio recordings (without the studio)<br />
HEADPHOME AMP<br />
HEADPHONE<br />
HEADPHONE<br />
MICROPHONE<br />
MICROPHONE<br />
HEADPHONE<br />
HEADPHONE<br />
HEADPHONES HEADPHONES HEADPHONES HEADPHONES<br />
KEYBOARD<br />
HEADPHOME AMP HEADPHOME AMP HEADPHOME AMP HEADPHOME AMP<br />
GUITAR EFFECT<br />
GUITAR EFFECT<br />
DRUM MACHINE<br />
MICROPHONE<br />
MICROPHONE<br />
GUITAR<br />
BASS<br />
20 FIREFLY <strong>808</strong> UNIVERSAL
Getting 6.2 audio from your FireFly<br />
COMPUTER<br />
SPEAKERS<br />
(BACK)<br />
SPEAKERS<br />
(MIDDLE)<br />
SPEAKERS<br />
(FRONT)<br />
SUBWOOFER<br />
8 in, 8 out<br />
STUDIO MONITORS<br />
FIREFLY <strong>808</strong> UNIVERSAL<br />
21
DIMENSIONS<br />
429.60/16.913<br />
259.90/10.232<br />
290.10/11.421<br />
88.00/3.465<br />
* All measurements are shown in mm/inches.<br />
22 FIREFLY <strong>808</strong> UNIVERSAL
SPECIFICATIONS<br />
Frequency Response<br />
Mic Input to Line Output (Gain @ unity):<br />
Mic Input to Digital Output (AES, 96 kHz sample rate):<br />
Distortion (THD & IMD)<br />
Mic Input to Line Output (@ +4 dBu output):<br />
Mic Input to Digital Output (AES, 48 kHz sample rate):<br />
Dynamic Range<br />
Noise<br />
Signal-to-Noise (A-weighted):<br />
Equivalent Input Noise (E.I.N.), 20 Hz to 20 kHz Bandwidth,<br />
150Ω source impedance:<br />
Residual Output Noise:<br />
Common Mode Rejection Ratio (CMRR)<br />
Crosstalk (Mic Input to Line Output)<br />
Input Gain Control Range<br />
Phantom Power<br />
Rated Output<br />
Maximum Input Levels<br />
Input Impedance<br />
Ch 1 and 2 Mic Input<br />
Ch 3 through 8 Mic Input<br />
Inst Input<br />
Line Input<br />
Line out<br />
Signal Level LEDs<br />
Sample Frequency Selections<br />
Input & Output connectors<br />
Analog Input Connectors<br />
Analog Output Connectors<br />
Digital Input Connectors<br />
Digital Output Connectors<br />
Two Toslink Optical Connectors<br />
AC Power Requirements<br />
Dimensions<br />
Weight<br />
+0.04, –0.26 dB, 20 Hz to 20 kHz<br />
+0, –0.2 dB, 20 Hz to 85 kHz<br />
THD+N: < 0.007%, 20 Hz to 20 kHz BW, 1 kHz input @ +4 dBu, preamp<br />
at unity gain<br />
THD+N: < 0.004%, 10mV rms input, gain at –1 dB FS output<br />
>110 dB (through A-to-D converters)<br />
>120 dB (Mic In to Line Out)<br />
>100 dB (ref. +4 dBu, Mic In to Line Out, Gain @ unity)<br />
–129 dBu @ +60 dB gain<br />
Line Out: < –100 dBu (Channel Gain at unity)<br />
Digital Out (AES, 48 kHz): < –110 dB FS<br />
Mic In: >60 dB @ 1 kHz, Gain @ maximum<br />
< –100 dB @ 1 kHz, +10 dBu signal on adjacent input, 150Ω source<br />
impedance<br />
Mic In: +10 dB to +50 dB<br />
Line In: –10 dB to + 40 dB<br />
+48 VDC, individual switches<br />
Line: +4 dBu<br />
Mic Input: +12 dBu, Gain @ unity<br />
Inst Input: +20 dBu, Gain @ –20 dB<br />
Line Input: > +20 dBu, Gain @ 0 dB<br />
1.1 kΩ<br />
1.1 kΩ<br />
500 kΩ<br />
22 kΩ balanced, 11 kΩ unbalanced<br />
100 Ω balanced<br />
-40, -20, -10 dBu, 0 dBu (normal operating level), OL = 14 dBu<br />
44.1 kHz, 48 kHz, 88.2 kHz, 96 kHz, 176.4 kHz, 192 kHz, External<br />
Two combo jack; Six balanced XLR mic inputs<br />
Two 1/4” TS high-impedance instrument inputs (through combo jack)<br />
Eight 1/4” TRS balanced line inputs<br />
Thirteen 1/4” TRS outputs and one for headphones<br />
RCA for S/PDIF, XLR for AES, BNC for external word clock and Toslink<br />
Optical inputs<br />
RCA for S/PDIF, XLR for AES, BNC for external word clock and Toslink<br />
Optical outputs<br />
Transmit channels 1-8 at 44.1/48 kHz operation<br />
Transmits channels 1-4 at 88.2/96 kHz operation<br />
Power Consumption: 60 watts<br />
<strong>Universal</strong> AC Power Supply: 100 VAC 240 VAC, 50-60 Hz<br />
483 x 88 x 286 mm (19 x 3.5 x 11.25 in.)<br />
5 kg (11 lbs.)<br />
FIREFLY <strong>808</strong> UNIVERSAL<br />
23
BLOCK DIAGRAM<br />
+48V<br />
GOBAL 4 8V<br />
CLIP<br />
MIC<br />
-10<br />
-20<br />
-40<br />
INSTRUMENT<br />
COMBO JACK<br />
CH1 IN<br />
GAIN<br />
PAD<br />
C H2 IN AS SAME AS CH1 .<br />
C H1-8 METE RIN G<br />
-10<br />
GOBAL 48V<br />
-20<br />
MIC<br />
CH3 IN<br />
IN/OUT<br />
C H4~8 IN AS SAME AS CH3 .<br />
D igital Signal Prose sso r<br />
ANALOG OUT1/2/3/4/5/6/7/8<br />
ANALOG OUT 1~8<br />
ANALOG OUT1<br />
ANALOG OUT2<br />
ANALOG OUT1/3/5/7<br />
MIX<br />
ANALOG OUT2/4/6/8<br />
1394 JAC K<br />
FIRWIRE<br />
FIREWIRE/USB<br />
USB2.0<br />
IN<br />
OUT<br />
WCLK IN/OUT<br />
DSP<br />
IN/OUT<br />
MIX L OUT<br />
SYNCHRONIZATION<br />
INTER<br />
SAMPLE<br />
44.1<br />
RATE<br />
88.2<br />
KHz<br />
AES/SPDIF<br />
IN<br />
OUT<br />
ADAT<br />
IN<br />
FIRWIRE<br />
9<br />
LINE<br />
SEND<br />
GAIN<br />
A<br />
N<br />
ES/EBU<br />
MIX R OUT<br />
AES<br />
48<br />
3<br />
3<br />
I<br />
1<br />
2<br />
1<br />
2<br />
+48V<br />
IN/OUT<br />
+48V<br />
CLIP<br />
+48V<br />
-40<br />
PHONES<br />
ADAT<br />
WCLK<br />
96<br />
176.4<br />
OUT<br />
9<br />
LINE IN<br />
AES/EBU<br />
OUT<br />
ADAT IN/OUT<br />
CLIP<br />
-3<br />
-6<br />
-10<br />
-20<br />
-40<br />
192<br />
3<br />
2<br />
1<br />
-20dB<br />
PHONES OUT<br />
MIDI<br />
IN/OUT<br />
S/PDIF IN/OUT<br />
CLIP<br />
-3<br />
-6<br />
-10<br />
-20<br />
-40<br />
24 FIREFLY <strong>808</strong> UNIVERSAL
APPENDIX<br />
Reference Books<br />
Phonic recommends the following books for those<br />
interested in advanced audio engineering and sound<br />
system operation:<br />
• Sound System Engineering by Don and Carolyn<br />
Davis, Focal Press, ISBN: 0-240-80305-1<br />
• Sound Reinforcement Handbook by Gary D. Davis,<br />
Hal Leonard Publishing Corporation, ISBN: 0-88188-<br />
900-8<br />
• Audio System Design and Installation by Philip<br />
Giddings, Focal Press, ISBN: 0-240-80286-1<br />
• Practical Recording Techniques by Bruce and Jenny<br />
Bartlett, Focal Press, ISBN: 0-240-80306-X<br />
• Modern Recording Techniques by Huber & Runstein,<br />
Focal Press, ISBN: 0-240-80308-6<br />
• Sound Advice – The Musician’s Guide to the Recording<br />
Studio by Wayne Wadham, Schirmer Books, ISBN: 0-<br />
02-872694-4<br />
• Professional Microphone Techniques by David Mills<br />
Huber, Philip Williams. Hal Leonard Publishing<br />
Corporation, ISBN: 0-87288-685-9<br />
• Anatomy of a Home Studio: How Everything Really<br />
Works, from Microphones to Midi by Scott Wilkinson,<br />
Steve Oppenheimer, Mark Isham. Mix Books, ISBN:<br />
091837121X<br />
• Live Sound Reinforcement: A Comprehensive Guide<br />
to P.A. and Music Reinforcement Systems and<br />
Technology by Scott Hunter Stark. Mix Books, ISBN:<br />
0918371074<br />
• Audiopro Home Recording Course Vol 1: A<br />
Comprehensive Multimedia Audio Recording Text by<br />
Bill Gibson. Mix Books, ISBN: 0918371104<br />
• Audiopro Home Recording Course Vol. 2: A<br />
Comprehensive Multimedia Audio Recording Text by<br />
Bill Gibson. Mix Books, ISBN:<br />
FIREFLY <strong>808</strong> UNIVERSAL<br />
25
6103 Johns Road #7