You also want an ePaper? Increase the reach of your titles
YUMPU automatically turns print PDFs into web optimized ePapers that Google loves.
e<br />
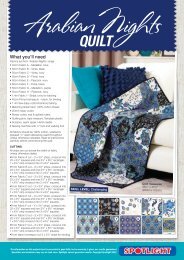
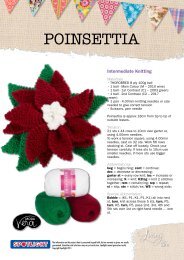
Living with<br />
Easy<br />
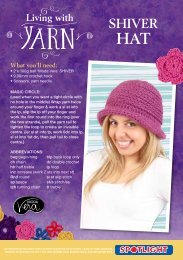
What you’ll need<br />
• Patons <strong>Inca</strong> 50g balls as per size<br />
• 1 pair 7.00mm knitting needles or<br />
size needed for correct tension<br />
• Scissors, yarn needle, tape measure<br />
• 51cm x 51cm cushion insert<br />
RUG<br />
Measurements RUG CUSHION<br />
Width (approx) cm 91 50<br />
Length (approx) cm 137 50<br />
PATONS INCA 50g balls<br />
1st Colour (C1-7019) 9 4<br />
2nd Colour (C2-7043) 8 3<br />
3rd Colour (C3-7001) 5 2<br />
4th Colour (C4-7017) 3 1<br />
Abbreviations<br />
alt<br />
alternate<br />
beg begin, beginning<br />
cont continue<br />
foll<br />
follows or following<br />
garter st every row knit<br />
K<br />
knit<br />
P<br />
purl<br />
patt pattern<br />
psso pass slipped st over<br />
sl<br />
slip<br />
st/s stitch/es<br />
tog together<br />
Tension:<br />
12.5 sts x 23 rows to 10cm over garter st,<br />
using 7.00mm needles. To work a tension square,<br />
use 7.00mm needles, cast on 18 sts.<br />
Knit 34 rows garter st. Cast off loosely.<br />
Check your tension carefully. If less sts to 10cm<br />
use smaller needles, if more sts use bigger<br />
needles.<br />
inca<br />
RUG & CUSHION<br />
COVER<br />
The information on this project sheet is presented in good faith, but no warranty is given, nor results guaranteed.<br />
Quantities <strong>and</strong> selections may vary at each store. <strong>Spotlight</strong> cannot guarantee results. Copyright <strong>Spotlight</strong> 2012.
Instructions<br />
RUG:<br />
SQUARES (worked diagonally, make 24)<br />
Using 7.00mm needles <strong>and</strong> C1, cast on 57 sts, leaving<br />
approx a 20cm length<br />
of yarn to sew seams.<br />
Row 1 <strong>and</strong> foll alt rows: (wrong side) Using<br />
colour already in use, knit to end.<br />
Row 2: K27, sl 1, K2tog, psso, K27 … 55 sts.<br />
Row 4: K26, sl 1, K2tog, psso, K26 … 53 sts.<br />
Using C2, Row 6: K25, sl 1, K2tog, psso, K25 … 51 sts.<br />
Using C1, Row 8: K24, sl 1, K2tog, psso, K24 … 49 sts.<br />
Using C2, Row 10: K23, sl 1, K2tog, psso, K23 … 47 sts.<br />
Using C1, Row 12: K22, sl 1, K2tog, psso, K22 … 45 sts.<br />
Using C2, Row 14: K21, sl 1, K2tog, psso, K21 … 43 sts.<br />
Using C1, Row 16: K20, sl 1, K2tog, psso, K20 … 41 sts.<br />
Cut off C1.<br />
Using C2, Row 18: K19, sl 1, K2tog, psso, K19 … 39 sts.<br />
Row 20: K18, sl 1, K2tog, psso, K18 … 37 sts.<br />
Using C3, Row 22: K17, sl 1, K2tog, psso, K17 … 35 sts.<br />
Using C2, Row 24: K16, sl 1, K2tog, psso, K16 … 33 sts.<br />
Using C3, Row 26: K15, sl 1, K2tog, psso, K15 … 31 sts.<br />
Using C2, Row 28: K14, sl 1, K2tog, psso, K14 … 29 sts.<br />
Using C3, Row 30: K13, sl 1, K2tog, psso, K13 … 27 sts.<br />
Using C2, Row 32: K12, sl 1, K2tog, psso, K12 … 25 sts.<br />
Break off C2.<br />
Using C3, Row 34: K11, sl 1, K2tog, psso, K11 … 23 sts.<br />
Row 36: K10, sl 1, K2tog, psso, K10 … 21 sts.<br />
Using C4, Row 38: K9, sl 1, K2tog, psso, K9 … 19 sts.<br />
Using C3, Row 40: K8, sl 1, K2tog, psso, K8 … 17 sts.<br />
Using C4, Row 42: K7, sl 1, K2tog, psso, K7 … 15 sts.<br />
Using C3, Row 44: K6, sl 1, K2tog, psso, K6 … 13 sts.<br />
Using C4, Row 46: K5, sl 1, K2tog, psso, K5 … 11 sts.<br />
Using C3, Row 48: K4, sl 1, K2tog, psso, K4 … 9 sts.<br />
Using C4, Row 50: K3, sl 1, K2tog, psso, K3 … 7 sts.<br />
Row 51: K2, sl 1, K2tog, psso, K2 … 5 sts.<br />
Row 52: K1, sl 1, K2tog, psso, K1 … 3 sts.<br />
Row 53: Sl 1, K2tog, psso.<br />
Fasten off, leaving approx 20cm length of yarn for<br />
sewing seams.<br />
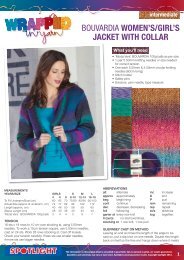
TO MAKE UP<br />
DO NOT PRESS. Using wool needle <strong>and</strong> a flat seam,<br />
join 4 squares together to make a large square, placing<br />
C1 (5 rows in garter st) to outer edges.<br />
Repeat with remaining squares to make 6 large squares<br />
in all. Join large squares together placing 2 squares to<br />
width of <strong>Rug</strong> <strong>and</strong> 3 squares to length of <strong>Rug</strong> as pictured.<br />
Sew in all ends.<br />
Living with<br />
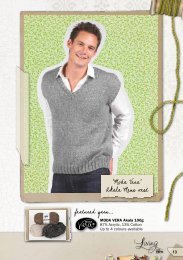
CUSHION COVER:<br />
SQUARES (worked diagonally, make 8)<br />
Work as given for Squares of <strong>Rug</strong>.<br />
CUSHION<br />
COVER<br />
TO MAKE UP<br />
DO NOT PRESS. Using wool needle <strong>and</strong> a<br />
flat seam, join 4 squares together for back of<br />
<strong>Cushion</strong> <strong>Cover</strong> <strong>and</strong> 4 squares together for front<br />
of <strong>Cushion</strong> <strong>Cover</strong>, placing C1 (5 rows in garter<br />
st) to outer edges as pictured. Using mattress<br />
st seam, join back <strong>and</strong> front pieces together<br />
along 3 sides. Sew in all ends. Place cushion<br />
insert inside <strong>Cushion</strong> <strong>Cover</strong> <strong>and</strong> close opening.<br />
The information on this project sheet is presented in good faith, but no warranty is given, nor results guaranteed.<br />
Quantities <strong>and</strong> selections may vary at each store. <strong>Spotlight</strong> cannot guarantee results. Copyright <strong>Spotlight</strong> 2012.