Featuring fabrics from Mardi Gras by Jinny Beyer - Logans ...
Featuring fabrics from Mardi Gras by Jinny Beyer - Logans ...
Featuring fabrics from Mardi Gras by Jinny Beyer - Logans ...

Create successful ePaper yourself
Turn your PDF publications into a flip-book with our unique Google optimized e-Paper software.
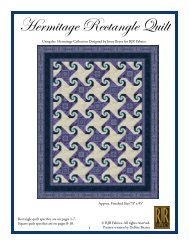
<strong>Jinny</strong>'s Method for Framing a Rectangular Quilt with a Border Print<br />
Because <strong>Mardi</strong> <strong>Gras</strong> is rectangular, the side border print strips must be pieced to ensure perfectly matching motifs in the<br />
border corners, as on the featured quilt. Here are <strong>Jinny</strong>'s step-<strong>by</strong>-step instructions for cutting and piecing the strips.<br />
1. Place one 2" x 60" inner border strip across the middle of<br />
the quilt, centering a mirror-image motif <strong>from</strong> the border<br />
print at the exact center of the quilt (Figure 1). Using a<br />
right-angle, 45° triangle to mark miter along one end of<br />
the strip, positioning triangle at edge of quilt as indicated<br />
(see arrow in diagram) to ensure that the seam allowance<br />
is included. Mark, then cut the miter (make sure miters<br />
are exact mirror-images).<br />
2. Carefully pick up the mitered edge of the border strip and<br />
bring it over to the other end of the border strip at the<br />
opposite side of the quilt. Position it at the precise point<br />
where the miter will be, making sure the fabric design<br />
matches. Cut the second miter.<br />
3. Using this first mitered strip as a pattern, place it on the<br />
remaining 60" inner border strip, matching the design<br />
exactly, and cut an identical strip. Reserve these two<br />
strips for the top and bottom inner borders.<br />
Figure 1 – Cut Top & Bottom Inner Border Strips