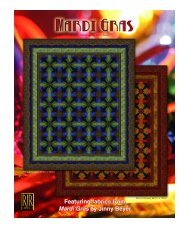
Featuring fabrics from Porcelana by Jinny Beyer - RJR Fabrics
Featuring fabrics from Porcelana by Jinny Beyer - RJR Fabrics
Featuring fabrics from Porcelana by Jinny Beyer - RJR Fabrics

You also want an ePaper? Increase the reach of your titles
YUMPU automatically turns print PDFs into web optimized ePapers that Google loves.
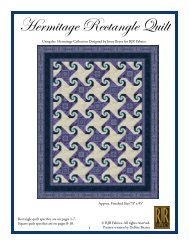
Designed <strong>by</strong> <strong>Jinny</strong> <strong>Beyer</strong><br />
72" x 72"<br />
<strong>Featuring</strong> <strong>fabrics</strong> <strong>from</strong> <strong>Porcelana</strong><br />
<strong>by</strong> <strong>Jinny</strong> <strong>Beyer</strong>
Finished Quilt 72" x 72"<br />
Instructions <strong>by</strong> Shannon Murray<br />
All seams are 1 ⁄4".<br />
Skill Level: Experienced<br />
<strong>Porcelana</strong><br />
Designed <strong>by</strong> <strong>Jinny</strong> <strong>Beyer</strong><br />
An original design <strong>by</strong> <strong>Jinny</strong> <strong>Beyer</strong>, <strong>Porcelana</strong> is a brilliant kaleidoscope design showcasing <strong>Jinny</strong>’s unique use of color and<br />
texture. <strong>Porcelana</strong> consists of eight pairs of mirror-imaged wedges. These sixteen wedges combine to form the inner star of<br />
the kaleidoscope design.<br />
Thirteen templates are used to create this stunning design. Please read the directions carefully before cutting each template,<br />
as several of the templates require precise placement and cutting.<br />
Fabric Requirements and Cutting Instructions<br />
Fabric Fabric Fabric Cutting Directions Yardage<br />
Key Swatch Number<br />
Border Prints:<br />
From the wide 6 1 ⁄4" border stripe, cut 4 LENGTHWISE<br />
strips 6 3 ⁄4" <strong>by</strong> 90" long – making sure a centered motif is<br />
Border Print 6451-04 at the halfway (45") mark for an accurate mitered border. 5 1 /4 Yards<br />
From the 2 1 ⁄2" wide narrow border, cut 4 LENGTHWISE strips<br />
3" <strong>by</strong> 68". Set aside the remaining border print for use in<br />
the quilt top.<br />
Cut 4 strips 1 7 ⁄8" wide the LENGTH of the fabric<br />
Middle Border 6457-03 (approximately 72"). Set aside the remaining fabric for 2 Yards<br />
Wedge <strong>Fabrics</strong>:<br />
Fabric #1 6457-04<br />
Fabric #2 6457-03<br />
use in the quilt top.<br />
Cut 8 of Template A and 8 of Template A(r). No special<br />
placement required.<br />
Cut 8 of Template C and 8 of Template C(r). No special<br />
placement required.<br />
(NOTE: Cut the Cornerstone <strong>Fabrics</strong> <strong>from</strong> Template M<br />
1 1 /4 Yard<br />
Fabric #3 6454-03 FIRST.) Cut 8 of Template F and 8 of Template F(r). Special 2 Yards<br />
placement required – see Precision Cutting instructions in<br />
pattern.<br />
Cut 8 of Template H and 8 of Template H(r). Special<br />
Fabric #4 6452-04 placement required – see Precision Cutting instructions 2 Yards<br />
Fabric #5 6455-03<br />
Cornerstone Fabric:<br />
in pattern.<br />
Cut 8 of Template J and 8 of Template J(r). No special<br />
placement required.<br />
Use leftover<br />
fabric <strong>from</strong><br />
middle border<br />
print.<br />
1/4 Yard<br />
Theme Fabric 6454-03<br />
Binding 6453-02<br />
Backing 6338-02<br />
Cut 4 of Template M. Special placement required – see<br />
Precision Cutting instructions in pattern.<br />
Cut strips for straight line binding or make bias binding<br />
as desired.<br />
Enough fabric has been accounted for to match the repeat<br />
in the fabric seam. Align carefully before cutting.<br />
Use leftover<br />
fabric <strong>from</strong><br />
Fabric #3.<br />
7/8 Yard<br />
5 Yards
Capturing the Kaleidoscope<br />
Design – Precision Cutting<br />
Three of the <strong>fabrics</strong> in this collection have been designed<br />
with mirror images. Accurate mirror-imaging is the key to<br />
capturing the kaleidoscope design of <strong>Porcelana</strong>. Accomplish<br />
this <strong>by</strong> planning template placement and cutting<br />
precisely. When cutting the fabric pieces F and H, it is<br />
important to place the template on the fabric where there is<br />
an image that is mirrored in other areas of the fabric. Your<br />
fabric placement may differ <strong>from</strong> that shown in the pattern.<br />
Directions for Template F and H:<br />
1. Place plastic template on selected motif in fabric. Care<br />
fully mark a portion of the design on the template. Then<br />
before cutting, make sure you will be able to cut 7 more<br />
identical pieces and 8 reverse pieces <strong>from</strong> the fabric. If<br />
there is not enough fabric for the 16 pieces <strong>from</strong> the motif<br />
you select, then adjust the placement of the template or<br />
find a different motif and follow the procedure again. With<br />
the template in place, draw around the template and<br />
repeat 7 times for a total of eight identical pieces. See<br />
Figure #1.<br />
F<br />
F(r)<br />
Cutting Border Print <strong>Fabrics</strong> with Templates<br />
After cutting the border stripes for the outer borders of the<br />
quilt, use the remainder of the border print yardage to cut<br />
Templates B, D, E, G, I & L and their respective reverse (r)<br />
units. The border prints in the wedge units will be adjoining<br />
their reverse units in the reverse wedges, requiring proper<br />
alignment.<br />
1. For Template B, use the 3 /4" mini border which forms both<br />
sides of the wide border stripe. See Figure #2.<br />
a Place template plastic on one side of the wide border<br />
and carefully mark fabric pattern lines onto the plastic<br />
template.<br />
b Mark and cut 8 identical pieces and 8 identical reverse<br />
(r) pieces.<br />
c Label all units accordingly and set aside for Piecing the<br />
Wedge Units.<br />
2. For Templates D, G & I, use the 1 /2" mini border which<br />
forms both sides of the narrow border stripe. This border<br />
with a 1 /4" seam allowance on either wide with be cut 1”<br />
wide See Figure #2. Repeat steps a - c.<br />
3. For Template E, use the entire 2 1 /2" narrow border (Cut<br />
3" to include seam allowance either side.) See Figure #2.<br />
Repeat steps a - c.<br />
4. For Template L, use the entire 2 1 /2" narrow border. See<br />
Figure #2. Mark a center placement line on the template<br />
for guidance. Cut 4 identical templates <strong>by</strong> centering a<br />
design <strong>from</strong> the fabric onto the template.<br />
5. Template K is cut <strong>from</strong> the wider border print fabric. Place<br />
Template K on a mirror-imaged motif on the wider print<br />
stripes. Mark a center placement line on the template for<br />
guidance. Mark distinct fabric lines onto the template<br />
plastic for guidance in aligning the template. Cut 8<br />
identical Template K pieces. See Figure #2.<br />
6. Label and set aside all Unit K pieces for Piecing the<br />
Wedge Units.<br />
3/4"<br />
2. Flip the templates over for the reverse (r) side of F and H<br />
and cut eight identical reverse pieces.<br />
3. Double check placement before cutting (“check twice,<br />
cut once”). Proper cutting will result in mirror-imaged<br />
units.<br />
4. Label all units accordingly and set aside for Piecing the<br />
Wedge Units.<br />
Directions for Template M:<br />
Figure 1<br />
Template M should be centered on a mirror-imaged motif.<br />
Mark a center placement line on the template for guidance.<br />
Cut 4 of the same motif for the cornerstones.<br />
Template K<br />
Templates E & L<br />
2 1 /2"<br />
Figure 2<br />
Template B<br />
3/4"<br />
1/2"<br />
Templates D, G & I<br />
1/2"
Piecing the Wedge Units<br />
See Figure #3.<br />
1. Sew Unit A to Unit B. Repeat for all eight wedges.<br />
2. Sew Unit A(r) to Unit B(r). Repeat<br />
for all eight reverse wedges.<br />
3. Sew Unit C to Unit D. Repeat for all<br />
eight wedges.<br />
4. Sew Unit C(r) to Unit D(r). Repeat<br />
for all eight reverse wedges.<br />
5. Sew Unit E to Unit F. Repeat for all<br />
eight wedges.<br />
6. Sew Unit E(r) to Unit F(r). Repeat<br />
for all eight reverse wedges.<br />
7. Sew Unit G to Unit H. Repeat for all<br />
eight wedges.<br />
8. Sew Unit G(r) to Unit H(r). Repeat<br />
for all eight reverse wedges.<br />
9. Sew Unit I to Unit J. Repeat for all<br />
eight wedges.<br />
10. Sew Unit I(r) to Unit J(r). Repeat for<br />
all eight wedges.<br />
I<br />
J<br />
C<br />
D<br />
H<br />
B<br />
G<br />
A<br />
F<br />
E<br />
Figure 3<br />
See Figure #6<br />
19. Piece the completed<br />
wedge unit to its reverse<br />
unit along the straight<br />
seam. When complete,<br />
the right side will be the<br />
exact mirror image of the<br />
left side.<br />
Reverse (r) Wedge<br />
A(r)<br />
E(r)<br />
B(r)<br />
C(r) C<br />
D(r)<br />
F(r)<br />
G(r)<br />
H(r)<br />
K<br />
D<br />
I(r) I<br />
J(r) J<br />
Figure 7<br />
Regular Wedge<br />
B<br />
G<br />
H<br />
A<br />
F<br />
E<br />
Reverse (r) Wedge<br />
A(r)<br />
E(r)<br />
B(r)<br />
C(r) C<br />
D(r)<br />
F(r)<br />
G(r)<br />
H(r)<br />
Figure 6<br />
See Figure #7<br />
20. Piece K to the units<br />
created in Figure #6.<br />
Complete for all 8 sets.<br />
D<br />
I(r) I<br />
J(r) J<br />
B<br />
Regular Wedge<br />
G<br />
H<br />
A<br />
F<br />
E<br />
See Figure #4<br />
11. Sew Unit AB to Unit CD. Repeat<br />
for all eight wedges.<br />
12. Sew Unit AB(r) to Unit CD(r).<br />
Repeat for all eight wedges.<br />
13. Sew Unit EF to Unit GH. Repeat<br />
for all eight wedges.<br />
14. Sew Unit EF(r) to Unit GH(r).<br />
Repeat for all eight wedges.<br />
C<br />
B<br />
D<br />
H G<br />
A<br />
F<br />
E<br />
Making the Kaleidoscope Design<br />
1. Piece together 4 completed wedges and then piece<br />
together the remaining four wedges as shown in Figure<br />
#8. Join the two sections together to create an octagon.<br />
The completed octagon is shown in Figure #9.<br />
I<br />
J<br />
Figure 4<br />
See Figure #5<br />
15. Sew Unit EFGH to Unit IJ. Repeat<br />
for all eight wedges.<br />
16. Sew Unit EFGH(r) to Unit IJ(r).<br />
Repeat for all eight wedges.<br />
17. Sew Unit ABCD to Unit EFGHIJ.<br />
Repeat for all eight wedges.<br />
18. Sew Unit ABCD(r) to Unit EFGHIJ(r).<br />
Repeat for all eight wedges.<br />
C<br />
D<br />
G<br />
H<br />
I<br />
J<br />
B<br />
A<br />
F<br />
E<br />
Figure 5<br />
Figure 8
2. Add L to the corners of the octagonal quilt as shown in<br />
Figure #10, centering the middle of the mirrored motif at<br />
the seam line where the regular wedge meets a reverse<br />
wedge to ensure accurate placement of the center.<br />
3. Add M to the four corners of the quilt as shown.<br />
Finished quilt top, without borders, is approximately 52"<br />
square.<br />
M<br />
L<br />
L<br />
M<br />
M<br />
L<br />
L<br />
M<br />
Figure 9 Figure 10
<strong>Jinny</strong>’s Method for Framing a Square Quilt with a Border Print<br />
1. Place one narrow (inner) border strip across the middle of<br />
the quilt, centering a mirror-imaged motif <strong>from</strong> the narrow<br />
border at the exact center of the quilt. Use a right-angle,<br />
45° triangle to mark the miter along one end of the strip,<br />
positioning triangle at the edge of the quilt as indicated in<br />
Figure #11 (see arrow). Cutting where the arrow indicates,<br />
at the exact edge of the quilt top, allows for the seam<br />
allowance. Mark, then cut the miter.<br />
2. Carefully pick up the mitered edge of the border strip and<br />
bring it over to the other end of the border strip at the<br />
opposite side of the quilt, making sure that the design<br />
matches. Upon centering a motif <strong>from</strong> the border print in<br />
the middle of the quilt, the designs should match at the<br />
edges.<br />
3. Using the first mitered strip as a pattern, place it on the<br />
remaining three narrow border strips, matching the design<br />
exactly. Cut three more identical strips.<br />
4. Sew the inner borders to the edges of the quilt. Begin <strong>by</strong><br />
pinning the midpoint (precisely at a mirror image) of one<br />
of the border pieces to the middle of one of the edges of<br />
the quilt. Next, pin the corners.Then find the midpoint of<br />
each half and pin. Continue finding midpoints and<br />
pinning. Finally, ease in any fullness, pinning carefully all<br />
along the edges. Sew all four inner border strips to the<br />
quilt, stopping short of the 1 /4" seam allowance where the<br />
miters will meet. Sew the miters into a Y-seam last.<br />
5. Repeat steps 1 through 4 for the middle and outer<br />
borders.<br />
6. Finish the quilt <strong>by</strong> layering the backing, batting, and quilt<br />
top; baste.<br />
7. Quilt, bind and finish as desired.<br />
Figure 11
Templates NOT Shown at full size – Enlarge 150% for true size.<br />
A<br />
B<br />
C<br />
D<br />
0 1" 2" 3"<br />
Use this 3" scale to insure the accuracy of your printout.
K<br />
G(r)<br />
H(r)<br />
G<br />
E<br />
J<br />
I<br />
I(r)<br />
J(r)
B(r)<br />
D(r)<br />
H<br />
A(r)<br />
C(r)
F(r)<br />
F<br />
E(r)
Templates NOT Shown at full size – THIS PAGE ONLY Enlarge 200% for true size.<br />
M<br />
L<br />
0 1" 2" 3"<br />
Use this 3" scale to insure the accuracy of your printout.