WATERCOLOR STARS - RJR Fabrics
WATERCOLOR STARS - RJR Fabrics
WATERCOLOR STARS - RJR Fabrics

You also want an ePaper? Increase the reach of your titles
YUMPU automatically turns print PDFs into web optimized ePapers that Google loves.
<strong>WATERCOLOR</strong> <strong>STARS</strong><br />
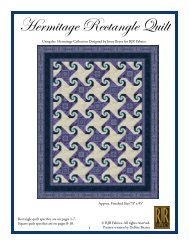
Designed by Sue Beevers<br />
Approx. Finished Size 72-1/2" square<br />
Using the English Countryside collection designed by Sue Beevers for <strong>RJR</strong> <strong>Fabrics</strong>
Directions: Read completely before beginning.<br />
E3 = Cut E from fabric 3<br />
BLOCK A<br />
1. Sew the E strips<br />
together. Press the<br />
seam allowances<br />
in the direction<br />
indicated by the<br />
arrows.<br />
E3<br />
E4<br />
E5<br />
E6<br />
2.<br />
Cut the strip set<br />
into five 2-1/2"<br />
wide units. Set<br />
aside.<br />
E5<br />
E4<br />
E3<br />
10.<br />
11.<br />
Sew an I8 to the end of<br />
each unit from step 8.<br />
Sew the star point blocks<br />
together as shown. Press.<br />
I8<br />
Make 20~ 2-1/2" x 6-1/2"<br />
Make 20~ 6-1/2" square<br />
3.<br />
4.<br />
Sew aF3, F4 and<br />
the F5 strips<br />
together. Press.<br />
Cut the strip set into<br />
ten 2-1/2" wide units.<br />
Set aside.<br />
Cut 5~ 2-1/2" wide units<br />
F3<br />
F4<br />
F5<br />
12.<br />
Sew the star points and units<br />
from F3/F4/F5 units into<br />
rows. Press.<br />
Cut 10~ 2-1/2" wide units<br />
5.<br />
Sew a F3 and F4 strip<br />
together. Press.<br />
F3<br />
6.<br />
7.<br />
8.<br />
Cut the strip set into<br />
ten 2-1/2" wide units.<br />
F4<br />
Sew a G3 to the side of each<br />
F3/F4 units. Press.<br />
Cut 10~ 2-1/2" wide units<br />
G3<br />
Make 20~ 4-1/2" square<br />
Sew a H3 to the end of a G7. Sew directly on the<br />
marked line. Trim the excess leaving an 1/4" seam<br />
allowance.<br />
Press.<br />
Repeat for a<br />
H3 G7<br />
total of 20.<br />
Make 20~ 2-1/2" x 4-1/2"<br />
13.<br />
Make 10~<br />
6-1/2" x 14-1/2"<br />
Sew the block A rows into five 14-1/2" square blocks.<br />
Press.<br />
9.<br />
Sew the<br />
remaining<br />
H3 G7<br />
pieces into<br />
mirror<br />
H3 G7<br />
image units as shown.<br />
Make 20~ 2-1/2" x 4-1/2"<br />
(mirror image of first 20)<br />
Make 5~ Block A 14-1/2" square
BLOCK B<br />
14. Sew a L2 and M9 L2<br />
strip together. Press.<br />
15.<br />
16.<br />
17.<br />
Cut into sixteen<br />
2-1/2" wide units.<br />
Set aside<br />
Sew the K2, J9, and<br />
K6 strips into a set<br />
as shown. Press.<br />
Cut into eight<br />
2-1/2" wide units.<br />
Set aside.<br />
M9<br />
K2<br />
J9<br />
K6<br />
J9<br />
Cut 16~ 2-1/2" wide units<br />
22.<br />
23.<br />
24.<br />
Sew the I11 squares to the<br />
mirror image units. Press.<br />
Sew the units for the star<br />
points together. Press.<br />
Sew the star points and L2/M9<br />
units into rows. Press.<br />
I11<br />
Make 32~<br />
2-1/2" x 4-1/2" units<br />
Make 32~ 6-1/2" square<br />
K2<br />
18.<br />
Piece the G10 and the<br />
marked I2 pieces into units<br />
using the same cut away<br />
corner technique as for<br />
block A.<br />
Be sure 32 mirror image<br />
units.<br />
Cut 8~ 2-1/2" wide units<br />
I2<br />
I2<br />
G10<br />
Make 32~ 2-1/2" x 4-1/2"<br />
Make 32~ 2-1/2" x 4-1/2"<br />
(mirror image of first 32)<br />
25.<br />
Make 16~<br />
6-1/2" x 14-1/2"<br />
Sew the block B rows into eight 14-1/2" square<br />
blocks. Press.<br />
19.<br />
20.<br />
Sew the N triangles into<br />
HST (half square triangle) units.<br />
Press.<br />
Sew the unmarked I2 squares<br />
to the HST units. Press.<br />
N13<br />
N2<br />
Make 64~2-1/2"<br />
HST units<br />
I2<br />
Make 64~<br />
2-1/2" x 4-1/2"<br />
21. Sew the units into blocks. Press.<br />
Make 32~<br />
4-1/2" blocks<br />
2<br />
Make 8~ Block B 14-1/2" square
26.<br />
BLOCK C<br />
Sew the B1 strips to opposite sides of the A2 square.<br />
Press. Sew the C1 strips to the top and bottom of the<br />
block. Press.<br />
C1<br />
28.<br />
Sew the short border strips to opposite sides of the<br />
quilt. Press. Sew the long border strips to the top and<br />
bottom of the quilt. Press.<br />
B1<br />
A2<br />
Make 8~ Block C<br />
14-1/2" square<br />
27.<br />
Sew the blocks and solid square Ds into rows as<br />
shown. Press.<br />
29.<br />
Layer the backing, batting and pieced top together.<br />
Baste layers.<br />
30. Quilt as desired.<br />
A<br />
C<br />
B<br />
C<br />
A<br />
31. Bind using a 3/8" seam allowance.<br />
C<br />
B<br />
D<br />
B<br />
C<br />
B<br />
D<br />
A<br />
D<br />
B<br />
C<br />
B<br />
D<br />
B<br />
C<br />
A<br />
C<br />
B<br />
C<br />
A<br />
3
CUTTING SUGGESTIONS<br />
Calculations are made on the basis of 40" usable fabric width once selvages are removed.<br />
FABRIC 1<br />
FABRIC 3 FABRICS 4 & 5 FABRIC 6<br />
B<br />
C<br />
K<br />
D<br />
B<br />
C<br />
Selvage<br />
FABRIC 2<br />
E F H G<br />
Selvage<br />
E F<br />
Selvage<br />
FABRICS 7 & 10<br />
E<br />
Selvage<br />
FABRIC 8<br />
N<br />
Binding<br />
A<br />
I<br />
K<br />
L<br />
Border<br />
Selvage<br />
G<br />
Selvage<br />
I<br />
Selvage<br />
FABRIC 9<br />
FABRICS 11 & 12<br />
FABRIC 13<br />
HINT:<br />
As you cut the pieces tag them<br />
with a little piece of paper with the<br />
letter name of the cut and the fabric<br />
number.<br />
Example: B1<br />
M J I<br />
N<br />
Selvage<br />
Selvage<br />
Selvage<br />
4
Watercolor Stars Yardage<br />
Maple Leaves, Green Fabric 1<br />
7378-02 1-1/2 yards<br />
Mud Puddle, Purple Fabric 2<br />
7379-01 3-1/4 yards<br />
BORDERS! Always measure your<br />
quilt before cutting border strips.<br />
Make adjustments as necessary<br />
Mud Puddle, Blue Fabric 3<br />
7379-02 3/4 yard<br />
Rain Drops, Green Fabric 4<br />
7380-02 1/4 yard<br />
Braken, Blue Fabric 5<br />
7374-01 1/4 yard<br />
Pebbles, Orange Fabric 6<br />
7375-03 1/8 yard<br />
English Ivy, Purple Fabric 7<br />
7376-03 1/2 yard<br />
Lilies, Pink Fabric 8<br />
7377-02 1/4 yard<br />
Rain Drops, Blue Fabric 9<br />
7380-03 1/2 yard<br />
Lilies, Green Fabric 10<br />
7377-03 1/2 yard<br />
English Ivy, Blue Fabric 11<br />
7376-02 1/4 yard<br />
Maple Leaves, Blue Fabric 12<br />
7378-03 1/4 yard<br />
Braken, Pink Fabric 13<br />
7374-02 1/3 yard<br />
B (16) 2-1/2" x 10-1/2"<br />
C (16) 2-1/2" x 14-1/2"<br />
D (4) 14-1/2" squares<br />
A (8) 10-1/2" squares<br />
I (128) 2-1/2" squares, marked 64 once<br />
diagonally<br />
K (2) 2-1/2" x 22"<br />
L (1) 2-1/2" x WOF (width of fabric 40-44")<br />
N (32) 2-7/8" squares, cut once diagonally<br />
Border (2) 2-1/2" x 70-1/2"<br />
(2) 2-1/2" x 74-1/2"<br />
Binding At least 308" of 2-1/2" wide<br />
E (2) 2-1/2" x 14"<br />
F (2) 2-1/2" x 27"<br />
H (40) 2-1/2" squares, marked once diagonally<br />
G (20) 2-1/2" x 4-1/2"<br />
E (2) 2-1/2" x 14"<br />
F (1) 2-1/2" x 27"<br />
E (2) 2-1/2" x 14"<br />
F (1) 2-1/2" x 27"<br />
E (1) 2-1/2" x 14"<br />
K (1) 2-1/2" x 22"<br />
G (40) 2-1/2" x 4-1/2"<br />
I (20) 2-1/2" squares<br />
J (2) 4-1/2" x 22"<br />
M (1) 4-1/2" x WOF<br />
G (64) 2-1/2" x 4-1/2"<br />
I (32) 2-1/2" squares<br />
I (32) 2-1/2" squares<br />
N (32) 2-7/8" squares, cut once diagonally<br />
Backing 5 yards of coordinating fabric. Not included in kit.<br />
Pattern written by Debbie Beaves<br />
© Copyright <strong>RJR</strong> <strong>Fabrics</strong> All rights reserved