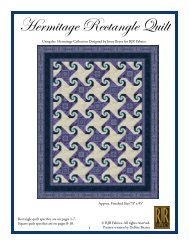
Quilter's Palette Tote - Jinny Beyer Studio
Quilter's Palette Tote - Jinny Beyer Studio
Quilter's Palette Tote - Jinny Beyer Studio

You also want an ePaper? Increase the reach of your titles
YUMPU automatically turns print PDFs into web optimized ePapers that Google loves.
<strong>Quilter's</strong> <strong>Palette</strong> <strong>Tote</strong><br />
Using the <strong>Quilter's</strong> <strong>Palette</strong> Collection Designed by <strong>Jinny</strong> <strong>Beyer</strong> for RJR Fabrics<br />
Approx. Finished Size 15" wide x 16-1/2" tall not counting straps.<br />
© RJR Fabrics, All rights reserved.<br />
1 Pattern written by Debbie Beaves
Read entire pattern before beginning. Use 1/4" seam<br />
allowances unless stated otherwise.<br />
DIRECTIONS~<br />
1. Print 2 copies of each of the foundation A and B as<br />
indicated on the originals. Trim the foundations and<br />
tape together where indicated.<br />
2. Paper piece the A & B foundations starting with<br />
black then color strip of fabric 1, black, color strip<br />
of fabric 2 and so on. Black (fabric 17) is sewn in<br />
between each color palette strip.<br />
FOUNDATION PIECING<br />
Place the first fabric 17 strip wrong side against the<br />
unmarked side of the foundation. Make sure it covers<br />
the first area 17. Pin to secure the layers.<br />
Place the first fabric 1 strip right sides together<br />
against the fabric 17 strip. Angle it so there is at<br />
least 1/4" of fabric 1 within the area marked 1 on<br />
the foundation. Hold up to light to position or<br />
thread a pin through the top point and the bottom<br />
point.<br />
1<br />
Tape<br />
1 2 3 4 5 6 7 8 9 10 11 12 13 14 15 16<br />
17 17 17 17 17 17 17 17 17 17 17 17 17 1717 17 17<br />
Foundation A<br />
Foundation B<br />
First fabric 1 strip RSU (right side up).<br />
1 2 3 4 5 6 7 8 9 10 11 12 13 14 15 16<br />
Using a short stitch length, machine stitch through<br />
all layers along the marked line separating areas 17<br />
and 1. Trim excess seam allowance. Flip the fabric<br />
strip 1 open and press.<br />
Repeat this process with the second fabric 17 strip etc.<br />
17 17<br />
17 17 17 17 17 17 17 17 17 17 17 1717 17 17<br />
First fabric 17 strip WSU (wrong side up).<br />
Remove the foundation paper by bending at the seams a few times to help loosen the paper at the stitched<br />
perforations.<br />
3. Sew the sets together. Press joining seam to one side.<br />
Fabric color number indicated in white.<br />
16 15 14 13 12 11 10 9 8 7 6 5 4 3 2 1<br />
Sew two sets of Foundations A & B.<br />
17<br />
Foundation A<br />
Foundation B<br />
2<br />
The foundation piecing method produces mirror<br />
image finished quilt work.
4.<br />
Sew the top band, accent band and base strips to the pieced section. Press the seam allowances in the<br />
direction indicated by the arrows.<br />
Top Band<br />
17<br />
Accent Band<br />
Base<br />
18<br />
17<br />
5.<br />
6.<br />
7.<br />
Place the pieced tote body onto an approx. 22" x 42" piece of cotton batting. Quilt as desired. Trim excess<br />
batting flush with the pieced tote body.<br />
POCKETS: Fold each pocket piece in half, right sides together. Sew each<br />
along the three raw sides. Leave the last approx. 1-1/2" open. Trim the corners<br />
remove excess. Turn each pocket right<br />
side out and press maintaining straight<br />
3-1/2"<br />
3-1/2"<br />
edges.<br />
6-1/2" 4"<br />
Position the pockets with the folded<br />
edge 3-1/2" from the short ends of the<br />
lining. Pin in place. Top stitch the three<br />
seamed edges of each pocket securing<br />
them to the lining. If desired, sew extra<br />
seams in the pockets to section off areas<br />
for items like a pen, lipstick, cell phone,<br />
keys etc...<br />
Center of Lining<br />
Fold 1/4" and press.<br />
to<br />
8.<br />
STRAPS: Press one long edge of each strap 1/4"<br />
forming a finished edge. Place two pieces of batting<br />
down the center of each strap. Fold the fabric over the<br />
batting ending with the finished edge. Top stitch down<br />
the center of each strap length three times (approx. 1/4"<br />
increments).<br />
Center batting.<br />
Fold onto batting.<br />
Top Stitch.<br />
3
9.<br />
Pin the straps to the quilted tote body. Baste<br />
stitch to body if desired using less than 1/4" seam<br />
allowance. The spacing described in the diagram<br />
below is approx as the quilted tote piece may vary<br />
in size some. Add tab for keys, zipper (see special<br />
touches)... if desired.<br />
5-3/4" 6" Approx. 11" 6" 5-3/4"<br />
12. SHAPE THE TOTE CORNERS:<br />
Fold the bottom of the tote and lining at each<br />
corner as shown in diagram. Stitch to form the<br />
tote shape on the two bag and<br />
two liner corners.<br />
3"<br />
13.<br />
Turn right side out pulling all pieces through the<br />
opening. Pull tote into shape tucking the lining<br />
into the body of the tote.<br />
6"<br />
14.<br />
Top stitch around the top rim of the tote. Whip<br />
stitch the opening closed.<br />
10.<br />
Pin the lining to the tote shown above, right sides<br />
together. Sew just along the top edge. Stitch again<br />
at the handles to reinforce.<br />
Lining<br />
SPECIAL TOUCHES<br />
SWIVEL HOOK: Make a strap for<br />
the key hook by cutting a 2-1/2" x 4"<br />
piece of fabric 17 (same fabric as top<br />
band). Fold and sew in the same way<br />
the straps were made (step 8) only this<br />
time without batting. Thread the fabric<br />
through the key hook base and pin in<br />
place beside one of the straps (before<br />
adding lining).<br />
Tab for Keys<br />
11.<br />
Open up and refold so the lining and pieced body<br />
are against their own right sides. Be sure the<br />
handles are out of the way of the impending seam<br />
allowances. Sew along all three raw edges of the<br />
bag leaving approx. 3" opening for turning right<br />
side out later.<br />
Leave Open<br />
ZIPPER: Cut two 6-1/2" x 15" pieces from lining<br />
fabric (18). Fold each strip in half lengthwise. Sew<br />
1/4" seam on each short<br />
FOLD<br />
end. Turn right side out.<br />
Press. Place the fold of each<br />
strip onto each side of a<br />
Raw Edges Make 2<br />
14" separating zipper. Top Raw Edges<br />
stitch. Pin the raw edges of<br />
zipper ... zipper... zipper ... zipper ... zipper ... zipper<br />
the strips to opposing sides<br />
of the bag centering over the<br />
handles. Proceed to step 11.<br />
Raw Edges<br />
Lining<br />
4
<strong>Quilter's</strong> <strong>Palette</strong> <strong>Tote</strong> Fabric Cutting Directions<br />
9812-08<br />
(QP87)<br />
1/8 yard<br />
Fabric 1<br />
Strips (2) 2-1/2" x 16"<br />
9412-003<br />
(QP102)<br />
1/8 yard<br />
Fabric 11<br />
Strips (2) 2-1/2" x 16"<br />
4005-3<br />
(QP86)<br />
1/8 yard<br />
Fabric 2<br />
4730-08<br />
(QP84)<br />
1/8 yard<br />
Fabric 3<br />
8868-4<br />
(QP83)<br />
1/8 yard<br />
Fabric 4<br />
6340-13<br />
(QP81)<br />
1/8 yard<br />
Fabric 5<br />
6740-06<br />
(QP80)<br />
1/8 yard<br />
Fabric 6<br />
6340-10<br />
(QP15)<br />
1/8 yard<br />
Fabric 7<br />
5866-21<br />
(QP113)<br />
1/8 yard<br />
Fabric 8<br />
6740-10<br />
(QP106)<br />
1/8 yard<br />
Fabric 9<br />
5866-21<br />
(QP103)<br />
1/8 yard<br />
Fabric 10<br />
Batting : Handles (4) 1-1/4" x 28"<br />
Bag Body (1) 22" x 42"<br />
Strips (2) 2-1/2" x 16"<br />
Strips (2) 2-1/2" x 16"<br />
Strips (2) 2-1/2" x 16"<br />
Strips (2) 2-1/2" x 16"<br />
Strips (2) 2-1/2" x 16"<br />
Strips (2) 2-1/2" x 16"<br />
Strips (2) 2-1/2" x 16"<br />
Strips (2) 2-1/2" x 16"<br />
Strips (2) 2-1/2" x 16"<br />
5<br />
6740-09<br />
(QP99)<br />
1/8 yard<br />
Fabric 12<br />
4730-12<br />
(QP143)<br />
1/8 yard<br />
Fabric 13<br />
4002-6<br />
(QP142)<br />
1/8 yard<br />
Fabric 14<br />
7427-26<br />
(QP140)<br />
1/8 yard<br />
Fabric 15<br />
6340-16<br />
(QP139)<br />
1/8 yard<br />
Fabric 16<br />
9410-14<br />
(QP48)<br />
2 yards<br />
Fabric 17<br />
4795-20<br />
(QP14)<br />
1-1/8 yards<br />
Green Accent<br />
Fabric 18<br />
Strips (2) 2-1/2" x 16"<br />
Strips (2) 2-1/2" x 16"<br />
Strips (2) 2-1/2" x 16"<br />
Strips (2) 2-1/2" x 16"<br />
Strips (2) 2-1/2" x 16"<br />
Strips (33) 3" x 16"<br />
Top Band<br />
(1) 2-1/2" x 39-1/2"<br />
Base (1) 5-1/2" x<br />
39-1/2"<br />
Straps (2) 3-1/2" x 28"<br />
Accent Band<br />
(1) 1-1/2" x 39-1/2"<br />
Liner<br />
(1) 20-1/2" x 39-1/2"<br />
Pockets<br />
(1) 11" x 16"<br />
(1) 6-1/2" x<br />
8-1/2"<br />
If adding zipper increase fabric 18 yardage to 1-3/8 yards<br />
LINER (fabric 18): After step 5, the size of the quilted<br />
tote may have become smaller depending on the<br />
batting weight and amount of quilting. If needed, make<br />
adjustments to the liner size to fit your tote's size.<br />
(QP___) is the <strong>Jinny</strong> <strong>Beyer</strong>'s Quilters <strong>Palette</strong> number.
TOTE FOUNDATION A<br />
NAVY BLUE TEAL<br />
CRACKLE<br />
TEAL<br />
Foundation A (starting with navy, ending with gold).<br />
GREEN LIME OCHER<br />
GOLD<br />
Fabric 1 Fabric 2 Fabric 3 Fabric 4 Fabric 5 Fabric 6 Fabric 7 Fabric 8<br />
Tape to section A matching black to black.<br />
Fabric 17<br />
BLACK<br />
Fabric 17<br />
BLACK<br />
Fabric 17 Fabric 17 Fabric 17 Fabric 17 Fabric 17 Fabric 17<br />
BLACK BLACK BLACK BLACK BLACK BLACK<br />
Fabric 17<br />
BLACK<br />
Using a black and white copier, enlarge 200% for a foundation<br />
measurement of 10" wide x 12-1/2" high. This will require an 11" x 17"<br />
paper size. Make 2 full size foundations/copies of foundation A.
PEACH<br />
TOTE FOUNDATION B<br />
Foundation B (starting with peach, ending with purple).<br />
ORANGE BRICK WINE PINK DK. PINK BURGUNDY PURPLE<br />
Fabric 9 Fabric 10 Fabric 11<br />
Fabric 12 Fabric 13 Fabric 14 Fabric 15 Fabric 16<br />
Tape to section A matching black to black.<br />
Fabric 17<br />
BLACK<br />
Fabric 17<br />
BLACK<br />
Fabric 17<br />
BLACK<br />
Fabric 17 Fabric 17 Fabric 17 Fabric 17 Fabric 17<br />
BLACK BLACK BLACK BLACK BLACK<br />
Fabric 17<br />
BLACK<br />
Using a black and white copier, enlarge 200% for a foundation<br />
measurement of 10" wide x 12-1/2" high. This will require an 11" x 17"<br />
paper size. Make 2 full size foundations/copies of foundation B.