Robert's Baltimore Album - RJR Fabrics
Robert's Baltimore Album - RJR Fabrics
Robert's Baltimore Album - RJR Fabrics

You also want an ePaper? Increase the reach of your titles
YUMPU automatically turns print PDFs into web optimized ePapers that Google loves.
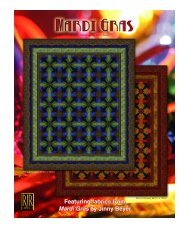
Designed by Robert Callaham<br />
Featuring panel prints and tonal coordinates<br />
from the Robert’s <strong>Baltimore</strong> <strong>Album</strong> collection
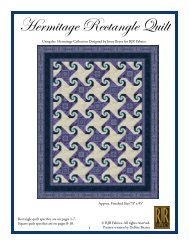
Designed by Robert Callaham<br />
Instructions by Cathryn Tallman-Evans<br />
Finished quilt size 81" x 81"<br />
All strips are to be cut crosswise on the grain of the fabric from selvage to selvage unless otherwise noted.<br />
Yardage is calculated for 42" wide fabric. Carefully trim off all selvages. Please read the pattern carefully before you begin.<br />
Fabric Requirements and Cutting Directions:<br />
Robert’s <strong>Baltimore</strong> <strong>Album</strong><br />
Fabric # Fabric Swatch Style # Cutting Directions Yardage<br />
Cut twenty strips 2 1 /2" wide. Cut three pieces<br />
1 5842-4 2 1 /2" x 10 1 /2" from each strip for a total of sixty 2 1 /8<br />
sashing pieces. Cut nine strips 2 1 /4" wide for the binding.<br />
2 5846-1 Cut 3 strips 21 /2" wide. Cut twelve squares 2 1 /2" x 2 1 /2" 3/8<br />
from each strip for a total of thirty-six cornerstone squares.<br />
Using the quilt pictured as a guide, cut twenty-five motif<br />
blocks from the yardage. Cut each motif block as a<br />
3 5838-1 10 1 /2" x 10 1 /2" square with the motif carefully centered<br />
in each square. It is recommended that a 10 1 /2" piece of<br />
tracing paper, with a 1 /4" seam allowance drawn all the<br />
way around, be used to center and cut out the motifs. 2 2 /3*<br />
To make the quilt as pictured, you will need four each of each<br />
the musical instruments, heart shaped wreath, and floral<br />
4 5839-1 bouquet motifs and two each of the flowers in the blue and<br />
gold vase motif. You will need one each of the remaining<br />
eleven motifs.<br />
Cut each printed border print stripe LENGHTHWISE into<br />
5 5840-1 a 10" x 90" long strip by trimming each stripe 1/4” 2 1 /2*<br />
beyond the outer edges of each printed motif stripe.<br />
6 90"-108" wide 21 /2<br />
Quilt Backing or 45" wide 6<br />
* The yardages listed are minimums. If purchasing yardage for this project, purchase enough fabric for four floral bouquet<br />
motifs from style #5838-1, four full musical instrument motifs from style #5839-1, and seven full floral garland motifs from style<br />
#5840-1.<br />
To Assemble the Blocks and Sashing:<br />
Arrange your motif squares as they will appear in your quilt.<br />
In the quilt pictured, the motif squares have been carefully<br />
placed to recreate the look of an authentic <strong>Baltimore</strong> <strong>Album</strong><br />
Quilt. Note that some squares are placed with the motifs<br />
upside down or on their sides.<br />
Sew a 2 1 /2" x 10 1 /2" Fabric 1 sashing piece to the right-hand<br />
side of each motif square. Press seams toward the sashing<br />
pieces.<br />
Using the quilt pictured as a guide, assemble the sashed<br />
squares into five rows of five squares each. Sew a 2 1 /2" x<br />
10 1 /2" Fabric 1 sashing piece to the left-hand side of each<br />
row.<br />
Sew a Fabric 2 cornerstone to the right-hand side of each<br />
remaining Fabric 1 sashing piece. Press seams toward the<br />
sashing pieces. Using the quilt pictured as a guide,<br />
assemble the sashing and cornerstone units into six rows of<br />
five units each. Sew a Fabric 2 cornerstone to the left-hand<br />
side of each row.<br />
Assemble the rows of blocks and sashing units as shown in<br />
the quilt pictured. Press all seams toward the rows of sashing<br />
units.<br />
To Add the Border:<br />
At this point, your quilt top should measure 62 1 /2" from top to<br />
bottom and 62 1 /2" from side to side. The quilt top must be<br />
the same measurement in both directions or the corners of<br />
the border print will not meet properly.<br />
Fold a trimmed border print strip in half crosswise with a<br />
floral garland motif carefully centered at the fold. Measuring<br />
from the fold, mark a point equal to half the measurement of<br />
the quilt top on each end, 31 1 /4" if your quilt top measures<br />
62 1 /2". Unfold the strip and lay your ruler with the 45 degree
line of the ruler even with the edge of the border print strip<br />
and the edge of the ruler even with the marked point. Cut the<br />
right-hand end of the border print strip as shown below.<br />
Repeat this procedure to cut the left-hand end of the border<br />
print strip as a mirror-image of the cut just made.<br />
45˚<br />
closest to the bow motifs. Fold one side of the quilt top in half<br />
and mark the center point with a pin. Pin the border print<br />
strip to the quilt top being careful to match the center points<br />
and keeping the bow motifs in the border stripe closest to the<br />
body of the quilt top. Use as many pins as needed to insure<br />
a smooth seam. Place pins 1 /4" in from each edge to mark<br />
the beginning and end points of the seam. Join the border<br />
print strip to the side of the quilt top, being careful to begin<br />
and end the seam 1 /4" in from each edge. Press the seam<br />
toward the border print strip. Repeat three times to sew a<br />
border print strip to each edge of the quilt top.<br />
To complete the borders, fold the seam allowances out of the<br />
way and sew the border print strips to each other at each<br />
corner of the quilt top. Begin each miter seam 1 /4" from the<br />
edge of the quilt top and sew out to the outer corners of the<br />
border print strips as shown. Press each miter seam open.<br />
Sew here<br />
1/4" from corner<br />
To cut the remaining strips identical to the first, lay an uncut<br />
border print strip with the cut strip centered on top of it,<br />
making sure to line up the printed motifs of the two strips.<br />
Using the diagonal edges of the cut strip as a guide, cut the<br />
ends of the strip underneath it. Repeat twice to make four<br />
identically cut border print strips.<br />
Fold one border print strip in half crosswise and mark the<br />
center point with a pin. Be sure to put the pin on the edge<br />
Finishing the Quilt:<br />
Layer the completed quilt top with batting and backing<br />
fabric and quilt as desired. This project is ideal for quilt-asyou-go<br />
techniques.<br />
Bind the completed quilt as desired, using the 2 1 /4" wide<br />
Fabric 1 strips.