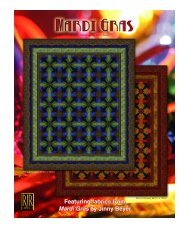
Ashford - RJR Fabrics
Ashford - RJR Fabrics
Ashford - RJR Fabrics

You also want an ePaper? Increase the reach of your titles
YUMPU automatically turns print PDFs into web optimized ePapers that Google loves.
Framing a Rectangular Quilt<br />
With rectangles, you cannot always be assured that the designs will<br />
automatically match at the corners so you must take an extra step.<br />
1. First, follow steps 1-3 above and cut two identical strips for the<br />
short ends of the quilt. The pieces for the other two sides of the quilt<br />
must be cut differently: for the corners on all pieces to<br />
match, there must be a seam in these long pieces at the exact<br />
center of the quilt.<br />
2. Place one of the cut strips on top of a length of the border<br />
print stripe, matching the fabric designs. Cut one miter to<br />
match the miter on the top strip. Set the top strip aside. Lay the newly<br />
cut strip on top of the quilt through the center, aligning one mitered<br />
edge with the edge of the quilt. Mark the center of the quilt on the<br />
strip as in Diagram 4. Move the strip from the quilt and cut it off ¼"<br />
beyond the center mark. Using this cut strip as a guide, cut one more<br />
piece identical to it.<br />
You also need two strips that<br />
are the exact mirror images of<br />
these pieces. Using one of the<br />
strips you just cut, flip it over and lay it on a Diagram 4: Find and<br />
strip of border print, matching the fabric<br />
mark the center of the quilt<br />
design exactly. (The two strips will be right on the border strip.<br />
sides together.) Cut the miter and straight edges to<br />
match the top piece. Using the newly cut strip as a guide, cut one more piece.<br />
3. Sew the seams at the middle of two mirror-imaged strips and attach these borders<br />
to the quilt as in Steps 5 and 6 in Framing a Square Quilt. Sewing the borders to a<br />
rectangular quilt in this manner assures that the corners will match. There will be a<br />
seam at the center of the long strips (Diagram 5), but the design at that center will<br />
mirror-image as well, allowing the design to flow around the quilt.<br />
g<br />
Diagram 5: The long borders on rectangular<br />
quilts have center seams.<br />
Applying Multiple Borders<br />
Jinny often designs quilts to make full use of the border prints. First, she will<br />
frame the quilt with the narrow border stripe, then add a coordinating fabric as<br />
a second border. The quilt is finished off with the wide stripe from the border<br />
print.<br />
Jinny personally measures and adds each border separately. However, when the<br />
middle border is a fabric that doesn’t have to be matched at the corners, she<br />
recommends the following method as being a little faster: Sew the second border<br />
to the first and then measure and cut them as a single border in the steps<br />
above. Measure, cut and sew the third border separately after the first two borders<br />
have been completed and sewn to the quilt.<br />
Binding the Quilt: When Jinny uses a border print to frame a quilt, she typically<br />
sews the binding to the back of the quilt and turns it to the front. This allows her to<br />
carefully hand-stitch the binding along a straight line printed on the border print<br />
fabric. For details, see www.jinnybeyer.com/binding.<br />
Diagram 6: Applying multiple borders<br />
Adding Borders the Jinny Beyer Way<br />
2<br />
©2010, Jinny Beyer