Featurng fabrics from English Garden by Jinny Beyer - RJR Fabrics
Featurng fabrics from English Garden by Jinny Beyer - RJR Fabrics
Featurng fabrics from English Garden by Jinny Beyer - RJR Fabrics

Create successful ePaper yourself
Turn your PDF publications into a flip-book with our unique Google optimized e-Paper software.
Designed <strong>by</strong> <strong>Jinny</strong> <strong>Beyer</strong><br />
Blue - Colorway 2<br />
Taupe - Colorway 3<br />
Slate - Colorway 4<br />
Red - Colorway 1<br />
All quilts are 56 1 /2" x 66 1 /2"<br />
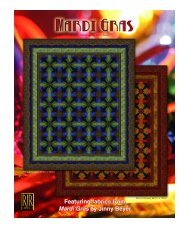
<strong>Featurng</strong> <strong>fabrics</strong> <strong>from</strong> <strong>English</strong> <strong>Garden</strong> <strong>by</strong> <strong>Jinny</strong> <strong>Beyer</strong>
<strong>English</strong> <strong>Garden</strong><br />
Designed <strong>by</strong> <strong>Jinny</strong> <strong>Beyer</strong><br />
Instructions <strong>by</strong> Helen Gregory<br />
Skill Level: Intermediate<br />
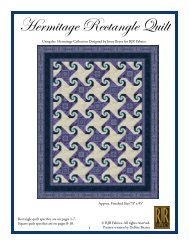
Finished Quilt: 56 1 /2” x 66 1 /2”<br />
An original design <strong>by</strong> <strong>Jinny</strong> <strong>Beyer</strong>, <strong>English</strong> <strong>Garden</strong> consists<br />
of twenty star blocks set in a four-<strong>by</strong>-five grid. A stunning<br />
secondary design is created <strong>by</strong> the <strong>fabrics</strong> used for the<br />
block corners (see the four-pointed stars with on-point<br />
border print squares as centers).<br />
Fabric Requirements<br />
The block piecing can be accomplished successfully <strong>by</strong><br />
hand or machine. For quilters who prefer to rotary cut, rotary<br />
cutting sizes are included on the templates for which rotary<br />
cutting is appropriate.<br />
Because this quilt is rectangular, to ensure perfectly matching<br />
motifs in the border corners, the side border print strips<br />
are seamed at the center. <strong>Jinny</strong>’s step-<strong>by</strong>-step instructions<br />
for Framing a Rectagular Quilt with a Border Print are<br />
included.<br />
Fabric # Description Yardage<br />
Colorway 1-Red Colorway 2-Blue Colorway 3-Taupe Colorway 4-Slate<br />
Fabric Swatch Style # Fabric Swatch Style # Fabric Swatch Style # Fabric Swatch Style #<br />
1 Center square 1/4 5819-3 5819-2 5819-3 5819-4<br />
2 Light green texture 7/8* 5816-3 5816-3 5816-3 - -<br />
2a* Pink texture 3/8* - - - - - - 5817-4<br />
2b* Lavender texture 5/8* - - - - - - 5816-4<br />
3 Shorter star points 1 5818-1 5818-21 5818-3 5818-1<br />
4** Ivory texture 3/4 5817-31 5817-31 5817-31 5817-31<br />
5*** Longer star points 1 3 /4 5798-1 5798-2 5798-3 5798-4<br />
6 Floral background 1 5815-1 5815-2 5815-3 5815-4<br />
7 Border stripe 3 1 /4 5814-1 5814-2 5814-3 5814-4<br />
8 Binding 5/8 5818-1 5819-2 5818-3 5818-1<br />
*<strong>Fabrics</strong> 2a & 2b replace Fabric 2 in Quilt 4—Slate.<br />
**Fabric 4 is also the suggested backing fabric. You will need an additional 3 3 /4 yards of 40”-wide fabric for backing this quilt (2 panels pieced widthwise).<br />
***Fabric 5 is also used for the middle border. Cut the middle border strips before cutting F and FR <strong>from</strong> this fabric.
Making the Templates<br />
Place semi-transparent template plastic over the pattern<br />
and, using a permanent marker, trace the pattern piece onto<br />
the plastic. Add the template letter and the arrow indicating<br />
the grain line.<br />
Cutting the Borders<br />
When cutting strips <strong>from</strong> the border print, take care to leave<br />
exactly 1 /4" seam allowance beyond the outside edge of<br />
each stripe. From the wide stripe of the border print fabric,<br />
cut two strips 5 1 /4" x 74" (reserve for outer border top and<br />
bottom), and four strips 5 1 /4" x 50" (reserve for outer border<br />
sides). From the narrow stripe, cut two strips 1 3 /4" x 48"<br />
(inner border top and bottom) and four strips 1 3 /4" x 32"<br />
(inner border sides). Note: The border print strip lengths<br />
include allowance for centering motifs as in the featured<br />
design. From Fabric 5, cut lengthwise strips as follows. Cut<br />
two strips 2 3 /4" x 62" (middle border sides) and two strips<br />
2 3 /4" x 52" (middle border top and bottom).<br />
Cutting H <strong>from</strong> Border Print <strong>Fabrics</strong><br />
After cutting the border strips, use the remainder of the<br />
border print yardage to cut 80 H as described and<br />
illustrated. Using a right angle triangle, draw a line down<br />
through the middle of plastic Template H. Place plastic H on<br />
selected mirror-imaged motif in the narrow stripe of the<br />
border print fabric, making sure that a stripe <strong>from</strong> the fabric<br />
falls just inside the sewing line on the long side of the<br />
template. With the template in place on the fabric, trace a<br />
portion of the design directly onto the template. As you<br />
move the template to cut the remaining pieces, use this<br />
mark as a guide for lining up the template. Carefully draw<br />
around the template and cut out the piece. Cut 80 identical<br />
H triangles; reserve for the block corners.<br />
Cutting the Block <strong>Fabrics</strong><br />
Cut the block <strong>fabrics</strong> according to the quantities indicated on the templates.<br />
Piecing the Blocks<br />
Step-<strong>by</strong>-step piecing diagrams are shown below. Following are specific diagrams for each colorway.<br />
1. Sew four Template B triangles (Fabric 2) to a Template A<br />
square (Fabric 1) as shown to make the block center.<br />
3. Add Template E triangles (Fabric 4).<br />
E<br />
E<br />
B<br />
A<br />
Make 80<br />
2. Stitch a Template C piece (Fabric 3) to a Template D<br />
triangle (Fabric 2), stopping 1 /4" <strong>from</strong> inner corner. Set-in<br />
a Template CR piece (Fabric 3).<br />
D<br />
Make 20<br />
4. Stitch Template F and FR triangles (Fabric 5) to a<br />
Template G triangle (Fabric 6).<br />
G<br />
C<br />
CR<br />
F<br />
FR<br />
Make 80 Make 20
5. Piece the block as shown, adding the fussy-cut Template H triangles (Fabric 7) to the corners.<br />
Make 20<br />
Colorway 1 – Red<br />
Colorway 2 – Blue<br />
Make 20<br />
Make 80 Make 80 Make 80 Make 20<br />
Make 80 Make 80 Make 80<br />
Make 20<br />
Make 20<br />
Colorway 3 – Taupe<br />
Colorway 4 – Slate<br />
Make 20<br />
Make 80 Make 80 Make 80<br />
Make 20<br />
Make 80 Make 80 Make 80<br />
Make 20<br />
Make 20
Assembling the Quilt Center<br />
Refer to the quilt image as a guide. Sew five rows of four blocks and sew the rows together.<br />
<strong>Jinny</strong>’s Method for Framing a Rectangular Quilt with a Border Print<br />
Because <strong>English</strong> <strong>Garden</strong> is rectangular, the side border print<br />
strips must be pieced to ensure perfectly matching motifs in<br />
the border corners, as on the featured quilt. Here are <strong>Jinny</strong>’s<br />
step-<strong>by</strong>-step instructions for cutting and piecing the strips.<br />
1. Place one 1 3 /4" x 48" inner border strip across the middle<br />
of the quilt, centering a mirror-image motif <strong>from</strong> the<br />
border print at the exact center of the quilt (Figure 1).<br />
Use a right-angle, 45° triangle to mark miter along one<br />
end of the strip, positioning triangle at edge of quilt as<br />
indicated (see arrow in diagram) to ensure that the seam<br />
allowance is included. Mark, then cut the miter.<br />
2. Carefully pick up the mitered edge of the border strip<br />
and bring it over to the other end of the border strip at<br />
the opposite side of the quilt. Position it at the precise<br />
point where the miter will be, making sure the fabric<br />
design matches. Cut the second miter.<br />
3. Using this first mitered strip as a pattern, place it on the<br />
remaining 48" inner border strip, matching the design<br />
exactly, and cut an identical strip. Reserve these two<br />
strips for the top and bottom inner borders.<br />
Figure 1 – Cut Top & Bottom Inner Border Strips
4. Because this quilt is rectangular, to ensure that the motifs<br />
will match at the corners, it is necessary to sew a seam<br />
in the center of each side border strip as follows. Place<br />
one of the cut top/bottom inner border strips on one of<br />
the border print 1 3 /4" x 32" strips, matching the fabric<br />
design. Cut one miter to match the miter on the cut strip.<br />
Place the newly cut strip along the length of the quilt<br />
through the center of the quilt with the miter at the edge<br />
of the quilt (Figure 2). Bring the strip to the exact center<br />
of the quilt and cut it off 1 /4" beyond the center.<br />
Cutting line<br />
Sewing line<br />
Figure 2 – Cut Mirror-Image Half Strips for Inner Border Sides
5. Using this cut strip as a guide, cut one more piece identical to it and two strips that are the exact mirror<br />
images of the first piece. Sew two mirror-imaged strips together to form the long (side) borders (Figure 3).<br />
6. To prepare to sew the inner border strips to the quilt, begin <strong>by</strong> pinning the midpoint of one of the strips to the<br />
middle of one of the edges of the<br />
quilt. Pin the corners next. Then find<br />
the midpoint of each half and pin.<br />
Continue finding midpoints and<br />
pinning. Finally, ease in any fullness,<br />
pinning carefully all along the edge.<br />
Sew all four inner border strips to the<br />
quilt. Sew the miters last.<br />
7. Sew the middle border strips to all<br />
four sides of the quilt and miter the<br />
corners.<br />
8. Repeat Steps 1-6 for the outer<br />
border.<br />
9. Layer the backing, batting, and quilt<br />
top; baste. Quilt, bind, and finish as<br />
desired.<br />
Seam<br />
Figure 3 – Piece Side Strips<br />
Templates<br />
(Shown at 100%, DO NOT scale when printing)<br />
A<br />
Cut 20 <strong>from</strong> Fabric 1<br />
(or rotary cut 2 1 /2" squares)<br />
B<br />
Cut 80 <strong>from</strong> Fabric 2<br />
Note: For Quilt 4, cut 80B <strong>from</strong> pink texture.<br />
0 1" 2" 3"<br />
Use this 3" scale to insure the accuracy of your printout.
Templates<br />
(Shown at 100%, DO NOT scale when printing)<br />
Note: For Quilt 4, cut 80D <strong>from</strong> lavender texture.<br />
C/CR<br />
(reverse)<br />
Cut 80C and<br />
80CR <strong>from</strong><br />
Fabric 3<br />
D<br />
Cut 80 <strong>from</strong><br />
Fabric 2<br />
(or rotary cut<br />
80 squares<br />
2 7 /8" x 2 7 /8"<br />
and cut once<br />
diagonally)<br />
E<br />
Cut 160 <strong>from</strong><br />
Fabric 4<br />
G<br />
Cut 80 <strong>from</strong> Fabric 6<br />
H<br />
Cut 80 <strong>from</strong><br />
Fabric 7<br />
F/FR (reverse)<br />
Cut 80F and<br />
80FR <strong>from</strong><br />
Fabric 5<br />
0 1" 2" 3"<br />
Use this 3" scale to insure the accuracy of your printout.