SX25 Series Process Controller - Spirax Sarco
SX25 Series Process Controller - Spirax Sarco
SX25 Series Process Controller - Spirax Sarco

You also want an ePaper? Increase the reach of your titles
YUMPU automatically turns print PDFs into web optimized ePapers that Google loves.
3231450/3<br />
IM-P323-25<br />
CH Issue 3<br />
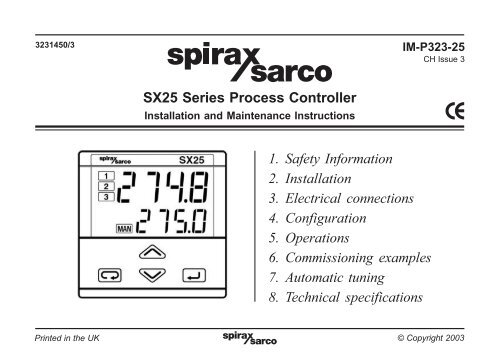
<strong>SX25</strong> <strong>Series</strong> <strong>Process</strong> <strong>Controller</strong><br />
Installation and Maintenance Instructions<br />
1 Safety Information<br />
2 Installation<br />
3 Electrical connections<br />
4 Configuration<br />
5 Operations<br />
6 Commissioning examples<br />
7 Automatic tuning<br />
8 Technical specifications<br />
IM-P323-25 Printed in the CH UK Issue 3 © Copyright 20031
2<br />
IM-P323-25 CH Issue 3
General Index<br />
1. Safety Information<br />
1.1 General<br />
1.2 Wiring Notes<br />
1.3 Safety requirements and electromagnetic<br />
compatibility<br />
2. Installation<br />
2.1 General description<br />
2.2 Dimensional details<br />
2.3 Panel cut-out<br />
2.4 Environmental ratings<br />
2.5 Panel mounting<br />
3. Electrical connections<br />
3.1 Termination<br />
3.2 Precautions and advised conductor course<br />
3.3 Wiring details<br />
3.4 Wiring examples<br />
3.5 Auxiliary relays for Valve Motor Drive actuators<br />
4. Configuration<br />
4.1 Configuration coding<br />
5. Operations<br />
5.1 Keys and display overview<br />
5.2 Display<br />
5.3 Parameter setting<br />
5.4 Parameter menu<br />
5.5 Parameter description<br />
5.6 Configuration menu<br />
6. Commissioning examples<br />
6.1 Example of pressure control for <strong>SX25</strong>-mA<br />
6.2 Example of temperature control for <strong>SX25</strong>-VMD<br />
7. Automatic tuning<br />
8. Technical specification<br />
IM-P323-25 CH Issue 3 3
1 Safety Information<br />
1.1 General<br />
Please carefully read through the following before proceeding with the installation of the controller.<br />
Your attention is drawn to Safety Information leaflet IM-GCM-10.<br />
If the controller is handled improperly or not used as specified, the resultant may:<br />
• cause danger of the life and limb of the third party,<br />
• damage the controller and other assets belonging to the owner,<br />
• hinder the performance of the controller and control system.<br />
1.2 Wiring notes<br />
Every effort has been made during the design of the controller to ensure the safety of the user, but the following<br />
precautions must be followed:-<br />
i) Maintenance personnel must be suitably qualified in working with equipment containing hazardous live voltages.<br />
ii) Ensure correct installation. Safety may be compromised if the installation of the product is not carried out as<br />
specified in this manual.<br />
iii) Isolate the controller from the mains supply before opening the unit.<br />
iv) The controller is designed as an installation category II product, and is reliant on the building installation for overcurrent<br />
protection and primary isolation.<br />
v) Wiring should be carried out in accordance with IEC 60364 or equivalent. For installations in the US and Canada,<br />
the controller must be wired in accordance with the Local and National Electrical Code (NEC) or the Canadian<br />
Electrical Code (CEC).<br />
vi) Fuses should be fitted in all phases. The instrument is protected with an internal fuse PTC, thermal protective<br />
device. To protect the instruments internal circuits use 2A T fuses for Relay outputs and 1A T fuses for Triac<br />
outputs. The Relay contacts are already protected with varistors. Fuses should not be fitted in the protective<br />
earth conductor. The disconnection or removal of other equipment must not compromise the integrity of the<br />
installation protective earth system.<br />
vii) The mains cable connection at the rear of the controller must be retained in position (by tie wrapping Etc.) This will<br />
prevent the high voltage cables at the rear of the controller from touching the SELV (Safe Extra Low Voltage)<br />
connections, in the unlikely event of the terminals coming loose.<br />
4<br />
IM-P323-25 CH Issue 3
viii) A disconnecting device (switch or circuit breaker) must be included in the building installation. This must be<br />
in close proximity to the equipment and within easy reach of the operator.<br />
• There must be a 3 mm contact separation in all poles.<br />
• It must be marked as the disconnecting device for the controller.<br />
• It must not interrupt the protective earth conductor.<br />
• It must not be incorporated into a mains supply cord.<br />
• The requirements for the disconnecting device are specified in IEC 60947-1 and IEC 60947-3 or equivalent.<br />
ix) The controller must not be located in such a way that the disconnecting device is made difficult to operate.<br />
1.3 Safety requirements and electromagnetic compatibility<br />
This product is CE marked. It complies with the requirements of 73/23/EEC as ammended by 93/68/EEC on the<br />
harmonisation of the law of Member States relating to electrical equipment designed for use within certain voltage<br />
limits, by meeting the standard EN 61010-1 (IEC 601010-1):90 +A1:92 + A2:95<br />
This product complies with the requirement of 89 / 336/ EEC as amended by 92/ 31/ EEC on the approximation of<br />
laws of the Member States relating to Electromagnetic Compatibility, by meeting the standards of :<br />
EN 50081-2 (Industrial Emissions)<br />
EN 61000-6-2 (Industrial immunity)<br />
The product may be exposed to interference above the limits of EN 61000-6-2 if:<br />
• The product or its wiring is located near to a radio transmitter.<br />
• Excessive electrical noise occurs on the mains supply.<br />
• Cellular telephones and mobile radios may cause interference if used within approximately one metre of the<br />
product or its wiring. The actual separation necessary will vary according to the power of the transmitter.<br />
• Power line protectors (ac) should be installed if mains supply noise is likely.<br />
• Protectors can combine filtering, suppression, surge and spike arrestors.<br />
IM-P323-25 CH Issue 3 5
2.1 General description<br />
2 Installation<br />
Installation must only be carried<br />
out by qualified personnel.<br />
Before proceeding with the installation<br />
of this controller, follow the instructions<br />
illustrated in this manual and,<br />
particularly the installation precautions<br />
marked with the symbol, related<br />
to the European Community directive<br />
on electrical safety and electromagnetic<br />
compatibility.<br />
To prevent hands or metal touching<br />
parts that may be electrically live, the<br />
controllers must be installed in an<br />
enclosure and/ or in a cubicle.<br />
6<br />
IM-P323-25 CH Issue 3
2.2 Dimensional details 2.3 Panel cut-out<br />
IM-P323-25 CH Issue 3 7
2.4 Environmental ratings<br />
Operating conditions<br />
Altitude up to 2 000 m (6 561 ft)<br />
%Rh<br />
Temperature 0...50°C (32...122°F)<br />
Relative humidity 5...95% non-condensing<br />
Special conditions<br />
Suggestions<br />
%Rh<br />
Temperature >50°C<br />
Humidity > 95%<br />
Conducting atmosphere<br />
Use forced air ventilation<br />
Warm up<br />
Use filter<br />
Forbidden conditions<br />
Corrosive atmosphere<br />
Explosive atmosphere<br />
8<br />
IM-P323-25 CH Issue 3
2.5 Panel mounting<br />
2.5.1 Insert the instrument 2.5.2 Installation securing 2.5.3 Clamps removing<br />
1 Prepare panel cut-out<br />
2 Check front panel gasket position<br />
3 Insert the instrument through<br />
the cut-out<br />
1 Fit the mounting clamps<br />
2 Push the mounting clamps towards<br />
the panel surface to secure the<br />
instrument<br />
1 Insert the screwdriver in the<br />
clips of the clamps<br />
2 Rotate the screwdriver<br />
UL note:<br />
For use on a flat surface<br />
of a Type 2 and Type 3<br />
'raintight' enclosure.<br />
2.5.4 Instrument unplugging<br />
1 Push and<br />
2 pull to remove the instrument<br />
Electrostatic discharges can damage<br />
the instrument<br />
Before removing the<br />
instrument the operator must<br />
discharge himself to ground<br />
IM-P323-25 CH Issue 3 9
3.1 Termination Unit<br />
3 Electrical connections<br />
t<br />
VMD<br />
OP4 mA<br />
(<strong>SX25</strong> mA ONLY)<br />
t<br />
VMD<br />
Pt 100<br />
UL note:<br />
Use 60/ 70°C (140/ 158°F)<br />
copper (cu) conductor only.<br />
<strong>SX25</strong>-VMD<br />
Output onOP1:<br />
OP3: t<br />
<strong>SX25</strong>-mA<br />
Output on OP4: mA<br />
t<br />
18 screw terminals<br />
Option terminals<br />
Holding screw<br />
0.5 N m<br />
Positive screw<br />
driver PH1<br />
Negative screw<br />
driver 0.8 x 4 mm<br />
Terminals<br />
Pin connector<br />
q 1.4 mm<br />
0.055 in max<br />
Fork-shape<br />
AMP 165004<br />
Ø 5.5 mm - 0.21 in<br />
Stripped wire<br />
L 5.5 mm - 0.21 in<br />
10<br />
IM-P323-25 CH Issue 3
3.2 Precautions and advised<br />
conductor course<br />
Despite the fact that the instrument<br />
has been designed to work in an harsh<br />
and noisy environmental (level IV of the<br />
industrial standard IEC 60801-4), it is<br />
recommended to use the following<br />
suggestions.<br />
All the wiring must comply with the<br />
local regulations.<br />
The supply wiring should be routed<br />
away from the power cables.<br />
Avoid to use electromagnetic<br />
contactors, power Relays and high<br />
power motors nearby.<br />
Avoid power units nearby, especially if<br />
controlled in phase angle<br />
Keep the low level sensor input wires<br />
away from the power lines and the<br />
output cables.<br />
If this is not achievable, use shielded<br />
cables on the sensor input, with the<br />
shield connected to earth.<br />
IM-P323-25 CH Issue 3 11
3.3 Wiring details<br />
3.3.1 Power supply<br />
Please read the safety information<br />
and the wiring notes before<br />
proceeding with the installation of<br />
the controller.<br />
The controller provides switching<br />
power supply with multiple isolation<br />
and internal PTC<br />
• Nominal voltage 100 - 240V~<br />
(-15% +10%) Frequency 50/60Hz<br />
• Power consumption 1.6 W max<br />
3.3.2 PV control unit<br />
A For L-J-K-S-T thermocouple type<br />
• Connect the wires with the polarity as<br />
shown<br />
• Always use compensation cable of the<br />
correct type for the thermocouple used<br />
• The shield, if present, must be<br />
connected to a proper earth<br />
B For Pt100 temperature sensor<br />
• If a 3 wire system is used, always use<br />
cables of the same diameter (1 mm 2 min.)<br />
(line 20 W/lead maximum resistance)<br />
• when using a 2 wire system, always use<br />
cables of the same diameter 1mm 2<br />
(AWG 18) and link terminals 5 and 6<br />
C For DT (2xRTD Pt100) Special<br />
When the distance between the<br />
controller and the sensor and the sensor<br />
is 15 m, using a cable of 1mm 2<br />
(AWG 18) diameter, produces an<br />
error on the measure of 1°C<br />
R1 + R2 must be
3.3.2 PV control unit<br />
D For mA, mV<br />
D1 With 2 wire transducer<br />
(<strong>SX25</strong> mA only)<br />
D2 With 3 wire transducer<br />
(<strong>SX25</strong> mA only)<br />
Rj >10MW<br />
Note:<br />
The auxiliary power supply is not<br />
available on the VMD controller.<br />
[1] Auxiliary power supply for external<br />
transmitter 18 V ±20%/30 mA max.<br />
without short circuit protection<br />
IM-P323-25 CH Issue 3 13
3.3.5 Output configuration<br />
The functionality associated to each of the outputs is defined during the<br />
configuration of the instrument, index L (see section 4.1).<br />
The suggested combinations are:<br />
<strong>SX25</strong> mA<br />
Output<br />
Alarms<br />
Primary Secondary AL2 AL3<br />
A Single Action Heat or Cool OP4 none none OP2 OP3<br />
B Single Action Heat or Cool OP4 none none OP1 OP3<br />
C Double Action Heat OP4 Cool OP3 OP2 -<br />
D Double Action Heat OP4 Cool OP2 - OP3<br />
E Double Action Heat OP1 Cool OP4 OP2 OP3<br />
F Double Action Heat OP2 Cool OP4 OP1 OP3<br />
OP2 output can be Relay or logic.<br />
The 'jumper' on the auxiliary<br />
board selects the output type:<br />
Link Pins 1-2 for OP2-Relay<br />
(Factory set)<br />
Link Pins 2-3 for OP2-Logic<br />
Jumper<br />
Auxiliary<br />
board<br />
<strong>SX25</strong> VMD<br />
G Valve Motor Drive Open OP1 Close OP3 OP2 OP2<br />
H Single Action Heat or Cool OP1 none none OP2 OP3<br />
I Single Action Heat or Cool OP2 none none OP1 OP3<br />
J Double Action Heat OP1 Cool OP3 OP2 -<br />
K Double Action Heat OP1 Cool OP2 - OP3<br />
L Double Action Heat OP2 Cool OP3 OP1 -<br />
OP1 - OP3<br />
OP2 - L<br />
OP2 - R<br />
Relay output<br />
Logic output<br />
Relay output<br />
Note: With heat or cool control AL2 and AL3 share the same output.<br />
14<br />
IM-P323-25 CH Issue 3
<strong>SX25</strong> mA Output combination<br />
3.3.5 – A, B<br />
OP4 Analogue mA control output 3.3.5 – C Double action analogue mA/relay control output<br />
• Galvanic isolation 500V~/1 min<br />
• 0/4...20mA, (750W or 15V– max)<br />
load<br />
coil<br />
3.3.5 – D Double action analogue mA/relay control output<br />
Relay output<br />
• SPST Relay N.O., 2A/250 V~<br />
for resistive load, fuse 2A ~ T<br />
Logic output not isolated<br />
• 0...5V–, ±20%, 30 mA max<br />
OP2, use Relay (terminals 15,16) or<br />
Logic (terminals 10,11)<br />
15<br />
2<br />
16<br />
3.3.5 – E Double action relay/ analogue mA control output<br />
load<br />
coil<br />
3.3.5 – F Double action relay/ analogue mA control output<br />
load<br />
coil<br />
15<br />
2<br />
16<br />
load<br />
coil<br />
IM-P323-25 CH Issue 3 15
<strong>SX25</strong> VMD Output combination<br />
3.3.5 – G Valve Motor Drive<br />
Relay/ Relay Control Output<br />
3.3.5 – H Single Action Relay<br />
Control Output<br />
3.3.5 – I Single Action Logic<br />
Control Output<br />
Coil of the heat<br />
load contactor<br />
3.3.5 – J Double Action Relay/Relay Control Output<br />
Valve drive PID without<br />
potentiometer (open,close,stop).<br />
Relay output<br />
• SPST Relay N.O., 2A/ 250 V~<br />
for resistive load, fuse 2A ~ T<br />
Logic output not isolated<br />
• 0...5 V–, ±20%, 30 mA max<br />
Coil of the heat<br />
Coil of the cool<br />
load contactor<br />
load contactor<br />
3.3.5 – K Double Action Relay/ Logic Control Output<br />
Coil of the heat<br />
load contactor<br />
16<br />
IM-P323-25 CH Issue 3
3.3.5 – L Double Action<br />
Logic/ Relay Control Output<br />
3.3.6 Alarms outputs<br />
The outputs OP1, OP2 and OP3,<br />
can be used as alarm outputs<br />
only if they are not configured<br />
as control outputs.<br />
Relay<br />
Logic<br />
Load<br />
alarm<br />
Fuse<br />
Coil of the cool<br />
load contactor<br />
Relay output<br />
• SPST Relay N.O., 2A/250 V~<br />
for resistive load, fuse 2A ~ T<br />
Logic output not isolated<br />
• 0...5 V–, ±20%, 30 mA max<br />
Coil of the load<br />
alarm contactor<br />
Relay<br />
15<br />
2<br />
16<br />
Coil of the load<br />
alarm contactor<br />
Relay<br />
Coil of the load<br />
alarm contactor<br />
IM-P323-25 CH Issue 3 17
3.4 Wiring examples 3.5 Auxiliary Relays for Valve Motor<br />
Drive actuators<br />
Example 1. <strong>SX25</strong>-mA for Pressure control: Using a 4-20mA<br />
pressure transmitter and a control valve with 4-20mA<br />
Electric or Electro-pneumatic positioner.<br />
<strong>SX25</strong>mA<br />
<strong>SX25</strong> VMD<br />
<strong>SX25</strong>mA<br />
When using <strong>SX25</strong> controller’s to directly drive VMD<br />
electric actuator’s, damage to the controller’s internal<br />
relays might occur due to switching the relatively<br />
heavy electrical loads.<br />
Auxiliary relays should therefore always be installed<br />
between the controller and the valve drive actuator.<br />
This will protect the controller from switching the<br />
actuators high current loads, avoid introducing high<br />
current loops within the proximity of the controller, and<br />
provide an easily replaceable switching element<br />
outside of the controller.<br />
Example2. <strong>SX25</strong>-VMD for Temperature control:<br />
Using Pt100 temperature sensor and a control<br />
valve with a Valve Motor Drive Elctric Actuator.<br />
18<br />
This advice is in line with that given by other<br />
manufacturers of similar equipment and is considered<br />
to be good working practice.<br />
IM-P323-25 CH Issue 3
4.1 Configuration coding<br />
The configuration code consists of<br />
4 digits that identify the operating<br />
characteristic of the controller, as<br />
chosen by the user.<br />
Refer to section 5.6 configuration<br />
menu and section 6,<br />
commissioning examples for<br />
additional help.<br />
The configuration code can be<br />
displayed on the front panel,<br />
following the instructions on page<br />
22 section 5.2.2.<br />
† 2.5W 1% shunt resistor must be fitted<br />
for mA input signal. See section 3.3.2<br />
4 Configuration<br />
Input type and range<br />
I<br />
RTD Pt100 IEC 60751 -99.9...300.0 °C -99.9...572.0 °F 0<br />
RTD Pt100 IEC 60751 -200...600 °C -328...1112 °F 1<br />
TC L Fe-Const DIN43710 0...600 °C -328...1112 °F 2<br />
TC J Fe-Cu45% Ni IEC 60584 0...600 °C 32...1112 °F 3<br />
TC T Cu-CuNi -200...400 °C -328...752 °F 4<br />
TC K Cromel -Alumel IEC 60584 0...1200 °C 32...2192 °F 5<br />
TC S Pt10%Rh-Pt IEC 60584 0...1600 °C 32...2912 °F 6<br />
† 0...20mA/0...50 mV, linear Engineering units 7<br />
† 4...20mA/»10...50 mV, linear Engineering units 8<br />
Custom input and range [1] 9<br />
[1] For example, other thermocouples types, DT (with 2 PT 100), custom linearisation etc.<br />
<strong>SX25</strong>-VMD <strong>SX25</strong>-mA L<br />
Control Output Output<br />
mode configuration Alarms configuration Alarms<br />
PID<br />
Control OP1 OP2, OP3 Control OP4 OP2, OP3 0<br />
Control OP2 OP1, OP3 Control OP4 OP1, OP3 1<br />
ON - OFF<br />
Control OP1 OP2, OP3 Control OP4 OP2, OP3 2<br />
Control OP2 OP1, OP3 Control OP4 OP1, OP3 3<br />
Control OP1-OP3 OP2 Control OP4-OP3 OP2 6<br />
Heat/Cool<br />
Control OP1-OP2 OP3 Control OP4-OP2 OP3 7<br />
Action<br />
Control OP2-OP3 OP1 Control OP4-OP3 OP1 8<br />
PID VMD Control OP1-OP3 OP2 N/ A N/ A 9<br />
Control action type<br />
Reverse (single action) Linear Cool (Heat/Cool double action) 0<br />
Direct (single action) On-Off Cool (Heat/Cool double action) 1<br />
M<br />
IM-P323-25 CH Issue 3 19
When the controller is powered up<br />
for the first time, the display shows<br />
the following message.<br />
Alarm 2 type and function<br />
N<br />
Not active 0<br />
Sensor break alarm/Loop Break Alarm 1<br />
<strong>Process</strong><br />
active high 2<br />
active low 3<br />
Deviation<br />
active high 4<br />
active low 5<br />
Band<br />
active out 6<br />
active in 7<br />
This shows that the controller has<br />
not been configured.<br />
Input the first code ILMN , using the<br />
up and down arrow keys, then press<br />
the enter key. The lower display will<br />
show Con2 . Now input code O for<br />
alarm 3, then press enter.<br />
The controller will remain in stand-by<br />
until the configuration code is set<br />
correctly (see section 5.6 page 36).<br />
CON2<br />
Alarm 3 type and function<br />
O<br />
Disabled 0<br />
Sensor break alarm/Loop Break Alarm 1<br />
<strong>Process</strong><br />
active high 2<br />
active low 3<br />
Deviation<br />
active high 4<br />
active low 5<br />
Band<br />
active out 6<br />
active in 7<br />
For alarm type and function see page 30.<br />
20<br />
IM-P323-25 CH Issue 3
5.1 Keys and display overview<br />
5 Operations<br />
5.1.1 Key functions and display<br />
in operator mode<br />
5.1.2 Key functions and display<br />
in programming mode<br />
IM-P323-25 CH Issue 3 21
5.2 Display<br />
During the operation, the<br />
parameters values cannot be<br />
modified by the user<br />
5.2.1 <strong>Process</strong> variables 5.2.2 Configuration codes<br />
Operator mode<br />
Operator<br />
mode<br />
Engineering<br />
units [1]<br />
Engineering<br />
units [1]<br />
Local<br />
Setpoint<br />
(Manual)<br />
Note<br />
[1] See table page 38<br />
[2] This display is not shown if the<br />
instrument has been configured<br />
as an On - Off controller<br />
OP1<br />
output<br />
(auto) [2]<br />
Hardware<br />
model<br />
Configuration<br />
code<br />
(see page 19)<br />
Software<br />
release<br />
Example: 3150 - 2002 / Release 00A<br />
22<br />
IM-P323-25 CH Issue 3
5.3 Parameter setting<br />
5.3.1 Numeric entry<br />
(i.e. the modification of the<br />
Setpoint value from 275.0 to 240.0 )<br />
Press or momentarily to<br />
change the value of 1 unit every push.<br />
Continued pressing of or<br />
changes the value, at a rate that<br />
doubles every second. Releasing the<br />
button causes the rate of change to<br />
decrease.<br />
In any case the change of the value<br />
stops when it has reached the<br />
max/ min limit set for the parameter.<br />
Operator<br />
mode<br />
working Setpoint<br />
displayed<br />
Local<br />
Setpoint display<br />
Lower<br />
—Lower Setpoint<br />
modification<br />
Raise<br />
In case of Setpoint modification:<br />
press or once to display<br />
the local Setpoint instead of<br />
working Setpoint.<br />
To confirm this change the display<br />
flashes once. Then the Setpoint<br />
can be modified<br />
after 2 sec.<br />
Setpoint entry.<br />
The operation is<br />
acknowledged by<br />
after 2 sec.<br />
one flash of the<br />
display.<br />
IM-P323-25 CH Issue 3 23
5.3.2 Mnemonic codes setting<br />
(e.g. configuration see page 36)<br />
Press the or to display the<br />
next or previous mnemonic for the<br />
selected parameter.<br />
Continued pressing of or<br />
will display further mnemonics at a rate<br />
of one mnemonic every 0.5 sec.<br />
Engineering<br />
Units<br />
Degree<br />
Centigrade<br />
Degree<br />
Fahrenheit<br />
Degree<br />
Fahrenheit<br />
no units<br />
defined<br />
Degree<br />
Centigrade<br />
Ph<br />
24<br />
IM-P323-25 CH Issue 3
5.3.3 Keypad lock<br />
To lock/unlock the keypad press<br />
the keys and<br />
simultaneously for 2 seconds.<br />
To confirm the keypad lock/unlock<br />
the display flashes once.<br />
5.3.4 Outputs lock 5.3.5 Auto / Man<br />
The outputs are switched to the<br />
Operator<br />
OFF status by pressing the keys<br />
mode<br />
and together.<br />
When the outputs are locked, the<br />
message Off is displayed<br />
instead of the Setpoint value.<br />
To unlock the outputs press both<br />
keys simultaneously (the Soft-start<br />
will be enabled).<br />
Select N¢n<br />
to switch to<br />
manual mode<br />
The keypad lock is<br />
remembered during<br />
power failure.<br />
operator mode<br />
Press<br />
simultaneously<br />
for 2 seconds<br />
The outputs lock/ unlock is<br />
remembered during power<br />
failure.<br />
Select Avto<br />
to switch to<br />
automatic<br />
mode<br />
• Press to confirm. Back to<br />
operator mode.<br />
• The led shows the manual<br />
mode status.<br />
• When manual mode is active, the<br />
Setpoint display shows the<br />
output value, that can be<br />
modified by<br />
IM-P323-25 CH Issue 3 25
5.4 Parameter menu<br />
Note:<br />
[1] This will not be displayed if the<br />
controller has been configured<br />
with alarm 2 not active or if<br />
sensor break type selected.<br />
Digit N/M of the configuration<br />
code is assigned to 0 or 1.<br />
27.4.8<br />
275.0<br />
Operator<br />
mode<br />
Auto/Man<br />
selection<br />
(see page 25)<br />
A.<br />
U<br />
8n<br />
The parameter setting procedure<br />
has a timeout. If no key is pressed<br />
for 30 seconds, the controller<br />
automatically switches back to the<br />
operator mode.<br />
After having selected the parameter<br />
or the code, press and to<br />
display or modify the value (see<br />
page 24) The value is entered when<br />
the next parameter is selected, by<br />
pressing the key.<br />
Pressing the key, the next<br />
group of parameters will be<br />
displayed.<br />
[2] Before Adpt is switched off,<br />
note down the calculated<br />
values. Pb., t.¡, t.d. are not<br />
automatically stored.<br />
0<br />
A35.Pp<br />
5.0<br />
p.b.<br />
5.0<br />
t.i.<br />
AL3 alarm<br />
threshold [1]<br />
(see page 30)<br />
Proportional band<br />
(PID algorithm only)<br />
0.5...999.9% of span<br />
Integral time<br />
(PID algorithm only)<br />
0ff / 0.1...100.0 min<br />
1.00<br />
t.d.<br />
20<br />
t.c.<br />
1.00<br />
O.C.<br />
Deriv<br />
(PID<br />
Off/0<br />
Cycle<br />
(time<br />
algori<br />
Overs<br />
(PID<br />
0.01..<br />
26<br />
IM-P323-25 CH Issue 3
P<br />
33<br />
PpAss<br />
Password entry<br />
only if Code value<br />
³5000<br />
(see page 38)<br />
0<br />
A25.p<br />
1st GROUP<br />
AL2 alarm threshold<br />
[1]<br />
(see page 30)<br />
5000<br />
Code entry<br />
from 5000 to 9999<br />
Must be equal to<br />
the value of the<br />
parameter Code<br />
NO<br />
OK<br />
YES<br />
vative time<br />
algorithm only)<br />
0.01 - 10.00<br />
le time<br />
proportional PID<br />
rithm only) 1...200 sec<br />
rshoot control<br />
algorithm only)<br />
...1.00<br />
60<br />
N0U.t.0<br />
0.5<br />
0U.h.Yy<br />
20<br />
t.c. C<br />
Valve travel time<br />
(Valve motor drive only)<br />
15...600 secs<br />
Valve minimum<br />
output step<br />
(Valve motor drive only)<br />
0.1 - 5.0%<br />
Cool cycle time<br />
(heat /cool with cool time<br />
propotional PID only)<br />
1...200 secs<br />
1.0<br />
r.C.w6a<br />
0.5<br />
hYy. C<br />
0.5<br />
d.bnd<br />
Cool relative gain<br />
(heat/cool configuration<br />
only) 0.1...10.0<br />
Cool output<br />
hysteresis<br />
(On-Off control only)<br />
0.1...10.0% range<br />
Dead band<br />
(heat/cool configuration<br />
only) -10.0...10.0%<br />
100.0<br />
Op. H<br />
100.0<br />
0Pp.HC<br />
0.5<br />
hYy.<br />
Control output<br />
high limit<br />
(PID algorithm only)<br />
10.0...100.0%<br />
Cool control<br />
output high limit<br />
(heat/cool PID<br />
configuration only)<br />
10.0...100.0%<br />
Control output<br />
hysteresis<br />
(On-Off control only)<br />
0.1...10.0% of span<br />
IM-P323-25 CH Issue 3 27
tun8<br />
2nd GROUP<br />
Tuning run/stop<br />
(PID algorithm only)<br />
Adpt<br />
Continuous Tuning start/stop<br />
(adaptive tuning)<br />
(PID algorithm only)<br />
p.6. a<br />
t.i. A<br />
t.d. A<br />
Calculated Proportional<br />
band [2] (display only)<br />
(available when adaptive<br />
tuning is selected)<br />
Calculated Integral Time<br />
[2] (display only)<br />
(available when adaptive<br />
tuning is selected)<br />
Calculated derivative<br />
time [2] (display only)<br />
(available when adaptive<br />
tuning is selected)<br />
OFff<br />
sl. u<br />
OFff<br />
sl. Dd<br />
L. range<br />
Ss.p. l<br />
Setpoint ramp up<br />
0ff /0.1...999.9 digit/min<br />
Setpoint ramp down<br />
0ff / 0.1...999.9 digit/min<br />
Setpoint low limit<br />
low range...sp H<br />
H. range<br />
Ss.p. H<br />
0.5<br />
A2hYy<br />
Setpoint high limit<br />
sp l ....high range<br />
AL2 Hysteresis<br />
0.1...10.0% of span<br />
28<br />
IM-P323-25 CH Issue 3
pass<br />
Password entry<br />
only if Code value
5.5 Parameter description<br />
First Group<br />
The controller parameters have been<br />
organised in groups, according to their<br />
functionality.<br />
A2SP<br />
A3SP<br />
AL2 alarm<br />
threshold<br />
AL3 alarm<br />
threshold<br />
The alarms use OP1, OP2 and OP3<br />
outputs in different ways, according to<br />
the configured types of alarms, as<br />
illustrated.<br />
With double action control output,<br />
(VMD or heating and cooling).<br />
There is only one control output left.<br />
Alarm AL2 and AL3 will share the<br />
same output. (see table on page 14).<br />
Proportional<br />
Pb band<br />
This parameter specifies the<br />
proportional band coefficient that<br />
multiplies the error (SP - PV)<br />
t¡<br />
Integral<br />
time<br />
The integral time value specifies the<br />
time required by the integral term to<br />
generate an output equivalent to<br />
the proportional term. When Off the<br />
integral term is not included in the<br />
control algorithm.<br />
td<br />
Derivative<br />
time<br />
The time required by the<br />
proportional term P to repeat the<br />
output provided by the derivative<br />
term D. When Off the derivative<br />
term is not included in the control<br />
algorithm.<br />
tc<br />
Control output<br />
cycle time<br />
Cycle time<br />
tc C<br />
cool<br />
This is the cycle time of the logic<br />
control output.<br />
30<br />
IM-P323-25 CH Issue 3
OC<br />
Overshoot control<br />
(Automatically disabled when the<br />
adaptive tuning is running).<br />
This parameter specifies the span<br />
of action of the overshoot control.<br />
The lower the O.C. value is, the<br />
smaller the overshoot will be during<br />
a set point change.The overshoot<br />
control doesn’t affect the PID<br />
algorithm. If set to 1, the overshoot<br />
control is disabled.<br />
Heat/Cool<br />
dbnd<br />
dead band<br />
This parameter specifies the width<br />
of the deadband between the Cool<br />
and the Heat channel.<br />
NUtn Valve travel time<br />
NUHY<br />
Valve movement<br />
sensitivity<br />
Control output<br />
OP H<br />
high limit<br />
Cool output<br />
OPHC<br />
high limit<br />
This parameter specifies the<br />
maximum value the control output<br />
can be set<br />
HY<br />
hy C<br />
Control output<br />
hysteresis<br />
Cool output<br />
hysteresis<br />
Control or alarm output hysteresis<br />
span, set in % of the full scale.<br />
SL v<br />
SL d<br />
Setpoint<br />
ramp up<br />
Setpoint<br />
ramp down<br />
This parameter specifies the<br />
maximum rate of change of<br />
the Setpoint in digit / min.<br />
When the parameter is Off,<br />
this function is disabled.<br />
A2hy<br />
A3hy<br />
AL2<br />
alarm hysteresis<br />
AL3<br />
alarm hysteresis<br />
Hysteresis of the threshold of both<br />
the alarms, that activate OP1 and<br />
OP2 control output. It is specified as<br />
a % of the full scale.<br />
Setpoint<br />
SP L<br />
low limit<br />
Setpoint<br />
SP H high limit<br />
Low / high limit of the Setpoint value.<br />
AL2, AL3<br />
A2Lb latching<br />
and blocking<br />
A3Lb functions<br />
For each alarm it is possible to<br />
select the following functions<br />
non£ none<br />
Ltch latching<br />
bloc blocking<br />
LtbL both latching and blocking<br />
IM-P323-25 CH Issue 3 31
Second group<br />
Ltch Latch Alarm<br />
Using the latch function, the alarm<br />
will remain energised after the<br />
alarm condition is no longer<br />
present. To reset the latch, press<br />
any key and the alarm will switch<br />
off.<br />
bloc Start up disabling<br />
Alarms with LBA (Loop Break Alarm) and Sensor Break Operation<br />
The Loop Break Alarm will detect faults in the input and output circuit of the<br />
controller.<br />
Select the code 1 on N or O configuration indexes (see page 20) to<br />
select the Loop Break Alarm. The following parameter is then available.<br />
tlba<br />
LBA delay<br />
This parameter will provide a<br />
time delay [1] of 1 to 9999 sec to<br />
the Loop Break Alarm<br />
The alarm condition is indicated by<br />
the red alarm LED and the flashing<br />
display.<br />
With the parameter set to OFF,<br />
the alarm will work with no<br />
delay.<br />
The alarm condition is indicated by<br />
the red alarm LED and the upper<br />
display will show the following:<br />
Note [1] If the input sensor breaks<br />
the alarm will energise immediately.<br />
Loop Break Alarm Conditions<br />
When the cause of the loop break disappears, the alarm staus stops.<br />
32<br />
IM-P323-25 CH Issue 3
Second group<br />
tf ¡l<br />
Input filter<br />
time constant<br />
This input filter provides a time<br />
constant (in seconds) to the PV input.<br />
insh<br />
Input shift<br />
The value entered into this<br />
parameter will offset the PV input<br />
value. Its effect is to shift the whole<br />
PV scale by ± 60 digits.<br />
derr<br />
Error Dead Band<br />
When the PV is within the error<br />
band, the control output will not<br />
change. This will help the life of the<br />
actuator by reducing the number of<br />
actuator starts.<br />
Soft-start control<br />
Stop<br />
output value<br />
Set the value of the control ouput<br />
during the Soft-start activation time<br />
(in %). To de-activate the Soft-start,<br />
set to 'OFF'.<br />
sttN<br />
Soft-start<br />
activation time<br />
Set the time duration (starting at<br />
power on) for the Soft-start function<br />
(in seconds).<br />
The Soft-start function is a warm up<br />
phase after the controller is first<br />
powered up.<br />
The Soft-start will set the control<br />
value to a desired position (STOP).<br />
for the set duration (Sttn).<br />
sa0p<br />
Output<br />
Safety value<br />
If the input signal fails, the control<br />
value can be set to a safe position<br />
(in %).<br />
IM-P323-25 CH Issue 3 33
Heat cool control<br />
Using one PID control algorithm, the<br />
controller can handle two different<br />
outputs, one of these performs the<br />
Heat action, the other one the Cool<br />
action.<br />
It is possible to overlap the<br />
outputs.<br />
The dead band parameter dbnd is<br />
the zone where it is possible to<br />
separate or overlap the Heat and<br />
Cool actions.<br />
The Cool action can be adjusted<br />
using the relative cool gain<br />
parameter rCG¢ <br />
To limit the Heat and Cool outputs<br />
the parameters Control Output High<br />
Limit OP H and Cool Control<br />
Output High Limit 0pHC can be<br />
used.<br />
When there is an overlap, the<br />
displayed output OUt shows the<br />
sum of the Heat and Cool outputs.<br />
A Heat /Cool actions separated<br />
Insert positive dbnd value<br />
(0...10%)<br />
B Heat /Cool actions overlapped<br />
Insert negative dbnd value<br />
(-10...0%)<br />
C Cool action adjusting<br />
Example with different relative cool gains.<br />
D On-Off Cool action<br />
34<br />
IM-P323-25 CH Issue 3
Analogue control output OP4<br />
r£tr<br />
Analogue control<br />
output range<br />
0-20 / 4-20<br />
Control output<br />
rtH selection<br />
non£ Not used<br />
NU<br />
Heat (single action)<br />
NU C Cool<br />
With <strong>SX25</strong> mA Cycle Time tc<br />
or Cool Cycle Time tc C<br />
are not present.<br />
IM-P323-25 CH Issue 3 35
5.6 Configuration menu<br />
The configuration of the controller is<br />
specified through a 4 digit code that<br />
defines the type of input, of control<br />
output and of the alarms.<br />
(section 4.1 page 19).<br />
Press or to display<br />
the next parameter or the next<br />
code and change its value.<br />
The new value entered is stored<br />
into the controller when the next<br />
parameter is selected by<br />
pressing .<br />
Operator<br />
mode<br />
Auto / Man<br />
selection<br />
(see page 25)<br />
Pressing the will display<br />
the next group of parameters.<br />
Note:<br />
You must remember<br />
the password code.<br />
If the code is changed<br />
from 33, and the operator<br />
forgets the code,<br />
he will be locked out<br />
of the controller.<br />
Control output<br />
selection<br />
(only if installed)<br />
non£ Not used<br />
NU Heat NU C Cool<br />
Change password [2]<br />
To change the password<br />
from 0...9999<br />
33 default from factory<br />
36<br />
IM-P323-25 CH Issue 3
Password entry<br />
only if Cod£ value<br />
³ 5000<br />
(see page 38).<br />
1st GROUP<br />
2nd GROUP<br />
Direct access<br />
to the configuration<br />
Code entry<br />
from 5000 to 9999<br />
Must be equal to<br />
the value of the<br />
parameter Code.<br />
if code ³ 5000<br />
NO<br />
YES<br />
Engineering units<br />
(see table 1)<br />
Entry of digits I-L-M-N<br />
of the configuration code<br />
(chapter 4.1 page 19 and 20)<br />
No of decimals<br />
(linear scale only)<br />
0...3<br />
Analogue control<br />
output range<br />
(only if installed)<br />
0-20/4-20mA<br />
Low range [1]<br />
(linear scale only)<br />
-999...9999<br />
High range [1]<br />
(linear scale only)<br />
-999...9999<br />
Entry of digit O<br />
Alarm3 configuration<br />
code.<br />
(4.1 page 20)<br />
IM-P323-25 CH Issue 3 37
NO<br />
YES<br />
Password entry<br />
only if Cod£ value<br />
6 Commissioning Examples<br />
When the controller is first powered<br />
up the display will show:<br />
This indicates that the controller<br />
is not configured (the controller<br />
will not function without being<br />
configured).<br />
If on power up the display does<br />
not show the above, but instead<br />
the operator mode (process<br />
variable and set point) is shown<br />
it signifies that the controller has<br />
already been configured. If this<br />
is the case it is unlikely that the<br />
pre-set configuration will be<br />
suitable for your application.<br />
To change the configuration code it<br />
is necessary to access the<br />
configuration menu. Section 5.6<br />
shows how to access this menu.<br />
To configure the controller a code<br />
number must be entered into the<br />
controller. The configuration code<br />
ILMNO, covers the input type, the<br />
control type, and the alarms.<br />
Refer to Configuration Coding, in<br />
section 4.1 to select the desired<br />
configuration settings. Selected<br />
codes should be recorded in the<br />
customer configuration and<br />
parameter record sheet.<br />
The following show examples of<br />
commissioning the <strong>SX25</strong> controller<br />
providing guidance for similar<br />
applications.<br />
6.1 Example of pressure control<br />
for <strong>SX25</strong>-mA<br />
The <strong>SX25</strong>-mA controller is<br />
monitoring system pressure with a<br />
pressure transmitter, and provides<br />
a 4-20mA control signal to the<br />
control valve.<br />
Configuration Code and<br />
parameters:<br />
• Pressure transmitter 0 to 50 barg,<br />
producing a 4-20mA output signal.<br />
• Control Valve with Electric or<br />
Electro-pneumatic positioner<br />
accepting a 4-20mA input signal.<br />
• Two Event alarms are required.<br />
Event Y2 set for active high<br />
process alarm at 25 bar with the<br />
Latch function. Event Y3 set<br />
for active outside band alarm<br />
set at 5 bar.<br />
• This process requires only one set<br />
point. The local set point is 20 bar<br />
IM-P323-25 CH Issue 3 39
Configuration code<br />
Using the and keys, enter<br />
the first part of the configuration<br />
code 'ILMN', conf.<br />
I L M N<br />
8 0 0 2<br />
Then press the enter key<br />
Enter the last digit for code 'O'<br />
CON2.<br />
O<br />
4<br />
This selects engineering units for the input signal. Using the table below<br />
enter the following values into these parameters.<br />
Parameter Description Default Value New Value<br />
Unit Input Eng. units C bar<br />
Sc.d.d Number of decimals 0 1<br />
Sc.Lo Low input value -999.9 0.0<br />
Sc.Hi High input value 999 50.0<br />
rert Analogue output range 4 - 20 mA 4 - 20 mA<br />
rtH Output Heating/ Cooling nu nu<br />
Code Change Security code 33 33<br />
Press the enter key<br />
or press the scroll key<br />
to review the data you have entered<br />
to exit the configuration menu.<br />
Then press the enter key<br />
The configuration code is now<br />
entered, and the display will show:<br />
o C<br />
vn¡t<br />
40<br />
IM-P323-25 CH Issue 3
First group parameters<br />
Press the scroll key<br />
The display will show<br />
Avto<br />
AN¢n<br />
which provides the option of<br />
selecting Automatic or manual<br />
control.<br />
Press the scroll key<br />
The display will show<br />
A2SP<br />
again.<br />
Alarm 2 threshold value.<br />
Using the table opposite, enter the<br />
following values into the parameters.<br />
Parameter Description Default Customer set<br />
Value Values<br />
A2S.P Alarm 2 set point Stop Stop<br />
A3S.P Alarm 3 set point Stop Stop<br />
P.b. Proportional band 5.0 5.0<br />
t.i. Integral time 5.0 5.0<br />
t.d. Derivative time 1.00 1.00<br />
O.C. Overshoot Control 1.00 1.00<br />
nu.tn Valve travel time 60 40<br />
nu.hy Valve Minimum output step 0.5 .05<br />
OP.H Control output high limit 100.0 5.0<br />
Press the enter key to save the<br />
value entered and to move to the<br />
next parameter.<br />
When the last parameter has been<br />
entered, press the enter key<br />
to save this value.<br />
Now press the scroll key to<br />
edit the second group parameters.<br />
IM-P323-25 CH Issue 3 41
Second group parameters<br />
The display will show<br />
Stop<br />
tvn£<br />
This is used to start the automatic<br />
tuning. Using this table enter the<br />
following values into these<br />
parameters.<br />
Press the enter key to save<br />
the value entered and to move to<br />
the next parameter.<br />
When the last parameter has been<br />
entered, press the enter key<br />
to save this value.<br />
To exit press the scroll key .<br />
The display will show: PASS pass<br />
Press the scroll key again<br />
and the display will return to the<br />
normal operating mode.<br />
The controller is ready to operate.<br />
Now enter the required set point of<br />
20.0 bar by using the and<br />
keys.<br />
Parameter Description Default Customer<br />
Value set Values<br />
tune Tuning PID Stop Stop<br />
AdPt Adaptive tuning PID Stop Stop<br />
SL. u Set point ramp up Off Off<br />
SL. d Set point ramp down Off Off<br />
S.P. L Set point low limit 0.0 0.0<br />
S.P. H Set point high limit 50.0 25.0<br />
A2hy Alarm 2 hysteresis 0.5 0.5<br />
A2L.b Alarm 2 latching and blocking none Ltch<br />
A3hy Alarm 3 hysteresis 0.5 0.5<br />
A3L.b Alarm 3 latching and blocking none none<br />
t.F iL Time constant input filter Off Off<br />
In.Sh Input shift Off Off<br />
d.Err Error dead band Off Off<br />
St.OP Soft start output value Off Off<br />
Sa.OP Control output high limit 0.0 0.0<br />
To improve control of the application,<br />
adjust the proportional band and<br />
integral time accordingly.<br />
42<br />
IM-P323-25 CH Issue 3
6.2 Example of temperature<br />
control for <strong>SX25</strong>-VMD<br />
The <strong>SX25</strong>-VMD controller is<br />
'ILMN'.<br />
I L M N<br />
monitoring system temperature<br />
8 0 0 2<br />
with a RTD Pt100, and provides a<br />
Valve Motor Drive control signal to<br />
Enter the last digit for code 'O'<br />
the electric control valve.<br />
The configuration code is now<br />
entered,and the<br />
display will show:<br />
Configuration Code and<br />
parameters:<br />
• Temperature sensor with an<br />
effective range from 0°C to<br />
100°C.<br />
• Control Valve with 20mm stroke<br />
and Valve Motor Drive electric<br />
actuator, speed 0.5mm/s .<br />
• Two Event alarms are required.<br />
Event Y2 set for active low<br />
process alarm set at 35°C with<br />
the blocking function. Event Y3<br />
set for an active high deviation<br />
alarm set at 10°C.<br />
• The process temperature<br />
required is 60°C is the control<br />
temperature.<br />
Configuration code<br />
Using the and keys, enter the first part of the configuration code<br />
Press the enter key<br />
to save the value entered<br />
and to move to the next<br />
parameter.<br />
Use the enter key to<br />
review the data you have<br />
entered or press the<br />
scroll key to exit the<br />
configuration menu.<br />
o C<br />
vn¡t<br />
then press the enter key<br />
then press the enter key<br />
This selects Celsius or Fahrenheit for<br />
the temperature units.<br />
Using the table below enter the following values into the parameters.<br />
Parameter Description Default Value New Value<br />
Unit temperature units °C °C<br />
Code Change Security code 33 33<br />
When the configuration menu is exited, the<br />
display will now show the normal operating<br />
mode, with the process variable at the top<br />
and the set point at the bottom.<br />
For example:<br />
With the controller<br />
configured, the<br />
parameters can<br />
now be entered.<br />
IM-P323-25 CH Issue 3 43<br />
O<br />
4
First group parameters<br />
From the normal operating mode<br />
press the scroll key . The<br />
display will show<br />
which provides the option of<br />
selecting Automatic or manual<br />
control.<br />
Press the scroll key<br />
Avto<br />
AN¢n<br />
again.<br />
The display will show A25p<br />
Alarm2 set point. Using the table<br />
opposite, enter the following values<br />
into the parameters.<br />
Press the enter key to save the<br />
value entered and to move to the<br />
next parameter.<br />
Parameter Description Default Customer set<br />
Value Values<br />
A2S.P Alarm 2 set point 0.0 35.0<br />
A3S.P Alarm 3 set point 0.0 10.0<br />
P.b. Proportional band 5.0 5.0<br />
t.i. Integral time 5.0 5.0<br />
t.d. Derivative time 1.00 1.00<br />
O.C. Overshoot Control 1.00 1.00<br />
nu.tn Valve travel time 60 40<br />
nu.hy Valve Minimum output step 0.5 .05<br />
OP.H Control output high limit 100.0 5.0<br />
When the last parameter has been<br />
entered, press the enter key<br />
to save this value.<br />
Now press the scroll key .<br />
44<br />
IM-P323-25 CH Issue 3
Second group parameters<br />
The display will show<br />
Stop<br />
tvn£<br />
This is used to start the automatic<br />
tuning. Using the table opposite,<br />
enter the following values into these<br />
parameters.<br />
Press the enter key to save the<br />
value entered and to move to the<br />
next parameter.<br />
When the last parameter has been<br />
entered, press the enter key to<br />
save this value.<br />
Press the scroll key .<br />
Pass<br />
The display will show:<br />
Press the scroll key again and<br />
the display will return to the normal<br />
operating mode.<br />
Parameter Description Default New<br />
Value Values<br />
tune Tuning PID Stop Stop<br />
AdPt Adaptive tuning PID Stop Stop<br />
SL. u Set point ramp up Off Off<br />
SL. d Set point ramp down Off Off<br />
S.P. L Set point low limit -99.9 5.0<br />
S.P. H Set point high limit 300.0 80.0<br />
A2hy Alarm 2 hysteresis 0.5 0.5<br />
A2L.b Alarm 2 latching and blocking none bloc<br />
A3hy Alarm 3 hysteresis 0.5 0.5<br />
A3L.b Alarm 3 latching and blocking none none<br />
t.F iL Time constant input filter Off Off<br />
In.Sh Input shift Off Off<br />
d.Err Error dead band Off Off<br />
St.OP Soft-start output value Off Off<br />
Sa.OP Output safety value 0.0 0.0<br />
The controller is ready to operate. Now enter the required<br />
set point of 60°C by using the and keys.<br />
And read section 5 (Automatic tuning), for the self-setting of<br />
the PID values.<br />
IM-P323-25 CH Issue 3 45
Two tuning methods are provided:<br />
• Initial one shot Fuzzy-tuning<br />
• Continuous, self learning<br />
Adaptive Tuning<br />
Fuzzy-Tuning allows the calculation of<br />
the optimal PID parameters by<br />
monitoring the response of the<br />
process.<br />
The controller provides 2 types of<br />
tuning algorithms, that are selected<br />
automatically according to the<br />
process condition when the<br />
operation is started.<br />
Step response<br />
This type is selected when the<br />
process is started.<br />
There must be a difference between<br />
the set point and the PV of more then<br />
5% of the input scan.<br />
This method has the big advantage<br />
of fast calculation, with a reasonable<br />
accuracy in the PID calculation.<br />
Natural frequency<br />
This is selected when the <strong>Process</strong><br />
Variable (PV) is close to the Setpoint<br />
(SP).<br />
46<br />
7 Automatic tuning<br />
This method provides a more<br />
accurate PID calculation but will<br />
take more time to complete.<br />
If the natural frequency tune is<br />
taking too long to complete, try<br />
the step response time.<br />
Operator<br />
mode<br />
press until<br />
To start<br />
select<br />
strt<br />
To stop<br />
select<br />
stop<br />
The green led will flash when<br />
the Fuzzy Tuning is in operation.<br />
At the end of this operation, the<br />
calculated PID values are stored<br />
and used by the control algorithm<br />
and the controller automatically<br />
returns to the operator mode. The<br />
green led will switch off.<br />
IM-P323-25 CH Issue 3
The self-learning Adaptive Tuning is<br />
non-intrusive. It doesn’t affect the<br />
process during the calculation of<br />
the optimal PID values.<br />
It is particularly suitable for<br />
controlling process whose<br />
control characteristics change<br />
with time or are not linear in<br />
relation to the Setpoint values.<br />
It doesn’t require any operation by<br />
the user. It works by continuously<br />
sampling the process response to<br />
the various process disturbance,<br />
determining the frequency and the<br />
amplitude of the signals.<br />
On the basis of this data and their<br />
statistical values, stored in the<br />
instrument, it automatically<br />
modifies the PID values.<br />
The new calculated PID values are<br />
stored in the controller’s menu,<br />
under Adaptive Selection<br />
(see page 28).<br />
Note:<br />
Before the Adaptive is switched<br />
off, note down the calculated PID<br />
values.<br />
If the Adaptive is switched off<br />
the new PID values will be lost<br />
If the power fails during Adaptive<br />
Tuning, the PID values are lost.<br />
At power on, the Adaptive Tuning<br />
starts automatically and will<br />
re-calculate the PID values.<br />
Operator<br />
mode<br />
press until<br />
press<br />
To start<br />
select<br />
strt<br />
To stop<br />
select<br />
stop<br />
IM-P323-25 CH Issue 3 47
Features<br />
(at 25°C environmental temp.)<br />
Total configurability<br />
(see section 4.1 page 19<br />
section 5.6 page 36)<br />
8 Technical specifications<br />
Description<br />
From the keypad the user can select:<br />
- type of input - associated functions and the corresponding outputs<br />
- type of control algorithm - type of output and the safe conditions<br />
- type and functionality of the alarms - values of all the control parameters.<br />
PV Input<br />
(see page12, 13 and 19)<br />
Common<br />
characteristics<br />
Accuracy<br />
Resistance<br />
thermometer<br />
(for DT: R1+R2<br />
must be 10MW<br />
°C/°F selectable<br />
4…20mA, 0-20mA<br />
with external shunt<br />
2.5W 1% Rj >10MW<br />
10…50mV, 0-50mV<br />
Rj >10MW<br />
2 or 3 wires<br />
connection<br />
Burnout<br />
(with any combination)<br />
Internal cold junction<br />
compensation con NTC<br />
Error 1°C/20°C ±0.5°C<br />
Burnout<br />
Engineering units<br />
Conf. decimal point position<br />
Init. Sc -999…9999<br />
Full Sc. -999…9999<br />
(min. range of 100 digits)<br />
Between 100…240V~<br />
the error is minimal<br />
Max. wire Res: 20W max<br />
(3 wires)<br />
Input drift<br />
0.35°C / 10° Env. Temp.<br />
Features<br />
(at 25°C environmental temp.)<br />
Operating modes<br />
and outputs<br />
Control mode<br />
Description<br />
1 double<br />
action PID<br />
loop or On/Off<br />
with 1 or 2<br />
alarms<br />
Algorithm<br />
Proportional band (P)<br />
Integral time (I)<br />
Derivative time (D)<br />
Error band<br />
Cycle time<br />
Dead band<br />
Cool relative gain<br />
Cool cycle time<br />
Overshoot control<br />
High limit<br />
Hysteresis<br />
Single<br />
action<br />
Double action<br />
Heat/cool<br />
Control output<br />
OP1-Relay /Triac<br />
OP2 -Logic<br />
OP1-Relay /Triac<br />
OP1-Relay /Triac<br />
OP2 Logic<br />
0.5…999.9%<br />
0.1…100.0 min<br />
0.01…10.00 min<br />
0.1…10.0 digit<br />
1…200 sec<br />
-10.0…10.0%<br />
0.1…0.10<br />
1…200 sec<br />
0.01…1.00<br />
OP3-Relay /Triac<br />
OP2 Logic<br />
OP3-Relay /Triac<br />
PID with overshoot control or On-off<br />
AL2 alarm<br />
OFF = O<br />
100.0…10.0% (heat) -100.0…-10.0%(cool)<br />
0.1…10.0%<br />
OP2-Relay or logic OP3-Relay/Triac<br />
OP1-Relay /Triac<br />
OP2-Relay or logic<br />
OP1-Relay /Triac<br />
AL3 alarm<br />
OP3-Relay/Triac<br />
OP3-Relay/Triac<br />
PID algorithm<br />
Heat / cool<br />
control action<br />
PID algorithm<br />
On-Off algorithm<br />
IM-P323-25 CH Issue 3 49
Features<br />
(at 25°C environmental temp.)<br />
OP1 output<br />
OP2 output<br />
OP3 output<br />
OP4 countinuous control<br />
output (option)<br />
AL2 - AL3 alarms<br />
Setpoint<br />
Tuning<br />
Auto/Man station<br />
Auxillary supply<br />
Description<br />
SPST Relay N.O., 2A/250V~ for resistive load<br />
Triac, 1A/250V~ for resistive load<br />
Logic not isolated: 5V–, ± 10%, 30mA max<br />
SPST Relay N.O., 2A/250V~ for resistive load<br />
SPST Relay N.O., 2A/250V~ for resistive load<br />
Triac, 1A/250V~ for resistive load<br />
Galvanic isolation: 500 V~/1 min<br />
Resolution 12bit (0.025%)<br />
Accuracy: 0.1 %<br />
Ramp up and down. User inhibited.<br />
Low limit<br />
High limit<br />
Jumper selectable<br />
(page 13)<br />
Protection by<br />
varistor<br />
for 220V ~<br />
and capacitor<br />
In current: 0/4…20mA 750½/15V max<br />
Hysteresis 0.1…10.0% c.s.<br />
Active high<br />
Deviation threshold<br />
Action type Band threshold<br />
Action<br />
Active low<br />
Absolute threshold<br />
Sensor break, heater break alarm,<br />
Latching/Blocking, Loop Break Alarm<br />
0.1…999.9 digit / min<br />
from low range to high limit<br />
from low limit to high range<br />
Step response<br />
±range<br />
0…range<br />
whole range<br />
Fuzzy-Tuning The controller selects automatically the best<br />
method according to the process conditions<br />
Natural frequency<br />
Adaptive Tuning self-learning, not intrusive, analysis of the process response to perturbations and<br />
continuously calculation of the PID parameters<br />
Standard with bumpless function<br />
+18V- ±20%, 30mA max. for external tranmitter supply<br />
50<br />
IM-P323-25 CH Issue 3
Features<br />
(at 25°C environmental temp.)<br />
Description<br />
Operational safety<br />
General<br />
characteristics<br />
Measure input<br />
Control output<br />
Parameters<br />
Access protection<br />
Power supply<br />
(PTC protected)<br />
Safety<br />
Electromagnetic<br />
compatibility<br />
Protection<br />
EN60529 (IEC 529)<br />
Dimensions<br />
Detection of out of range, short circuit or sensor break with automatic activation<br />
of the safety strategies and alerts on display<br />
Safety value: -100%…100%<br />
Parameter and configuration data are stored in a non volatile memory for an<br />
unlimited time<br />
Password to access the configuration and parameters data,<br />
keypad lock, output lock<br />
100 - 240V~ (- 15% + 10%) 50/60 Hz or<br />
24V~ (- 25% + 12%), 50/60 Hz and 24V– (- 15% + 25%)<br />
Power consumption 2.6 W max.<br />
Compliance to EN 61010-1 (IEC 601010 – 1), installation class 2<br />
(2500V) pollution class 2, instrument class II<br />
Compliance to the CE standards<br />
(see page 5)<br />
IP65 front panel<br />
1/16 DIN - 48 x 48, depth 120 mm, weight 130 gr. apx.<br />
1.89 x 1.89, depth 4.72 in, weight 4.6 oz. apx.<br />
IM-P323-25 CH Issue 3 51