Sonim Xperience One (XP1) - Sonim Technologies
Sonim Xperience One (XP1) - Sonim Technologies
Sonim Xperience One (XP1) - Sonim Technologies

Create successful ePaper yourself
Turn your PDF publications into a flip-book with our unique Google optimized e-Paper software.
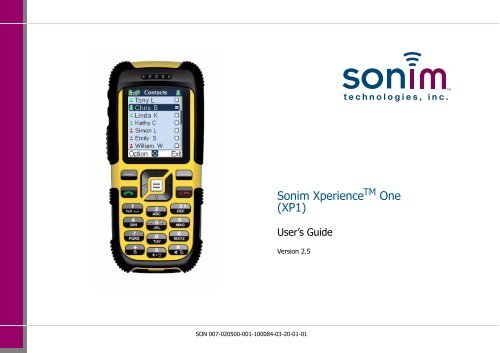
<strong>Sonim</strong> <strong>Xperience</strong> TM <strong>One</strong><br />
(<strong>XP1</strong>)<br />
User’s Guide<br />
Version 2.5<br />
SON 007-020500-001-100084-03-20-01-01
Copyright © 2006 <strong>Sonim</strong> <strong>Technologies</strong>, Inc.<br />
SONIM, <strong>Sonim</strong> <strong>Xperience</strong>, <strong>Sonim</strong> Xtend and the <strong>Sonim</strong> logo<br />
are trademarks of <strong>Sonim</strong> <strong>Technologies</strong>, Inc. Other company<br />
and product names may be trademarks or registered trademarks<br />
of the respective owners with whom they are associated.<br />
Disposal of old electrical & electronic equipment<br />
The symbol of the crossed-out wheeled bin<br />
indicates that within the countries in the<br />
European Union, this product, and any<br />
enhancements marked with this symbol, can<br />
not be disposed as unsorted waste but must<br />
be taken to separate collection at their endof-life.<br />
Disposal of battery<br />
Please check local regulations for disposal of<br />
batteries.<br />
The battery should never be placed in municipal<br />
waste. Use a battery disposal facility if<br />
available.<br />
Declaration of Conformity<br />
<strong>Sonim</strong> <strong>Technologies</strong> Inc, declares that the mobile phone<br />
<strong>Sonim</strong> <strong>Xperience</strong> <strong>One</strong> – <strong>XP1</strong> is in compliance with the<br />
essential requirements and other relevant provisions of<br />
Directive 1999/5/EC.
Contents<br />
Contents............................................................i<br />
General information..........................................1<br />
Network services............................................... 1<br />
<strong>Sonim</strong> support information................................. 1<br />
Use the guide effectively.................................... 1<br />
Options commonly used across menu items ........ 2<br />
Your safety guidelines ......................................3<br />
Battery care...................................................... 4<br />
Charging the battery ................................... 4<br />
Replacing the battery .................................. 4<br />
Avoiding short circuit................................... 4<br />
Avoiding high temperatures ......................... 4<br />
Disposing the battery .................................. 4<br />
More safety information..................................... 5<br />
Personal medical devices ............................. 5<br />
Child safety................................................. 5<br />
Emergency calls .......................................... 5<br />
SAR certification.......................................... 5<br />
Getting started..................................................7<br />
Battery information ........................................... 7<br />
Battery usage ............................................. 7<br />
Insert and remove the battery ..................... 7<br />
Charge the battery ...................................... 7<br />
Set battery alert.......................................... 8<br />
Your SIM card................................................... 8<br />
Insert the SIM card ..................................... 8<br />
Remove the SIM card .................................. 9<br />
Key operations without your SIM card .......... 9<br />
Parts of the <strong>XP1</strong> phone...................................... 9<br />
<strong>XP1</strong> keypad ................................................ 10<br />
Standby mode .................................................. 10<br />
Operations in standby mode ........................ 11<br />
Basic settings.................................................... 11<br />
Keypad functions .............................................. 12<br />
PTT quick start ..................................................15<br />
Get started ....................................................... 15<br />
PTT functions at a glance .................................. 15<br />
Registering with the PTT service. ....................... 16<br />
Deactivate the PTT service................................. 16<br />
PTT settings ..................................................... 16<br />
PTT display icons .............................................. 18<br />
Create a PTT contact......................................... 19<br />
Create a group.................................................. 19<br />
Copy existing contact information....................... 19<br />
Make a one-to-one call ...................................... 20<br />
Move a call to the background ..................... 20<br />
Dial in a PTT call ......................................... 20<br />
Make an unplanned group call ........................... 21<br />
Make a group PTT call....................................... 21<br />
Accept a PTT invitation...................................... 21<br />
Block incoming PTT calls.................................... 22<br />
View PTT call log............................................... 22<br />
Copy phone book contacts to PTT list ................. 23<br />
Refresh the PTT contact list ............................... 23<br />
Your <strong>XP1</strong> phone ................................................24<br />
Main menu ....................................................... 24<br />
Home screen indicators ..................................... 24<br />
Settings............................................................ 26<br />
Ringer settings............................................ 26<br />
Phone settings ............................................ 26<br />
Network settings ......................................... 27<br />
Manage the phone book .................................... 29<br />
i
Add a new number.......................................29<br />
Send a namecard.........................................30<br />
Edit or delete phone records .........................30<br />
Copy or move numbers to other lists .............31<br />
Manage personal information........................31<br />
Phone book memory ....................................31<br />
Store the IP service number..........................32<br />
Make calls......................................................... 33<br />
Dial a number....................................................33<br />
Dial an international number...............................33<br />
Dial a number via phone book ............................33<br />
Dial a number via the call list menu.....................33<br />
Speed dial .........................................................34<br />
Receive a call ....................................................35<br />
Any key answer ...........................................35<br />
Forward a call....................................................35<br />
Call barring........................................................36<br />
Call waiting........................................................36<br />
Auto redial ........................................................36<br />
Auto answer ......................................................37<br />
Filter calls..........................................................37<br />
Black list calls ..............................................37<br />
White list calls .............................................38<br />
Call filter settings .........................................38<br />
Other call settings..............................................38<br />
Review call information ......................................38<br />
Push-to-Talk..................................................... 40<br />
PTT settings ......................................................40<br />
General settings...........................................40<br />
Audio settings..............................................40<br />
Backlight .....................................................40<br />
Reject list ....................................................41<br />
Display name...............................................41<br />
Report reminder ..........................................41<br />
Manage your PTT contacts .................................41<br />
Create contacts............................................41<br />
Copy contacts from phone book....................41<br />
Set as default ..............................................42<br />
Turn on DnD ...............................................42<br />
Send a PTT invitation ...................................42<br />
Modify contact information ...........................42<br />
Delete a contact...........................................43<br />
Manage PTT groups ...........................................43<br />
Create a new group .....................................43<br />
Import a group ............................................43<br />
Rename a group ..........................................43<br />
Edit group information..................................43<br />
Delete members from a group ......................44<br />
Delete a group.............................................44<br />
Send group ID .............................................44<br />
Use chat groups.................................................44<br />
Create a chat group .....................................44<br />
Rename a chat group...................................45<br />
Edit/view chat group information ..................45<br />
Delete a chat group .....................................46<br />
Import a group ............................................46<br />
View PTT logs....................................................46<br />
Outgoing calls list.........................................46<br />
Answered calls list........................................47<br />
Missed calls list ............................................47<br />
Rejoin a group session .................................47<br />
Delete a list .................................................47<br />
ii
Make PTT calls.................................................. 48<br />
Make calls from the PTT contacts list ............ 48<br />
Make calls from the PTT calls list.................. 48<br />
Make calls from the calls list......................... 48<br />
Make calls from the group list ...................... 49<br />
Make unplanned group calls......................... 49<br />
Respond to an invitation .................................... 50<br />
Add more members to the session ..................... 50<br />
Mute or unmute the session............................... 50<br />
Use handsfree mode for calls ............................. 50<br />
Place a call in the background............................ 51<br />
View IPA details ............................................... 51<br />
Messages ..........................................................52<br />
Message settings............................................... 52<br />
Text input mode ............................................... 52<br />
Conventional text input................................ 52<br />
Predictive text input .................................... 53<br />
Write messages ................................................ 53<br />
Send an SMS via phone book ............................. 54<br />
Manage your messages ..................................... 54<br />
Inbox ......................................................... 54<br />
Unsent messages ........................................ 55<br />
Sent messages............................................ 55<br />
Predefined SMS messages ........................... 55<br />
View SMS memory ...................................... 55<br />
SMS broadcasts........................................... 55<br />
Voice mail........................................................ 56<br />
Tools .................................................................57<br />
Organizer ......................................................... 57<br />
Create new event entries ............................. 57<br />
Edit organizer entries .................................. 58<br />
Delete entries ............................................. 58<br />
Alarm clock....................................................... 58<br />
Calculator......................................................... 58<br />
Audio recorder .................................................. 59<br />
Audio playback ........................................... 59<br />
Stopwatch ........................................................ 59<br />
Count-down timer ............................................. 59<br />
Universal time................................................... 59<br />
Personalizing your phone..................................61<br />
Themes............................................................ 61<br />
Managing your files ........................................... 62<br />
WAP...................................................................63<br />
Index.................................................................68<br />
iii
General information<br />
General information<br />
Congratulations on the purchase of a <strong>Sonim</strong> <strong>Xperience</strong><br />
<strong>One</strong> – <strong>XP1</strong> mobile phone. The <strong>Sonim</strong> <strong>XP1</strong> phone is fully<br />
compliant with the recently ratified Open Mobile Alliance<br />
(OMA) PoC standard specification. It has an intuitive, feature-rich<br />
user interface that allows you to switch between<br />
Push-to-Talk over Cellular (PoC) functions and other applications<br />
on your <strong>XP1</strong> phone.<br />
Network services<br />
These are additional services that you can avail through<br />
your network service provider. To make the best of these<br />
services, you must subscribe to them through your service<br />
provider and obtain instructions for their use from your service<br />
provider.<br />
<strong>Sonim</strong> support information<br />
For additional product and support information, visit<br />
www.sonimtech.com.<br />
Use the guide effectively<br />
Acquaint yourself with the terminology and symbols used in<br />
the guide to help you use your phone effectively.<br />
Press<br />
Select<br />
Means to press and release a key<br />
immediately. For example, Press 2<br />
means that you press the key on<br />
the keypad that is labeled with the<br />
numeral 2 and the alphabets<br />
“ABC”.<br />
Means to either press the Left or<br />
Right Selection Key to apply the<br />
command indicated at the bottom<br />
of the screen. For example, if this<br />
guide says Select Menu > Messages<br />
> SMS > Write message,<br />
you must press the Left Selection<br />
Key to select Menu, scroll to<br />
Messages and press the Left Selection<br />
Key, scroll to SMS and press<br />
the Left Selection Key, scroll to<br />
Write message and press the Left<br />
Selection Key. To select Exit, press<br />
the Right Selection Key.<br />
1
Press and hold<br />
menu options<br />
Select Menu<br />
A menu item<br />
suffixed with<br />
three dots (…)<br />
<br />
Means to press and hold a key for<br />
2–3 seconds before releasing the<br />
key. This action is typically used<br />
when trying to switch on/off the<br />
phone or when using shortkeys to<br />
access specific functions. For<br />
example. press and hold 1 to<br />
access Voicemail.<br />
These options are displayed at the<br />
bottom of the screen. The selection<br />
keys are used to accomplish<br />
the indicated option.<br />
Means to press the Left Selection<br />
Key to select the Menu<br />
option or press the Menu key<br />
(center) for the same result.<br />
Means more options are available<br />
but only one has been mentioned<br />
in the guide.<br />
Signifies a Note.<br />
<br />
Options commonly used<br />
across menu items<br />
The following are common actions used across various<br />
menu items:<br />
Exit<br />
Clear<br />
OK<br />
Signifies a Tip.<br />
Displays the previous screen. Use the<br />
Right Selection key to perform this function.<br />
Deletes data character by character. Use<br />
the Right selection key to perform this<br />
function.<br />
Confirms an action. Use the Left Selection<br />
Key or the Menu key to perform this<br />
function.<br />
General information<br />
2
Your safety guidelines<br />
Your safety guidelines<br />
Please read and understand the following safety guidelines<br />
before you use the phone. These guidelines provide details to<br />
Do not to use the phone at a refueling point.<br />
Observe restrictions when using radio equipment<br />
at fuel depots, chemical plants or where<br />
blasting operations are in progress.<br />
Electrical interference may obstruct the use of<br />
your phone.<br />
enable you to operate your phone safely and conform to any<br />
legal requirements regarding the use of cellular phones.<br />
Adhere to road safety laws. Do not hold/use a<br />
phone while you are driving; find a safe place to<br />
stop first. Do not speak into a hands-free microphone<br />
while you are driving.<br />
Observe restrictions in hospitals and near medical<br />
equipment.<br />
Switch off your cellular phone when in an aircraft.<br />
Wireless phones can cause interference or<br />
danger to an aircraft.<br />
Do not expose the battery to high temperatures<br />
(in excess of 60°C).<br />
The symbol of the crossed-out wheeled bin<br />
indicates that within the countries in the European<br />
Union, this product, and any enhancements<br />
marked with this symbol, can not be<br />
disposed as unsorted waste but must be taken<br />
to separate collection at their end-of-life.<br />
Ensure that only qualified personnel install or<br />
repair your phone.<br />
Avoid using the phone in close proximity to personal<br />
medical devices, such as pacemakers and<br />
hearing aids.<br />
Use only <strong>Sonim</strong> <strong>XP1</strong> approved charging equipment<br />
to charge your phone and avoid damage to<br />
your phone.<br />
The <strong>Sonim</strong> <strong>XP1</strong> is water-resistant, dust-resistant<br />
and rugged. However, it is not water-proof, dustproof<br />
or incapable of being broken if dropped or<br />
thrown. For best results one should protect the<br />
<strong>XP1</strong> from moisture, dust and strong impacts.<br />
Make back-up copies of important information<br />
stored in your phone or maintain a written record.<br />
3
Battery care<br />
A rechargeable battery powers your device. Use the battery<br />
only for its intended purpose. Never use any charger or battery<br />
that is damaged. If the battery is completely discharged,<br />
it may take a few minutes before the charging<br />
indicator appears on the display or before any calls can be<br />
made.<br />
Charging the battery<br />
The full performance of a new battery is achieved only after<br />
two or three complete charge and discharge cycles. The<br />
battery can be charged and discharged hundreds of times<br />
but it will eventually wear out. Unplug the charger from the<br />
electrical plug and the device when not in use. Do not leave<br />
the fully charged battery connected to a charger, since overcharging<br />
may shorten its lifetime. If left unused, a fully<br />
charged battery will lose its charge over time.<br />
Replacing the battery<br />
When the talk and standby times are noticeably shorter<br />
than normal, replace the battery. If a replacement battery is<br />
being used for the first time or if the battery has not been<br />
used for a prolonged period, it may be necessary to connect<br />
the charger and then disconnect and reconnect it to begin<br />
charging the battery.<br />
Avoiding short circuit<br />
Do not short-circuit the battery. An accidental short-circuit<br />
can occur when a metallic object such as a coin, clip, or pen<br />
causes direct connection of the positive (+) and negative (-<br />
) terminals of the battery. (These look like metal strips on<br />
the battery.) This might happen, for example, when you<br />
carry a spare battery in your pocket or purse. A short-circuit<br />
at the terminals may damage the battery or the connecting<br />
object.<br />
Avoiding high temperatures<br />
Leaving the battery in hot or cold places, such as in a closed<br />
car in summer or winter conditions, will reduce the capacity<br />
and lifetime of the battery. Always try to keep the battery<br />
between 15°C and 25°C (59°F and 77°F). A device with a<br />
hot or cold battery may not work temporarily, even when<br />
the battery is fully charged. Battery performance is particularly<br />
limited in temperatures well below freezing.<br />
Disposing the battery<br />
Do not dispose of batteries in a fire as they may explode.<br />
Batteries may also explode if damaged. Dispose of batteries<br />
according to local regulations and recycle when possible. Do<br />
not dispose as household waste. Do not dismantle, open or<br />
shred cells or batteries. In the event of a battery leak, do<br />
not allow the liquid to come in contact with the skin or eyes.<br />
In the event of leak or a hazard seek medical help immediately.<br />
Your safety guidelines<br />
4
Your safety guidelines<br />
More safety information<br />
Personal medical devices<br />
Mobile phones may affect the operation of cardiac pacemakers<br />
and other implanted equipment. Please avoid placing<br />
the mobile phone over the pacemaker, for example. in<br />
your breast pocket. When using the mobile phone, place it<br />
at the ear opposite the pacemaker. If a minimum distance<br />
of 15 cm (6 inches) is kept between the mobile phone and<br />
the pacemaker, the risk of interference is limited. If you<br />
have any reason to suspect that interference is taking place,<br />
immediately turn off your mobile phone. Contact your cardiologist<br />
for more information. For other medical devices,<br />
please consult your physician and the manufacturer of the<br />
device.<br />
Comply with instructions to switch off the device or deactivate<br />
the RF transmitter function when asked to do so, especially<br />
when posted in hospitals and airplanes. Equipment<br />
used in these places may be sensitive to radio waves emitted<br />
from the device and adversely affect their operation.<br />
Likewise, observe restrictions at gas stations or other areas<br />
with flammable atmosphere or when close to electro-explosive<br />
devices.<br />
Child safety<br />
Do not allow children to play with your mobile phone or its<br />
accessories. Keep it out of their reach. They could hurt<br />
themselves or others, or could accidentally damage the<br />
mobile phone or accessories. Your mobile phone and its<br />
accessories may contain small parts, which could be<br />
detached and create a choking hazard.<br />
Emergency calls<br />
Mobile phones operate using radio signals, which cannot<br />
guarantee connection under all conditions. Therefore you<br />
should never rely solely upon any mobile phone for essential<br />
communications (e.g. medical emergencies).<br />
Emergency calls may not be possible in all areas, on all cellular<br />
networks, or when certain network services and/or<br />
mobile phone features are in use. Check with your local service<br />
provider.<br />
SAR certification<br />
When communicating over the wireless network, the mobile<br />
phone emits low radio waves known as radio frequency<br />
energy or RF. The Specific Absorption Rate or SAR is the<br />
unit used to measure the amount of RF energy absorbed by<br />
the body while using the phone and is expressed in watts/<br />
kilogram. In compliance with the product standards in EN<br />
50360:2001, the allowed limit of SAR averaged for 10g tissue<br />
is 2.0 (W/kg).<br />
5
The localized (SAR) of the portable <strong>XP1</strong> device has been<br />
measured in all cases as requested by the relevant international<br />
standards. The maximum localized SAR value for<br />
which the device has been tested and certified for specific<br />
exposure limits and different network bands is given below:<br />
900 MHz Band<br />
Min. measured SAR: 0.13<br />
Max. measured SAR: 0.68<br />
1800 MHz Band<br />
Min. measured SAR: 0.08<br />
Max. measured SAR: 0.15<br />
You can reduce the exposure of the human body to RF<br />
energy by keeping the phone at a distance from the head/<br />
body. For example, by using a hands free headset.<br />
Your safety guidelines<br />
6
Getting started<br />
Getting started<br />
Battery information<br />
Battery usage<br />
• Use only an <strong>XP1</strong> certified battery, charger or any other<br />
accessories that are designed for this phone model.<br />
• The use of other batteries, chargers and accessories<br />
may void the warranty terms of your phone and cause<br />
damage.<br />
• Do not subject the battery to extreme temperature<br />
environments and protect it from moisture.<br />
• Please keep the battery out of the reach of children.<br />
Insert and remove the battery<br />
1. With the back of the phone facing you, turn the battery<br />
cover knob counter-clockwise, to open the battery<br />
cover (as shown in the figure).<br />
Open the battery cover<br />
2. Lift the flap that covers the<br />
battery.<br />
3. Insert the battery flush into<br />
the battery slot such that the<br />
three metallic contacts at the<br />
top of the battery are aligned<br />
with the metallic contacts<br />
within the battery compartment.<br />
4. Place the cover back and turn<br />
the battery cover knob clockwise<br />
to lock the battery cover.<br />
5. To remove the battery, lift the<br />
flap behind the phone and<br />
raise the lower end of the<br />
battery from the slot. The<br />
battery can now be removed.<br />
Charge the battery<br />
The battery delivered with your<br />
mobile phone is not fully charged. We<br />
recommend that you charge your<br />
mobile for three hours before you use<br />
your mobile phone for the first time.<br />
1. Insert the charger plug into a<br />
220V AC power outlet.<br />
2. Align the charger connector with<br />
the USB socket at the bottom of<br />
the phone and insert it.<br />
Lift the battery cover<br />
Insert battery<br />
Charge battery<br />
7
3. If the battery is being charged<br />
when the phone is switched off,<br />
only the battery icon with the message<br />
Charging is displayed (as<br />
shown in the adjacent figure).<br />
When the battery has been fully<br />
charged, the message Completed is displayed.<br />
4. If the battery is being charged while the phone is<br />
switched on, you will notice that the bars in the battery<br />
charge icon (visible on the home screen) show<br />
movement indicating that the battery is being charged.<br />
After the phone is fully charged the battery bars on the<br />
display stop scrolling. You can safely disconnect the<br />
charger from the phone.<br />
5. After the charging process has begun, the only way to<br />
stop charging is to disconnect the charger. If possible,<br />
use a power jack that is easy to plug and unplug.<br />
<br />
To<br />
protect the USB socket of the phone from<br />
vibration during the charging process, disable<br />
the vibrate function and use the ringing<br />
function instead, if you wish to leave your<br />
phone on while the battery is being<br />
charged.<br />
1. To set the battery alert select Menu > Quick settings<br />
> Normal > Personalize > Battery alert ><br />
On or, press Menu key to select the checkbox beside<br />
Battery alert to activate the alert.<br />
2. Select Exit to go to the previous screen or press<br />
to return to the home screen.<br />
For more information on alerts, refer “Personalizing your<br />
phone” on page 61.<br />
Your SIM card<br />
Purchase a SIM card from your mobile operator. Your SIM<br />
card stores your phone number and user registration information.<br />
The SIM card can be used in any GSM phone. Your<br />
phone number and user registration information always<br />
remain the same.<br />
Insert the SIM card<br />
1. Ensure the phone is switched off.<br />
2. Lift the battery cover and remove the battery. For<br />
instructions refer “Insert and remove the battery” on<br />
page 7.<br />
3. Place the SIM card in the designated slot located at the<br />
lower end of the phone.<br />
Getting started<br />
Set battery alert<br />
When you set the battery alert, every time the battery<br />
charge is low you hear an alarm.<br />
8
Getting started<br />
4. Slide the silver clip over the SIM card to hold it<br />
securely (as shown in the figure B).<br />
Parts of the <strong>XP1</strong> phone<br />
The <strong>XP1</strong> keypad has six function keys and 12 alphanumeric<br />
keys. The right side of the phone has the three PTT related<br />
keys as shown in the figure:<br />
Insert SIM card<br />
5. Replace the battery and the cover. Turn the battery<br />
cover knob clockwise to lock the battery cover.<br />
Remove the SIM card<br />
1. Ensure the phone is switched off.<br />
2. Lift the battery cover to remove the battery. Refer<br />
instructions in the section “Insert and remove the battery”<br />
on page 7.<br />
3. Slide the silver clip upwards and remove the SIM card.<br />
4. Replace the battery and the cover.<br />
Key operations without your SIM card<br />
1. Press the Menu key to enter the<br />
main menu.<br />
2. Select SOS.<br />
3. Select Call to contact your service<br />
provider.<br />
1.Ear piece<br />
2.Display screen<br />
3.Volume keys<br />
4.PTT key<br />
5.Function keys<br />
6.Alpha-numeric keys<br />
7.Charger port<br />
<strong>XP1</strong> at a glance<br />
8.Microphone<br />
9.Headset port<br />
10.Loud speakers<br />
11.Battery cover<br />
12.Battery cover knob<br />
9
<strong>XP1</strong> keypad<br />
The various keypad keys and their corresponding functions<br />
are described in the following figure.<br />
Function keys<br />
1.Navigation arrow keys<br />
(Up/Down/Left/Right)<br />
2.Right Selection Key (RSK)<br />
3.Menu key<br />
4.Power On/Off/End call<br />
5.Call accept/Send<br />
6.Left Selection Key (LSK)<br />
Numeric keys<br />
7.Press and hold for voicemail<br />
8.Press and hold to turn on/<br />
off the loudspeaker<br />
9.Press and hold to lock/<br />
unlock the keypad<br />
10.Press and hold to turn<br />
on/off silent mode.<br />
11.Press and hold to display<br />
+ (before dialling an international<br />
Keypad functions<br />
number)<br />
use these keys efficiently. For more information on text<br />
input modes refer section “Text input mode” on page 52.<br />
Standby mode<br />
Certain information is displayed when the phone is in<br />
standby mode, for example, the name of the service provider,<br />
date and time, battery charge status, PTT and GPRS<br />
connectivity. Other indicators may be displayed (if the feature<br />
is activated), like the alarm, call forward etc.<br />
The device with a fully-charged battery can remain in the<br />
standby mode for a duration of 200 hours without PTT service<br />
and for 70 hours if the PTT service is activated.<br />
1.PTT and GPRS connectivity<br />
2.Signal strength indicator<br />
3.Display icons<br />
4.Battery charge indicator<br />
5.Service provider<br />
6.Local time<br />
7.RSK command<br />
8.LSK command<br />
Getting started<br />
The alpha-numeric keys comprise numbers from one to<br />
zero, alphabets from A-Z, plus [*] and [#] keys. By pressing<br />
the designated key you can input numbers or characters.<br />
Choose the appropriate text input option to enable you to<br />
Standby screen display<br />
10
Getting started<br />
Operations in standby mode<br />
The following can be accessed from the home screen when<br />
the phone is in standby mode or when the phone is not in<br />
use.<br />
Press<br />
Up arrow<br />
Down arrow<br />
Right arrow<br />
Left arrow<br />
PTT key<br />
Menu key<br />
Left Selection key<br />
Right Selection key<br />
Pickup/Send key<br />
<br />
To access<br />
Call list<br />
Phone book list<br />
Write message<br />
WAP options<br />
PTT contacts<br />
Main menu<br />
Main menu<br />
Phone book<br />
Outgoing calls list<br />
The four functions that are performed using<br />
the arrow keys are set as factory defaults,<br />
however they can be changed. You can also<br />
configure new shortcuts. For more information<br />
on shortcuts refer page 27.<br />
Basic settings<br />
When you have switched on your phone the name of the<br />
service provider is displayed.<br />
Security settings<br />
1. To prevent unauthorized use of your phone, you can<br />
set a PIN code. Select Menu > Settings > Security<br />
settings > PIN code > On > OK. After this is set,<br />
every time you power on the phone, you will be<br />
requested to enter the PIN. If the PIN code is wrong<br />
you cannot access the phone.<br />
2. To change the PIN code select Menu > Settings ><br />
Security settings > Change code > OK. You can<br />
change codes for PIN, PIN2 and Call barring.<br />
Date and time<br />
1. To set the Date and Time, select Menu > Settings ><br />
Date and time > OK.<br />
Auto keypad lock<br />
1. To lock the keypad, select Menu > Settings ><br />
Phone settings > Auto keypad lock > OK. You can<br />
choose to switch it off or enable the feature.<br />
2. Alternatively press and hold the ‘*’ key to lock and<br />
unlock the keypad.<br />
Silent mode<br />
In the silent mode, the alerts for Calls, Alarm, Organizer,<br />
SMS, PTT calls, battery status will not work.<br />
1. Select Menu > Quick settings > Silent > OK ><br />
Enable.<br />
11
Keypad functions<br />
The following table displays the various keys and the corresponding functions they perform:<br />
Keypad key<br />
Power On/Off/End call<br />
Accept/Send<br />
LSK/RSK<br />
Menu key (center)<br />
Operation<br />
•Press and hold to switch on or switch off the mobile phone.<br />
•Press when in Menu or Edit modes to return to Standby mode.<br />
•Press to end a call.<br />
•Press to reject an incoming call.<br />
•Press to answer an incoming call.<br />
•After entering a phone number, press to make a call.<br />
•Press and hold to make an IP call, provided the IP number is set.<br />
•Press while in Standby mode to access Outgoing calls list.<br />
These keys are present immediately below the display screen.<br />
•Press the Left selection key (LSK) or Right selection key (RSK) to select the function indicated at<br />
the bottom of the screen.<br />
The indicated functions can vary according to different program definitions.<br />
•Press LSK to access the main menu, in standby mode.<br />
•Press RSK to access the Phone book, in standby mode.<br />
Present at the center of the navigation keys.<br />
•Press while in standby mode to enter the main menu.<br />
•Press when required to be used as a toggle key to select or clear a checkbox.<br />
•Press to perform similar tasks as the Left Selection Key.<br />
•Press to select the OK command.<br />
Getting started<br />
12
Getting started<br />
Keypad key<br />
Navigation keys<br />
Numeric keys<br />
Operation<br />
The Left and Right Selection keys, Power On/Off and Pickup keys surround this key group. There<br />
are arrows on the key that denote the direction for scrolling through information, displayed on the<br />
screen.<br />
Up/Down<br />
•Press to view the target characters by pages in the text editor.<br />
•Press to browse menus/lists at the same level.<br />
•Press to view the previous or next picture when previewing pictures.<br />
•Press to increase or decrease the volume during a call.<br />
Left/Right<br />
•Press to move the cursor left or right in the text editor.<br />
•Press to browse the main menu.<br />
•Press to turn to previous or subsequent pages when browsing the contacts in the address book.<br />
•Press to view the previous or next picture when previewing pictures.<br />
•Press the Left navigation key during a call, to mute or unmute the phone.<br />
•Press the Right navigation key during a GSM call to switch on/off the handsfree mode and during<br />
a PTT call to increase or decrease the volume.<br />
•Press the required keys to enter the desired phone number and press to make a call. Alternatively<br />
enter the number and select Options to Dial the number.<br />
•Press and hold any numeric key to create shortcuts from the available options.<br />
•Press and hold in standby mode to access your Voice mail.<br />
•When entering text, press to enter spaces.<br />
13
Keypad key<br />
Operation<br />
•Press and hold to set the ringtones for incoming calls.<br />
•Press and hold to switch on and switch off the loudspeaker during a PTT or a GSM call.<br />
•Press and hold to set the Alarm.<br />
Getting started<br />
•Press and hold to display the calculator.<br />
•Press and hold to display the languages screen.<br />
•Press and hold to display ‘+’ used for dialing an international number.<br />
•Press to switch between lower case and upper case, when entering text.<br />
•Press and hold to lock the keypad. Use it as a toggle key to lock and unlock the keypad.<br />
•When entering text, press to display special characters, for example, period, comma etc.<br />
•Press and hold in standby mode to toggle between Silent on/off modes.<br />
•When entering text, press to switch to different character input modes for example, T9, abc and<br />
123.<br />
14
PTT quick start<br />
PTT quick start<br />
This section helps you to quickly get started and use the<br />
PTT function on your phone. Follow the instructions to create<br />
contacts, make calls to individuals, predefined groups<br />
and ad hoc (informal) groups.<br />
Get started<br />
1. Before using the phone, ensure that the SIM card and<br />
battery are inserted in the phone. For more details<br />
refer “Insert and remove the battery” on page 7.<br />
2. Hold down the Power On key for a couple of<br />
seconds to switch on the phone.<br />
PTT functions at a glance<br />
The following table explains the use of the various PTT<br />
related keys present on your <strong>XP1</strong> mobile phone.<br />
Use<br />
PTT key<br />
To<br />
- Display the contacts list.<br />
- Initiate a PTT call.<br />
- Bring back to focus a PTT<br />
call that is in the background.<br />
Use<br />
PTT volume<br />
PTT menu<br />
Menu selection keys<br />
(Left and Right)<br />
Navigation keys<br />
Power On/Off/End call<br />
Right arrow key<br />
Charger port<br />
Headset connector port<br />
To<br />
- Adjust the volume during<br />
a PTT conversation.<br />
- Navigate up and down the<br />
PTT Contacts list.<br />
- Access the PTT functions.<br />
- Activate the menu options<br />
displayed at the bottom of<br />
the screen.<br />
- Scroll horizontally or vertically<br />
to a desired menu<br />
option.<br />
- Switch on and switch off<br />
the phone.<br />
- Return to the home screen<br />
when the phone is in use.<br />
- End a PTT call.<br />
- Increase or decrease the<br />
volume during a PTT call.<br />
- Charge the battery.<br />
- Enable the use of headset<br />
phones for a PTT conversation.<br />
15
Registering with the PTT service.<br />
1. Select Menu > PTT to register with the service.<br />
<br />
Deactivate the PTT service<br />
1. Select Menu > PTT > scroll to Close PTT > OK.The<br />
PTT services gets deactivated and the standby screen<br />
displays P in red and G in green<br />
2. To again register to the PTT service, select Menu ><br />
scroll to and select PTT. The PTT services gets activated<br />
and the standby screen will display both P and G<br />
in green .<br />
PTT settings<br />
When registration with the PTT service<br />
is successful, P and G are displayed in<br />
green at the top left corner of the<br />
screen.<br />
1. On the home screen, select Menu > PTT > scroll to<br />
Settings.<br />
The following settings are available on the PTT application:<br />
Type Preference Function<br />
General<br />
Answer<br />
settings<br />
Sorting<br />
Individual<br />
Manual<br />
Always<br />
Never<br />
My availability<br />
Alphabetically<br />
Available first<br />
Allows you to specify<br />
answer settings for<br />
each contact separately.<br />
Renders individual<br />
settings ineffective.<br />
All calls should be<br />
manually answered.<br />
Shows your online<br />
presence to other<br />
contacts all the time.<br />
Does not show your<br />
online presence to<br />
contacts.<br />
Displays the contact<br />
names in alphabetical<br />
order.<br />
Displays online contacts<br />
first.<br />
PTT quick start<br />
16
PTT quick start<br />
Type Preference Function<br />
Hide my<br />
ID<br />
Never<br />
Always<br />
Displays your ID to<br />
other online contacts<br />
when you are in a<br />
PTT session.<br />
Displays your ID as<br />
anonymous to other<br />
online contacts during<br />
a PTT session.<br />
Type Preference Function<br />
Always on<br />
Reject list<br />
Reject list<br />
Add to reject<br />
list<br />
allows to set backlight<br />
always on during<br />
a PTT session.<br />
Disallows persons on<br />
the list from calling<br />
you.<br />
Audio<br />
Speaker<br />
On<br />
Speaker<br />
volume<br />
Select/clear<br />
the checkbox<br />
Sets the loudspeaker<br />
on or off respectively.<br />
Adjusts the volume of<br />
the loudspeakers.<br />
Display name<br />
Display<br />
name<br />
Report reminder<br />
Allows to modify and<br />
edit the display<br />
name.<br />
Backlight<br />
Timer on<br />
Turns off the backlight<br />
after the set<br />
backlight time in the<br />
phone settings is over<br />
during a PTT session.<br />
Report<br />
reminder<br />
Other<br />
Select intervals<br />
Sets off a recurring<br />
reminder alarm at the<br />
set intervals.<br />
17
Type Preference Function<br />
Turn on<br />
DnD<br />
Press the<br />
PTT key and<br />
select<br />
Option ><br />
Turn on<br />
DnD > OK<br />
A global setting that<br />
disallows PTT contacts<br />
from calling<br />
you. When this option<br />
is turned on, other<br />
contacts perceive you<br />
as offline.<br />
Icon<br />
Description<br />
Indicates that you are<br />
attempting to speak while<br />
the other person is speaking.<br />
Wait for the other participant<br />
to finish speaking<br />
before you can start speaking.<br />
PTT quick start<br />
PTT display icons<br />
The common display icons within the PTT application are<br />
explained in the following table:<br />
Icon<br />
Description<br />
Appears when you start<br />
speaking.<br />
Appears when the other<br />
person takes the floor.<br />
Indicates that the PTT session<br />
is on, but no one is<br />
speaking.<br />
Indicates a contact’s Presence<br />
or Availability. Red<br />
indicates an offline contact<br />
while green indicates an<br />
online contact and gray<br />
indicates an unknown contact,<br />
not registered with<br />
the server.<br />
The letters P and G in red<br />
indicate no connectivity to<br />
the PTT server and GPRS<br />
respectively.<br />
18
PTT quick start<br />
Icon<br />
Description<br />
The letters P and G in<br />
green indicate that the<br />
GPRS network is present<br />
and you are logged on to<br />
the PTT service.<br />
Create a PTT contact<br />
The letters P in red and G<br />
in green indicate that the<br />
GPRS network is present,<br />
but you have not registered<br />
with the PTT service.<br />
1. Press and release the PTT key to display the Contacts<br />
screen. Select Option > Create contact > OK.<br />
OR<br />
Select Menu > PTT > Contact > Option > Create<br />
contact > OK.<br />
2. Enter the Contact number and Contact name. Choose<br />
the Answer settings, either as Manual or Auto<br />
answer. Manual is the default setting.<br />
The manual setting allows you to pick a call, while an<br />
auto setting accepts an incoming call automatically.<br />
3. Select Save > OK to accept the new contact information.<br />
Select Exit to revert to the PTT screen.<br />
Create a group<br />
1. Select Menu > PTT > Group > Option > Create<br />
group > OK.<br />
2. Enter a Group name and select Save. Make a note of<br />
the Group Id displayed and select OK.<br />
3. To view the members of a group, scroll to a group and<br />
select Option > Edit/view members > OK. Existing<br />
group members are displayed. If no members have<br />
been created for the group, the display is empty.<br />
4. To add new members to a group, on the Group members<br />
screen, select Option > Add via number > OK.<br />
5. Enter the Contact number and Contact name. Select<br />
Save > OK. The new member is added to the group.<br />
6. To add members from the PTT Contacts list, on the<br />
Group members screen select Option > Add via list<br />
> OK. Use the Menu key to select the checkbox<br />
against each contact. You can select multiple contacts.<br />
Select Save > OK. The selected contacts are added to<br />
the Group as members.<br />
7. Select Exit to return to the Groups screen.<br />
Copy existing contact information<br />
You can transfer existing contacts from the Phone book list<br />
to PTT Contacts.<br />
1. Press the PTT key.<br />
2. Select Option > Copy from phone > OK.<br />
19
3. On the Phone book list select the contact whose details<br />
you want to copy to the PTT contact list and select OK.<br />
4. You can choose to retain or change the existing contact<br />
details.<br />
5. Change the Answer settings either to Manual or Auto<br />
answer.<br />
6. Select Save > OK, the copied contact information is<br />
displayed in the Contacts list.<br />
Make a one-to-one call<br />
This is a simple PTT session where just one caller and one<br />
recipient are involved in the conversation.<br />
1. Press and release the PTT key to display the existing<br />
list of PTT Contacts.<br />
2. Scroll to the contact you want to call. Press and hold<br />
the PTT key until the top of the screen displays Start<br />
sending, Speaking. Continue to hold the PTT key while<br />
you are speaking.<br />
3. Release the PTT key when you finish speaking.<br />
4. When the other person begins speaking, the top of the<br />
screen displays Start receiving, Listen.<br />
5. If you attempt to take the floor while the other person<br />
is speaking, Remote speaking is displayed at the top of<br />
the screen.<br />
6. To end a PTT call press button. PTT session<br />
ended is displayed on the screen.<br />
7. If the other participant disconnects the calls, the No<br />
active user(s) available in the session, is displayed.<br />
Move a call to the background<br />
You can work on other functions on your device, for example,<br />
send an SMS or use the Phone book while you are on a<br />
PTT call. For more information refer section “Place a call in<br />
the background” on page 51.<br />
Dial in a PTT call<br />
You can make a PTT call by directly dialing the number of a<br />
contact. This facility is made available only if offered by your<br />
service provider. In such a case, a Tel URI (Uniform<br />
Resource Indicator) is given to you by your service provider.<br />
1. Enter the contact number using the international format<br />
(for example, +1234567890) and press the PTT<br />
key. When the number is being dialed, Ringing is displayed<br />
at the top of the phone. If the recipient's contact<br />
number is not registered with your service<br />
provider the message User(s) not available is displayed<br />
on the screen.<br />
2. After the recipient accepts the call, Ad-hoc PTT invitation,<br />
Start sending, Speaking is displayed at the top of<br />
the screen. Wait for the beep, press the PTT key and<br />
begin talking. Continue to hold the PTT key while you<br />
are speaking.<br />
3. Release the PTT key when you finish speaking.<br />
4. When the other person begins speaking, Start receiving,<br />
Listen is displayed at the top of the screen.<br />
5. To end a PTT call press button. PTT session<br />
ended is displayed on the screen. PTT session ended is<br />
displayed.<br />
PTT quick start<br />
20
PTT quick start<br />
Make an unplanned group call<br />
An unplanned or and ad hoc group call is made to contacts<br />
who are selected at random from the Contacts list.<br />
1. Press and release the PTT key to display the list of PTT<br />
contacts.<br />
2. Use the Menu key as a toggle key to select or clear<br />
the checkbox against each contact you want to call.<br />
3. Press and hold the PTT key, Ringing is displayed on the<br />
screen.<br />
4. When any participant accepts your call the top of the<br />
screen displays Start sending, Speaking.<br />
5. Release the PTT key when you finish speaking.<br />
6. When another participant takes the floor, the top of<br />
the screen displays Start receiving, Listen. The screen<br />
displays the list of contacts in the session.<br />
7. If you attempt to take the floor while another person is<br />
speaking, Remote speaking is displayed at the top of<br />
the screen.<br />
8. To end a PTT call press button. PTT session<br />
ended is displayed.<br />
9. As the initiator or the call, if you end the session all the<br />
participants in the ad hoc session are disconnected.<br />
Make a group PTT call<br />
1. Select Menu > PTT > Group > OK. The list of PTT<br />
groups is displayed.<br />
2. Scroll to the PTT group you want to call. Press and<br />
hold the PTT key, Ringing is displayed on your screen.<br />
3. When any participant from the group accepts your call<br />
the top of the screen displays Group session, Start<br />
sending, Speaking. Continue to hold the PTT key while<br />
you are speaking.<br />
4. Release the PTT key when you finish speaking.<br />
5. When any other participant speaks, the top of the<br />
screen displays Group session, Start receiving, Listen.<br />
6. If you attempt to speak while another member of the<br />
group is speaking, Remote speaking is displayed at the<br />
top of the screen.<br />
7. To end a PTT call press button. PTT session<br />
ended is displayed.<br />
8. If all the other group members end the call before you<br />
disconnect, No active user(s) in the session is displayed.<br />
Accept a PTT invitation<br />
When you receive an incoming call the top of the screen<br />
displays Ad-hoc PTT invitation.<br />
1. Select Accept to take the call.<br />
2. Select Reject to decline the call. A declined call is displayed<br />
as a missed call on your screen.<br />
<br />
Use<br />
the headset to talk without having to<br />
hold the phone. For more information<br />
refer section “Use handsfree mode for<br />
calls” on page 50.<br />
21
3. When you accept the call, the top of the screen now<br />
displays Start receiving, Listen. When there is a pause<br />
and no one is speaking Push to talk, Idle is displayed.<br />
4. To continue with the conversation, press the PTT key<br />
after the other person finishes speaking. The top of<br />
the screen displays Start sending, Speaking.<br />
5. To end the call press . PTT session ended is displayed.<br />
6. If the caller ends the call, No active user(s) in the session<br />
is displayed.<br />
7. If you are invited to a Group call, you can leave the<br />
session and rejoin later. For more information on how<br />
to rejoin a session refer section “Rejoin a group session”<br />
on page 47.<br />
Block incoming PTT calls<br />
Turn on the Do not Disturb (DnD) option to block incoming<br />
calls from other PTT members.<br />
1. Press the PTT key, the Contacts list appears.<br />
2. To block callers from calling you, select Option ><br />
Turn on DnD > OK. A red icon is displayed at<br />
the top of the screen indicating that the option is<br />
enabled.<br />
3. To disable the feature, select Option > Turn off DnD<br />
When the DnD option is turned on, any PTT contact trying<br />
your number gets the message ‘User busy’.<br />
View PTT call log<br />
The PTT call log maintains outgoing, answered and missed<br />
PTT calls in separate lists. You can also rejoin a session<br />
using the Rejoin group session feature in the Call log menu,<br />
for more information refer “Rejoin a group session” on<br />
page 47.<br />
1. To access the Call log select Menu > PTT > Call log<br />
> OK. The PTT Call list displays the different lists and<br />
options.<br />
2. To view a call log, scroll to any Call list, for example, to<br />
view an outgoing call entry, select the Outgoing calls<br />
list and select OK. Scroll to a contact and select OK.<br />
The outgoing call details are displayed. For further<br />
options select Option to list the available options.<br />
For more information refer “View PTT logs” on<br />
page 46.<br />
3. You can also make calls from the Outgoing calls list,<br />
Answered calls list and Missed calls list. Scroll to a contact<br />
and press the PTT key to initiate the call.<br />
For more details on the Push-to-Talk feature refer section<br />
“Push-to-Talk” on page 40.<br />
PTT quick start<br />
> OK. A green icon is displayed at the top of the<br />
screen indicating that the option is turned off.<br />
22
PTT quick start<br />
Copy phone book contacts to<br />
PTT list<br />
Contact information maintained in the phone book can be<br />
copied to the PTT contacts list.<br />
1. To copy contact information, on the home screen<br />
select Phonebk > View list > OK.<br />
2. Scroll to the contact you want to add to your PTT list<br />
and select Option > Add to contacts > OK > Save.<br />
3. You can modify the contact details before you select<br />
Save.<br />
Refresh the PTT contact list<br />
1. To refresh the PTT contact list select Menu > PTT ><br />
Contact > Option > Scroll to Refresh List and<br />
select OK. The new contacts gets added in to the list.<br />
<br />
Refresh<br />
list is normally used when contacts are<br />
added via web application for example sonim’s<br />
XPA.<br />
23
Your <strong>XP1</strong> phone<br />
This model is a bar type phone with a single LCD screen.<br />
The graphic field of the screen is 129 (w) and 160 (h) pixels.<br />
The CSTN technology used displays 65K colors.<br />
Main menu<br />
To access the main menu press the Menu key or press the<br />
Left selection key to display the main menu which comprises<br />
the following nine items:<br />
Home screen indicators<br />
The home screen indicators are visible when the phone is in<br />
standby mode. Some icons indicate the status of certain<br />
components of the phone, for example, the battery charge<br />
indicator, the network status indicator, the date and time<br />
etc. Some icons are displayed only if the specific service is<br />
activated.<br />
The following table describes the display indicators available<br />
in the <strong>XP1</strong> phone:<br />
Your <strong>XP1</strong> phone<br />
Display<br />
indicators<br />
Name<br />
Description<br />
1.Call list<br />
2.Settings<br />
3.My files<br />
4.Phone book<br />
5.Message<br />
6.Tools<br />
7.PTT<br />
8.Quick settings<br />
9.WAP<br />
Battery<br />
Roaming<br />
Five clear bars indicate<br />
maximum battery charge.<br />
Opaque bars indicate<br />
decline in battery charge.<br />
This icon is only displayed<br />
when your phone is registered<br />
with a non-home<br />
network.<br />
Main menu icons<br />
24
Your <strong>XP1</strong> phone<br />
Display<br />
indicators<br />
Name<br />
GPRS<br />
Description<br />
P displayed in red indicates<br />
that the GPRS network<br />
is present but you<br />
have not logged on to the<br />
PTT service.<br />
P displayed in green indicates<br />
that the GPRS network<br />
is present and you<br />
have logged on to the<br />
PTT service.<br />
Display<br />
indicators<br />
Name<br />
Silent<br />
Report<br />
reminder<br />
Description<br />
Indicates that the phone<br />
is on Silent mode.<br />
Indicates that a recurring<br />
reminder alarm has been<br />
set.<br />
New events are also be<br />
displayed with the same<br />
icon<br />
Voicemail<br />
Alarm<br />
Clock<br />
Vibrate<br />
Indicates that there are<br />
new voicemail messages.<br />
Indicates that the alarm<br />
clock has been set.<br />
Indicates that the Vibrate<br />
mode is turned on.<br />
Missed<br />
calls<br />
Navigation<br />
arrows<br />
Indicates that there are<br />
missed PTT calls or GSM<br />
calls and Instant Personal<br />
Alerts.<br />
Indicates the available<br />
directions for navigation<br />
and is always displayed at<br />
the bottom of the screen.<br />
Call Forward<br />
Indicates that the Call<br />
forward function is<br />
enabled.<br />
25
Display<br />
indicators<br />
Settings<br />
Name<br />
Unread<br />
message<br />
SMS memory<br />
WAP alert<br />
Black list<br />
White list<br />
Description<br />
Indicates that there are<br />
unread messages in the<br />
SMS inbox.<br />
Indicates that the SMS<br />
memory is full.<br />
Indicates receipt of a new<br />
WAP alert<br />
Indicates that the black<br />
list filter has been<br />
enabled.<br />
Indicates that the white<br />
list filter has been<br />
enabled.<br />
You can create and modify various settings on your <strong>XP1</strong><br />
phone.<br />
1. On the Standby screen select Menu > Settings to<br />
display the options.<br />
Ringer settings<br />
You can set different tunes for your incoming calls, PTT<br />
calls, SMS alerts and alarms. Separate tunes can also be set<br />
for different caller groups that are maintained in the phone<br />
book, for example, family, friends et al. This helps you to<br />
identify callers of a specific group.<br />
You can choose between Standard tunes (pre-recorded factory<br />
tunes) or Own melodies (downloadable via WAP or<br />
Comm. Port, or your personal recordings).<br />
1. To set ring tunes for incoming calls, select Menu ><br />
Settings > Ringer settings > Incoming calls ><br />
OK > Colleague…> OK.<br />
2. Choose between Standard Tunes or Own melodies and<br />
select OK. Select Exit to move to the Incoming call<br />
screen.<br />
You can similarly set ring tunes for PTT calls, SMS alerts and<br />
alarms. For more information refer“Personalizing your<br />
phone” on page 61.<br />
Phone settings<br />
1. Select Menu > Settings > Phone settings > OK.<br />
The phone settings displayed are:<br />
• Auto power: switches off and switches on the phone<br />
automatically, at the specified time set by you.<br />
• Welcome text: allows you to create the welcome text<br />
that is displayed when the phone is switched on.<br />
• Idle screen: has the following two settings:<br />
Your <strong>XP1</strong> phone<br />
26
Your <strong>XP1</strong> phone<br />
Idle screen type: allows you to set the Standby<br />
screen display to Digital, Analog, Month view (calendar<br />
view) or Universal time modes.<br />
Wallpaper: allows you to set the background screen<br />
display using the embedded pictures available in your<br />
phone or from your own pictures that you have downloaded<br />
on to your phone. The wallpaper will be displayed<br />
on the standby screen only if the idle screen<br />
type is Digital<br />
• Color theme: allows you to set the color theme for<br />
the main menu and the related screens. There are<br />
three themes available.<br />
• Languages: displays all the phone menu options and<br />
text in the selected language. For example, choose<br />
English to display all menu items, text messages etc. in<br />
English. The other languages available on this device<br />
are, Spanish, German, French, Chinese, Dutch, Swedish,<br />
Greek, Russian and Italian.<br />
• Contrast adjust: allows you to increase or decrease<br />
the screen contrast. Use the navigation arrows to<br />
adjust the contrast.<br />
• Backlight: keeps the screen display active for the<br />
period chosen by you. The duration could be 30 seconds,<br />
a minute or three minutes.<br />
• Shortcuts: allows you to assign a hotkey for a specific<br />
function.<br />
1. To set a shortcut, on the Shortcuts screen, select a<br />
key, choose from the list of keys displayed and select<br />
OK. The list of options is displayed. Choose an option,<br />
for example, PTT > OK. The shortcut is set.<br />
2. To cancel a shortcut select Menu > Settings ><br />
Phone settings > scroll to Shortcuts > scroll to and<br />
select the shortcut key you want to cancel (for example,<br />
PTT) > Empty > OK. The shortcut is cancelled.<br />
Network settings<br />
This relates to various network related settings. You can<br />
choose your network, specify the network account, indicate<br />
whether GPRS is required at all times and so on.<br />
Select Menu > Settings > Network settings > OK to<br />
display the network settings.<br />
• Preferred networks: has a list of options which will<br />
enable you to view a list of available networks, allows<br />
you add a new network or delete an existing network.<br />
These options are available, if provided by your service<br />
provider.<br />
Show list<br />
Displays a list of preferred<br />
network providers. Scroll<br />
to a network and Select.<br />
The preferred network is<br />
displayed at the top of the<br />
list.<br />
Delete list<br />
Removes a network provider<br />
from the existing<br />
list.<br />
27
Available networks<br />
Add existing<br />
Add network code<br />
Locates and displays the<br />
network providers available<br />
to you.<br />
Displays a list of existing<br />
network providers. Allows<br />
you to add a network provider<br />
list. Select Add to<br />
add a network provider to<br />
the preferred networks<br />
list.<br />
Allows you to enter the<br />
code applicable to a network,<br />
typically required<br />
when using the roaming<br />
service. The saved PLMN<br />
(Public Land Mobile Network)<br />
is added to the preferred<br />
networks list.<br />
• Attach GPRS: permits continuous GPRS connectivity<br />
when the option Always attached is selected. Select<br />
Attached during PDP session, if you want GPRS<br />
connectivity only when required. To connect to GPRS<br />
and the PTT service, press Menu > PTT to begin the<br />
registration.<br />
• Register again: allows you to register your phone<br />
again. If you have chosen a different network, select<br />
this option to register with the new network.<br />
• Network account: is used to connect to the GSM or<br />
GPRS network. Contact your service provider to<br />
change the existing factory profiles and to acquire the<br />
correct parameter updates. Connection errors are<br />
caused due to wrong parameters. Certain predefined<br />
profiles may be locked to prevent re-configuration.<br />
The following options are dependent on your network<br />
operator and the service you have requested.<br />
1. On the Network account screen, choose a network<br />
account and select Option > View > OK to view the<br />
account information.<br />
2. Select Option > Set PTT default to use the network<br />
profile for connecting to the PTT service.<br />
<br />
After<br />
you have specified a network account<br />
as the PTT default network, restart your<br />
phone.<br />
3. Select Option > Edit > OK to modify the following<br />
account information.<br />
• Account name: allows you to rename the selected<br />
network account.<br />
• Bearer: allows you to choose from two protocols for<br />
WAP service. You can either choose GSM only or GPRS<br />
only. GPRS is required to access the PTT service.<br />
• GSM settings: The following GSM settings can be<br />
configured:<br />
Your <strong>XP1</strong> phone<br />
28
Your <strong>XP1</strong> phone<br />
Data call type: choose between ISDN and Analogue.<br />
Phone number: enter the number you need to dial.<br />
When your phone connects to the Internet, it will dial<br />
this number automatically.<br />
User name: the user name required to log in to the<br />
WAP server.<br />
User password: the corresponding password that<br />
enables you to log in to the WAP service.<br />
• GPRS settings: configures the settings for APN<br />
(Access Point Name - a requirement for GPRS), User<br />
name and User password required to log in to the<br />
WAP/data server.<br />
Manage the phone book<br />
You can use the phone book to maintain phone numbers of<br />
your contacts. This feature enables you to add, delete, dial<br />
phone numbers and send SMS messages.<br />
Alternatively to directly access the phone book list and its<br />
allied options, press the Down navigation key to display<br />
the Phone book list.<br />
Add a new number<br />
1. Choose the phone memory where you want to store<br />
the phone number. On the home screen select<br />
Phonebk > scroll to Select memory > OK.<br />
2. Select either SIM card or Phone as the memory type<br />
to store the new number and select OK. Select Exit to<br />
revert to the Home screen.<br />
<br />
The<br />
SIM card stores the name and number<br />
of the contact, while the phone memory<br />
additionally stores other contact details like,<br />
name, contact number (including mobile,<br />
office, home and fax), email and postal<br />
address.<br />
<br />
When<br />
you switch on the phone, it takes<br />
sometime for the phone book to initialize.<br />
Wait till you can use the phone.<br />
<br />
To<br />
enter a symbol for email address, press 1<br />
repeatedly till you get the desired symbol. For<br />
example, press 1 thrice to display ‘@’ and<br />
press 1 four times to display ‘_’.<br />
To access the phone book, on the home screen select<br />
Phonebk, or select Menu > Phone book > Select. The<br />
list of phone book options is displayed.<br />
3. Select Phonebk > scroll to Add New > OK. Enter the<br />
Name and Phone number and select Save.<br />
29
4. Select Yes to save a copy of the new contact to your<br />
PTT contact list. Select No to revert to the Phone<br />
book.<br />
Alternatively, you can directly enter a number and select<br />
Option > Save. Enter the Name of the contact and select<br />
Save > Yes. The new number is updated in the Phone<br />
book list. Select No, if you want to change the number<br />
before saving it.<br />
Send a namecard<br />
A namecard contains contact details of an individual. You<br />
can send a namecard either from the Search option or the<br />
View list option in the Phone book.<br />
1. To send a namecard to another contact, select<br />
Phonebk > View list > OK.<br />
2. Scroll to the contact name and select Option > Send<br />
namecard > OK.<br />
3. Enter the recipient’s contact number and select OK.<br />
4. Select one of the following options to send the namecard<br />
information.<br />
• Phonebk: option to select the contact to whom the<br />
namecard is to be sent.<br />
• Group: option to select the group of contacts to<br />
whom the namecard is to be sent.<br />
• Send now: sends message instantly.<br />
• Send & save: option to send the message and save<br />
it.<br />
• Save: option to store the message.<br />
• Save as user defined: allows you to save the namecard<br />
information for reuse.<br />
• Add icon: allows you to insert an image from the<br />
existing emoticon folder.<br />
Edit or delete phone records<br />
• To edit a record<br />
On the home screen select Phonebk > View list ><br />
OK. Scroll to the contact you want to edit and select<br />
Option > Edit > OK. Make the changes and select<br />
Save. The record is edited the updated Phone book<br />
list is displayed.<br />
• To delete a record<br />
On the home screen select Phonebk > View list ><br />
OK. Scroll to the contact you want to delete and select<br />
Option > Delete > OK. To confirm the deletion select<br />
OK. The updated Phone book list is displayed.<br />
<br />
You<br />
can also use the Search option to locate<br />
a contact name and then edit or delete the<br />
record.<br />
• To delete all records in the SIM memory<br />
On the home screen select Phonebk > Advanced ><br />
OK > Delete all SIM records > OK.<br />
Your <strong>XP1</strong> phone<br />
30
Your <strong>XP1</strong> phone<br />
• To delete all records in the Phone memory<br />
On the home screen select Phonebk > Advanced ><br />
OK > Delete all phone records > OK.<br />
Copy or move numbers to other lists<br />
• To copy a number to the PTT Contacts list<br />
On the home screen select Phonebk > View list ><br />
OK. Scroll to the contact you want to add to your PTT<br />
list and select Option > Add to contacts > OK ><br />
Save.<br />
• To copy all records from SIM card to Phone<br />
memory<br />
Select Phonebk > Advanced > OK > Copy all from<br />
SIM to phone > OK.<br />
• To copy all records from Phone memory to the<br />
SIM card<br />
Select Phonebk > Advanced > OK > Copy all from<br />
phone to SIM > OK.<br />
• To move all records from SIM card to Phone<br />
memory<br />
Select Phonebk > Advanced > OK > Move all<br />
from SIM to phone > OK. Moved records get<br />
deleted from the source location. In this case all the<br />
records moved from the SIM card will not be available<br />
in the SIM memory anymore.<br />
• To move all record from Phone memory to SIM<br />
card<br />
Select Phonebk > Advanced > OK > Move all<br />
from phone to SIM > OK. In this case all record<br />
moved from the Phone book will not be available in the<br />
phone book memory anymore.<br />
Manage personal information<br />
1. Select Phonebk > Own info > OK > Edit own info<br />
> OK.<br />
Enter your Name and other personal details such as<br />
Mobile number, Office number, Home number, Fax<br />
number, Pager number, Email, Postal address and<br />
Postal code. Use the Down navigation key to move<br />
to each field.<br />
2. To delete your information select Phonebk > Own<br />
info > OK > Delete own info > OK.<br />
3. To mail your information to another person, Phonebk<br />
> Own info > OK > Send own info > OK.<br />
4. To view your own information select Phonebk > Own<br />
info > OK > Display own info > OK.<br />
Phone book memory<br />
You can store records in both phone memory and SIM card.<br />
Phone memory has the capacity to store upto 500 records<br />
and the SIM memory depends on the SIM provider.<br />
1. To verify the memory status select Phonebk > Memory<br />
status > OK.<br />
31
Store the IP service number<br />
You can store your IP service number and relieve yourself of<br />
the trouble of entering it each time you make an IP call.<br />
1. To store the IP number select Phonebk > IP number<br />
> OK. Enter the IP number and select Save.<br />
<br />
You<br />
can make IP calls only if your network<br />
operator supports IP service numbers.<br />
Your <strong>XP1</strong> phone<br />
32
Make calls<br />
Make calls<br />
Before making a call you must ensure the following:<br />
• Keypad is not locked.<br />
• A valid SIM card is installed.<br />
• Phone battery is charged.<br />
• Phone is switched on and the network operator’s name<br />
is displayed.<br />
Dial a number<br />
1. Use the numeric keys to enter the number and press<br />
the Send key .<br />
2. Alternatively you can enter the desired phone number<br />
and select Option > Dial > Dial > OK.<br />
Dial an international number<br />
1. Press and hold the numeric key 0 till the + symbol is<br />
displayed. Enter the Country code, Area code (without<br />
0) and the phone number and press or select<br />
Option > Dial.<br />
Dial a number via phone book<br />
You can dial a number directly from the Phone book list or<br />
either from the Search option or the View list option in the<br />
Phone book.<br />
To locate a phone number:<br />
2. On the home screen select Phonebk > Search > OK.<br />
Enter the name or the number (Press # to switch<br />
between numeric and text input modes) and select<br />
OK.<br />
OR<br />
Select Phonebk > View list > OK.<br />
3. When the Search option is used, the specified name is<br />
displayed. Press to dial the number or select<br />
Option > Dial > Dial > OK. Select End to disconnect.<br />
4. When the View list option is used, from the displayed<br />
list, choose the contact you want to call press or<br />
select Option > Dial > Dial > OK to make a call.<br />
Select End to end the call.<br />
Dial a number via the call list<br />
menu<br />
This Call list comprises separate lists for Outgoing,<br />
Answered and Missed calls. These call lists also include PTT<br />
call logs.<br />
In this menu you can view the list of calls, delete an entire<br />
list of calls and review call information related to cost, duration,<br />
time of call etc.<br />
1. To access the Call list select Menu > Call list. All the<br />
available call lists are displayed.<br />
33
2. Choose a list and select OK to view the list of calls<br />
within a list, for example, Outgoing calls list.<br />
3. Choose a contact and select OK to view the date and<br />
time of the call.<br />
PTT contacts within the call list have the following options:<br />
• Add to contacts: adds the number to the list of PTT<br />
contacts.<br />
• Send PTT invite: sends an IPA or an alert to the PTT<br />
contact. The PTT contact receives a missed call.<br />
• Delete: deletes the contact number from the call list.<br />
• Add to reject list: moves the contact number to the<br />
reject list. Thereafter all incoming calls from the specified<br />
contact number are rejected. The caller gets the<br />
message User busy.<br />
• Import Group: allows you to add group information<br />
to your list of contacts. This option is available only for<br />
group contacts.<br />
• PTT invitation: allows you to call the PTT contact<br />
directly. This option is available only for group contacts.<br />
GSM contacts within the call list have the following options:<br />
• Dial: displays dial options from which to choose.<br />
IP dial<br />
Dial<br />
Dials a number through<br />
the IP network.<br />
Dials a GSM number.<br />
IP Handsfree<br />
Handsfree dial<br />
When you dial a number<br />
through the IP network,<br />
you can talk using the<br />
speaker.<br />
You can talk using the<br />
speaker.<br />
• Send SMS: sends an SMS message to the specified<br />
contact. Select Option to view the SMS options.<br />
• Send phone number: displays your phone number<br />
to the recipient.<br />
• Delete: deletes the contact number from the Call list.<br />
• Check number: displays the contact number of the<br />
caller.<br />
• Save: prompts you to save the name and number of<br />
the contact. Enter the name and select Save. This<br />
option is absent for contacts already saved in your<br />
contact list.<br />
Speed dial<br />
This option enables you to dial a number quickly via a shortcut.<br />
1. On the home screen, select Phonebk > View list ><br />
OK.<br />
2. Scroll to the frequently called number and select<br />
Option > Speed dial > OK.<br />
3. Choose a hotkey and select OK to set the shortcut.<br />
Make calls<br />
34
Make calls<br />
4. To dial the number, just press and hold the designated<br />
shortcut key.<br />
<br />
If<br />
you use IP Dialing and have already entered<br />
an IP number in the Phone book, the phone<br />
will automatically add the service number<br />
before the number you entered, and place the<br />
call.<br />
Receive a call<br />
Menu key to select the checkbox and activate the feature.<br />
Forward a call<br />
If you are not available or choose not to answer a call, you<br />
can use this function to forward your incoming calls to a<br />
new number or an existing number in the Phone book list,<br />
provided your network operator supports this service.<br />
1. To access Call forward settings select Menu > Settings<br />
> Call settings > Call forward > OK.<br />
The Call forward options are mentioned below:<br />
1. To receive a call, press the Accept key (this key<br />
is used to send and accept a call).<br />
2. To reject a call press the Power on/off key .<br />
3. To receive another call while you are already speaking,<br />
the call waiting feature for GSM calls should be<br />
enabled via the Settings menu. For details on how to<br />
enable Call waiting facility, refer “Call waiting” on<br />
page 36.<br />
Any key answer<br />
When enabled, you can press any key except to<br />
answer a call.<br />
1. To activate this feature, select Menu > Settings ><br />
Call settings > Anykey answer > On or press the<br />
Call Forward option<br />
Unconditional<br />
If busy<br />
If no reply<br />
If unreachable<br />
Cancel<br />
Status<br />
Function<br />
Forward all incoming calls to<br />
a pre-designated number.<br />
Forward calls when your<br />
phone is busy.<br />
Forward calls when you do<br />
not answer the incoming<br />
calls.<br />
Forward calls when you<br />
have switched off your<br />
phone.<br />
Withdraw the Call forward<br />
option.<br />
Check the current Call forward<br />
status.<br />
35
When Call forward is enabled, the icon is displayed<br />
at the top of the screen when the phone is in<br />
standby mode.<br />
Call barring<br />
You can use this function to stop incoming calls. You can set<br />
Call barring facility for outgoing calls, international calls,<br />
local calls and all incoming or roaming incoming calls.<br />
1. To set Call barring settings select Menu > Settings<br />
Call settings > OK > Call barring > OK.<br />
2. Enter a restriction password. (Your network operator<br />
provides this before you use this function). This password<br />
will be sent to the network for verification.<br />
• Cancel barring: when you cancel the call barring<br />
facility you are prompted to enter a restriction password<br />
again. If the password is correct, your phone will<br />
contact the network to disable this function.<br />
• Barring status: when you check the status, your<br />
phone will send a request to the network and the feedback<br />
will be displayed on your screen.<br />
Call waiting<br />
This facility can be used for GSM or GPRS calls.<br />
GSM calls<br />
When Call waiting is enabled or turned on and your phone<br />
is in conversation, the message Call waiting from... is displayed.<br />
1. To enable call waiting facility, select Menu > Settings<br />
> Call settings > Call waiting > GSM call > On ><br />
OK.<br />
2. To cancel the call waiting facility, select Menu > Settings<br />
> Call settings > Call waiting > GSM call ><br />
Off > OK. You will not be prompted when you receive<br />
an incoming call while your phone is busy. The caller<br />
will receive a busy signal.<br />
3. To verify the call waiting status, select Menu > Settings<br />
> Call settings > Call waiting > GSM call ><br />
Status.<br />
GPRS calls<br />
If the call waiting facility is enabled and you receive a GSM<br />
call while you are in a GPRS session or a PTT session, the<br />
number of the caller is displayed on your phone. You can<br />
choose to accept or reject the call. If you accept the GSM<br />
call, the PTT session is available only for a couple of minutes<br />
before it closes.<br />
1. To set Call waiting facility select Menu > Settings ><br />
Call settings> OK > Call waiting > OK.<br />
Auto redial<br />
When enabled, your phone will automatically redial within a<br />
set interval, if a call does not connect.<br />
1. To enable this function select Menu > Settings ><br />
Call settings > Auto redial > On.<br />
OR<br />
Make calls<br />
36
Make calls<br />
Use the Menu key as a toggle key to select and clear<br />
the checkbox beside the Auto redial option to enable<br />
and disable the function.<br />
2. When you redial a number, you are prompted with the<br />
message Redial? Select OK to redial, select Exit to<br />
stop redialing. If in the meantime you begin to make a<br />
call, the phone automatically quits redialing.<br />
Auto answer<br />
When enabled your incoming calls will automatically be<br />
answered.<br />
1. Select Menu > Settings > Call settings > Auto<br />
answer > On.<br />
OR<br />
Use the Menu key as a toggle key to select and clear<br />
the checkbox beside the Auto redial option to enable<br />
and disable the function.<br />
Filter calls<br />
This function enables you to avoid receiving unnecessary<br />
calls. Phone numbers of calls you do not want to answer<br />
can be placed in the “black list” while phone numbers of<br />
calls you want to answer can be placed in the “white list”.<br />
1. To enable this function select Menu > Settings ><br />
Call filter > OK.<br />
Black list calls<br />
In this menu you can add, search for, change and delete<br />
numbers that you do not want to answer. This menu has<br />
two submenus: Add and Search.<br />
Add to black list<br />
1. To add a number to the black list, on the Call filter<br />
screen, select Blacklist > OK > Add new> OK. Two<br />
options are displayed:<br />
• New number: Allows you to enter a new number to<br />
be stored in the black list.<br />
• Phone book: Allows you to open the phone book list<br />
to select and transfer a number to the black list.<br />
<br />
When<br />
a contact is added to the black list or<br />
white list the new number should be prefixed by<br />
‘+’ and country code. To add ‘+’ and country<br />
code to a number in black list, select Black list<br />
> Search > OK > scroll to and select the number<br />
> Option > Change > prefix the number<br />
with ‘+’ and country code> OK.<br />
Search for black listed numbers<br />
1. To locate a black listed number, on the Call filter<br />
screen, select Blacklist > Search > OK.<br />
2. Scroll to a number and select Option > Change ><br />
OK to modify a number or select Option > Delete ><br />
OK to remove a number from the black list.<br />
37
White list calls<br />
This list contains phone numbers of persons you want to<br />
call. The options are similar to that of Black list calls. Refer<br />
“Black list calls” on page 37.<br />
Call filter settings<br />
You can enable or disable the call filter settings.<br />
1. On the Call filter screen, select Call filter settings ><br />
OK.<br />
• Enable black list: rejects all incoming calls from<br />
numbers in the black list.<br />
• Enable white list: answers incoming calls from numbers<br />
listed in the white list, and rejects incoming calls<br />
from numbers that are not available in the list.<br />
• Close filter: disallows filtering for incoming calls.<br />
Other call settings<br />
• Minute reminder: when enabled prompts you at the<br />
50th second of every minute during a conversation.<br />
2. To view whether the option is enabled or not, select<br />
Status > OK.<br />
Review call information<br />
1. Select Menu > Call list > Call meters > OK. The<br />
following options are available:<br />
• Last call: displays the duration of the last call.<br />
• Last GPRS call: displays the transmitted bytes of the<br />
last GPRS service.<br />
• Call timer: displays the duration of all the incoming or<br />
outgoing calls. Select Reset Timer > OK to restart<br />
the counter or meter.<br />
• Display cost: if enabled, displays the duration and<br />
charges of the call. Disabled mode is the default mode.<br />
• If you want to enable this function, you need to<br />
acquire a PIN2 code from your network operator.<br />
• Accum. charges: this service is only available when<br />
your SIM card contains charging information. Use this<br />
service to configure or view all charge information<br />
related to your calls.<br />
Make calls<br />
Select Menu > Settings > Call settings > Minute<br />
reminder > On.<br />
The following can be configured:<br />
• Send ID: when enabled displays your ID to the recipient<br />
when you call or send a message. However this<br />
service must be supported by your network.<br />
1. To enable this option, select Menu > Settings > Call<br />
settings > Send ID >OK.<br />
Show cost<br />
Displays total charges of<br />
all outgoing and incoming<br />
calls since the last reset.<br />
38
Make calls<br />
Reset charge count<br />
Show balance<br />
Resets the counter to<br />
zero (protected by PIN2<br />
code).<br />
Displays available balance.<br />
Show limit<br />
Cancel limit<br />
Set limit<br />
Displays maximum limit<br />
available.<br />
Cancels maximum limit<br />
available on charges<br />
(protected by PIN2<br />
code).<br />
Sets maximum limit for<br />
charges (protected by<br />
PIN2 code).<br />
<br />
If<br />
the charges exceed the maximum limit,<br />
you cannot make or receive calls. All<br />
chargeable calls will be disconnected automatically.<br />
• Call tariff: displays the rate per call unit. This information<br />
is stored in the SIM card. You can also reset<br />
and set the rate.<br />
39
Push-to-Talk<br />
The <strong>Sonim</strong> <strong>Xperience</strong> <strong>One</strong> (<strong>XP1</strong>) brings to you the Pushto-Talk<br />
over cellular (PoC) experience. Now you can turn<br />
your mobile phone into a walkie-talkie and have a one-toone<br />
or one-to-many communication at the push of a key<br />
and the call communication is almost instantaneous.<br />
PTT settings<br />
Your PTT settings enable you to access this service more<br />
effectively.<br />
General settings<br />
1. Select Menu > PTT > Settings > General > OK.<br />
• Answer settings: allows you to set the answer settings<br />
for PTT contacts. If you choose Individual, you<br />
have the option to set individual answer settings for<br />
each contact. Hence when you create a PTT contact,<br />
you can either specify a manual setting, where the<br />
phone rings before you accept the call or specify an<br />
auto answer setting where the PTT session is established<br />
automatically without you picking up the call.<br />
If you choose Manual, any answer setting you create<br />
for individual contacts is rendered ineffective and all<br />
incoming calls must be picked up manually.<br />
• My availability: displays your online presence to<br />
other contacts, scroll to My availability and choose<br />
Always to make your presence available at all times,<br />
or choose Never to remove your online presence.<br />
• Sorting: Sorts your list of contacts, scroll to Sorting<br />
and choose either Alphabetically to display the list of<br />
contacts in alphabetical order or Available first to<br />
display names of contacts that are online first, followed<br />
by the list of offline contacts.<br />
• Hide my ID: hides your name from online contacts<br />
during a conference session, scroll to Hide my ID and<br />
choose Always to display an anonymous identity at all<br />
times, or choose Never to display your ID to other<br />
online contacts during a session.<br />
Audio settings<br />
1. Select Menu > PTT > Settings > Audio > OK.<br />
• Speaker On: use the Menu key as a toggle key to<br />
select or clear the Speaker On checkbox.<br />
• Speaker volume: adjusts the speaker volume, press<br />
the Right navigation arrow to increase the volume<br />
and press the Left navigation key to decrease the<br />
speaker volume.<br />
To restart the PTT service, press and hold the Menu<br />
key to register with the PTT service again.<br />
Backlight<br />
1. Select Menu > PTT > Settings > OK > Scroll to<br />
Backlight > OK.<br />
• Timer on: allows you to use the same time settings as<br />
in phone settings to display backlight in a PTT session.<br />
Push-to-Talk<br />
40
Push-to-Talk<br />
• Always on: allows you keep the backlight on always<br />
during a PTT session.<br />
Reject list<br />
All calls from contacts on your reject list are blocked from<br />
calling your number.<br />
1. Select Menu > PTT > Settings > OK > Reject list<br />
> OK.<br />
2. To add a contact to the Reject list, select Reject list ><br />
OK > Option > Add to reject list > OK.<br />
3. Enter the name of the contact and select OK. The contact<br />
name gets added to the reject list.<br />
Display name<br />
1. Select Menu > PTT > Settings > Display name.<br />
2. On the confirm display name screen, select Clear and<br />
enter new name if required.<br />
3. Select OK to confirm the new display name.<br />
Report reminder<br />
This setting displays an alert on the home page every time<br />
the set interval expires, until you turn off the reminder.<br />
1. Select Menu > PTT > Settings > Report reminder.<br />
2. Scroll to the appropriate interval and select OK. Upon<br />
expiry of the set interval a reminder or an alert is displayed<br />
on the home screen. For example, if you have<br />
chosen the reminder interval as 15 minutes, then, after<br />
every 15 minute-interval the reminder alert pops-up on<br />
the home screen.<br />
3. Select Off to turn off the setting.<br />
4. Select Exit to return to the previous screen or press<br />
to return to the home screen.<br />
Manage your PTT contacts<br />
Your PTT contact list is a list of members<br />
whom you want to either call or<br />
chat with, outside of the GSM network.<br />
Your contact list can be created<br />
freshly or copied from your existing<br />
list of contacts into your phone book.<br />
You can add, edit, delete or call a<br />
contact.<br />
1. Select Menu > PTT > Contact<br />
> OK.<br />
2. Select Option to view the Contacts submenu.<br />
Create contacts<br />
1. To create a new contact, on the Contacts screen select<br />
Create contact > OK.<br />
2. Enter the Contact number and Contact name.<br />
3. To specify the Answer settings select Manual to<br />
enable you to pick a call from the specified contact or<br />
select Auto answer to automatically accept a call<br />
from the specified contact.<br />
4. Select Save > OK to add the new contact details.<br />
Copy contacts from phone book<br />
1. To copy contact details from your phone book to the<br />
PTT Contacts list, select Copy from phone book ><br />
41
OK. The list of contacts in your Phone book is displayed.<br />
2. Select Contact name > OK> Save > OK. The copied<br />
contact is added to the PTT Contacts list.<br />
3. You can also choose to modify the contact details, like<br />
Contact name, Contact number and Answer settings,<br />
before you add the contact name to your PTT contact<br />
list. Select Clear to remove the existing data.<br />
Set as default<br />
To bring the contact to the top of the Contacts screen use<br />
the Set as default option.<br />
1. On the Contacts screen, select the contacts of your<br />
choice > Option > Set as default > OK. The contact<br />
is displayed as the first contact in the Contacts screen.<br />
Turn on DnD<br />
To block contacts from calling you, use Turn on DnD (Donot-Disturb)<br />
option. Anyone trying to contact you gets the<br />
message User busy.<br />
1. On the Contacts screen, select Option > Turn on<br />
DnD > OK. Notice that the icon on the title bar<br />
changes from green to red indicating that the Turn on<br />
DnD option has been activated.<br />
2. Similarly to turn off the option, select Menu > PTT ><br />
Contact > OK > Option > Turn off DnD > OK. The<br />
icon color reverts to green.<br />
<br />
When this option is turned on, other contacts<br />
will perceive you as offline.<br />
Send a PTT invitation<br />
Use this option to send a message to the contact you wish<br />
to talk to. When an invitation is sent, the contact receives a<br />
missed call.<br />
1. On the Contacts screen, use the Menu key as a toggle<br />
key to select or clear the checkbox against the contact<br />
name.<br />
2. After the checkbox is selected, select Option > Send<br />
PTT invite > OK. Message Success is displayed. You<br />
can send a message only to contacts who are online.<br />
3. You can also send a PTT invitation via the Outgoing<br />
calls list present in the Call list, select Menu > Call<br />
list > Outgoing calls list > OK. Scroll to a contact<br />
and select OK > Option > OK > Send PTT invite ><br />
OK.<br />
Modify contact information<br />
1. On the Contacts screen, use the Menu key as a toggle<br />
key to select or clear the checkbox against the contact<br />
name.<br />
Push-to-Talk<br />
42
Push-to-Talk<br />
2. After the checkbox is selected, select Option > Edit<br />
contact > OK.<br />
3. Edit the contact details, like Contact name, Contact<br />
number and Answer settings, before you add the contact<br />
to your PTT contact list. Select Clear to erase the<br />
existing data.<br />
Delete a contact<br />
1. On the Contacts screen, use the Menu key as a toggle<br />
key to select or clear the checkbox against the contact<br />
name.<br />
2. After the checkbox is selected, select Option ><br />
Delete contact > OK. Select Yes to confirm the<br />
deletion. Select OK to return to the Contacts list.<br />
Manage PTT groups<br />
A group includes names of contacts that form part of a specific<br />
pre-arranged group, for example, family, friends and<br />
the like. Group feature enables a user to create a group,<br />
edit group name, rename a group, view a group ID and<br />
delete groups.<br />
1. Select Menu > PTT > Group > OK.<br />
2. Select Option to view the Groups submenu.<br />
Create a new group<br />
1. To create a new contact group, on the Groups screen<br />
select Option > Create group > OK.<br />
2. Enter the Group name, for example, family and select<br />
Save. An ID is generated for the group. It is recommended<br />
that a maximum of 20 members can be added<br />
to a group.<br />
3. Select OK to view the new group in the Groups list.<br />
Import a group<br />
1. To import a new group you must be aware of the<br />
group’s ID. On the Groups screen select Option ><br />
Import group > OK.<br />
2. Enter the Group ID and Group name and select Save<br />
> OK. The imported group is added to your Groups<br />
list.<br />
Rename a group<br />
1. To assign a different name to an existing group, on the<br />
Groups screen scroll to the group you want to rename<br />
and select Option > Rename group > OK.<br />
2. Change the Group name and select Save > OK. The<br />
change in name is reflected in your Groups list.<br />
<br />
Use<br />
this option to view a group’s ID.<br />
Edit group information<br />
This option allows you to view, add, edit and delete members<br />
within a group. You can create a group by adding<br />
members from the PTT Contacts list.<br />
43
Add members via the PTT contact list<br />
1. To add members via the PTT contacts list, on the<br />
Groups screen scroll to the group and select Option ><br />
Edit/View members > Option > Add via list ><br />
OK. Use the Menu key as a toggle key to select or<br />
clear members from the group. Select Save.<br />
Add contacts via telephone number<br />
1. To add new contacts to the group using a telephone<br />
number, on the Groups screen scroll to the group and<br />
select Option > Edit/View members > Option ><br />
Add via number > OK. Enter the Contact name and<br />
Number and select Save. The new member is added<br />
to the group.<br />
Delete members from a group<br />
1. To delete members from a group, on the Groups<br />
screen scroll to the group and select Option > Edit/<br />
View members > Option > Delete members ><br />
OK. Use the Menu key as a toggle key to select or<br />
clear the checkbox against the member to be deleted<br />
from the group. Select Save > Yes > OK.<br />
Delete a group<br />
1. To remove a group, on the Groups screen scroll to the<br />
group you want to delete and select Option > Delete<br />
group > OK.<br />
2. Select Yes to confirm the deletion. Select OK to return<br />
to the Groups list. The selected group is deleted from<br />
your Groups list.<br />
Send group ID<br />
1. To send group ID to the members of the group, select<br />
Menu > PTT > Group > OK.<br />
2. Select the group > Send group ID.<br />
<br />
Only<br />
the owner of the group can view the members<br />
and send the group ID.<br />
Use chat groups<br />
Using the chat facility you can “talk” to other chat members<br />
on their mobile in real time. You can create chat group<br />
members or keep chat sessions open to everyone.<br />
1. Select Menu > PTT > Chat group > OK.<br />
2. Select Option to view the Chat groups submenu.<br />
Create a chat group<br />
1. To create a new chat group, on the Chat groups<br />
screen, select Option > Create group > OK.<br />
2. Enter the Chat group name. Use the T9 or Predictive<br />
text mode if you are creating generic group names, for<br />
example, Colleague.<br />
3. Use the arrows to choose the Chat group type, choose<br />
either Members only or Open.<br />
4. Select Save > OK.<br />
Push-to-Talk<br />
44
Push-to-Talk<br />
Rename a chat group<br />
1. To assign a different name to an existing chat group,<br />
on the Chat groups screen, scroll to the chat group you<br />
want to rename and select Option > Rename chat<br />
group > OK.<br />
2. Select Clear to erase the existing Group name.<br />
3. Edit the chat group name and select Save > OK. The<br />
changed name is reflected in the Chat groups list.<br />
Edit/view chat group information<br />
This option allows you to view, add, edit and delete members<br />
within a Chat group. You can create a Chat group by<br />
adding members from the PTT Contacts list.<br />
Add members via the contacts list<br />
1. To add members via the contacts list, on the Chat<br />
groups screen scroll to the chat group and select<br />
Option > Edit/View members > Option > Add<br />
via list > OK. Use the Menu key as a toggle key to<br />
select or clear members from the chat group. Select<br />
Save.<br />
Add contacts using the telephone number<br />
1. To add new contacts to the Chat group using a telephone<br />
number, on the Chat groups screen scroll to the<br />
chat group and select Option > Edit/View members<br />
> Option > Add via number > OK. Enter the<br />
Contact name and Number and select Save. The new<br />
member is added to the Chat group.<br />
Delete members from a group<br />
1. To delete members from a chat group, on the Chat<br />
groups screen scroll to the chat group and select<br />
Option > Edit/View members > Option > Delete<br />
members > OK. Use the Menu key as a toggle key<br />
to select or clear the checkbox against the member to<br />
be deleted from the chat group. Select Save > Yes ><br />
OK.<br />
Send a group ID<br />
1. To a members only<br />
• On the chat groups screen, scroll to the appropriate<br />
chat group and select Option > Send group<br />
ID > OK. Only the members of the chat group<br />
receive the group ID.<br />
2. To an open chat group<br />
Only those members to whom the group ID is published will<br />
be able to participate in a group call.<br />
• On the chat groups screen, scroll to an appropriate<br />
chat group and select Option > Send group<br />
ID > OK. The Send group ID screen displays a<br />
list of all the PTT contacts.<br />
• Use the Menu key to select the checkbox against<br />
the names of the group members to whom you<br />
wish to publish the group ID and select OK.<br />
3. Add a group ID<br />
On receipt of a group ID, a message is displayed on the<br />
screen with the group id.<br />
• To save the group id, select Accept. Once saved<br />
the group id is added to the group list.<br />
• To reject the group id, select Cancel.<br />
45
Delete a chat group<br />
1. To remove a chat group, on the Chat groups screen<br />
scroll to the chat group you want to delete and select<br />
Option > Delete group > OK.<br />
2. Select Yes to confirm the deletion. Select OK to return<br />
to the Chat groups list. The selected chat group is<br />
deleted from the Chat groups list.<br />
Import a group<br />
1. To import a new group you must be aware of the<br />
group’s ID. On the Groups screen select Option ><br />
Import group > OK.<br />
2. Enter the Group ID and Group name and select Save<br />
> OK. The imported group is added to your Groups<br />
list.<br />
View PTT logs<br />
The PTT call log maintains logs of all outgoing, answered or<br />
missed PTT calls in separate call lists. You can also rejoin a<br />
group session using the Call Log, for more information refer<br />
“Rejoin a group session” on page 47.<br />
1. To access the PTT Call list select Menu > PTT > Call<br />
log > OK.<br />
Outgoing calls list<br />
This list displays all calls made to individuals as well as<br />
groups. Calls made to groups are always PTT calls, while<br />
calls made to individuals could be GSM calls.<br />
1. To view the list of outgoing calls, on the Call list screen<br />
select Outgoing calls list > OK.<br />
2. To view call details scroll to the call record and select<br />
OK.<br />
3. Select Option to view outgoing call options. Call<br />
options vary for individuals and groups.<br />
• Add to contacts: adds the outgoing contact to your<br />
contacts list, on the Outgoing calls list screen scroll to<br />
the contact and select OK > Option > Add to contacts<br />
> Save > OK to add the name to your contacts.<br />
The updated Contacts list appears. Select Exit to<br />
revert to the Call list.<br />
• Send PTT invite: sends a message to a contact when<br />
the contact is an individual. On the Outgoing calls list,<br />
scroll to a contact and select OK > Option > OK ><br />
Send PTT invite > OK. Message sent successfully is<br />
displayed and the contact will receive a missed call.<br />
• PTT invitation: calls the members of the selected<br />
group. On the Outgoing calls list, scroll to a group and<br />
select OK > Option > PTT invitation > OK to initiate<br />
a group call.<br />
• Delete: deletes a group or an individual contact. On<br />
the Outgoing calls list screen scroll to the contact you<br />
want to delete and select OK > Option > Delete ><br />
OK. To confirm the deletion select OK. The record is<br />
deleted and the updated Outgoing calls list is displayed.<br />
• Add to reject list: adds a group or an individual contact<br />
to the reject list, on the Outgoing calls list screen<br />
scroll to the contact or group you want to reject and<br />
Push-to-Talk<br />
46
Push-to-Talk<br />
select OK > Option > Add to reject list > OK. To<br />
confirm the operation select Yes. In case of a group,<br />
the members of the rejected group are added to the<br />
Reject list.The following additional options are available<br />
for group calls.<br />
• Import a group: Normally an outgoing group ID<br />
would already exist in your contact list. But in cases<br />
where you have initiated a group call using the<br />
answered list or the missed call list, you can use the<br />
import group options to add the group ID to your<br />
group contact list.<br />
Answered calls list<br />
This list contains call names of contacts whose calls you<br />
have accepted. The options available are similar to Outgoing<br />
calls. You can add new contacts to your PTT Contacts<br />
list, delete contacts, move contacts to the reject list and<br />
send a PTT invitation to a contact, import a group and rejoin<br />
a group session. For instructions refer “Outgoing calls list”<br />
on page 46.<br />
Import a group<br />
To import a group, on the Answered calls list, scroll to a<br />
group and select OK > Option > Import group > OK.<br />
The Group Id and Name are displayed. Select Save to add<br />
the group to your Groups contact list.<br />
Missed calls list<br />
This list displays the names of contacts whose calls have<br />
been unanswered by you. Any Instant Personal Alert (IPA)<br />
that you receive is also displayed in the Missed calls list. You<br />
can add the contact to your PTT Contacts list, delete a contact,<br />
move a contact to the reject list and send a PTT invitation<br />
to a contact. For instructions refer “Outgoing calls list”<br />
on page 46.<br />
Rejoin a group session<br />
This option is used when you want to join in or return to a<br />
PTT group session, which you have been part of and have<br />
opted out for some reason.<br />
On the Call list scroll to Rejoin group session and select OK.<br />
When the Group ID is called, Ringing is displayed at the top<br />
of the screen and you automatically join the session if it is<br />
still in progress. If the session is over, No user(s) in this session<br />
is displayed.<br />
Delete a list<br />
To delete a list (Outgoing, Answered or Missed calls<br />
list)<br />
• Select Menu > PTT > Call log > Delete > OK<br />
(choose the list) > OK. To confirm the deletion select<br />
OK. Select Exit to move to the previous screen.<br />
To delete a contact or a group separately<br />
• Select Menu > PTT > Call log > OK > Outgoing calls<br />
list (select a contact name or group) > OK > Option<br />
> Delete > OK.<br />
47
Make PTT calls<br />
A user can make a one-to-one or one-to-many call from the<br />
list of contacts, make a group call, join a chat list, call from<br />
call log entries, and pick an incoming PTT call or send a PTT<br />
invitation.<br />
Calls can be made from the PTT contacts list, from the PTT<br />
Call log or from the Call list.<br />
Make calls from the PTT contacts list<br />
1. Select Menu > PTT > Contact.<br />
OR<br />
Press and release the PTT key to view the PTT Contacts<br />
list.<br />
2. Scroll to the contact and press the PTT key to initiate<br />
the call.<br />
3. If the user is not available, a message user(s) not<br />
available is displayed.<br />
<br />
When you press and hold the PTT key while<br />
the device is idle, the first contact on the Contacts<br />
list is called.<br />
Make calls from the PTT calls list<br />
You can make calls to contacts from the Outgoing calls list,<br />
Answered calls list or the Missed calls list.<br />
1. Select Menu > PTT > Call log > OK.<br />
2. Choose a list and select OK, for example, Outgoing<br />
calls list.<br />
3. Scroll to the contact you want to call and press the<br />
PTT key to initiate the call.<br />
4. If you select a group contact, select OK > Option ><br />
PTT invitation > OK to initiate a call.<br />
Make calls from the calls list<br />
1. Select Menu > Call list > Outgoing calls list > OK.<br />
2. If you select an individual contact, press the PTT key<br />
to initiate the call.<br />
3. If you select a group contact, select OK > Option ><br />
PTT invitation > OK to initiate the call.<br />
To proceed with the call<br />
After you have chosen any one of the invitation modes and<br />
have initiated the call, the screen displays Ringing.<br />
1. Press and hold the PTT key until the top of the screen<br />
displays Start sending Speaking. Continue to hold the<br />
PTT key while you are speaking.<br />
2. Release the PTT key when you finish speaking.<br />
3. When the other person takes floor control the top of<br />
the screen displays Start receiving Listen.<br />
4. If you attempt to speak before the other person finishes<br />
speaking, Remote speaking is displayed on top of<br />
the screen. Wait for the beep before you can begin<br />
speaking.<br />
5. When you end the call, the top of the screen displays<br />
PTT call ended.<br />
Push-to-Talk<br />
48
Push-to-Talk<br />
Make calls from the group list<br />
A group has a set of pre-arranged members and a unique<br />
group ID. A group PTT call is similar to a one-to-many PTT<br />
call.<br />
1. To access the group list select Menu > PTT > Group.<br />
2. Scroll to a group and press the PTT key, Ringing is displayed<br />
on the screen.<br />
3. When any member from the<br />
group responds, the contact<br />
name is displayed with a green<br />
icon beside it. If a member has<br />
not accepted the call a red icon<br />
is displayed beside the contact<br />
name. You can begin speaking<br />
after the beep. Group session,<br />
Start sending, Speaking is displayed<br />
at the top of the<br />
screen. When you are speaking a list of all the participants<br />
in the session is displayed on the screen.<br />
4. Continue to hold the PTT key while you are speaking<br />
and release the key when you finish speaking.<br />
5. If any member takes floor control, Start receiving, Listen<br />
is displayed at the top of the screen.<br />
6. During the session the status of<br />
all the members in the group is<br />
displayed on the screen. The<br />
name of the person speaking is<br />
highlighted in the displayed list<br />
of participants.<br />
7. To add more members to the<br />
group select Add, use the<br />
Menu key to select more members<br />
and select OK. Add user to<br />
session is displayed at the top of the screen.<br />
8. As the initiator, if you press the button , the<br />
group session closes and all members get disconnected<br />
from the session.<br />
9. Press the button to end the call.<br />
Make unplanned group calls<br />
Unplanned or ad hoc groups are created on the spur of the<br />
moment and do not have pre-arranged set of members or a<br />
specified group ID.<br />
1. To make an ad hoc group call, press the PTT key, the<br />
list of Contacts appears.<br />
2. Use the Menu key as a toggle key to select or clear<br />
the checkbox against the contacts you want to call.<br />
3. Press the PTT key to initiate the call Ad-hoc PTT invitation.<br />
Start sending, Speaking is displayed at the top of<br />
the screen.<br />
49
4. If you want to add more contacts to the session select<br />
Add and choose the contacts you want to call. Add<br />
user to session is displayed at the top of the screen.<br />
5. Continue to hold the PTT key while you are speaking<br />
and release the key when you finish speaking.<br />
6. Press the button to end the call.<br />
Respond to an invitation<br />
1. When you receive an incoming call, Ad-hoc PTT invitation<br />
is displayed at the top of the screen. Select<br />
Accept to respond to the call or Reject to decline the<br />
call.<br />
2. If you are in a group session, the status of all the<br />
members in the session is displayed.<br />
3. To continue speaking, press the PTT key and speak<br />
after the beep. The key should be continuously<br />
pressed when you are speaking. Release the PTT key<br />
when you finish speaking.<br />
4. If both parties are in the session but not speaking,<br />
Push to Talk, Idle is displayed at the top of the screen.<br />
5. If the other person ends the call, No active user(s) in<br />
the session is displayed.<br />
6. If you end the call, PTT session ended is displayed.<br />
Add more members to the<br />
session<br />
You can invite more members from the contact list during a<br />
PTT session.<br />
1. Select Option > Add > Contacts > select the contact<br />
> Add. The contact will be invited for the PTT session.<br />
Mute or unmute the session<br />
1. Select Option > Mute. The speaker is turned off and<br />
all the incoming talk burst gets muted.<br />
2. If you want to unmute, Select > Option > Unmute.<br />
The speaker is turned on and incoming talk burst is<br />
received.<br />
Use handsfree mode for calls<br />
The handsfree mode can be used for both GSM and PTT<br />
calls. You can use the answer/end call button on the headset<br />
phone which enables you to talk on the phone without<br />
holding the phone.<br />
GSM calls:<br />
1. Press or click the headset button to accept a call.<br />
2. Press and hold the button headset button to end the<br />
call.<br />
3. To record the conversation, press the head set button<br />
during a call.<br />
PTT calls:<br />
1. Press or click this button to accept a call.<br />
2. Click the button to start speaking.<br />
3. Click again when you finished speaking. You do not<br />
have to hold the button as you would for the PTT key,<br />
hence this facility is termed ‘Click to Talk’.<br />
Push-to-Talk<br />
50
Push-to-Talk<br />
4. To end a PTT call press and hold the headset button.<br />
5. Press and hold the headset button to reject the call.<br />
Place a call in the background<br />
You can work on other functions, like sending an SMS or<br />
browsing the Phone book while a PTT call is in progress.<br />
1. Select Accept to answer an incoming PTT call.<br />
2. To place the PTT call in the background, select Back<br />
with the Right Selection Key. The standby screen is<br />
displayed.<br />
3. To enter the main menu press the Menu key and<br />
access the Messages menu to send an SMS or browse<br />
through the Phone book menu. While using another<br />
function, you can continue to listen to the PTT talk<br />
burst in the background.<br />
4. To focus back on the PTT call, press the PTT key and<br />
continue the PTT conversation.<br />
View IPA details<br />
An IPA is an Instant Personal Alert. When you received an<br />
IPA, a log is updated in your Missed calls list and a missed<br />
call pop-up is displayed on the home screen.<br />
1. On receipt of the missed call, on the Home screen,<br />
select List to display the Missed calls list.<br />
2. Scroll to the contact and select OK to view the missed<br />
call details.<br />
3. Select Option > Add the contacts to add the contact<br />
to your existing PTT contact list.<br />
4. Select Option > Send PTT invite to respond to the<br />
sender’s message.<br />
5. Select Option > Delete to delete the missed call<br />
entry.<br />
6. Select Option > Add to Reject list to block the contact<br />
from calling you.<br />
5. Press to end the PTT call.<br />
<br />
You cannot make a GSM call while a PTT<br />
call (GPRS packet) is in progress. But during<br />
the PTT idle period, i.e. when no one<br />
is speaking, you can accept or reject a<br />
GSM call. If you accept the GSM call and<br />
speak for more than 30 seconds, the PTT<br />
session gets disconnected.<br />
51
Messages<br />
SMS is a convenient and inexpensive means of communication.<br />
You can send a text message to other people via this<br />
service. You can use the SMS menu in your phone to send<br />
an SMS message to other mobile phones or any other<br />
equipment that can receive SMS.<br />
To access the SMS function select Menu > Messages ><br />
SMS. The list of options is displayed.<br />
Message settings<br />
1. To view or define settings for your messages select<br />
Menu > Messages > SMS > Settings > OK.<br />
OR<br />
Press the Right navigation key as a shortcut to the<br />
Messages menu.<br />
• Service number: is provided by your service provider.<br />
This is the message center number via which your<br />
messages are sent and received. This field can be<br />
edited. Messages cannot be sent if this field is left<br />
blank.<br />
• Status report: enable this option to get a delivery<br />
confirmation for the messages you send. Use the<br />
Menu key to select the option and select OK.<br />
Status report will be temporarily disabled when a long<br />
message of about four pages is sent.<br />
• Reply path: if this option is enabled, messages that<br />
are sent to your inbox will be sent via your service center<br />
rather than the sender’s service center. Use the<br />
Menu key to select the option and select OK.<br />
• Signature: enable this option to set a signature that<br />
will be suffixed to your sent messages. Use the Menu<br />
key to select the option and select OK. Enter the signature<br />
and select Save. If your message exceeds the<br />
maximum number of characters, the signature automatically<br />
gets omitted from your message.<br />
• Validity period: sets the period to store your messages<br />
in the message center. Use the navigation keys<br />
to choose the period. On expiry of the specified period<br />
the messages are erased from the assigned memory.<br />
• Memory: enables you to choose the location in which<br />
you can store the messages. The messages could<br />
either be stored in the SIM card memory or the<br />
Mobile phone memory.<br />
Text input mode<br />
When you enter text, the input mode is displayed at the top<br />
right of the screen. Press and release the # key to view the<br />
different text input modes, such as, Conventional (Abc),<br />
Predictive (T9) and numeric (123).<br />
Conventional text input<br />
The traditional mode uses the multi-tap method to enter a<br />
character<br />
Messages<br />
52
Messages<br />
1. To choose the input text for a character (abc / en T9 /<br />
123), press and release the # key.<br />
2. To switch between upper case, lower case and sentence<br />
case use key 0 as a toggle key. When the sentence<br />
case is used, the letter which comes immediately<br />
after the characters full stop (.), exclamation mark (!)<br />
and question mark (?) automatically becomes capital.<br />
3. To enter a character, press the numeric key repeatedly<br />
until the desired character appears on the screen. For<br />
example, to enter GOOD, in the text mode, press 4<br />
once to display G, press 6 thrice to display O, and<br />
again press 6 thrice to display O and press 3 once to<br />
display D.<br />
4. When editing text, to insert a space between characters<br />
or words, press 1.<br />
5. To erase a character select Clear.<br />
6. To insert special characters, press * to display the first<br />
batch of special characters and press either the Right<br />
or Down navigation key to display the second and<br />
third batch of special characters. A numeric key is<br />
associated with a special character. Press the designated<br />
numeric key to enter the special character. For<br />
example, in batch one press 1 to display a period and<br />
in batch 2, press 1 to display open parenthesis ‘(‘.<br />
Predictive text input<br />
Converse to the Conventional mode, the Predictive text<br />
input mode requires you to press once a numeric key that<br />
has the letter you require.<br />
1. To choose the Predictive text input mode, press and<br />
release the # key till enT9 is displayed.<br />
2. To enter a word, press the numeric key with the<br />
required alphabet for the word you are creating, just<br />
once. For example, to enter GOD, press keys 4, 6 and<br />
3 only once. Intuitively the word GOD is displayed in<br />
the text strip.<br />
3. If the word you require is not displayed, use the navigation<br />
keys to locate the right word. If not you can<br />
choose the nearest word and build on it.<br />
4. When the desired word is displayed, select Select or<br />
press Key 1, to accept the word and display it in the<br />
text pane.<br />
5. To display the word along with a dot press key 1 twice.<br />
6. Go on and enter the next word.<br />
7. To insert special characters, press * to display them.<br />
For more information refer point 6 of “Conventional<br />
text input” on page 52.<br />
Write messages<br />
1. To create a message select Menu > Messages ><br />
SMS > Write message > OK.<br />
2. Enter the number and press the Down navigation key<br />
to move to the text pane<br />
Or<br />
Select a number from the Phone book list by pressing<br />
the Menu key or selecting Option > Phonebk. Scroll<br />
to and select the contact by pressing the Menu key,<br />
53
Select Exit to return to the text pane. The contact<br />
address is displayed in the To field.<br />
3. Enter the message in the text pane. The text input<br />
mode is displayed at the top right of the screen. Press<br />
and release # to choose the appropriate text input<br />
mode.<br />
4. After entering your message, press the Menu key<br />
Send now > OK to send the message.<br />
Alternatively select Option > Send now … > OK to<br />
send your message. Other options include:<br />
• Send & save: Sends the message and saves a copy of<br />
the message.<br />
• Save: saves the message in the memory.<br />
• Save as user defined: saves the created message as<br />
a user defined SMS for reuse.<br />
• Add icon: adds an emoticon in your message.<br />
• Insert defined SMS: enables you to insert a predefined<br />
SMS message from the Defined message list.<br />
Send an SMS via phone book<br />
You can send an SMS message either from the Search<br />
option or the View list option in the Phone book.<br />
1. To search for a phone number, on the home screen<br />
select Phonebk > Search > OK.<br />
OR<br />
Select Phonebk > View list > OK.<br />
2. If the Search option is selected, enter the phone number<br />
or the contact name and select OK. Press # to<br />
switch between numeric and text input modes.<br />
3. Choose the contact you want to call and select Option<br />
> Send SMS > OK.<br />
4. Enter the message and select Option. Choose an SMS<br />
option and select OK to send your message.<br />
Manage your messages<br />
Inbox<br />
The Inbox stores and displays all the incoming messages.<br />
1. To access the Inbox select Menu > Messages > SMS<br />
> Inbox > OK. A list of messages is displayed.<br />
2. To straight away delete a single message or the entire<br />
list without reading the message, select Option ><br />
Delete or Delete all respectively.<br />
3. To open a message, scroll to a message and press the<br />
Menu key.<br />
4. After a message is opened other functions can be performed.<br />
Select Option to list the options.<br />
• Reply: sends a response to the sender of the message.<br />
• Forward: sends a message to another recipient.<br />
Select Option > Phonebk to select a recipient from<br />
the phone book list. Select Option > Group to select<br />
multiple recipients.<br />
• Delete: deletes a message after you have read it.<br />
• Dial: calls the number of the sender.<br />
Messages<br />
54
Messages<br />
• Save number: extracts the number from the mail and<br />
saves it after you have entered the sender’s name in<br />
the Phone book list. Select Yes if you also want to<br />
copy the contact number to your PTT contacts list.<br />
• Move to phone: moves the caller’s number to the<br />
Phone book if the message is stored in the SIM card<br />
memory.<br />
Unsent messages<br />
Messages that have been saved to be sent later or messages<br />
that fail during transmission are stored in Unsent<br />
messages.<br />
1. To access Unsent messages select Menu > Messages<br />
> SMS > Unsent messages > OK.<br />
2. Select Option to display the delete options.<br />
3. Press the Menu key to view the message.<br />
4. Press the Menu key > Option > Send now… to send<br />
the message.<br />
You can also Forward an unsent message.<br />
Sent messages<br />
Transmitted messages are stored in Sent messages folder.<br />
1. To access sent messages select Menu > Messages ><br />
SMS > Sent messages > OK.<br />
2. Select Option to display the delete options.<br />
3. Press the Menu key to view the message.<br />
4. Press the Menu key > Option > Send now… to<br />
resend the message.<br />
You can also Forward a Sent message.<br />
Predefined SMS messages<br />
You can customize and store up to a maximum of 10 SMS<br />
messages in the SIM card memory. On the other hand the<br />
phone book memory can store a larger number of predefined<br />
SMS messages.<br />
1. Select Menu > Messages > SMS > User define<br />
SMS > OK.<br />
2. Enter a message and select Save.<br />
View SMS memory<br />
1. To view the memory capacity for SMS messages select<br />
Menu > Messages > SMS > Capacity > OK.<br />
SMS broadcasts<br />
You can receive a variety of text messages, such as news<br />
and traffic information, broadcast by your network. These<br />
messages are provided to all users in a certain cell. If you<br />
have subscribed to this service, your network will provide<br />
you the available channel numbers.<br />
Receive SMS broadcasts<br />
To receive or stop broadcast messages, you can choose to<br />
enable or disable Cell Broadcast (CB) service.<br />
1. To receive broadcast messages select Menu > Messages<br />
> SMS > scroll to Broadcast SMS > Reception<br />
> On > OK. Choose Off to stop this service.<br />
55
New cell broadcast messages are directly shown on<br />
your standby display, until you press any key. Broadcast<br />
SMS messages cannot be stored in your phone or<br />
SIM card, and thus cannot be viewed again.<br />
<br />
If<br />
the Broadcast SMS option is enabled, the<br />
standby time in your phone will be reduced.<br />
Channel lists<br />
You can add a new topic or channel number, which is a new<br />
broadcast type, into your Topic list. A topic code number<br />
can consist of 3 digits only.<br />
1. To add a topic select Menu > Messages > SMS ><br />
scroll to Broadcast SMS > Topics > OK > Add ><br />
OK.<br />
2. Enter the code (a maximum of three characters) provided<br />
by the service provider and select OK.<br />
3. To change an existing topic code, on the Topics screen,<br />
choose a topic code and select Option > Change ><br />
OK. Change the code number and select OK.<br />
4. To delete an existing topic, on the Topics screen,<br />
choose a topic code and select Option > Delete ><br />
OK.<br />
Voice mail<br />
Your incoming calls can be forwarded to your voice mail.<br />
Callers will be prompted to leave a message for you. This<br />
feature requires you to enter a voice mail number which is<br />
provided by your service provider.<br />
1. To set voice mail number select Menu > Messages ><br />
Voice mail > Voice mail number > OK. Enter the<br />
number provided by your service provider. This number<br />
should be used when you want to listen to your<br />
stored voice mail messages.<br />
2. When you need to listen to your incoming voice mail<br />
messages, select Menu > Messages > Voice mail ><br />
Call voice mail > OK. Enter your voice mail number<br />
and select Call. You are connected to your mailbox<br />
where you can hear the stored voice mails messages.<br />
<br />
For<br />
quick access to Voice mail press and<br />
hold 1.<br />
Messages<br />
56
Tools<br />
Tools<br />
Tools are used to organize and manage your daily tasks systematically.<br />
Organizer<br />
The Organizer has a calendar to enable you to set appointments,<br />
create appropriate notes, schedule reminders when<br />
required, set alerts and repeat specific settings.<br />
Tasks can be viewed on a daily, weekly and monthly basis.<br />
1. To access the Organizer and its associated functions,<br />
select Menu > Tools > Organizer > OK. The calendar<br />
for the current month is displayed. Use the navigation<br />
keys to navigate across months.<br />
2. Select Option to view the list of options available.<br />
• New: create new entries under meeting or memo categories.<br />
You can set the date, time, duration, reminder<br />
and so on for a meeting/memo.<br />
• Check (this month): list all tasks for the current<br />
month.<br />
• Check all: display the entire list of tasks.<br />
• Delete all: remove the entire list of tasks from the<br />
memory.<br />
• Delete passed: remove all elapsed entries.<br />
• Capacity: display the memory capacity and the memory<br />
percentage used, in proportion to what is available.<br />
A maximum of 30 entries can be stored.<br />
• Weekly: display the current week’s status.<br />
Create new event entries<br />
You can create two types of event entries.<br />
• Meeting: set the date and time for a meeting.<br />
• Choose a date on the calendar and select Option<br />
> New > Meeting > OK or alternatively, choose<br />
a date and press the Menu key > select Option<br />
> New > Meeting > OK.<br />
• Set the Date, Start and End time of the meeting.<br />
• Specify a note related to the meeting, for example,<br />
enter the name of the person you wish to<br />
meet or talk to.<br />
• Set the Alert type, for example, 10 min. before.<br />
• Set the Repeat Method or frequency of the meeting<br />
if required, for example, Weekly.<br />
• Memo: multiple memo entries can be set for a day.<br />
• Choose a date on the calendar and select Option<br />
> New > Memo > OK.<br />
• Select the Date and Time of creating the memo.<br />
The other options are similar to that of creating meeting<br />
entries.<br />
<br />
If<br />
No reminder is selected as the Alert type,<br />
you will not be prompted, but the entry<br />
remains in the memory until it is deleted.<br />
57
Edit organizer entries<br />
1. Select Menu > Tools > Organizer.<br />
2. Scroll to a date and press the Menu key to display the<br />
list of entries.<br />
3. Choose an entry (either meeting or memo) and select<br />
Option > Change.<br />
Delete entries<br />
You can delete one entry at a time or all entries simultaneously.<br />
1. To delete entries collectively, select Menu > Tools ><br />
Organizer> Option > Delete all.<br />
2. To delete entries separately, select Menu > Tools ><br />
Organizer. Scroll to a date and press the Menu key.<br />
Scroll to an entry and select Option > Delete.<br />
Alarm clock<br />
Select Menu > Tools > Alarm clock > OK.<br />
You can set three alarms on this phone.<br />
1. To set an alarm, on the Alarm settings screen, select<br />
On to select an alarm item.<br />
2. Enter the alarm time and specify the frequency of the<br />
alarm, for example, Everyday and select OK.<br />
3. To set the alarm tone, scroll to Ringer settings and<br />
select On > Standard tunes or Own melodies ><br />
OK.<br />
4. To disable the alarm, on the Alarm settings screen,<br />
scroll to an alarm item and select > Off.<br />
Calculator<br />
The calculator in this phone is designed to perform simple<br />
mathematical calculations.<br />
1. Select Menu > Tools > Calculator > OK.<br />
2. To enter the numbers, press the numeric keys<br />
3. To use mathematical operators use the navigation<br />
keys.<br />
Navigation key<br />
Up<br />
Down<br />
Left<br />
Right<br />
Operator<br />
* (Multiply)<br />
/ (Divide)<br />
+ (Add)<br />
- (Subtract)<br />
4. After performing the calculations, press the Menu key<br />
for the final result.<br />
5. Select Option to display further options.<br />
Options<br />
Explanation<br />
CE - Clear<br />
Enables you to clear and reenter<br />
a number.<br />
MC - Memory Clear Clears number from the<br />
memory.<br />
MR - Memory Read Reads the number from the<br />
memory.<br />
MS - Memory Store Stores the entered number<br />
in the memory.<br />
M+ - Memory Plus Adds a number to the number<br />
in the memory and<br />
stores the result in the<br />
memory.<br />
Tools<br />
58
Tools<br />
Options<br />
Exit<br />
<br />
This<br />
Audio recorder<br />
Select Menu > Tools > Audio recorder > OK.<br />
1. To record an audio file, on the Audio recorder screen<br />
select Record.<br />
2. Select Pause to temporarily stop the recording.<br />
3. Select Retrieve to continue with the recording.<br />
4. Select Stop to end the recording.<br />
5. Select Exit to revert to the previous menu.<br />
The recorded audio file is stored under My files. For more<br />
information refer “Managing your files” on page 62<br />
Audio playback<br />
Explanation<br />
Quit the menu.<br />
phone accepts numbers up to a maximum<br />
of 10 digits per entry.<br />
1. To access a recorded audio file, select Menu > My<br />
files > Sounds > Own melodies > OK.<br />
Stopwatch<br />
1. Select Menu > Tools > Stopwatch> OK.<br />
2. To trigger the timer, on the Stopwatch screen, select<br />
Start. The counter begins running.<br />
3. To stop the counter select Pause. To continue select<br />
Go.<br />
4. To reset the counter select Clear.<br />
5. To record a reading, press the Menu key while the<br />
counter is running. A maximum of six readings are displayed.<br />
6. Select Exit to revert to Tools.<br />
Count-down timer<br />
This function is helpful when you need to be reminded of a<br />
specific event or you want to time a particular task.<br />
1. Select Menu > Tools > Count-down timer > On ><br />
OK.<br />
2. Specify the time when you need to be reminded in<br />
terms of hours and minutes. The maximum time you<br />
can set is 23 hours and 59 minutes (23:59) and the<br />
minimum is one minute (00:01).<br />
3. When the count-down is completed, the alarm rings.<br />
Universal time<br />
You can view the time of major cities in different time zones<br />
using this function and set the time on your phone to a<br />
selected time zone. You also have the option to use Daylight<br />
Saving Time (DST).<br />
The local time is displayed in the lower half of the screen<br />
while the universal time is displayed in the upper half of the<br />
screen. Use the navigation keys to peruse various time<br />
zones.<br />
59
1. To view the universal time, select Menu > Tools ><br />
Universal time > OK.<br />
2. To set your local time, navigate to a specific Universal<br />
time and select Option > Set as local > OK. For<br />
example, navigate to San Francisco and set it as the<br />
local time.<br />
3. To set Daylight Saving Time, select Option > Daylight<br />
saving option > On > OK. The symbol of the<br />
sun is displayed beside the name of the city signifying<br />
DST option is on.<br />
4. To view the time at different cities on different longitudes<br />
and latitudes, use the navigation keys. The time<br />
corresponding to the city is displayed beside the name<br />
of the city.<br />
Tools<br />
60
Personalizing your phone<br />
Personalizing your phone<br />
You can customize ring tones, alerts and alarms on your<br />
phone for different environments.<br />
1. Select Menu > Quick settings.<br />
There are four environment profiles present in this phone.<br />
Normal is the default profile, while the other profiles are<br />
Silent, Meeting, Outdoors and Use in car.<br />
<br />
You can only change the parameters for the<br />
Normal mode.<br />
• Normal: This is the default profile wherein all sounds<br />
are enabled. Parameters in this mode can be changed.<br />
You can change the name of this profile, select Menu<br />
> Quick settings > Normal > Change name.<br />
To personalize the ring tunes in your phone, select<br />
Normal > Personalize > OK. You can choose Ringtones<br />
or the Vibrate mode for various alerts.<br />
Sound settings: You can set Ringtones or the Vibrate<br />
mode for alerts such as: Call alert, PTT alert, Alarm<br />
alert, Organizer alert, SMS alert.<br />
You can set the ringer volume for GSM calls, PTT calls,<br />
alarms and alerts.<br />
For other settings such as Key tone, Connect alert and<br />
Battery alert, select the appropriate checkbox using<br />
the Menu key and activate the function.<br />
• Silent: mutes all sounds in the phone. To disable all<br />
sounds, select Silent > On. Alternatively, press and<br />
hold the # key when the phone is in standby mode.<br />
Select View to see the list of alerts that will be disabled.<br />
• Meeting: enables the Vibrate mode for all alerts. To<br />
activate this mode, select Meeting > On. Select View<br />
to see the list of alerts that are available in this mode.<br />
• Outdoors: enables the ringtone and vibrate mode<br />
simultaneously for all alerts. To activate this mode,<br />
select Outdoors > On. Select View to see the list of<br />
alerts that are available in this mode.<br />
• Use in car: enables all sounds and is almost similar to<br />
the Normal settings except that the Connect Alert is<br />
disabled. To activate this mode, select Use in car ><br />
On. Select View to see the list of alerts that are<br />
enabled.<br />
Themes<br />
You can choose from the existing color themes available on<br />
your phone. For more information refer “Phone settings” on<br />
page 26.<br />
61
Managing your files<br />
Using the My files menu, you can store and manage audio<br />
files and pictures. You can Preview the files, view their<br />
details and Delete files. The maximum storage capacity is<br />
9000kb.<br />
1. To view your files select Menu > My files.<br />
2. Scroll to a category and select either Pictures or<br />
Sounds and select OK.<br />
3. For pictures select Embedded pictures or Own pictures,<br />
that you would have downloaded via WAP. For sounds<br />
select Standard tunes or Own melodies that you would<br />
have downloaded or recorded. For more information<br />
refer, “Audio recorder” on page 59.<br />
4. Scroll to file from the displayed list and select Option<br />
to display further options.<br />
For pictures, you can preview a picture, set it as a wallpaper<br />
and see more details about the picture.<br />
For sounds, you can set a particular sound as your ringer<br />
tone and see the details of the file.<br />
Personalizing your phone<br />
62
WAP<br />
WAP<br />
This mobile phone has an internal WAP browser that allows<br />
you to browse contents of various WAP websites on the<br />
Internet.<br />
This facility is made available only if you subscribe to a data<br />
service from your network operator for Internet access. You<br />
need to consult your local operator for more details.<br />
Configure the WAP when you use it for the first time. Some<br />
WAP parameters on your phone have already been set to a<br />
specific network operator. If you utilize the services of the<br />
same network operator you can directly operate the WAP<br />
service with the available configuration. If not, you need to<br />
reconfigure the settings.<br />
<br />
If<br />
you are unable to view WAP web pages<br />
because your network operator changed its<br />
WAP parameters or the Internet Content<br />
Provider (ICP) changed its WAP web<br />
address or contents, please consult your<br />
network operator and ICP for updates.<br />
1. Select Menu > WAP > OK.<br />
The following sub menu is displayed:<br />
• Bookmarks: Use this menu to add and manage your<br />
bookmarks and go directly to the corresponding web<br />
address. You can also edit or delete bookmarks via this<br />
menu<br />
• Resume: You can view web pages from where you<br />
last left off. Access the web pages you visited last via<br />
this menu. Select the Back and Forward options to<br />
move between web pages.<br />
• Enter address: You can enter a web address directly<br />
and browse using this menu.<br />
• Settings: The following configurations can be set via<br />
this menu:<br />
Select profile: In this menu, existing profiles are<br />
listed on the display. Scroll to the required profile and<br />
select OK.<br />
Edit homepage: You can edit the web address of<br />
your homepage. Specify a Title and the Web Address.<br />
Connection: Specify the connection sustains for WAP.<br />
Select a Network account from the list, enter the Proxy<br />
address of the proxy server, select the Connection type<br />
and enter the Port of a proxy server.<br />
Browser options: If web pages contain pictures, you<br />
can choose whether to show these pictures in this<br />
menu by selecting the option Show images. If you<br />
choose the Enable refresh option in this menu the web<br />
pages get refreshed.<br />
Rename profile: Specify a name for the selected profile<br />
in this menu. The maximum length of the name is<br />
40 characters.<br />
63
Cache: This is a storage mechanism provided in the<br />
phone. You can choose to enable the cache mode or<br />
clear the cache memory.<br />
Cookies: Cookies are used when the web browser<br />
requests for a page from the web server. You can<br />
Enable or Clear cookies via this menu.<br />
WAP<br />
• Push Inbox: WAP Push mechanism is used by operators<br />
and certain web portals to send data such as configuration,<br />
ring tones and wallpapers. You can<br />
configure support for this feature and view the<br />
received messages in this menu.<br />
64
End user licence agreement<br />
End user licence agreement<br />
This wireless device, (the "Device") contains software<br />
owned by <strong>Sonim</strong> <strong>Technologies</strong>, Inc. ("<strong>Sonim</strong>") and its third<br />
party suppliers and licensors (collectively, the "Software").<br />
As user of this Device, <strong>Sonim</strong> grants you a non-exclusive,<br />
non-transferable, non-assignable license to use the Software<br />
solely in conjunction with the Device on which it is<br />
installed and/or delivered with. Nothing herein shall be construed<br />
as a sale of the Software to a user of this Device.<br />
You shall not reproduce, modify, distribute, reverse engineer,<br />
decompile, otherwise alter or use any other means to<br />
discover the source code of the Software or any component<br />
of the Software. For avoidance of doubt, you are at all times<br />
entitled to transfer all rights and obligations to the Software<br />
to a third party, solely together with the Device with which<br />
you received the Software, provided always that such third<br />
party agrees in writing to be bound by these rules.<br />
You are granted this license for a term of the useful life of<br />
this Device. You can terminate this license by transferring all<br />
your rights to the Device on which you have received the<br />
Software to a third party in writing. If you fail to comply<br />
with any of the terms and conditions set out in this license,<br />
it will terminate with immediate effect<br />
<strong>Sonim</strong> and its third party suppliers and licensors are the sole<br />
and exclusive owner of and retain all rights, title and interest<br />
in and to the Software. <strong>Sonim</strong>, and, to the extent that<br />
the Software contains material or code of a third party, such<br />
third party, shall be entitled third party beneficiaries of<br />
these terms. The validity, construction and performance of<br />
this license shall be governed by the laws of Delaware,<br />
United States<br />
Limited warranty<br />
<strong>Sonim</strong> provides this Limited Warranty for your mobile phone<br />
and original accessory delivered with your mobile phone<br />
(hereinafter referred to as "Product"). Should your Product<br />
need warranty service, please return it to the dealer from<br />
whom it was purchased, or contact your local <strong>Sonim</strong> Call<br />
Center (national rates may apply) or visit www.sonimtech.com<br />
to get further information.<br />
Our warranty<br />
Subject to the conditions of this Limited Warranty, <strong>Sonim</strong><br />
warrants this Product to be free from major defects in<br />
design, material and workmanship at the time of its original<br />
purchase by a consumer, and for a subsequent period of<br />
two (2) years.<br />
What we will do<br />
If, during the warranty period, this Product fails to operate<br />
under normal use and service, due to defects in design,<br />
materials or workmanship, <strong>Sonim</strong>'s authorized distributors<br />
or service partners, in the country/region where you purchased<br />
the Product, will, at their option, either repair or<br />
replace the Product in accordance with the terms and conditions<br />
stipulated herein. <strong>Sonim</strong> and its service partners<br />
reserve the right to charge a handling fee if a returned<br />
65
Product is found not to be under warranty according to the<br />
conditions below<br />
Please note that some of your personal settings, downloads<br />
or other information may be lost when your <strong>Sonim</strong> Product<br />
is repaired or replaced. <strong>Sonim</strong> does not take any responsibility<br />
for any lost information of any kind and will not reimburse<br />
you for any such loss. You should always make<br />
backup copies of all the information stored on your <strong>Sonim</strong><br />
Product such as downloads, calendar and contacts before<br />
handing in your <strong>Sonim</strong> Product for repair or replacement.<br />
Conditions<br />
1 The warranty is valid only if the original proof of purchase<br />
issued to the original purchaser by a <strong>Sonim</strong><br />
authorized dealer, specifying the date of purchase and<br />
serial number for this Product, is presented with the<br />
Product to be repaired or replaced. <strong>Sonim</strong> reserves the<br />
right to refuse warranty service if this information has<br />
been removed or changed after the original purchase<br />
of the Product from the dealer.<br />
2. If <strong>Sonim</strong> repairs or replaces the Product, the repaired<br />
or replaced Product shall be warranted for the remaining<br />
time of the original warranty period or for ninety<br />
(90) days from the date of repair, whichever is longer.<br />
Repair or replacement may involve the use of functionally<br />
equivalent reconditioned units. Replaced parts or<br />
components will become the property of <strong>Sonim</strong>.<br />
3. This warranty does not cover any failure of the Product<br />
due to normal wear and tear, or due to misuse, including<br />
but not limited to use in other than the normal and<br />
customary manner, in accordance with the <strong>Sonim</strong><br />
instructions for use and maintenance of the Product.<br />
Nor does this warranty cover any failure of the Product<br />
due to accident, software or hardware modification or<br />
adjustment, acts of God or damage resulting from liquid<br />
interacting with the product beyond what is<br />
described as acceptable in the user guide for the product.<br />
A rechargeable battery can be charged and discharged<br />
hundreds of times. However, it will eventually<br />
wear out - this is not a defect. When the talk-time or<br />
standby time is noticeably shorter, it is time to replace<br />
your battery. <strong>Sonim</strong> recommends that you use only<br />
batteries and chargers approved by <strong>Sonim</strong>. Minor variations<br />
in display brightness and color may occur<br />
between phones. There may be tiny bright or dark<br />
dots on the display. These are called defective pixels<br />
and occur when individual dots have malfunctioned<br />
and can not be adjusted. Several defective pixels are<br />
deemed acceptable.<br />
4. This warranty does not cover Product failures caused<br />
by installations, modifications, or repair or opening of<br />
the Product performed by a non-<strong>Sonim</strong> authorized person.<br />
Tampering with any of the seals on the Product<br />
will void the warranty.<br />
5. The warranty does not cover Product failures which<br />
have been caused by use of accessories or other<br />
peripheral devices which are not <strong>Sonim</strong> branded original<br />
accessories intended for use with the Product.<br />
6. THERE ARE NO EXPRESS WARRANTIES, WHETHER<br />
WRITTEN OR ORAL, OTHER THAN THIS PRINTED LIM-<br />
ITED WARRANTY. ALL IMPLIED WARRANTIES,<br />
End user licence agreement<br />
66
End user licence agreement<br />
INCLUDING WITHOUT LIMITATION THE IMPLIED<br />
WARRANTIES OF MERCHANTABILITY OR FITNESS<br />
FOR A PARTICULAR PURPOSE, ARE LIMITED TO THE<br />
DURATION OF THIS LIMITED WARRANTY. IN NO<br />
EVENT SHALL SONIM OR ITS LICENSORS BE LIABLE<br />
FOR INCIDENTAL OR CONSEQUENTIAL DAMAGES OF<br />
ANY NATURE WHATSOEVER, INCLUDING BUT NOT<br />
LIMITED TO LOST PROFITS OR COMMERCIAL LOSS;<br />
TO THE FULL EXTENT THOSE DAMAGES CAN BE DIS-<br />
CLAIMED BY LAW.<br />
67
Index<br />
A<br />
adhoc invitation 20<br />
alpha-numeric 10<br />
answered calls list 47, 48<br />
import a group 47<br />
audio<br />
own melodies 26, 59, 62<br />
playback 59<br />
PTT settings 40<br />
recorder 59<br />
standard tunes 26, 62<br />
auto power on 26<br />
B<br />
battery<br />
alert 8<br />
bars 8<br />
charge 7<br />
charge icon 8<br />
charge indicator 10<br />
cover 9<br />
information 7<br />
insert 7<br />
C<br />
call accept/send key 10<br />
call barring<br />
cancel 36<br />
status 36<br />
call information<br />
accum. charges 38<br />
call meters 38<br />
cost 38<br />
last call 38<br />
last GPRS call 38<br />
channel lists 56<br />
chat group<br />
add contacts 45<br />
add members 45<br />
create 44<br />
delete group 46<br />
delete members 45<br />
edit 45<br />
rename 45<br />
send a group ID 45<br />
view 45<br />
contact<br />
turn on DnD 42<br />
contacts<br />
add via list 19, 44<br />
add via number 19, 44<br />
block 42<br />
copy 19, 41<br />
create 19, 41<br />
delete 43<br />
modify 42<br />
sorting 16<br />
turn on DnD 46<br />
D<br />
Dial in a PTT call 20<br />
F<br />
filter calls 37<br />
G<br />
GPRS 18, 36, 38<br />
GSM<br />
dial 34<br />
IP dial 34<br />
IP Handsfree 34<br />
send phone number 34<br />
I<br />
IPA 51<br />
K<br />
keypad<br />
accept/send 12<br />
end call 12<br />
function keys 10<br />
LSK/RSK 12<br />
navigation keys 13<br />
numeric keys 10, 13<br />
power on/off 12<br />
<strong>XP1</strong> 10<br />
Index<br />
68
Index<br />
L<br />
left selection key 10<br />
M<br />
managing your files 62<br />
meeting mode 61<br />
menu<br />
call list 33, 46, 48<br />
key 9, 11, 12, 21, 42<br />
main 24<br />
messages 52<br />
my files 62<br />
options 2<br />
Phonebk 33<br />
PTT menu 15<br />
Push-to-Talk 40<br />
quick settings 61<br />
selection keys 15<br />
tools 57<br />
WAP 63, 65<br />
menu key 10<br />
message settings<br />
memory 52<br />
reply path 52<br />
service number 52<br />
signature 52<br />
status report 52<br />
validity period 52<br />
messages<br />
conventional text 52<br />
delete 54<br />
forward 54<br />
inbox 54<br />
predictive text 53<br />
reply 54<br />
save as user defined 54<br />
send & save 54<br />
sent 55<br />
settings 52<br />
text input mode 52<br />
unsent 55<br />
via phone book 54<br />
write 53<br />
missed calls list 47<br />
import a group 47<br />
IPA 51<br />
my files 62<br />
N<br />
navigation arrow keys 10<br />
navigation arrows 25<br />
network<br />
account 28<br />
GPRS 28<br />
preferred 27<br />
register again 28<br />
O<br />
OMA 1<br />
organizer<br />
capacity 57<br />
check 57<br />
create new event 57<br />
delete 57, 58<br />
edit 58<br />
meeting 57<br />
memo 57<br />
new 57<br />
past 57<br />
weekly 57<br />
outdoors mode 61<br />
outgoing calls<br />
add to contacts 46<br />
add to reject list 46<br />
delete 46<br />
PTT invitation 46<br />
send PTT invite 46<br />
outgoing calls list 11, 22, 34<br />
P<br />
personalize 61<br />
backlight 27<br />
color theme 27<br />
contrast adjust 27<br />
idle screen 26<br />
languages 27<br />
ringer tone 62<br />
wallpaper 27, 62<br />
welcome text 26<br />
69
phone book<br />
add 29<br />
copy 31<br />
delete 30<br />
dial 33<br />
edit 30<br />
memory 31<br />
move 31<br />
own info 31<br />
send 30<br />
phone calls<br />
call barring 36<br />
call filter 37<br />
call information 38<br />
call waiting 36<br />
dial 33<br />
forward 35<br />
GSM 36<br />
international number 33<br />
IP service 32<br />
receive 35<br />
speed dial 34<br />
phone settings<br />
auto answer 37<br />
auto redial 36<br />
call timer 38<br />
minute reminder 38<br />
send ID 38<br />
PoC 1, 40<br />
power on/off/end call 10<br />
presence 18<br />
press 1, 11<br />
press and hold 2<br />
PTT<br />
call log 22, 46, 47<br />
Close PTT 16<br />
contacts 34<br />
copy 23<br />
display icons 18<br />
function keys 15<br />
groups 19<br />
Push-to-Talk 40<br />
quick start 15<br />
PTT calls<br />
ad hoc 21<br />
block 22<br />
click to talk 50<br />
group 21<br />
handsfree 50<br />
invitation 21, 34, 42<br />
move to background 20, 51<br />
one-to-one 20<br />
rejoin group session 47<br />
speaker volume 17<br />
PTT groups<br />
add contacts using the telephone<br />
number 44<br />
add members via the PTT contact<br />
list 44<br />
create 43<br />
delete group 44<br />
delete group members 44<br />
edit group information 43<br />
import 43<br />
rename 43<br />
PTT settings<br />
answer 16, 40<br />
audio 17, 40<br />
connection settings 40<br />
general 16, 40<br />
hide my ID 17, 40<br />
reject list 17, 41<br />
report reminder 41<br />
show me online 40<br />
sorting 40<br />
turn on DnD 18<br />
R<br />
receive SMS broadcasts 55<br />
reject list 34<br />
rejoin a group session 47<br />
report reminder 17, 41<br />
right selection key 10<br />
Right Selection Key (RSK) 10<br />
S<br />
safety guidelines 3<br />
select 1<br />
service provider 1<br />
settings<br />
call filter 37<br />
Index<br />
70
Index<br />
date and time 11<br />
network 27<br />
phone 26<br />
ringer 26<br />
security 11<br />
silent mode 11, 61<br />
SIM card<br />
insert 8<br />
operations 9<br />
remove 9<br />
SMS<br />
memory 55<br />
predefined 55<br />
send 34<br />
SMS broadcasts 55<br />
sound settings 61<br />
standby mode duration 10<br />
T<br />
themes 61<br />
tools<br />
alarm clock 58<br />
audio recorder 59<br />
calculator 58<br />
count-down timer 59<br />
organizer 57<br />
stopwatch 59<br />
universal time 59<br />
U<br />
universal time<br />
daylight saving time 59<br />
local 60<br />
use in car mode 61<br />
V<br />
voice mail 56<br />
W<br />
WAP<br />
address 63<br />
bookmarks 63<br />
browser options 63<br />
cache 64<br />
connection 63<br />
cookies 64<br />
homepage 63<br />
profile 63<br />
push inbox 64<br />
resume 63<br />
settings 63<br />
X<br />
<strong>XP1</strong><br />
auto keypad lock 11<br />
auto power 26<br />
keypad 9<br />
operation 12<br />
phone 1, 24<br />
shortcuts 27<br />
speaker setting 17<br />
standby mode 10<br />
71