RMC-140 Manual - Datavideo
RMC-140 Manual - Datavideo
RMC-140 Manual - Datavideo

You also want an ePaper? Increase the reach of your titles
YUMPU automatically turns print PDFs into web optimized ePapers that Google loves.
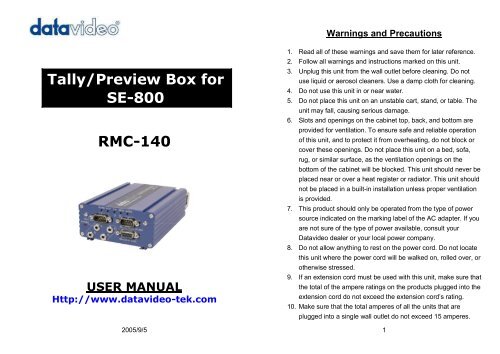
Warnings and Precautions<br />
Ì¿´´§ñЮ»ª·»© Þ±¨ º±®<br />
ÍÛóèðð<br />
ÎÓÝóïìð<br />
Û®®±®ÿ<br />
ËÍÛÎ ÓßÒËßÔ<br />
ج¬°æññ©©©ò¼¿¬¿ª·¼»±ó¬»µò½±³<br />
2005/9/5<br />
1. Read all of these warnings and save them for later reference.<br />
2. Follow all warnings and instructions marked on this unit.<br />
3. Unplug this unit from the wall outlet before cleaning. Do not<br />
use liquid or aerosol cleaners. Use a damp cloth for cleaning.<br />
4. Do not use this unit in or near water.<br />
5. Do not place this unit on an unstable cart, stand, or table. The<br />
unit may fall, causing serious damage.<br />
6. Slots and openings on the cabinet top, back, and bottom are<br />
provided for ventilation. To ensure safe and reliable operation<br />
of this unit, and to protect it from overheating, do not block or<br />
cover these openings. Do not place this unit on a bed, sofa,<br />
rug, or similar surface, as the ventilation openings on the<br />
bottom of the cabinet will be blocked. This unit should never be<br />
placed near or over a heat register or radiator. This unit should<br />
not be placed in a built-in installation unless proper ventilation<br />
is provided.<br />
7. This product should only be operated from the type of power<br />
source indicated on the marking label of the AC adapter. If you<br />
are not sure of the type of power available, consult your<br />
<strong>Datavideo</strong> dealer or your local power company.<br />
8. Do not allow anything to rest on the power cord. Do not locate<br />
this unit where the power cord will be walked on, rolled over, or<br />
otherwise stressed.<br />
9. If an extension cord must be used with this unit, make sure that<br />
the total of the ampere ratings on the products plugged into the<br />
extension cord do not exceed the extension cords rating.<br />
10. Make sure that the total amperes of all the units that are<br />
plugged into a single wall outlet do not exceed 15 amperes.<br />
1
11. Never push objects of any kind into this unit through the<br />
cabinet ventilation slots, as they may touch dangerous voltage<br />
points or short out parts that could result in risk of fire or<br />
electric shock. Never spill liquid of any kind onto or into this<br />
unit.<br />
12. Except as specifically explained elsewhere in this manual, do<br />
not attempt to service this product yourself. Opening or<br />
removing covers that are marked Do Not Remove may<br />
expose you to dangerous voltage points or other risks, and will<br />
void your warranty. Refer all service issues to qualified service<br />
personnel.<br />
13. Unplug this product from the wall outlet and refer to qualified<br />
service personnel under the following conditions:<br />
a. When the power cord is damaged or frayed;<br />
b. When liquid has spilled into the unit;<br />
c. When the product has been exposed to rain or water;<br />
d. When the product does not operate normally under<br />
normal operating conditions. Adjust only those controls<br />
that are covered by the operating instructions in this<br />
manual; improper adjustment of other controls may<br />
result in damage to the unit and may often require<br />
extensive work by a qualified technician to restore the<br />
unit to normal operation;<br />
e. When the product has been dropped or the cabinet<br />
has been damaged;<br />
f. When the product exhibits a distinct change in<br />
performance, indicating a need for service.<br />
Table of Contents<br />
WHATS IN THE BOX? .................................................................4<br />
INTRODUCTION ...........................................................................5<br />
FEATURE ......................................................................................6<br />
INTERFACE ..................................................................................7<br />
INSTALLATION .............................................................................8<br />
Connect with SE-800 monitor outòòòòòòòòòòòòòòòòòòòòòòòòòòòòòòòòòòòòòòòòòòòòòòòòòòòç<br />
Connect thru TLM-404 òòòòòòòòòòòòòòòòòòòòòòòòòòòòòòòòòòòòòòòòòòòòòòòòòòòòòòòòòòòòòòòòòòòòòç<br />
Connect RS-232 from SE-800 òòòòòòòòòòòòòòòòòòòòòòòòòòòòòòòòòòòòòòòòòòòòòòòòòòòòòòòòç<br />
DISPLAY MODES .......................................................................10<br />
SET UP MENU ............................................................................11<br />
Color processor setting òòòòòòòòòòòòòòòòòòòòòòòòòòòòòòòòòòòòòòòòòòòòòòòòòòòòòòòòòòòòòòòòòòïï<br />
Video output settingòòòòòòòòòòòòòòòòòòòòòòòòòòòòòòòòòòòòòòòòòòòòòòòòòòòòòòòòòòòòòòòòòòòòòòòòïí<br />
SAMPLE CONNECTION DIAGRAMS........................................14<br />
<strong>RMC</strong>-<strong>140</strong> and SE-800 application òòòòòòòòòòòòòòòòòòòòòòòòòòòòòòòòòòòòòòòòòòòòòòòòïì<br />
SPECIFICATION .........................................................................15<br />
PRODUCT REGISTRATION.......................................................16<br />
SERVICE & SUPPORT ...............................................................17<br />
2<br />
3
Whats in the box?<br />
1. <strong>RMC</strong>-<strong>140</strong><br />
2. User <strong>Manual</strong><br />
3. RS232 cable x 1<br />
4. BNC 1.2m cable * 5<br />
5. AC/DC Power Adapter<br />
Introduction<br />
Thank you for purchasing the <strong>RMC</strong>-<strong>140</strong>. This is an accessory<br />
for the SE-800, and it can also be used for security camera<br />
monitoring. In order to bring out the maximum performance of<br />
this software, we recommend that you spend some time<br />
reading this manual carefully.<br />
Product Overview<br />
The <strong>RMC</strong>-<strong>140</strong> is especially designed for control by the SE 800,<br />
via RS-232 port. In general, you can only select the main<br />
output from one of four different video sources in the SE-800<br />
by looking at the TLM-404 (4 x 4 LCD monitor) or other<br />
similar products. You might not know which camera source<br />
you want to switch to. With the <strong>RMC</strong>-<strong>140</strong>, everything becomes<br />
easier and faster. You will be able to see next source preview<br />
and next transition effect indicator showing on the same<br />
monitor.<br />
The <strong>RMC</strong>-<strong>140</strong> also has an extra feature, you can select 4<br />
different display modes, Quad, POP, PIP, or Next source<br />
screen, plus tally light indicators on the same monitor.<br />
4<br />
5
Features<br />
Interface<br />
Next source preview<br />
Combine 4 different video sources into one video output<br />
(4 display modes, Quad, POP, PIP, and full screen.)<br />
Next transition effect indicator<br />
Tally light indicator<br />
1<br />
4<br />
2<br />
3<br />
1. 4 composite input<br />
2. Monitor output (Quad, POP, PIP & Next selectable)<br />
3. Full screen next source preview output, Effect and<br />
Tally light indicators<br />
4. Power connector (DV12V)<br />
9<br />
8<br />
6<br />
5<br />
7<br />
5. Tally light signal out (15pin & 3.5mm jack)<br />
6. RS-232 input from SE-800<br />
7. RS-232 by pass<br />
8. Menu<br />
9. Display mode selects (Quad, POP, PIP and Next)<br />
6<br />
7
Installation<br />
1. Connect four monitor outputs from SE-800,<br />
Or loop thru from TLM-404.<br />
Plug in the power adapter, and connect to the power.<br />
Now <strong>RMC</strong>-<strong>140</strong> is ready to use.<br />
8<br />
9
Display Modes<br />
The four display modes of the <strong>RMC</strong> <strong>140</strong> are:<br />
Next Source<br />
PIP<br />
SET UP Menu<br />
The <strong>RMC</strong> <strong>140</strong> has a simple Set<br />
Up Menu, which is navigated<br />
with the +, -, Up, Down and<br />
Menu buttons.<br />
To call up the menu press the<br />
menu button.<br />
Shows a full screen display of<br />
the cued up source.<br />
Quad<br />
Shows a full screen of the Live<br />
Source with a PIP of the cued<br />
up source.<br />
POP<br />
Within the menu there are Color Processor Settings for each input,<br />
and a Video Output Setting.<br />
Color Processor Settings. These settings do not affect the<br />
actual video channels on the mixer; they are only fine tune<br />
adjustments within the <strong>RMC</strong> <strong>140</strong>.<br />
Shows all four sources with<br />
Tally Indication.<br />
Shows the Live Source in the<br />
main window, plus the other<br />
three sources with Tally<br />
Indication.<br />
Use the Up or Down buttons to<br />
navigate the menu, and<br />
highlight the channel you<br />
require. (In this example<br />
Channel A)<br />
In all display modes the active effect in the SE 800 is shown across<br />
the bottom of the screen.<br />
10<br />
11
Video Output Settings<br />
Then press the menu button, to<br />
enter the settings menu<br />
The Video Output can be set to Same or Separate. Same will feed<br />
identical signals to both outputs, whereas Separate will feed<br />
whichever display mode you have selected to the Main Output (PIP,<br />
QUAD, POP, Next Source), and a full screen next source preview<br />
to the Next Source Output.<br />
Use the Up or Down buttons to<br />
navigate the menu, and<br />
highlight the channel you<br />
require. (In this example<br />
Channel A)<br />
Main Output This will always show the chosen<br />
display pattern i.e. PIP, POP, QUAD or Next<br />
Source.<br />
Next Source Output This can either give the<br />
same display pattern as the Main Output or a full<br />
screen next source preview.<br />
Then press the menu button, to<br />
enter the settings menu<br />
Use the Up and Down buttons<br />
to navigate the options, and<br />
the + and buttons to adjust<br />
the values (-99 - +99).<br />
To change from Same to<br />
Separate or vice versa,<br />
highlight Video Output and<br />
press the menu button to<br />
toggle from one to the other.<br />
Once set highlight Save and<br />
Exit, and press the menu<br />
button.<br />
Once the values are set<br />
highlight Save and Exit, and<br />
press the menu button.<br />
12<br />
13
Sample connection diagrams<br />
Example 1: <strong>RMC</strong>-<strong>140</strong> and SE-800 Application<br />
Specification<br />
Video Formats<br />
Analog Composite NTSC or PAL (NTSC and PAL are<br />
separate models)<br />
Video Inputs<br />
4 Composite<br />
Video Output<br />
1 Composite (Quad, POP, PIP, Next source preview)<br />
1 Composite (Full screen next source preview)<br />
RS-232 Data Control Port<br />
From SE-800- Connecting <strong>Datavideo</strong> SE-800 RS-232<br />
By pass- For other RS-232 remote control devices<br />
Tally Light Signal Out<br />
1 15pin<br />
4 3.5mm mini jack<br />
Video Bandwidth<br />
Composite 4.6 MHz<br />
DG, DP +/- 5%, 5 degrees<br />
Signal/Noise Ratio:<br />
Video > 50dB<br />
Dimensions W x D x H<br />
6.3" x 3.93" x 1.95"<br />
160mm x 100mm x 49.5mm<br />
Weight<br />
5.36 lb, 2.5 kg<br />
Power<br />
Input:<br />
12V<br />
14<br />
15
Product registration<br />
Go on line www.datavideo.info/product_reg.htm for product<br />
registration<br />
See the warranty card for warranty period<br />
Service and Support<br />
It is our goal to make your products ownership a satisfying experience. Our<br />
supporting staff is available to assist you in setting up and operating your<br />
system. Please refer to our web site www.datavideo-tek.com for answers to<br />
common questions, support requests or contact your local office below.<br />
<strong>Datavideo</strong> Corporation (USA)<br />
12300-U East Washington Blvd., Whittier, CA 90606 USA<br />
Tel: +1 562 696 2324 contactus@datavideo.us www.datavideo.us<br />
<strong>Datavideo</strong> Technologies Europe BV<br />
Californiedreef 263565 BL Utrecht, The Netherlands<br />
Tel: +31 30 261 9656 info@datavideo.nl www.datavideo.info<br />
<strong>Datavideo</strong> UK Limited<br />
Unit 2 Waterside Business Park, Hadfield, Glossop, Derbyshire SK131BE UK<br />
Tel: +44 1457 851000 sales@datavideo.co.uk www.datavideo.info<br />
<strong>Datavideo</strong> Technologies Co., Ltd.<br />
10F, 176 Jian-Yi Rd, Chung Ho City, Taipei Hsien, Taiwan 235<br />
Tel: +886 2 8227 2888 info@datavideo.com.tw<br />
www.datavideo.com.tw<br />
<strong>Datavideo</strong> Technologies China Co.<br />
2F-D, 2 Lane 777, West Guangzhong Rd, Zhabei District, Shanghai, China<br />
Tel: +86 21 5603 6599 service@datavideo.cn www.datavideo.cn<br />
<strong>Datavideo</strong> Technologies (S) PTE Ltd.<br />
No. 100, Lorong 23 Geylang, #01-03 DCentennial Bldg, Singapore 388398<br />
Tel: +65 6749 6866 info@datavideo.sg www.datavideo.sg<br />
16<br />
All the trademarks are the properties of their respective owners.<br />
<strong>Datavideo</strong> Technologies Co., Ltd. All rights reserved 2005.<br />
17<br />
P/N: 082060374E2