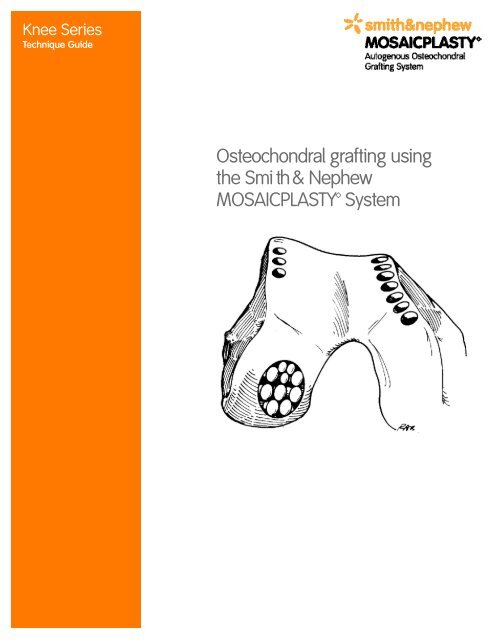
Osteochondral grafting using the Smith & Nephew MOSAICPLASTY ...
Osteochondral grafting using the Smith & Nephew MOSAICPLASTY ...
Osteochondral grafting using the Smith & Nephew MOSAICPLASTY ...

You also want an ePaper? Increase the reach of your titles
YUMPU automatically turns print PDFs into web optimized ePapers that Google loves.
Knee Series<br />
Technique Guide<br />
O s t e o c h o n d ral <strong>grafting</strong> <strong>using</strong><br />
<strong>the</strong> Smi th & N e p h e w<br />
M O S A I C P LA STY System
<strong>Osteochondral</strong> <strong>grafting</strong> <strong>using</strong> <strong>the</strong> <strong>Smith</strong><br />
& <strong>Nephew</strong> <strong>MOSAICPLASTY</strong> System<br />
As described by<br />
Prof. László Hangody, M.D., Ph.D., D.Sc.<br />
Uzsoki Hospital, Orthopaedic and Trauma Department,<br />
Budapest, Hungary<br />
Anthony Miniaci, M.D., FRCS<br />
Toronto Western Hospital, Toronto, Ontario, Canada<br />
Gary A. Z. Kish, M.D.<br />
Saint George Medical Center, Portsmouth, NH, USA<br />
Localized articular cartilage defects in weightbearing<br />
joints are common, yet difficult to treat.<br />
<strong>MOSAICPLASTY</strong> <strong>grafting</strong> represents a method of<br />
autogenous osteochondral transplantation for <strong>the</strong><br />
treatment of focal cartilaginous defects secondary<br />
to biomechanical chondropathy, traumatic chondral<br />
lesions and osteochondritis dissecans of <strong>the</strong> knee<br />
and ankle. The success rate is higher for patients<br />
under age 50 due to biochemical changes in <strong>the</strong><br />
synovial fluid that occur after age 50. (See<br />
Bibliography for references.)<br />
This procedure can generally be performed<br />
arthroscopically for lesions of <strong>the</strong> femoral condyles<br />
when <strong>the</strong> effect is close to <strong>the</strong> intercondylar notch<br />
and does not exceed 2 cm in diameter, and does<br />
not need more than 4–6 grafts. Larger defects may<br />
be treated as experience is gained with <strong>the</strong><br />
technique.
Overview<br />
The <strong>MOSAICPLASTY</strong> technique involves obtaining<br />
small osteochondral cylindrical grafts from <strong>the</strong> less<br />
weight-bearing periphery of <strong>the</strong> femur at <strong>the</strong><br />
patellofemoral joint, and transporting <strong>the</strong>m to <strong>the</strong><br />
prepared defect site. With a combination of 2.7 mm,<br />
3.5 mm, 4.5 mm, 6.5 mm, and 8.5 mm grafts, <strong>the</strong><br />
site is filled with 70–90% transplanted hyaline<br />
cartilage. Fibrocartilage “grouting” growing upward<br />
from <strong>the</strong> prepared cancellous bed will complete <strong>the</strong><br />
<strong>MOSAICPLASTY</strong> graft.<br />
Postoperatively, <strong>the</strong> patient should be kept nonweight-bearing<br />
with no partial loading for<br />
2–6 weeks and encouraged to reestablish full ROM.<br />
This time period and activity level will allow:<br />
The grafts to bond to surrounding bone and<br />
cartilage;<br />
The surface to remain congruent without<br />
subsidence of <strong>the</strong> press-fit transplanted<br />
osteochondral graft.<br />
Note: Chisels, drill guides, and trephines must be<br />
sharp. Replace drill guides and trephines when<br />
damaged or dull. For consistent results, use<br />
disposable chisels for each procedure. The cutting<br />
edge cannot be resharpened without compromising<br />
<strong>the</strong> self-centering geometry of <strong>the</strong> original tip.<br />
IMPORTANT: Placing <strong>the</strong> grafts perpendicular to <strong>the</strong><br />
surface, at <strong>the</strong> level of <strong>the</strong> original articular surface,<br />
is paramount to <strong>the</strong> success of <strong>the</strong> operation.<br />
Patient Consent<br />
For <strong>the</strong> most part, cartilaginous lesions are<br />
only defined at arthroscopy. If <strong>the</strong> preoperative<br />
differential diagnosis includes such a lesion, <strong>the</strong><br />
patient should be advised of <strong>the</strong> possibility of a<br />
<strong>MOSAICPLASTY</strong> graft. The patient should be<br />
prepared for an open procedure if <strong>the</strong> site is<br />
inaccessible due to location posterior or <strong>the</strong>re is<br />
inability to flex <strong>the</strong> knee sufficiently. This procedure<br />
can lead to an overnight stay and altered weightbearing<br />
status for several weeks.<br />
Contraindications<br />
Infectious or tumor defects.<br />
Generalized arthritis, rheumatoid and/or<br />
degenerative in type.<br />
Those patients under <strong>the</strong> age of 50 with early<br />
unicompartment arthritis where <strong>the</strong> donor site<br />
cartilage is thin and <strong>the</strong> cartilage surrounding <strong>the</strong><br />
defect is of poor quality.<br />
In malaligned or unstable joints (varus or valgus,<br />
patellar-subluxation), restoration or joint mechanics<br />
needs to be addressed separately, or at <strong>the</strong> time of,<br />
<strong>the</strong> <strong>MOSAICPLASTY</strong> procedure. Patellar<br />
realignment, ACL, PCL, meniscal repair, and<br />
osteotomies can be done concurrently.<br />
Operative Preparation<br />
1. Holding area IV antibiotics.<br />
2. Anes<strong>the</strong>sia: General or regional, with tourniquet<br />
control.<br />
3. Patient is positioned supine with knee capable<br />
of 120° flexion. Contralateral extremity is placed<br />
in a stirrup.<br />
4. Standard EUA and arthroscopic survey<br />
technique.<br />
Choosing a Procedure<br />
An open procedure may be chosen when first<br />
performing <strong>the</strong> technique or when an arthroscopic<br />
approach is not practical due to <strong>the</strong> size or location<br />
of <strong>the</strong> lesion. With <strong>the</strong> exception of this portal<br />
location, this technique applies to both open and<br />
arthroscopic procedures.<br />
3
Surgical Technique<br />
Portal Selection<br />
Perpendicular access to <strong>the</strong> lesion is critical to<br />
proper insertion of <strong>the</strong> grafts. Care must be<br />
exercised in making <strong>the</strong> viewing and working<br />
portals. For most femoral condylar lesions, central<br />
anterior medial and central anterior lateral portals<br />
will allow correct access. Initially, a 1.2 mm K-wire or<br />
18 gauge spinal needle can be used to locate <strong>the</strong><br />
portal sites (Figure 1). It should be noted that <strong>the</strong>se<br />
portals tend to be more central than <strong>the</strong> standard<br />
portals due to <strong>the</strong> inward curve of <strong>the</strong> condyles<br />
(Figure 2).<br />
Figure 1. Medial and lateral portal areas<br />
For osteochondritis dissecans on <strong>the</strong> medial femoral<br />
condyle <strong>the</strong> approach needs to be from <strong>the</strong> lateral<br />
side. A standard lateral portal is sometimes too<br />
oblique. Therefore, use <strong>the</strong> central patellar tendon<br />
portal which gives good access to <strong>the</strong> inner<br />
positions of both <strong>the</strong> medial femoral condyle and<br />
<strong>the</strong> lateral femoral condyle.<br />
If an arthroscopic approach will not be practical, it<br />
may be necessary to create a medial or lateral<br />
anterior sagittal incision, or an oblique incision.<br />
Figure 2. Range of working portal instruments direction.<br />
4
Defect Preparation<br />
1. With <strong>the</strong> use of a full radius resector or curette<br />
and a knife blade, <strong>the</strong> edges of <strong>the</strong> defect are<br />
brought back to good hyaline cartilage at a right<br />
angle (Figure 3).<br />
2. Abrade <strong>the</strong> base of <strong>the</strong> lesion to viable<br />
subchondral bone with an abrader or half-round<br />
rasp (Figure 4).<br />
3. Use a drill guide to determine <strong>the</strong> number of<br />
grafts needed (Figure 5).<br />
4. A dilator may be used to measure <strong>the</strong> depth of<br />
<strong>the</strong> defect.<br />
Procurement of <strong>Osteochondral</strong> Grafts<br />
The grafts can be obtained ei<strong>the</strong>r arthroscopically<br />
or through a mini-arthrotomy (1.5–2.0 cm). If <strong>the</strong><br />
grafts are to be taken arthroscopically, certain<br />
points are emphasized. The preferred sites are <strong>the</strong><br />
medial femoral condyle periphery of <strong>the</strong><br />
patellofemoral joint or <strong>the</strong> lateral femoral condyle<br />
above <strong>the</strong> sulcus terminalis above <strong>the</strong> line of <strong>the</strong><br />
notch. If additional grafts are needed, up to three<br />
grafts may be obtained from <strong>the</strong> standard portals. If<br />
more grafts are needed or if you want to go<br />
superiorly, superomedial or superolateral portals<br />
may be necessary. Additional grafts can be<br />
harvested by flexing or extending <strong>the</strong> knee.<br />
Figure 3<br />
Figure 4<br />
Figure 5<br />
5
The best view for harvesting grafts from <strong>the</strong><br />
superior portals is obtained by introducing <strong>the</strong><br />
scope through <strong>the</strong> inferior ipsilateral portal. The<br />
lateral femoral condyle periphery through a small<br />
arthrotomy (15–20 mm) is ano<strong>the</strong>r option for grafts.<br />
Figure 6<br />
Figure 7a<br />
Figure 7b<br />
1. Use a spinal needle or a K-wire to locate <strong>the</strong><br />
donor site, and <strong>the</strong>n make <strong>the</strong> portal.<br />
2. Introduce <strong>the</strong> proper-sized tube chisel with <strong>the</strong><br />
harvesting tamp.<br />
3. Once <strong>the</strong> site has been clearly identified, locate<br />
<strong>the</strong> chisel perpendicular to <strong>the</strong> articular surface<br />
(Figure 6) and drive it by hammer to <strong>the</strong><br />
appropriate depth, usually 15 mm. Generally, <strong>the</strong><br />
length of <strong>the</strong> graft should be at least two times<br />
its diameter. It is important to hold <strong>the</strong> chisel<br />
firmly to avoid it shifting at <strong>the</strong> cartilage/bone<br />
interface, producing a crooked graft.<br />
Note: By flexing <strong>the</strong> knee, lower sites can be<br />
obtained. The lower limit is <strong>the</strong> top of <strong>the</strong><br />
intercondylar notch.<br />
Insert <strong>the</strong> 4.5 mm harvesting tamp into <strong>the</strong><br />
crosshole in <strong>the</strong> tubular chisel and use it as a lever.<br />
Alternatively, single-use chisels can be used.<br />
4. Toggle (do NOT rotate) <strong>the</strong> chisel, ca<strong>using</strong> <strong>the</strong><br />
graft to break free at <strong>the</strong> chisel tip.<br />
5. Eject <strong>the</strong> grafts from <strong>the</strong> chisel by sliding <strong>the</strong><br />
appropriate-sized chisel guard over <strong>the</strong> cutting<br />
end (Figure 7a).<br />
6. Using <strong>the</strong> tamp, push <strong>the</strong> graft out (Figure 7b)<br />
onto gauze in a saline-wetted basin.<br />
7. Measure <strong>the</strong> harvested grafts to determine <strong>the</strong><br />
depth necessary to drill <strong>the</strong> recipient holes in <strong>the</strong><br />
defect site.<br />
Spacing <strong>the</strong> grafts to avoid confluence at depth<br />
(approximately 3 mm) will avoid any weakening of<br />
<strong>the</strong> condyle. The donor site holes will eventually fill<br />
with cancellous bone and fibrocartilage. Care<br />
should be taken when harvesting 6.5 mm and<br />
8.5 mm grafts to avoid creating patellar tracking<br />
problems or weakening <strong>the</strong> condyle.<br />
6
Insertion of <strong>Osteochondral</strong><br />
Grafts<br />
Drill/Dilate/Deliver<br />
(3D Grafting)<br />
Drill<br />
1. With <strong>the</strong> knee flexed and good<br />
distention established,<br />
reintroduce <strong>the</strong> drill guide<br />
<strong>using</strong> <strong>the</strong> dilator as an<br />
obturator. Place it in <strong>the</strong> defect<br />
perpendicular to <strong>the</strong> surface.<br />
By rotating <strong>the</strong> arthroscope,<br />
<strong>the</strong> drill guide and <strong>the</strong><br />
perpendicularity of <strong>the</strong> laser<br />
mark can be seen from<br />
different angles, ensuring<br />
proper orientation. Then tap it<br />
into <strong>the</strong> subchondral bone.<br />
2. Insert an appropriately-sized<br />
drill bit and drill to <strong>the</strong> desired<br />
depth (Figure 8). Generally, a<br />
recipient hole a few millimeters<br />
deeper than <strong>the</strong> length of <strong>the</strong><br />
graft is desirable to minimize<br />
high intraosseal pressure.<br />
Inflow is now reduced to<br />
minimize leakage.<br />
3. Remove <strong>the</strong> drill bit.<br />
Dilate<br />
1. Insert <strong>the</strong> dilator into <strong>the</strong> drill<br />
guide. Tap to <strong>the</strong> desired<br />
depth.<br />
2. While firmly holding <strong>the</strong> drill<br />
guide, insert <strong>the</strong> 2.7 mm<br />
harvesting tamp into <strong>the</strong><br />
dilator and use it as a lever to<br />
remove <strong>the</strong> dilator from <strong>the</strong><br />
hole (Figure 9).<br />
Figure 8. A 4.5 mm drill guide secured in defect with drill bit through <strong>the</strong> guide.<br />
Figure 9. The dilator is removed <strong>using</strong> <strong>the</strong> 2.7 mm harvesting tamp.<br />
7
Deliver<br />
Figure 10. Insertion of graft with adjustable plunger.<br />
1. Adjust <strong>the</strong> delivery tamp by<br />
turning <strong>the</strong> handle to initially<br />
allow <strong>the</strong> graft to sit slightly<br />
higher than <strong>the</strong> depth of <strong>the</strong><br />
defect. This will minimize <strong>the</strong><br />
likelihood of overpenetrating<br />
<strong>the</strong> graft.<br />
2. Stop Inflow; o<strong>the</strong>rwise fluid<br />
flow can push <strong>the</strong> graft out of<br />
<strong>the</strong> tube.<br />
3. Deliver <strong>the</strong> graft under direct<br />
visualization into <strong>the</strong> recipient<br />
hole through <strong>the</strong> drill guide<br />
with <strong>the</strong> use of <strong>the</strong> delivery<br />
tamp (Figure 10).<br />
4. The graft can be inserted<br />
deeper by turning <strong>the</strong> delivery<br />
tamp handle counterclockwise.<br />
The graft should be<br />
flush with <strong>the</strong> original articular<br />
surface. Remove <strong>the</strong> drill<br />
guide to inspect <strong>the</strong> graft. If<br />
<strong>the</strong> graft is proud, reinsert<br />
<strong>the</strong> drill guide and gently tap<br />
<strong>the</strong> graft down with an<br />
appropriately-sized tamp.<br />
5. Insert <strong>the</strong> subsequent grafts in<br />
a similar fashion by placing<br />
<strong>the</strong> drill guide immediately<br />
adjacent to <strong>the</strong> previouslyplaced<br />
grafts.<br />
Note: Caution must be taken to<br />
keep <strong>the</strong> shoulder of <strong>the</strong> drill<br />
guide off <strong>the</strong> previously inserted<br />
grafts. This will avoid inadvertent<br />
recessing of <strong>the</strong> grafts (Figure 11).<br />
Figure 11. Care must be taken not to sit <strong>the</strong> guide tube on <strong>the</strong> previous grafts.<br />
8
Closure and Postoperative<br />
Treatment<br />
When all <strong>the</strong> holes are filled and<br />
<strong>the</strong> grafts seated, put <strong>the</strong> knee<br />
through a range of motion and<br />
varus, valgus stress (Figure 12).<br />
Close <strong>the</strong> portals and drain <strong>the</strong><br />
joint through <strong>the</strong> superior portal.<br />
Postoperatively, remove <strong>the</strong> drain<br />
at 24 hours. The patient is<br />
discharged and advised to<br />
remain partial weight-bearing for<br />
2–6 weeks, or non-weightbearing<br />
for osteochondritis<br />
dessicans. Range of motion and<br />
isometric quadriceps exercises<br />
and swimming are encouraged<br />
during this period. Barring<br />
complications, return to full<br />
activities can be accomplished in<br />
2–4 months.<br />
Figure 12<br />
9
Bibliography<br />
Hangody L, Kárpáti Z. New alternative in <strong>the</strong> treatment of severe, localized cartilage damages in <strong>the</strong> knee<br />
joint. Hungarian Journal of Traumatology and Orthopaedics; 37:237–242, 1994.<br />
Hangody L, Kárpáti Z, Szerb I. <strong>Osteochondral</strong> autograft implantation in <strong>the</strong> treatment of knee chondropathy.<br />
First prize winner poster of <strong>the</strong> 6th Congress of ESSKA; Berlin, 1994.<br />
Hangody L, Sükösd L, Szigeti I, Kárpáti Z. Arthroscopic autogenous osteochondral mosaicplasty. Hungarian<br />
Journal of Traumatology and Orthopaedics; 39:49–54, 1996.<br />
Hangody L, Kárpáti Z, Szerb I. Autogenous osteochondral mosaicplasty in <strong>the</strong> treatment of osteochondritis<br />
dissecans of <strong>the</strong> talus. First Prize winner poster of <strong>the</strong> 7th Congress of ESSKA; Budapest, Hungary, 1996.<br />
Hangody L, Szigeti I, Kárpáti Z, Sükösd L. Eine neue Methode in der Behandlung von schweren, lokalen<br />
Knorpelschäden im Kniegelenk. Osteosyn<strong>the</strong>se International; 5:316-321, 1997.<br />
Hangody L, Kish G, Kárpáti Z, et al. Autogenous osteochondral graft technique for replacing knee cartilage<br />
defects in dogs. Orthopaedics International Edition; 5:175–181, 1997.<br />
Hangody L, Kish G, Kárpáti Z, et al. Treatment of osteochondritis dissecans of talus: <strong>the</strong> use of <strong>the</strong><br />
mosaicplasty technique. Foot and Ankle International; Vol 18 No 10 (OCT): 628–634, 1997.<br />
Hangody L, Kish G, Kárpáti Z, et al. Arthroscopic autogenous osteochondral mosaicplasty for <strong>the</strong> treatment<br />
of femoral condylar articular defects. Knee Surgery Sports Traumatology Arthroscopy; 5:262–267, 1997.<br />
Hangody L, Kish G, Kárpáti Z, Eberhart R. <strong>Osteochondral</strong> plugs – Autogenous osteochondral mosaicplasty<br />
for <strong>the</strong> treatment of focal chondral and osteochondral articular defects. Operative Techniques in<br />
Orthopaedics; Vol 7 No 4 (OCT): 312–322, 1997.<br />
Hangody L, Kish G, Kárpáti Z, et al. Mosaicplasty for <strong>the</strong> treatment of articular cartilage defects: application<br />
in clinical practice. Orthopaedics; 21:751, 1998.<br />
Hangody L, Kish G, Kárpáti Z. Mosaicplasty for <strong>the</strong> treatment of osteochondritis dissecans of <strong>the</strong> knee.<br />
Journal of Sports Traumatology and Related Research; 20:126, 1998.<br />
Hangody L, Kish G, Kárpáti Z. Arthroscopic autogenous osteochondral mosaicplasty – a multicentric,<br />
comparative, prospective study. Index Traumatologie du Sport; 5:3–7, 1998.<br />
Kish G, Módis L, Hangody L. <strong>Osteochondral</strong> mosaicplasty for <strong>the</strong> treatment of focal chondral and<br />
osteochondral lesions of <strong>the</strong> knee and talus in <strong>the</strong> athlete. Clinics in Sports Medicine; 18:45–61, 1999.<br />
Hangody L. The role of <strong>the</strong> mosaicplasty in <strong>the</strong> treatment of cartilage defects. In “Imhoff-Burkart:<br />
Knieinstabilitaten und Knorpelschaden”, Steinkopff Verlag; 1998.<br />
Hangody L. Autogenous osteochondral mosaicplasty. In “Pfeil-Siebert-Janousek-Josten: Minimal Invasive<br />
Techniques in <strong>the</strong> Orthopaedics”, Spinger Verlag; 2000.<br />
Hangody L, Kish G. Surgical treatment of osteochondritis dissecans of <strong>the</strong> talus. In “Duparc: European<br />
Textbook on Surgical Techniques in Orthopaedics and Traumatology”, Editions Scientifiques et Medicales<br />
Elsevier; 55–630–B–10:1–5, 2000.<br />
Hangody L. Mosaicplasty. In “Insall J, Scott N: Surgery of <strong>the</strong> Knee”, 357–361, Churchill Livingstone; 2000.<br />
Hangody L. Autologous <strong>Osteochondral</strong> Mosaicplasty in <strong>the</strong> Treatment of Focal Chondral and <strong>Osteochondral</strong><br />
Defects of <strong>the</strong> Weight-bearing Articular Surfaces. Osteologie; 9:63–69, 2000.<br />
Hangody L, Kish G, Szabó Zs, Kárpáti Z, Szerb I, Gáspár L, Módis L. Three to six year results of autologous<br />
osteochondral mosaicplasty on <strong>the</strong> talus. Foot and Ankle International; 22(7):552–558, 2001.<br />
Hangody L, Feczkó P, Kemény D, Bodó G, Kish G. Autologous osteochondral mosaicplasty for <strong>the</strong> treatment<br />
of full thickness cartilage defects of <strong>the</strong> knee and ankle. Clinical Orthopaedics; 391:October, Suppl.<br />
328–337, 2001.<br />
10
Ordering Information<br />
<strong>Smith</strong> & <strong>Nephew</strong> <strong>MOSAICPLASTY</strong> Systems are available as a Complete System or Precision System, and in individual components. Both systems are<br />
suitable for open or arthroscopic surgical approaches.<br />
The <strong>MOSAICPLASTY</strong> Complete System contains instrumentation for harvesting and placing grafts 2.7 mm, 3.5 mm, 4.5 mm, 6.5 mm, and 8.5 mm in<br />
diameter. Trephines for hard bone coring are optional and are not included. Drill bits are required, but not included. A <strong>MOSAICPLASTY</strong> Complete<br />
Sterilization Tray is included.<br />
The <strong>MOSAICPLASTY</strong> Precision System includes instrumentation for harvesting and placing grafts 2.7 mm, 3.5 mm, and 4.5 mm in diameter. The 6.5 mm<br />
and 8.5 mm size instrumentation are offered as options for surgeons preferring larger grafts. Trephines for hard bone coring are optional and are not<br />
included. Drill bits are required, but not included. A <strong>MOSAICPLASTY</strong> Precision Sterilization Tray is included.<br />
The <strong>MOSAICPLASTY</strong> DP Disposable System is a sterilized, single-use set comprised of a harvesting chisel, harvesting tamp, and a drill bit. Graft<br />
placement drill guides, dilators, and delivery tamps are required, but not included.<br />
<strong>MOSAICPLASTY</strong> Systems<br />
REF<br />
Description<br />
7205532 <strong>MOSAICPLASTY</strong> Complete System<br />
7205605 <strong>MOSAICPLASTY</strong> Precision System<br />
Graft Placement<br />
Drill Guides (five to ten patient uses)<br />
7207214† 2.7 mm Drill Guide<br />
7207215† 3.5 mm Drill Guide<br />
7207216† 4.5 mm Drill Guide<br />
7205501 6.5 mm Drill Guide<br />
7205502 8.5 mm Drill Guide<br />
Dilators<br />
7205509† 2.7 mm Dilator<br />
7205510† 3.5 mm Dilator<br />
7205511† 4.5 mm Dilator<br />
7205512 6.5 mm Dilator<br />
7205513 8.5 mm Dilator<br />
Delivery Tamps<br />
7207205† 2.7 mm Delivery Tamp<br />
7207206† 3.5 mm Delivery Tamp<br />
7207207† 4.5 mm Delivery Tamp<br />
7205505 6.5 mm Delivery Tamp<br />
7205506 8.5 mm Delivery Tamp<br />
Drill Bits (required, single use, non-sterile)<br />
7205508 2.7 mm Drill Bit<br />
7207212 3.5 mm Drill Bit<br />
7207213 4.5 mm Drill Bit<br />
7205503 6.5 mm Drill Bit<br />
7205504 8.5 mm Drill Bit<br />
† <strong>MOSAICPLASTY</strong> Precision System components<br />
Graft Harvesting<br />
Tubular Chisels (five to ten patient uses)<br />
7207099† 2.7 mm Tubular Chisel<br />
7207098† 3.5 mm Tubular Chisel<br />
7207097† 4.5 mm Tubular Chisel<br />
7205493 6.5 mm Tubular Chisel<br />
7205494 8.5 mm Tubular Chisel<br />
Chisel Guards<br />
7207208† 2.7 mm Chisel Guard<br />
7207209† 3.5 mm Chisel Guard<br />
7207210† 4.5 mm Chisel Guard<br />
7205499 6.5 mm Chisel Guard<br />
7205500 8.5 mm Chisel Guard<br />
Harvesting Tamps<br />
7207107† 2.7 mm Harvesting Tamp<br />
7207106† 3.5 mm Harvesting Tamp<br />
7207105† 4.5 mm Harvesting Tamp<br />
7205495 6.5 mm Harvesting Tamp<br />
7205496 8.5 mm Harvesting Tamp<br />
Trephines (optional–for hard bone)<br />
7207089 2.7 mm Trephine<br />
7207088 3.5 mm Trephine<br />
7207087 4.5 mm Trephine<br />
7205497 6.5 mm Trephine<br />
7205498 8.5 mm Trephine<br />
7207103 Trephine Adaptor for 2.7 mm, 3.5 mm, and 4.5 mm sizes<br />
7205515 Trephine Adaptor for 6.5 mm and 8.5 mm sizes<br />
<strong>MOSAICPLASTY</strong> DP Disposable System<br />
7209234 3.5 mm Disposable Harvesting Set<br />
7209235 4.5 mm Disposable Harvesting Set<br />
7209236 6.5 mm Disposable Harvesting Set<br />
7209237 8.5 mm Disposable Harvesting Set<br />
11
Additional Instruction<br />
Prior to performing this technique,<br />
consult <strong>the</strong> Instructions for Use<br />
documentation provided with<br />
individual components — including<br />
indications, contraindications,<br />
warnings, cautions, and instructions.<br />
Courtesy of <strong>Smith</strong> & <strong>Nephew</strong>, Inc.,<br />
Endoscopy Division<br />
Caution: U.S. Federal law restricts this device<br />
to sale by or on <strong>the</strong> order of a physician.<br />
Endoscopy<br />
<strong>Smith</strong> & <strong>Nephew</strong>, Inc.<br />
Andover, MA 01810<br />
USA<br />
www.smith-nephew.com<br />
978 749 1000<br />
978 749 1108 Fax<br />
800 343 5717 U.S. Customer Service<br />
Trademarks of <strong>Smith</strong> & <strong>Nephew</strong>. Certain marks registered<br />
U.S. Patent & Trademark Office.<br />
©2001, 2005 <strong>Smith</strong> & <strong>Nephew</strong>, Inc. All Rights Reserved.<br />
Printed in USA<br />
09/05 1030208 Rev. G