FAST-FIX⢠360 Meniscal Repair System - Smith & Nephew
FAST-FIX⢠360 Meniscal Repair System - Smith & Nephew FAST-FIX⢠360 Meniscal Repair System - Smith & Nephew
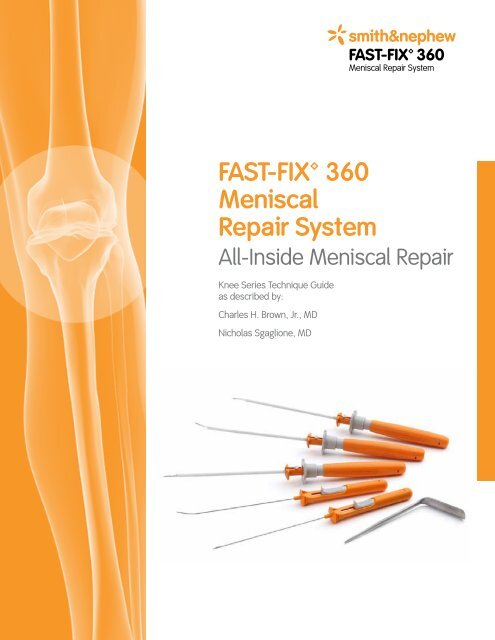
FAST-FIX 360 Meniscal Repair System FAST-FIX 360 Meniscal Repair System All-Inside Meniscal Repair Knee Series Technique Guide as described by: Charles H. Brown, Jr., MD Nicholas Sgaglione, MD
- Page 3 and 4: All-Inside Meniscal Repair with the
- Page 5 and 6: Setup Each FAST-FIX 360 Meniscal Re
- Page 7 and 8: Figure 7. Insert the delivery needl
- Page 9 and 10: Figure 17. Slide the knot pusher/su
- Page 12: Ordering Information To order the i
<strong>FAST</strong>-FIX <strong>360</strong><br />
<strong>Meniscal</strong> <strong>Repair</strong> <strong>System</strong><br />
<strong>FAST</strong>-FIX <strong>360</strong><br />
<strong>Meniscal</strong><br />
<strong>Repair</strong> <strong>System</strong><br />
All-Inside <strong>Meniscal</strong> <strong>Repair</strong><br />
Knee Series Technique Guide<br />
as described by:<br />
Charles H. Brown, Jr., MD<br />
Nicholas Sgaglione, MD
All-Inside <strong>Meniscal</strong> <strong>Repair</strong> with the<br />
<strong>FAST</strong>-FIX <strong>360</strong> <strong>Meniscal</strong> <strong>Repair</strong> <strong>System</strong><br />
Introduction<br />
The meniscus contributes to optimal knee joint function because of its critical role in load<br />
transmission, shock absorption, joint stability, lubrication, articular cartilage nutrition,<br />
and neuromuscular proprioception. Clinical studies have demonstrated that even partial<br />
meniscectomy can lead to early joint chondrosis and arthrosis 1 . As a result, repair of peripheral<br />
and red/white meniscal tears is now the standard of care.<br />
Due to the ability to predictably place vertical or horizontal mattress sutures on the femoral or<br />
tibial surfaces of the meniscus, the inside-out repair technique is considered by many surgeons<br />
to be the “gold standard” for meniscal repair. However, the inside-out technique requires a<br />
posterior incision and dissection to avoid neurovascular complications, thereby adding morbidity<br />
and operative time to the procedure. The technique also requires a trained assistant to retrieve<br />
and tie the repair sutures.<br />
The outside-in repair technique was introduced in an attempt to eliminate the need for a<br />
posterior incision and dissection. However, the outside-in technique offers limited access to<br />
tears in the posterior third of the meniscus and limits the surgeon’s ability to perform a vertical<br />
mattress suture and place sutures on the tibial surface of the meniscus.<br />
The all-inside arthroscopic suture-based technique has addressed many of the limitations of<br />
the inside-out and outside-in techniques. The all-inside suture-based technique has gained<br />
popularity because of the following advantages:<br />
≠ The repair can be safely performed without a posterior incision.<br />
≠ The technique allows easy access to tears in the posterior and middle thirds of the meniscus.<br />
≠ The repair can be performed without a trained assistant.<br />
≠ The technique allows vertical or horizontal mattress sutures to be inserted on the femoral or<br />
tibial surface of the meniscus.<br />
These advantages allow for minimally invasive meniscal repair, resulting in less postoperative<br />
pain and morbidity for patients 2 .<br />
As described by:<br />
Charles H. Brown, Jr., MD<br />
Medical Director<br />
Abu Dhabi Knee & Sports Medicine Centre<br />
Abu Dhabi, United Arab Emirates<br />
Nicholas Sgaglione, MD<br />
Associate Chairman and Program Director<br />
Department of Orthopaedic Surgery<br />
North Shore-Long Island Jewish Medical Center<br />
New Hyde Park, New York<br />
<strong>FAST</strong>-FIX <strong>360</strong> <strong>Meniscal</strong> <strong>Repair</strong> <strong>System</strong> All-Inside <strong>Meniscal</strong> <strong>Repair</strong> 3
Overview<br />
The <strong>FAST</strong>-FIX <strong>360</strong> <strong>Meniscal</strong> <strong>Repair</strong> <strong>System</strong> provides a strong, reproducible, and time-saving technique for meniscal<br />
repair. Biomechanical studies have demonstrated that a vertical mattress suture performed using the <strong>FAST</strong>-FIX <strong>360</strong><br />
<strong>Meniscal</strong> <strong>Repair</strong> <strong>System</strong> has biomechanical properties equal to that of a vertical mattress suture performed using the<br />
open and inside-out repair techniques. This result can be achieved without the previously mentioned disadvantages<br />
and limitations of the inside-out and outside-in repair techniques, and without the need for intra-articular knot tying.<br />
The system gives the surgeon the versatility of placing horizontal or vertical mattress sutures on the femoral or tibial<br />
surfaces of the meniscus, potentially minimizing risk to the posterior neurovascular structures.<br />
Building on the proven clinical success of the earlier <strong>FAST</strong>-FIX and ULTRA <strong>FAST</strong>-FIX <strong>Meniscal</strong> <strong>Repair</strong> <strong>System</strong>s’<br />
techniques, the all new <strong>FAST</strong>-FIX <strong>360</strong> <strong>Meniscal</strong> <strong>Repair</strong> <strong>System</strong> offers the following advantages:<br />
• Easier and faster implant deployment with added safety features<br />
• More controlled implant delivery<br />
• Smaller insertion points, minimizing disruption to the meniscus<br />
• Less needle advancement needed for implant delivery<br />
• A built-in depth penetration limiter<br />
• Stiffer needle shaft for enhanced delivery control<br />
• Ability to reposition the needle for optimal suture placement<br />
As a result, the <strong>FAST</strong>-FIX <strong>360</strong> <strong>Meniscal</strong> <strong>Repair</strong> <strong>System</strong> (Figure 1) helps optimize the chances of a successful<br />
meniscal repair.<br />
As with all arthroscopic procedures, adequate joint distention and visualization of the meniscus tear are essential<br />
for success. To minimize the potential for damage to neurovascular structures, it is strongly recommended that the<br />
surgeon use the built-in, adjustable depth penetration limiter to control the depth of penetration of the delivery<br />
needle. The tear is precisely assessed and the point of needle insertion from the peripheral rim is measured with a<br />
meniscal depth probe. This measurement is used to set the built-in adjustable depth penetration limiter.<br />
Unlike the earlier <strong>FAST</strong>-FIX <strong>Meniscal</strong> <strong>Repair</strong> <strong>System</strong>, implants in the new <strong>FAST</strong>-FIX <strong>360</strong> <strong>Meniscal</strong> <strong>Repair</strong> <strong>System</strong><br />
are pushed out of the delivery needle rather than being stripped away from the needle. This new delivery method<br />
minimizes the depth of needle penetration needed to successfully deploy the implants, thereby decreasing the<br />
risk of injury to nearby neurovascular structures. The <strong>FAST</strong>-FIX <strong>360</strong> <strong>Meniscal</strong> <strong>Repair</strong> <strong>System</strong> also employs a new<br />
ergonomically shaped <strong>360</strong>° deployment slider which makes a “clicking” sound upon deployment of the implants.<br />
These new features provide a more controlled method to ensure proper implant deployment.<br />
Auditory confirmation<br />
Ergonomic handle<br />
Adjustable depth limiter<br />
Needle tip available<br />
in curved, reverse<br />
curved, and straight<br />
<strong>360</strong>° active deployment slider<br />
Stiffer, low-profile needle shaft<br />
Enhanced suture<br />
management<br />
Laser-marked<br />
needle tip<br />
Smaller implants and<br />
ULTRABRAID 2-0 Suture<br />
Figure 1. The <strong>FAST</strong>-FIX <strong>360</strong> <strong>Meniscal</strong> <strong>Repair</strong> <strong>System</strong>.<br />
4 <strong>FAST</strong>-FIX <strong>360</strong> <strong>Meniscal</strong> <strong>Repair</strong> <strong>System</strong> All-Inside <strong>Meniscal</strong> <strong>Repair</strong>
Setup<br />
Each <strong>FAST</strong>-FIX <strong>360</strong> <strong>Meniscal</strong> <strong>Repair</strong> <strong>System</strong> contains two 5 mm polymer integrated bio-inert anchors<br />
(PEEK-OPTIMA ® from Invibio ® ) with a pretied, self-sliding knot comprised of 2-0, non-absorbable, UHMW<br />
polyethelene ULTRABRAID Suture. The entire system is packaged in an easy-to-insert integrated delivery needle.<br />
The delivery needles are available in curved, straight, and reverse curved designs (Figure 2). The curved and<br />
reverse curved designs allow the surgeon to rotate the needle tip away from the neurovascular structures when<br />
penetrating the meniscus, further reducing the risk of neurovascular injury. The curved delivery needle is optimally<br />
shaped to allow vertical mattress sutures to be inserted on either the femoral or tibial surfaces of the meniscus.<br />
The reverse curved delivery needle is most useful for repairing tears on the tibial surface and more anterior located<br />
tears. The anchors are placed into the meniscus sequentially and are seated safely outside the capsule. The suture<br />
is then tensioned in a simple manner without the need for arthroscopic knot tying.<br />
The built-in, adjustable depth penetration limiter is adjustable from 10 mm to 18 mm from the tip of the needle. The<br />
device comes with the depth penetration limiter preset at 18 mm. Patients with small knees, peripheral tears in the<br />
red-red zone, tears around the popliteus hiatus, and tears in the middle third of the medial meniscus may require<br />
a delivery depth less than the preset depth of 18 mm. Use of the meniscal depth probe in conjunction with the<br />
adjustable depth penetration limiter (white plastic sheath) allows controlled delivery of the implants.<br />
Figure 2. Delivery needle designs.<br />
Procedure Setup and Portal Placement<br />
The operating room setup includes a lateral thigh post or leg holder to allow application of valgus stress to the knee<br />
to open the medial or lateral compartments for easier access to the tear. Use a surgical skin marker to outline the<br />
following surface landmarks: the patella, the medial and lateral borders of the patellar tendon, and the medial and<br />
lateral joint lines. Create the anterolateral portal at the level of the inferior pole of the patella as close as possible to<br />
the lateral border of the patellar tendon. Perform diagnostic arthroscopy, identify the meniscal tear, and assess its<br />
suitability for repair. Create the anteromedial portal under direct arthroscopic visualization. Insert an 18 gauge needle<br />
through the skin above the medial joint line. Adjust the needle position to allow optimal insertion of the <strong>FAST</strong>-FIX <strong>360</strong><br />
delivery needle. Adjust the external starting position for the needle so that the needle can be placed perpendicular<br />
to the tear. Create the anteromedial portal in routine fashion using a #11 blade. It is important to dilate the portal with<br />
the arthroscopic blunt obturator to allow for easier passage of the delivery needle into the joint.<br />
<strong>Repair</strong> lateral meniscal tears by viewing the tear through the anterolateral portal and using the anteromedial portal<br />
for the delivery needle. For a medial meniscal tear, use the meniscal depth probe to determine if the sutures should<br />
be inserted through the anteromedial portal or if it is necessary to switch the scope to the anteromedial portal and<br />
insert the sutures through the anterolateral portal. In general, medial meniscal tears in the middle third zone are best<br />
repaired by inserting the sutures through the anterolateral portal. This approach allows the sutures to be inserted<br />
perpendicular to the tear. Because the tibial spines can interfere with optimal suture placement when the sutures<br />
are inserted through the anterolateral portal, in some cases it may be necessary to insert the sutures through the<br />
anteromedial portal.<br />
<strong>FAST</strong>-FIX <strong>360</strong> <strong>Meniscal</strong> <strong>Repair</strong> <strong>System</strong> All-Inside <strong>Meniscal</strong> <strong>Repair</strong> 5
Procedure<br />
Figure 3. Establish<br />
depth limit using<br />
the adjustable<br />
depth limiter and<br />
depth probe.<br />
Figure 4. Use<br />
laser marks as a<br />
reference.<br />
<strong>Meniscal</strong> tear site preparation is essential for biological<br />
healing of the tear. <strong>Meniscal</strong> rasps and/or arthroscopic<br />
shavers are used to abrade and excoriate both sides<br />
of the tear and the perimeniscal synovium. Once the<br />
optimal portal placement is determined and the meniscal<br />
tear site is prepared, perform the repair as follows:<br />
1. Use the meniscal depth probe to determine the<br />
desired depth limit. Place the tip of the probe at the<br />
meniscosynovial junction and measure the width<br />
of the meniscus at the desired entry point for the<br />
delivery needle. In the average size knee a depth<br />
of 14 mm is usually adequate. Adjust the depth<br />
penetration limiter to the desired length by pressing<br />
the depth limiter button (Figure 3). This length can<br />
be adjusted outside or inside of the joint. The laser<br />
marks on the tip of the needle can also be used as a<br />
reference (Figure 4).<br />
2. Insert the <strong>FAST</strong>-FIX <strong>360</strong> delivery needle into the joint<br />
through the appropriate arthroscopic portal. Insertion<br />
is facilitated through the use of the slotted cannula<br />
(sold separately) (Figure 5).<br />
Figure 6.<br />
Introduce the<br />
delivery needle<br />
into the joint<br />
with the tip<br />
down against<br />
the slotted<br />
cannula.<br />
Figure 5. Use a slotted<br />
cannula to ease insertion.<br />
The slotted cannula eases passage through the<br />
fat pad, and the cannula can also be used to help<br />
position the tip of the delivery needle at the desired<br />
location on the meniscus. Introduce the delivery<br />
needle through the slotted cannula into the joint,<br />
ensuring that the tip of the needle is pointing down<br />
(Figure 6). Once the needle is inside the joint, the<br />
slotted cannula may be removed if desired.<br />
Pearl: Hold the delivery needle at the handle<br />
and push the slider with the thumb to deploy the<br />
implants. Do not advance the deployment slider while<br />
introducing the delivery needle into the joint or the<br />
implant will deploy prematurely.<br />
6 <strong>FAST</strong>-FIX <strong>360</strong> <strong>Meniscal</strong> <strong>Repair</strong> <strong>System</strong> All-Inside <strong>Meniscal</strong> <strong>Repair</strong>
Figure 7. Insert the delivery needle into the meniscus through<br />
the capsule.<br />
Figure 8. Keep the delivery needle in position during deployment<br />
of the implants.<br />
Figure 9. Push the deployment slider all the way forward to<br />
deploy T1.<br />
Figure 10. Withdraw the delivery needle from the meniscus slowly<br />
for better suture management.<br />
Vertical Mattress Suture <strong>Repair</strong><br />
3. For a vertical mattress suture repair, place the first implant (T1) on the<br />
capsular side of the tear. Insert the <strong>FAST</strong>-FIX <strong>360</strong> delivery needle into<br />
the capsule or into any remaining meniscal tissue on the capsular side<br />
of the tear (Figure 7). Use the slotted cannula to stabilize the meniscus,<br />
enhance visualization, and minimize skiving of the delivery needle to<br />
ensure more accurate placement of the implants. Position the tip of the<br />
slotted cannula at the desired entry point and rotate the cannula away<br />
from the direction of the neurovascular structures. Rotating the cannula<br />
allows better visualization of the delivery needle tip and directs the<br />
needle away from the neurovascular structures. Keeping the delivery<br />
needle in position, push the deployment slider all the way forward<br />
to deploy T1 (Figures 8 and 9). Proper deployment of the implant is<br />
accompanied by a “clicking” sound. For better suture management and<br />
to prevent pulling out the second implant (T2), release the deployment<br />
slider and slowly withdraw the needle out of the meniscus, keeping the<br />
needle inside the slotted cannula (if desired) and within arthroscopic view<br />
(Figure 10).<br />
Pearl: Release the slider right after deployment of T1 to allow the<br />
“spring back” of the slider to its original position flush with the handle to<br />
pick up the T2 implant (Figure 11). Do not slowly release or hold the slider.<br />
If the slider does not spring back, the user may manually return the slider<br />
to its original position.<br />
Figure 11. Make sure the trigger is flush to the handle<br />
prior to deploying T2.<br />
<strong>FAST</strong>-FIX <strong>360</strong> <strong>Meniscal</strong> <strong>Repair</strong> <strong>System</strong> All-Inside <strong>Meniscal</strong> <strong>Repair</strong> 7
Figure 12. Advance<br />
the delivery needle<br />
to the preset<br />
needle depth limit.<br />
Figure 13. Push the<br />
deployment slider<br />
all the way forward<br />
to deploy T2.<br />
Figure 14. Withdraw<br />
the needle from the<br />
joint.<br />
Figure 15. Pull the<br />
free end of the<br />
suture.<br />
Figure 16. Apply<br />
tension to the<br />
suture to cinch the<br />
knot down.<br />
Position the slotted cannula at the desired entry<br />
point on the inner meniscal fragment (if desired).<br />
The entry point for the second (T2) implant should<br />
be at least 5 mm from the tear site. Advance the<br />
delivery needle until the depth penetration limiter<br />
contacts the surface of the meniscus (Figure 12).<br />
Keeping the delivery needle in position, push the<br />
deployment slider all the way forward to deploy T2<br />
(Figure 13). As with T1, proper deployment of T2 is<br />
accompanied by a “clicking” sound. Slowly withdraw<br />
the delivery needle from the joint after deployment<br />
of T2 (Figure 14).<br />
Pearl: Do not push the deployment slider until the<br />
needle is fully penetrated through the meniscus to<br />
the preset depth limit or T2 will deploy prematurely.<br />
Horizontal Mattress Suture <strong>Repair</strong><br />
4. For a horizontal mattress suture repair, place the<br />
first implant (T1) at the posterior location. Place the<br />
delivery needle perpendicular to the tear and a<br />
minimum of 5 mm from the tear site on the inner<br />
meniscal fragment. Advance the delivery needle until<br />
the depth penetration limiter contacts the surface<br />
of the meniscus. Keeping the delivery needle in<br />
position, push the deployment slider all the way<br />
forward to deploy T1. Proper deployment of the implant<br />
is accompanied by a “clicking” sound. Release the<br />
deployment slider and slowly withdraw the delivery<br />
needle out of the meniscus, keeping the needle<br />
within arthroscopic view. Position the delivery needle<br />
more anteriorly along the meniscal tear site for the<br />
insertion of the second limb of the horizontal mattress<br />
suture. In general, maintain a minimum width of 8 mm<br />
between the two insertion points. Advance the delivery<br />
needle until the depth penetration limiter contacts the<br />
surface of the meniscus. Keeping the delivery needle<br />
in position, push the deployment slider all the way<br />
forward to deploy T2. As with T1, proper deployment<br />
of T2 is accompanied by a “clicking” sound. Slowly<br />
withdraw the delivery needle from the joint after<br />
deployment of T2.<br />
Pearl: Do not push the deployment slider until the<br />
needle is fully penetrated through the meniscus to<br />
the preset depth limit or T2 will deploy prematurely.<br />
5. Remove the delivery needle from the knee, pulling<br />
the free end of the suture out of the joint. The free<br />
end of the suture is pulled to advance the sliding knot<br />
and reduce the meniscal tear (Figure 15). It is normal<br />
to encounter firm resistance as the knot is snugged<br />
down. It is important to pull the free end of the suture<br />
directly perpendicular to the tear site. Wrap the suture<br />
around several fingers and use the tibia as a fulcrum<br />
to provide a controlled method of tightening the knot.<br />
Slowly and steadily apply tension to the suture. In<br />
most cases, this steady pulling of the suture will cinch<br />
the knot down (Figure 16).<br />
Pearl: If too much resistance is encountered while<br />
advancing the knot, use the <strong>Smith</strong> & <strong>Nephew</strong><br />
Straight or Curved Knot Pusher/Suture Cutter (sold<br />
separately) to help facilitate removing suture laxity.<br />
8 <strong>FAST</strong>-FIX <strong>360</strong> <strong>Meniscal</strong> <strong>Repair</strong> <strong>System</strong> All-Inside <strong>Meniscal</strong> <strong>Repair</strong>
Figure 17. Slide the knot pusher/suture cutter to the knot.<br />
Figure 18. Push the knot pusher/suture cutter tip against the knot<br />
to recess the knot.<br />
Figure 19. Push the trigger to cut the suture.<br />
Figure 20. Completed vertical mattress stitch.<br />
6. To further tighten the knot and further compress the tear site, thread the free end of the<br />
suture through the knot pusher/suture cutter. Both curved and straight knot pushers/suture<br />
cutters are available. Use a suture funnel to facilitate threading of the suture.<br />
7. While holding the suture taut, gently slide the knot pusher/suture cutter to the knot<br />
(Figure 17). The knot pusher should engage the suture in a direct line perpendicular to<br />
the repair. A manual suture “pull”/“push” maneuver is suggested, and the knot should be<br />
tightened until the desired amount of compression is generated at the tear site.<br />
8. Position the tip of the knot pusher/suture cutter against the knot to ensure a 2–3 mm suture<br />
tail when the suture is cut. Continuing to hold the suture taut, push the knot pusher/suture<br />
cutter tip against the knot. In some cases it is possible to recess the knot into the surface of<br />
the meniscus, leaving the tail of the suture flush with the surface of the meniscus (Figure 18).<br />
Cut the suture by pushing the trigger forward (Figures 19 and 20). Because of the high<br />
strength of the suture, using a small arthroscopic basket punch or scissors to cut the suture<br />
often results in the tail of the suture being frayed.<br />
9. Place sutures on the tibial side of the tear as well as the femoral side of the tear to reduce<br />
puckering of the meniscus. The reverse curved delivery needle is especially useful for placing<br />
sutures on the tibial side of the tear.<br />
<strong>FAST</strong>-FIX <strong>360</strong> <strong>Meniscal</strong> <strong>Repair</strong> <strong>System</strong> All-Inside <strong>Meniscal</strong> <strong>Repair</strong> 9
Postoperative Care<br />
The <strong>FAST</strong>-FIX <strong>360</strong> <strong>Meniscal</strong> <strong>Repair</strong> <strong>System</strong> utilizes a high strength non-absorbable suture and<br />
allows the repair to be performed with a vertical mattress suture, which has been shown to be<br />
the strongest meniscal repair technique. As a result, the standard rehabilitation protocol used<br />
with inside-out repairs can be utilized.<br />
Additional Instruction<br />
Prior to performing this technique, consult the Instruction for Use documentation provided<br />
with individual components – including indications, contraindications, warnings, cautions,<br />
and instructions.<br />
Pearls<br />
• Prepare meniscal tear site properly.<br />
• Choose the portal which most easily allows the delivery needle to be inserted<br />
perpendicular to the tear site.<br />
• Set the depth penetration limiter.<br />
• Use curved or reverse curved delivery needles.<br />
• Vertical mattress suture: T1 inserted into the capsular side of the tear; T2 inserted<br />
on the meniscal side of the tear.<br />
• Hold the device at the handle and push the slider with the thumb to deploy T1 and T2.<br />
• Keep the device in position during deployment of T1 and T2.<br />
• Release slider after deployment of T1 to allow “spring back” of the slider to pick up T2.<br />
• For better suture management and to prevent pulling out T2, release the deployment slider<br />
and slowly withdraw the needle out of the meniscus.<br />
• Thread suture onto the knot pusher/suture cutter with the suture funnel.<br />
• If the knot does not cinch smoothly, it usually requires a steady and more forceful pull, which is<br />
facilitated by wrapping the suture around several fingers, like a pulley, and applying tension.<br />
• Cinch the knot to obtain the desired degree of compression at the tear site.<br />
• Avoid over-cinching the knot, which can result in puckering of the meniscus or the suture<br />
cutting through the meniscus and weakening the repair.<br />
• Alternate divergent femoral side and tibial (tensile) side suture placement optimizes the<br />
strength of the repair and helps achieve an anatomic repair.<br />
• Consider the reverse curved delivery needle for placing sutures on the tibial surface<br />
of the meniscus.<br />
• Place the <strong>FAST</strong>-FIX <strong>360</strong> delivery needle either through the inferior (tibial) or superior (femoral)<br />
surface of the meniscus for optimal strength.<br />
• For the easiest knot sliding and avoidance of the neurovascular bundles, insert the needle<br />
perpendicular to the tear using a contralateral approach. Use portals placed adjacent to the<br />
patella tendon to facilitate this procedure.<br />
• The pretied, self-sliding knot included in the <strong>FAST</strong>-FIX <strong>360</strong> <strong>Meniscal</strong> <strong>Repair</strong> <strong>System</strong> slides<br />
from (T1) to (T2). Therefore, placing T1 further away than T2 facilitates sliding of the knot.<br />
• Maintaining the needle insertion tip within the arthroscopic view at all times avoids potential<br />
suture tangling.<br />
10 <strong>FAST</strong>-FIX <strong>360</strong> <strong>Meniscal</strong> <strong>Repair</strong> <strong>System</strong> All-Inside <strong>Meniscal</strong> <strong>Repair</strong>
Ordering Information<br />
To order the instruments used in this technique, call +1 800 343 5717 in the U.S.<br />
or contact your authorized <strong>Smith</strong> & <strong>Nephew</strong> representative.<br />
REF<br />
Description<br />
72202467 <strong>FAST</strong>-FIX <strong>360</strong> Straight Needle<br />
72202468 <strong>FAST</strong>-FIX <strong>360</strong> Curved Needle<br />
72202469 <strong>FAST</strong>-FIX <strong>360</strong> Reverse Curved Needle<br />
72202674 Straight knot pusher/suture cutter and slotted cannula set, single use<br />
72202675 Curved knot pusher/suture cutter and slotted cannula set, single use<br />
Accessories:<br />
015186 <strong>Meniscal</strong> depth probe, reusable<br />
014549 45° Diamond rasp, reusable<br />
014550 90° Diamond rasp, reusable<br />
7210977 Slotted cannula, reusable<br />
7210450 Suture funnel, sterile, box of 10<br />
7209950 Suture threaders, sterile, box of 10<br />
References<br />
1. Ak. Joy Singh, Nilachandra L, Y.Nandabir Singh, Brogen Ak. Rehabilitation Following<br />
Arthroscopic Partial Meniscectomy - A Neglected Issue. IJPMR 15, April 2004; 1-6.<br />
2. Nicholas A. Sgaglione, Meniscus <strong>Repair</strong>: Update on New Techniques: Techniques in<br />
Knee Surgery 1(2): 113-127, December 2002.<br />
CAUTION: U.S. Federal law restricts these devices to sale by or on the order of a physician.<br />
Courtesy of <strong>Smith</strong> & <strong>Nephew</strong>, Inc., Endoscopy Division<br />
Trademarks of <strong>Smith</strong> & <strong>Nephew</strong>, registered U.S. Patent & Trademark Office.<br />
All trademarks acknowledged.<br />
Endoscopy<br />
<strong>Smith</strong> & <strong>Nephew</strong>, Inc.<br />
Andover, MA 01810<br />
USA<br />
www.smith-nephew.com<br />
+1 978 749 1000<br />
+1 978 749 1108 Fax<br />
+1 800 343 5717 U.S. Customer Service<br />
©2010 <strong>Smith</strong> & <strong>Nephew</strong>, Inc.<br />
All rights reserved.<br />
04/2010 10600542 Rev. A


